15 Book Page Crafts Ideas for Beautiful DIY Wall Decor
Vintage literary paper crafts turn worn book pages into wall art using warm sepia tones, folding techniques, and simple framing so old pages feel like intentional decor rather than salvaged scraps. This guide gives you 15 book page crafts ideas for beautiful DIY wall decor, from folded art to layered collage.
Picture a wall where a paper rosette catches afternoon light, where a folded page silhouette sits crisp inside a slim black frame, where a garland of tea-stained text loops gently above a reading chair. The mood is warm, a little nostalgic, and quietly literary — every piece looking like it was made with care, not glued together in a rush. Here are 15 ideas worth saving — and stealing.
Why Vintage Literary Paper Crafts Work So Well
Vintage literary paper craft draws from mid-century ephemera collecting and the folk art tradition of paper folding, using discarded or damaged books instead of letting them go to waste. What separates it from generic “shabby chic” paper crafts is intention — pages are chosen for their typography, aging, and texture, not just used as filler material.
The palette stays warm and muted: cream, sepia tan, and soft charcoal ink, built from aged paper, thin wire, simple wood frames, and craft glue. These materials keep the focus on the paper’s own texture and yellowing rather than introducing bright, competing colors.
This style is trending as Pinterest search data shows steady interest in “book page art” and “upcycled book crafts,” reflecting a broader sustainability-minded shift toward repurposing damaged or unsellable books instead of discarding them.
Small walls handle this style well. Prioritize a single framed piece or a small folded rosette first, since both add warmth and texture without needing a large surface.
Style at a Glance
| Element | Trait 1 | Trait 2 |
|---|---|---|
| Philosophy | Repurpose with intention | Texture over color |
| Materials | Aged paper, thin wire | Simple wood frames |
| Color palette | Cream, sepia tan | Soft charcoal ink |
The 15 Ideas
1. Folded Paper Rosette Wall Cluster
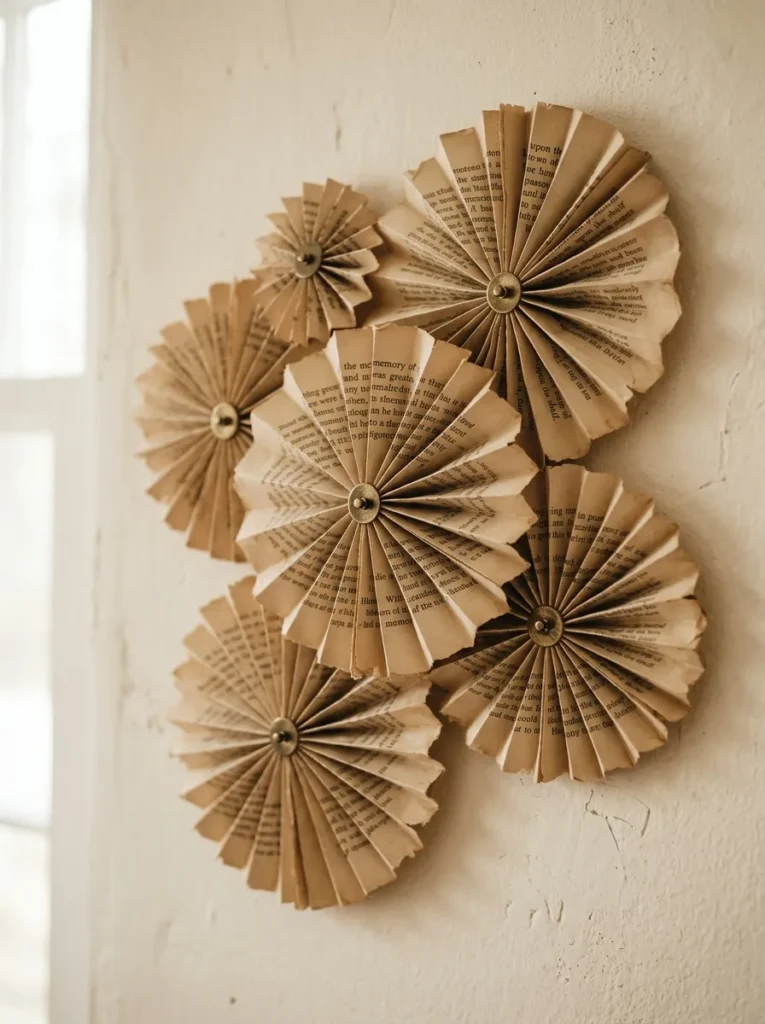
Vibe: The wall feels layered and dimensional, small paper sculptures catching shadow at every fold.
Why it works: Accordion-folding pages before gathering them into a rosette uses the paper’s own structure to create dimension, a technique that turns flat text into a three-dimensional object without paint, glue color, or any added material.
How to get it: Accordion-fold five to seven book pages into even quarter-inch pleats, gather and pin them tightly at the center with a small brass fastener, then fan the folds open into a circle.
Quick Win: A $6 pack of damaged secondhand books yields enough pages for a dozen rosettes in one sitting.
Shop The Look
- Secondhand book page bundle
- Small brass paper fasteners
- Craft glue precision tip
- Wall mounting adhesive dots
- Small wood display shelf
Also view: 18 Creative Book DIY Ideas for Every Season
2. Framed Single Page with a Bold Illustration
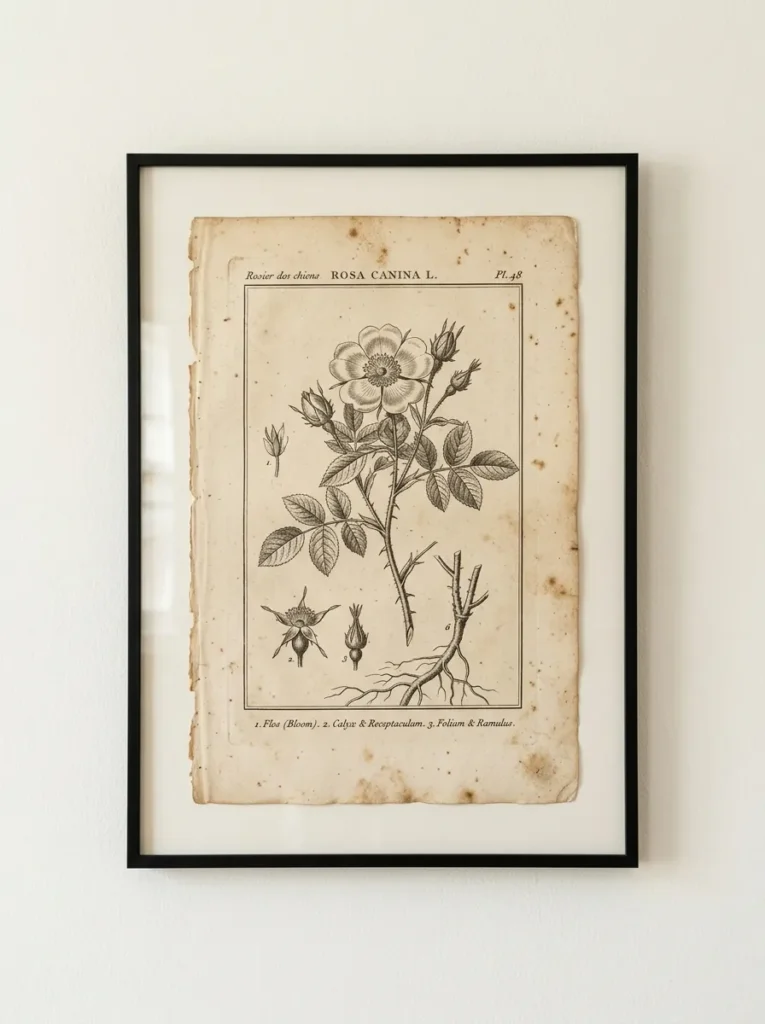
Vibe: The frame feels still and confident, one page treated with the same respect as fine art.
Why it works: A slim, unobtrusive black frame lets the page’s natural aging, foxing spots, yellowed edges, do the visual work, using restraint the same way a gallery would treat a genuine print rather than dressing it up with an ornate frame.
How to get it: Choose a page with a strong illustration or decorative border, mat it with at least two inches of cream matting, and frame it in a thin black metal or wood frame no wider than half an inch.
Shop The Look
- Slim black picture frame 8×10
- Cream mat board insert
- Acid-free page backing board
- Small wall hanging hook
- Wall level tool
Also view: 15 DIY Halloween Book Page Crafts for Home Decor
3. Warm Picture Light Above a Framed Page Grouping
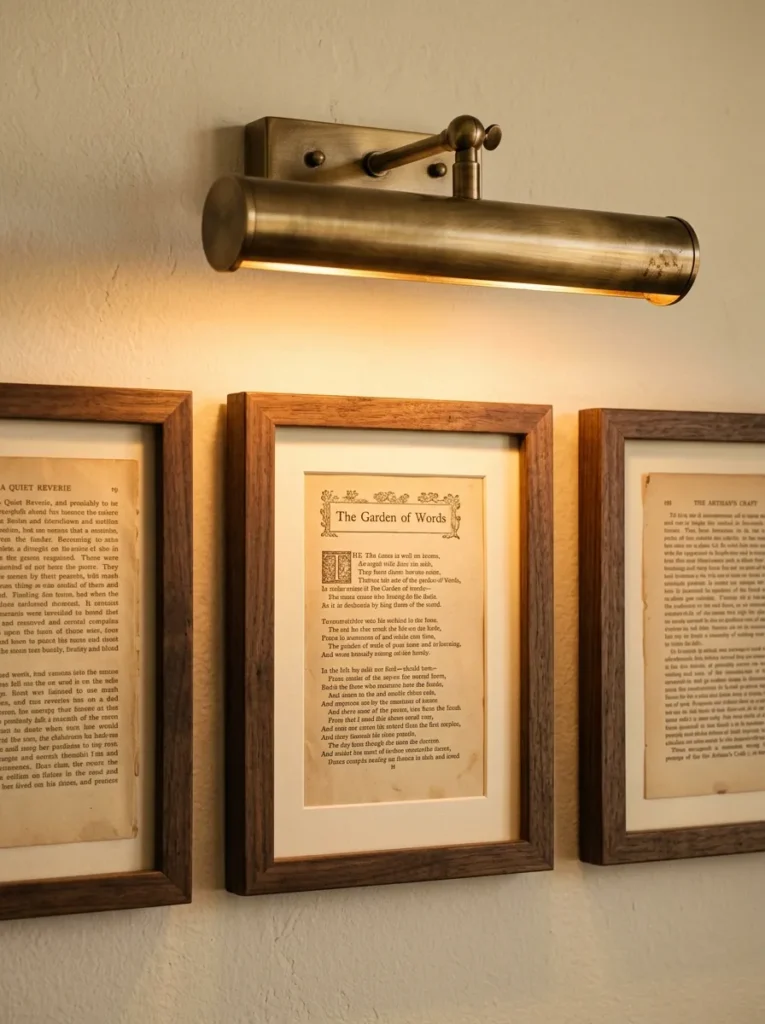
Vibe: The grouping feels warm and gallery-like, the pages glowing softly under their own dedicated light.
Why it works: A small picture light mounted directly above framed pages uses targeted warm light the way a museum would illuminate a print, a lighting principle that elevates paper craft into something that reads as curated rather than casually hung.
How to get it: Mount a brass picture light centered above a grouping of three framed pages, angled to wash light evenly across all three without hot spots on any single frame.
Quick Win: A $22 battery-operated picture light needs no wiring and mounts with adhesive strips.
Shop The Look
- Brass picture light battery
- Adhesive light mounting strips
- Warm white LED bulb small
- Slim black frame set of 3
- Wall hanging template kit
4. Layered Collage Silhouette Cutout
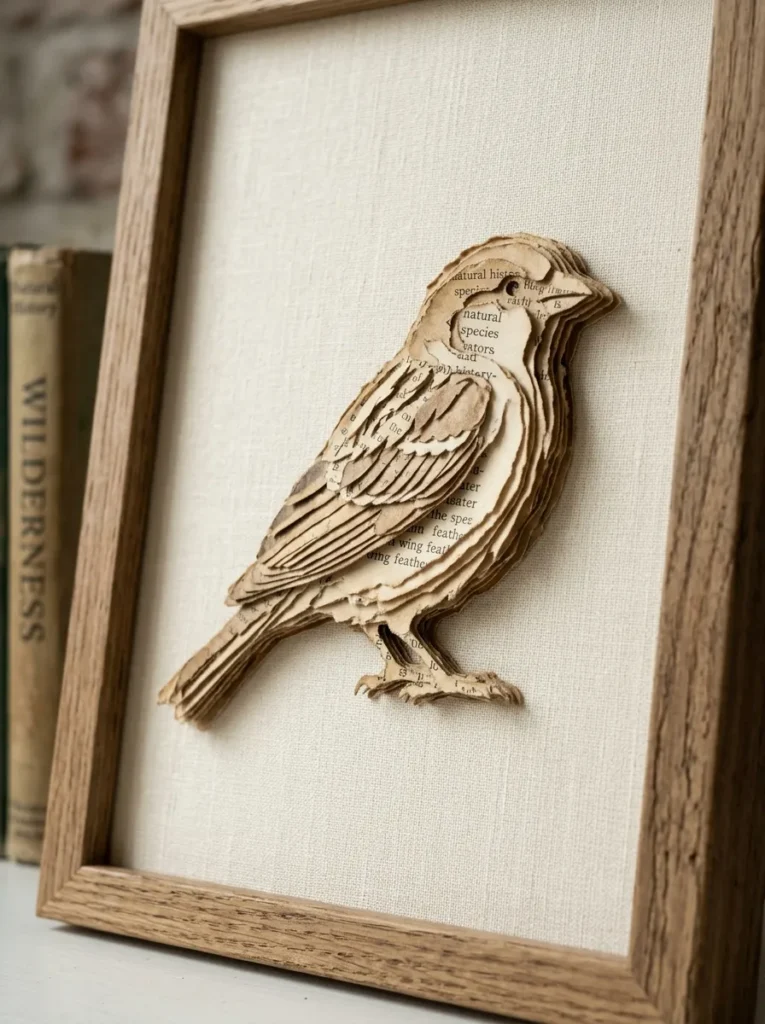
Vibe: The silhouette feels layered and sculptural, a shape built entirely from stacked text.
Why it works: Cutting the same silhouette from three or four pages and layering them with small foam spacers between each creates real shadow depth, a dimensional technique that separates this from a flat, single-layer cutout taped to a wall.
How to get it: Trace one silhouette template onto three to four book pages, cut each precisely, and stack them with small foam adhesive dots between layers so each casts a subtle shadow on the one beneath.
Shop The Look
- Silhouette stencil template set
- Small foam adhesive spacers
- Craft cutting mat
- Precision craft knife
- Shadow box display frame
5. Hanging Paper Garland Across a Reading Nook
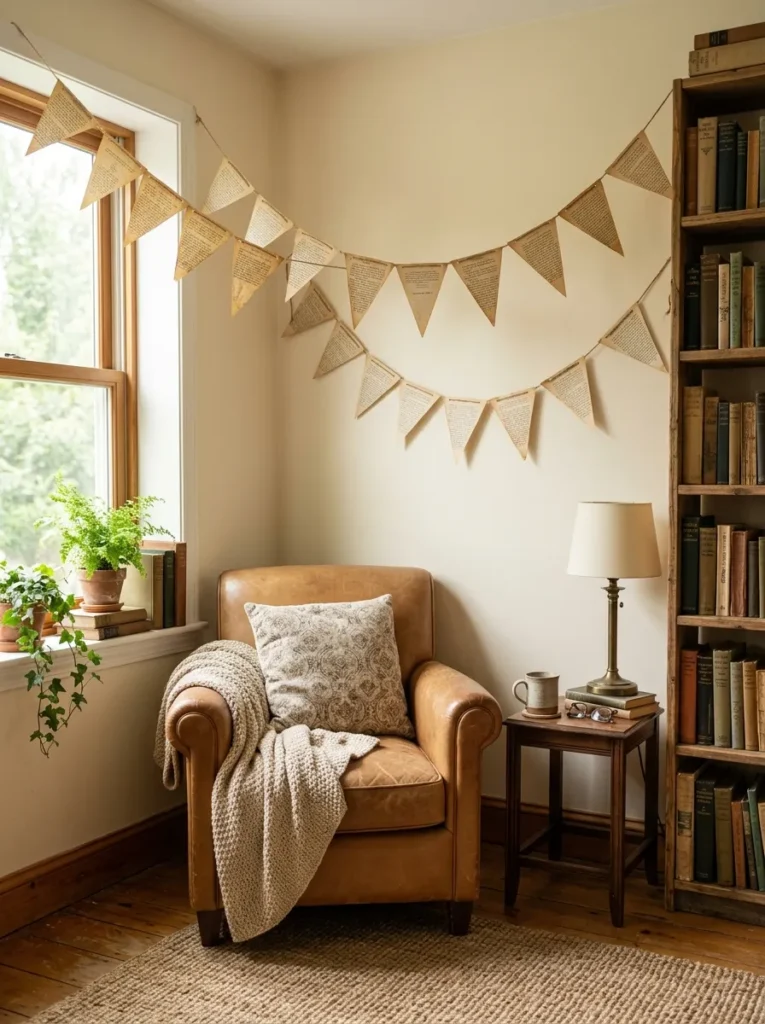
Vibe: The corner feels hushed and inviting, the garland softening the space overhead.
Why it works: Stringing small pennants on jute rather than ribbon keeps the material palette consistent with the rest of this style’s natural, muted textures, and the slight irregularity in hand-cut triangles reads as handmade rather than mass-produced.
How to get it: Cut fifteen to twenty small triangles from book pages, glue each folded over a length of jute twine, spacing them evenly with a half-inch gap between pennants.
Quick Win: A $4 spool of jute twine and pages from one damaged book make a six-foot garland in under thirty minutes.
Shop The Look
- Jute twine spool thin
- Secondhand book page bundle
- Craft glue stick
- Small wall hooks pair
- Paper cutting shears
6. Charcoal Ink Accent Wall Behind a Page Display
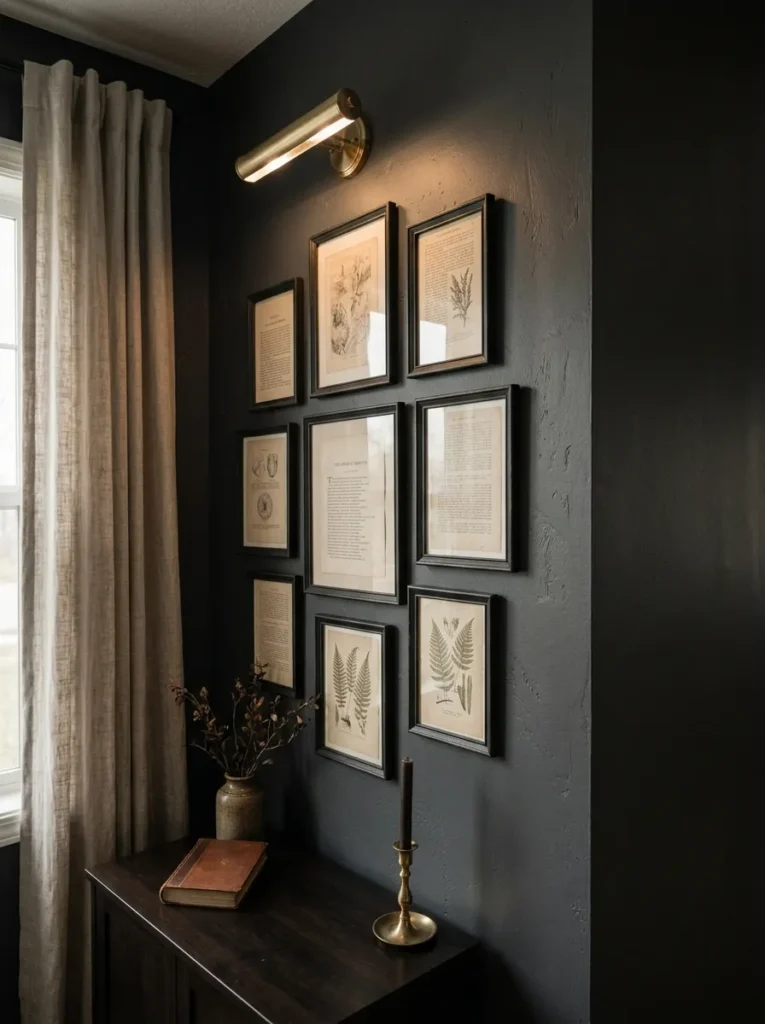
Vibe: The wall feels moody and grounding, the pale paper glowing against the deeper backdrop.
Why it works: Painting the display wall in soft charcoal rather than leaving it white uses contained color contrast — the deep tone makes the cream and sepia paper read as brighter and more luminous by comparison than it would against a plain white wall.
How to get it: Paint just the section behind your framed pages in soft charcoal, extending the color at least six inches beyond the widest frame on every side.
Shop The Look
- Soft charcoal matte interior paint
- Painter’s tape roll
- Slim black frame set
- Foam paint roller kit
- Small brass picture light
7. Book Page Bunting for a Shelf Edge
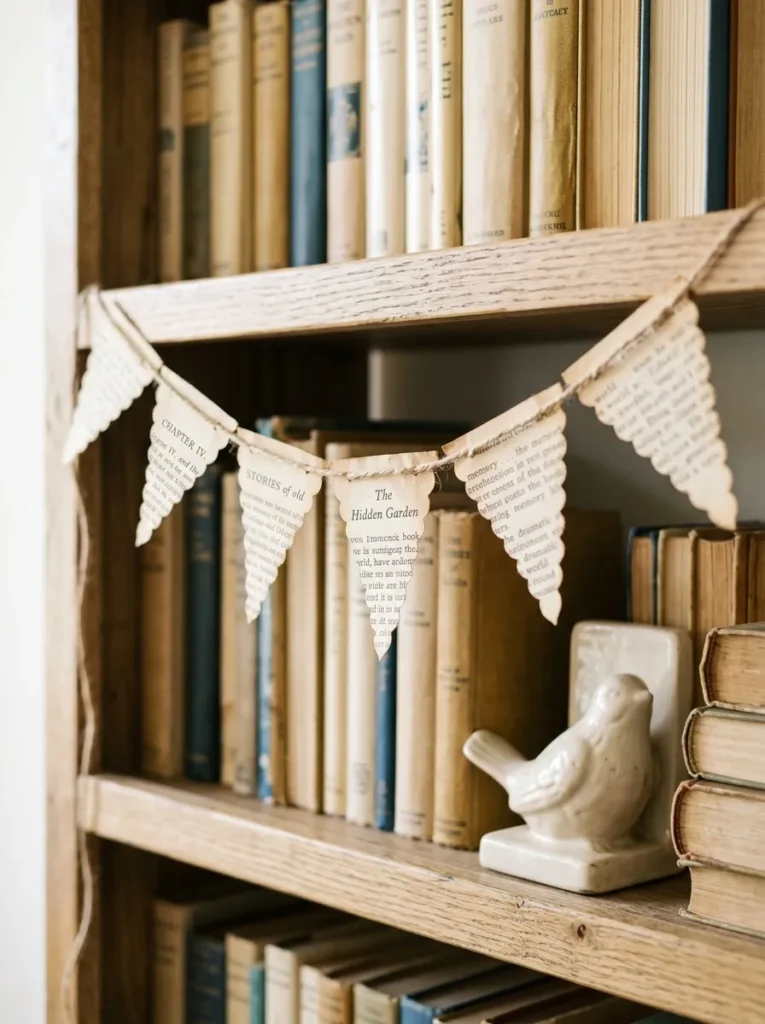
Vibe: The shelf feels airy and softly finished, a small detail dressing up an otherwise plain edge.
Why it works: A scalloped rather than straight-cut bunting edge adds a subtle handcrafted silhouette, using shape variation as a small but noticeable design detail that a straight-edged strip of paper wouldn’t achieve.
How to get it: Cut a long strip of book pages into a scalloped wave pattern using a template, gluing the top edge to a thin strip of cream cardstock for structural support before draping.
Shop The Look
- Scalloped edge template
- Cream cardstock strip
- Craft glue precision tip
- Small adhesive shelf clips
- Ceramic bookend pair
8. Zoned Gallery Wall Mixing Pages with Art Prints
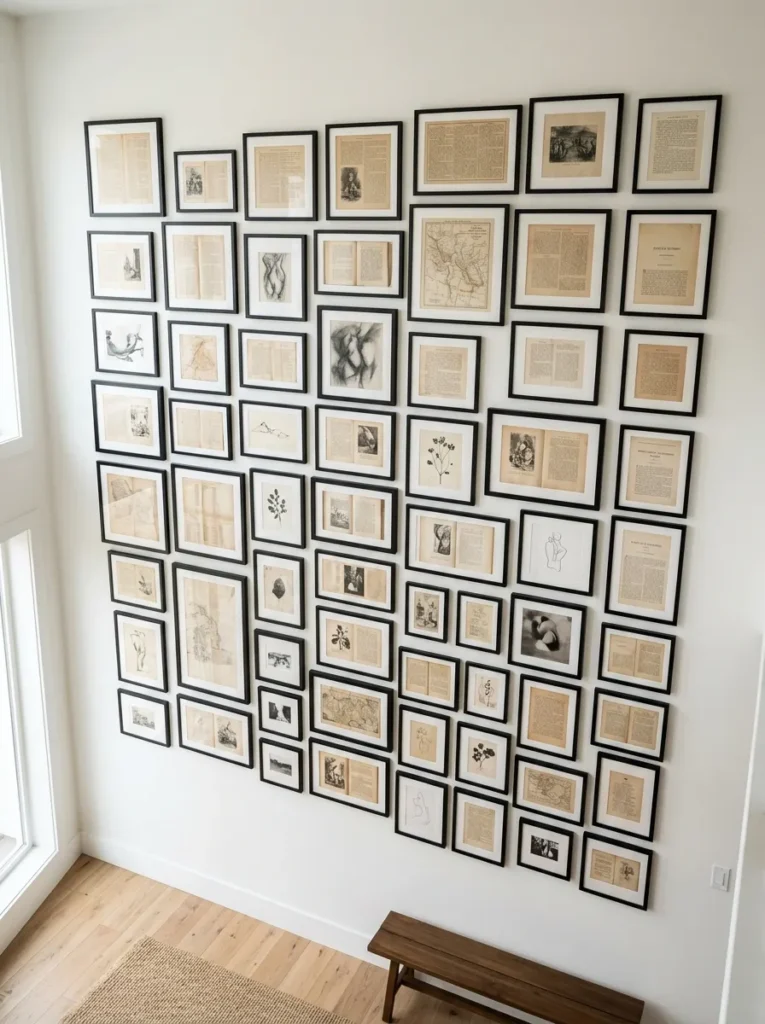
Vibe: The wall feels grounded and curated, book pages holding their own beside real art prints.
Why it works: Keeping every frame in the same matte black finish while varying only the content inside applies a layout principle used in professional gallery walls — consistency in one element, frame color, lets variety in another, content, feel intentional rather than mismatched.
How to get it: Arrange four to six frames of varying sizes in a loose grid, alternating book pages with one or two small art prints, keeping every frame the same black finish.
Shop The Look
- Slim black frame set mixed sizes
- Small art print set neutral
- Gallery wall layout template
- Picture hanging hardware kit
- Wall level tool
9. Book Page Lampshade Wrap
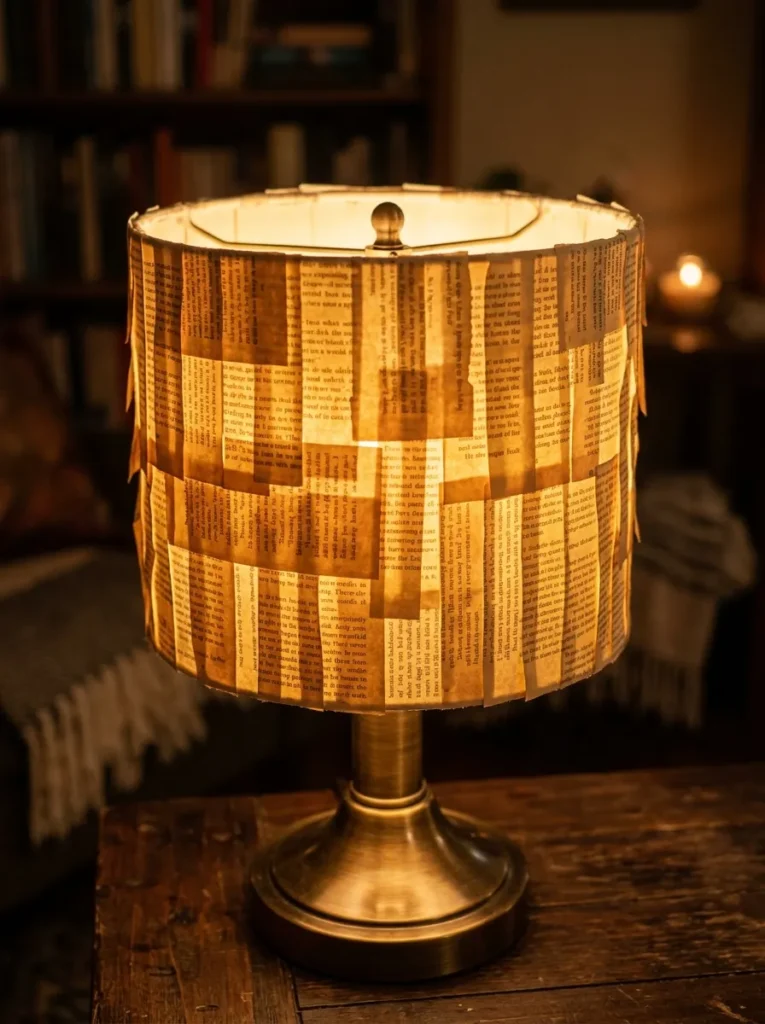
Vibe: The lampshade feels warm and glowing, text becoming a soft pattern once lit from within.
Why it works: Wrapping thin paper strips around a lampshade lets the material’s own translucency become the design feature — the text is only fully visible once backlit, a material behavior unique to this application versus a flat framed page.
How to get it: Cut book pages into two-inch strips, overlap and glue them around a plain drum shade in a shingled pattern, and use only a low-wattage warm bulb to avoid fire risk from the paper surface.
Quick Win: A $10 plain paper drum shade from a craft store gives you a ready base to wrap in one evening.
Shop The Look
- Plain drum lamp shade
- Secondhand book page bundle
- Craft glue stick
- Low-wattage warm LED bulb
- Brass lamp base
10. Pressed and Framed Open Book Page Spread
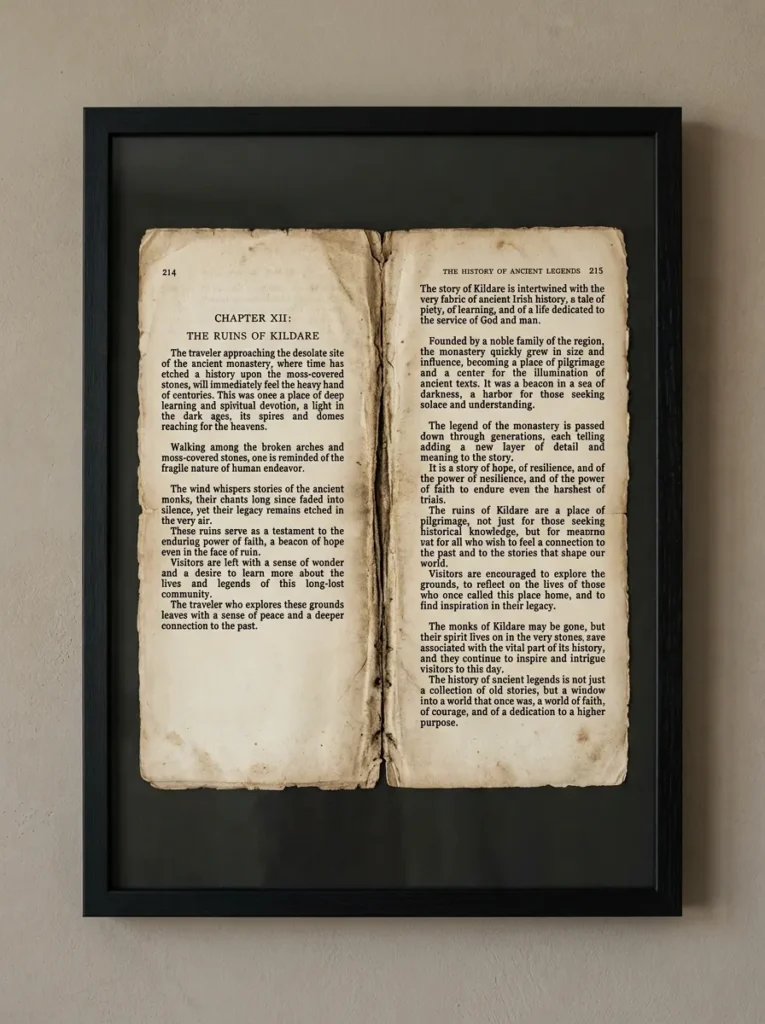
Vibe: The frame feels still and quietly personal, the spine crease keeping the object’s history visible.
Why it works: Leaving the spine crease visible rather than cutting the pages apart preserves the object’s original form, a choice that keeps the piece reading as an artifact rather than a craft material, adding authenticity the individual-page approach doesn’t have.
How to get it: Press an open two-page spread flat under heavy books for 48 hours, then mount it under glass in a shadow box frame deep enough to accommodate the slight spine curve.
Shop The Look
- Shadow box display frame deep
- Acid-free mounting corners
- UV-protective glass frame
- Book pressing weights
- Wall hanging hardware kit
11. Small-Space Corner Shelf Styled with Loose Pages
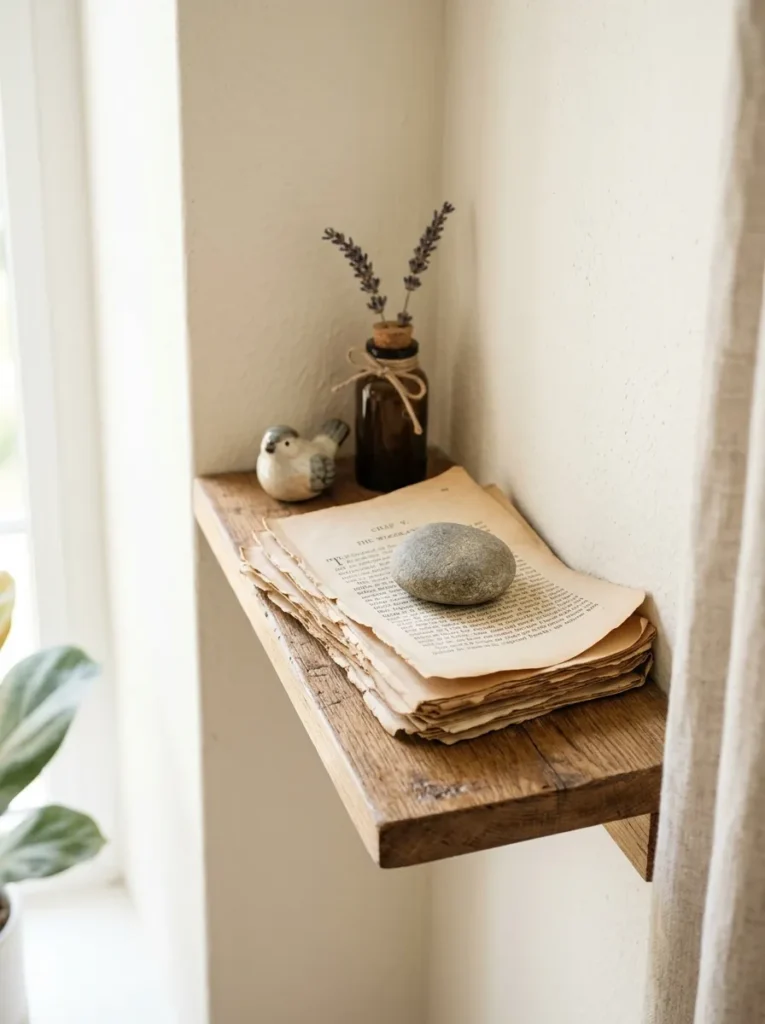
Vibe: The corner feels airy and unfussy, a small styled moment that took almost no space to create.
Why it works: A loose stack of pages weighted with one stone is a small-space adaptation that delivers the style’s textural warmth without needing a frame, wall space, or any hanging hardware at all, ideal for a narrow shelf with limited depth.
How to get it: Stack five to eight loose pages unevenly, curling the top page slightly upward, and weight the stack with one smooth stone or small brass object to keep it from shifting.
Quick Win: A single torn book page and a stone from your yard recreate this look in under five minutes.
Shop The Look
- Narrow floating corner shelf
- Small smooth stone paperweight
- Secondhand book page bundle
- Shelf bracket mounting kit
- Small brass bookend
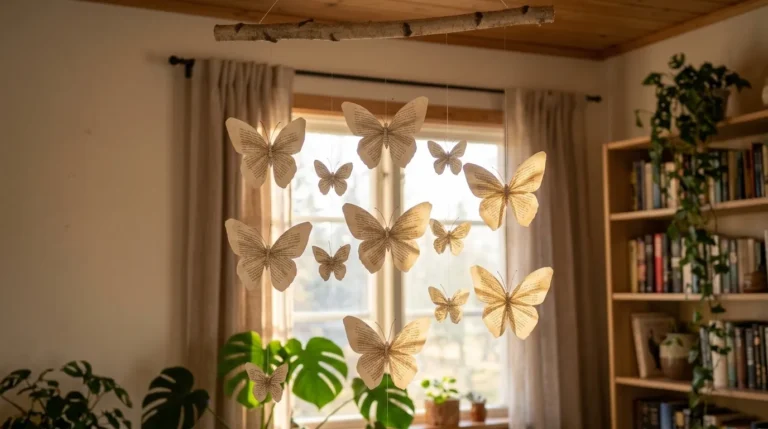
12. Book Page Butterfly or Moth Wall Cluster
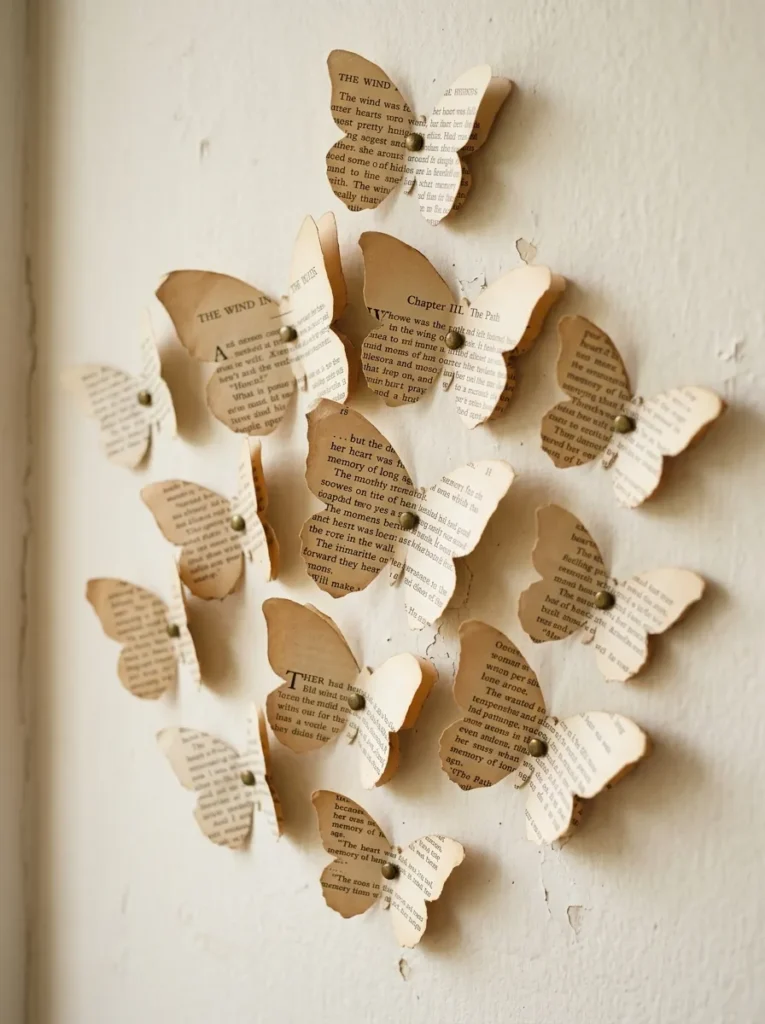
Vibe: The cluster feels layered and a little whimsical, paper insects caught mid-flight on the wall.
Why it works: Folding each butterfly’s wings slightly upward before pinning creates a lifted, three-dimensional shadow on the wall behind it, a folding technique that turns a flat cutout into something with real visual movement.
How to get it: Cut butterfly shapes from book pages using a template, score and fold each wing slightly along the body line, then pin each at a slightly different angle in a loose, scattered arrangement rather than a tight grid.
Shop The Look
- Butterfly silhouette template set
- Small brass decorative pins
- Craft scoring tool
- Precision craft scissors
- Wall protector pin backing
13. Book Page Wreath for a Front Door or Wall
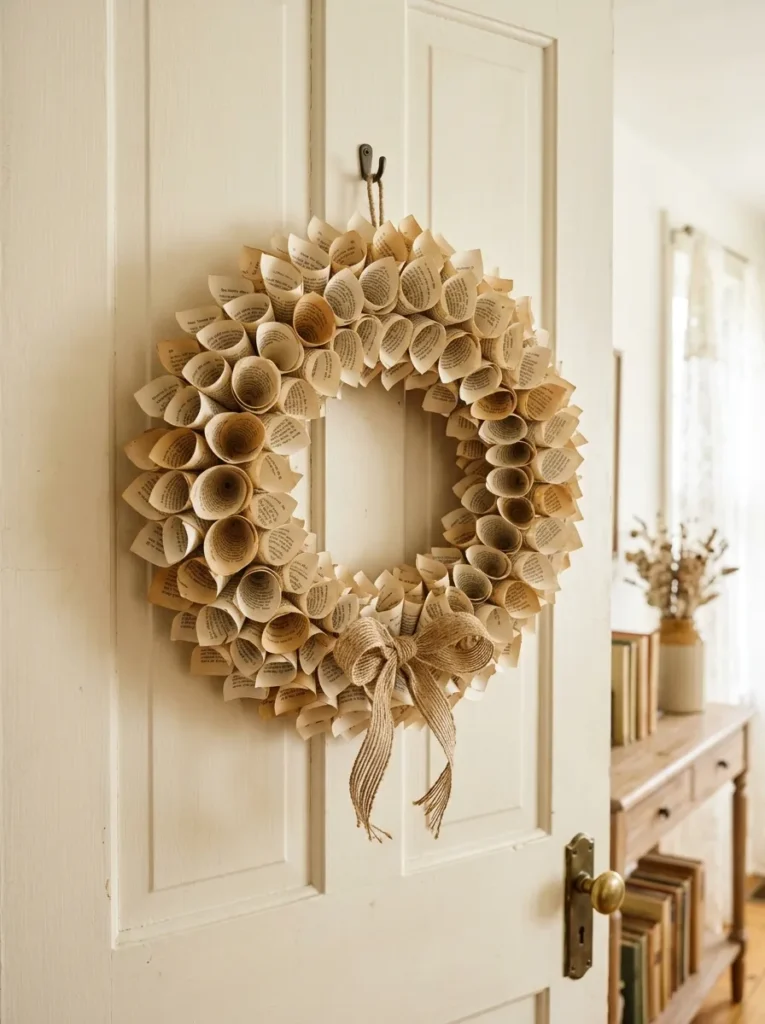
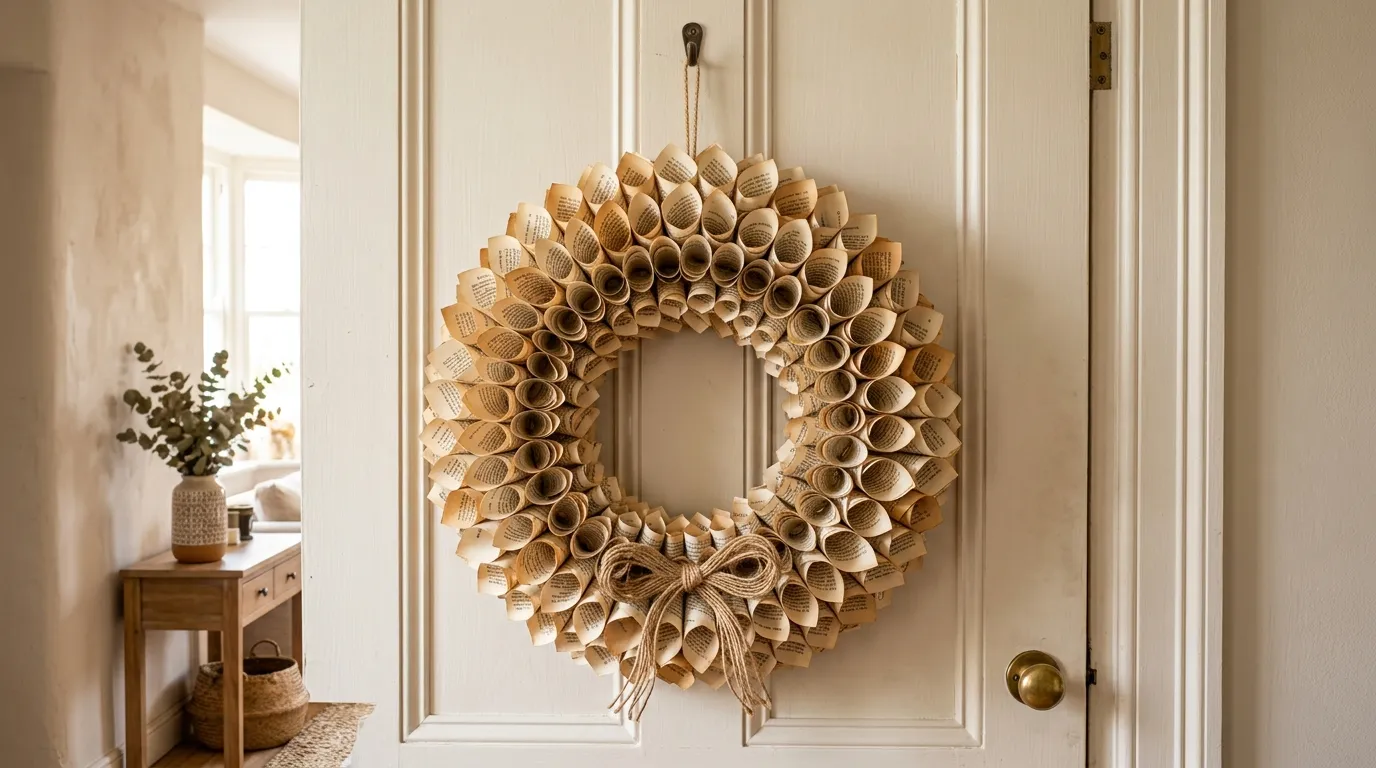
Vibe: The wreath feels airy and textured, entirely built from small rolled paper shapes.
Why it works: Rolling individual pages into tight cones and gluing them onto a circular base uses repetition of one simple shape to build a larger, more complex form, the same structural logic behind the rosette cluster but scaled into a full wreath.
How to get it: Roll thirty to forty book pages into tight cones, glue each cone’s base onto a cardboard wreath form working in overlapping rows from the outer edge inward.
Quick Win: A $5 cardboard wreath form and pages from one paperback make a full twelve-inch wreath in one sitting.
Shop The Look
- Cardboard wreath form 12 inch
- Secondhand book page bundle
- Craft glue precision tip
- Jute ribbon for hanging
- Small wreath hanging hook
14. Layered Ombre Page Fan Display
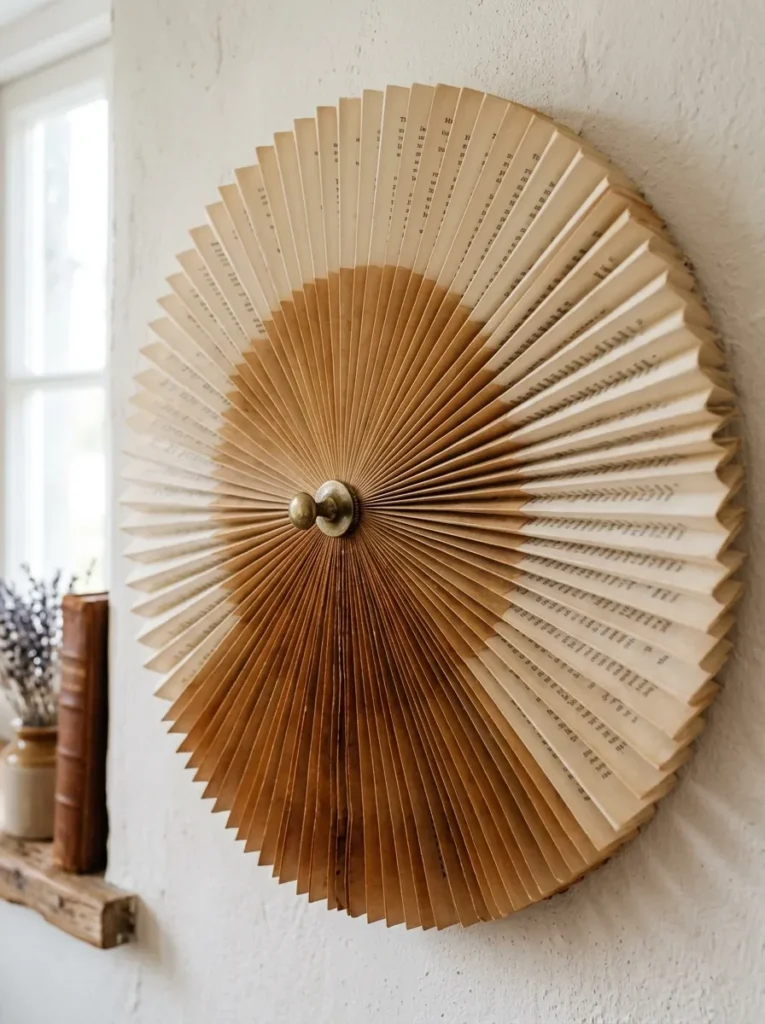
Vibe: The fan feels still and considered, color moving in a clear gradient across the arrangement.
Why it works: Tea-staining pages in graduating soak times, from a quick dip to a longer soak, creates a genuine color gradient using the paper’s own material reaction rather than paint, keeping the piece entirely within the style’s natural-material philosophy.
How to get it: Prepare a tea bath and dip pages for increasing lengths of time from thirty seconds to five minutes, let each dry flat, then arrange in a fan from lightest to darkest pinned at one base point.
Shop The Look
- Black tea bags bulk pack
- Secondhand book page bundle
- Drying rack for wet paper
- Small brass fan pin
- Wall mounting adhesive strip
15. Framed Page with a Hand-Underlined Passage as Focal Detail
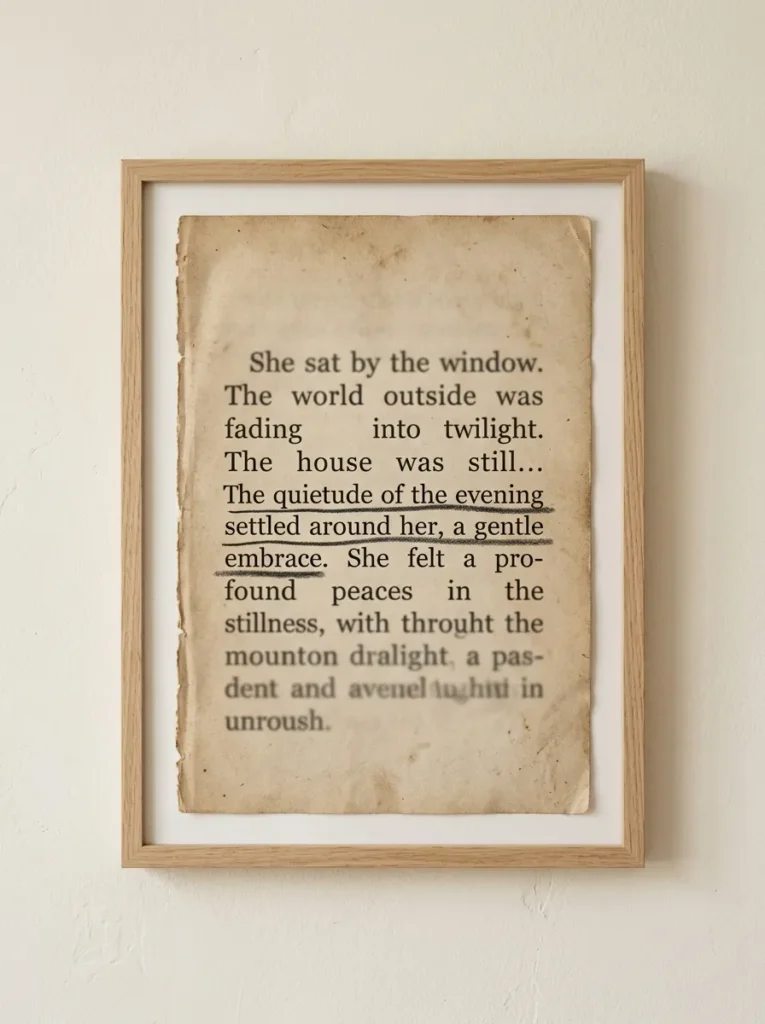
Vibe: The page feels serene and personal, one small mark suggesting a story without spelling it out.
Why it works: A single hand-drawn underline uses restraint the same way the rest of this style handles decoration — one small human gesture on an otherwise untouched page reads as intimate and considered rather than over-decorated.
How to get it: Choose a page with a passage that feels meaningful, draw one straight underline beneath a single sentence with a fine charcoal-gray pen, and frame the page as-is without any additional embellishment.
Quick Win: A $4 fine-tip gray pen and any secondhand paperback create this piece in under ten minutes.
Shop The Look
- Fine-tip charcoal gray pen
- Secondhand paperback book
- Slim cream mat frame
- Acid-free backing board
- Small wall hanging hook
How to Start Your Book Page Craft Wall
The single best first move is sourcing damaged or unsellable secondhand books rather than cutting up anything intact. Thrift stores and library sales often sell water-damaged or torn books for under a dollar each, giving you plenty of material to practice folding and cutting techniques without any guilt about the source.
The most common mistake is using glossy, modern paperback pages, which don’t hold folds crisply and lack the warm, aged tone that makes this style read as vintage. Fix it by seeking out books printed before the 1980s, where paper tends to be thinner, more porous, and already naturally yellowed.
Three items under $50 that make an immediate difference: a $6 bundle of secondhand book pages, a $5 cardboard wreath form, and a fine-tip charcoal gray pen for the underlined-passage piece.
A full wall of book page crafts realistically takes two to three weekends done a project or two at a time, though most individual crafts finish within an hour. Budget $20–$40 for materials across several projects, since most of the cost comes from frames rather than the paper itself.
Frequently Asked Questions About Book Page Crafts
Is it okay to cut up old books for crafts?
Using damaged, water-stained, or otherwise unsellable secondhand books is the most common and least wasteful approach, since these copies were likely headed for disposal anyway. Many crafters specifically avoid cutting up rare, first-edition, or still-readable copies out of respect for the book as an object.
What colors work best for book page wall decor?
Stick to the paper’s natural cream and sepia tones, adding charcoal ink or brass accents only in small doses through pins, frames, or hand-drawn details. Introducing bright paint colors tends to clash with the aged, muted quality that makes this style feel authentic.
How much does it cost to make book page wall decor?
A single framed page or garland costs $5–$15 including a secondhand book and basic frame or twine. A full gallery wall or wreath project typically runs $30–$60 once you factor in several frames or a wreath form, since the paper material itself stays inexpensive throughout.
Does this style work in a small apartment?
Yes — a single framed page, a small rosette cluster, or a corner shelf styled with loose pages all deliver the style’s warmth without needing wall space for a full gallery arrangement. The lampshade wrap is another excellent small-footprint option that adds texture to furniture you likely already own.
What’s the most important technique to learn first?
Learn to fold and score paper cleanly before attempting cuts, since a crisp fold is what separates a rosette or butterfly from looking crafted rather than crumpled. Practicing accordion folds on a few sacrificial pages first will make every later project, from the wreath to the bunting, come out noticeably sharper.
Ready to Create Your Own Book Page Wall Decor?
These 15 ideas cover everything from folded rosettes and tea-stained fans to framed spreads and hand-underlined details, so there’s a starting point whether you have one damaged paperback or a whole box of them. This kind of wall doesn’t need to come together all at once — framing just one page this weekend is a genuine, finished piece on its own. Today, find one secondhand book with damage too significant to sell, and set aside five pages to experiment with folding. Once your first piece is on the wall, you’ll have proof that even a book past its reading life still has something beautiful left to give. Pin your favorite rosette or wreath idea now, before your next thrift store trip fills your arms with more books than pages you’ll actually use.