14 Easy Book Page Crafts for Creative Adults
Book page crafts are handmade decorative and functional objects created by cutting, folding, rolling, shaping, or painting the pages of old, damaged, or surplus books — transforming what would otherwise be discarded paper into objects with genuine aesthetic character, a warm material presence, and the specific layered quality of text and typography that makes book page the most visually interesting paper available to any crafter. This article gives you 14 easy book page craft projects for creative adults that range from 20-minute quick wins to afternoon-long satisfying builds, all achievable with basic craft tools and the pages of any book rescued from a charity shop, library sale, or recycling pile.
Picture a home where the textures of old book pages appear in unexpected places — a wreath of tightly rolled paper cones beside the front door, a set of origami stars catching afternoon light on a windowsill, a framed typographic collage above the desk that looks like it came from a design gallery. None of it expensive. All of it carrying the specific warmth of paper that has been read, held, and now remade into something entirely new. Book page crafts are the most material-honest creative practice available — every project begins with something that already has a life, and every finished object carries that life forward. Here are 14 projects worth saving — and making.
Why Book Page Crafts Work So Well for Creative Adults
Book page crafts succeed as a creative practice for adults because they resolve two distinct creative barriers simultaneously: material cost (old books cost nothing or pennies from charity shops, library sales, and community recycling events) and creative pressure (the pre-printed text and typography on every page means that every cut shape, rolled tube, or folded form already has visual character before any creative decision is applied). The design philosophy draws from the Arts and Crafts Movement’s insistence on the beauty of material honesty — using what is at hand in its most authentic form — and from the contemporary upcycling movement’s reclaiming of discarded materials as creative raw material rather than waste.
The visual quality that makes book page paper uniquely beautiful in craft objects is its typographic texture — the combination of printed text columns, page numbers, chapter headings, and occasional illustrations creates a warm, complex visual surface at every scale. Up close, individual words and sentences are legible and interesting. From a distance, the page reads as a warm cream-and-gray pattern whose regularity contrasts with the irregular forms of cut, folded, or rolled craft shapes. This dual-scale visual quality — readable up close, textural from a distance — is what distinguishes book page craft objects from equivalent shapes made in plain paper, and it is the property that makes even the simplest book page craft project produce a result that looks more considered than its actual technique demands.
The book page craft practice has maintained cultural relevance across multiple creative generations because the material is genuinely abundant, freely available, and universally recognizable — everyone knows what a book page is, which means every object made from book pages carries a conceptual layer (the relationship between reading and making, between text and form, between the literary and the decorative) that pure paper craft objects do not. This conceptual layer gives book page craft objects a conversational quality that makes them compelling as display objects — they invite questions and comments that equivalent objects in plain paper do not.
Even the most basic creative skill set is sufficient for the majority of book page craft projects — the ability to cut with scissors, fold along a crease, roll paper tightly around a pencil, and apply glue stick. The complexity of the results is produced by repetition (many simple shapes assembled together) rather than by technical difficulty, which makes book page craft one of the few creative practices where quantity of effort reliably produces quality of result.
Style at a Glance
| Element | Trait 1 | Trait 2 |
|---|---|---|
| Philosophy | Material honesty through upcycled text — the book’s prior life as reading material visible in every craft object | Repetition as design principle — many simple shapes producing complex beautiful results |
| Materials | Rescued book pages, PVA glue, bone folder, scissors, craft knife, hot glue gun | Pencil for rolling, watercolor paint, washi tape, twine, wire, foam board |
| Color Palette | Natural cream and gray book page typographic texture | Aged yellow book pages, warm sepia, occasional watercolor wash over text |
1. Book Page Rolled Paper Cone Wreath
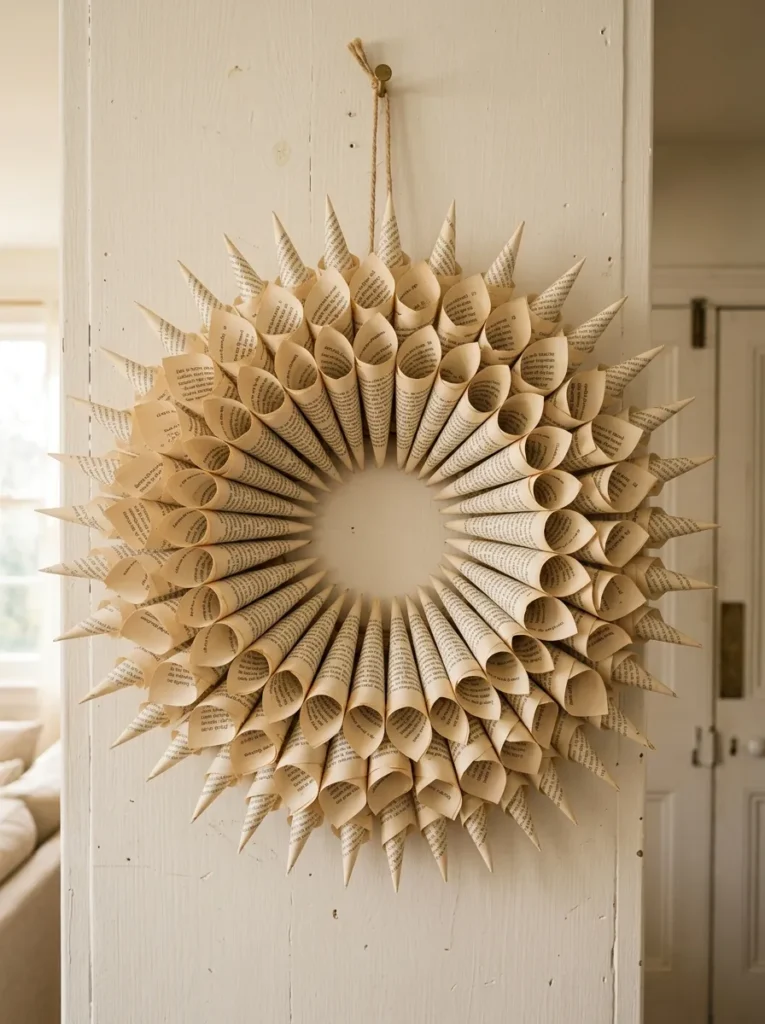
Vibe: Warm and textural — the wreath that makes people pause in front of it to understand what it is made from.
Why it works: A book page cone wreath applies the design principle of repetitive unit construction — each individual paper cone is a simple, quick-to-make form that takes under two minutes to produce, but the assembled wreath of 80–100 cones creates a visual complexity and textural richness that reads as architecturally sophisticated. The cone’s pointed form creates directional interest at every viewing angle — from directly in front, the cones read as a dense circular pattern; from the side, they read as a sculptural relief. The book page typography is visible on every cone at both scales — the close-up reveals legible text, the full-wreath view reveals warm typographic texture — producing the dual-scale visual quality that makes book page craft specifically compelling.
How to get it: Cut book pages into triangles approximately 25cm long and 6cm wide at the base. Roll each triangle tightly from the wide end toward the pointed tip around a pencil, applying a small dot of glue at the final tip to seal. Remove the pencil — the cone holds its form. Attach completed cones to a circular cardboard or grapevine base using a hot glue gun, working in concentric circles from the outer edge inward. Pack cones densely enough that the base is not visible between them — approximately 80–100 cones for a 35cm diameter wreath.
Quick Win: Rolling 20 cones while watching television or listening to a podcast over several evenings before beginning the assembly means the wreath itself can be assembled in a single focused session — breaking the repetitive rolling work across casual moments makes a project requiring 100 cones entirely achievable.
| Product |
|---|
| Circular cardboard wreath base 35cm |
| Hot glue gun with extra sticks |
| Old book set for page sourcing |
| Pencil set for cone rolling mandrel |
| PVA craft glue for cone tip sealing |
Also view: 15 Beautiful Spring Home Decor Ideas
2. Book Page Origami Star Garland
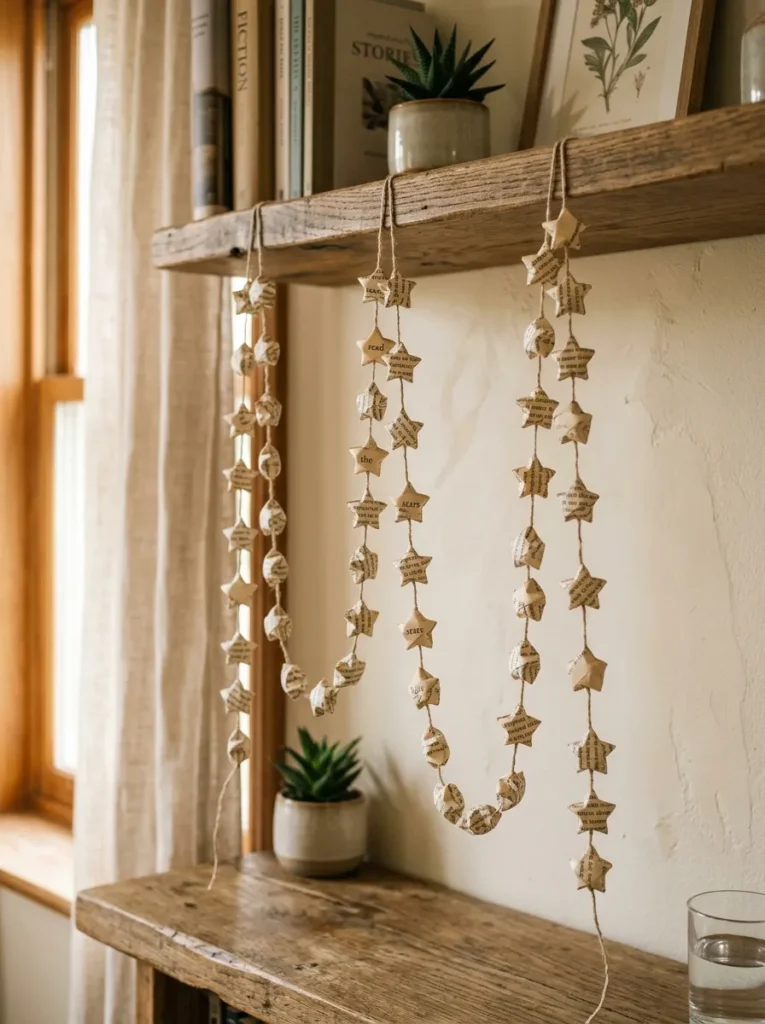
Vibe: Delicate and warm — the garland that makes a room look like someone spent all their spare moments making something beautiful.
Why it works: Book page origami lucky stars (the traditional five-pointed puffed star folded from a strip of paper) are the book page craft project with the highest per-unit charm-to-effort ratio — each star takes approximately three minutes to fold from a strip of book page paper, but assembled into garlands of 30–50 stars, they create a decoration with the visual delicacy and warmth of a handmade installation that would cost significantly more if purchased. The puffed three-dimensional form of each star catches light differently from its five faces depending on viewing angle, creating the kind of shimmering, dynamic quality that flat-cut paper stars cannot produce. The book page typography is visible on the star’s faces at close range, giving the garland its conceptual depth beyond its decorative function.
How to get it: Cut book pages into strips approximately 1cm wide and 25cm long — a paper trimmer makes this dramatically faster than scissors. Fold each strip into a lucky star by making an initial pentagon loop from one end, then wrapping the remaining strip around the pentagon in five sequential turns, tucking the final end into the loop, and puffing the star by pressing inward on the five concave points between the star tips. Thread completed stars onto linen thread using a bookbinding needle, spacing 2–3cm between each star. Hang garlands at slightly different lengths for the most visually complete display.
| Product |
|---|
| Paper trimmer for consistent strip cutting |
| Natural linen thread thin for stringing |
| Bookbinding needle for star threading |
| Old book set for page strips |
| Small curtain rod or shelf hooks for display |
Also view: 13 Elegant Tan Sofa Styling Ideas for Every Home
3. Book Page Decoupage Vase
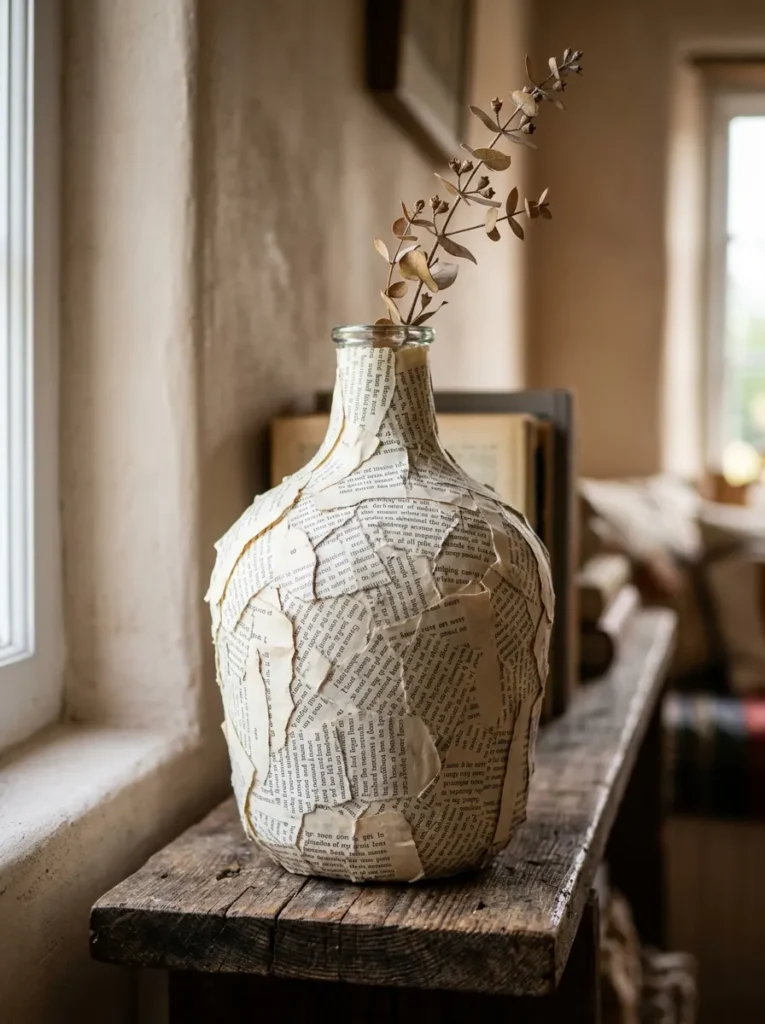
Vibe: Warm and textural — the vase that makes a single dried stem look like it was arranged by someone who understands exactly what they are doing.
Why it works: Book page decoupage on a vase applies the design principle of surface unification through material continuity — covering the entire exterior surface of an object in overlapping torn book page pieces creates a continuous typographic surface that reads as an intentional material finish rather than a decoration applied over a base object. The torn edge technique (tearing rather than cutting the page pieces) is the specific detail that elevates decoupage from craft project to something that reads as artisanal — torn edges reveal the paper’s fiber structure and blend more naturally at their overlapping joints than cut edges, which create visible seams that interrupt the surface continuity. The result is a vase whose surface carries the warmth and visual complexity of old text in every direction.
How to get it: Tear book pages into irregular pieces approximately 5x5cm — tearing into rough rectangles and triangles produces more natural-looking surface coverage than tearing into any specific shape. Apply Mod Podge to a small area of the vase exterior with a flat brush, press a torn page piece into the Mod Podge, smooth flat, then brush another coat of Mod Podge over the page surface — the double-coat technique (adhesive under and over) creates the sealed, smooth finish that distinguishes durable decoupage from surface-level paper application. Work in sections around the vase, overlapping pieces by 5–10mm at their edges. Apply two final coats of Mod Podge over the completed surface for durability and a clean finish.
| Product |
|---|
| Mod Podge gloss or matte medium |
| Flat brush set for Mod Podge application |
| Glass or ceramic vase for decoupage base |
| Old book set for page tearing |
| Dried botanical stem set for display |
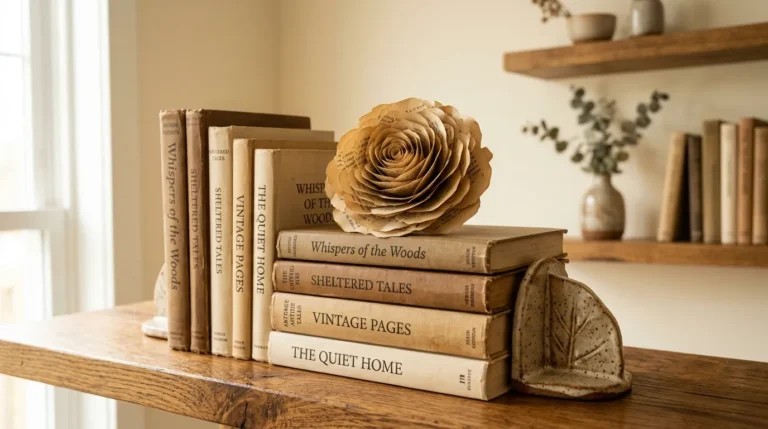
4. Book Page Paper Roses
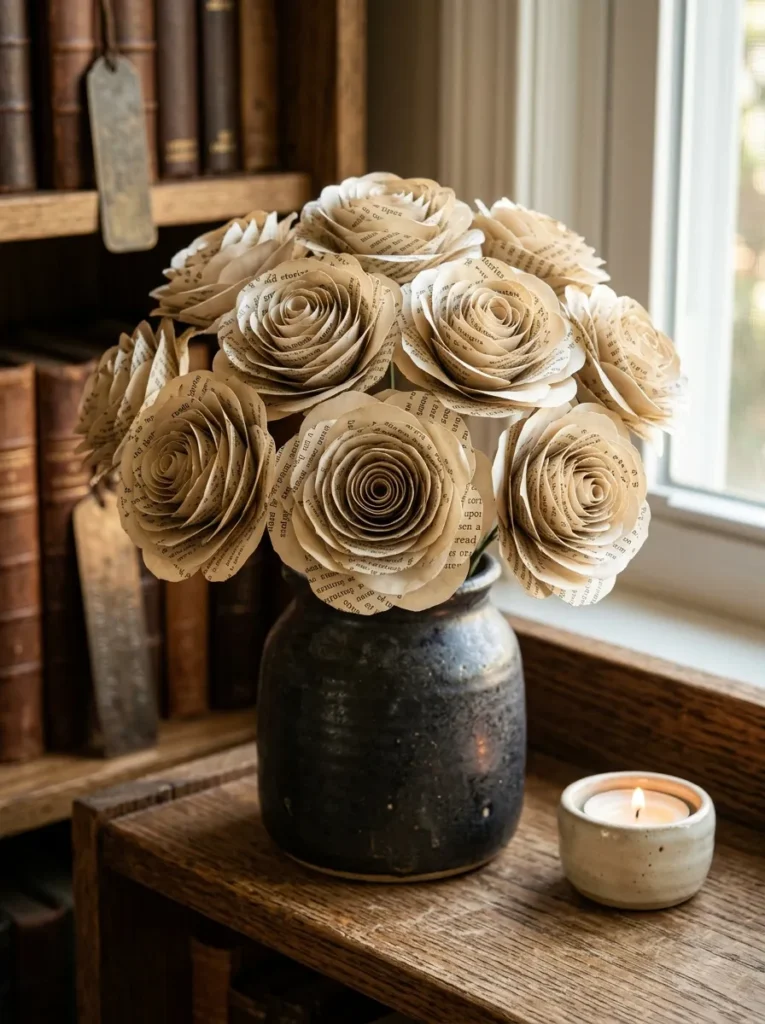
Vibe: Warm and romantic — the flowers that last indefinitely and look better in low afternoon light than any fresh arrangement.
Why it works: Book page paper roses apply the botanical principle of graduated form repetition — a rose’s visual character is produced by the progression from tightly coiled center petals through gradually opening outer petals, and this graduated form is achievable in book page paper by varying the curl tension of successive paper strip layers. The book page typography appears on each petal’s surface in a way that reads as specifically beautiful — the text curved around the petal form suggests a relationship between reading and nature that gives these paper roses a conceptual resonance beyond their decorative function. Paper roses made from book pages are one of the most frequently made book page craft projects precisely because the result is immediately recognizable as beautiful to any observer.
How to get it: Cut book pages into strips approximately 2cm wide and 20cm long. Curl each strip by running it over a pencil or dowel — the amount of curl applied determines the petal openness. Begin rolling from one end, forming the tight center bud, then add successive strips at slightly reduced curl tension for progressively more open petals. Secure each strip addition with a small dot of hot glue at its base. Continue adding strips until the rose reaches the desired diameter. Glue the completed rose to a length of florist wire wrapped in green floral tape for a stem.
| Product |
|---|
| Florist wire green 24 gauge set |
| Green floral tape stem wrap |
| Hot glue gun mini for petal joining |
| Pencil for petal curling |
| Dark ceramic vase for rose display |
5. Book Page Typographic Framed Art
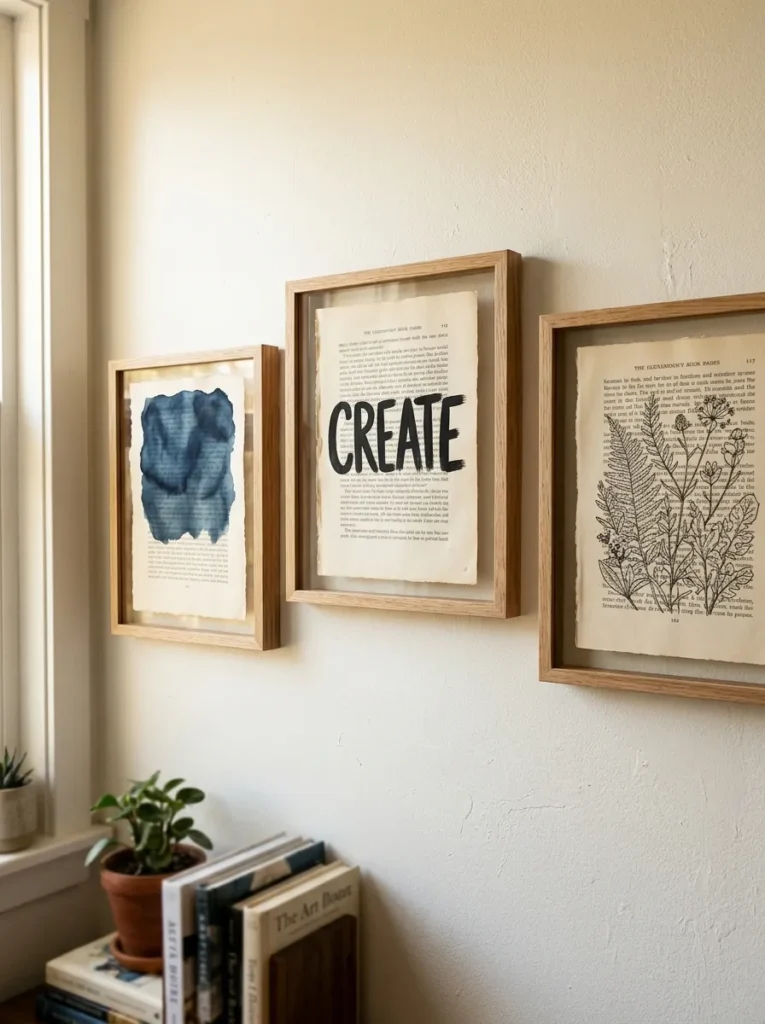
Vibe: Warm and considered — the wall art trio that looks like something bought from a design-forward independent gallery.
Why it works: Book page typographic framed art applies the design principle of material layering as artistic medium — the book page itself is the base layer, and the addition of watercolor, hand lettering, or pen drawing creates a second layer that exists in relationship to the text layer beneath. The most visually sophisticated book page art works with the text rather than over it — a watercolor wash that is transparent enough to allow the text to read through the color, or a botanical drawing placed at a scale that creates an organic relationship with the column layout of the page beneath it. This transparency of layers is what distinguishes genuinely beautiful book page art from the simpler version where the addition simply obscures the text entirely.
How to get it: Select book pages with interesting typography — pages with varied text sizes (chapter headings, body text, footnotes) are more visually interesting than uniform body text pages. For the watercolor treatment: wet the page with clean water using a wide brush, drop in watercolor pigment, and allow to bloom and dry — the dry page resists water-soluble paints enough to maintain the text’s legibility beneath the wash. For hand lettering: use a broad-tip brush marker or brush pen in matte black, choosing one word that relates to or contrasts interestingly with the page’s content. Frame in float frames to display the full page edge.
| Product |
|---|
| Natural oak float frame set three sizes |
| Watercolor paint set deep tones |
| Matte black brush pen for lettering |
| Fine-tip pen for botanical overlay |
| Old book set with varied typography |
6. Book Page Paper Fan Garland
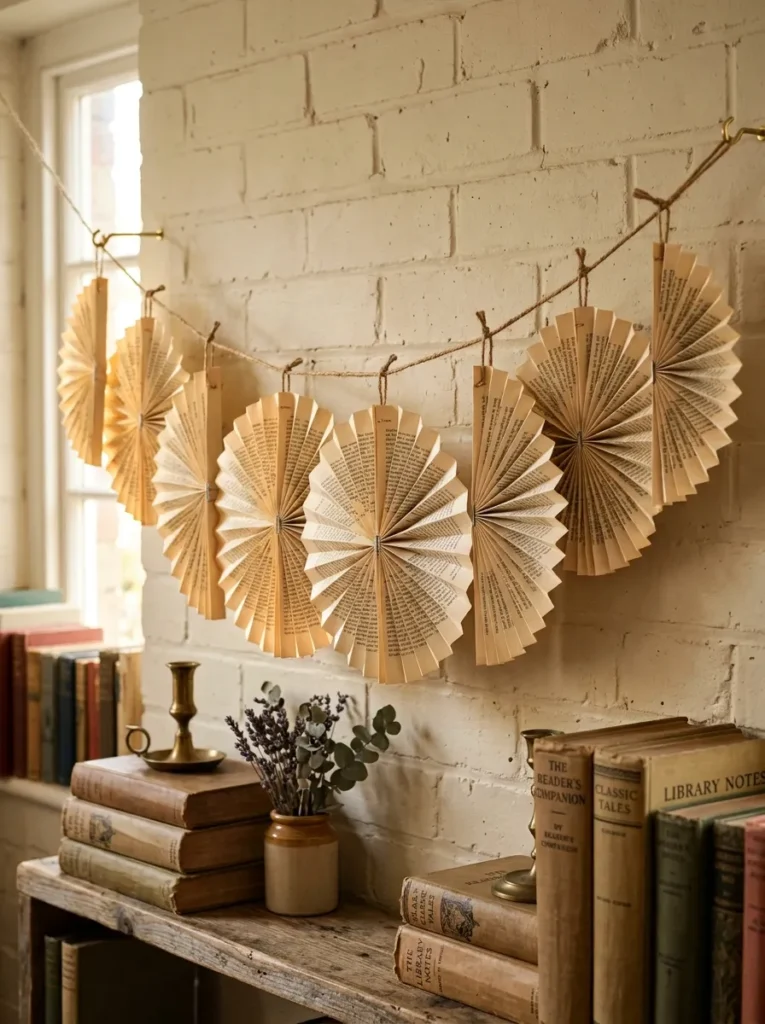
Vibe: Warm and playful — the garland that makes a mantel or shelf edge look like a celebration without any further decoration required.
Why it works: Accordion-pleated paper fans from book pages apply the design principle of structural transformation from flat material — the same flat page that reads as typographic surface when held still reads as a dynamic three-dimensional form when accordion-folded and opened into a fan. The accordion fold creates regular, parallel strips of the page visible in the fan’s face, which produces a striped pattern of text and white space that is more graphically interesting at fan scale than the continuous text of the flat page. A garland of fans in graduated sizes creates visual rhythm across its length — the eye reads from the smallest to the largest and back, producing the kind of compositional movement that makes a garland feel alive rather than static.
How to get it: Stack three to five book pages together and accordion fold from one short end to the other in 1.5cm fold increments — folding the stack together ensures identical fold spacing across all layers. Secure the bottom of the accordion with a rubber band, then open the fan fully and staple through all layers at the base center to hold the open form. Remove the rubber band. For a complete circular fan, make two identical accordion-folded stacks and glue their flat sides together at the base — the combined stack opens into a full circle. String on natural twine by threading through a small hole punched above the staple.
| Product |
|---|
| Natural twine thin roll for stringing |
| Stapler with extra staples |
| Rubber band set for holding folds |
| Hole punch single for stringing |
| Old book set pages with varied text |
7. Book Page Rolled Bead Jewelry
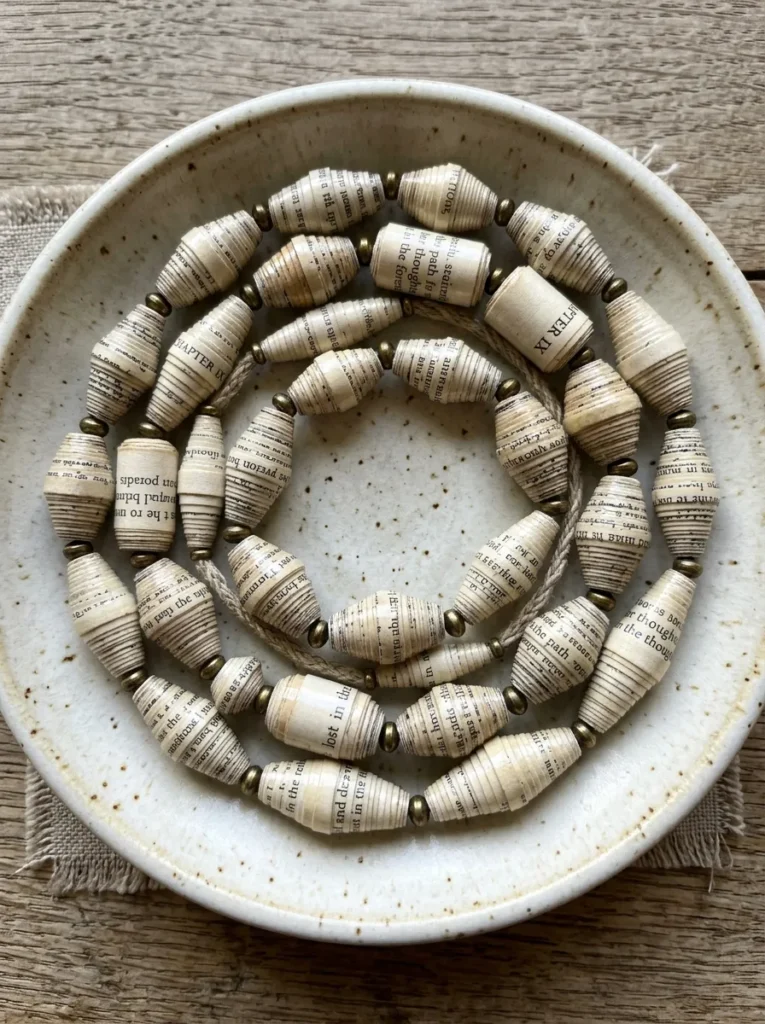
Vibe: Warm and artisanal — the jewelry that makes people reach out to touch it and then ask where it came from.
Why it works: Book page rolled beads applied to jewelry use the design principle of material identity at multiple scales — at wearing distance, the beads read as warm cream paper with a slight typographic texture; up close, the cross-section of each bead reveals the compressed typography in a pattern that reads as an accidental abstract design. This scale transition — from wearable surface material to microscopic typographic cross-section — gives book page bead jewelry a conceptual depth that most handmade jewelry lacks. The specific quality of the cross-section detail at the bead’s end faces is what most surprises people examining book page jewelry for the first time: the compressed text layers produce a pattern that looks deliberately designed rather than incidentally produced.
How to get it: Cut book pages into long triangles approximately 30cm long and 2cm wide at the base for standard cylindrical beads; wider at the base and shorter for bicone profiles; perfectly rectangular for tube beads. Roll tightly from the wide end around a bamboo skewer (the skewer determines the bead hole diameter — use a larger skewer for chunky necklace-weight beads). Apply a thin line of glue along the final 3cm of the triangle before completing the roll. Seal with three coats of clear Mod Podge or clear nail polish while still on the skewer. String on waxed linen thread with brass spacer beads between paper beads.
| Product |
|---|
| Bamboo skewer set for rolling mandrel |
| Clear glossy Mod Podge sealer |
| Waxed linen thread jewelry |
| Brass spacer bead set small |
| Jewelry clasp set for necklace finishing |
8. Book Page Paper Butterflies Mobile
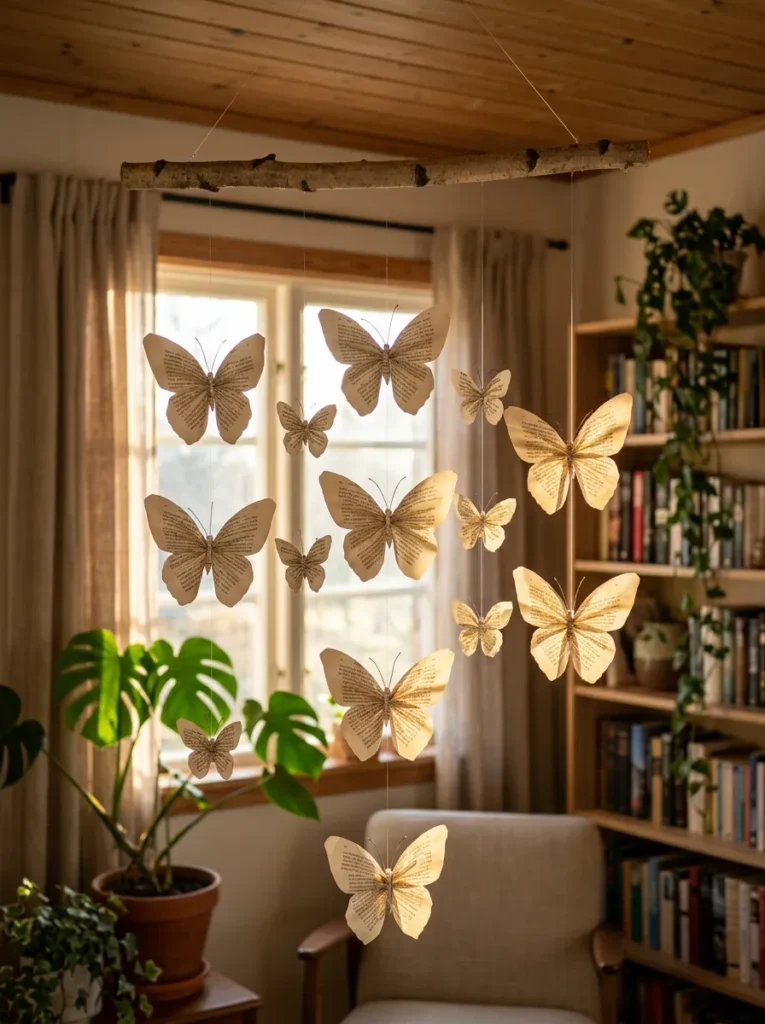
Vibe: Delicate and whimsical — the mobile that makes a corner of any room look like a scene from a favorite illustrated book.
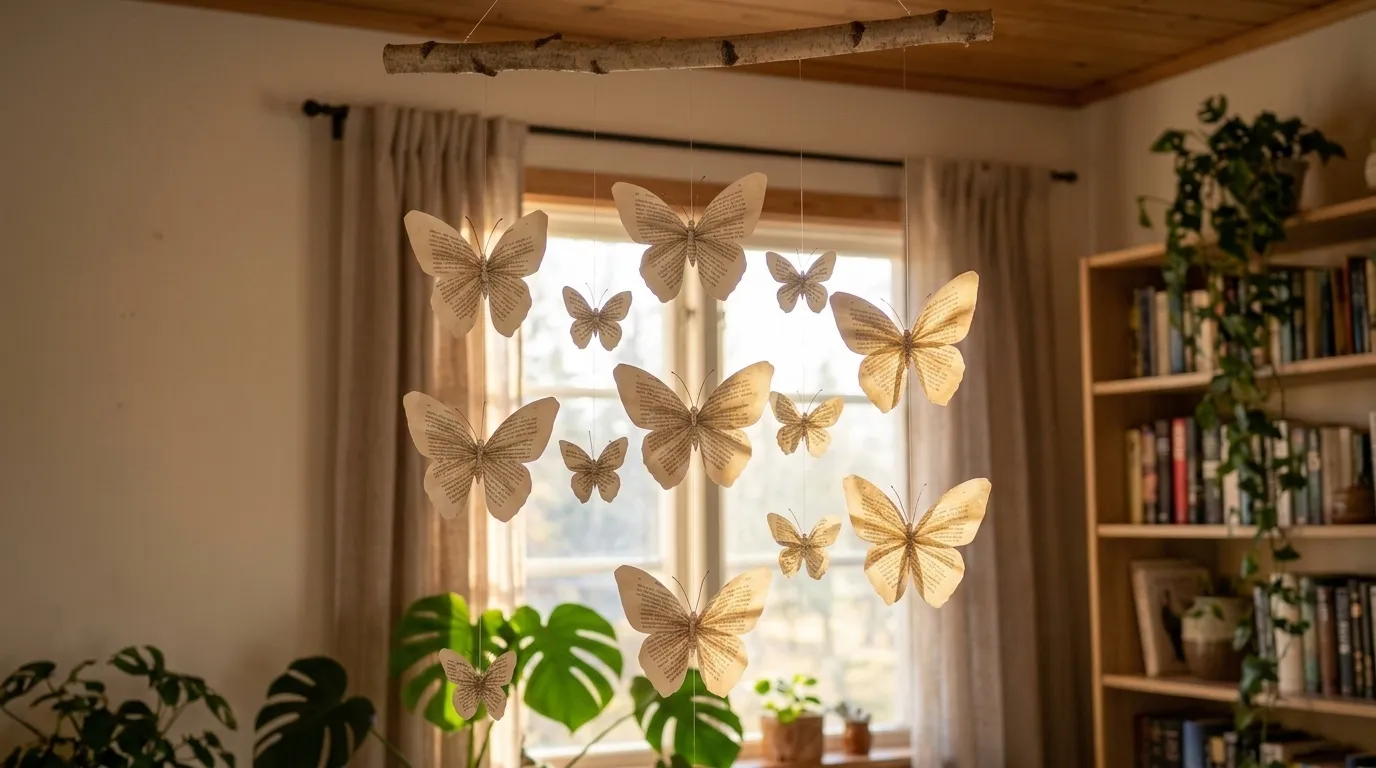
Why it works: Book page butterfly mobiles apply the design principle of apparent weightlessness through form suggestion — the butterfly is the natural world’s form most associated with light, fragile, airborne movement, and folded book page in butterfly form carries that association even in a static indoor display. The key design element is the body fold: cutting an hourglass silhouette from book page and pinching the center creates a wing fold that gives the butterfly natural three-dimensionality and the appearance of wings in mid-movement rather than flat against a surface. Hung at varied heights on fishing line from a natural twig, the mobile creates a three-dimensional space within the room that is both decorative and genuinely captivating to watch in any air movement.
How to get it: Draw a butterfly wing template at two sizes (approximately 8cm and 12cm wingspan) on cardstock. Trace onto book pages and cut. Pinch the center of each butterfly gently between thumb and forefinger to create the body fold that raises the wings above flat. Thread invisible fishing line through a small hole punched at the body center fold, tying a knot to hold position. Attach fishing lines at varied heights to a natural birch twig — the weight distribution determines whether the twig hangs level. Suspend the twig from the ceiling using a ceiling hook and additional fishing line at the twig center.
| Product |
|---|
| Butterfly wing template cardstock |
| Clear fishing line thin 0.3mm |
| Natural birch twig for mobile suspension |
| Adhesive ceiling hook small removable |
| Hole punch single for wing threading |
9. Book Page Decoupage Tray or Serving Board
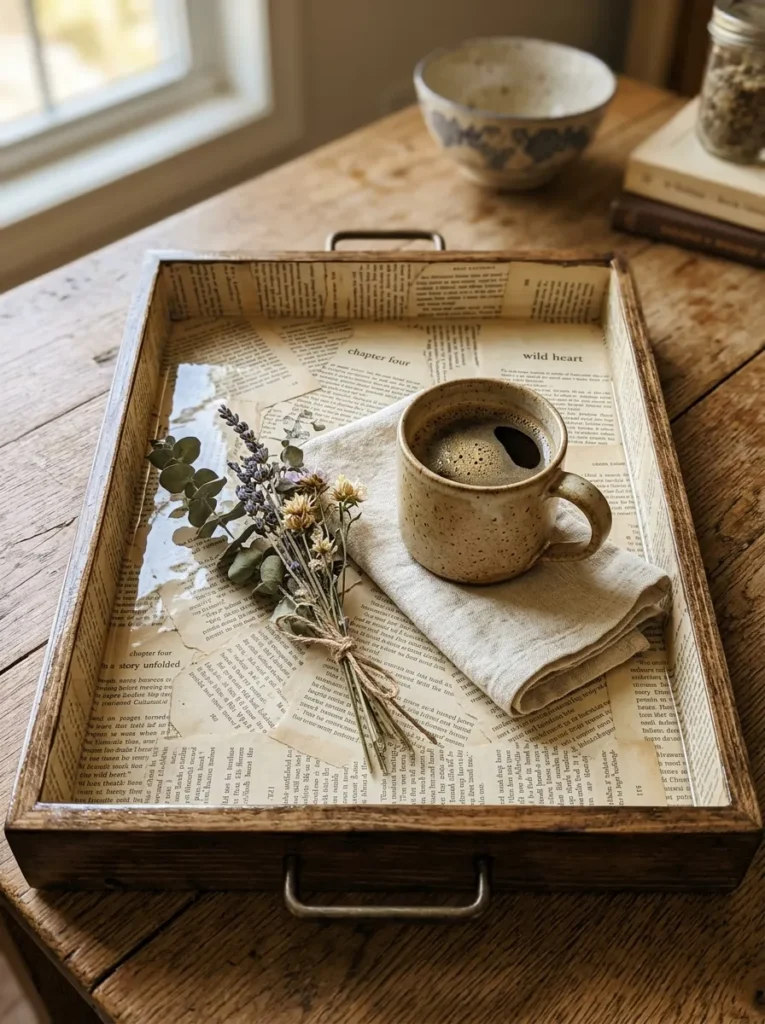
Vibe: Warm and domestic — the tray that makes a morning tea arrangement look like a scene from a beautiful novel.
Why it works: Book page decoupage on a serving tray applies the material transformation principle at functional scale — a plain wooden tray is a utility object whose domestic status is entirely determined by what it holds, but a book page decoupage tray is itself a designed object whose typographic surface makes it visually interesting whether it is carrying objects or displayed empty. The tray format is particularly well-suited to book page decoupage because the tray’s raised sides contain the decoupage application to a defined area with natural borders, making the technique more forgiving of imprecision than covering an object with continuous surfaces (like a vase). The glossy seal finish protects the decoupage against the moisture of cups and objects placed on the surface — the functional requirement that distinguishes a durable tray from a purely decorative one.
How to get it: Sand the tray’s interior lightly to improve adhesion. Apply torn book page pieces using Mod Podge as described in the vase project — torn edges and overlapping coverage maintain the same technique. Pay particular attention to the tray corners where the floor meets the walls: press torn pieces into corners carefully with a soft brush, applying extra Mod Podge at the corner joint. Apply a minimum of four final coats of Mod Podge gloss over the completed surface — the tray will be used as a functional surface and requires more sealing than a purely decorative object.
| Product |
|---|
| Wooden serving tray unfinished |
| Mod Podge gloss multiple coats |
| Fine grit sandpaper for tray prep |
| Flat brush set for application |
| Old book pages torn for decoupage |
10. Book Page Paper Flower Bouquet
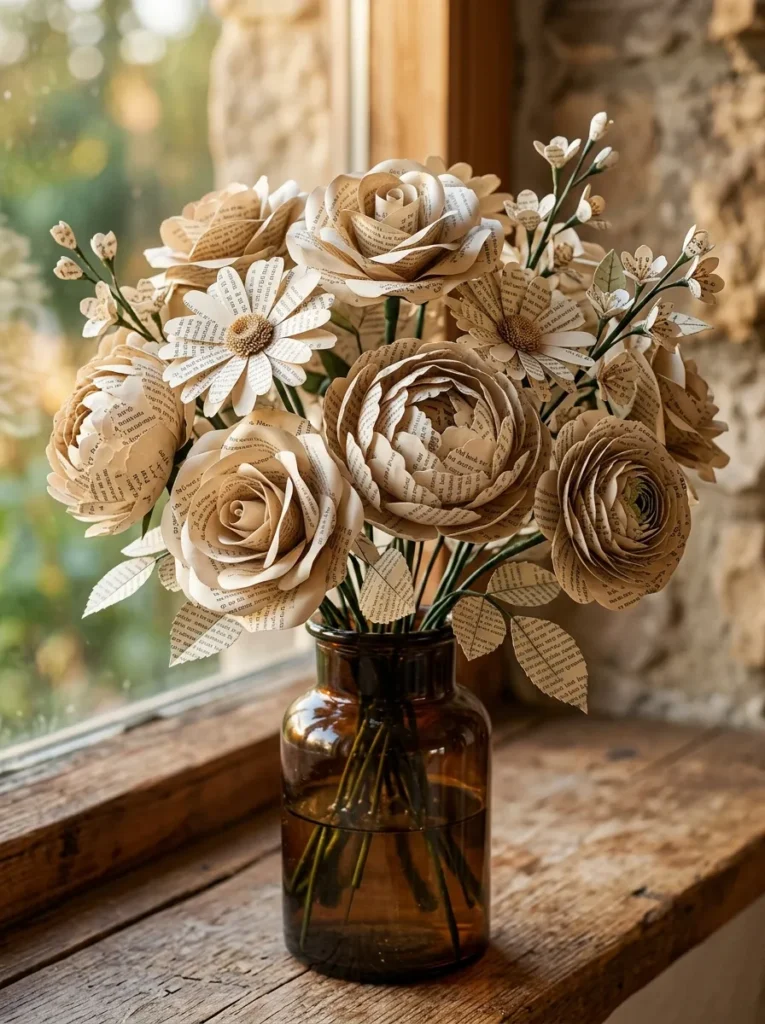
Vibe: Romantic and abundant — the bouquet that makes a corner of any room feel like a still-life painting.
Why it works: A mixed book page paper flower bouquet applies the horticultural design principle of varied form and scale — a convincing bouquet requires flowers of different sizes, forms, and levels of openness, and book page paper achieves this variety by modifying the same basic petal construction (cut, curl, and assemble) across different petal shapes and sizes. The bouquet as a whole is far more visually compelling than any individual flower within it because the relationships between different flower forms — the tight peony beside the open rose, the flat daisy beside the ranunculus — create the visual conversation that makes a bouquet beautiful regardless of material. A full mixed paper flower bouquet is the book page craft project that most consistently produces gasps of recognition from observers encountering it for the first time in a domestic setting.
How to get it: Make each flower type using the appropriate petal template: roses from long graduated strips (as in project 4), peonies from multiple identical large rounded petal shapes attached around a central button, daisies from narrow elongated petals glued in a circle around a center, ranunculus from small rounded petals in graduated density. Make leaves by cutting simple leaf shapes and scoring a center vein line with a bone folder before attaching to wire stems. Arrange the completed flowers by height, with larger forms at the center and smaller filler flowers at the bouquet’s perimeter and lower positions.
| Product |
|---|
| Florist wire assorted gauges |
| Green floral tape stem wrap |
| Bone folder for leaf vein scoring |
| Petal template set varied forms |
| Hot glue gun for petal assembly |
11. Book Page Shadow Box Display
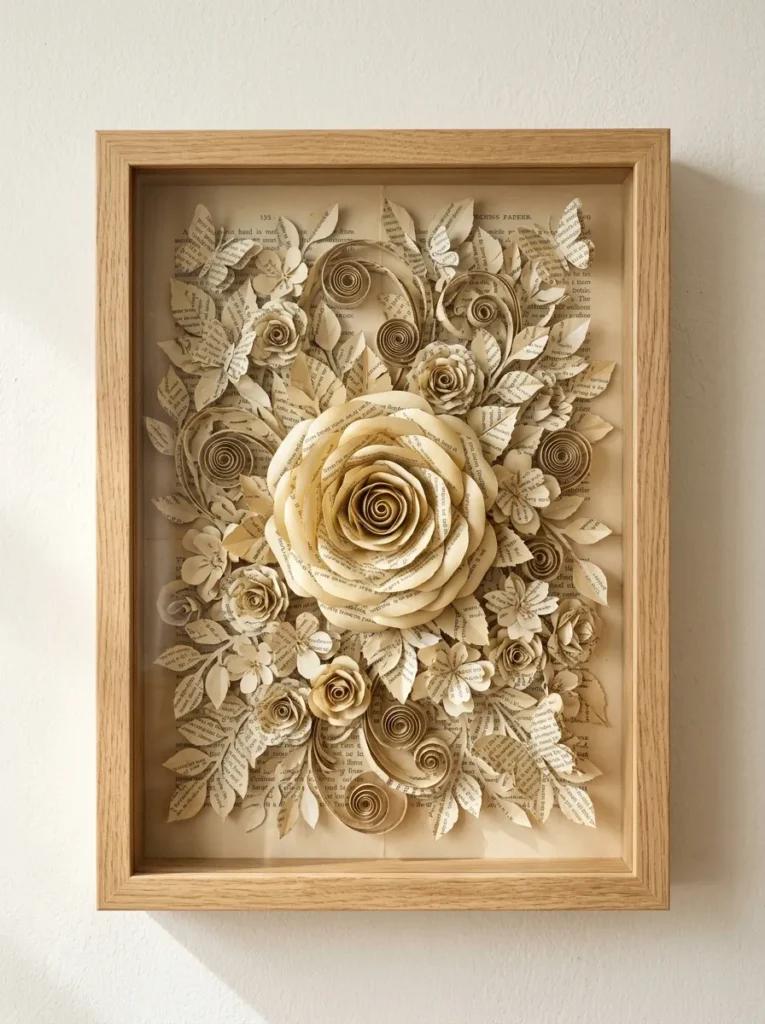
Vibe: Warm and intricate — the framed piece that takes two minutes to absorb and reveals something new at every look.
Why it works: A book page shadow box display applies the design principle of controlled three-dimensionality as art medium — the shadow box frame’s depth allows elements to be positioned at different distances from the viewer, creating genuine spatial depth within a framed composition. The shadow box format is the ideal display vehicle for book page paper elements because the glass front protects the fragile paper objects from dust and damage while allowing them to remain fully three-dimensional — a quality lost when paper art is pressed flat beneath glass in a standard frame. Elements placed at different depths within the shadow box cast shadows on the elements behind them as light rakes through from the sides, creating a dynamic shadow composition within the box that changes throughout the day.
How to get it: Plan the shadow box composition on paper before beginning construction — sketch the placement of the large central element, the medium supporting elements, and the small accent elements at three depths within the box. Attach the back-layer elements directly to the shadow box back panel using PVA glue. Attach mid-layer elements using foam mounting squares (3mm depth) to lift them off the back layer. Attach the front-layer elements using foam mounting squares at 6mm depth for the greatest apparent projection from the back. Close the shadow box and check the depth clearance — elements at the front layer must not contact the glass front when the box is closed.
| Product |
|---|
| Deep shadow box frame natural wood |
| Foam mounting square set 3mm and 6mm |
| PVA glue for back panel adhesion |
| Book page rose and flower elements |
| Small book page butterfly set |
12. Book Page Decoupage Letter or Initial
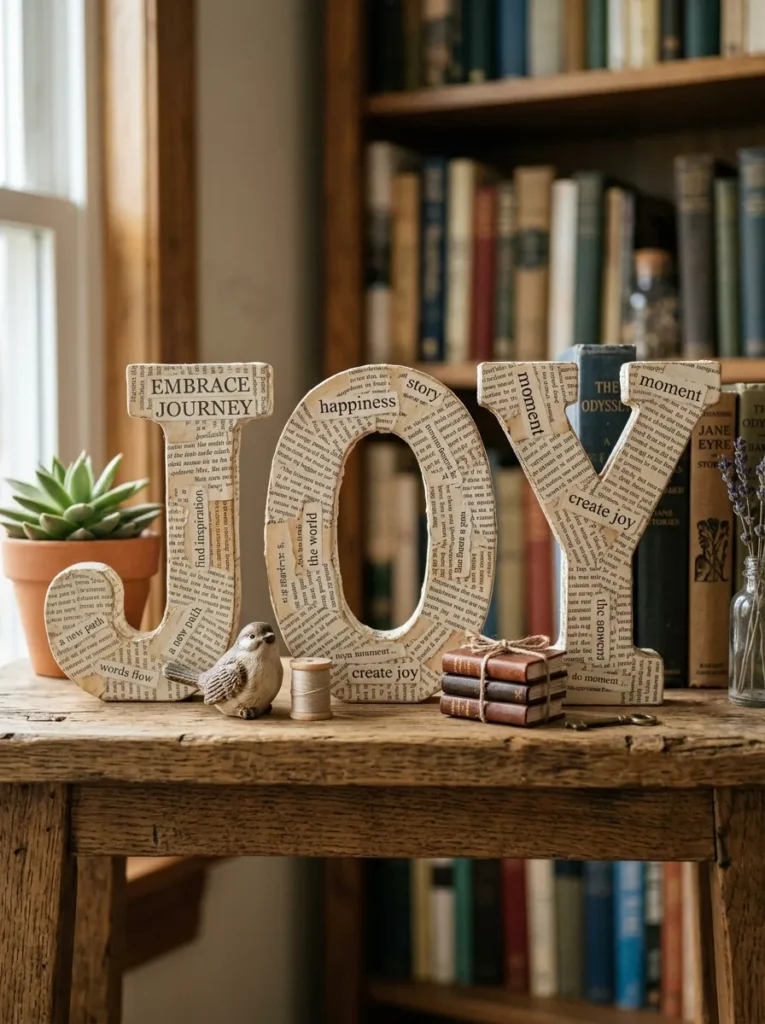
Vibe: Warm and typographic — the shelf display that plays with the nature of books and reading in a single composed moment.
Why it works: Book page decoupage letters apply the design principle of material meaning — covering a letter of the alphabet in the pages of books makes visible the relationship between letter (the fundamental unit of written language) and book (language in its assembled, read form). This conceptual layer gives book page letter displays a depth that equivalent letters covered in other decorative materials lack — the choice of book page is not arbitrary but materially meaningful to anyone who reads. The typographic texture of the book page reads differently when it covers a three-dimensional letter form than when it covers a flat surface, because the page text wraps around the letter’s curves and edges in a way that creates a continuous text surface suggesting the letter is built from language itself.
How to get it: Source pre-cut wooden letters in the desired size from a craft supply store — 20cm height is the minimum for the decoupage texture to be clearly visible. Apply torn book page pieces using the standard Mod Podge technique (under and over application), working around the letter’s three-dimensional form including the side faces and any interior counters in letters like ‘B’, ‘D’, or ‘O’. Wrap page pieces over the letter edges rather than cutting to the edge — the wrapped overlap at edges creates a cleaner finish than attempting to cut precisely to the letter’s edge. Apply two final coats of matte Mod Podge for a softer, less reflective finish than gloss.
| Product |
|---|
| Wooden letter set pre-cut 20cm |
| Mod Podge matte for letter finish |
| Old book pages torn for decoupage |
| Flat brush for Mod Podge application |
| Shelf display stand set small |
13. Book Page Advent Calendar Cones
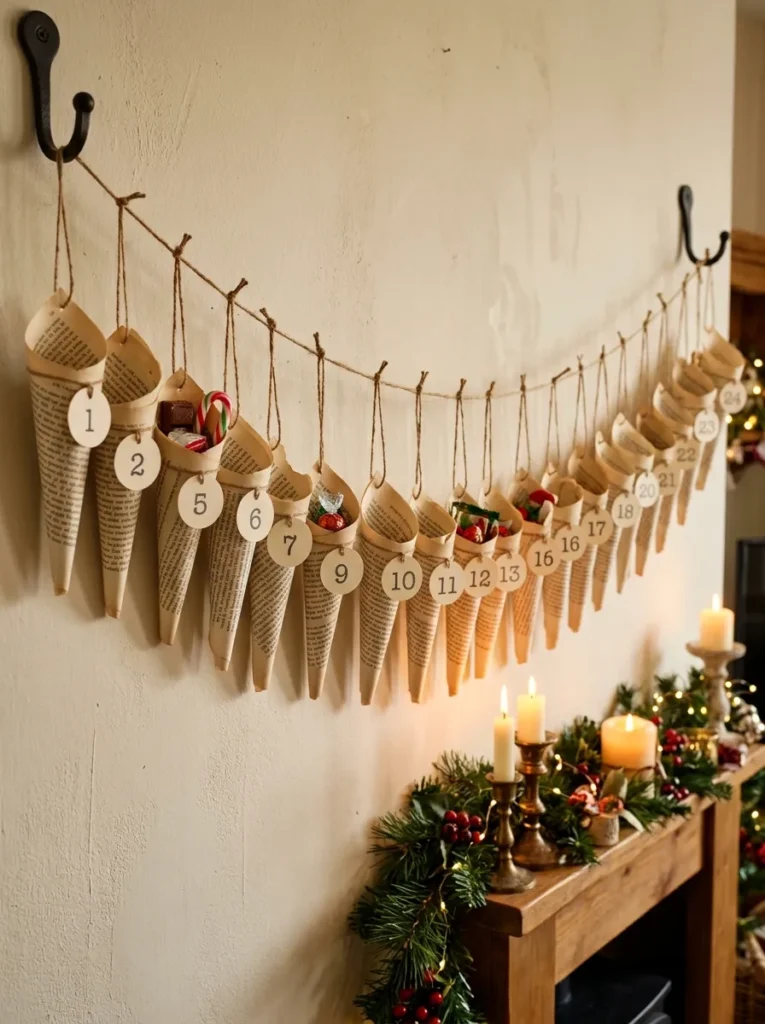
Vibe: Warm and festive — the advent calendar that is more beautiful empty than most commercial versions are full.
Why it works: Book page cone advent calendars apply the design principle of festive material appropriateness — the warm cream and gray of book page typography sits naturally in a winter holiday palette (referencing the cream-and-gold aesthetic of traditional Christmas color schemes) while the literary material of old book pages references the storytelling and narrative traditions most associated with the holiday season. The cone format is the most efficient advent vessel available: quick to make, self-standing with a simple curled base, naturally top-opening for treat concealment, and dimensionally varied enough that slightly different cone proportions across the 24 pieces creates the pleasingly handmade inconsistency that commercial advent calendars cannot replicate.
How to get it: Make 24 cones using larger triangles than the wreath cones — approximately 30cm long and 15cm at the base for a cone large enough to hold wrapped chocolates or small treats. Roll each cone tightly at the tip but leave the wide end more open for the treat-holding capacity. Create a small base by folding a small triangle of page paper under the cone base. Number each cone with handwritten or stamped numbers on a small kraft paper tag tied with thin jute twine. String on natural twine using small S-hooks or tied loops through a hole punched at each cone’s top edge.
| Product |
|---|
| Natural jute twine for garland and tags |
| Number stamp set 1–24 small |
| Kraft paper tag set for numbering |
| Wall hook set for garland suspension |
| Wrapped chocolate treat set for filling |
14. Book Page Woven Wall Hanging
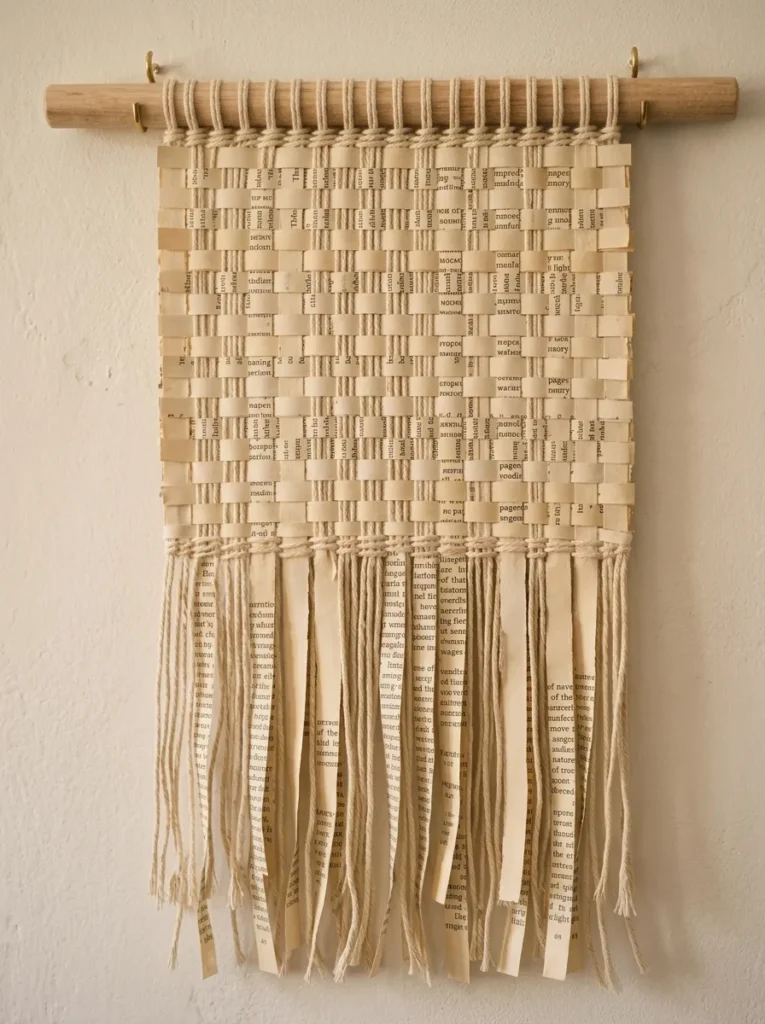
Vibe: Warm and textural — the wall piece that makes visitors ask whether it is paper or fabric before they reach out to touch it.
Why it works: A book page woven wall hanging applies the design principle of material substitution in a traditional craft structure — weaving is a textile technique, and substituting book page strips for yarn weft creates an object that reads simultaneously as textile craft and paper craft, occupying an interesting visual territory between the two traditions. The over-under plain weave structure is clearly visible in the finished piece, and the book page typography appears in horizontal bands across the weaving, creating a visual rhythm of text running perpendicular to the warp threads that references the horizontal line of reading. The result is a wall piece with more visual complexity and material interest than equivalent weavings in any single material.
How to get it: Build or purchase a simple frame loom (four pieces of 2×2 lumber nailed into a rectangle and strung with warp threads at 8 threads per inch). Warp the loom with natural cotton thread. Cut book pages into 1cm-wide strips along their length — these become the weft. Weave each strip over and under the warp threads across the full loom width, pressing each weft row tightly against the previous with a weaving comb. When the weaving reaches the desired length, cut the warp threads from the loom with 10cm of excess above the top weave row, tie the excess warp threads to a natural dowel rod, and hang. Leave the bottom warp threads unfinished as natural fringe or tie in pairs as decorative fringe ends.
Quick Win: Folding book page strips in half along their length before weaving (fold brings the text inward, showing only blank margins on the weft surface) creates a cleaner, less visually busy weave surface — a useful alternative when the typography appears too dense in the woven structure.
| Product |
|---|
| Frame loom small weaving kit |
| Natural cotton warp thread |
| Weaving comb for row pressing |
| Natural wood dowel 30cm |
| Old book pages cut in strips for weft |
How to Start Your Book Page Craft Practice
Start with the paper cone wreath. Before attempting any project requiring specialized tools, templates, or additional materials, make a single book page rolled cone — tear a triangular strip from an old book page, roll it tightly around a pencil from the wide end toward the pointed tip, apply a dot of glue, remove the pencil. Hold the cone in your hand and look at it. In this single object you can see the entire visual language of book page craft: the typography that makes the paper interesting, the cone form that makes the paper dimensional, and the warm cream texture that makes the paper domestic and beautiful. Make twenty more cones over the next three evenings while doing something else, then glue them to a circular cardboard base over a single afternoon. The finished wreath will be the project that convinces you this is a practice worth maintaining.
The most common mistake book page crafters make is using books that are too recently published or too pristine — modern printing produces a very white, very bright paper that lacks the warm cream-to-aged-amber quality that gives book page craft its characteristic warmth. The best book pages come from books printed before 1990, whose paper has developed a warm aging tone, and from books with varied typography — chapter headings, pull quotes, footnotes, and body text at different sizes create more visually interesting surfaces than uniform body text. Charity shops, library sales, and secondhand bookshops typically yield boxes of precisely the right material for under a few pounds — damaged, water-stained, or incomplete books whose pages are otherwise perfect for craft use.
Three items under $30 that make every book page craft project better: A bone folder ($6–$8) that creates crisp, precise fold lines on book pages in a way that finger-folding cannot produce — the single most important tool for any paper-folding book page project; a paper trimmer ($15–$20) that cuts consistent strips, triangles, and rectangles from book pages in seconds rather than the minutes required with scissors — the specific tool that makes repetitive book page craft projects (beads, stars, garland elements) genuinely achievable within a single session; and a bottle of Mod Podge in a gloss finish ($6–$8) that provides the adhesive and sealing functions for the majority of decoupage book page projects in a single purchase.
Realistic expectations: A single small book page craft project — a handful of rolled stars, a small paper rose, one decoupage vase — takes 20–45 minutes of active making time. A medium project — a full wreath, a bouquet of paper flowers, or a framed typographic piece — takes 2–4 hours across one or two sessions. A large or ambitious project — a shadow box display, a full advent calendar, or a woven wall hanging — takes 4–8 hours across several sessions. The material cost across all 14 projects on this list is minimal: a single old book from a charity shop ($0.50–$2.00) provides the pages for three to four complete projects from this list, making book page craft one of the most financially accessible creative practices available to any adult maker.
Frequently Asked Questions About Book Page Crafts
Which books are best to use for book page crafts?
The most visually beautiful book pages for craft use come from older books printed before the 1990s — their paper has developed a warm cream-to-amber aging tone that modern printing’s bright white paper lacks, and their typography tends to be more varied (different fonts for headings and body text, varied column layouts, occasional illustrations) than contemporary book design. Hardback books from charity shops are the ideal source because they contain a large number of pages in good condition at minimal cost. Books to avoid are those with heavy glossy coated paper (used in photography books and some art books) — coated paper does not roll cleanly, does not take glue well, and does not develop the warm aging tone of uncoated paper. Novels, reference books, encyclopedias, and textbooks printed before 1990 are the best sources. Never use books with cultural, historical, or sentimental value — the craft use of a book is a creative act, but it should be reserved for books that have genuinely reached the end of their readable life rather than books worth preserving.
How do I prevent book page crafts from yellowing or deteriorating over time?
Book page crafts made from already-aged paper will not deteriorate further with normal indoor display — the aging process that produces the warm cream tone has already occurred. For projects that will be handled (jewelry, trays, functional objects), sealing with multiple coats of Mod Podge or clear acrylic sealer provides adequate protection against moisture, handling, and light exposure. Direct sunlight will bleach aged paper and should be avoided for displayed book page art — indirect natural light or artificial light maintains the warm cream tone indefinitely. For framed book page art, UV-filtering glass provides the maximum protection against light-induced fading. Rolled and folded projects (garlands, mobiles, wreaths) should be stored flat in a dry environment between seasonal uses — humidity causes book page paper to expand and distort, which can irreversibly alter the forms of rolled and folded elements.
Is it ethical to use old books for craft projects?
Using books for craft projects is ethically appropriate when the books in question are genuinely at the end of their useful reading life — damaged, incomplete, water-stained, or duplicate copies whose content is widely available in other formats. Charity shops and library sale events specifically produce books in this category: books they cannot sell in reading condition but whose pages remain physically usable. It is not appropriate to use books with cultural significance, rare printings, first editions, or books that could be repaired and returned to use. The distinction is between giving a damaged book’s material a second life through creative transformation and destroying a book for purely aesthetic reasons. Many book page crafters find that sourcing from charity shops and library sales — where the books are already designated as unsellable — resolves this ethical consideration completely while providing an abundant and essentially free material supply.
What is the best adhesive for book page craft projects?
PVA craft glue (diluted 2:1 with water for decoupage applications, full strength for structural bonding) is the foundational adhesive for most book page craft projects because it is flexible when dry (important for paper-on-paper bonding), dries clear, and is water-soluble for cleanup. Mod Podge is essentially a commercial PVA formulation with additional binding agents and is the most convenient single-product adhesive and sealer for all decoupage book page projects. Hot glue (from a glue gun) is the appropriate adhesive for assembling three-dimensional book page elements — cones to wreath bases, petals to flower centers, flowers to stems — where speed of bonding is more important than flexibility or transparency. Spray adhesive is appropriate for attaching flat book page pieces to flat surfaces where brush adhesive application might create visible ridges. Avoid superglue (cyanoacrylate) for book page craft — it bonds too quickly for the repositioning needed in arrangement-based projects and creates visible white residue on paper surfaces.
How do I make book page craft projects look more finished and professional?
The three finishing decisions that most reliably elevate book page craft from craft-project appearance to something more sophisticated are: consistent edge treatment (folded and torn edges sealed with diluted Mod Podge so they lie flat rather than lifting away from surfaces), adequate sealing coats (minimum three coats of Mod Podge over any decoupage surface, applied in alternating directions to build an even protective layer), and thoughtful display context (book page crafts are most visually compelling when displayed against a plain, warm-toned background that allows the typographic texture to read clearly — a warm white or natural wood surface is ideal, while a patterned or busy background competes with the page’s own visual complexity). For three-dimensional projects like roses and flowers, lightly misting the completed piece with a can of matte fixative spray (the kind sold for fixing pencil drawings) seals the outer surface and prevents the paper from absorbing moisture from humid environments, which is the most common cause of book page craft deterioration in display.
Ready to Create Your Dream Book Page Craft Collection?
These 14 projects cover the complete range of what book page craft can become — from the dense textural satisfaction of a rolled cone wreath and the delicate charm of a lucky star garland, to the conceptual depth of a typographic shadow box display and the material crossing of a book page woven wall hanging. Every book page craft practice begins with the simplest possible first act — tearing a page from a charity shop book, rolling it around a pencil, and seeing what form it takes — and builds from that single transformation outward to whatever scale and ambition the maker brings to it. This weekend, find one old book at a charity shop, tear out twenty pages, roll them into cones while something plays in the background, and begin gluing them to a cardboard circle. The wreath you finish will be more beautiful than you expect, and the making of it will be more satisfying than most weekend activities that cost far more. Save the projects that match your available time, your display context, and your creative instincts — and begin from that first rolled cone.