15 One-Hour Crafts That Look Surprisingly Beautiful
One-hour crafts are quick, low-supply DIY projects completable in 60 minutes or less that produce genuinely beautiful, display-worthy results — no specialist skills, no expensive tools, and no art degree required. Here are 15 ideas that move fast, look considered, and will make anyone who sees them ask where you bought them.
There is a particular satisfaction in making something beautiful with your hands in the time it takes to watch a film. No waiting for deliveries, no complex instructions, no expensive equipment collecting dust in a spare room. The best one-hour crafts share a quality that distinguishes them from generic DIY: they produce objects that look intentional — like they were chosen, not assembled. Here are 15 ideas worth saving — and stealing.
Why One-Hour Crafts Work So Well
What are one-hour crafts, really? One-hour crafts sit at the intersection of creative satisfaction and practical realism — they are projects designed for people who want to make things but live in the actual world, where time is genuinely limited and attention is genuinely divided. As a creative category, they draw from the broader maker movement’s emphasis on hand-produced objects with visible craft, but filter it through the constraint of accessibility: materials available at any craft or hardware store, techniques learnable in minutes, and results achievable in a single sitting. The best one-hour crafts are not simplified versions of harder projects — they are complete projects in their own right, where the constraint of an hour is itself a design parameter.
Core materials and approaches. The material vocabulary of beautiful one-hour crafts leans toward the naturally elegant: air-dry clay, beeswax, dried botanicals, raw linen and cotton fabric, natural twine, glass vessels, plaster of Paris, watercolor on thick paper, concrete mix, and basic acrylic paint in deliberate palettes. Techniques cluster around four core actions — pouring, wrapping, pressing, and painting — each of which produces tactile, handmade results without requiring fine motor precision. The most successful one-hour crafts tend to use materials that do some of the aesthetic work themselves: wax drips create their own organic texture, pressed flowers arrange themselves into compositions, and air-dry clay carries fingerprints and tool marks that read as craft rather than imperfection.
Why they matter now. The resurgence of handcraft in a heavily digital daily life is not nostalgia — it is a genuine psychological need. Research published in the British Journal of Occupational Therapy consistently links regular creative activity with reduced cortisol levels, improved mood, and greater sense of personal agency. One-hour crafts specifically serve this need because they are completable in a single session: the satisfaction of a finished object — held, displayed, given away — is available within the hour, not after weeks of intermittent effort. Pinterest data shows “easy DIY home decor” and “quick crafts” searches peaking consistently in January and October, the two months when people most actively seek productive creative outlets indoors.
Can complete beginners achieve beautiful results? The honest answer is yes — with the right project selection. Projects that rely on process (dipping, pouring, pressing) rather than precision (cutting, measuring, sewing) produce beautiful results regardless of prior experience, because the material’s own behavior contributes to the aesthetic. The projects in this list are selected specifically for process-reliant techniques that reward engagement over skill.
Style at a Glance
| Element | Detail |
|---|---|
| Philosophy | Make something beautiful in the time you actually have |
| Key Materials | Air-dry clay, beeswax, dried botanicals, linen, plaster, watercolor |
| Key Techniques | Pouring, pressing, wrapping, painting, molding, dipping |
15 One-Hour Crafts That Look Surprisingly Beautiful
1. Air-Dry Clay Pinch Pot Trinket Dish
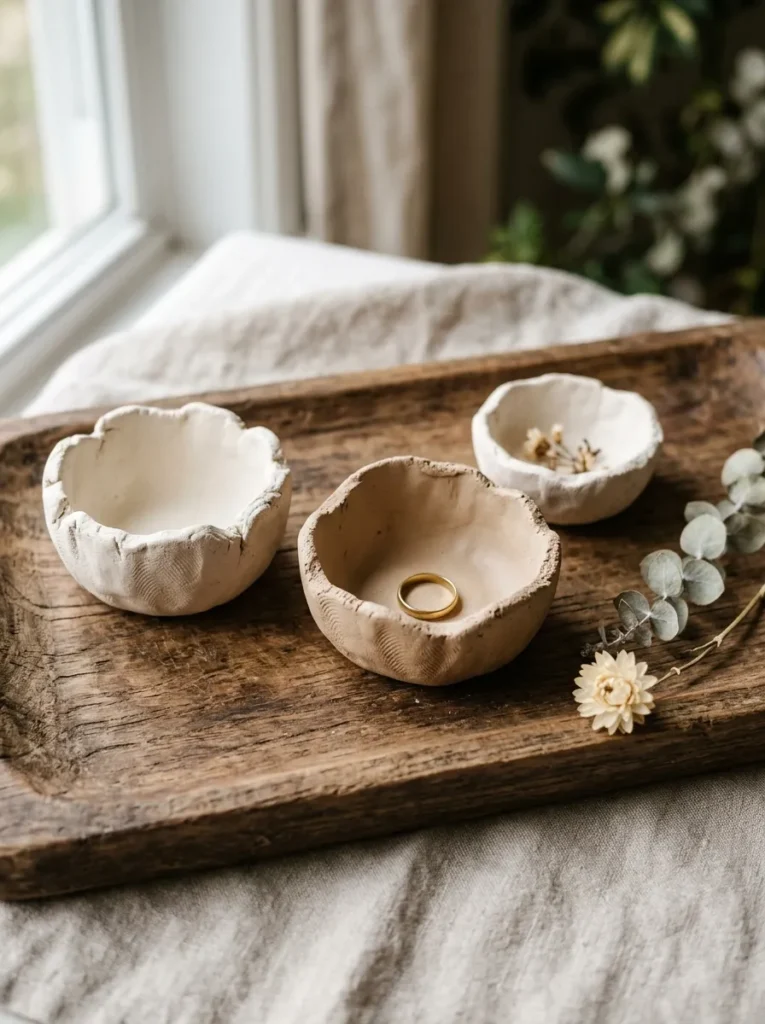
Vibe: A clay pinch pot feels handmade in the most satisfying sense — the object carries the evidence of its own making.
Why it works: The pinch pot is one of humanity’s oldest ceramic forms, and its appeal has never diminished precisely because the technique produces an object that no machine can replicate: the slightly irregular rim, the fingerprint impressions in the clay wall, the gentle asymmetry of a form shaped by actual hands. Air-dry clay makes this technique accessible without a kiln — Crayola Air-Dry Clay and DAS Air-Hardening Modeling Clay both produce results with genuine ceramic quality when sanded smooth after drying. The design principle operating here is honest material expression: the clay is not trying to look like anything other than what it is, which is the source of its aesthetic dignity.
How to get it: Take a golf-ball-sized piece of air-dry clay and press your thumb into the center. Rotate the ball slowly while pinching the walls upward and outward to create a shallow dish form, keeping the walls approximately 5mm thick. Smooth the interior with a damp finger. Allow 24 hours to dry, then sand lightly with 220-grit paper and seal with a coat of matte Mod Podge. Paint the exterior with a wash of white acrylic for a clean finish, or leave in natural clay tone.
Quick Win: A 2.5 lb block of air-dry clay costs $8–$12 and yields 15–20 small pinch pot dishes — make a set of three in graduated sizes for a more considered display than a single piece.
Shop The Look
| Product |
|---|
| Air dry clay white 2.5lb block non-toxic |
| Matte Mod Podge sealer brush on |
| Fine grit sandpaper 220 pack for clay smoothing |
| Small wooden display tray natural finish |
| Dried eucalyptus bundle natural for styling |
Also view: 16 DIY Paper Garland Ideas Worth Saving
2. Pressed Flower Resin Bookmark Set
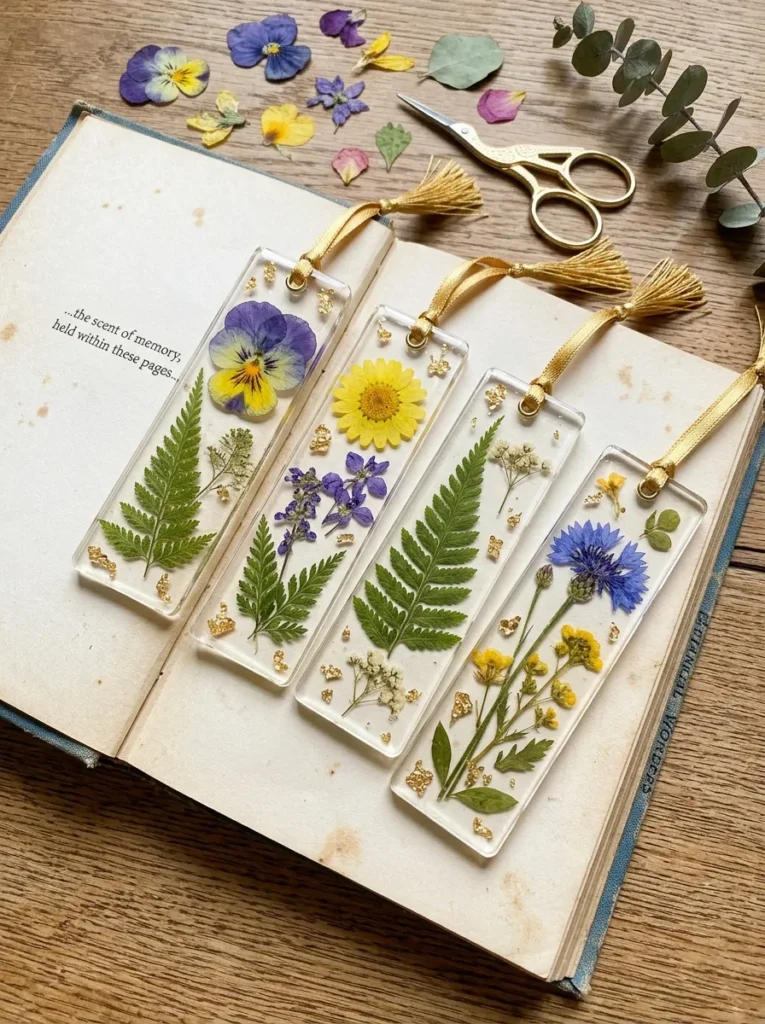
Vibe: A pressed flower resin bookmark feels luminous — like wearing a garden under glass.
Why it works: Resin casting suspends organic material in a state of permanent, translucent beauty — it is the craft technique that most consistently produces results that look genuinely professional regardless of maker experience. The design principle is preservation as aesthetics: the pressed flower, suspended and backlit through clear resin, reads as a natural specimen in a museum vitrine, which is a far more sophisticated presentation than a pressed flower under glass. Bookmark proportions (approximately 2×6 inches) are ideal for first resin casts because the shallow pour depth minimizes bubble formation and curing heat issues that affect deeper molds.
How to get it: Press flowers between heavy books for 48 hours minimum (or use a microwave flower press for results in under 2 minutes). Mix two-part epoxy resin per manufacturer instructions and pour a thin base layer into silicone bookmark molds. Allow to partially cure (approximately 30 minutes), then arrange pressed flowers face-down on the tacky surface. Pour a second layer to encase. Insert a gold jump ring and ribbon loop before final cure. Total active time: 45–50 minutes across two pour sessions.
Shop The Look
| Product |
|---|
| Two-part epoxy resin clear casting kit |
| Silicone bookmark mold set rectangle |
| Microwave flower press quick dry botanical |
| Gold jump ring set small jewelry findings |
| Satin ribbon gold thin for bookmark loop |
3. Beeswax Taper Candles with Rolled Honeycomb Sheets
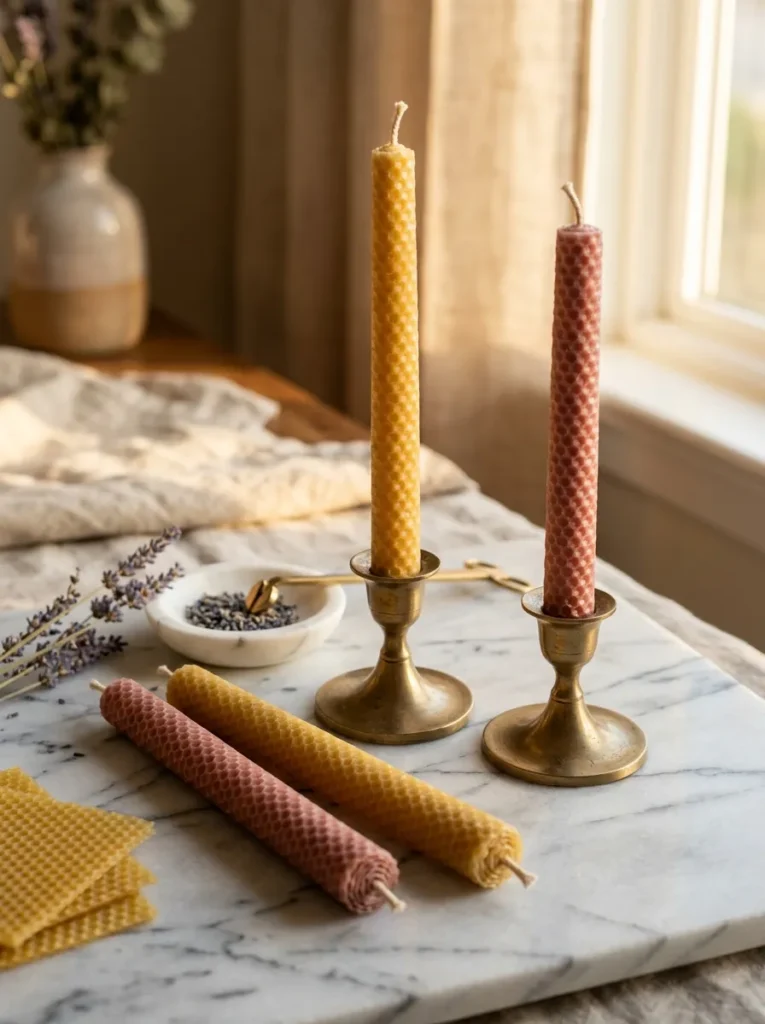
Vibe: A hand-rolled beeswax taper feels warm before it is even lit — the honeycomb texture catches light like the wax is already glowing.
Why it works: Rolled beeswax sheet candles are the perfect one-hour craft because the material requires no melting, no thermometers, and no specialized equipment — the beeswax sheet is simply warmed slightly and rolled around a wick. Yet the result reads as considerably more sophisticated than a poured paraffin candle: the visible honeycomb texture is unmistakably handmade, the natural beeswax scent is subtle and genuinely pleasant, and the honey-yellow color has a warmth that no artificial dye can replicate. Rolling candles at a slight diagonal to the sheet edge creates a gentle spiral that adds visual interest to the finished taper.
How to get it: Warm a beeswax sheet (8×16 inches) with a hair dryer for 30 seconds until pliable. Place a cotton wick along one short edge, extending 1 cm above the sheet. Roll the sheet tightly and evenly around the wick, pressing the final edge to seal. Trim the bottom flat with a sharp knife. For a two-tone taper, roll a second sheet in a contrasting color around the first before sealing. Total time per candle: 5–7 minutes.
Quick Win: A pack of 24 beeswax sheets in assorted colors costs $15–$20 and produces 12 tapers — a set of six matching tapers in two heights makes one of the most impressive handmade gifts available for the material cost.
Shop The Look
| Product |
|---|
| Beeswax honeycomb sheet set assorted colors |
| Cotton candle wick pre-tabbed set |
| Brass taper candlestick holder set of 4 |
| Small marble serving dish for display |
| Dried lavender bundle natural |
4. Linen-Wrapped Vase with Twine Detail
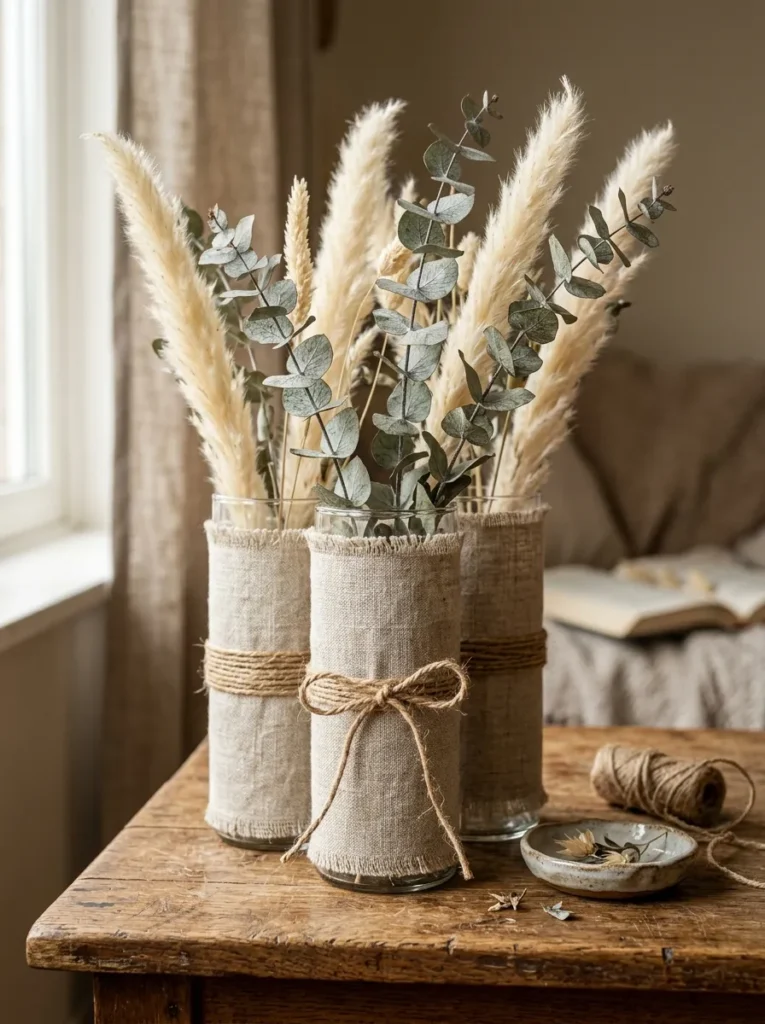
Vibe: A linen-wrapped vase feels warm and deliberately textural — the natural fabric transforms a glass vessel into something that belongs to an interior, not just a garden center.
Why it works: Fabric wrapping is the craft technique that most efficiently demonstrates a core design principle: material transformation. A plain glass cylinder from a dollar store reads as utilitarian; the same cylinder wrapped in linen and tied with jute twine reads as a considered decor object. The transformation costs approximately 15 minutes and $2 in materials per vase. Linen specifically works because its natural slub texture and irregular weave read as artisanal rather than cheap, and its neutral warm tone bridges virtually any interior palette. The visible raw edge at the top of the wrapping — deliberately left unfolded rather than hemmed — signals handmade intentionality.
How to get it: Cut a rectangle of natural linen fabric to the height of your glass vase plus 1 inch, and long enough to wrap around with 1 inch of overlap. Apply a thin line of fabric glue along the inside edge of the overlap and press to seal. Wrap a length of jute twine three times around the vase at one-third height from the bottom, tie in a simple knot, and trim ends to 2 inches. Fill with dried botanicals immediately — no water required.
Shop The Look
| Product |
|---|
| Natural linen fabric by the yard medium weight |
| Jute twine natural roll 100ft |
| Fabric glue washable clear |
| Dried pampas grass stems bundle |
| Clear glass cylinder vase set of 3 |
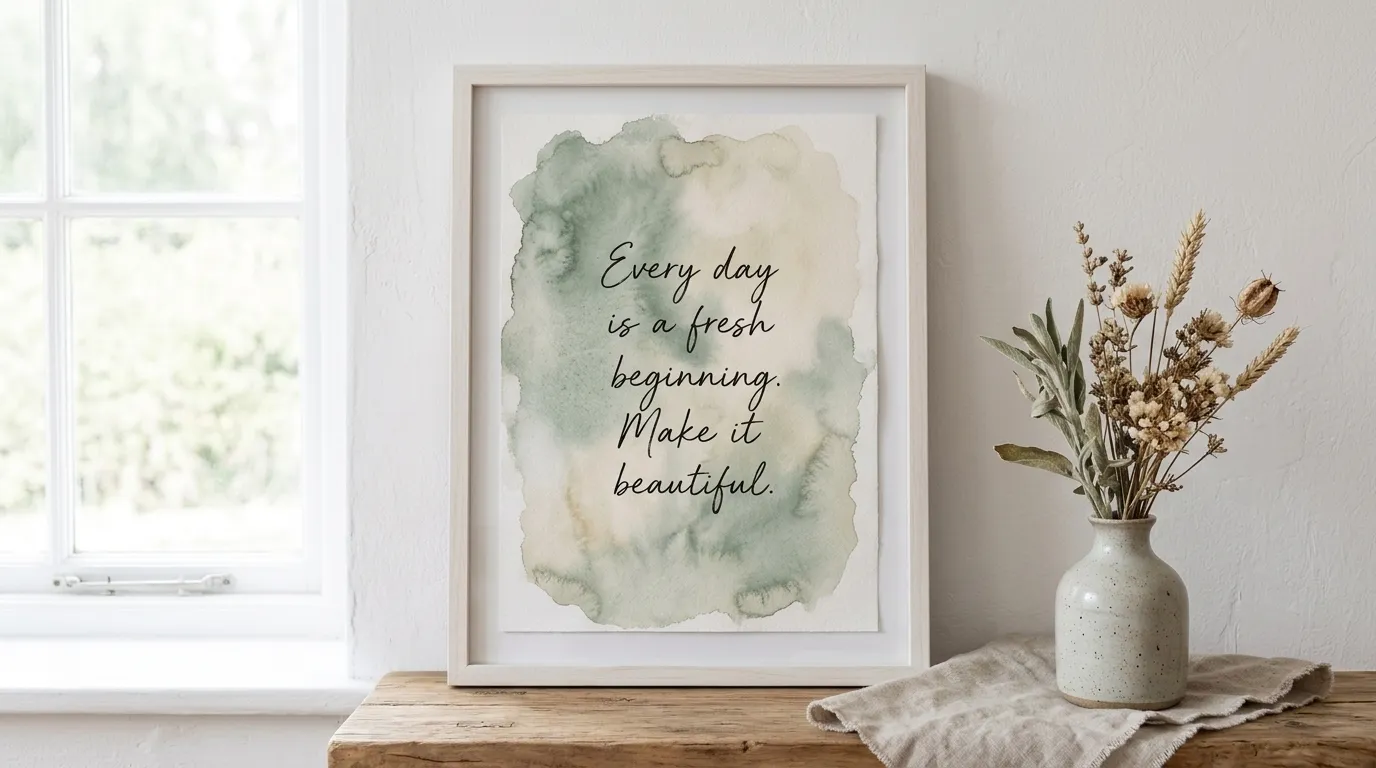
5. Watercolor Wash Quote Print
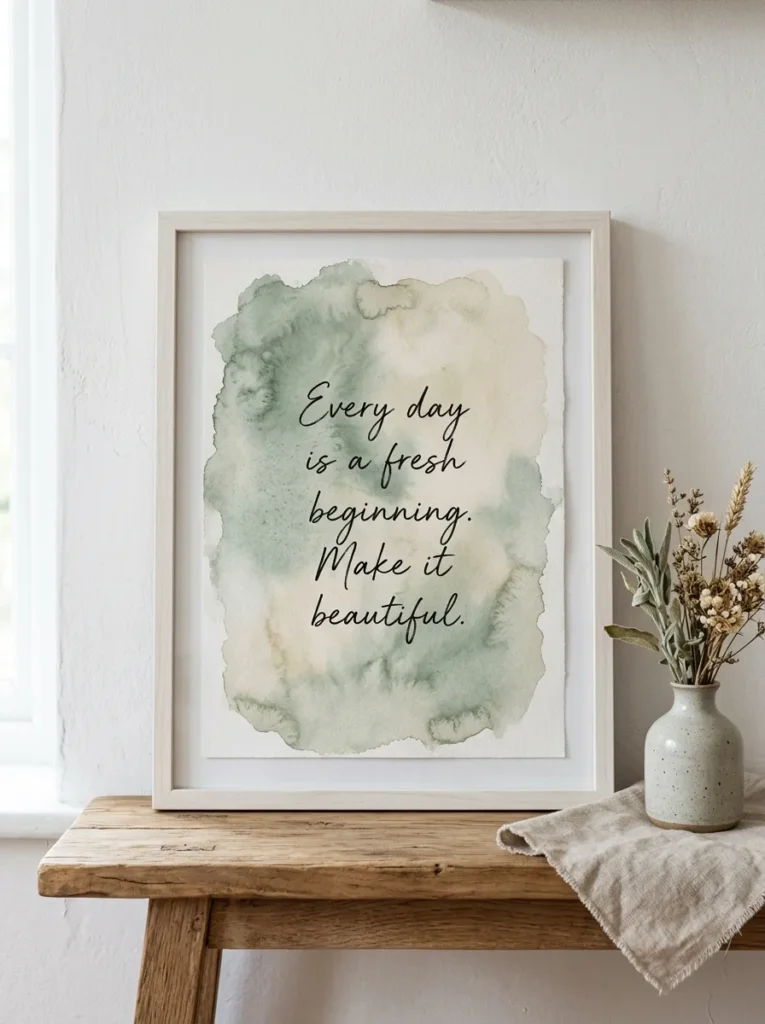
Vibe: A watercolor quote print feels personal — handwriting that carries the physical presence of the person who made it.
Why it works: The combination of loose watercolor wash and handwritten text produces an object that occupies a specific aesthetic territory — more personal than a printed poster, more accessible than a painting. The design principle is controlled imperfection: the watercolor wash is deliberately loose and bloom-edged (which is achieved by working wet-on-wet), creating a background that reads as skilled rather than messy precisely because the edges are fluid rather than forced. The handwritten text over a dry wash adds a layer that printed typography cannot: the visible individual pressure and speed of a real person’s hand.
How to get it: Wet a sheet of 140 lb cold-press watercolor paper with clean water. Drop dusty sage watercolor paint along the upper third and let it bloom downward. Add warm yellow ochre at the bottom third and let the two colors meet and blend in the center. Allow to dry completely (10–15 minutes with a heat gun, or 30 minutes naturally). Write your chosen quote in black fine-liner pen using a light pencil guide line erased afterward. Frame in a simple white or natural wood frame.
Shop The Look
| Product |
|---|
| Cold press watercolor paper 140lb block |
| Watercolor paint set artist quality tubes |
| Black fine liner pen set 0.3 0.5 0.8mm |
| Heat gun craft small for drying |
| Simple white wood frame 8×10 |
6. Concrete Tealight Holders
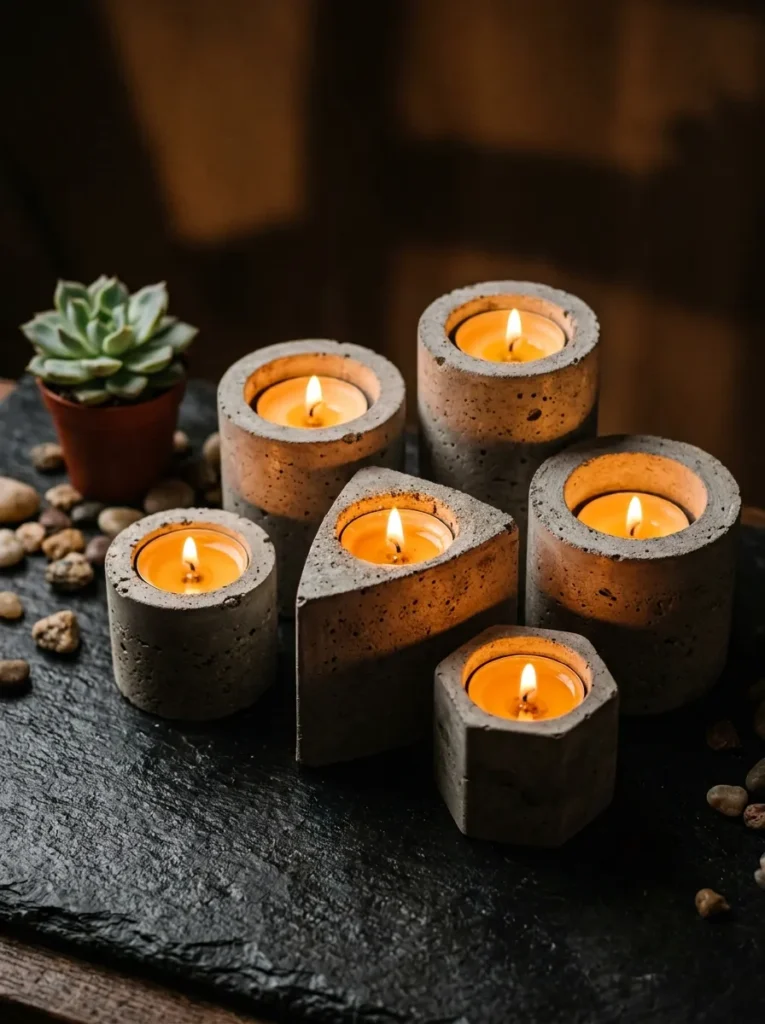
Vibe: Concrete tealight holders feel elemental — raw, heavy, and warm all at once.
Why it works: Concrete is the craft material that most consistently surprises makers with how beautiful its raw state is — the aggregate texture, the slight color variation from mixing, and the weight of even a small concrete object give it a material authority that no lightweight substitute achieves. The design principle is material honesty: concrete tealight holders make no attempt to disguise what they are, and their value comes entirely from the inherent dignity of the material itself. The contrast between raw grey concrete and warm amber tealight is one of the most elemental material pairings in design — used in architecture, industrial design, and now increasingly in domestic craft.
How to get it: Mix quick-set concrete powder with water to a thick peanut butter consistency. Grease the inside of small plastic cups or cardboard tubes with petroleum jelly. Pour concrete to half height, press a greased smaller cup or balloon into the center to create the tealight cavity, and weigh it down. Pour remaining concrete around the insert to the top. Allow to set for 45 minutes, then remove the insert and outer mold. Sand any sharp edges with 80-grit sandpaper and seal with concrete sealer spray.
Quick Win: A 5 lb bag of quick-set concrete costs $6–$8 and produces 8–10 small tealight holders — use plastic yogurt cups and small paper cups as molds for forms that require no specialty equipment.
Shop The Look
| Product |
|---|
| Quick set concrete powder small bag 5lb |
| Petroleum jelly large tub mold release |
| Concrete sealer spray matte finish |
| Tealight candles set of 50 warm white |
| Coarse sandpaper 80 grit pack |
7. Dried Flower Arrangement in Bud Vase Cluster
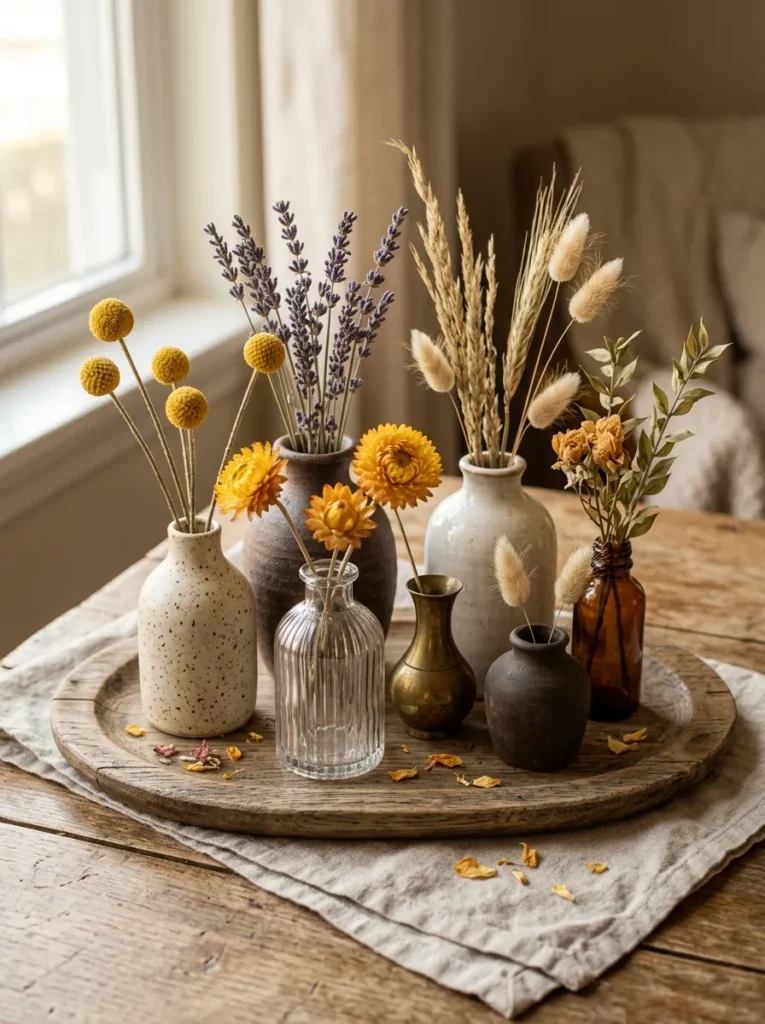
Vibe: A bud vase cluster feels gathered — like someone with a good eye spent a thoughtful hour collecting the right things.
Why it works: The bud vase cluster is where the design principle of visual grouping is most elegantly demonstrated: seven small vases clustered on a tray read as a composed installation, while the same seven vases distributed across a room would read as scattered clutter. The tray creates the containing edge that transforms a collection into a composition, and the varying heights of the vases create the visual rhythm that makes the grouping interesting rather than flat. Dried botanicals rather than fresh flowers are the correct material choice for a one-hour craft — they require no conditioning, no water, and no future maintenance, and they improve visually over time as their colors deepen and their textures become more pronounced.
How to get it: Collect seven vessels of varying heights and materials — the variety of material (ceramic, glass, brass, clay) is what gives the cluster its visual complexity. On a wooden oval tray, arrange the tallest vase at the back-center and position shorter vessels progressively forward, leaving slight asymmetry rather than strict symmetry. Insert one to two dried stems per vase — a single stem often reads more confidently than a small bunch. Vary the stem types: one architectural (dried allium or craspedia), one textural (dried grass plume), one colorful (dried strawflower or statice).
Shop The Look
| Product |
|---|
| Assorted bud vase set ceramic glass brass small |
| Dried strawflower bundle assorted warm tones |
| Dried craspedia billy ball stem bundle |
| Oval wooden serving tray for display styling |
| Dried lavender bundle natural |
8. Hand-Marbled Paper Using Shaving Cream
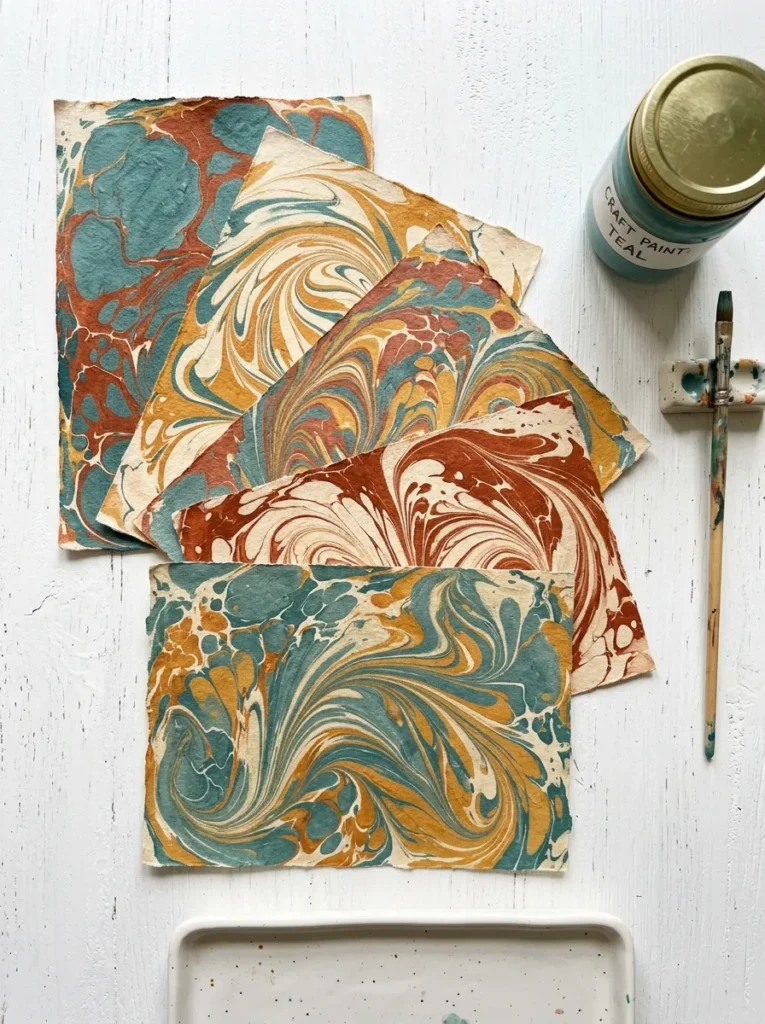
Vibe: Hand-marbled paper feels playful and genuinely unique — no two sheets are ever the same, which is the entire point.
Why it works: Shaving cream marbling is the craft technique with the highest surprise-to-effort ratio in this list: the process takes under 10 minutes per sheet, uses materials available at any pharmacy, and produces results that look indistinguishable from traditional Turkish Ebru marbling — a technique that takes years to master. The design principle is controlled chaos: the paint floats on the shaving cream surface and responds to any disturbance of the foam, which means the maker has influence over the general movement direction but not the final pattern. This relinquishing of control is precisely what produces the organic, non-repeating beauty of marbled paper.
How to get it: Spread a 1-inch layer of white shaving foam in a shallow tray. Drop 4–5 colors of acrylic paint in small dots across the foam surface. Draw a skewer through the paint in slow, sweeping S-curves and spirals. Lay a sheet of cardstock or watercolor paper face-down on the foam and press lightly. Lift and scrape the foam off with a ruler edge, revealing the transferred marble pattern. Lay flat to dry for 20 minutes.
Shop The Look
| Product |
|---|
| White shaving foam can for marbling craft |
| Acrylic craft paint set jewel tones assorted |
| Cardstock paper pack heavy white |
| Shallow baking tray for marbling craft |
| Wooden skewer set for pattern making |
9. Wax Seal Sticker Set with Custom Monogram
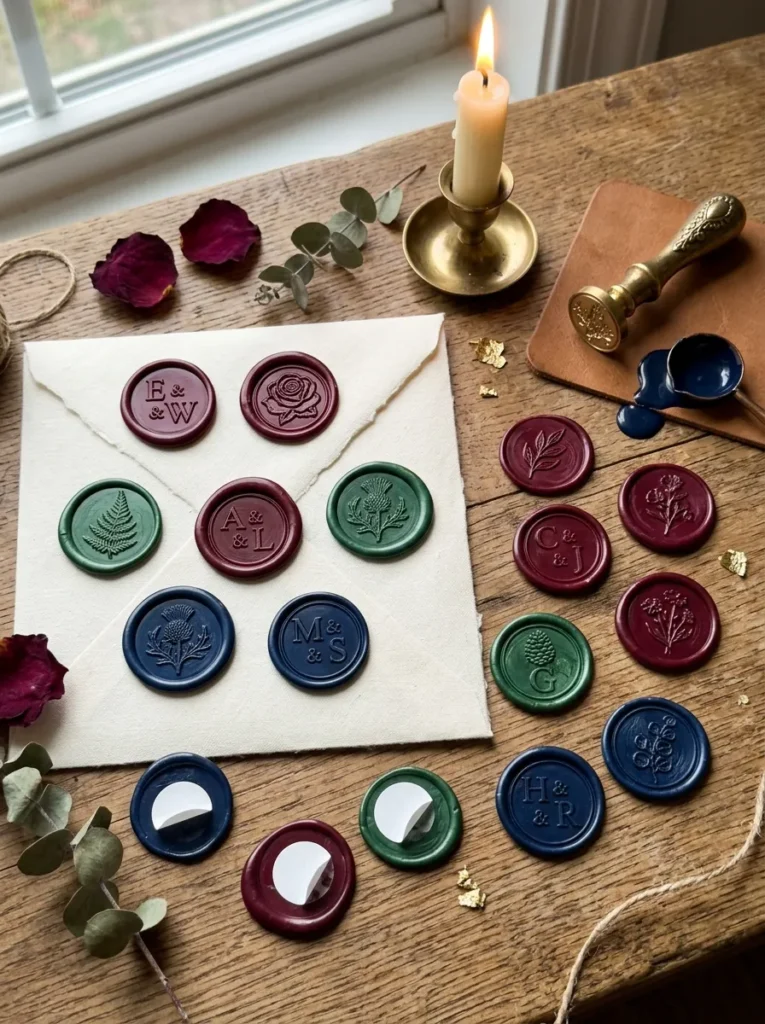
Vibe: Wax seals feel ceremonial — small acts of intention that make ordinary correspondence feel significant.
Why it works: The wax seal stamp is one of the oldest mark-making tools in Western correspondence, and its revival in contemporary craft is driven by the same impulse that makes handwriting more meaningful than typing — it requires physical presence and deliberate action, and it produces a result that is visibly irreproducible by digital means. Pre-made wax seal stickers (which use a peel-and-stick backing rather than requiring an open flame) make the format accessible in a one-hour craft context while maintaining all the visual impact of traditional sealing wax. The design principle is material richness: the depth and sheen of colored wax reads as luxurious regardless of scale, which is why a 1-inch wax seal transforms an ordinary envelope into an object worth keeping.
How to get it: Use a wax seal gun (similar to a glue gun but loaded with colored wax sticks) to dispense a pool of wax approximately 2cm in diameter onto a silicone mat. Press a cool, dry stamp into the wax and hold for 10 seconds. Peel carefully — the seal releases cleanly from silicone. Apply a double-sided sticker dot to the back for a peel-and-stick application. Make 20–30 seals in one sitting for a batch that covers all gifting and correspondence needs for months.
Quick Win: A wax seal starter kit — gun, five wax colors, and five stamp designs — costs $20–$35 and produces unlimited seals with no open-flame wax melting required, making it the safest and most versatile entry point into the technique.
Shop The Look
| Product |
|---|
| Wax seal gun electric with wax sticks set |
| Wax seal stamp set monogram botanical |
| Silicone mat for wax seal making |
| Double sided sticker dots small |
| Cream envelope set A2 A6 for correspondence |
10. Plaster Wall Hanging with Embedded Botanicals
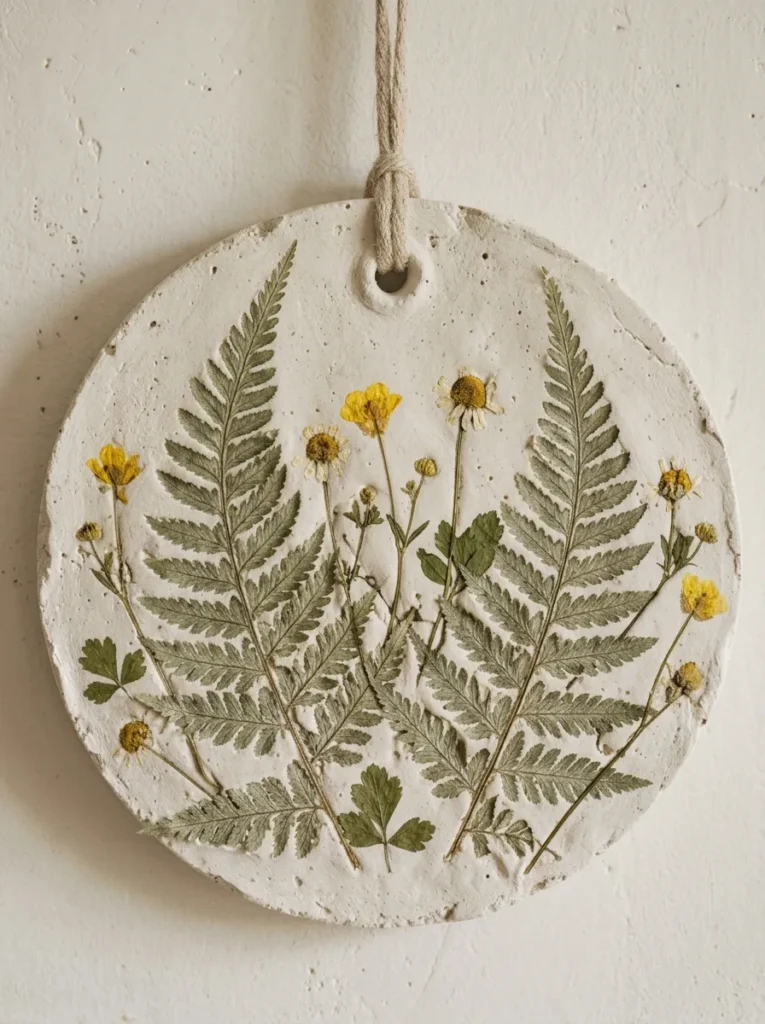
Vibe: A plaster botanical hanging feels delicate and sculptural — a small object that carries the weight of something much larger.
Why it works: Embedding dried botanicals into wet plaster produces an effect that reads as genuinely artisanal: the plant material becomes part of the object’s surface rather than decoration applied to it, which is a fundamental distinction in craft objects between surface decoration and material integration. The design principle is relief texture: as the plaster sets around the botanical forms, it captures the fine detail of leaf veins, petal edges, and stem structure, creating a natural-history-specimen quality that no printing technique can replicate. The circular form references both botanical specimen mounts and relief medallion traditions, placing the object in a lineage of decorative craft that reads as historically grounded.
How to get it: Mix plaster of Paris with water to a thick cream consistency. Pour into a circular silicone mold (6–8 inch diameter) to a depth of 1.5 cm. Press dried fern fronds, pressed flowers, or skeleton leaves face-down into the wet plaster surface. Before the plaster fully sets (approximately 20 minutes), thread a length of linen cord through a hole made with a skewer near the top. Allow to cure fully (40 minutes), then remove from mold and allow to dry overnight before hanging.
Shop The Look
| Product |
|---|
| Plaster of Paris small bag 4lb |
| Silicone round mold set 4 6 8 inch |
| Dried fern frond botanical set |
| Natural linen cord thin 2mm roll |
| Pressed flower set assorted dried botanical |
11. Fabric-Dyed Linen Napkins with Natural Dye
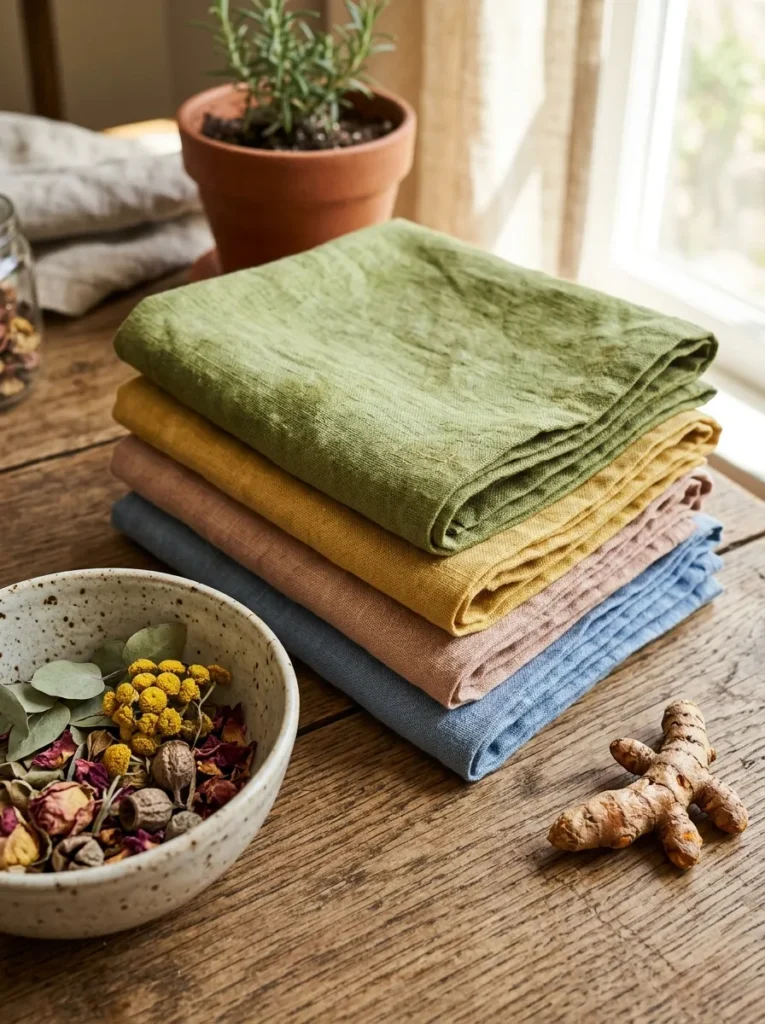
Vibe: Naturally dyed linen napkins feel organic — colors that came from somewhere real, with all the gentle irregularity that implies.
Why it works: Natural dyeing is the craft technique that most directly connects the maker to the long tradition of pre-industrial textile production — turmeric, avocado pits, red cabbage, and black tea are the same dye sources used for centuries before synthetic dyes became available in the 1850s. The design principle is natural color variation: unlike synthetic fabric dye, natural dyes produce slightly mottled, non-uniform color that reads as intrinsically more interesting than flat industrial color. Pre-mordanting with alum (potassium aluminum sulfate, available at any pharmacy) dramatically improves the color fastness of natural dyes on linen without any specialist chemistry.
How to get it: Soak linen napkins in a mordant solution (4 tablespoons alum dissolved in 4 liters warm water) for 30 minutes. For turmeric yellow: simmer 3 tablespoons turmeric powder in 3 liters water for 20 minutes, add mordanted napkins, and simmer for 30 minutes. Rinse in cool water, wring gently, and hang to dry. Total active time per color: approximately 45–50 minutes including mordanting.
Shop The Look
| Product |
|---|
| Natural linen napkin set 6 piece undyed |
| Alum mordant powder for natural dyeing |
| Turmeric powder bulk for natural dye |
| Dried indigo powder natural fabric dye |
| Large stainless pot 8qt for dyeing |
12. Decoupage Terracotta Pot with Vintage Botanical Pages
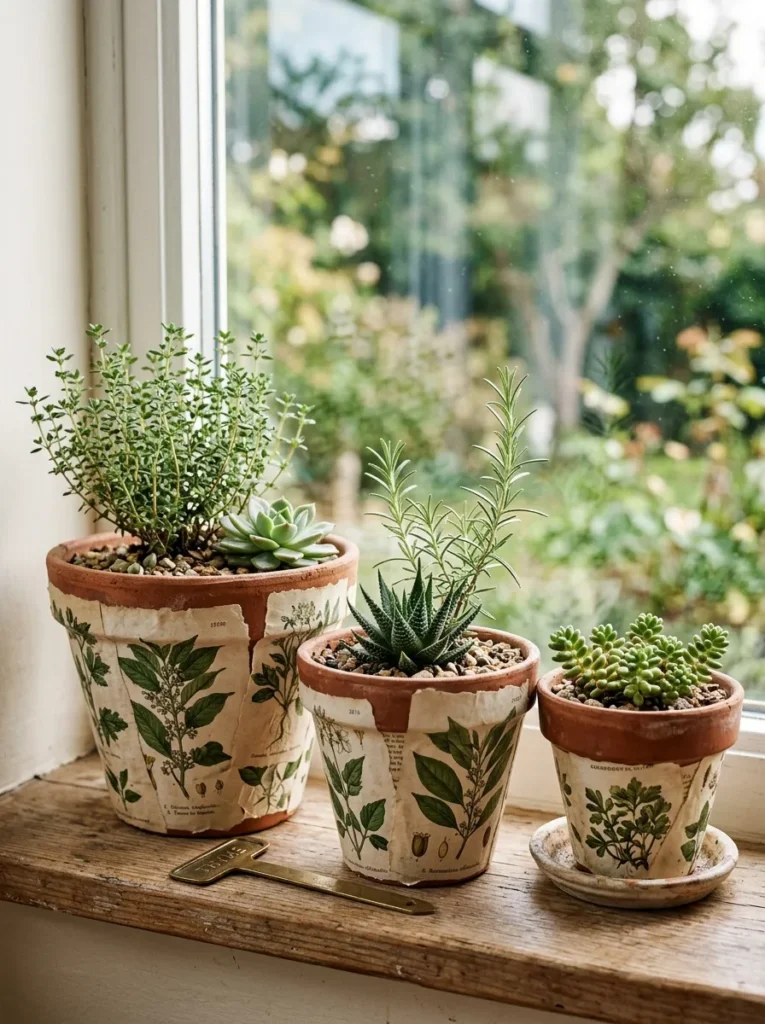
Vibe: Decoupaged botanical pots feel nostalgic and layered — like objects that have absorbed the personality of a library over decades.
Why it works: Decoupage is the craft technique with the longest continuous history in decorative arts — it was practiced in 17th-century European courts as a way of making lacquered furniture accessible to those who couldn’t afford Asian lacquerwork imports. Applied to terracotta pots with vintage botanical illustration pages, it produces objects that reference both natural history cabinet tradition and the warm, layered aesthetic of contemporary grandmillennial design. The design principle is surface narration: the botanical illustrations carry their own visual content — detailed plant anatomy, Latin nomenclature, engraved linework — that makes the pot read as a found object rather than a crafted one.
How to get it: Tear pages from a vintage botanical illustration book (available at thrift stores for $2–$5) or print botanical images from free archive sources such as the Biodiversity Heritage Library. Apply Mod Podge to a section of the terracotta pot surface, press a torn page piece onto the wet glue, smooth with a damp finger, and apply another layer of Mod Podge over the top. Overlap pieces to cover the entire pot exterior. Seal with two coats of matte Mod Podge. Total time: 45–55 minutes.
Quick Win: Printing free botanical illustrations from the Biodiversity Heritage Library (biodiversitylibrary.org) at home on aged-tone parchment paper produces the same vintage quality as original book pages at zero material cost beyond the paper and ink.
Shop The Look
| Product |
|---|
| Matte Mod Podge decoupage medium large |
| Terracotta pot set 3 sizes small medium large |
| Parchment aged paper A4 for printing |
| Small foam brush set for decoupage |
| Small succulent plant set of 3 assorted |
13. Macramé Knot Keychain Set
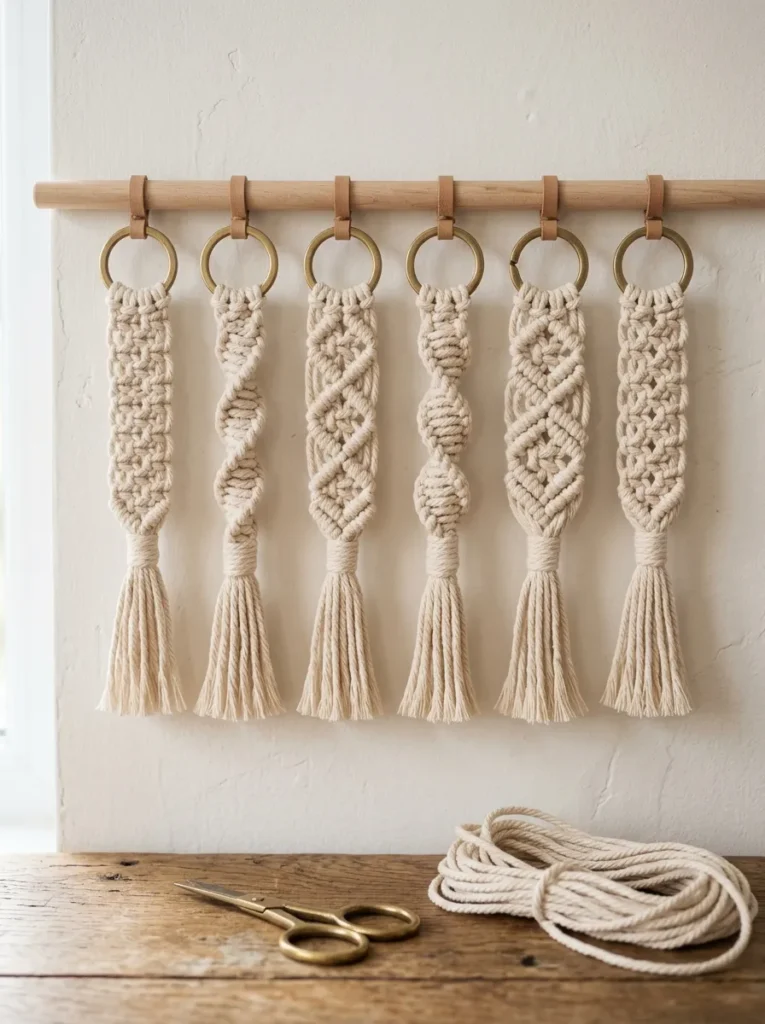
Vibe: A macramé keychain feels handmade with intention — small enough to make in an hour, personal enough to give as a gift.
Why it works: Macramé operates on a straightforward design principle — functional knot-making elevated to decorative art through the choice of material, the rhythm of the pattern, and the finishing of the fringe. Keychains are the ideal macramé project for beginners because the small scale makes every knot visible and correctable, the total cord length is manageable (approximately 1 meter per keychain), and the finished object is genuinely useful rather than purely decorative. Natural unbleached cotton cord in 3mm diameter produces results that read as considered and contemporary rather than craft-fair-generic, which is largely a function of the cord quality and the clean finishing of the fringe end.
How to get it: Cut four lengths of 3mm natural cotton cord at 50 cm each. Fold all four in half and attach the loop ends to a brass key ring using a lark’s head knot. You now have eight working cords. Tie square knots across all eight cords (four cords per half, alternating which four are active) for approximately 3 cm of knotted length. Trim the remaining cord ends to an even 3 cm fringe and unravel the plies for a soft, brushed finish.
Shop The Look
| Product |
|---|
| Natural cotton macrame cord 3mm 100ft roll |
| Brass key ring set 25mm split ring |
| Small sharp scissors for cord trimming |
| Wooden display dowel 12 inch thin |
| Macrame knot pattern card beginner guide |
14. Tinted Glass Vases with Diluted Acrylic Paint
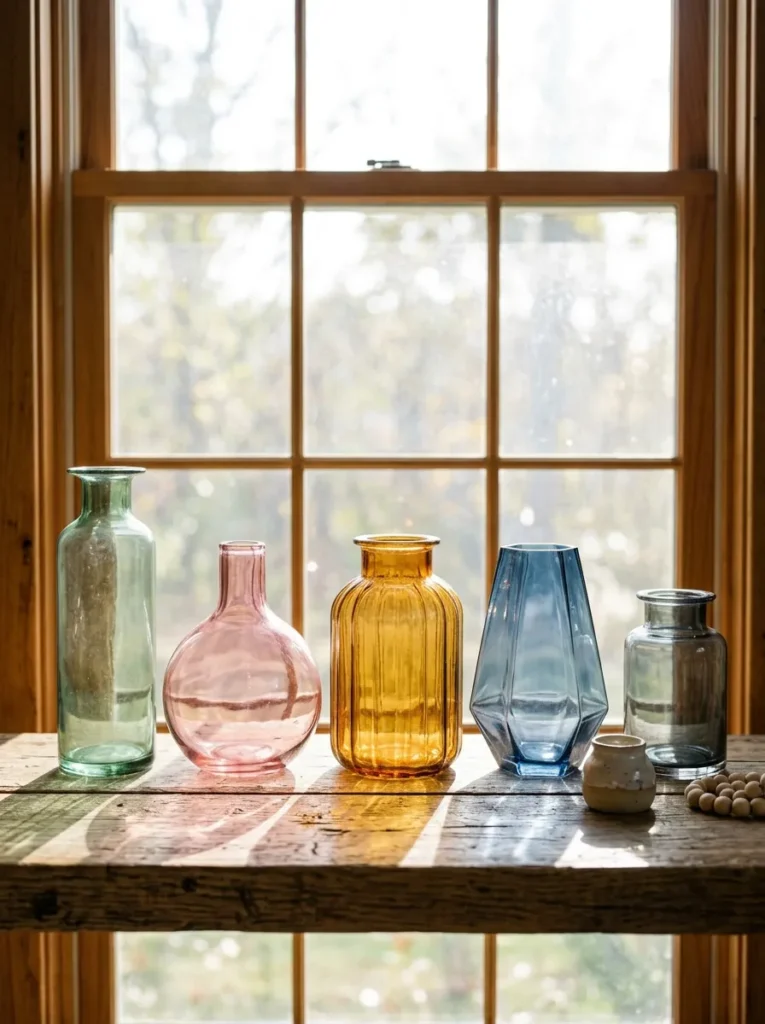
Vibe: Tinted glass vases feel luminous — color that is held inside the object rather than applied to its surface.
Why it works: Tinting glass with diluted acrylic paint applied to the interior surface produces a depth of color that exterior painting cannot achieve — the paint is seen through the glass, which gives it a translucency and luminosity that reads as genuinely beautiful rather than crafted. The design principle is light behavior: tinted glass changes its appearance throughout the day as light passes through it at different angles, making it a dynamic rather than static object. A shelf of five tinted vases in a harmonious palette creates the light-through-glass effect of stained glass at a fraction of the complexity and cost.
How to get it: Mix one part acrylic paint with two parts Mod Podge and dilute with water to a thin, pourable consistency. Pour the mixture into a clean glass vase, swirl to coat the interior surface, then pour out the excess. Prop the vase upside-down at an angle on a paper towel-covered surface and allow to drain for 10 minutes. Bake in an oven at 150°C for 30 minutes to cure. Once cool, the tinted surface is water-resistant enough for dried botanicals (not for water).
Quick Win: A single bottle of acrylic craft paint ($2–$4) diluted with Mod Podge tints five to six vases — the entire material cost for a shelf of five luminous tinted vases sits under $15.
Shop The Look
| Product |
|---|
| Clear glass vase set 5 piece varying shapes |
| Acrylic craft paint set 12 colors |
| Matte Mod Podge for glass tinting medium |
| Small foam roller for glass coating |
| Wooden shelf floating 24 inch display |
15. Small-Space One-Hour Craft: Framed Pressed Leaf Grid
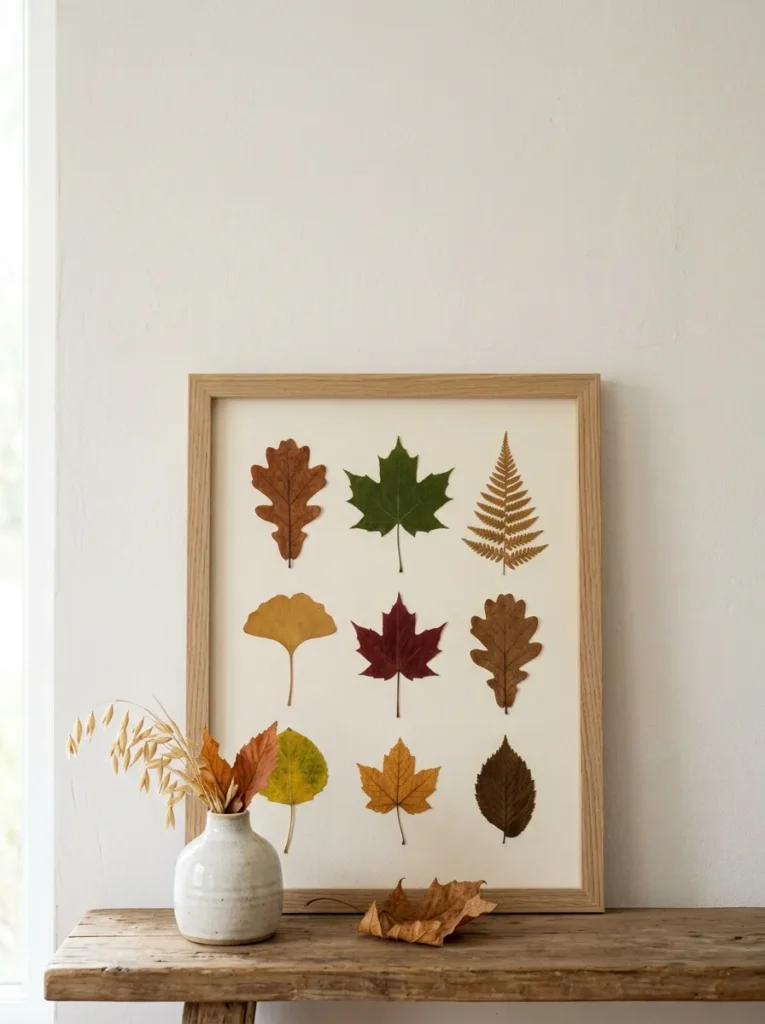
Vibe: A pressed leaf grid feels ordered and quietly scientific — like a naturalist’s field notes turned into wall art.
Why it works: The botanical specimen grid is the one-hour craft that most directly references the tradition of natural history illustration and scientific collection, which gives it a visual authority that purely decorative crafts cannot claim. The design principle is systematic arrangement: nine leaves in a 3×3 grid on cream card, with equal spacing between each leaf, transforms a collection of natural objects into a composition with the rigor of a diagram and the warmth of a garden. Autumn leaves pressed between heavy books for 48 hours (or microwaved between paper towels for 2 minutes) flatten completely and retain their color for months to years when kept away from direct sunlight.
How to get it: Collect nine leaves of varying species and sizes. Press between heavy books for 48 hours or microwave between paper layers for 90-second intervals until flat. Cut a piece of cream card stock to 7×9 inches and lightly mark a 3×3 grid in pencil with 2 cm spacing between positions. Apply a small dot of clear craft glue to the back of each leaf and press to the card. Allow to dry, erase pencil marks, and frame in a simple natural oak or white frame with the card as a floating mount.
Shop The Look
| Product |
|---|
| Slim natural oak picture frame 8×10 |
| Cream card stock heavyweight A4 for mounting |
| Clear craft glue precision tip bottle |
| Microwave flower and leaf press kit |
| Pencil set H and 2H for light guide marks |
How to Start Your One-Hour Craft Practice
The single first move is to set up a permanent, ready-to-use craft surface — even if it is just one shelf in a cupboard where the core materials (air-dry clay, a small watercolor set, craft glue, and a few lengths of natural cord) are always accessible and organized. The single biggest barrier to one-hour crafting is not motivation but friction: the 20 minutes of gathering supplies before any making can begin turns a 60-minute project into an 80-minute one and makes the whole activity feel heavier than it should. A permanent, prepared craft surface reduces that friction to zero.
The most common mistake is choosing a project that requires drying, curing, or setting time within the hour — and then counting that passive time as craft time, which creates the disappointing experience of an “unfinished” project at the end of an hour. The fix is to select projects where the active making is completable in 60 minutes, and the drying or curing happens passively afterward. Most of the projects in this list follow this structure: active time under 60 minutes, passive cure time overnight.
Three materials under $50 that unlock the most projects: a 2.5 lb block of air-dry clay ($10–$12) that serves pinch pots, wall hangings, and sculpted objects; a two-part epoxy resin starter kit ($20–$28) that enables bookmarks, jewelry, and paperweight casting; and a 100-ft roll of natural cotton macramé cord ($8–$12) that covers keychains, wall hangings, and plant hangers. Together these three materials cover eight of the fifteen projects in this list for under $50 total.
Realistic expectations: one-hour crafts are not one-hour finished objects in every case — they are projects where your active involvement is one hour, and the result is something genuinely display-worthy rather than a practice piece. The first attempt at any technique typically produces something 70–80% as beautiful as subsequent attempts, which is almost always still beautiful enough to display or give. Allow yourself the first attempt without judgment; the second attempt will surprise you.
Frequently Asked Questions About One-Hour Crafts
What are the best one-hour crafts for complete beginners with no experience?
The three most beginner-reliable one-hour crafts are the air-dry clay pinch pot (which requires only hands and a ball of clay), the linen-wrapped vase (which requires only scissors, glue, and fabric), and the beeswax rolled taper candle (which requires only a beeswax sheet, a wick, and a hair dryer). All three use process-reliant techniques where the material’s natural behavior produces most of the aesthetic result — no fine motor skill, no prior craft experience, and no specialist tools are required for any of them.
What materials do I need to start making one-hour crafts at home?
A starter one-hour craft kit covers most of the projects in this category: air-dry clay ($10), a basic watercolor set ($12–$18), Mod Podge in matte ($8), a roll of natural cotton cord ($8–$12), a bag of quick-set concrete ($6–$8), and a two-part resin starter kit ($20–$28). This full starter kit totals $64–$84 and covers over ten distinct project types. Most projects also require materials already present in most homes: glass jars and vases, acrylic paint, basic brushes, and heavy books for pressing.
How do I make one-hour craft results look professional and display-worthy?
The three decisions that most determine whether a one-hour craft reads as professional or amateur are material quality (natural materials — linen, cotton, clay, beeswax, real botanical — consistently read as higher quality than synthetic substitutes), finishing (sanding, sealing, or trimming edges cleanly adds 10 minutes and dramatically improves perceived quality), and presentation (how an object is displayed — on a tray, in a frame, in a vase cluster — contributes as much to its perceived quality as the object itself).
Can one-hour crafts be sold or given as gifts?
One-hour crafts make some of the most appreciated handmade gifts precisely because they are visibly made rather than purchased, and because the constraint of the format forces a clarity and simplicity that more complex handmade objects sometimes lack. The strongest gift candidates from this list are the beeswax taper candle set, the wax seal sticker collection, the pressed flower resin bookmarks, and the naturally dyed linen napkins — all of which are useful, beautiful, and clearly handmade without requiring explanation of their process.
How do I find time for one-hour crafts in a busy schedule?
The one-hour craft is specifically designed for the gaps that already exist in most schedules — a weekend morning before the day’s obligations begin, an evening after children are in bed, or a Sunday afternoon. The key reframe is treating craft time as genuinely non-negotiable leisure rather than a task that competes with productivity — which means scheduling it as a specific hour rather than waiting for a free afternoon to materialize. Setting a timer for 60 minutes and beginning regardless of preparation level removes the perfectionist resistance that delays most creative practice indefinitely.
Ready to Make Something Beautiful This Hour?
These 15 one-hour crafts span the full range of what a single hour and a handful of materials can produce — from clay forms and botanical hangings to tinted glass, marbled paper, and hand-rolled candles — so regardless of your experience level, your material budget, or your available space, there is a genuinely achievable starting point here. The most important thing to understand is that the hour is not a constraint — it is the entire point. The limitation of time is what produces the clarity, the directness, and the honest material quality that makes these objects beautiful rather than overworked. Today, pick the one project that made you reach for your phone to check if you have the materials, gather what you need, set a timer for 60 minutes, and begin. Pin the ideas that made your hands want to make something, and let those be the ones you start with first.