15 Simple One Hour DIY Gifts Anyone Can Make
Simple one hour DIY gifts use basic craft techniques, kitchen ingredients, and accessible materials to produce genuinely beautiful and thoughtful handmade presents within a single hour of working time — no specialist tools, no advanced skills, and no multi-day projects. This article gives you exactly 15 ideas spanning food gifts, botanical makes, paper crafts, textile projects, and home accessories so every maker finds a one-hour gift that matches their materials, their skill level, and their recipient.
The specific appeal of a one-hour gift is the combination of genuine making — enough time and care to produce something real and personal — with enough efficiency that the gift does not consume the whole day. Most of the ideas in this list land closer to twenty or forty minutes of active making time, with a small buffer for the specific irreducible step that makes each gift complete: the label, the ribbon, the final trimming, the cooling time. The hour is honest and achievable. Here are 15 ideas worth making this weekend.
Why Simple One Hour DIY Gifts Work So Well
The psychology of handmade gift-giving is well-documented: recipients consistently rate handmade gifts as more thoughtful, more personal, and more emotionally resonant than equivalently priced purchased alternatives — not because of the materials involved but because of the demonstrated investment of time. A gift that took an hour to make communicates sixty minutes of dedicated attention to the recipient, which most purchased gifts of any price cannot replicate. This “costly signaling” effect (the term economists use for demonstrations of investment that communicate priority) is the mechanism behind the consistent finding that handmade gifts punch significantly above their material cost in perceived value.
The practical challenge of handmade gifts has historically been the skill and time barrier — the most beautiful handmade gifts (embroidered textiles, hand-turned ceramics, hand-blown glass) require years of learning and hours or days of making that most gift-givers cannot sustain alongside the rest of their lives. One-hour gifts solve this problem by focusing on techniques where the complexity ceiling is low but the quality ceiling is genuinely high — techniques where a complete beginner and an experienced maker produce results that are more similar than different because the material itself (the beeswax, the paper, the fresh botanical) does the quality work rather than the technical skill of the maker.
The fifteen ideas in this list were selected for three shared properties: they are genuinely achievable in under an hour of active making time by a person with no prior experience of the specific technique, they produce finished objects that read as genuinely considered gifts rather than as activity projects, and they scale easily across recipient types (the homemade spice blend works as a host gift, a birthday present, a thank-you, and a small gesture equally well). Each idea also includes a clear specification of the skill ceiling — some one-hour gifts, like the pressed flower card, produce results almost indistinguishable between a beginner and an expert; others, like the watercolor bookmark, produce visibly different quality levels but all within the range that reads as beautiful and handmade rather than amateurish.
Style at a Glance
| Element | Gift Core | One-Hour Edge |
|---|---|---|
| Philosophy | Time invested communicates care | Sixty minutes is genuinely achievable |
| Materials | Kitchen pantry, craft paper, botanical, wax | Glass jar, ribbon, kraft card, twine |
| Occasion Range | Birthday, thank-you, host gift, seasonal, just because |
15 Simple One Hour DIY Gifts Anyone Can Make
1. Homemade Spice Blend in a Labeled Glass Jar
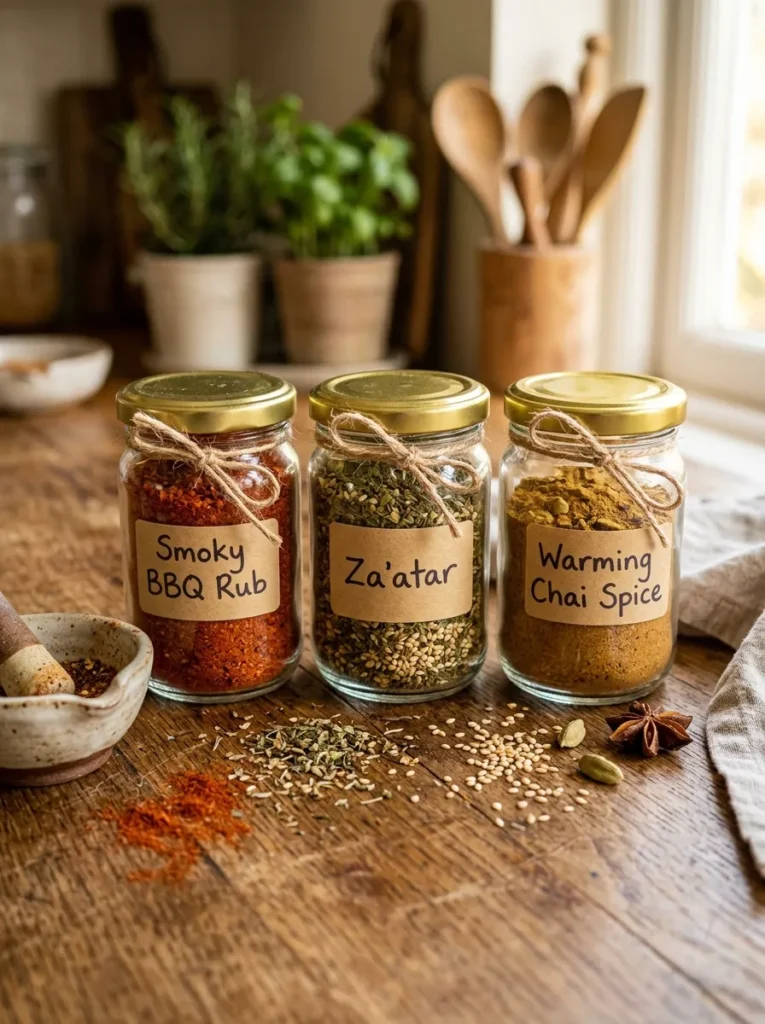
Vibe: The spice jars feel like something from a specialist food market — specific, beautiful, and immediately useful.
Why it works: Homemade spice blends apply the food gift principle of elevated everyday use — spices are used in every kitchen at every meal, and a beautifully labeled custom blend communicates both the maker’s knowledge of the recipient’s cooking style and the care taken to create something more specific and considered than a purchased spice jar. The glass jar presentation with a handwritten label converts what is essentially a kitchen pantry task (measuring and mixing spices) into a genuinely gift-quality object.
Time breakdown: Measuring and mixing: 5–10 minutes. Filling and sealing: 5 minutes. Label writing and tying: 10 minutes. Total active time: 20–25 minutes.
How to get it: Choose a blend appropriate to the recipient’s cooking style. Classic options: Za’atar (dried thyme, sumac, sesame seeds, salt in equal parts); Smoky BBQ Rub (smoked paprika 4 parts, brown sugar 2 parts, garlic powder 1 part, cumin 1 part, cayenne half part); Ras el Hanout (cumin, coriander, ginger, cinnamon, paprika, cardamom, turmeric in a 3:3:2:2:2:1:1 ratio). Mix directly in a small bowl, taste for balance, and decant into a clean glass jar. Write the blend name and key uses on a kraft label card and tie to the jar with natural twine.
Quick Win: A 50ml glass jar filled with a single-ingredient speciality salt (smoked salt, flaked sea salt with lemon zest, or sel de Guérande) takes five minutes to assemble and reads as a beautifully specific food gift without any blending.
Shop The Look
| Product |
|---|
| Small glass jar set 50–100ml gold lid |
| Kraft label card hole punched |
| Natural twine thin roll |
| Smoked paprika quality finishing |
| Za’atar spice blend ingredient set |
Also view: 15 One-Hour Crafts That Look Surprisingly Beautiful
2. Beeswax Rolled Taper Candles
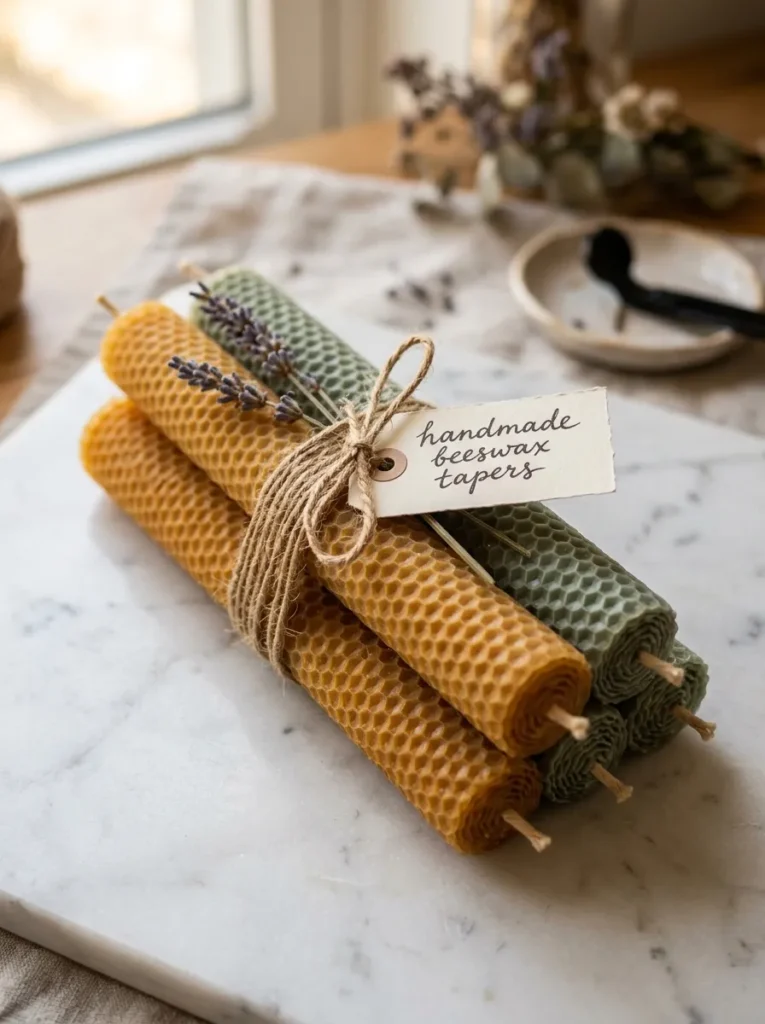
Vibe: The beeswax tapers feel ancient and refined simultaneously — the honeycomb texture and warm amber color carrying the material quality that no paraffin candle replicates.
Why it works: Beeswax rolled taper candles are the ideal one-hour gift because the rolling technique requires no heat, no melting equipment, and no specialist knowledge — a warmed beeswax sheet rolls around a wick in under five minutes per candle, and four candles can be made, bundled, and labeled in well under an hour. Yet the finished object reads as premium artisan candle work because genuine beeswax has inherent quality signals: the honeycomb texture, the warm amber color, the natural honey fragrance, and the longer burn time than paraffin.
Time breakdown: Warming beeswax sheets: 3 minutes. Rolling four candles: 15 minutes. Bundling and labeling: 5 minutes. Total: 23 minutes.
How to get it: Purchase natural beeswax honeycomb sheets (available from craft stores and online craft suppliers in packs of 10–20 sheets, in natural amber and dyed colors). Warm briefly with a hair dryer on the lowest setting for 10–15 seconds if the room is cool — cold beeswax cracks when rolled. Lay a pre-tabbed cotton wick along the short edge of the sheet with a small overhang at the base. Roll the sheet tightly from the wick edge, pressing firmly at each turn. Bundle two to four candles and tie with natural twine.
Shop The Look
| Product |
|---|
| Natural beeswax honeycomb sheet set |
| Dyed beeswax sheet set sage |
| Pre-tabbed cotton wick set |
| Natural jute twine bundle |
| Dried lavender sprig small bunch |
3. Pressed Flower Greeting Card
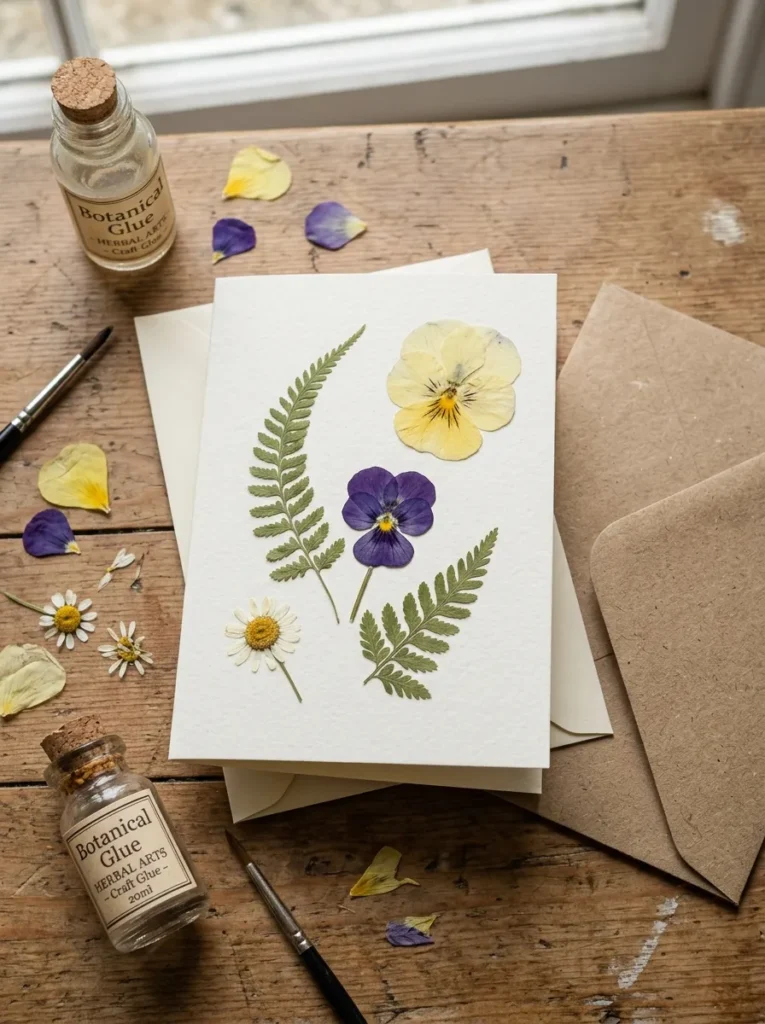
Vibe: The pressed flower card feels like finding a note tucked inside a botanical book — specific enough to be clearly made for this recipient, beautiful enough to keep rather than discard.
Why it works: A pressed flower card applies the handmade greeting card principle: a card that is also a small artwork carries significantly more emotional weight than a purchased card at any price. The pressed flower technique requires the one preparation step (pressing flowers, which takes 1–2 weeks) but the actual making of the card — arranging and adhering the pre-pressed flowers — takes under fifteen minutes. This is the one idea in this list that benefits from advance preparation: a flower press or two heavy books kept stocked with pressed flowers means cards can be assembled in under fifteen minutes whenever they are needed.
Time breakdown: (Assuming flowers already pressed) Arranging composition: 5 minutes. Adhering with glue: 5 minutes. Drying time: 10 minutes. Total active time: 10–20 minutes.
How to get it: Press flowers between the pages of a heavy book, with paper towels on each side to absorb moisture, for a minimum of two weeks. For the card: cut 300gsm cream card stock to A6 size and score the center fold. Arrange the pressed flowers on the card front in a loose, natural composition before adhering. Apply a tiny dot of clear-drying craft glue (Mod Podge, PVA, or dedicated botanical adhesive) to each flower’s back using a toothpick. Press gently into position. Allow to dry for ten minutes before handling. Write the message on the interior in ink.
Shop The Look
| Product |
|---|
| Cream card stock 300gsm A6 set |
| Kraft envelope A6 set |
| Clear drying craft glue small |
| Flower press wooden craft |
| Pressed flower assorted set |
4. Homemade Honey with Dried Herbs or Citrus
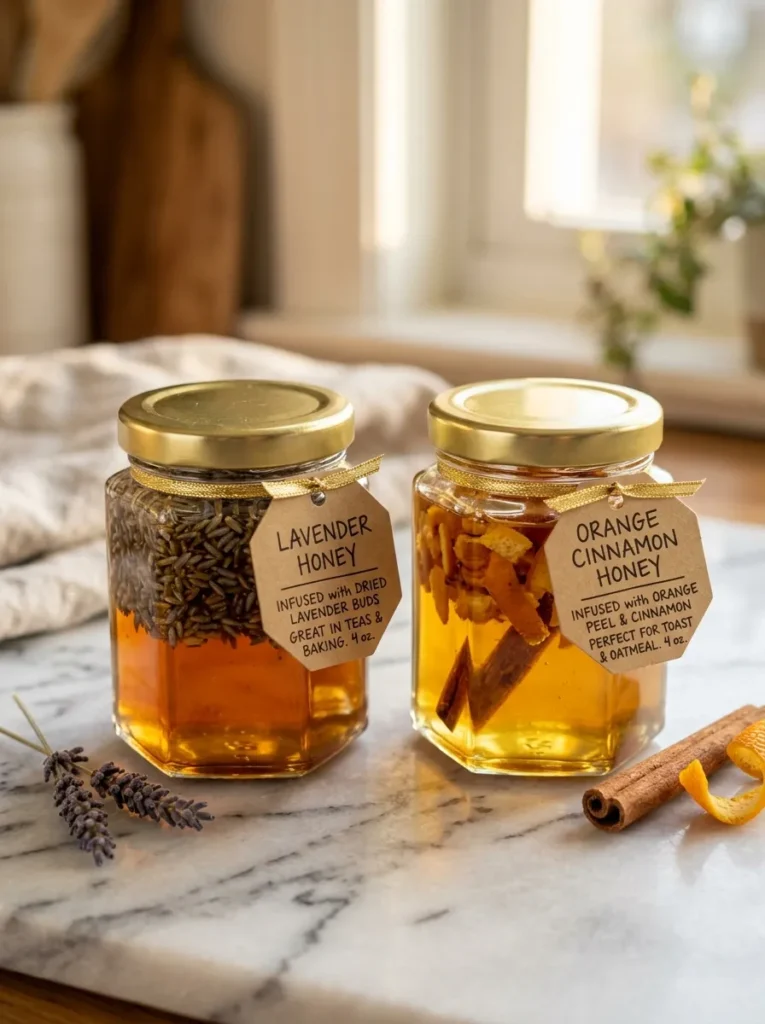
Vibe: The infused honey jars feel like sunlight in a jar — the amber color and botanical inclusions making the gift as beautiful to display as it is useful to eat.
Why it works: Infused honey applies the elevated everyday luxury principle — honey is already a pleasurable food, and the addition of dried botanicals converts it into something specific and crafted that reads as premium artisan food at a fraction of artisan pricing. The making technique requires no heat, no cooking skill, and no specialist equipment — dried botanicals are simply stirred into room-temperature honey and the jar is sealed, with the infusion improving over days as the flavors develop.
Time breakdown: Warming honey slightly for pouring: 3 minutes. Adding botanicals: 2 minutes. Filling jars: 5 minutes. Labeling and finishing: 10 minutes. Total: 20 minutes.
How to get it: Warm a good-quality raw honey gently (in a warm water bath, not a microwave) until pourable but not hot — above 45°C destroys the enzymes that make raw honey valuable. Stir in the chosen botanical: dried lavender buds (1 tablespoon per 200g honey), dried rose petals (2 tablespoons per 200g), dried orange peel (1 tablespoon per 200g), or dried thyme (1 teaspoon per 200g for a savoury honey). Pour into clean, dry glass jars and seal. The botanical pieces remaining visible in the honey are both decorative and functional — they continue infusing over time. Label with contents and a suggested use (lavender honey on yogurt; orange honey in tea).
Shop The Look
| Product |
|---|
| Raw honey 500g quality |
| Hexagonal glass jar set 100ml |
| Dried lavender buds food grade |
| Dried orange peel food grade |
| Hexagonal kraft label set gold ribbon |
5. Homemade Bath Salts in a Decorative Jar
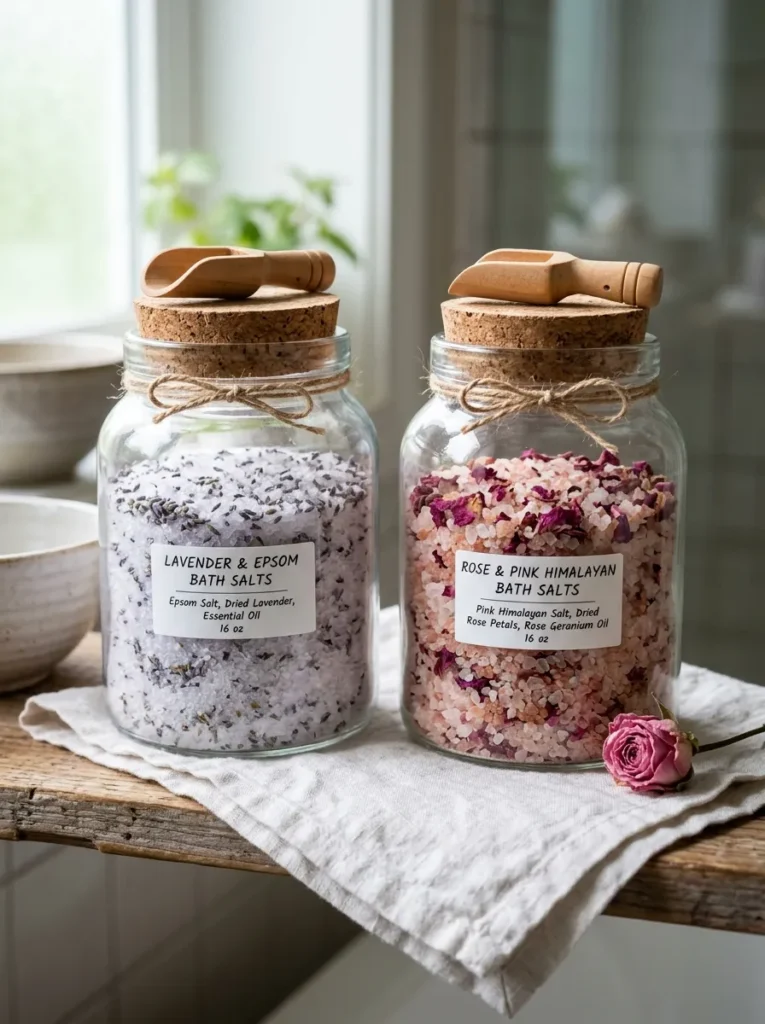
Vibe: The bath salt jars feel like a spa gift that was assembled by someone who knows exactly what relaxation should smell like.
Why it works: Homemade bath salts apply the self-care gift principle — products that encourage the recipient to take dedicated time for themselves carry an emotional message as well as a functional one. The making process for bath salts is genuinely simple (mix, scent, fill, seal) but the finished jar reads as a considered, premium gift because the glass container, the botanical additions, and the personalized label convert a commodity ingredient (Epsom salt) into a specific, crafted product.
Time breakdown: Mixing and scenting: 10 minutes. Filling jars: 5 minutes. Labeling and finishing: 10 minutes. Total: 25 minutes.
How to get it: Combine three parts Epsom salt with one part fine sea salt or Himalayan pink salt as the base. Add fragrance: 15–20 drops of essential oil per cup of salt (lavender, rose, eucalyptus, peppermint, or a blend). Add color optionally: 2–3 drops of natural food coloring or a teaspoon of dried botanical powder (dried lavender powder, dried rose powder) per cup of salt for a subtle tint. Mix thoroughly. Stir in 1–2 tablespoons of dried botanicals (lavender buds, dried rose petals, dried chamomile) for visual texture. Fill into wide-mouth glass jars and seal with a cork or metal lid. Label with a small white label specifying the blend and suggested use (two tablespoons per bath).
Shop The Look
| Product |
|---|
| Epsom salt large bag |
| Himalayan pink salt fine |
| Lavender essential oil pure |
| Wide mouth glass jar 200ml cork |
| Dried lavender buds bath |
6. Seed Paper Cards — Plant the Card Gift
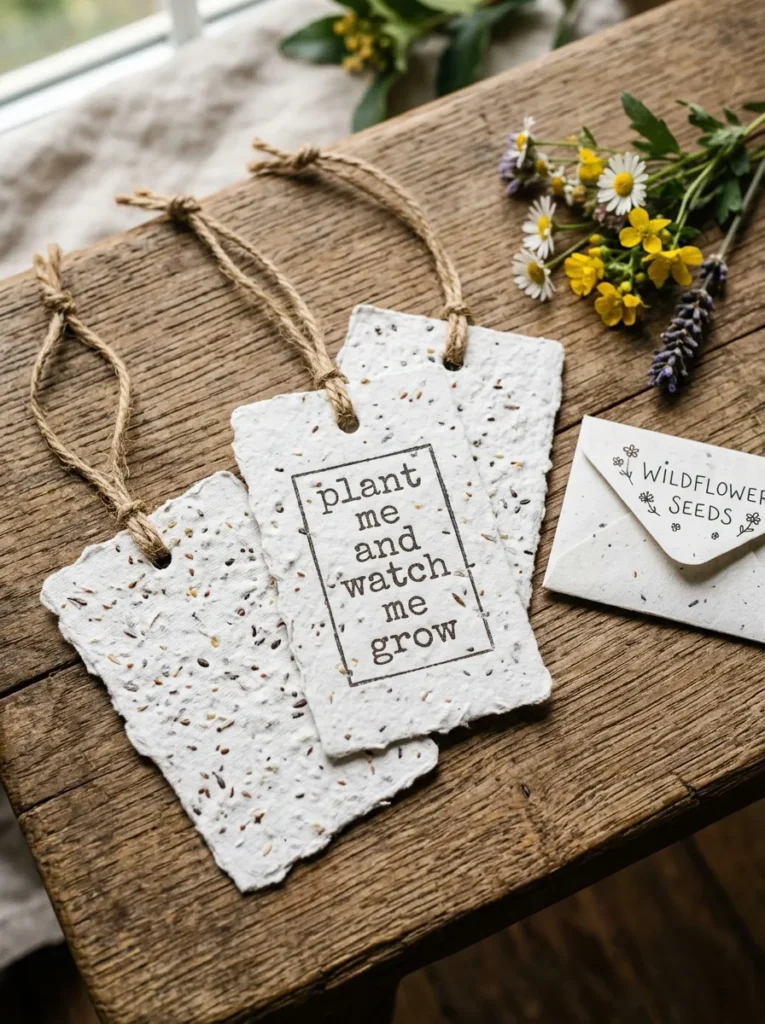
Vibe: The seed paper tags feel like a gift that keeps growing — the most specific possible version of a card that continues after it is received.
Why it works: Seed paper gift tags apply the extended gift life principle — a seed paper card that can be planted after its message is read continues to give long after the initial gifting moment, which makes it the most narratively rich version of a greeting card gift. Making seed paper takes slightly longer than one hour for a full sheet method, but making seed paper gift tags using a simplified handmade paper technique is achievable in well under an hour using pre-purchased handmade paper and wildflower seeds adhered to the surface rather than embedded.
Time breakdown: Preparing paper pieces: 5 minutes. Adhering seeds: 10 minutes. Drying: 15–20 minutes (passive). Punching holes and threading twine: 5 minutes. Total active time: 25–30 minutes.
How to get it: Use a simplified surface-seed technique: cut natural handmade paper (or thick recycled card stock) into the desired tag size. Brush the entire surface of each tag with a thin, even coat of clear Mod Podge or PVA glue. Sprinkle wildflower seeds (available from garden suppliers in small packets) evenly across the glued surface, pressing gently so each seed adheres. Allow to dry flat for 15–20 minutes. Brush one final thin coat of Mod Podge over the seeds to secure them. When dry, punch a hole at the top corner and thread with a natural twine loop. Stamp or hand-write “plant me” instructions and the type of seeds.
Shop The Look
| Product |
|---|
| Natural handmade paper sheets |
| Wildflower seed mix small packet |
| Mod Podge matte craft |
| Small hole punch craft |
| Natural twine thin card loop |
7. Herb-Infused Oil for Cooking
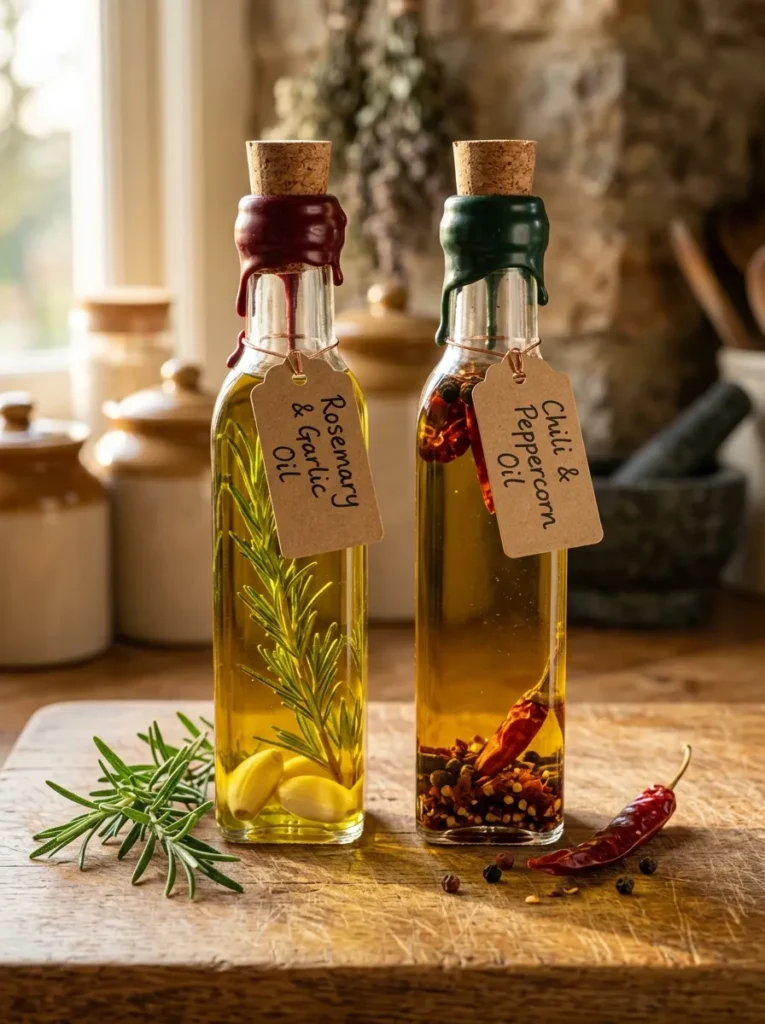
Vibe: The herb oils feel like something from a specialist Italian deli — the visible aromatics in the golden oil and the wax seal communicating genuine craft intention.
Why it works: Herb-infused oils for cooking apply the elevated daily-use principle — olive oil is used in virtually every kitchen at every meal, and a custom infused version makes that daily act more interesting and more flavorful. The making technique (a cold infusion with dried herbs, which is the safest method for a gift) takes under fifteen minutes of active work and produces a gift that reads significantly more expensive than its actual material cost.
Time breakdown: Preparing the bottle: 3 minutes. Adding herbs and filling with oil: 5 minutes. Sealing with cork and wax: 5 minutes. Labeling: 5 minutes. Total: 18 minutes per bottle.
How to get it: Use dried herbs only for gifting safety (fresh herbs in oil create botulism risk if not refrigerated and used immediately — dried herbs are safe for room-temperature gifting). Place 1–2 sprigs of dried rosemary, a few dried chili flakes, or a teaspoon of mixed peppercorns into a clean slim glass bottle (250ml, sealed-base form rather than a wide-mouth jar). Fill with a good-quality mild olive oil (a neutral-flavored oil allows the herb infusion to be the primary flavour). Cork, then dip the neck in melted sealing wax for a luxurious finish. Label with the oil type, infusion ingredient, and suggested uses.
Shop The Look
| Product |
|---|
| Slim glass bottle 250ml cork |
| Good quality olive oil mild |
| Dried rosemary culinary |
| Sealing wax stick and melter |
| Kraft label kraft tag copper wire |
8. Yarn Tassel Bookmark
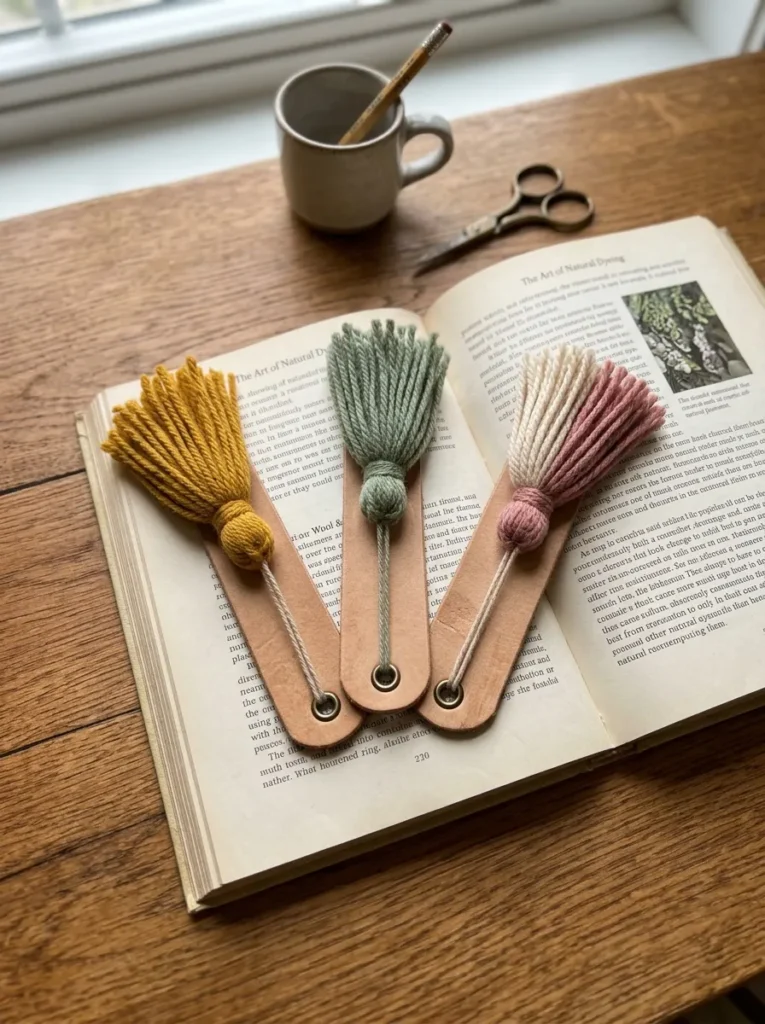
Vibe: The tassel bookmarks feel like small useful artworks — functional enough for daily use, charming enough to be genuinely appreciated every time they mark a page.
Why it works: Yarn tassel bookmarks apply the functional beauty principle at the smallest scale — a bookmark is used every day by a reader, and a beautiful one is noticed and appreciated with every use. The tassel-making technique is the simplest possible craft: wrap yarn around two fingers, tie off, cut the loops. Making a set of three bookmarks (which reads as a more generous gift than one) takes under twenty minutes including the card cutting and hole-punching.
Time breakdown: Cutting card strips: 5 minutes. Making three tassels: 10 minutes. Attaching tassels to cards: 5 minutes. Total: 20 minutes for a set of three.
How to get it: Cut bookmark strips from 300gsm card stock or a thin strip of leather (approximately 2cm wide by 15cm long per bookmark). Punch a small hole at one end using a hole punch. Make a tassel by wrapping yarn approximately 20–25 times around two fingers, tying the wrapped bundle tightly at one end with a separate piece of yarn, and cutting the loops at the other end. Thread a short length of yarn through the punched hole, thread through the tassel’s tied end, and knot securely. Trim the tassel ends to an even length. Make three per gift in coordinating color pairs.
Shop The Look
| Product |
|---|
| Thick card stock 300gsm set |
| DK yarn set coordinating colors |
| Small hole punch craft |
| Thin leather strip bookmark craft |
| Sharp scissors tassel trim |
9. Watercolor Greeting Card
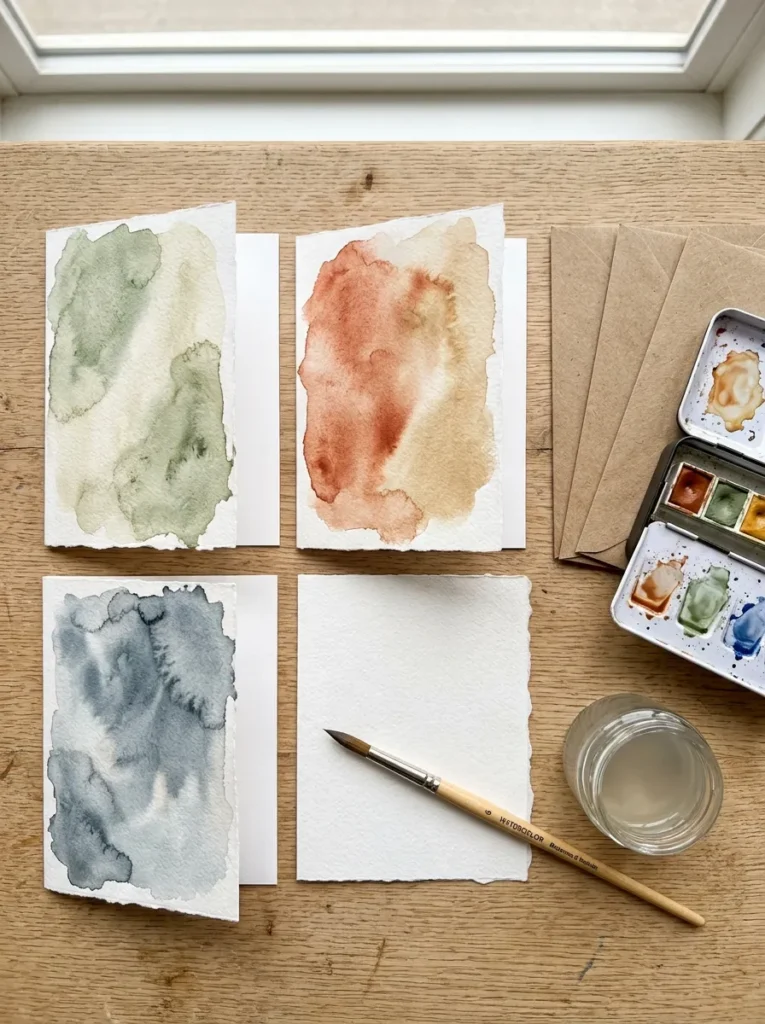
Vibe: The watercolor cards feel like small artworks that someone who cares also happens to write inside — the specific visual quality communicating artistic investment that a printed card cannot.
Why it works: Watercolor greeting cards apply the gift card art principle — the same message inside a purchased card and a handmade watercolor card carries different emotional weight because the handmade card demonstrates that the sender spent time creating the container for the message rather than simply selecting one from a rack. The wet-on-wet watercolor technique (painting onto dampened paper to allow colors to bloom organically) requires almost no skill — the water carries the pigment naturally, producing a beautiful abstract wash that does not require any painting ability to achieve.
Time breakdown: Dampening and painting three cards: 15 minutes. Drying (passive): 15–20 minutes. Scoring and folding: 3 minutes. Total active time: 18–20 minutes.
How to get it: Cut 300gsm cold-press watercolor paper to A6 size (four cards from one A4 sheet). Dampen the front face of each card with a flat brush dipped in clean water. While the surface is wet, drop concentrated watercolor paint from a tube or cake onto the dampened surface and allow the color to bloom and migrate naturally without directing it. Add a second color for a two-tone blend. Allow to dry completely flat before scoring the center fold. The natural bloom and soft edge quality of wet-on-wet watercolor is the characteristic that makes these cards beautiful — do not attempt to direct the paint.
Shop The Look
| Product |
|---|
| Watercolor paper 300gsm cold press A4 |
| Watercolor paint set tube or cake |
| Wide flat brush set watercolor |
| Bone folder scoring card |
| Kraft envelope A6 set |
10. Homemade Nut Butter in a Jar
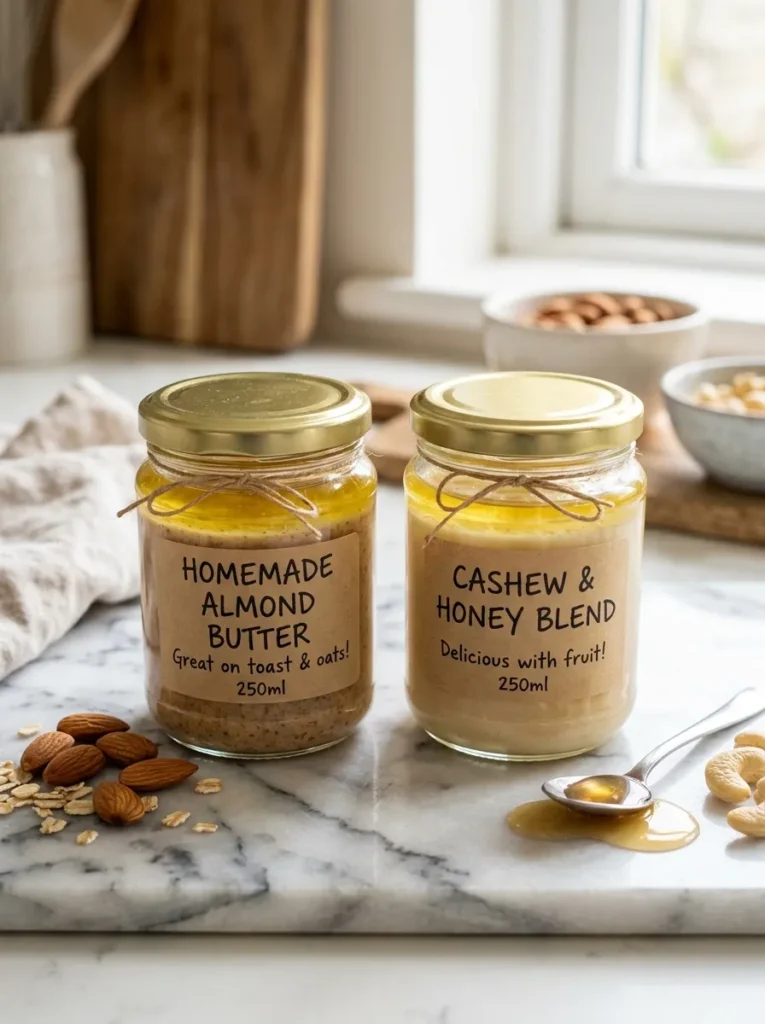
Vibe: The nut butter jars feel genuinely nourishing — the natural color, the slight oil separation, and the handwritten label communicating real food made in someone’s kitchen.
Why it works: Homemade nut butter applies the kitchen craft gift principle — a food gift made using only a food processor and a single primary ingredient (nuts) produces a result indistinguishable in quality from premium artisan nut butter at significantly lower cost, and the glass jar and handwritten label presentation elevates it decisively above any commercial equivalent in the gift context.
Time breakdown: Roasting nuts: 10 minutes. Blending: 10–15 minutes. Filling jar and labeling: 5 minutes. Total: 25–30 minutes.
How to get it: Roast 300g of raw almonds (or cashews, macadamias, or a mixed nut blend) in an oven at 180°C for 10 minutes. Allow to cool for 3–4 minutes — still warm is better for blending than fully cooled. Transfer to a food processor and blend continuously, stopping to scrape down the sides every minute or so. The nuts will go through a crumbly stage (2 minutes), a paste stage (5 minutes), and will eventually release their natural oils to produce smooth, flowing nut butter (8–12 minutes total). Add a pinch of salt and optionally a tablespoon of honey or coconut oil for the final minute of blending. Decant into a clean glass jar and label with the nut variety and a use suggestion.
Shop The Look
| Product |
|---|
| Raw almond 300g natural |
| Raw cashew 300g natural |
| Glass jar 250ml gold lid |
| Handwritten label small kraft |
| Sea salt finishing pinch |
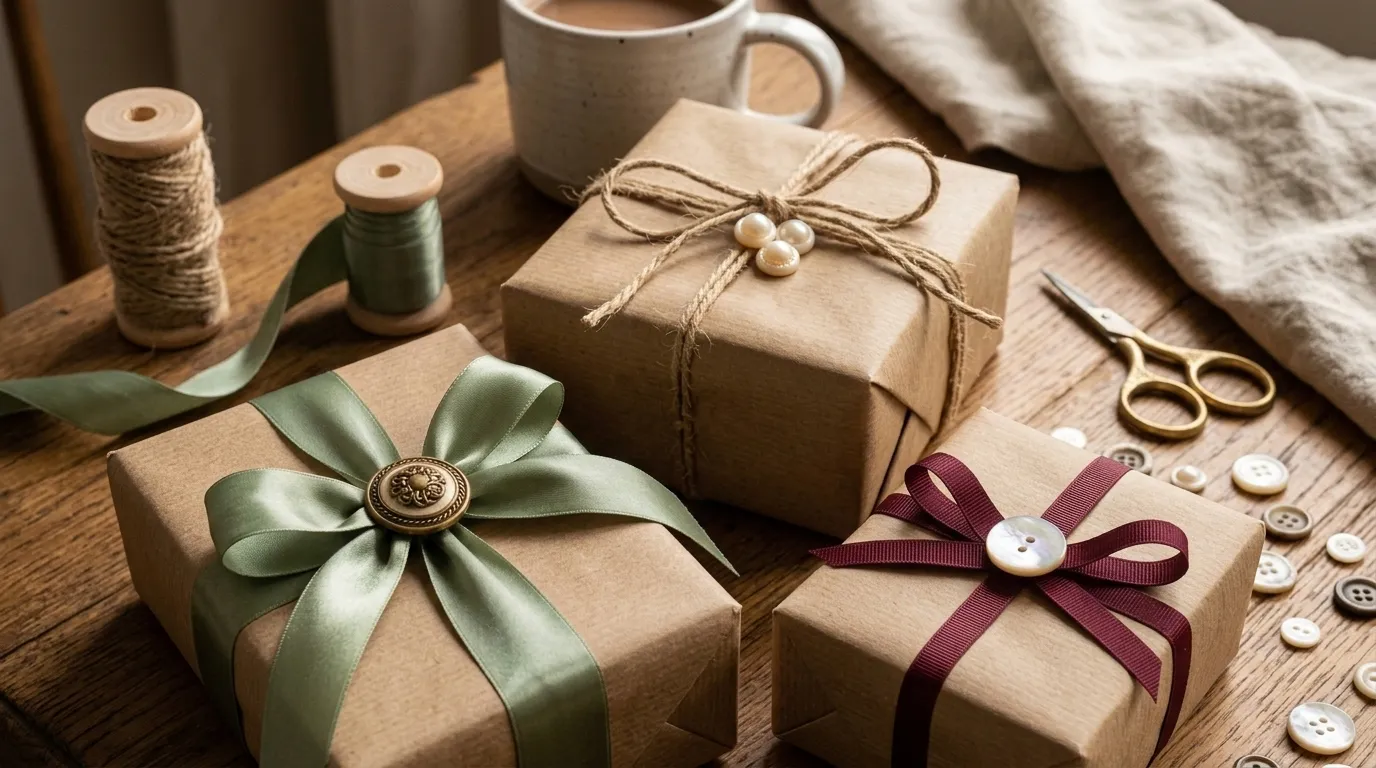
11. Ribbon and Button Gift Wrapping Upgrade
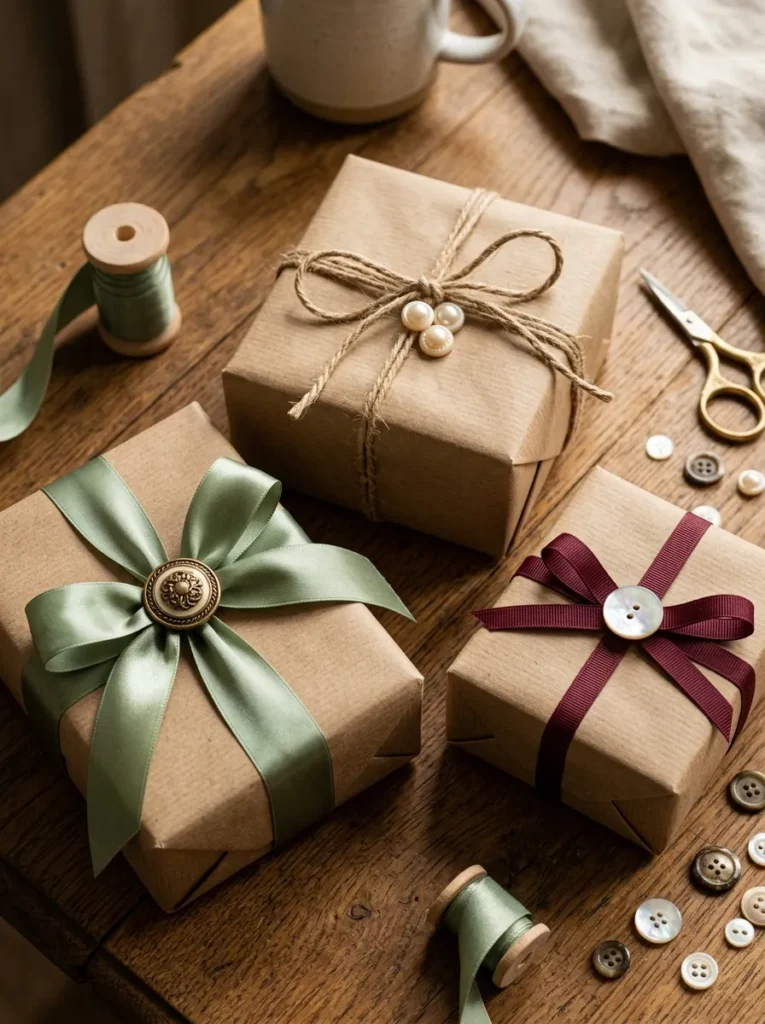
Vibe: The button-embellished gift wrapping feels like the wrapping itself is already a decision about beauty — the kraft-and-button combination communicating a consistent aesthetic from the first moment of receiving.
Why it works: An upgraded gift wrapping system applies the presentation-as-gift principle — the wrapping of a gift is experienced before the gift itself, and beautiful, considered wrapping communicates care before any content is revealed. The button detail specifically converts a standard ribbon bow into a textural accent that is small enough to be a decoration and specific enough to reference the maker’s material sensibility.
Time breakdown: Wrapping three gifts in kraft paper: 10 minutes. Tying ribbons: 10 minutes. Threading and positioning buttons: 5 minutes. Total: 25 minutes for three gifts.
How to get it: Wrap all gifts in a consistent base material (kraft paper is the most versatile — available from stationery and art supply stores in rolls or sheets). Choose a consistent ribbon palette across all gifts (sage green, natural jute, and burgundy are a harmonious three-tone family that reads as curated). Thread one or three buttons onto each ribbon before tying the bow — the button should sit at the bow’s center after tying. For a pearl or mother-of-pearl button, a single large button at the bow center reads as particularly elegant. For smaller buttons, a cluster of three or five reads better than one or two.
Shop The Look
| Product |
|---|
| Kraft paper roll wrapping |
| Sage green satin ribbon roll |
| Natural jute twine roll |
| Vintage button set assorted |
| Pearl button set large |
12. Dried Botanical Sachet for Drawers or Closets
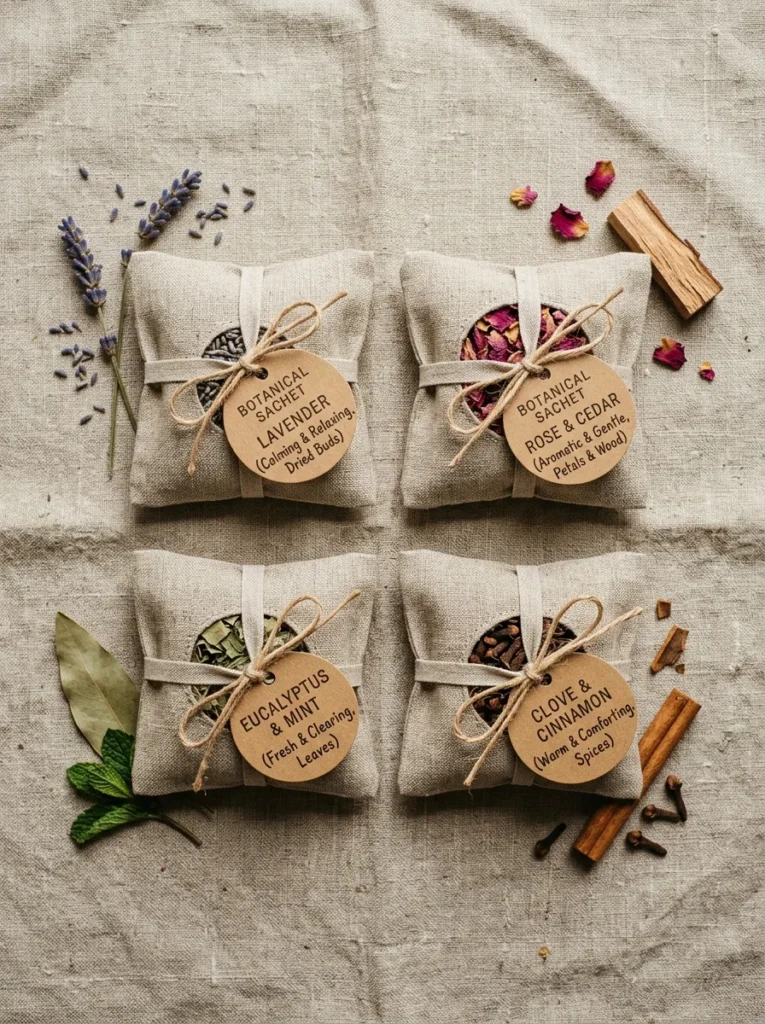
Vibe: The botanical sachets feel like a gift that makes the recipient’s home smell better every day for six months — functional, aromatic, and quietly wonderful.
Why it works: Dried botanical sachets apply the daily ambient gift principle — a sachet placed in a drawer or closet provides a pleasant fragrance that is experienced every time the drawer opens or the closet door is opened, making it a gift with a six-to-twelve-month presence in the recipient’s daily life. The making technique is the simplest possible textile project — a pre-cut linen square, filled and tied, requires no sewing and no specialist equipment.
Time breakdown: Cutting linen squares: 5 minutes. Filling with botanicals: 10 minutes. Tying and labeling: 10 minutes. Total: 25 minutes for four sachets.
How to get it: Cut squares of natural linen approximately 20×20cm. Place a generous tablespoon of the dried botanical blend in the center of each square. Gather the four corners of the square together above the botanical filling and tie tightly with a linen ribbon to form a small bundle (no sewing required). Trim any excess linen above the tie for a clean finish. Attach a small kraft tag specifying the botanical blend and suggested use (drawer, closet, car, under the pillow). The simplest and most popular blends: lavender buds alone; dried rose petals with cedar chips; dried eucalyptus and peppermint leaves; whole cloves and cinnamon chips.
Shop The Look
| Product |
|---|
| Natural linen fabric piece |
| Dried lavender buds bulk |
| Dried rose petals |
| Cedar chips sachets |
| Kraft tag small hole punched |
13. No-Bake Chocolate Bark with Toppings
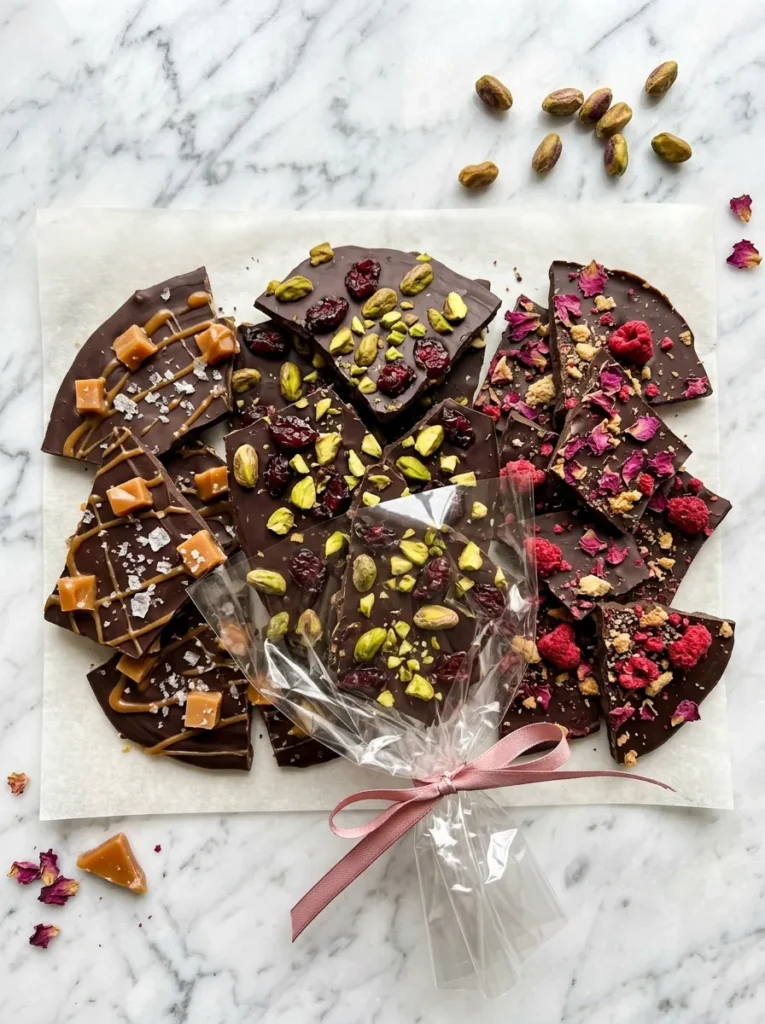
Vibe: The chocolate bark feels like a gift from a chocolate boutique — the irregular pieces and curated toppings communicating artisan intention at confectionery scale.
Why it works: No-bake chocolate bark applies the easiest food gift principle — melted and reset chocolate with toppings is genuinely the simplest food gift available, but the combination of high-quality dark chocolate and carefully chosen toppings elevates the result to premium confectionery quality. The only skill required is melting chocolate without burning it, which requires only low heat and slow stirring. The presentation (parchment paper backing, cellophane wrap, satin ribbon) converts a flat piece of chocolate into a gift-quality confectionery.
Time breakdown: Melting chocolate: 5–8 minutes. Spreading and topping: 5 minutes. Setting time: 15–20 minutes (passive in the fridge). Breaking and wrapping: 5 minutes. Total active time: 15–18 minutes.
How to get it: Melt 200g of good-quality dark chocolate (70% cocoa for the most grown-up result) in a heat-proof bowl over a pan of barely simmering water (do not let the bowl touch the water), stirring until just smooth. Pour onto a flat baking tray lined with parchment paper and spread to approximately 5mm thickness. Add toppings immediately: scatter dried cranberries and crushed pistachios for a classic version; or dried rose petals and freeze-dried raspberries for a more delicate version; or flaked sea salt and caramel pieces for a salty-sweet version. Refrigerate for 20 minutes until firmly set. Break into irregular pieces with your hands. Wrap in a parchment paper sheet folded like an envelope, slip into a cellophane bag, and tie with satin ribbon.
Shop The Look
| Product |
|---|
| Dark chocolate 70% good quality |
| Dried cranberry topping |
| Pistachio topping shelled |
| Dried rose petal food grade |
| Clear cellophane bag gift wrap |
14. Knotted Bracelet with a Charm
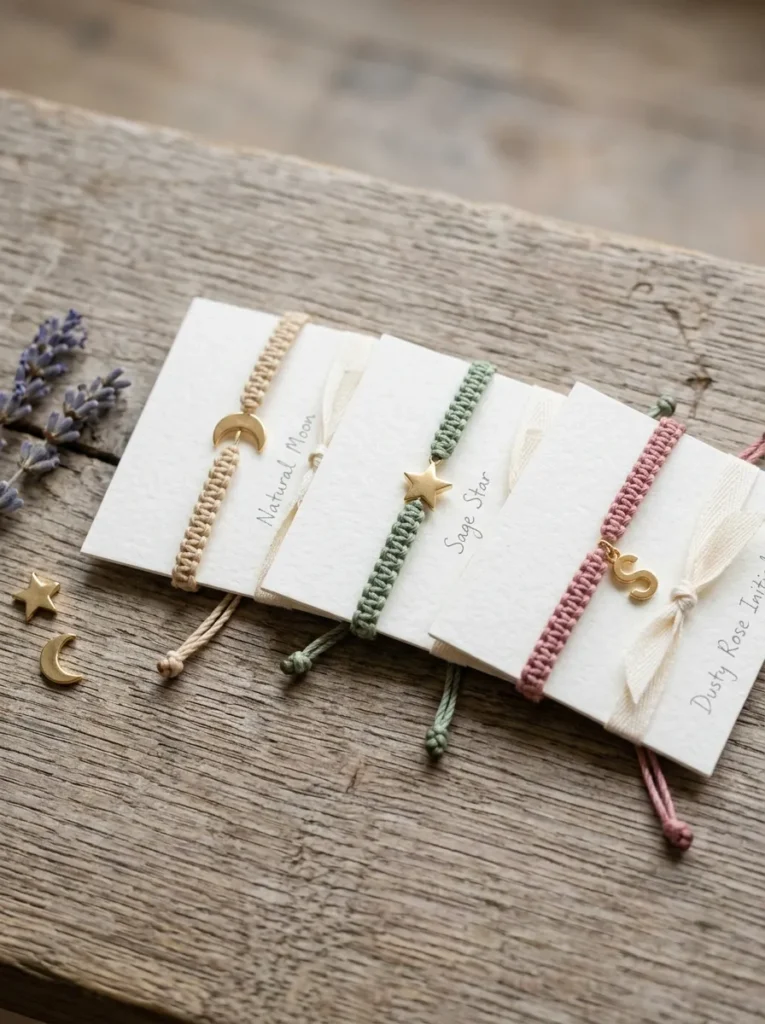
Vibe: The knotted charm bracelet feels like something bought from a small independent jeweller at a market — simple, wearable, and specific.
Why it works: A knotted cord bracelet with a charm applies the personal jewelry gift principle — jewelry is one of the most emotionally resonant gift categories, and a handmade version communicates the additional layer of made-specifically-for-you that purchased jewelry cannot. The knotted cord technique uses only basic macramé knots (the square knot and the sliding knot closure) that can be learned in under five minutes from written instructions, making it genuinely accessible to a complete beginner.
Time breakdown: Cutting cord and selecting charm: 3 minutes. Knotting the bracelet body: 10–15 minutes. Adding charm and finishing sliding knot: 5 minutes. Card presentation: 3 minutes. Total: 21–26 minutes.
How to get it: Cut three lengths of 2mm waxed cotton cord, each approximately 60cm long. Fold one length in half to create the bracelet center loop. Thread the charm onto the folded center and tie a simple overhand knot just below the charm to secure it. Work 4–6 square knots on each side of the central charm using the cord pair on each side (left pair and right pair), creating a short knotted section of approximately 3cm on each side. Use the remaining cord lengths to create a sliding knot closure: cross the two cord ends, wrap each end around the other three times, and pull tight — this creates a bracelet that adjusts to any wrist size.
Shop The Look
| Product |
|---|
| Waxed cotton cord 2mm set |
| Small gold charm set moon star |
| Small gold initial charm set |
| Small white card bracelet display |
| Thin satin ribbon small card tie |
15. Homemade Granola in a Glass Jar
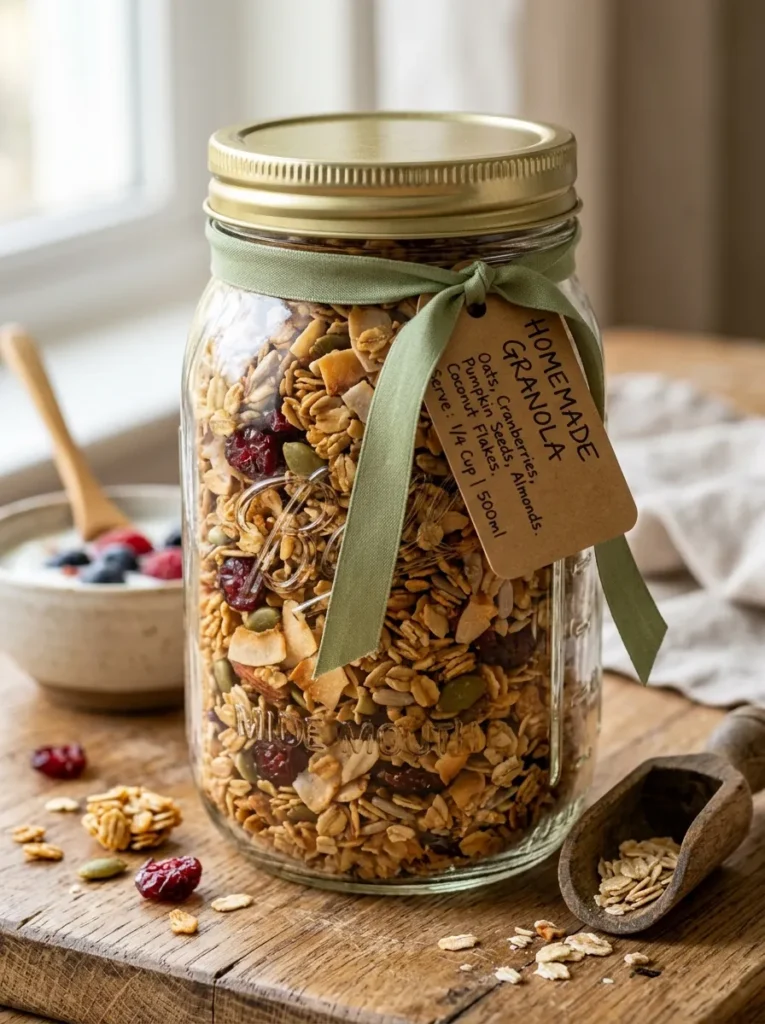
Vibe: The granola jar feels like the best possible breakfast gift — the visible ingredients and golden baking color communicating genuine homemade nourishment.
Why it works: Homemade granola applies the breakfast gift principle — it is the food category that is most associated with morning warmth and self-care, most welcome in the daily routine of almost any recipient, and most distinctly better in a homemade version than a commercial one. The active making time for granola is under twenty minutes (mixing and monitoring), and the passive oven time (25–30 minutes) runs concurrent with packaging and labeling other gifts in this list.
Time breakdown: Mixing: 5 minutes. Oven time: 25 minutes (passive). Cooling: 10 minutes (passive). Filling jar and labeling: 5 minutes. Total active time: 10 minutes.
How to get it: Combine 300g rolled oats, 80ml olive or coconut oil, 60ml honey or maple syrup, and a pinch of salt in a large bowl. Mix well until all oats are evenly coated. Add any flavour additions: 1 teaspoon cinnamon, a teaspoon of vanilla extract, a handful of pumpkin or sunflower seeds. Spread in an even layer on a lined baking tray. Bake at 160°C for 25–30 minutes, stirring every 10 minutes, until golden and fragrant. Remove and allow to cool completely on the tray (the granola crisps as it cools). Add dried fruit (cranberries, apricot pieces, raisins) once cooled. Decant into a wide-mouth glass jar and label.
Shop The Look
| Product |
|---|
| Rolled oats 500g natural |
| Honey raw quality |
| Dried cranberry 100g |
| Pumpkin seed 100g |
| Wide mouth glass jar 500ml |
How to Start Your One-Hour Gift Practice
The single best first move for developing a one-hour gift practice is creating a dedicated gift-making kit — a small box or bag containing the materials that enable the quickest and most universally appropriate one-hour gifts from this list. The core kit requires: a roll of kraft paper, natural twine, a set of small glass jars, a packet of kraft label cards, a set of coordinating ribbons, and a small selection of dried botanicals. With these materials in place, a spice blend, an infused honey, a botanical sachet, and a beeswax candle can all be made without any additional shopping. The kit costs $40–60 to assemble once and enables dozens of gifts across multiple occasions and recipient types.
The most common one-hour gift mistake is underestimating the label and finishing time — the active making of most food and craft gifts in this list takes fifteen to twenty-five minutes, but the label writing, ribbon tying, card writing, and final presentation assembly consistently takes an additional fifteen to twenty minutes that the one-hour estimate must account for. Rushing the finishing stage is the single most common quality failure in handmade gifts — a beautifully made nut butter in a jar with a scrawled, hurried label reads as less considered than a slightly less perfect nut butter with a careful, hand-lettered label in a coordinating color. Always allocate fifteen minutes specifically to the label and presentation stage of any gift in this list.
Three specific items under $50 that enable the widest range of one-hour gifts from this list: a set of twelve small glass jars in 50–100ml sizes with gold metal lids ($12–18, enabling Ideas 1, 4, 7, and 10 immediately); a pack of fifty kraft label cards with pre-punched holes and a small roll of natural twine ($8–12, enabling the labeling and finishing stage of every food and botanical gift in this list); and a beeswax sheet starter kit with pre-tabbed wicks ($14–20, enabling Idea 2 with sufficient material for twenty-four tapers). These three items combined for under $50 enable five of the fifteen ideas in this list immediately.
Frequently Asked Questions About One-Hour DIY Gifts
Which one-hour gift is best for a complete beginner with no craft experience?
The beeswax rolled taper candles (Idea 2) and the homemade spice blend (Idea 1) are the most accessible for a complete beginner because neither requires any technique beyond measuring, mixing, and rolling — skills that are already present in every adult’s repertoire. The granola (Idea 15) and the nut butter (Idea 10) are equally beginner-accessible and produce results that are genuinely indistinguishable between a beginner and an expert because the quality is determined by ingredient quality rather than technique. For the craft ideas specifically, the watercolor greeting card’s wet-on-wet technique (Idea 9) is the most accessible craft because the water does the work — the maker does not need to paint skillfully because the natural bloom of watercolor on wet paper produces beautiful results regardless of skill level.
How do you make a one-hour gift look like it took longer?
The presentation layer — the label, the ribbon, the jar, the card, the wrapping — creates the majority of a one-hour gift’s perceived investment. A spice blend in a paper bag with a scribbled label reads as a quick afterthought; the same spice blend in a glass jar with a neat handwritten kraft label, tied with natural twine and a small dried herb sprig, reads as a considered gift that took significantly longer than it did. The four presentation elements that most increase perceived investment: a clean, careful handwritten label (not printed, not hurried); a natural tying material (twine, linen ribbon, or thin copper wire — not commercial gift ribbon); a glass or natural material container (glass jar, linen pouch, kraft paper — not plastic or commercial packaging); and one small botanical or decorative accent (a dried herb sprig, a cinnamon stick, a pressed flower tucked under the twine).
What one-hour gifts work best for large groups (ten or more people)?
The gifts with the highest production efficiency for large groups are those that scale linearly without increasing technique complexity: the spice blend (Idea 1) — one large batch mixed once, then portioned into ten jars with individual labels; the chocolate bark (Idea 13) — one large batch spread on a tray, broken into ten portions and individually wrapped; and the granola (Idea 15) — one large batch baked in two trays, portioned into ten jars. All three of these can be scaled from one recipient to twenty without any change in technique, and the total time for a batch of ten remains well within two to three hours rather than ten separate one-hour sessions.
How do you personalize a one-hour gift to make it feel specific?
The personalization opportunities within one-hour gifts are primarily in the content choice and the label specificity. For food gifts, choosing a spice blend, nut butter type, or honey infusion specifically appropriate to the recipient’s cooking style or flavor preferences is the most impactful personalization. For craft gifts, incorporating the recipient’s favorite color into the yarn tassel bookmark, watercolor card palette, or beeswax candle color is immediately readable personalization. The label is the most universally available personalization opportunity: a label that names the recipient (“Sarah’s lavender honey”), describes the specific content with the recipient in mind (“Smoky BBQ Rub — for summer grilling”), or includes a short personal note about why the specific item was chosen reads as significantly more personal than a generic product label regardless of the gift itself.
Can these one-hour gifts be made in advance and stored?
Yes, with category-specific storage requirements. Food gifts with shelf stability: spice blends (12+ months sealed), honey infusions (12+ months sealed), infused oils with dried herbs (6 months sealed, refrigerate after opening), granola (4–6 weeks in a sealed jar). Food gifts with limited shelf life: nut butter (3–4 weeks refrigerated, label with a best-before date), chocolate bark (2–3 weeks at room temperature, label with use-by date). Craft gifts with no storage concerns: beeswax candles (store indefinitely in a cool, dark place), pressed flower cards (store flat without stacking, avoid humidity), botanical sachets (store in a sealed bag to preserve fragrance until gifting). Making a batch of one-hour gifts in advance for multiple upcoming occasions is one of the most practical applications of this list — a Sunday afternoon batch session of four to six different gift types creates a gift inventory for multiple upcoming occasions.
Ready to Start Making?
These 15 ideas move through every dimension of what makes a one-hour gift genuinely successful — from the kitchen craft of spice blends, honey infusions, and chocolate bark, to the botanical sensory gifts of bath salts, sachets, and herb oils, to the handmade paper and textile works of pressed flower cards, watercolor cards, and knotted bracelets. Starting with the gift-making kit — assembling the glass jars, the kraft labels, the natural twine, and the dried botanicals into a single dedicated box this weekend — is not a small beginning. It is the beginning that makes every subsequent gift-making moment possible without any additional shopping, planning, or preparation. The person who receives a small glass jar of handmade lavender honey with a careful handwritten label and a lavender stem tucked under the twine is not receiving a food product. They are receiving the evidence that someone thought about them specifically, found them worth an hour, and made something rather than purchasing it. That evidence is the gift, and these 15 ideas are the vehicles for delivering it.