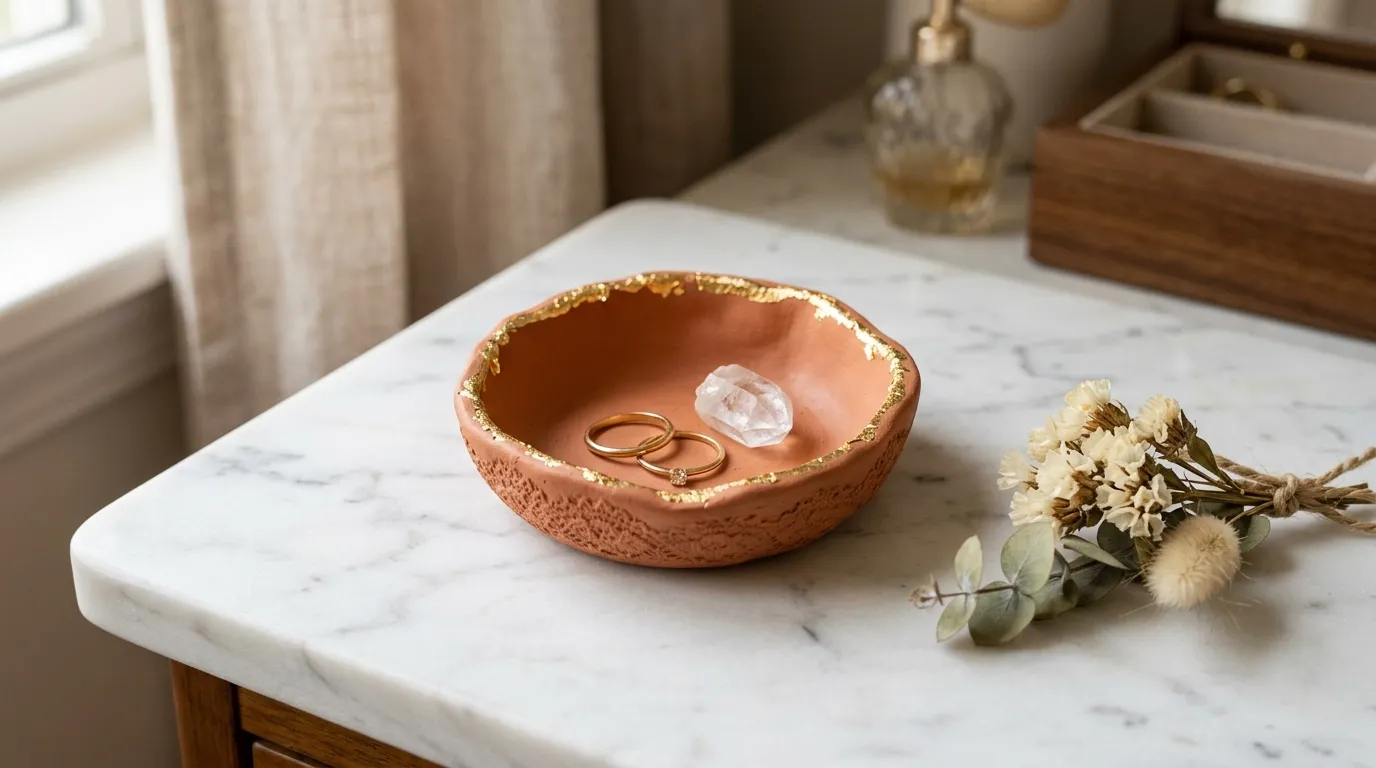
15 Air Dry Clay Decor Projects You’ll Want to Copy
Air dry clay decor refers to decorative and functional home objects sculpted, molded, or hand-built from self-hardening clay that cures at room temperature without a kiln — making professional-looking ceramic-style pieces accessible to any skill level, in any home, with minimal tools and investment. This article gives you 15 creative, beginner-friendly air dry clay decor projects that range from wall art and vases to jewelry dishes, planters, and sculptural objects — all achievable in a single weekend with materials that cost under $30.
Picture a home where the small objects on every shelf and surface carry the quiet authority of something made rather than bought. A pinch pot bowl beside the keys. A textured wall tile catching afternoon light. A small sculptural vessel holding a single dried stem. None of them perfect. All of them yours. Air dry clay is the most democratic craft material available — it asks only for your hands, a flat surface, and the willingness to begin. Here are 15 projects worth saving — and stealing.
Why Air Dry Clay Decor Works So Well
Air dry clay occupies a creative territory that sits between professional ceramics and accessible craft — it produces objects with the visual weight, material presence, and tactile warmth of stoneware pottery without requiring a kiln, a pottery wheel, or any specialized equipment beyond what most households already own. The design philosophy draws from the wabi-sabi aesthetic tradition of Japanese craft — the idea that objects bearing the evidence of their making, including imperfections, fingerprints, and irregular edges, possess a beauty that machine-perfect objects fundamentally lack.
The materials that make air dry clay projects visually compelling are simple and honest: the clay itself in its natural white or terracotta form, acrylic paints in earth tones and muted mineral hues, food-safe sealers for functional pieces, natural beeswax polish, and simple texture tools sourced from the kitchen — forks, toothpicks, lace fabric, leaf surfaces, and dried botanicals pressed into soft clay. Colors follow a natural palette: raw white clay, terracotta orange-brown, iron oxide gray, warm ochre, matte black, dusty sage green, and the warm ivory of unwaxed clay with a thin acrylic wash.
The air dry clay decor movement has grown significantly alongside the broader maker culture resurgence, driven by the combination of social media visibility — clay projects photograph exceptionally well in natural light — and the genuine accessibility of the material to beginners. Unlike wheel throwing, which requires years of practice to produce pleasing results, hand-building with air dry clay produces satisfying objects on the very first attempt, which sustains engagement with the craft in a way that more technically demanding processes cannot.
Even minimal investment produces impressive results. A 2-lb block of air dry clay costs $8–$12 and contains enough material for 10–15 small projects. The tools needed for the first session are almost certainly already in the kitchen — a rolling pin, butter knife, fork, and drinking glass as a circle cutter. The single most important material investment beyond the clay itself is a quality matte sealer, which transforms the slightly chalky surface of dried air dry clay into a clean, finished result that reads as intentional ceramic rather than craft project.
Style at a Glance
| Element | Trait 1 | Trait 2 |
|---|---|---|
| Philosophy | Wabi-sabi material honesty — imperfection as beauty | Accessible making without specialized tools or skill |
| Materials | Air dry clay, acrylic earth tones, matte sealer, beeswax polish | Natural texture tools — lace, leaves, forks, botanicals |
| Color Palette | Raw white clay, terracotta, iron oxide gray, warm ochre | Dusty sage, matte black, warm ivory, dried botanical cream |
1. Pinch Pot Ring Dish with Textured Rim
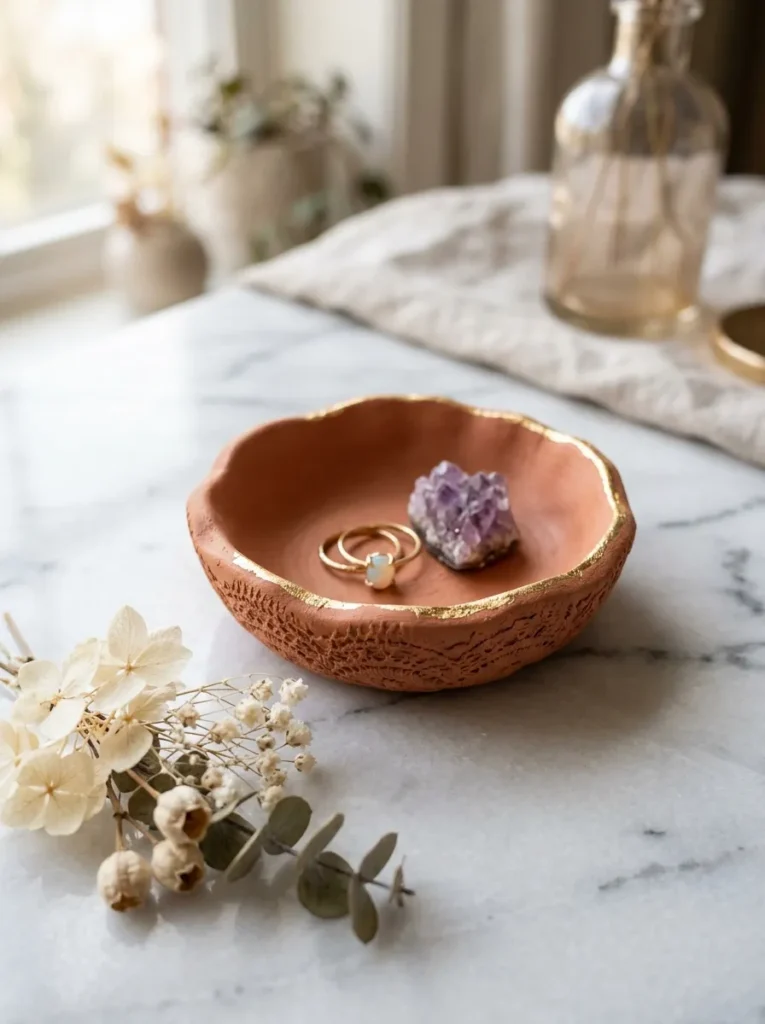
Vibe: Warm and delicate — the small dish that makes a vanity surface feel curated.
Why it works: The pinch pot ring dish is the foundational air dry clay project because it teaches the two most essential hand-building skills — centering a clay ball and opening it with thumb pressure — while producing an immediately useful and visually satisfying result. The lace texture impression on the exterior rim applies the principle of borrowed texture: pressing a piece of lace firmly into soft clay and peeling it away leaves a negative impression of the lace weave pattern that looks far more intentional and complex than the 10-second technique that produced it. The slight irregularity of the pinched rim is not a flaw — it is the visual evidence of the hand-making process that distinguishes this dish from a machine-cast equivalent.
How to get it: Roll a ball of clay approximately the size of a golf ball. Press your thumb into the center and gradually pinch outward and upward, rotating the ball in your palm with each pinch, until you have a shallow bowl shape approximately 3 inches in diameter with walls of even thickness. Before the clay hardens, press a small square of lace fabric firmly onto the exterior rim surface for 10 seconds, then peel away carefully. Allow to dry completely (24–48 hours), sand lightly with 220-grit sandpaper, and paint with two coats of matte terracotta acrylic. Apply gold leaf flakes to the inner rim edge using a thin layer of craft glue as adhesive.
Quick Win: A sheet of gold leaf ($6 for 25 sheets) and a small jar of gold leaf adhesive transforms any painted air dry clay piece into something that looks expensive immediately — the gold accent catches light differently than paint and elevates the perceived quality of even the most basic pinch pot form.
Shop The Look
- Air dry clay white 2 lb block
- Matte terracotta acrylic paint 2 oz
- Gold leaf sheets imitation 25 pack
- Gold leaf adhesive size brush-on
- Fine grit sandpaper 220 set
Also view: 16 Beautiful Craft Room Storage Ideas for Small Spaces
2. Sculptural Wall Tiles with Botanical Impressions
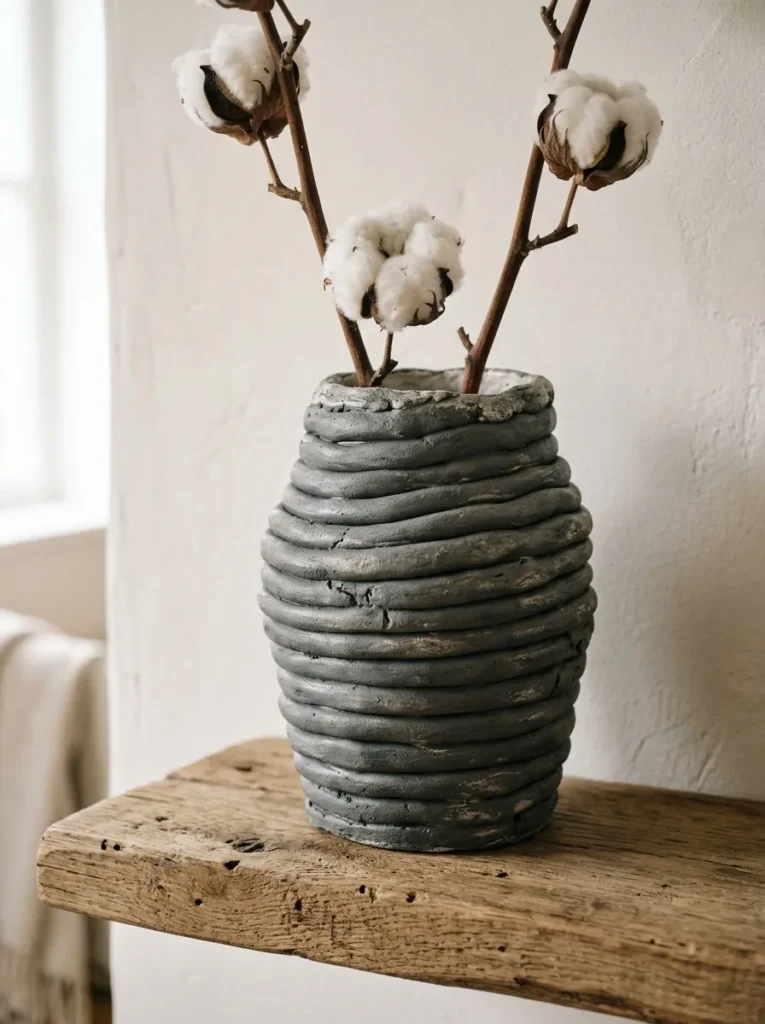
Vibe: Sculptural and warm — wall art that is more interesting the closer you stand to it.
Why it works: Botanical impression tiles exploit the principle of shadow relief — the deep impression left by a real leaf or fern pressed into soft clay creates a three-dimensional surface that catches and holds shadow as light rakes across it from the side, producing a constantly changing visual effect that no flat printed tile can replicate. The ochre wash technique — applying diluted acrylic paint across the whole tile and immediately wiping the surface clean — leaves pigment only in the recessed impression areas, dramatically amplifying the botanical detail visibility without obscuring the clean white surface. Mounted in an asymmetric grid, six tiles create a complete wall installation from what are essentially six individual craft projects.
How to get it: Roll clay to 8mm thickness on a non-stick surface. Cut into 10x10cm squares using a craft knife and ruler — a straight edge produces the cleanest tile geometry. Press a fresh botanical specimen (fern frond, eucalyptus leaf, or dried seed head) firmly into the clay surface, applying even pressure across the entire specimen, then peel away carefully. Allow tiles to dry completely on a flat surface to prevent warping. After drying and light sanding, apply matte white paint, then a thin ochre wash wiped back to reveal only the impression detail. Mount with strong adhesive mounting strips rather than nails to protect the wall surface.
Shop The Look
- Air dry clay white 5 lb block large
- Matte white acrylic paint 4 oz
- Raw ochre acrylic paint 2 oz
- Fresh eucalyptus stems for impressions
- Adhesive mounting strip set heavy duty
3. Coiled Vase with Organic Texture
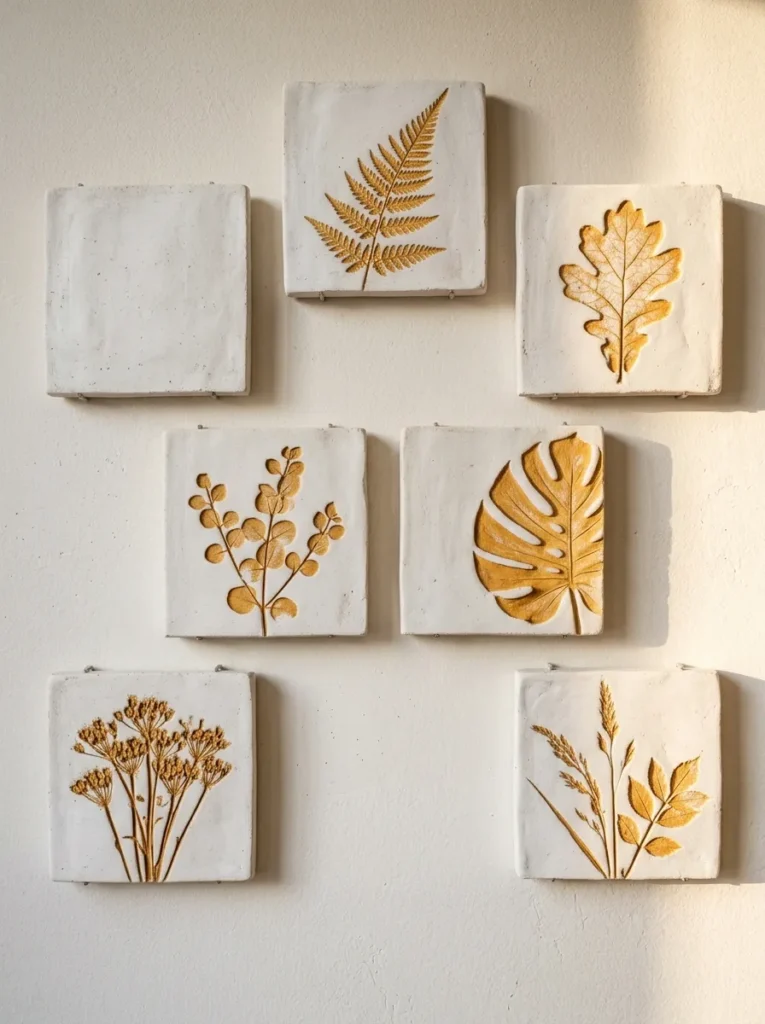
Vibe: Grounded and textural — the vase that looks like it was made by someone who knew exactly what they were doing.
Why it works: The coiling technique — building a vessel by stacking and joining ropes of clay — is one of the oldest ceramic construction methods in human history, and deliberately leaving the coil seams visible on the exterior rather than smoothing them away creates a surface that reads simultaneously as primitive and sophisticated. The design principle is structural honesty: the visible coils make the building method legible, which gives the object an immediate craft authenticity that a smooth-surfaced pinched or slab-built equivalent lacks. Painting in a single matte iron gray tone unifies the coil texture into a cohesive surface while allowing the relief of individual coils to catch and cast micro-shadows.
How to get it: Roll clay into 1cm diameter ropes of equal thickness by hand on a smooth surface. Coil the first rope into a flat circle for the base, then stack subsequent coils on top of each other, scoring and slip-joining each coil to the one below using a fork scratch and a thin slurry of clay and water as adhesive. Build to your desired height — 15–20cm is ideal for a first coiled vase. Deliberately avoid smoothing the exterior surface. After complete drying, apply two thin coats of iron gray matte acrylic and seal with a matte varnish.
Shop The Look
- Air dry clay terracotta 2 lb block
- Iron gray matte acrylic paint
- Matte varnish sealer spray can
- Dried cotton stem bunch natural
- Raw oak floating shelf wall mounted
4. Slab-Built Geometric Planter with Drainage Hole
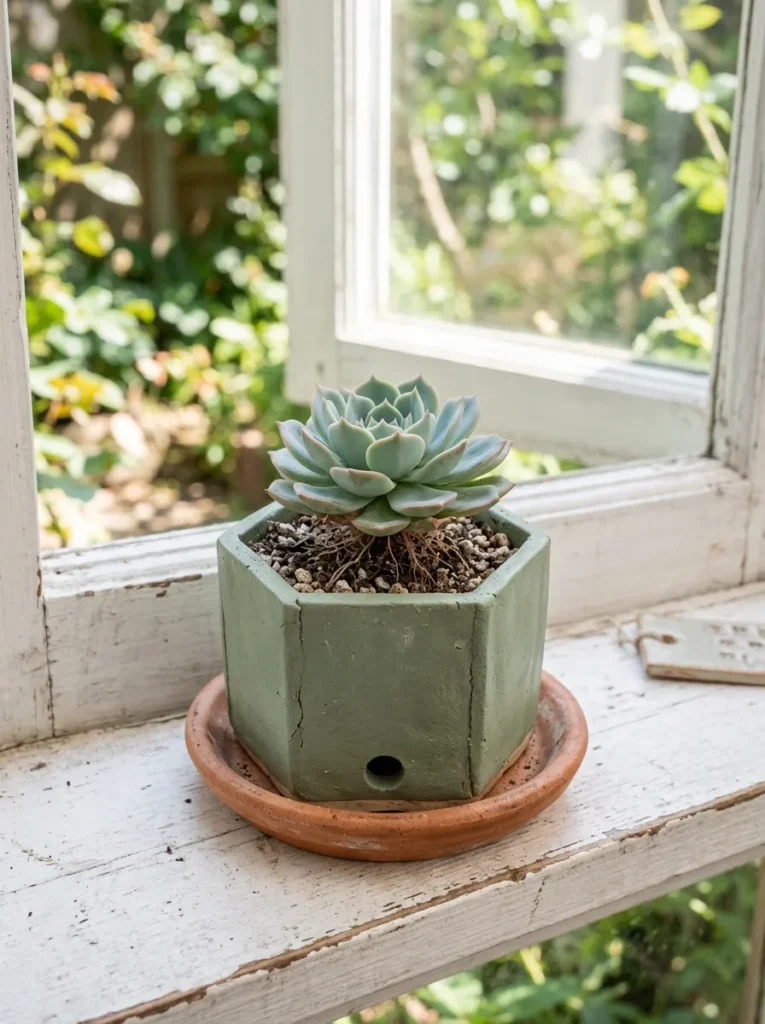
Vibe: Clean and fresh — the planter that makes a windowsill look considered without trying.
Why it works: Slab building — rolling clay flat and cutting geometric shapes that are joined at their edges — is the air dry clay technique that produces the cleanest, most architectural results for beginners because it relies on straight cuts and right angles rather than hand-forming skill. The hexagonal form is achievable by cutting six identical trapezoid panels using a cardboard template and joining them at their long edges using score-and-slip technique. The visible slab join lines at each corner of the finished planter are the artisan detail that distinguishes a hand-built geometric planter from an injection-molded plastic version — they reveal the construction logic of the piece in a way that is genuinely satisfying to look at closely.
How to get it: Roll clay to 6mm uniform thickness using two wooden guide rails of equal height as rolling guides — these ensure perfectly even slab thickness across the entire panel. Cut a paper template for your chosen polygon and trace onto the clay with a pointed tool before cutting with a sharp craft knife. Score all joining edges with a fork, apply slip, and join panels firmly. Insert a drinking straw through the base slab before the clay hardens to create the drainage hole — remove the straw after 10 minutes. Allow to dry slowly under a loose plastic sheet to prevent the slab walls from drying faster than the joins and cracking at the seams.
Quick Win: Two wooden chopsticks taped to a rolling pin at each end serve as perfect rolling guides for consistent 5–6mm slab thickness — a $0 tool upgrade that immediately improves slab building results without purchasing specialized clay tools.
Shop The Look
- Air dry clay white 2 lb block
- Matte sage green acrylic paint
- Craft knife with replacement blades
- Succulent plant assortment small
- Terracotta saucer set small sizes
5. Moon Phase Wall Hanging Set
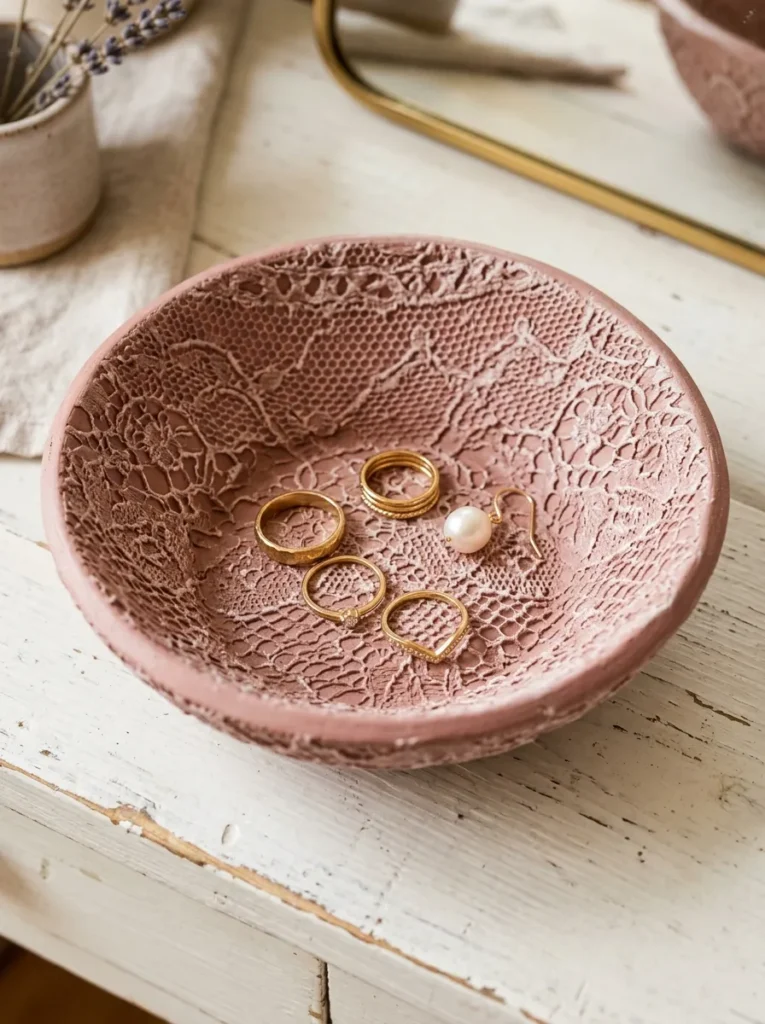
Vibe: Serene and dreamy — the wall installation that makes a bedroom feel like a considered space.
Why it works: The moon phase sequence wall hanging applies the design principle of seriality — a group of objects sharing a single formal logic (in this case, the progressive circle-to-crescent transformation of the moon phases) creates a wall installation with narrative coherence that reads as more sophisticated than the sum of its individual parts. Each disc is simple to produce — a circle with a curved edge removed in progressive amounts — but the seven discs together create a complete visual sequence that functions simultaneously as wall art, natural reference, and craft object. The jute twine and wood bead spacing between discs adds a second material layer that softens the geometry of the clay circles.
How to get it: Cut a full circle template from cardboard in your chosen disc diameter (5–7cm works well for bedroom scale). Use this template to cut seven full circles from rolled clay, then use a smaller cardboard crescent mask to cut the appropriate curved section from each disc to create each moon phase. Poke a small jute twine hole at the top of each disc before drying. After drying and painting in matte white, use a small liner brush to apply raw gold acrylic along the curved edge of each disc. String on jute twine with 3–4 small wood beads between each disc as spacers.
Shop The Look
- Air dry clay white 2 lb block
- Matte white acrylic paint
- Raw gold metallic acrylic paint fine
- Natural jute twine thin roll
- Small wooden bead set natural
6. Textured Trinket Bowl with Lace Impression
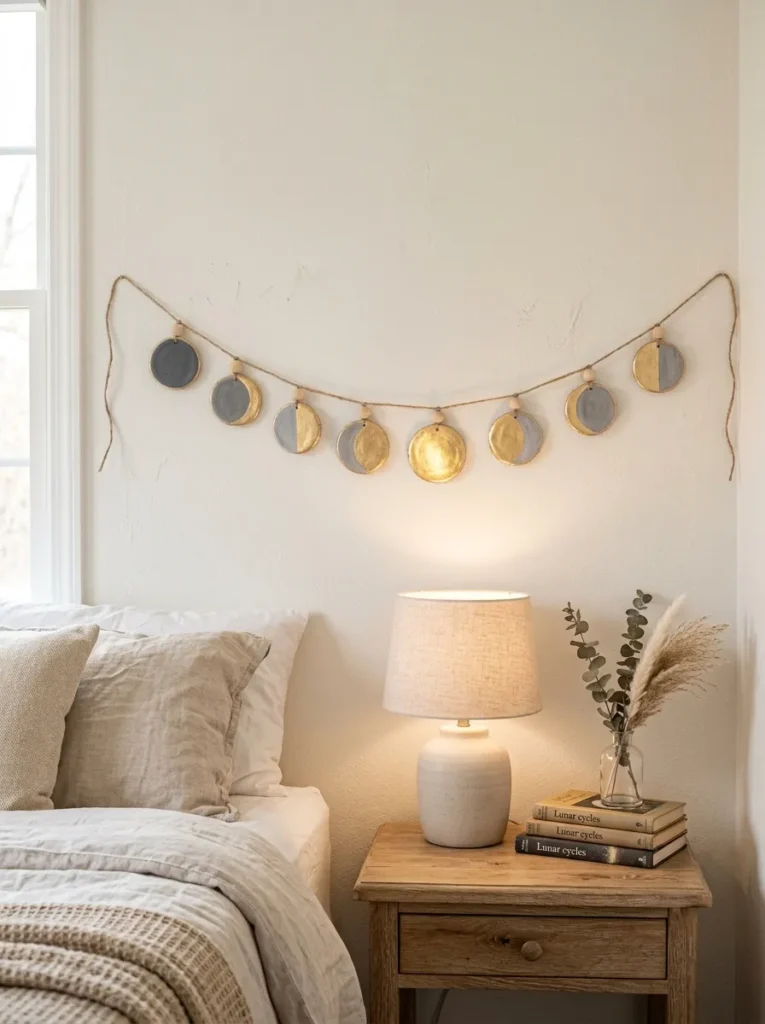
Vibe: Soft and warm — the bowl that makes costume jewelry look like a collection.
Why it works: The lace impression technique applied across an entire bowl surface rather than just the rim creates a comprehensive texture treatment that transforms the clay object into something that reads as a dedicated textile-ceramic hybrid — the lace pattern is so deeply embedded in the clay identity of the piece that it seems inherent to the material rather than applied. The dry-brush highlight technique — loading a brush with pearl white paint and wiping most of it off before lightly skimming the raised texture points — creates the impression of depth without adding visual complexity, making the lace pattern legible as light sculpture rather than flat pattern.
How to get it: Roll clay to 5mm thickness and lay a large piece of lace fabric over the entire surface. Roll over the lace firmly with a rolling pin, pressing it fully into the clay surface. Peel the lace away carefully. Cut a circle from the impressed clay using a bowl as a template, then drape over a small upturned bowl (lined with plastic wrap to prevent sticking) to create the bowl curve. Allow to dry fully on the mold — approximately 48 hours — before removing. After drying, apply matte dusty rose base coat, then dry-brush pearl white across texture peaks.
Shop The Look
- Lace fabric piece fine weave for impressions
- Dusty rose matte acrylic paint
- Pearl white acrylic paint dry brush
- Small jewelry dish gift set box
- Plastic wrap roll for mold release
7. Air Dry Clay Candle Holders with Carved Patterns
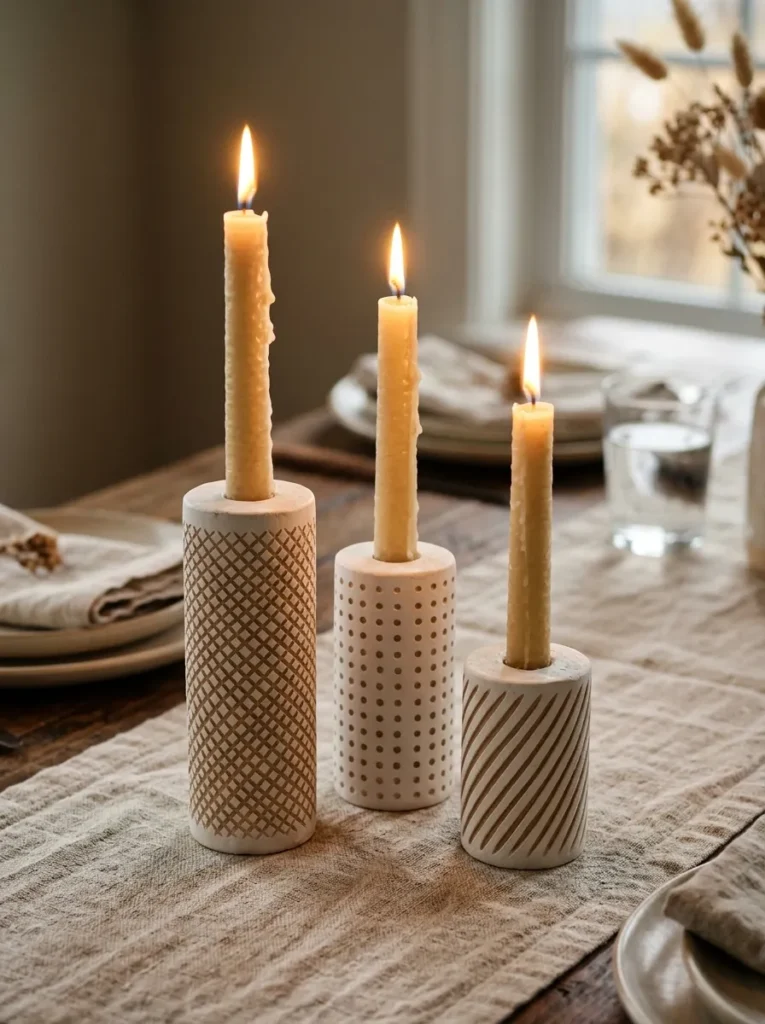
Vibe: Warm and intimate — the table objects that make a weeknight dinner feel like an occasion.
Why it works: Cylindrical candle holders are the most structurally forgiving form in clay hand-building — the slab is rolled into a tube and joined at a single seam, producing a stable, symmetrical vessel with minimal construction complexity. The carved geometric pattern applied to the exterior wall serves a dual function: it creates visual interest on the holder surface and, when a candle is lit inside, produces a glow that escapes through the thinned clay walls at the carved areas, creating a lantern effect that adds warmth to any table surface. The two-color reveal of matte white paint over raw clay in the carved recesses creates depth without requiring multiple paint colors.
How to get it: Roll a clay slab to 6mm thickness and cut a rectangle — the width becomes the height of the cylinder, the length becomes the circumference. Roll the slab around a cardboard tube of your desired diameter (a paper towel roll for a large holder, a toilet paper roll for a medium one). Score and slip-join the overlapping seam and smooth the join carefully. Carve the geometric pattern using a pointed wooden tool or toothpick into the leather-hard clay (partially dried, firm but not fully hard) — this is the ideal carving stage. After full drying and painting, the raw clay color shows naturally in carved recesses.
Quick Win: Carving a simple dot grid pattern using the blunt end of a pencil pressed repeatedly into leather-hard clay takes under 5 minutes and produces a pattern that looks intentionally designed — the most time-efficient decorative technique for clay candle holders.
Shop The Look
- Air dry clay white 2 lb block
- Matte warm white acrylic paint
- Wooden clay carving tool set
- Beeswax taper candle set natural
- Natural linen table runner undyed
8. Minimalist Wall Arch Sculpture
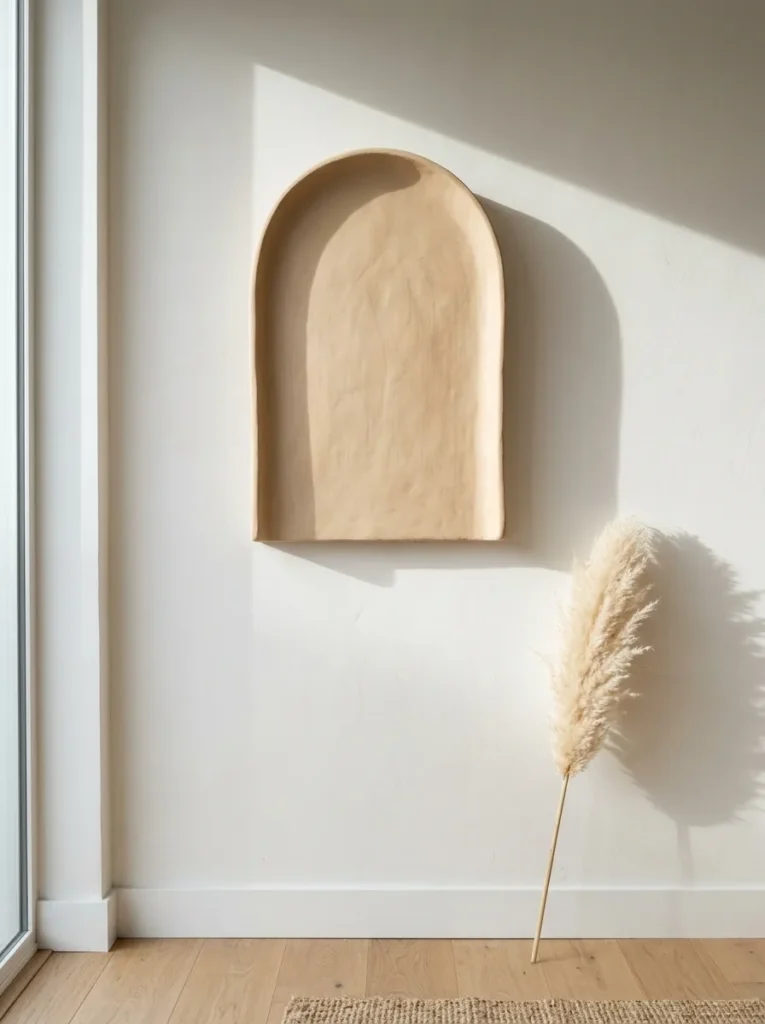
Vibe: Clean and sculptural — a wall object that makes an empty wall look like it was always intended to have exactly that.
Why it works: The arch form is the single most architecturally resonant shape available in air dry clay wall sculpture — it references doorways, windows, and classical architectural elements in an abstract, minimal way that connects to the viewer’s spatial memory without being literal. The shadow the arch casts on the wall behind it is as important as the object itself: in strong directional light, the curved shadow doubles the visual presence of the piece, creating a composition of object and shadow that reads as more sophisticated than either element alone. A single warm sand paint coat allows the natural clay surface character to read through the paint layer, preventing the finished arch from looking like painted plastic.
How to get it: Build the arch form by cutting two matching arch shapes from a 1cm thick clay slab using a cardboard template. Allow both pieces to firm slightly for 30 minutes before carefully bending each into the arch curve over a cardboard tube form. Join the two pieces back to back with score-and-slip along their entire contact surface, pressing firmly to eliminate air gaps. Smooth the exterior surfaces with a damp finger and allow to dry slowly over 72 hours to prevent cracking at the curve. After full drying, apply a single thin coat of warm sand acrylic — enough to add color but thin enough to allow clay texture to remain visible.
Shop The Look
- Air dry clay white 5 lb large block
- Warm sand acrylic paint 4 oz
- Cardboard tube form arch mold
- Dried pampas grass stem large
- Picture hanging adhesive strip heavy duty
9. Stamped Clay Gift Tags and Ornaments
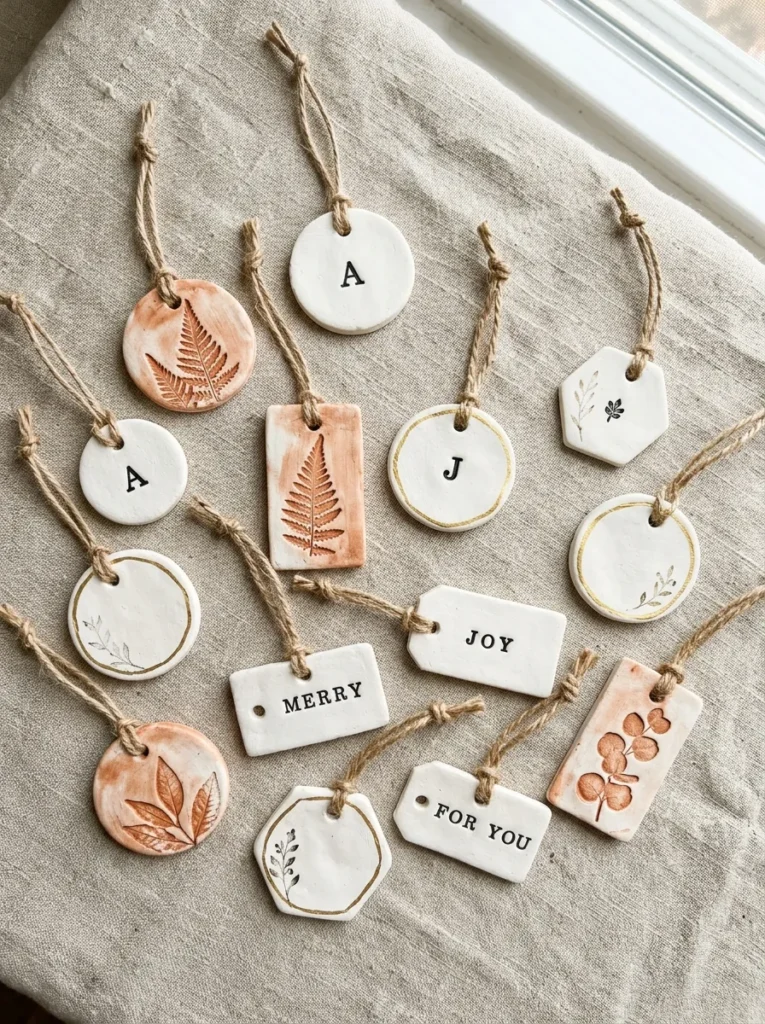
Vibe: Warm and creative — the small handmade objects that make gift-giving feel genuinely personal.
Why it works: Stamped clay gift tags represent the lowest barrier entry point for air dry clay decor — requiring no special tools, no construction skill, and no previous clay experience — while producing objects with enough tactile sophistication to function as decorative items in their own right beyond their gift tag utility. The design principle is added value through material substitution: replacing a paper or cardboard gift tag with a small fired-looking clay piece immediately elevates the perceived value of any gift without increasing the actual cost. A collection of these tags displayed in a ceramic bowl or hanging from a branch becomes a room decoration in its own right.
How to get it: Roll clay to 5mm thickness and cut tag shapes using a craft knife — rectangles, ovals, circles, or organic free-form shapes all work. Poke a jute twine hole at the top using a toothpick or thin straw before the clay hardens. Press rubber botanical stamps or alphabet stamps firmly and evenly into the clay surface. After full drying (24 hours), apply a thin diluted acrylic wash in terracotta, matte black, or raw ochre over the entire surface, then wipe back immediately with a damp cloth — the pigment settles into the stamp impressions and enhances their definition dramatically.
Shop The Look
- Botanical rubber stamp set assorted
- Alphabet letter stamp set small rubber
- Air dry clay white 2 lb block
- Natural jute twine thin roll
- Acrylic ink wash set earth tones
10. Hand-Built Pinch Pot Planter Cluster
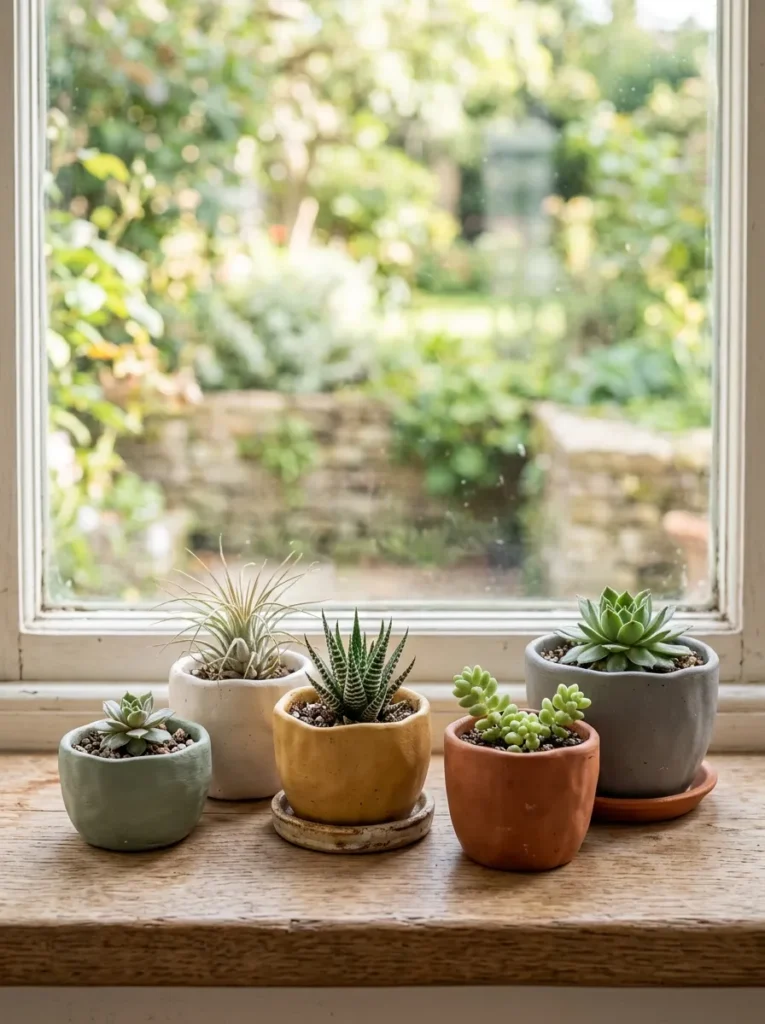
Vibe: Warm and living — the windowsill cluster that makes even a north-facing window feel inviting.
Why it works: A cluster of five small pinch pot planters in different muted earth tones applies the principle of tonal family variation — the five colors are individually distinct but collectively cohesive because they all share the same muted, earthy quality. No two pinch pots are identical in form, size, or color, which means the cluster reads as accumulated and collected rather than purchased as a set. This is the defining aesthetic quality of handmade collections: the visual interest comes from the relationships between individual pieces rather than the perfection of any single one. Each successive pinch pot also improves on the last, meaning a cluster of five captures the maker’s learning curve as part of the display.
How to get it: Make five pinch pots in graduated sizes from golf ball to tennis ball clay portions. Vary the wall angle slightly on each — one more open and shallow, one taller and narrower — so each pot has a distinct personality within the family. After drying, paint each pot in a single flat matte color from the earth tone palette: terracotta, raw white, dusty sage, warm ochre, and iron gray. Apply no more than two thin coats to preserve clay surface texture visibility. Seal with matte varnish and fill with succulent potting mix before planting.
Quick Win: A six-color muted earth tone acrylic paint set ($12–$16) provides all the colors needed for a full pinch pot planter cluster — terracotta, sage, ochre, gray, white, and raw umber — without requiring individual color mixing or multiple paint purchases.
Shop The Look
- Earth tone matte acrylic paint set 6 colors
- Air dry clay terracotta 2 lb block
- Air plant tillandsia assortment small
- Succulent plant mix small 2-inch pots
- Matte finish varnish sealer brush-on
11. Textured Clay Coasters with Cork Backing
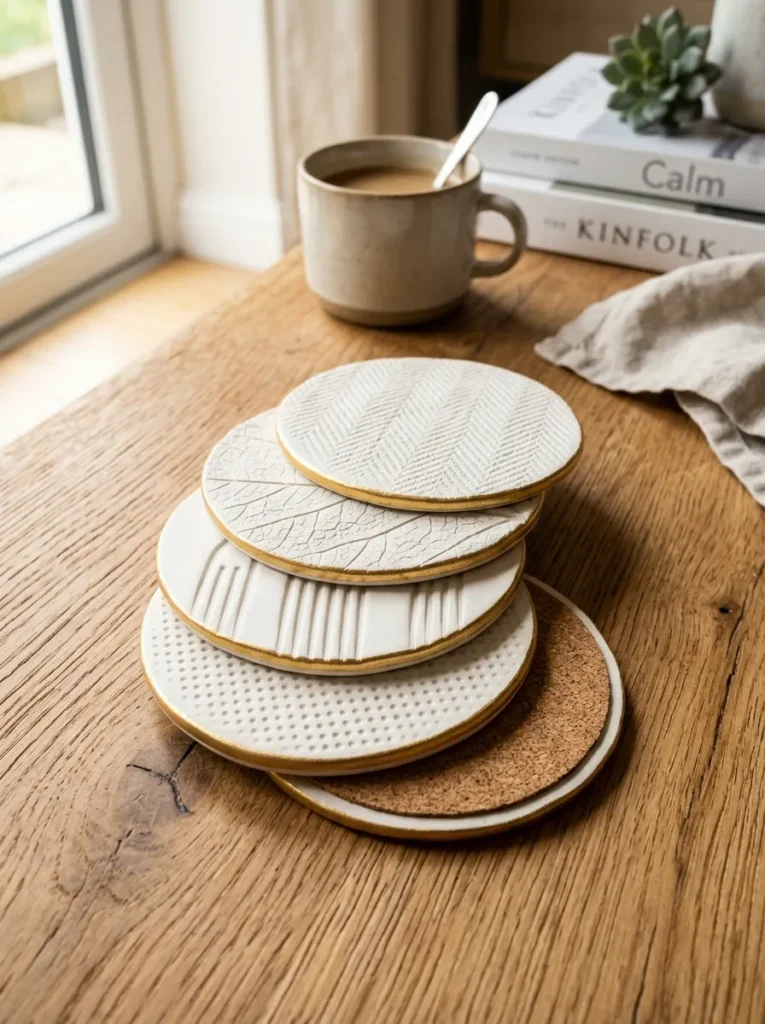
Vibe: Considered and warm — the functional object that earns a place on the coffee table even when no one is using it.
Why it works: Clay coasters apply the principle of functional decoration — objects that serve a practical purpose while contributing meaningfully to the visual composition of the surface they occupy. The cork backing is the critical functional element: it protects table surfaces from moisture seeping through the porous clay and prevents the hard ceramic edge from scratching finishes. Four coasters with four different texture treatments creates a matched set with enough internal variation to be visually interesting as a group — each coaster is identifiably part of the same family through shared color and format while being individually distinct through its unique texture.
How to get it: Roll clay to 8mm thickness for coasters — thicker than other clay projects because the coaster must withstand the weight of a full drink without flexing or cracking. Cut 9cm diameter circles using an upturned glass as a cutter. Apply texture treatments to each using different tools: drag a fork across one in parallel lines, press linen fabric into another, lay a real leaf onto the third and roll lightly, use a pencil eraser to stamp a dot grid on the fourth. After full drying, paint matte white, apply gold rim using a fine liner brush, seal thoroughly with at least three coats of waterproof matte sealer, and glue cork sheet circles to the base using waterproof craft adhesive.
Shop The Look
- Air dry clay white 2 lb block
- Matte white acrylic paint
- Gold metallic acrylic paint fine liner
- Cork sheet self-adhesive 2mm thickness
- Waterproof matte sealer brush-on 3 coat
12. Hanging Clay Mobile with Geometric Shapes
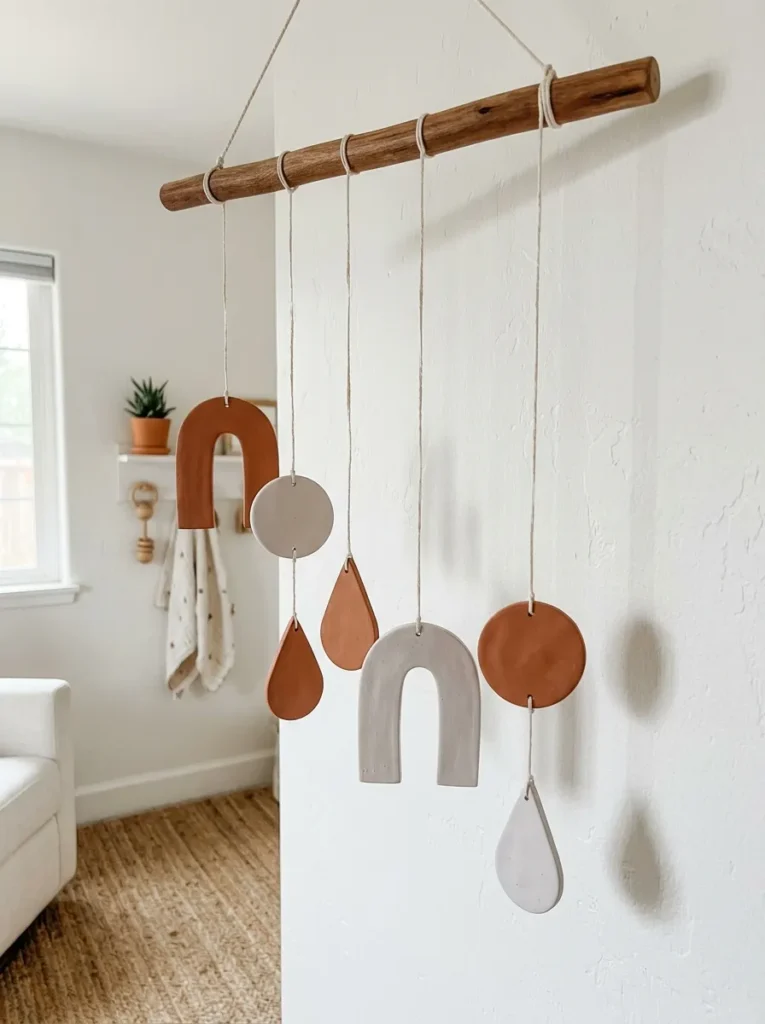
Vibe: Serene and gentle — the mobile that works as well in a design-forward living room as in a nursery.
Why it works: A clay geometric mobile applies the combined design principles of shadow play and kinetic composition — the geometric shapes cast clean, identifiable shadow silhouettes on the wall behind them, and the gentle movement of the mobile in air circulation constantly repositions these shadows, creating a living wall installation from a static collection of clay objects. The two-color palette of dusty white and terracotta maintains coherence across six different shapes — the color variation provides rhythm while the muted tonal relationship between the two colors prevents visual competition. Suspending shapes at different lengths creates depth perception that makes the mobile appear more complex than its individual elements suggest.
How to get it: Cut geometric shapes from a rolled clay slab using cardboard templates — arches require a curved cut, circles need a round cutter, and teardrops combine a circle cut with a pointed extension. Poke cotton thread holes at the top of each shape before drying — two holes for shapes that need to hang level, one hole for freely rotating pendants. After drying and painting in alternating dusty white and terracotta, tie each shape to the dowel at varied lengths using natural cotton thread, balancing the mobile by adjusting thread lengths until it hangs level before final knotting.
Shop The Look
- Natural wood dowel 30cm display rod
- Matte dusty white acrylic paint
- Natural cotton thread spool thin
- Ceiling hook adhesive removable
- Air dry clay white 2 lb block
13. Impressed Leaf Dish for Entryway Keys
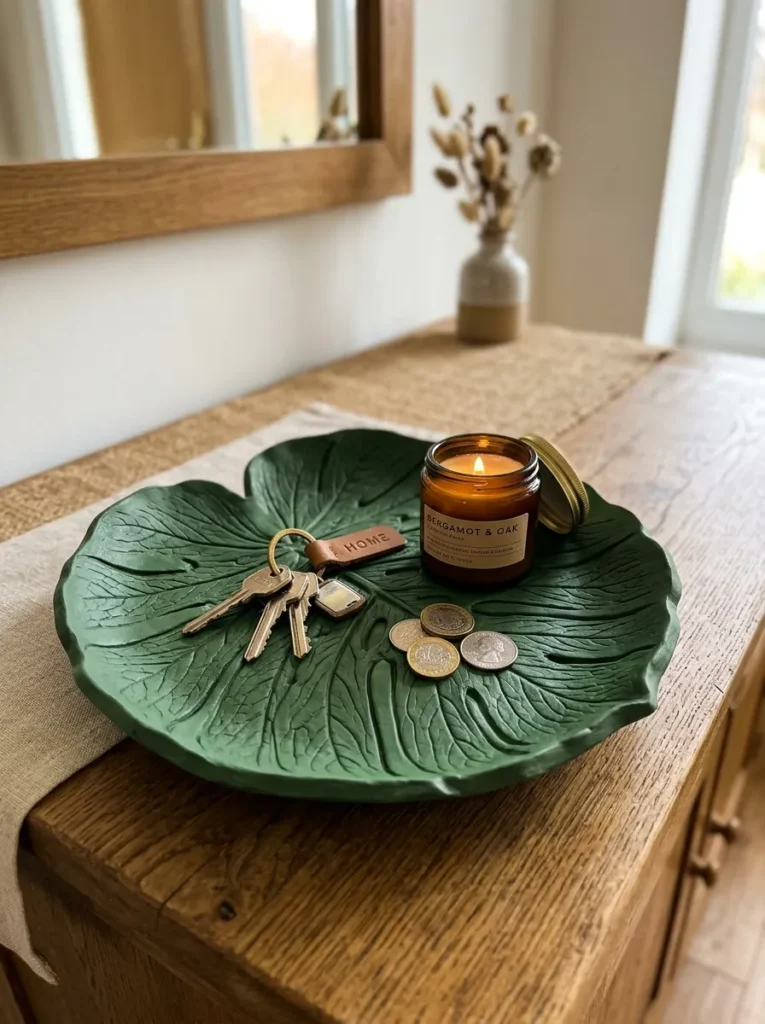
Vibe: Warm and purposeful — the entryway object that solves a practical problem and looks deliberate doing it.
Why it works: Using a real monstera leaf as both a texture stamp and a shape template creates a dish where form and decoration are unified — the dish is literally shaped like a leaf and textured by the same leaf, making the design logic immediately legible and satisfying. This is the principle of single-source design: all visual decisions (shape, edge profile, surface pattern) derive from a single natural object rather than being independently chosen, which produces an inherent coherence that multi-source designs must work hard to achieve. The deep matte green paint connects the clay dish directly to its botanical inspiration, completing the design narrative without requiring additional decorative choices.
How to get it: Harvest a large monstera leaf with clearly defined veins and place it vein-side-down on a lightly oiled surface. Roll clay directly onto the leaf to 8mm thickness, pressing the rolling pin firmly across the full leaf surface to transfer the complete vein pattern into the clay. Cut around the leaf perimeter using a craft knife, following the natural leaf edge profile exactly — including the characteristic monstera split cuts. Drape the leaf-shaped clay over a shallow bowl lined with plastic wrap to create the dish curve, removing the real leaf immediately. After full drying, apply deep matte green acrylic in a single thin coat.
Shop The Look
- Monstera plant small for leaf harvest
- Deep matte green acrylic paint
- Craft knife handle with blades
- Small shallow bowl mold draping form
- Plastic wrap mold release roll
14. Air Dry Clay Alphabet Letter Bookends
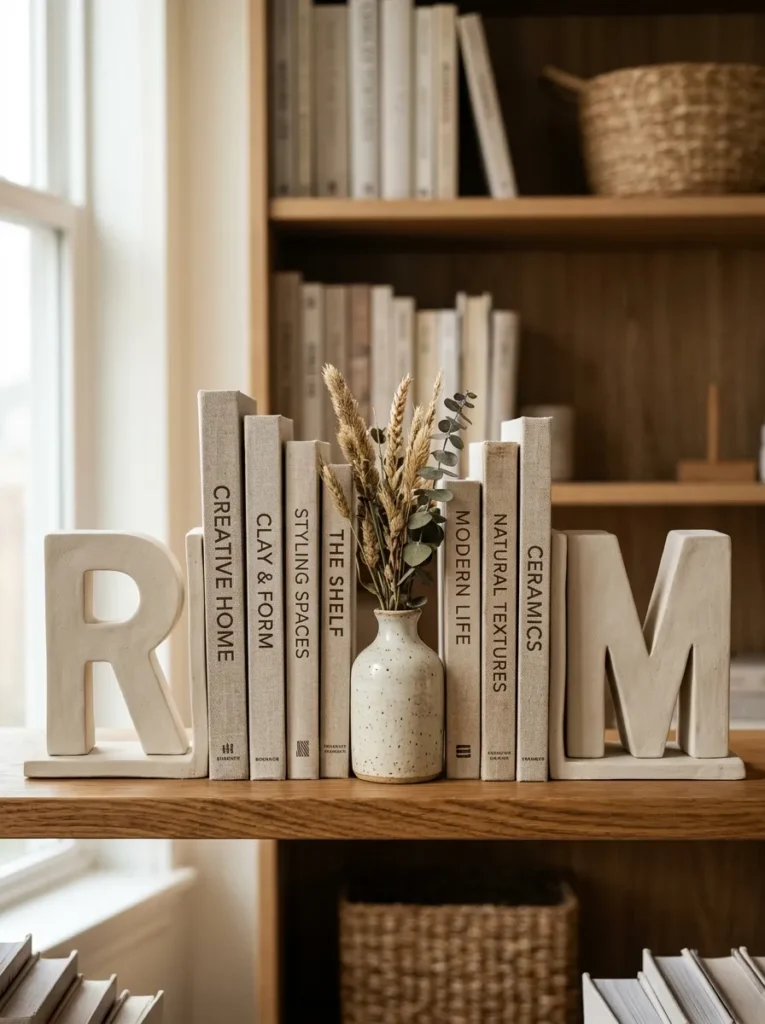
Vibe: Warm and personal — the shelf object that makes a bookcase feel like it belongs to someone specific.
Why it works: Personalized alphabet letter bookends apply the design principle of initial monogramming as spatial anchor — a pair of meaningful letters on a bookshelf immediately establishes personal ownership of the space in a way that generic bookends cannot. The solid block letter form is achievable in air dry clay by layering multiple slab cutouts of the same letter profile and joining them to create the required depth and weight. The weighted backing slab is the functional key: without it, a clay letter would tip forward under book pressure — the flat slab base creates the counterweight that makes the bookend structurally viable.
How to get it: Print or draw your chosen letter in a clean block sans-serif font at the desired size — 12–15cm height works well for bookshelf scale. Cut the letter profile from clay slab at 2cm thickness by stacking and joining three 6mm slabs. Cut a rectangular base slab approximately 12x10cm and stand it vertically behind the letter, joining the letter to the front face of the base slab with score-and-slip. The letter protrudes forward of the base, and the base sits flat against books to provide counterweight. Fill the base interior with a poured layer of fine sand or small gravel before sealing the top for additional weight.
Quick Win: Filling the hollow base of clay bookends with fine sand before sealing — approximately 100g per bookend — provides enough counterweight to support a full row of hardcover books without tipping, transforming a decorative clay letter into a fully functional bookend.
Shop The Look
- Air dry clay white 5 lb large block
- Matte warm white acrylic paint
- Fine craft sand weight fill
- Waterproof craft adhesive strong bond
- Linen book cover set fabric wrap
15. Minimalist Clay Bead Garland
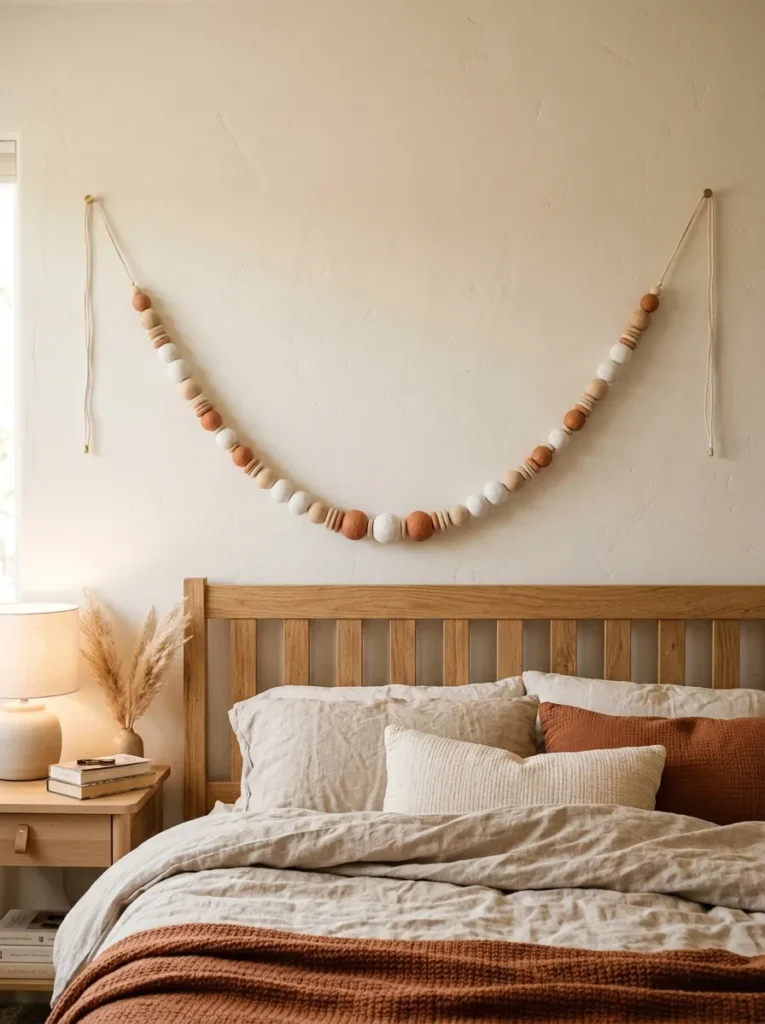
Vibe: Warm and gentle — the wall installation that reads as decorative textile rather than craft project.
Why it works: A clay bead garland occupies an aesthetic space between jewelry and wall art — it is too large and architecturally positioned to read as wearable, but too delicate and textile-like to read as sculpture. This ambiguity is the source of its visual interest. The design principle at play is material contrast through material combination: the hard, matte ceramic quality of the clay beads is softened and connected by the natural cotton cord, creating a composition where the tension between rigid and flexible materials reads as deliberately considered. The alternating white and terracotta color sequence creates rhythm across the garland’s length without requiring complex color decisions.
How to get it: Roll clay into spheres between both palms — perfect spheres are not necessary and slight irregularity is preferable for handmade authenticity. Create disc beads by flattening spheres slightly between two fingers. Pierce each bead through the center using a wooden skewer or toothpick before drying — rotate the skewer gently as you push through to prevent the clay walls from collapsing. Allow beads to dry on the skewer for the first hour to maintain the hole shape, then slide off to finish drying. After painting alternating white and terracotta, string on 3mm natural cotton cord with small wood bead spacers between each clay bead.
Shop The Look
- Natural cotton cord 3mm macramé rope
- Small natural wood bead set
- Matte white acrylic paint small jar
- Matte terracotta acrylic paint small jar
- Wooden skewer set for bead piercing
How to Start Your Air Dry Clay Decor Transformation
Start with the pinch pot ring dish. Before rolling slabs, coiling ropes, or attempting any constructed form, make one pinch pot from a golf ball of clay — open it with your thumb, pinch it outward until you have a shallow bowl, press a square of lace into the rim, and set it aside to dry. This 15-minute project teaches the single most important clay lesson: the material is more forgiving than you expect, and imperfection is an asset rather than a problem. Once the dish is dry and painted, place it somewhere visible — the vanity, the entryway, the kitchen counter — and let the fact that you made it settle into the room before starting the next project.
The most common mistake first-time air dry clay makers make is drying their pieces too quickly. Setting clay projects near a heat source — a sunny window, a radiator, a warm oven — causes the surface to dry faster than the interior, creating surface cracks that split the piece before it can be finished. Always dry air dry clay at room temperature away from direct heat and sunlight, covered loosely with a piece of plastic wrap for the first 12 hours if the piece has thick walls or joined sections. A slow dry is a crack-free dry. This single habit adjustment eliminates the most frustrating outcome in beginner clay work before it happens.
Three items under $50 that make an immediate impact: A 2-lb block of white air dry clay ($10) that contains enough material for at least 8–10 small projects and is the only non-negotiable material investment; a six-color muted earth tone acrylic paint set ($14) that provides terracotta, sage, ochre, gray, white, and raw umber without individual color purchasing; and a can of matte sealer spray ($8) that transforms the slightly chalky dried clay surface into a clean, finished result that reads as intentional ceramic — the single material upgrade that most dramatically elevates the perceived quality of every finished piece.
Realistic expectations: A single small air dry clay project — a pinch pot ring dish, a set of gift tags, or a coaster — takes 20–40 minutes of active making time and 24–48 hours of passive drying time. A medium project — a coiled vase, a wall tile set, or a slab planter — takes 1–2 hours of active making across two sessions (building and decorating) and 48–72 hours of drying. A complete room installation — wall tiles, a vase cluster, coasters, and a bead garland — can be built across two weekends for a total material investment of $30–$60. The only supply that replenishes regularly is the clay itself — all tools, paints, and sealers purchased in the first session serve dozens of future projects.
Frequently Asked Questions About Air Dry Clay Decor Projects
What is the difference between air dry clay and polymer clay for home decor projects?
Air dry clay hardens through water evaporation at room temperature — no heat source is required, making it accessible for any home environment. It produces larger, lighter pieces and accepts acrylic paint directly on its surface. Polymer clay requires baking in a conventional oven at 130–150°C to cure, produces denser and more flexible finished pieces, and accepts alcohol inks and specialty polymer mediums not suitable for air dry clay. For home decor projects at the scale described in this article — vases, wall tiles, planters, coasters — air dry clay is the more practical choice because it can be made in larger volumes without oven constraints. Polymer clay is better suited to small, detailed jewelry and miniature objects where its flexibility and fine detail retention after curing are genuine advantages.
How do I prevent air dry clay from cracking while it dries?
The three most effective crack prevention strategies are even wall thickness throughout the piece, slow room-temperature drying away from heat and sunlight, and covering the piece loosely with plastic wrap for the first 12 hours of drying to equalize the moisture release rate between surface and interior. Cracks almost always occur at the thinnest point of a piece — where walls are too thin, where joined sections meet at different thicknesses, or where slab edges are thinner than slab centers. Rolling clay with consistent guide rails ensures even slab thickness before building. If a crack appears while the clay is still damp, it can be repaired by working fresh clay into the crack with a damp finger and smoothing over — this repair is invisible after drying and painting.
Is air dry clay waterproof enough for planters and coasters?
Unfinished air dry clay is not waterproof and will soften and eventually dissolve when exposed to sustained moisture. For planters, apply a minimum of three coats of waterproof matte sealer to the interior surface, add a drainage hole, and use a separate saucer to prevent the base sitting in water. For coasters, apply three coats of waterproof sealer to all surfaces including the base, add cork backing, and wipe spills promptly rather than allowing drinks to sit. Neither application will handle submersion in water or extended exposure to rain, but both handle normal household moisture contact reliably when properly sealed. For outdoor planter use, consider lining the interior with a plastic bag insert to completely separate the clay from soil moisture.
What is the best paint to use on air dry clay for a ceramic-looking finish?
Matte acrylic paint in 2–3 thin coats produces the most convincing ceramic appearance on air dry clay. The key is thin coats — thick single-coat application looks painted rather than fired, obscures surface texture, and tends to peel at edges. Apply the first thin coat, allow to dry completely (30–60 minutes), lightly sand with 400-grit sandpaper, apply the second thin coat, and finish with a quality matte sealer spray. For the most authentic stoneware appearance, apply a slightly darker wash of diluted paint after the base coat and wipe back immediately — the darker wash settles into any surface texture and creates the tonal depth variation that distinguishes real fired pottery from a flat painted surface.
How long does air dry clay last once projects are finished and sealed?
Properly sealed air dry clay decor pieces last indefinitely in indoor environments — sealed pieces from the 1980s and 1990s remain in excellent condition where indoor humidity and temperature are reasonably stable. The critical variables are sealing quality and indoor environment: pieces sealed with three or more coats of waterproof matte varnish in rooms with normal household humidity (30–60% relative humidity) show no degradation over decades. High-humidity environments — bathrooms without ventilation, basements with moisture issues — can cause unsealed pieces to absorb atmospheric moisture and soften over time. For bathroom or kitchen use, seal generously and reapply a fresh sealer coat annually as simple maintenance.
Ready to Create Your Dream Air Dry Clay Decor Collection?
These 15 projects cover the complete range of what air dry clay can achieve in a home — from the intimate scale of a stamped gift tag and the functional elegance of a textured coaster to the architectural presence of a wall arch sculpture and the living warmth of a pinch pot planter cluster. Every clay journey starts with a single golf ball of material and a pair of hands — the pinch pot ring dish this weekend is not a practice run for something more ambitious later, it is the real thing, the genuine beginning of a creative practice that grows more fluent and more confident with every piece made. This weekend, tear open a block of white air dry clay, roll the smallest portion into a ball, press your thumb into the center, and see what your hands make of it — the result will surprise you, and it will be yours in a way that nothing purchased ever quite is. Save the projects that call to you most, gather your materials, and begin from that first pinch.