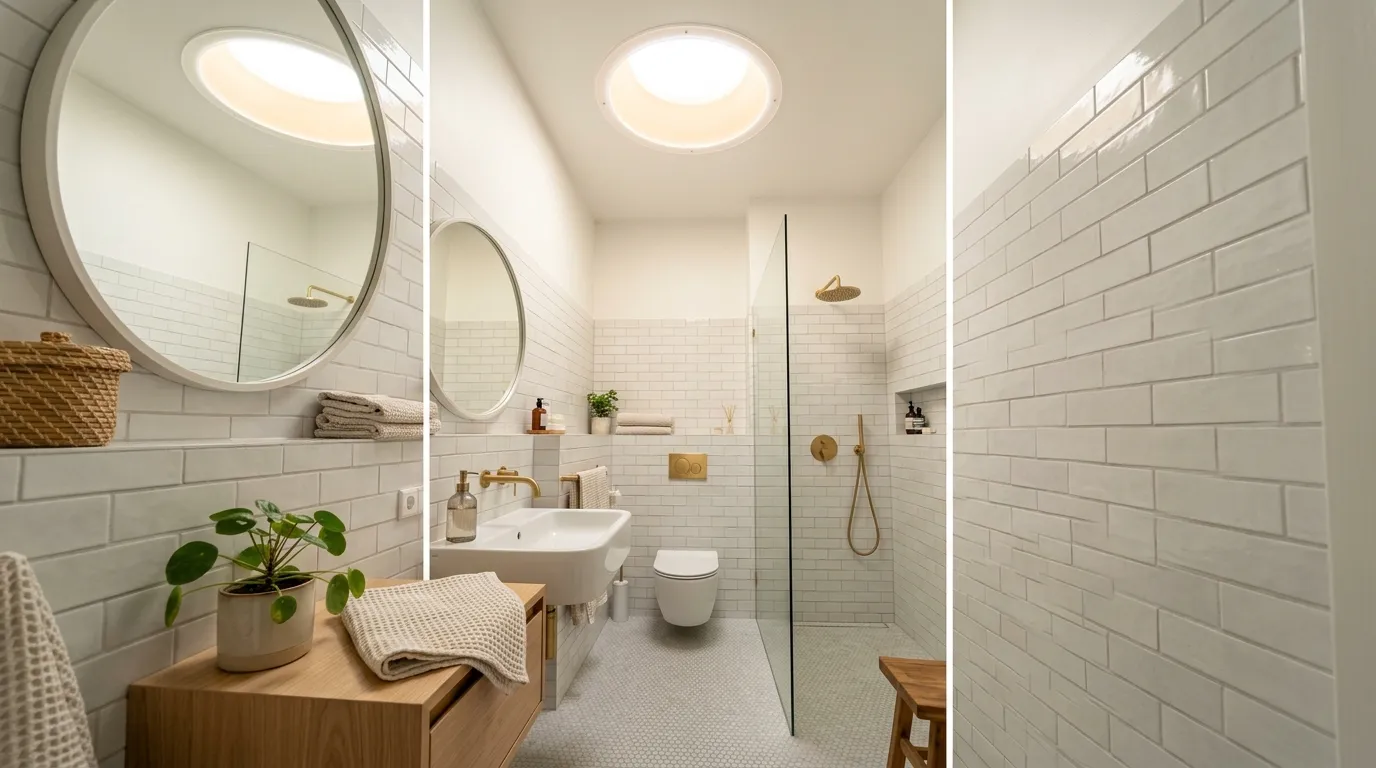
14 Smart Small Bathroom Ideas for Tiny Spaces
A smart small bathroom is a compact bathing and grooming space — typically under 50 square feet — that has been designed with deliberate spatial intelligence to provide the full functional range of a standard bathroom while feeling more generous, more organized, and more genuinely beautiful than its physical dimensions suggest. This article gives you 14 smart small bathroom ideas across layout optimization, storage integration, visual expansion techniques, fixture specification, lighting strategy, material selection, and finishing details so every decision in your small bathroom produces the maximum possible return in function, space perception, and design quality.
A small bathroom that works brilliantly is not the result of expensive materials or clever product purchases. It is the result of a series of specific, sequenced design decisions — made in the correct order, at the correct scale, and with the correct understanding of how each decision affects every other decision — that together create a space that feels genuinely designed rather than merely fitted. The difference between a 40-square-foot bathroom that feels cramped and one that feels complete is almost never about square footage — it is almost always about the intelligence of the decisions made within those 40 square feet. Here are 14 ideas worth saving — and implementing.
Why Smart Design Transforms Small Bathrooms
Small bathroom design draws from the convergence of space planning expertise, ergonomic research, material science, and the accumulated practical wisdom of architects and interior designers who have spent careers optimizing compact bathing environments in urban apartments, small homes, and renovation projects where every square inch is genuinely consequential. The design traditions most associated with excellence in small bathroom design include the Japanese approach to compact bathing spaces — where the wet room concept, the deep soaking tub within a small footprint, and the deliberate material quality of every surface create bathing environments of genuine luxury within dimensions that Western design would consider inadequate — and the Scandinavian approach of maximizing natural light, using pale material tones to advance space, and maintaining material restraint to prevent visual crowding.
The physiological experience of a small bathroom is primarily determined by three environmental variables that are independent of actual square footage: perceived ceiling height (which can be increased by vertical design elements), visual floor area (which can be increased by eliminating floor-contact furniture and using wall-hung fixtures), and light level (which directly affects the perceived size of any space — a bright small bathroom reads as approximately 30% larger than the same space in dim light). Smart small bathroom design systematically addresses all three variables through specific decisions about materials, fixtures, lighting, and storage — producing a room that reads as significantly larger than its measured dimensions.
The most important design sequencing principle for small bathrooms is to address spatial decisions before material decisions — where walls are, where plumbing is, what fixtures are used, and how storage is integrated must all be determined before any material selection, color choice, or accessory purchase is made. The most common small bathroom design failure is making material and decorative decisions first (choosing tile, paint, and accessories) and then discovering that the spatial and functional problems remain, because materials and decoration cannot resolve layout, lighting, or storage deficiencies.
What to Prioritize
| Priority | Detail |
|---|---|
| First | Layout and fixture placement — every spatial decision before any material decision |
| Second | Storage integration — built-in over added, wall-hung over floor-standing |
| Third | Lighting — position and temperature before fixture aesthetics |
| Fourth | Material selection — spatial properties (tone, texture, pattern) before visual appeal |
14 Smart Small Bathroom Ideas for Tiny Spaces
1. Install a Floating Vanity to Create Visual Floor Space
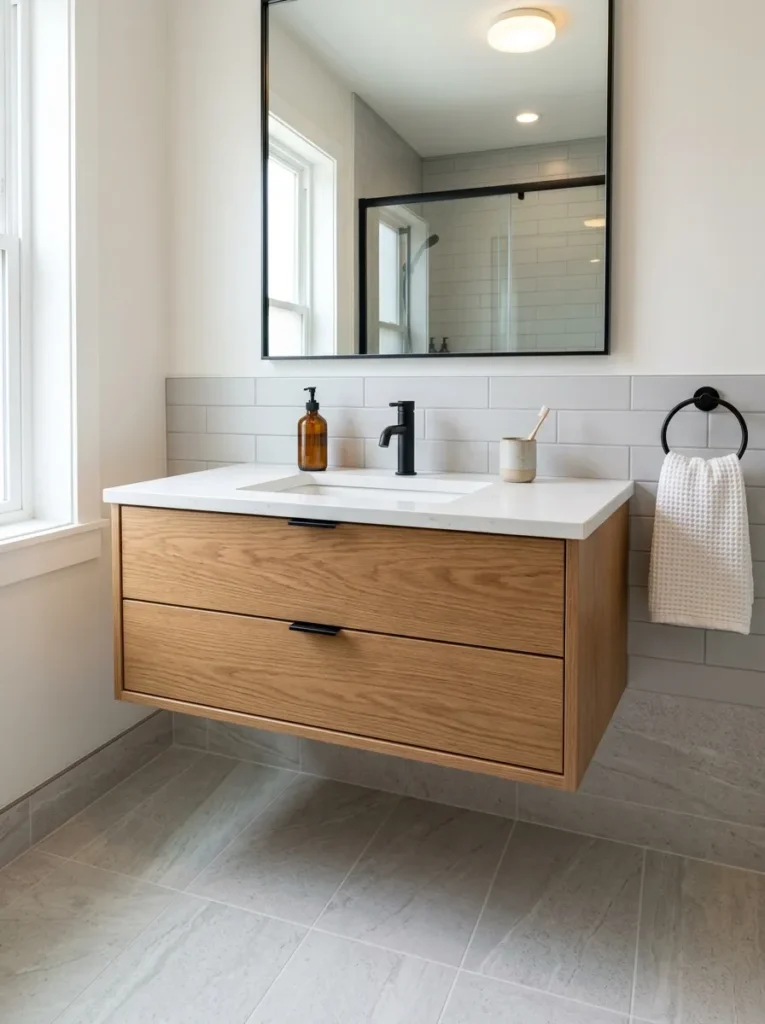
Vibe: The bathroom is open — a floating vanity with clear floor space beneath creates the single most impactful spatial expansion available in a small bathroom, where the continuous visible floor running from the doorway to the back wall makes the room read as significantly larger than its measured dimensions.
Why it works: The floating vanity creates spatial openness in a small bathroom through the most fundamental visual mechanism available: extending the visible floor plane to the full room depth without interruption. A floor-contact vanity terminates the visible floor at the vanity’s front edge, visually dividing the room into two zones (the clear floor area and the vanity-occupied area) and making the room appear to end at the vanity. A floating vanity allows the eye to follow the continuous floor tile from the doorway threshold all the way to the back wall, which makes the room appear to have significantly more depth than the floor-contact alternative. Research in environmental psychology consistently shows that visible floor area is the primary variable in room size perception — a room with 60% of its floor visible reads as larger than a room with 40% of its floor visible even when the total square footage is identical.
How to get it: Floating vanities require a structural wall backer (3/4-inch plywood installed between wall studs before drywall, or a post-installation blocking retrofit) to support the cantilevered cabinet load. This backer should extend from floor to 30 inches high behind the vanity position. Mount the floating vanity at 18–21 inches from the finished floor — lower than conventional vanity heights but appropriate for the visual clearance that creates the spatial expansion effect. Source slim-profile floating vanities (12–14 inches deep rather than the standard 17–21-inch depth) for the most space-efficient installation in a small bathroom.
Quick Win: A simple open floating shelf mounted at vanity height with a vessel sink on top (rather than a full cabinet) costs $100–$200 in materials, requires minimal wall preparation, and achieves 80% of the floating vanity’s spatial expansion benefit at a fraction of the cost.
Shop The Look
- Floating bathroom vanity 24 inch white
- Wall mount vanity warm wood veneer
- Undermount sink 16 inch bathroom
- Matte black single hole faucet
- Floating vanity wall bracket kit
Also view: 15 Small Bathroom Decor Ideas with Clever Storage
2. Use a Large Format Floor-to-Ceiling Tile to Eliminate Visual Interruption
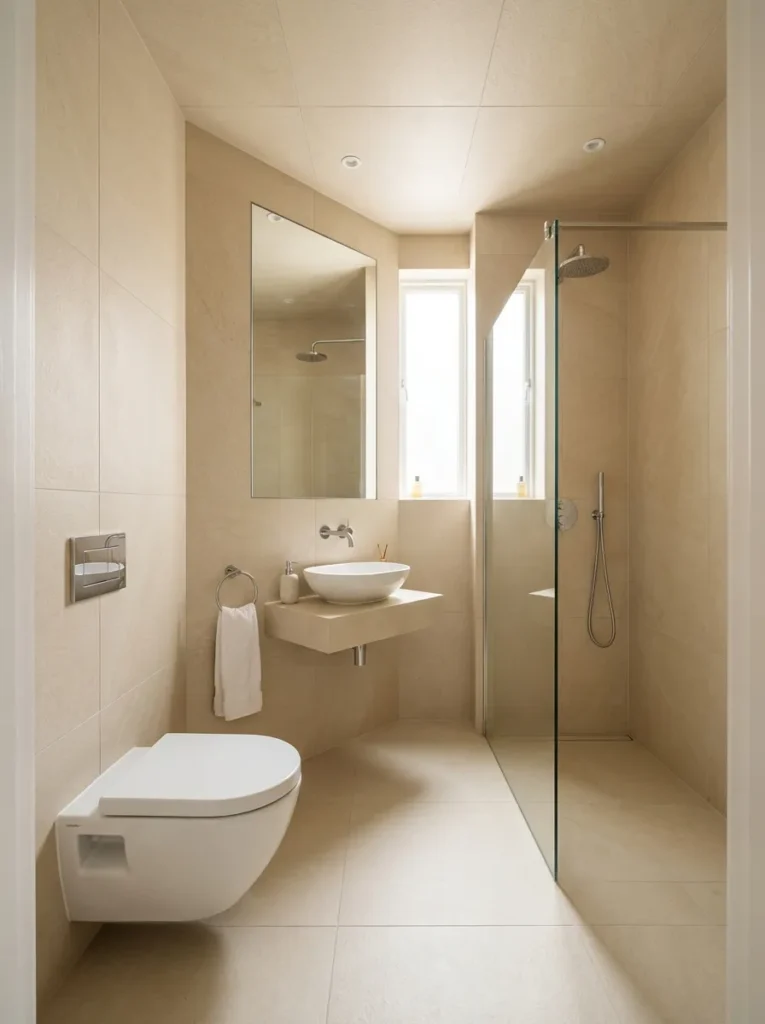
Vibe: The bathroom is continuous — using the same large format tile on the floor and all walls to ceiling height eliminates every visual boundary in the small bathroom, creating a single continuous mineral surface that reads as a much larger space than a room with varied surfaces and colors on different planes.
Why it works: Visual boundaries — the transition between floor and wall tile, between wall tile and painted wall, between the tiled wet zone and the painted dry zone — create the perception of a room divided into smaller sections, each of which reads as a distinct smaller space. Eliminating all these boundaries by using the same tile material from floor to ceiling on all surfaces creates the visual perception of a single, unified, continuous space that reads as significantly larger than any of its individual surfaces. The grout line color matching is the critical detail that completes this effect — matching grout to tile color makes the grout lines recede visually, so the tile surface appears as a continuous material rather than a grid of tiles. Large format tiles (24×24 inch minimum) reduce the total number of grout lines in the space, further reducing visual interruption.
How to get it: Specify the same porcelain or ceramic tile for floor and walls in the bathroom renovation, selecting a large format (24×24 or 12×24 inch) in a warm neutral tone. Floor tile must be textured or matte-finished for slip resistance — select a tile with a matte or micro-textured surface for the floor application and specify the same tile for walls, where the smooth wall version provides a slightly more refined appearance. Use a pre-mixed grout in a color as close as possible to the tile body color. The tiling budget will be higher than standard bathroom tiling due to the larger covered area (all four walls plus floor), but the spatial impact is the most significant available through any material decision.
Shop The Look
- Large format tile 24×24 warm cream
- Same tile floor wall specification
- Matching grout color tile body
- 12×24 tile warm grey floor wall
- Large tile leveling clip system
3. Replace the Shower Curtain with a Frameless Glass Panel
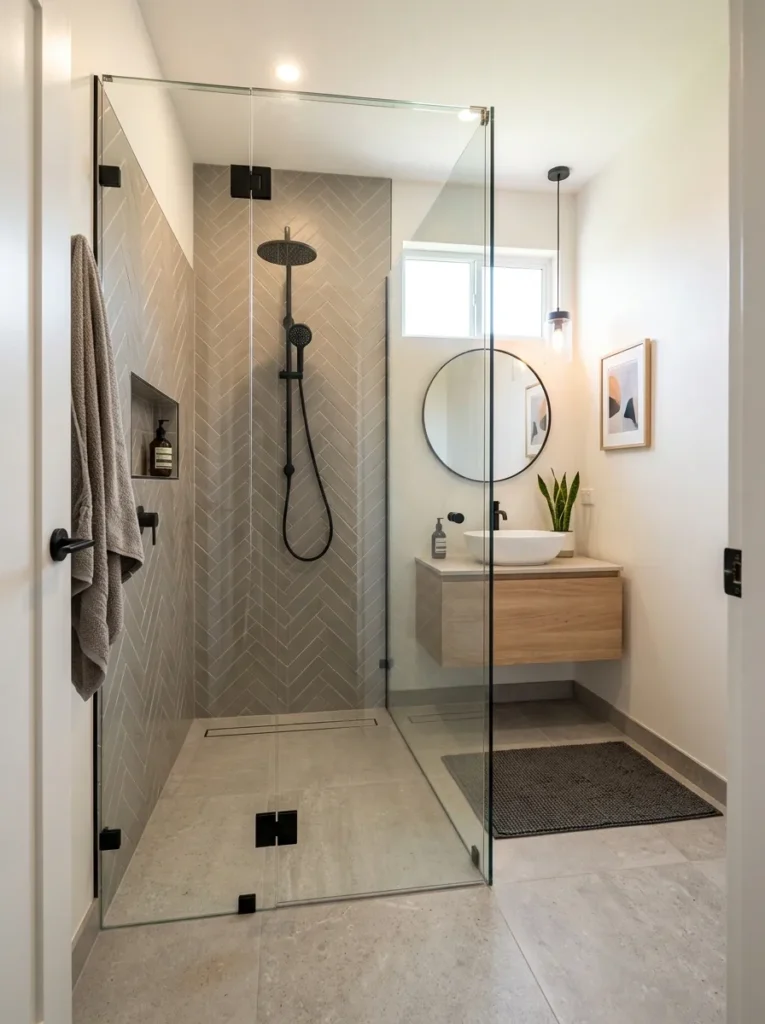
Vibe: The shower is integrated — a frameless clear glass shower panel or door makes the shower area visually continuous with the rest of the bathroom, effectively adding the shower’s square footage to the room’s perceived space rather than closing it off as a separate, opaque zone.
Why it works: A shower curtain is the small bathroom’s most spatially damaging element when closed — it creates a solid visual barrier across the bathroom’s width that divides the room into two small zones and makes both zones appear smaller than the room’s actual total square footage. A frameless glass panel eliminates this barrier completely — the shower area is visible in its entirety from any position in the bathroom, and the room reads as a single continuous space. The glass transparency specifically extends the perceived depth of the bathroom by allowing the eye to travel through the glass to the shower’s back wall, adding 30–48 inches of perceived depth that the opaque shower curtain blocks. Frameless glass (no frame visible at the panel edges) is specifically preferable to framed glass enclosures in small bathrooms — frame lines create additional visual interruptions that reduce the transparency benefit.
How to get it: A single fixed frameless glass panel (a stationary glass screen rather than a door) is the most cost-effective glass shower option ($200–$600 installed) and is appropriate for showers that are not fully enclosed. A frameless pivot or hinged glass door ($400–$1,200 installed) provides full shower enclosure with maximum visual transparency. Specify clear glass (not frosted or patterned) for maximum spatial benefit — frosted glass maintains visual privacy but reduces the transparency benefit that makes glass shower enclosures spatially effective. Hardware should be in minimal profile (small round knobs or D-handles in matte black or brushed brass rather than large decorative handles).
Shop The Look
- Frameless glass shower panel fixed
- Frameless shower door pivot clear
- Minimal shower handle matte black
- Glass shower door 3/8 inch clear
- Shower panel installation hardware
4. Install a Recessed Medicine Cabinet to Eliminate Mirror Projection
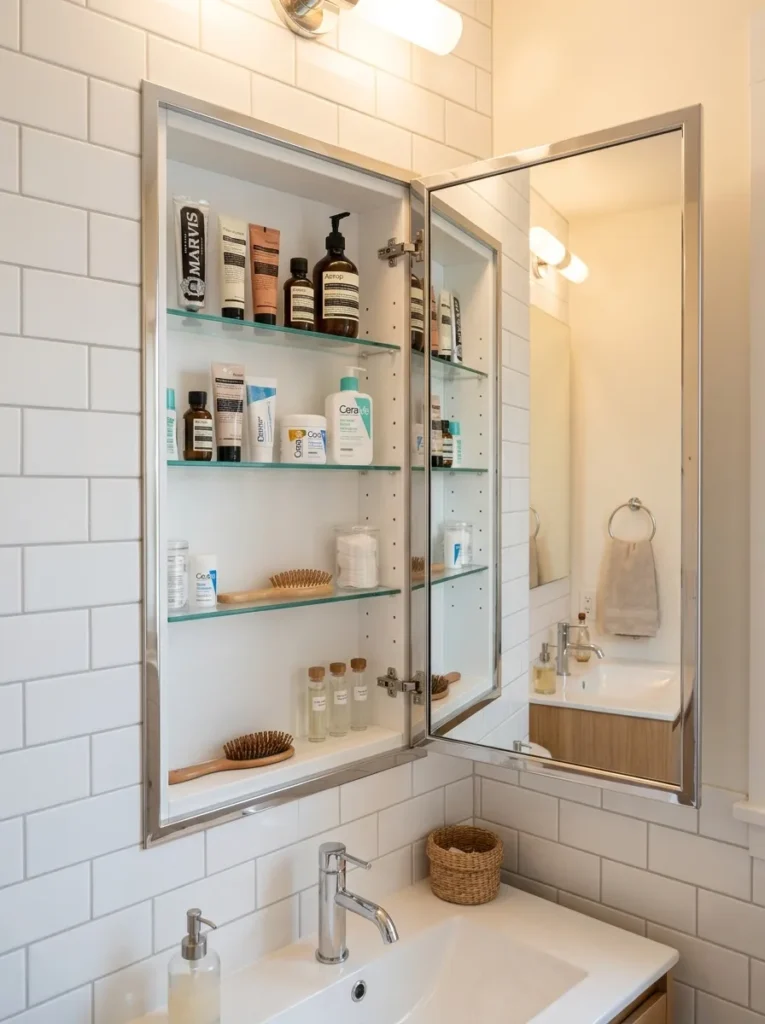
Vibe: The cabinet is invisible — a recessed medicine cabinet that sits flush with the wall surface provides the same storage as a surface-mounted cabinet while occupying zero floor space and zero perceived room volume — the cabinet is present in the wall but not in the room.
Why it works: A surface-mounted medicine cabinet projects 4–6 inches into the bathroom’s already-limited volume, creating a visual obstruction at eye level that makes the bathroom feel more crowded and smaller. A recessed medicine cabinet occupies exactly the same wall volume (the 3.5 inches between wall studs in a standard framed wall) but projects nothing into the room — its face is flush with the wall surface, which means it reads as a wall mirror when closed and as an organized storage cabinet when open. In a small bathroom where every inch of visual and physical clearance is significant, the recessed cabinet’s zero-projection installation is the correct specification regardless of the additional installation complexity it requires. The mirror-fronted recessed cabinet also eliminates the need for a separate vanity mirror purchase — the cabinet door’s mirror serves both functions.
How to get it: Recessed medicine cabinets are installed between wall studs during construction or renovation — the standard 14.5-inch opening between studs accommodates cabinets up to 14 inches wide. For wider installations (24–30 inches), one stud must be removed and a header installed above the opening — this is structural work requiring a contractor if the wall is load-bearing. Recessed medicine cabinets are available from American Standard, Kohler, and specialty bathroom retailers at $80–$600 depending on size and features. Single-door models for small vanities and double-door models for wider installations are both widely available.
Shop The Look
- Recessed medicine cabinet 14 inch flush
- Recessed cabinet double door wide
- Medicine cabinet flush mount mirror
- Recessed cabinet interior organizer
- Adjustable shelf recessed cabinet
5. Choose a Corner Sink or Toilet to Maximize Floor Area
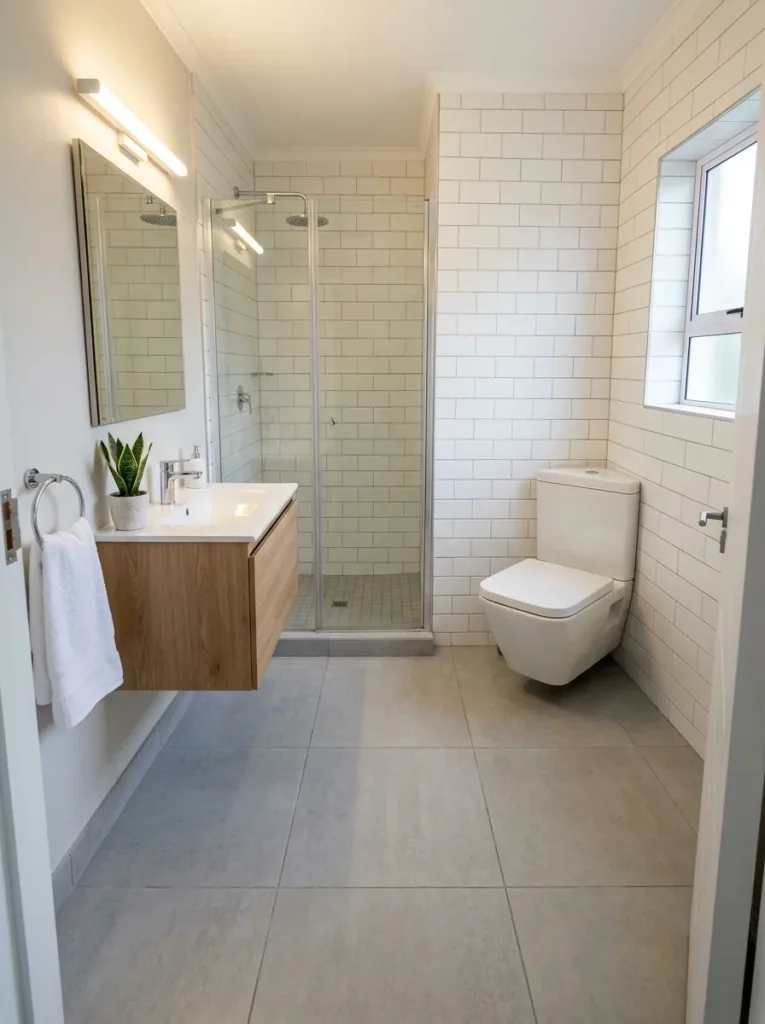
Vibe: The layout is efficient — a corner sink or toilet that uses the room’s least useful spatial zone (the corner) for the fixture occupies no primary wall space and opens the bathroom’s center and primary walls for the clearances that make the room genuinely usable.
Why it works: Corners are the bathroom’s spatially least valuable zones — they are the hardest to access, the most awkward to clean around, and the locations where standard rectangular fixtures (sinks and toilets) create the most wasted space at their sides and rear. A corner-specific fixture (designed with a triangular or angled geometry that fits into a 90-degree corner) occupies exactly the corner volume that would otherwise be wasted clearance space, while freeing the primary wall surfaces (which receive natural light, accommodate storage, and provide the full-width clearances that make a bathroom functional) for use by other fixtures or by open space. A standard 24-inch-wide wall sink on a primary wall requires 12 inches of clearance on each side plus the 24-inch fixture width — consuming 48 inches of primary wall. The same functional sink in a corner installation occupies 18–22 inches of each corner wall rather than 48 inches of a single primary wall.
How to get it: Corner bathroom sinks are available in wall-hung versions ($80–$300 for the sink alone, plus wall bracket) and pedestal versions ($120–$400) in standard triangular geometries designed for 90-degree corner installation. Corner toilets (with a triangular cistern designed to fit into a 90-degree corner) are available at $200–$600 and reduce the toilet’s total wall space requirement from the standard 30-inch minimum to approximately 22–24 inches of each corner wall. Both corner fixtures require plumbing rough-in at the corner position — plan the plumbing layout to accommodate corner fixture positions before any tile or finishing work.
Shop The Look
- Corner bathroom sink wall mount
- Corner toilet compact triangular cistern
- Corner sink pedestal small bathroom
- Wall bracket corner sink mount
- Corner fixture plumbing rough-in guide
6. Extend Tile Into the Shower Niche for Seamless Storage
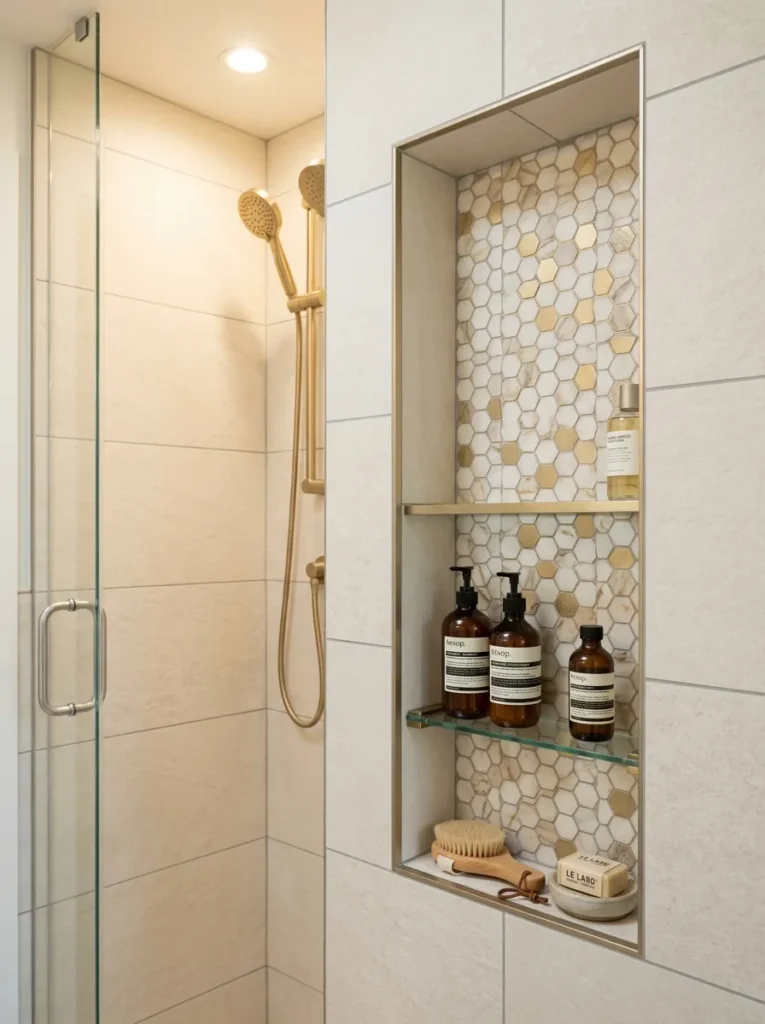
Vibe: The niche is architectural — a recessed shower niche with a contrasting accent tile on the back wall eliminates surface-mounted shower caddies that project into the shower space, keeps products organized at the correct height, and creates a designed detail that improves both the shower’s function and its visual quality.
Why it works: In a small bathroom shower, every inch of space is precious — a surface-mounted shower caddy or rack projects 4–8 inches into the shower’s usable space and reduces the effective shower area proportionally. A recessed niche occupies no shower space (it is built into the wall cavity) while providing equivalent or superior storage. The accent tile on the niche’s back wall creates the specific design detail that elevates the niche from a functional opening to a designed feature — the contained area of contrasting tile within the larger shower tile field reads as an intentional design decision, like a frame within a frame. The correct niche height (bottom of niche at elbow height when standing — approximately 48 inches from the shower floor) ensures that products are accessible without bending or reaching above shoulder height.
How to get it: Shower niches must be framed during rough construction — between studs in a framed wall, or as a projected bump-out if the wall is masonry. The standard framed niche is sized to the stud spacing (14.5 inches wide) and any desired height (typically 12–24 inches). Waterproof the niche interior completely before tiling — the niche’s interior corners are among the most water-vulnerable points in the shower enclosure. Select an accent tile for the back wall that references the main tile’s material family (a mosaic in the same stone type, a smaller format of the same tile, or a complementary material like marble or brass-finish metal mosaic) for design coherence.
Shop The Look
- Shower niche insert waterproof 12×24
- Accent tile mosaic marble niche
- Small hex tile gold niche back
- Niche waterproofing membrane corner
- Shower niche framing kit pre-made
7. Use Vertical Storage to Exploit Ceiling Height
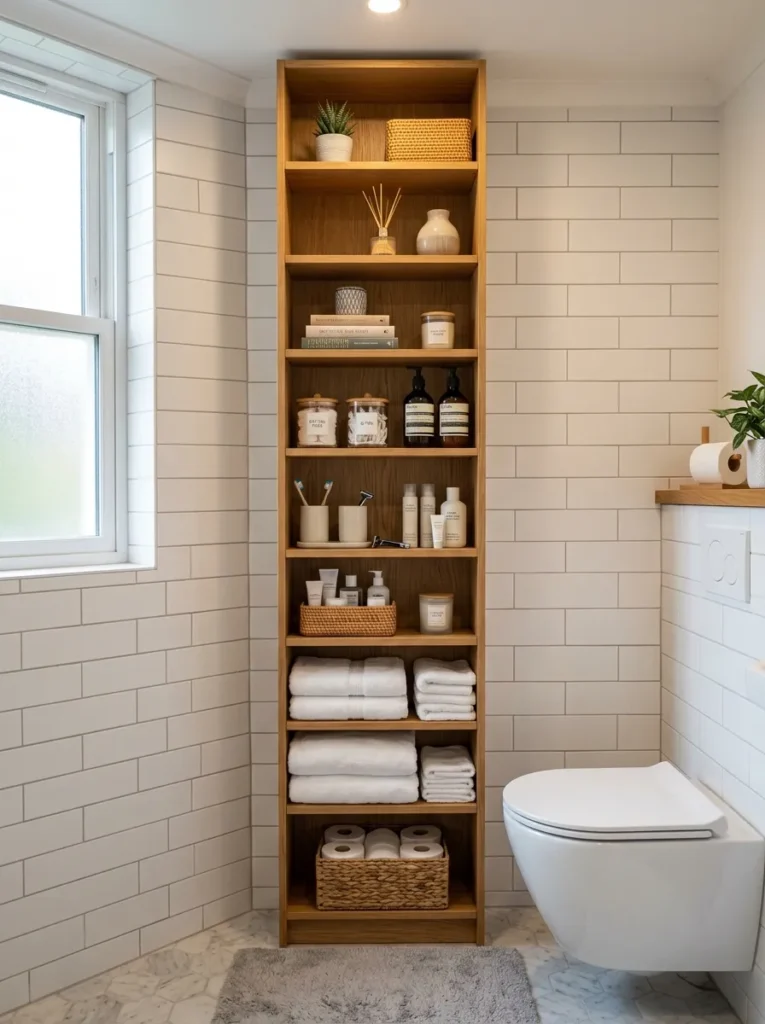
Vibe: The storage is vertical — a floor-to-ceiling slim shelf tower that exploits the full height of the bathroom while occupying only 1–1.5 square feet of floor area creates the maximum storage density available within a small bathroom’s limited footprint.
Why it works: Small bathroom storage almost always has more vertical dimension available than horizontal — the ceiling is typically 8 feet high, while the floor area is limited. A floor-to-ceiling slim shelf tower (10 inches deep by 14 inches wide by 90 inches tall) provides approximately 600 cubic inches of organized storage (6 shelves at 14×10×8-inch depth per shelf) while occupying only 0.97 square feet of floor area — the most storage per floor-area-occupied ratio of any bathroom storage format. The slim depth (8–10 inches) is critical — a deeper unit would project further into the room and reduce clearance, while 8–10 inches provides sufficient storage for bathroom essentials (rolled towels, toiletry bottles, folded face cloths) without meaningful room intrusion. Position beside the toilet (which has existing floor area commitment) rather than in open floor space to minimize the floor area impact.
How to get it: IKEA’s RÅGRUND bamboo corner shelf unit and the VESKEN bathroom series both provide slim vertical storage appropriate for small bathrooms at $20–$50. Custom slim shelf towers built from 3/4-inch plywood ($30–$60 in materials) can be precisely sized to the available space. For the most space-efficient installation, build the tower to extend within 2 inches of the ceiling and within 1 inch of the adjacent wall — precise fitting makes the unit read as built-in rather than added, which improves both its visual integration and its spatial efficiency.
Shop The Look
- Slim bathroom shelf tower floor ceiling
- IKEA VESKEN bathroom shelf unit
- Narrow bathroom storage tower white
- Floor to ceiling shelf tower 10 inch
- Bamboo bathroom shelf tower corner
8. Install Towel Warmers and Heated Rails on the Door or Wall
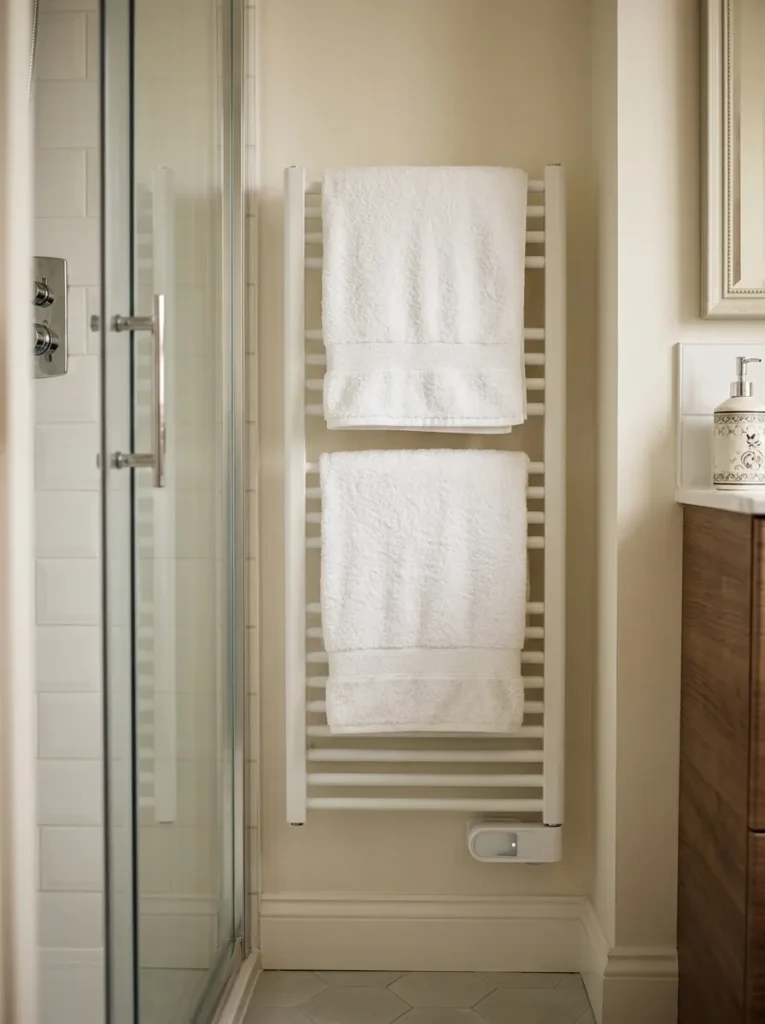
Vibe: The storage is unconventional — mounting towel rails on the bathroom door’s interior face or on a narrow wall section between fixtures puts the towel storage on surfaces that are otherwise unused, recovering real storage capacity from the room’s dead zones.
Why it works: The interior face of the bathroom door is the single most consistently underused surface in any bathroom — it provides 15–20 square feet of vertical surface that receives no plumbing, no electrical, and no structural requirement, and that can be used for towel hanging, robe hooks, or small organizer racks without any permanent installation in most cases. A door-mounted towel rack ($15–$40 from home organization retailers) provides towel storage for a family’s daily-use towels without occupying any wall space or floor space in the bathroom itself. An electric heated towel rail on a narrow wall section (the 6–12-inch wall section between a vanity and a shower, or between a toilet and a wall) places warm, dry towel storage in a previously unused or merely decorative wall zone.
How to get it: Install a door-mounted towel rack (over-the-door hook style, $15–$35) on the bathroom door’s interior face for immediate, installation-free towel storage. For a more permanent installation, mount a slim electric heated towel rail ($80–$200 for plug-in versions, $150–$400 for hardwired versions) on the narrowest available wall section — rails as slim as 14 inches wide are available and provide 3–4 towel hanging positions. Measure the available narrow wall width precisely before purchasing — the selected rail must fit within the available space with a minimum of 2 inches clearance on each side.
Shop The Look
- Over door towel rack bathroom
- Slim electric heated towel rail plug
- Narrow wall towel rail 14 inch
- Door mount towel hook set
- Heated towel rail hardwired slim
9. Choose a Pedestal or Wall-Hung Toilet for Maximum Floor Visibility
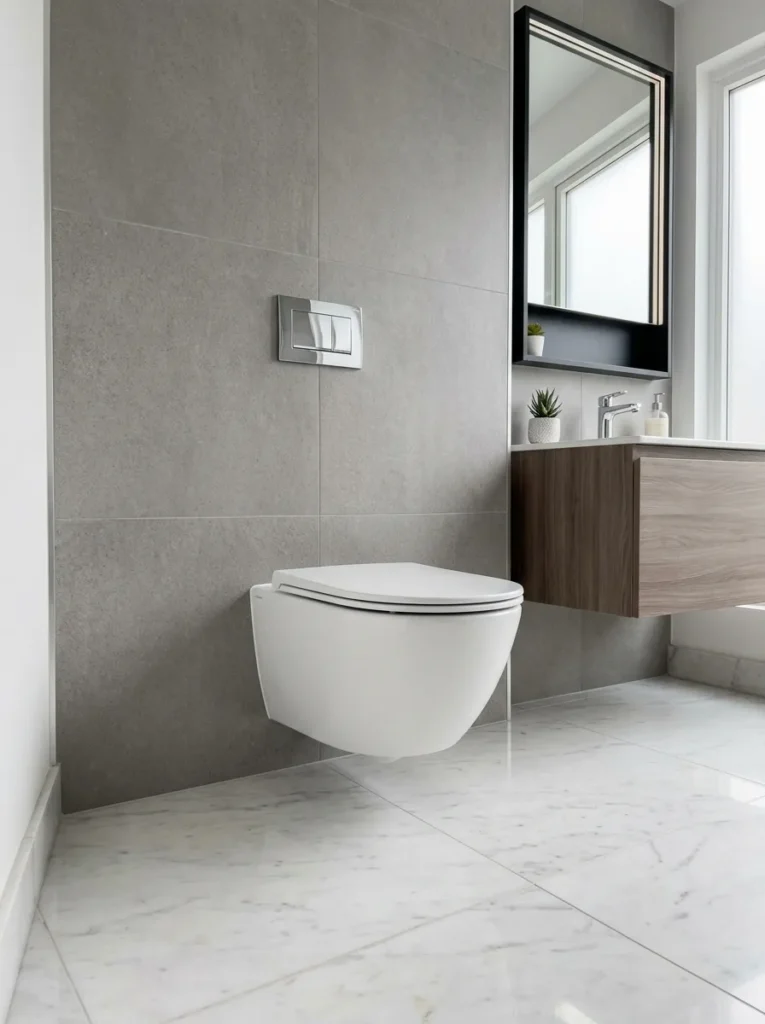
Vibe: The bathroom is clean — a wall-hung toilet with its cistern concealed in the wall and a completely clear floor beneath creates the most spacious and most cleanable toilet installation available, where the continuous floor from front to back makes both the room’s perceived size and its cleaning efficiency dramatically better.
Why it works: The standard floor-mounted toilet with an exposed cistern creates two spatial problems in a small bathroom simultaneously: the cistern’s visual bulk at the back of the toilet (typically 7–12 inches deep and 15–20 inches tall) adds a significant visual mass to the toilet’s rear, and the floor contact of the toilet base creates a zone around the toilet that cannot be cleaned with a mop or cloth in a single pass. A wall-hung toilet eliminates both problems — the cistern is concealed within a carrier frame in the wall, so the toilet presents as a single clean bowl form, and the floor beneath and behind the toilet is entirely clear and accessible for cleaning in a single mop pass. In a small bathroom where the toilet is one of the primary focal elements visible from the doorway, the clean, minimal profile of a wall-hung toilet significantly improves the room’s overall visual quality.
How to get it: Wall-hung toilets require a carrier frame system (from Geberit, Duravit, or TOTO, $250–$500 for the frame) installed within the wall during construction or renovation, before wall finishing. The carrier frame must be anchored to the floor and to wall studs — it is the structural element that supports the toilet’s cantilevered load, which requires robust installation. The toilet bowl mounts to the carrier frame’s two exposed bolts after wall finishing is complete. Total installed cost for a wall-hung toilet system: $800–$2,000 including frame, bowl, and flush plate.
Shop The Look
- Wall-hung toilet bowl white compact
- In-wall toilet carrier frame Geberit
- Flush plate actuator matte black
- Wall-hung toilet seat soft close
- Carrier frame installation guide
10. Maximize Natural Light with a Frosted Glass Window in the Shower
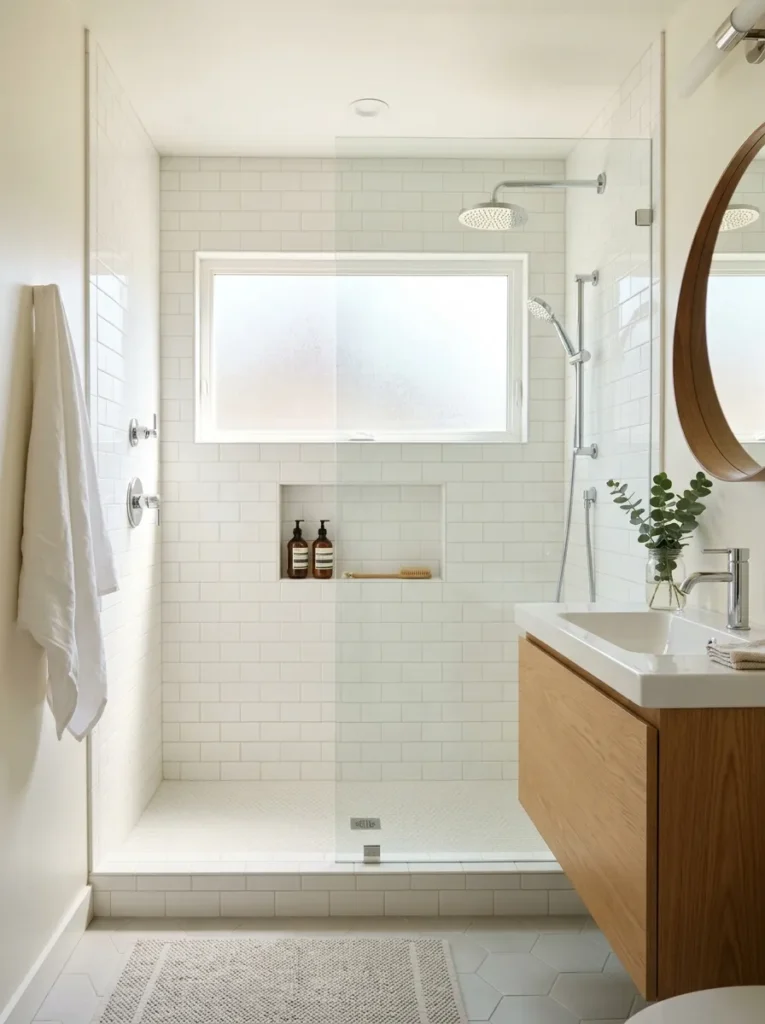
Vibe: The shower is naturally lit — a frosted glass window in the shower wall brings daylight into the bathroom’s most enclosed zone, making the shower feel significantly more open and the overall bathroom significantly brighter and more generous.
Why it works: Natural light is the most powerful spatial enhancement tool available in small bathroom design — a bright, naturally lit space consistently reads as 20–30% larger than the same space in artificial light, regardless of the actual square footage. In small bathrooms, the shower area is typically the darkest zone (enclosed on three sides, often without any natural light access), creating a compressed, cave-like spatial quality that makes the whole bathroom feel smaller and less pleasant. A frosted glass window in the shower wall (frosted for privacy, sized and positioned to maximize light transmission) transforms the shower from the darkest zone to the brightest zone in the bathroom, which reverses the spatial perception entirely. The shower becomes the visual focus that draws the eye rather than a dark zone the eye avoids.
How to get it: A frosted glass shower window is installed in the exterior wall of the shower enclosure — it requires an opening in the exterior wall (for a bathroom on an exterior wall) or a light well (for interior bathrooms) and must be installed with tempered safety glass as required by building codes for wet-zone windows. Specify a horizontal format (wider than tall) to maximize light transmission while maintaining shower splash protection. Position the window bottom at 60 inches from the shower floor to avoid direct splash contact while capturing the most light from the exterior.
Shop The Look
- Frosted glass window shower exterior
- Tempered frosted glass horizontal
- Shower window installation flashing
- Glass block window shower privacy
- Solar tube daylight bathroom interior
11. Install Pocket or Barn Door to Recover Floor Area
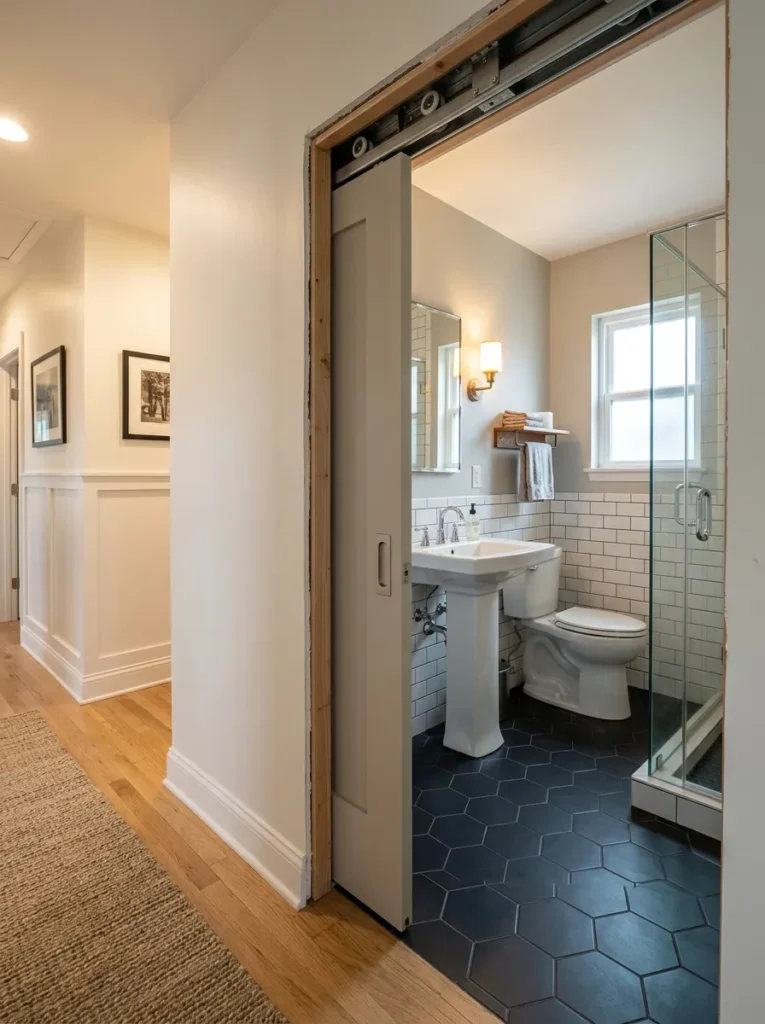
Vibe: The bathroom is recovered — a pocket door that slides into the wall cavity when open eliminates the bathroom door’s swing arc entirely, recovering 6–9 square feet of previously unusable floor area and converting a small bathroom’s most spatially wasteful element into genuinely usable room.
Why it works: The standard hinged bathroom door creates a swept floor area (the door’s swing arc) that must remain permanently clear of any furniture, fixture, or accessory — in a 40-square-foot bathroom, this swing clearance zone can represent 15–20% of the total floor area. A pocket door that slides horizontally into the wall cavity eliminates this swept area completely — the door has no swing arc, and the floor area that the hinged door’s arc occupied becomes immediately available for use. In a small bathroom where every square foot of floor area is significant, the recovery of 6–9 square feet of previously unusable swing clearance can make the difference between a bathroom that feels cramped and one that functions comfortably. A barn door (sliding on a surface-mounted track rather than recessed into the wall) provides the same swing-arc elimination without requiring wall cavity work, though it requires clear wall space beside the doorway for the door to slide into when open.
How to get it: Pocket door installation requires framing a cavity within the wall beside the doorway opening during construction or major renovation — the cavity must be twice the door width (for the door to fully retract) and full door height (typically 80 inches). Pre-fabricated pocket door frame kits ($50–$150) include the track and hardware for installation within the framed cavity. A barn door provides a surface-mounted alternative that requires no wall modification ($150–$400 for door, hardware, and track) but needs at least one full door-width of clear wall space beside the opening on the appropriate side.
Shop The Look
- Pocket door frame kit installation
- Barn door bathroom privacy interior
- Barn door track hardware set
- Pocket door pull hardware flush
- Sliding door bathroom privacy small
12. Use a Monochromatic Color Palette Throughout
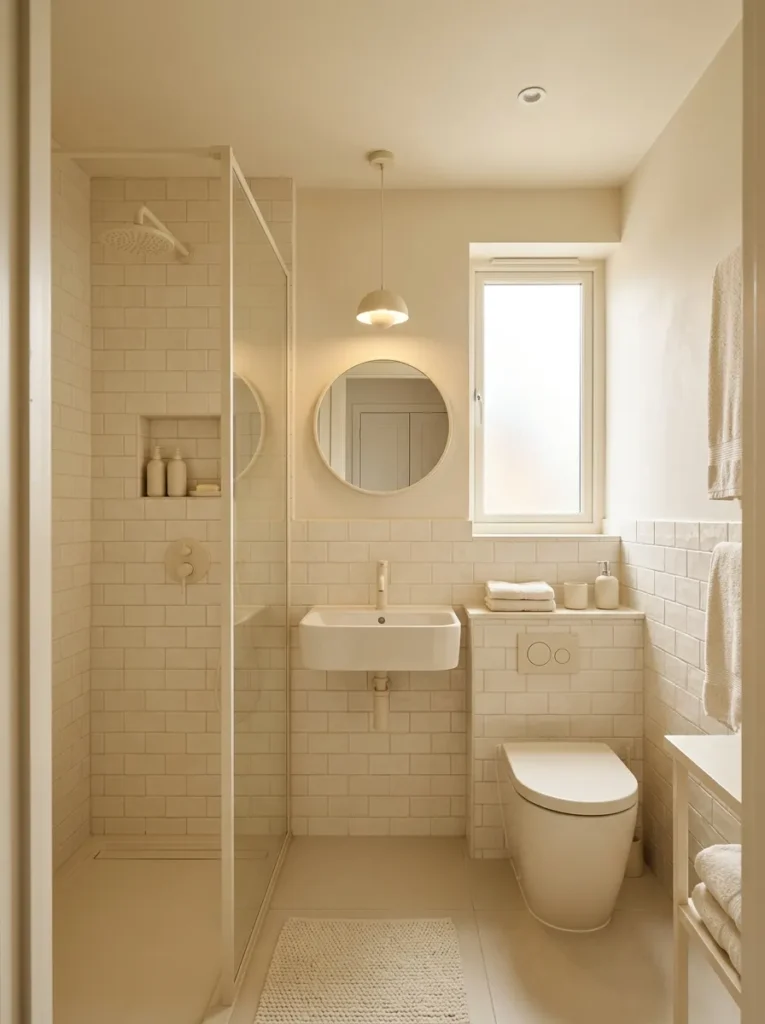
Vibe: The bathroom is serene and expansive — a monochromatic palette that unifies all bathroom surfaces within a single warm tonal family eliminates the contrast boundaries between surfaces that make small rooms feel divided into smaller zones, creating the perception of a single generous volume.
Why it works: Visual contrast between surfaces — the boundary between white wall tile and grey floor tile, between a dark vanity and light walls, between colored accessories and neutral backgrounds — creates perceptual divisions that make a small room read as a collection of smaller, divided areas rather than a single unified space. A monochromatic palette that keeps all surfaces within a single tonal family (allowing slight variation in value and material texture but no significant color contrast) eliminates these visual divisions, making the room read as a continuous, unified volume. The eye, having no color contrast boundary to stop at, travels freely through the entire space and registers it as a single generous area rather than a series of small, separate zones. Warm off-white and warm cream are the most effective monochromatic palettes for small bathrooms because they reflect maximum light while maintaining the warmth that prevents the palette from reading as clinical.
How to get it: Select a single warm neutral tone (warm off-white, warm cream, or warm light greige) and specify it consistently across all bathroom surfaces: floor tile, wall tile, paint (for any surfaces not tiled), fixtures (white or near-white rather than strongly colored), towels, and accessories. Allow natural tonal variation within the palette — a warm cream tile will read slightly differently from warm cream paint, and the variation within the tonal family is the texture that makes the monochromatic palette interesting rather than flat. Avoid introducing any element with strong color contrast — even a single dark towel or a black faucet becomes a significant visual interruption in a successful monochromatic palette.
Shop The Look
- Warm cream tile bathroom monochromatic
- Warm white paint bathroom coordinate
- White bathroom fixtures coordinating
- Cream towel set bathroom neutral
- Warm off-white accessories bathroom
13. Add a Skylight or Solar Tube for Overhead Natural Light
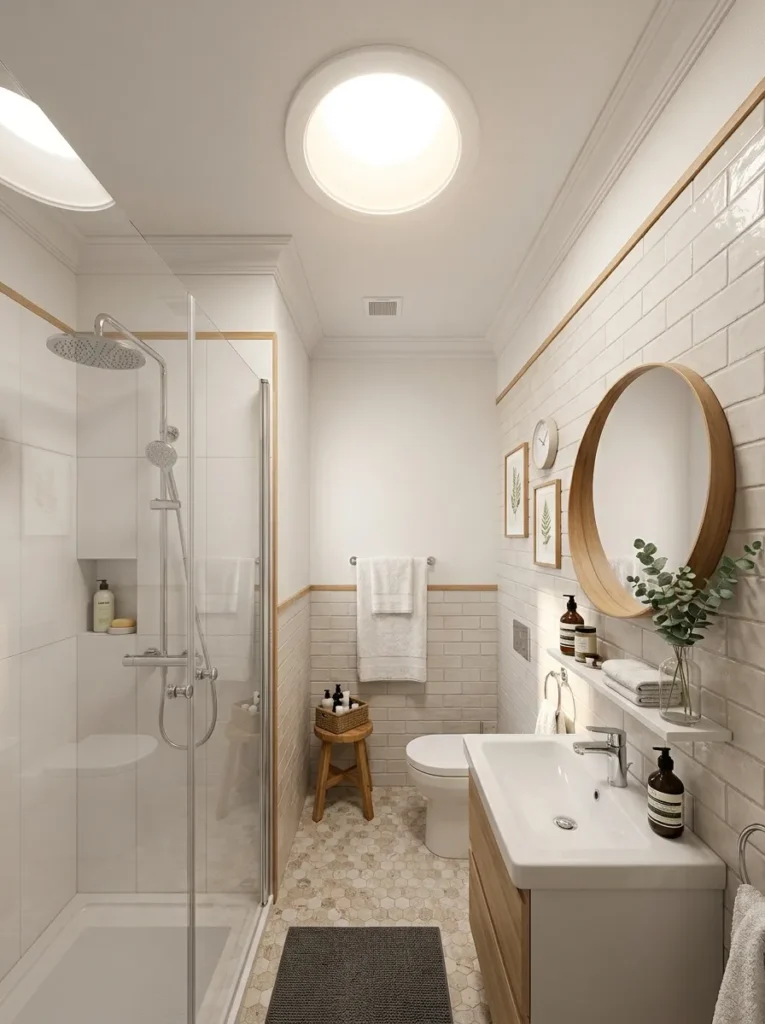
Vibe: The bathroom is spa-like — overhead natural light from a skylight or solar tube fills the bathroom from above with warm, diffused daylight that transforms the small space into a genuinely bright, open environment that feels significantly more generous than any artificial lighting can achieve.
Why it works: Overhead natural light — daylight entering from above rather than from the side — creates the most uniform and most flattering light distribution in a small bathroom because it illuminates all horizontal surfaces (the floor, the counter, the top of the toilet) equally and reaches the room’s corners without the directional shadows that side windows create. In bathrooms on upper floors or with roof access, a skylight (a fixed or operable glazed opening in the ceiling) provides the highest-quality overhead natural light available — the direct sky view creates a connection to the outdoors that transforms the bathroom’s spatial quality. A solar tube (a tubular skylight that collects daylight at the roof through a dome collector and delivers it through a reflective tube to a ceiling diffuser) provides significant overhead natural light even in bathrooms not adjacent to the roof — the tube can be angled and routed through ceiling framing, making it accessible to bathrooms on lower floors in multi-story homes.
How to get it: Solar tubes ($200–$600 for the unit plus $200–$500 for installation) are the most cost-effective overhead natural light option for bathrooms not adjacent to the roof — they can be installed in a single day and create dramatic light improvements in dark bathrooms. Skylights ($500–$2,000 for the unit plus $500–$2,000 for installation depending on complexity) provide higher light levels and a genuine sky connection but require roof access and more complex installation. Both options should be installed by a licensed roofer to ensure waterproofing integrity at the roof penetration.
Shop The Look
- Solar tube skylight bathroom small
- Tubular daylight device ceiling kit
- Skylight fixed bathroom ceiling install
- Solar tube dome collector roof
- Ceiling diffuser round daylight
14. Style with Minimal Accessories on Every Surface
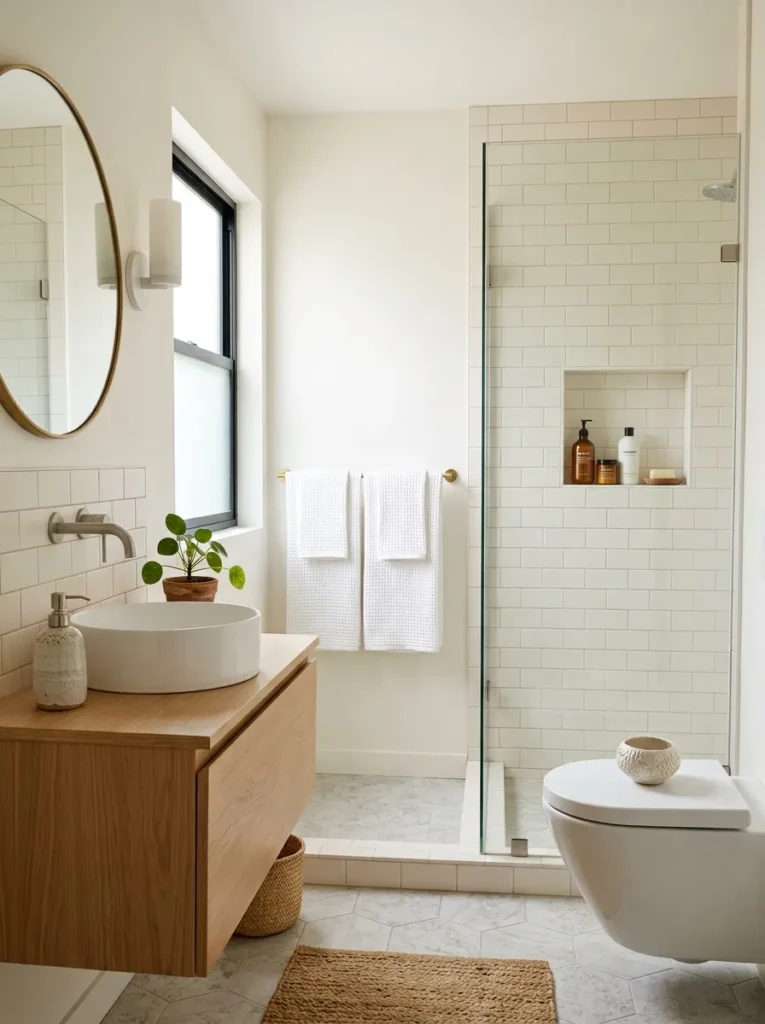
Vibe: The bathroom is designed — extreme surface restraint in a small bathroom creates the spa-like quality of a hotel bathroom where every object on every surface has been deliberately placed, and the abundance of clear surface communicates intentional design rather than incomplete decoration.
Why it works: In a small bathroom, every object on every surface occupies a proportionally larger share of the room’s total visual field than the same object in a larger room — a soap dispenser, a candle, a plant, and three decorative objects on a 24-inch vanity counter occupy approximately 30% of the vanity’s visible surface and contribute significantly to the room’s perceived density. Removing all but the absolute essentials from every surface (the three-object rule maximum per surface) frees the visual field of the small bathroom, making the room’s material quality (the tile, the fixture, the vanity material) the visual story rather than the accumulation of objects placed on top of it. The minimal styling principle for a small bathroom is specific: one soap dispenser and one small plant on the vanity counter; three or fewer products in the shower niche; one or two neatly folded white towels on the towel rail; and nothing on the toilet tank.
How to get it: Apply the minimal styling principle through systematic removal — take everything off every bathroom surface and return only the absolute essentials. Apply the three-object maximum per surface strictly: vanity (soap dispenser, hand lotion, one small plant — maximum), shower niche (shampoo, conditioner, body wash — nothing else), towel rail (one or two towels — maximum). Store all other items in the medicine cabinet, under-sink cabinet, or vertical shelf tower. Replace plastic packaging with refillable ceramic or glass containers for the objects that remain on surfaces — a ceramic soap dispenser reads as a designed object while a plastic soap bottle reads as a consumer product, and the distinction significantly affects the bathroom’s perceived quality.
Shop The Look
- Ceramic soap dispenser minimal
- Small terracotta pot bathroom plant
- White towel set minimal fluffy
- Refillable glass shampoo dispenser
- Minimal bathroom accessory set
How to Approach Your Small Bathroom Transformation
The correct sequencing for a small bathroom transformation — regardless of budget — is spatial decisions first, material decisions second, and accessory decisions last. Every dollar spent on tile, fixtures, and finishing materials produces maximum return only when the spatial decisions (layout, fixture placement, storage integration, lighting position) have already been made correctly. A beautiful tile in a poorly laid-out bathroom does not fix the layout; a well-planned layout with modest tile and quality lighting produces a bathroom that feels genuinely good to use. The most common small bathroom renovation error is beginning with material selection (choosing tile and fixtures first) and then discovering that the spatial problems — insufficient storage, poor lighting, inadequate floor clearance — remain regardless of how beautiful the materials are.
The most impactful small bathroom improvement available at zero cost is removing half the objects from every surface in the bathroom and keeping them removed for two weeks. This single subtraction — which costs nothing, requires no installation, and can be reversed immediately — changes the perceived size of the bathroom by approximately 20% by freeing the visual field of accumulated object density. Most bathroom users discover after this experiment that they do not miss the removed objects and do not return them to the surfaces. The bathroom they see after two weeks is closer to the correctly styled bathroom than the one they started with, and it provides a much more accurate baseline for understanding which additions and changes will actually improve the room.
Three small bathroom upgrades under $80 that produce immediate, significant improvement without any construction: replacing all bathroom surfaces’ accumulated accessories with a maximum of three per surface ($0 — through removal); replacing existing light bulbs with warm 2700K LED versions and adding a simple plug-in vanity sconce beside the mirror for bilateral face lighting ($20–$50); and replacing a shower curtain with a clear PEVA liner on the existing rod ($8–$20) as an interim step toward frameless glass, which immediately opens the shower visually to the rest of the room and creates the transparency benefit of glass at a fraction of the cost.
A complete smart small bathroom transformation — floating vanity, floor-to-ceiling same tile, frameless glass shower, recessed medicine cabinet, wall-hung toilet, pocket door, overhead natural light, and minimal styling — represents a significant renovation investment of $8,000–$25,000 depending on the specific fixtures and materials chosen. The return on this investment — in daily quality of life, in the bathroom’s contribution to the home’s overall value and livability, and in the elimination of daily spatial frustrations that accumulate into significant quality-of-life deficits — makes small bathroom renovation one of the highest-return investments available in residential property improvement.
Frequently Asked Questions About Small Bathroom Design
What is the single most important change I can make to a small bathroom?
The floating vanity is consistently the highest-impact single change available in a small bathroom that has not already been optimized — it creates visible floor space, provides storage, and elevates the room’s visual quality simultaneously. However, if the bathroom already has a floating vanity or the installation is not feasible, the second most impactful change is replacing the shower curtain with a clear frameless glass panel, which opens the shower visually to the rest of the room and adds the shower’s full square footage to the perceived room space. Both changes require construction work — the highest-impact zero-construction change is systematic surface clearing, which costs nothing and creates an immediate 20–30% perceived size improvement.
How do I make a small bathroom feel bigger without renovation?
Four specific design actions make a small bathroom feel significantly larger without any construction: first, remove all but the absolute essential objects from every surface (maximum three objects per surface — the reduction in visual density creates an immediate perceived size increase); second, replace the shower curtain with a clear plastic liner on the existing rod ($8–$20), which opens the shower visually to the rest of the room; third, hang a large mirror (or the HOVET mirror discussed elsewhere in this article) on the wall opposite or perpendicular to the window, which doubles the perceived depth of the room and amplifies natural light; fourth, replace all existing light bulbs with warm 2700K LED versions and ensure the vanity is lit by bilateral side lighting rather than a single overhead fixture. These four changes together create a noticeably more generous bathroom without any permanent modification.
What tile makes a small bathroom look bigger?
Large format tile (24×24 inch minimum) in a single warm neutral tone, used on both the floor and the walls, with matching grout color, creates the most significant size-expansion effect of any tile choice. The large format reduces the number of grout lines, which reduces the visual grid that makes spaces feel smaller. The same tile on floor and walls eliminates the floor-to-wall boundary that divides the room perceptually into smaller zones. The matching grout further reduces the grid’s visual prominence. Warm neutral tones (warm cream, warm off-white, warm light grey) in a matte or honed finish reflect sufficient light to brighten the room while the warm undertone prevents the clinical quality of pure cool white. The single change most likely to make a small bathroom feel smaller is the opposite: small tile format (1×1 or 2×2 inch mosaic) on all surfaces, which creates a high-frequency visual grid that makes the brain read the space as a collection of small units rather than a single generous volume.
How do I create storage in a small bathroom without a renovation?
The three most effective non-renovation storage additions for a small bathroom are: a door-mounted rack on the bathroom door’s interior face (immediately adds 3–6 hook positions and one or two shelf levels for zero floor and wall space); a slim over-toilet shelving unit (a freestanding ladder or A-frame shelf that straddles the toilet tank, adding 3–4 shelf levels above the toilet in the space that would otherwise be empty ceiling volume above the toilet); and a recessed shower shelf insert (a pressure-fit shelf that fits between existing tile without adhesive or drilling, adding product storage within the shower enclosure without a recessed niche). These three additions together can add 20–30 additional storage positions to a small bathroom for $60–$150 in total materials.
What color should I paint a small bathroom?
The most space-expanding color choice for a small bathroom is a warm white or warm off-white with a yellow-red undertone (not a cool or blue-toned white, which makes the room feel cold and slightly smaller). Warm white reflects maximum light while the warm undertone prevents the clinical quality of pure white, creating a bathroom that feels both bright and genuinely pleasant to be in. The specific paint tone matters less than the undertone — Benjamin Moore White Dove OC-17, Sherwin-Williams Alabaster SW 7012, and Farrow & Ball Wimborne White No. 239 are three warm whites that have performed consistently well in small bathroom applications. If the decision is specifically about whether to use color at all versus staying with white: a monochromatic warm tone throughout (all surfaces in the same warm cream family) consistently outperforms both pure white and colored walls in small bathroom spatial perception, because the tonal unity eliminates the contrast boundaries that divide the room into smaller-reading zones.
Ready to Transform Your Small Bathroom?
These 14 ideas cover the full spectrum of what smart small bathroom design can achieve — from the floor-clearing spatial generosity of a floating vanity and a wall-hung toilet to the visual continuity of floor-to-ceiling same tile and a monochromatic palette, from the transparency benefit of frameless glass and the overhead light magic of a solar tube to the storage intelligence of a recessed medicine cabinet and a vertical shelf tower, from the layout efficiency of corner fixtures and a pocket door to the surface restraint of minimal styling that lets every material quality decision speak for itself. You do not need all 14 to create a small bathroom that genuinely works — you need the three or four decisions that most directly address your specific bathroom’s most significant spatial, functional, or organizational limitations. Start with the surface clearing today — remove everything from every surface, keep only the absolute essentials, and spend a week in the bathroom you reveal. That bathroom, seen clearly without its accumulated objects, will tell you exactly what it needs next. Pin the ideas that named your bathroom’s specific challenges — those are the ones worth implementing first.