13 Easter Craft Night Ideas Everyone Will Enjoy
An Easter craft night is a deliberately organized creative gathering — for families, friends, or mixed-age groups — centered on making seasonal handmade objects together, with projects selected for their accessibility across skill levels, their visual appeal, and their ability to generate genuine conversation and shared enjoyment alongside the making. Here are 13 ideas for hosting an Easter craft night that produces beautiful objects and genuinely good memories.
The best craft nights aren’t about the crafts. They’re about the particular quality of attention that making something by hand creates — the way hands occupied with a task free the mind for the kind of unhurried conversation that doesn’t happen at dinner tables or across phone screens. Easter’s specific material vocabulary — eggs, botanicals, pastel palettes, the particular quality of early spring — gives a craft night a seasonal richness that’s worth building an evening around. Here are 13 ideas worth gathering for.
Why Easter Craft Night Ideas Work So Well
What makes Easter specifically well-suited to a craft night gathering? Easter occupies a unique position in the seasonal calendar as a holiday with an exceptionally rich material and visual vocabulary — natural eggs in their varied forms, spring botanicals at their freshest, the specific palette of early spring (blush, sage, butter yellow, soft lavender, warm cream) — that provides natural aesthetic coherence to any evening’s creative output. Unlike some holiday craft occasions where the aesthetic is commercially predetermined (red and green Christmas, orange and black Halloween), Easter’s craft palette is genuinely beautiful and genuinely varied, which means participants making different projects across the same evening produce objects that feel visually related without being identical.
Core materials and approaches for Easter craft nights. The most successful Easter craft night material selections prioritize: accessibility for all skill levels (projects completable in 30–60 minutes without prior experience), aesthetic payoff visible within a single session (things that look genuinely beautiful by the end of the evening), and materials that travel well to a hosting location (pre-portioned into individual kits, no hazardous materials, minimal specialist tools). Eggs — both natural and faux — are the natural center of Easter craft projects, but the most interesting Easter craft nights expand beyond egg decoration into botanical projects, textile crafts, paper crafts, and edible making that share the seasonal aesthetic without requiring everyone to hold an egg.
Why mixed-age Easter craft nights work better than age-segregated ones. The most memorable Easter craft nights are intergenerational — they bring children, parents, and grandparents to the same table with the same materials and let the age-varied group produce strikingly different results from identical starting points. A child pressing flowers onto a blown egg, a teenager doing intricate wax resist patterns on the same egg, and a grandparent doing a precise botanical drawing on paper beside them are all doing the same fundamental thing — engaging with the season’s material through a making practice — and the conversation between these different practices is where the evening’s genuine warmth is generated.
Can Easter craft nights be hosted successfully without advanced preparation? The most important preparation for any craft night is material organization — pre-portioning materials into individual project kits (everything one person needs for one project, contained together) dramatically reduces the in-session friction that disrupts creative flow and derails mixed-age gatherings. Beyond that, the most successful Easter craft nights have three to four project options available (not just one — different participants have different interests and comfort levels) and a clear table setup that allows making to begin immediately upon arrival.
Seasonal Style at a Glance
| Element | Detail |
|---|---|
| Philosophy | Making together creates conversation that conversation alone cannot |
| Key Materials | Natural eggs, botanical materials, beeswax, natural dyes, watercolor |
| Key Palette | Blush, sage, butter yellow, soft lavender, warm cream, dusty teal |
13 Easter Craft Night Ideas Everyone Will Enjoy
1. Natural Botanical Egg Decoration — Pressed Flower Wrapping
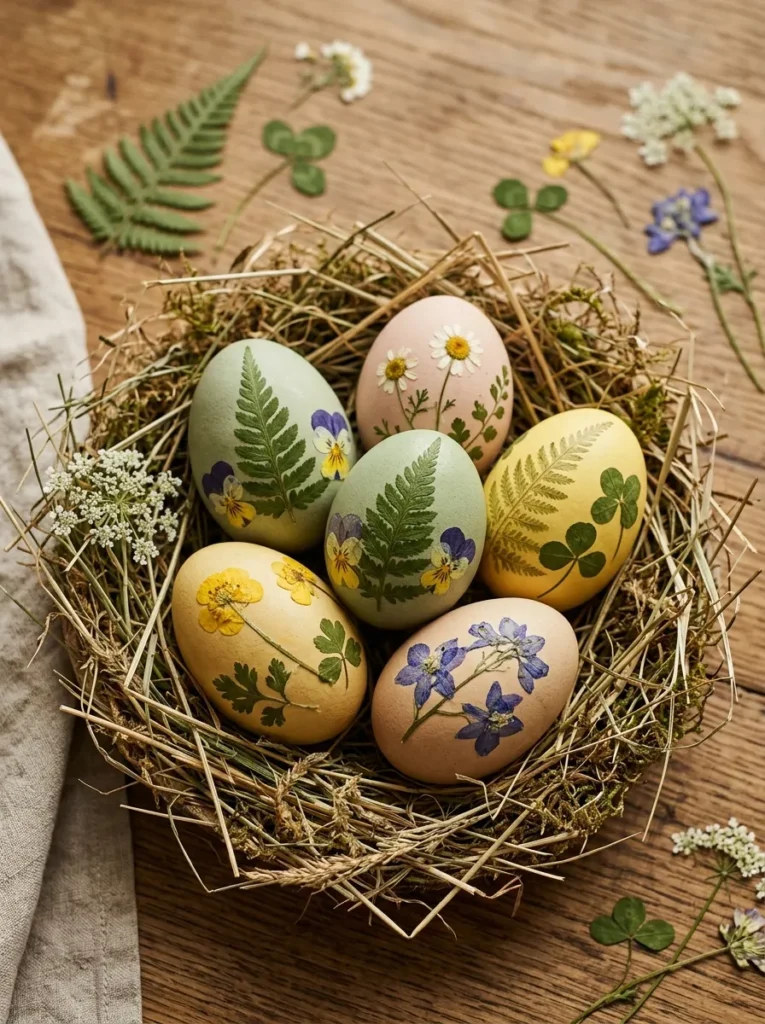
Vibe: Botanical pressed egg decoration feels specifically natural — the Easter egg that looks like the season made it rather than a craft store.
Why it works: Wrapping botanicals around eggs during natural dyeing is the Easter egg technique that most directly references the natural world — the pressed botanical impression on the dyed egg surface creates the visual quality of a natural specimen, as though the flower transferred itself to the egg at the moment of spring. The design principle is natural material as direct decoration: rather than painting or drawing a botanical onto the egg’s surface, this technique uses the actual botanical as the decorative element, which gives the finished egg a specificity and authenticity that representational decoration cannot achieve. No two botanical eggs are identical because no two pressed specimens are identical — which means the evening’s collective output is a genuinely varied collection of individual objects.
How to get it: Gather small botanical specimens (fern fronds, pansy flowers, clover, small leaves) and dampen slightly. Press each specimen against the surface of a raw or hard-boiled egg and wrap tightly in a piece of natural silk fabric (or panty hose) to hold the specimen in place during dyeing. Dye the wrapped egg in a natural dye bath (red onion skins produce sage green on white eggs, yellow onion skins produce warm gold, turmeric produces bright yellow, red cabbage produces blue-grey). Remove from dye after 20–40 minutes, unwrap carefully, and remove the botanical — the egg’s surface will show the negative space impression of the botanical surrounded by the dye color.
Quick Win: Pre-dampen botanical specimens and pre-cut silk or pantyhose wrapping pieces into individual kits before the craft night — the wrapping step is the one that benefits most from pre-preparation and the one most likely to cause in-session frustration if materials aren’t ready.
Shop The Look
| Product |
|---|
| Natural dye kit onion skin turmeric egg |
| Dried botanical press kit flower specimens |
| Natural silk squares for egg wrapping |
| White eggs for dyeing craft |
| Egg display stand set wooden |
Also view: 15 Easter Crochet Patterns for Spring Decor
2. Beeswax Resist Pysanky-Inspired Egg Decoration
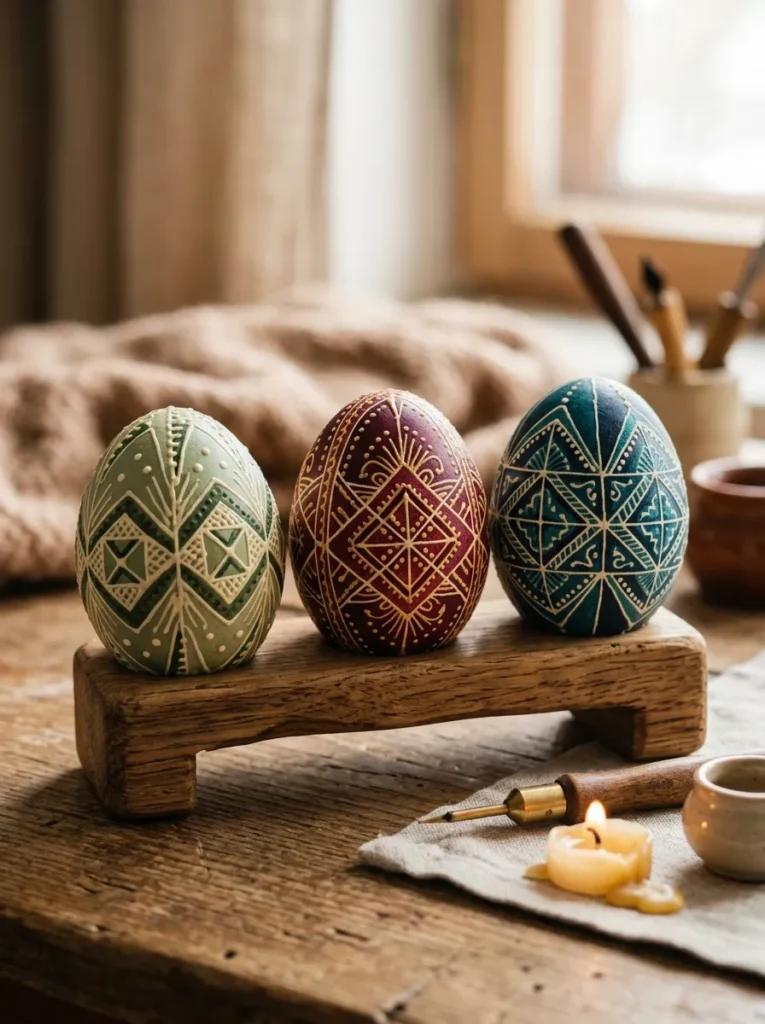
Vibe: Pysanky-inspired beeswax resist eggs feel intricately beautiful — the Easter craft that rewards patience with results that look genuinely extraordinary.
Why it works: The wax resist technique — drawing molten beeswax onto the egg’s surface before each dye bath, which protects the egg’s color at that point from subsequent dye layers — creates layered, multi-colored patterns of considerable visual complexity from a technique that is accessible to any age group willing to work slowly. The design principle is additive complexity through sequential resist: each additional layer of wax resist and dye adds a new color element to the egg’s surface pattern, building the final complex design through a series of simple individual steps rather than requiring the maker to execute a complex design at once. This sequential simplicity is what makes pysanky-inspired decoration achievable for craft night participants at all skill levels.
How to get it: Set up individual craft kits with a white egg, a small kistka (the traditional heated stylus used for wax application — inexpensive versions are widely available from Ukrainian cultural suppliers and craft stores), a candle for heating the kistka, and dye baths in at least three colors in light-to-dark sequence (yellow first, then orange or green, then the darkest color last). Apply wax to the areas of the egg where the first color (the egg’s natural white) should be preserved. Dye in the first color. Apply wax to preserve those areas. Continue through the color sequence, applying wax after each dye bath to preserve each subsequent color.
Shop The Look
| Product |
|---|
| Kistka wax stylus tool set pysanky |
| Beeswax block for resist technique |
| Pysanky dye set Ukrainian Easter |
| White egg stand display set |
| Candle holder for kistka heating |
3. Watercolor Easter Egg Painting on Paper
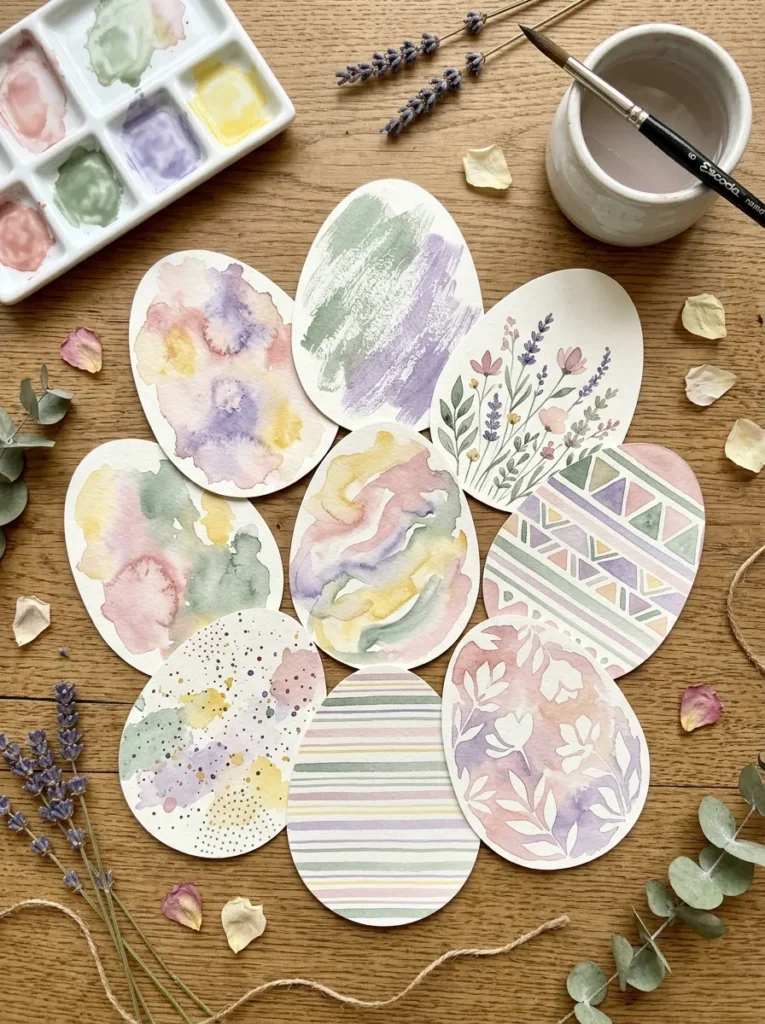
Vibe: Watercolor egg paintings feel artfully seasonal — the Easter craft that produces something displayable on the wall rather than on the mantel.
Why it works: Painting watercolor Easter eggs on paper rather than actual eggs shifts the Easter craft from a functional decorating activity to a fine art activity — the finished watercolor egg shapes are framed prints rather than seasonal objects, which gives them a longevity and displayability that decorated eggs lack. The design principle is seasonal form as art subject: the egg shape is both compositionally satisfying (an elegant oval with gentle proportional relationships) and symbolically resonant for the season — using it as a watercolor subject produces seasonal art rather than seasonal decor. Multiple participants painting the same egg outline with different watercolor approaches produces a compelling collective display of the evening’s work.
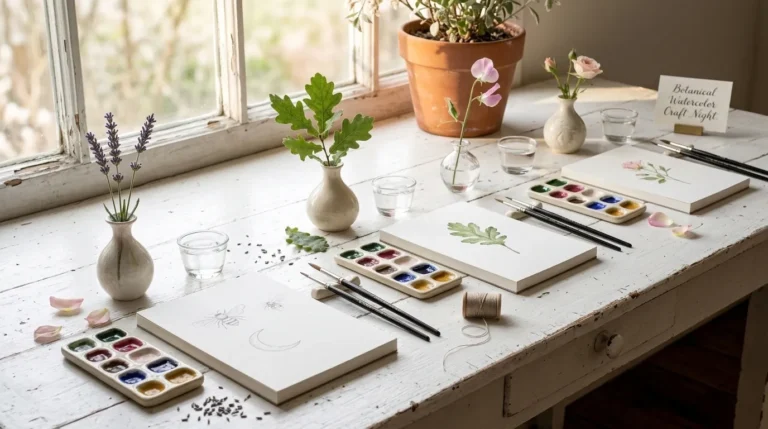
How to get it: Pre-cut or pre-trace egg outlines on sheets of 300gsm cold-press watercolor paper for each participant — providing the outline removes the drawing step that might inhibit non-artists and allows everyone to focus on the painting. Set up individual painting stations with a small watercolor palette in the Easter palette (blush, sage, butter yellow, lavender, and warm cream), two brushes (a size 8 round for washes and a size 3 round for details), a water jar, and the pre-traced egg sheets. Offer two to three technique guidance cards (wet-on-wet bleeding, dry brush texture, simple botanical motifs) that participants can attempt or ignore as they prefer.
Shop The Look
| Product |
|---|
| Watercolor paper 300gsm cold press sheet |
| Watercolor paint set spring palette |
| Round watercolor brush set size 3 8 |
| Egg outline template for tracing |
| Small water jar set for craft table |
4. Natural Egg Dyeing with Kitchen Ingredients
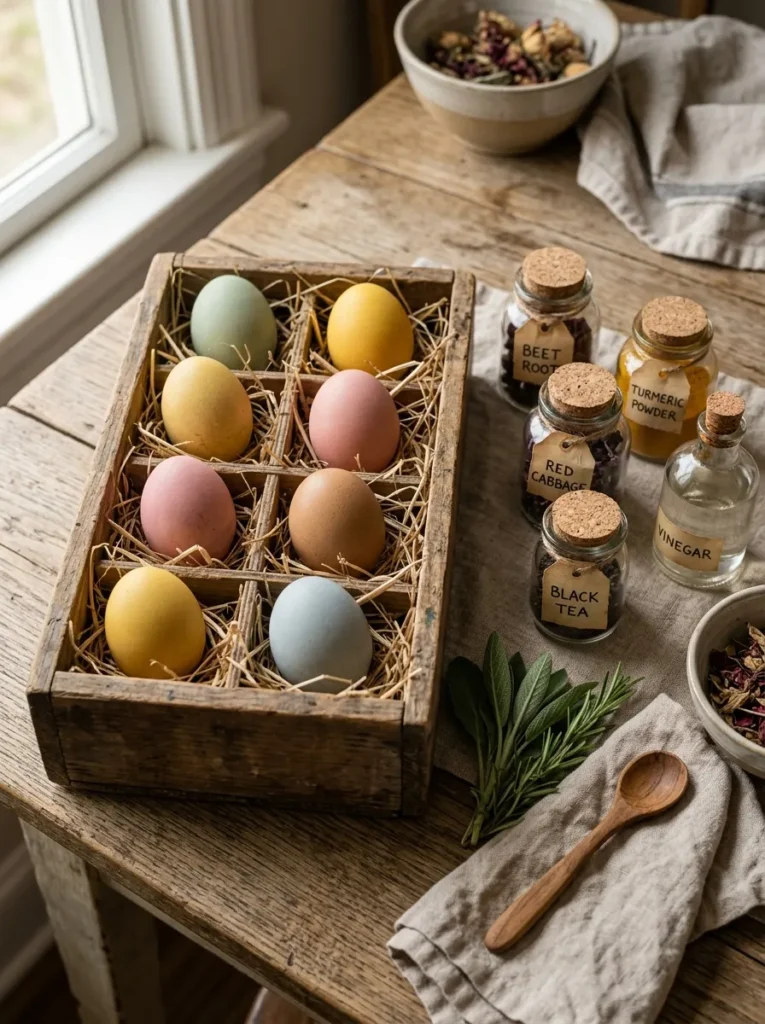
Vibe: Natural kitchen-dyed eggs feel warmly authentic — the Easter tradition that tastes like the season and looks like it was made by someone who genuinely cared.
Why it works: Natural dyeing with kitchen ingredients is the Easter craft activity that most effectively bridges making and cooking — the dye baths are prepared from actual food ingredients (turmeric, red cabbage, beet, onion skins, black tea) that most households contain, which makes the craft feel continuous with the domestic kitchen rather than separate from it. The design principle is material familiarity as creative accessibility: when the materials for a craft are the same materials as the kitchen pantry, the activity feels immediately approachable rather than requiring special supplies. The muted, sophisticated tones that natural dyes produce are also significantly more beautiful than the bright synthetic commercial egg dyes most people grew up using — which creates the satisfying surprise that the simplest ingredients produce the most elegant results.
How to get it: Prepare dye baths in advance of the craft night: simmer each natural dye material in water for 30 minutes, strain, add a splash of white vinegar, and cool to room temperature before participants arrive. Label each dye bath clearly with its color name and expected color result. For the craft night, participants lower hard-boiled (or blown) white eggs into the dye baths and leave for 20–60 minutes, checking color development every 15 minutes. Beet produces blush-pink, turmeric produces golden yellow, red cabbage produces sage-blue (with vinegar) or pink-blue (without), black tea produces soft brown, and red onion skins produce terracotta-sage.
Shop The Look
| Product |
|---|
| White eggs for natural dyeing |
| Turmeric powder for golden yellow dye |
| Red cabbage for blue sage dye |
| White vinegar for dye mordant |
| Wooden egg crate for display |
5. Decoupage Easter Eggs with Tissue Paper
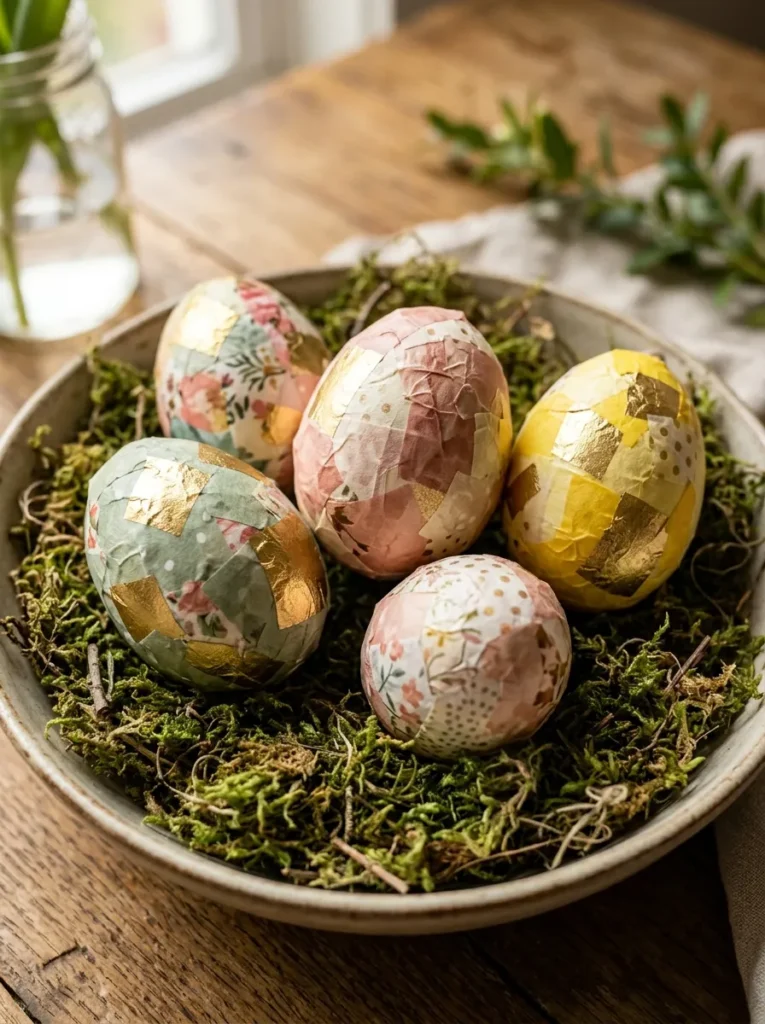
Vibe: Decoupage tissue paper eggs feel colorfully layered — the Easter craft that turns the simplest materials into something surprisingly rich-looking.
Why it works: Decoupage with tissue paper is the Easter egg technique most accessible to the youngest craft night participants — it requires only torn paper pieces, Mod Podge, and a brush, and produces a finished result within 20–30 minutes that looks visually rich and deliberately layered. The design principle is overlapping color as visual depth: tissue paper decoupage creates color depth through the layering of semi-transparent pieces — where two tissue colors overlap, a third color is created, which gives the egg’s surface a complexity that any single applied color cannot achieve. The slight translucency of tissue paper also allows the egg’s base color to influence the final surface color through the layers, creating a warmth in the finished piece that opaque decoupage paper cannot.
How to get it: Pre-tear tissue paper into irregular pieces 2–4 cm across and organize by color into small trays at the craft table — the pre-tearing step saves time during the session and keeps the table organized. Participants brush a thin layer of Mod Podge onto the egg surface, press a tissue piece onto the wet glue, brush another layer of Mod Podge over the top, and repeat until the egg is covered. Applying tissue pieces in varied directions and overlapping different colors produces the most interesting result. Finish with two to three coats of matte or gloss Mod Podge over the full surface.
Shop The Look
| Product |
|---|
| Tissue paper set spring Easter palette |
| Matte Mod Podge for decoupage |
| Faux wooden eggs for decoupage base |
| Foam brush set 1 inch for Mod Podge |
| Dried moss for egg bowl display |
6. Painted Clay Easter Ornaments
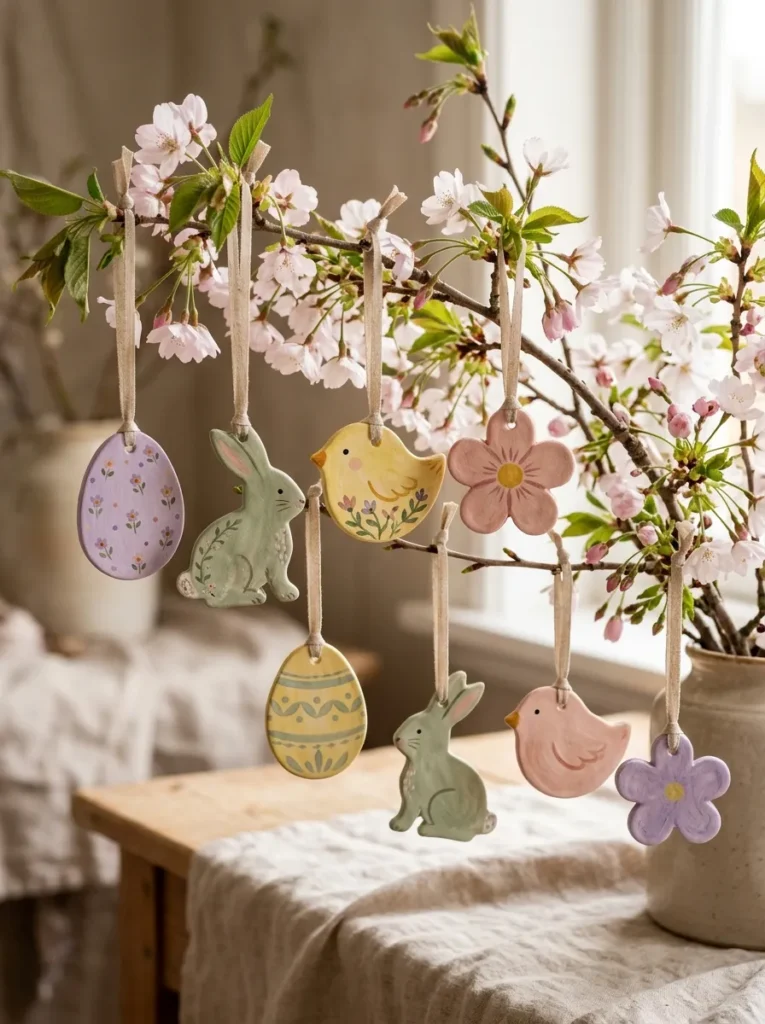
Vibe: Painted clay Easter ornaments feel charmingly handmade — the seasonal decoration that children make and adults keep for years.
Why it works: Air-dry clay ornaments combine the tactile pleasure of clay work with the painting step that most participants enjoy most — the two-stage process (shape first, paint second) creates a satisfying narrative within the craft night, and the finished painted ornament has the warmth of a handmade ceramic object without requiring a kiln. The design principle is tactile making followed by visual completing: the clay shaping step engages participants at a physical, three-dimensional level, and the painting step allows visual personal expression — together they cover two distinct creative modes in a single project, which keeps participants of varied temperament and preference engaged throughout.
How to get it: Pre-cut clay into portions (approximately 30–40g per ornament) and provide rolling pins and simple cookie cutter shapes (egg, bunny, chick, flower). Participants roll clay to 5mm thickness and cut shapes. Pierce a hole at the top with a straw or toothpick before the clay dries. Allow to dry (clay ornaments made during the craft night can be painted at the same session if thinly rolled — they dry to a paintable surface in 60–90 minutes). Paint with diluted watercolor or thin acrylic washes. Thread a ribbon through the hole when dry.
Shop The Look
| Product |
|---|
| Air dry clay white 1kg for group |
| Easter cookie cutter set egg bunny |
| Watercolor set spring palette for painting |
| Ribbon set Easter palette for hangers |
| Rolling pin small for clay rolling |
7. Pressed Flower Cards and Gift Tags
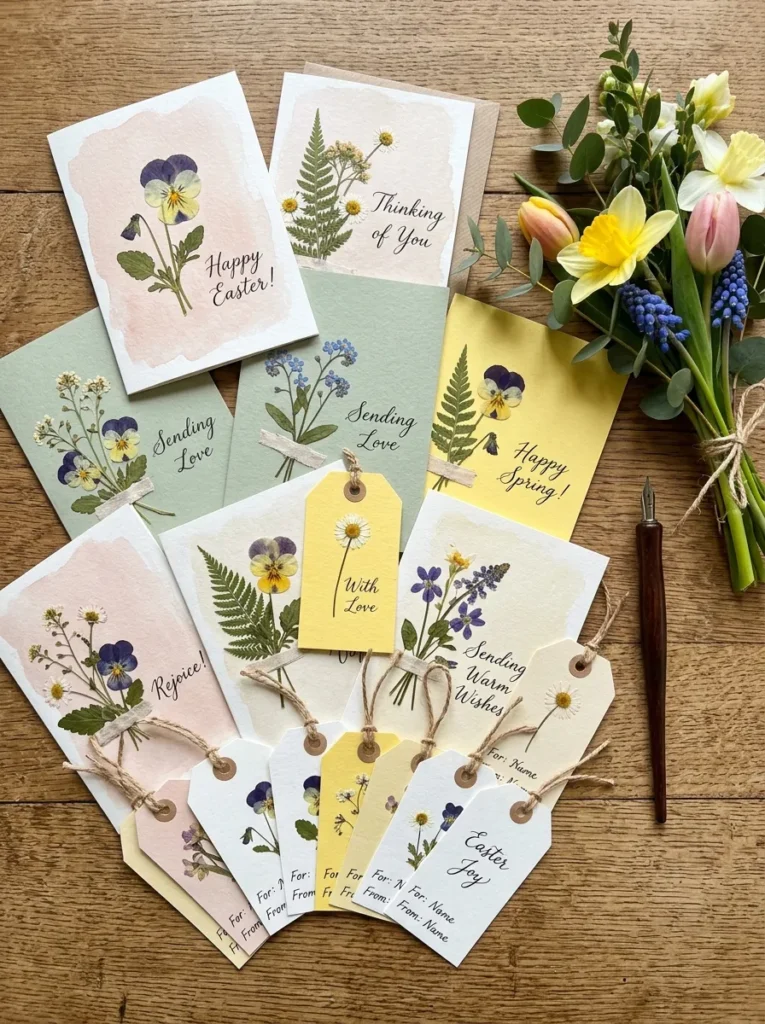
Vibe: Pressed flower cards feel intimately thoughtful — the Easter correspondence that the recipient keeps long after Easter has passed.
Why it works: Pressed flower cards are the Easter craft project that most directly converts seasonal botanical material into a personal communication object — the card is not simply a vehicle for a message but a composed botanical artwork that carries the season’s natural quality into a form the recipient holds and reads. The design principle is natural material as compositional element: the pressed botanical specimens arranged on a watercolor-washed card surface become the card’s primary visual content, which the handwritten message complements rather than dominates. The combination of the botanical’s natural imperfection and the handwritten message’s personal imperfection creates an object with a specific warmth that no printed card can replicate.
How to get it: Pre-press botanical specimens for at least 48 hours before the craft night (or use purchased pre-pressed specimens). Pre-wash card stock sheets with a diluted watercolor wash in Easter palette colors and allow to dry fully before the session. At the craft night, participants arrange pressed specimens on the washed card surface and adhere using a thin coat of Mod Podge or PVA glue, then seal with a finishing coat. Handwrite messages with a fine-tip pen after the adhesive is fully dry. Cut to card size and fold, or cut to gift tag size with a hole punched for jute twine.
Shop The Look
| Product |
|---|
| Pre-pressed flower set for cards |
| Card stock heavyweight natural cream |
| Watercolor paint set for card wash |
| Fine tip black pen for writing |
| Natural jute twine for tag loops |
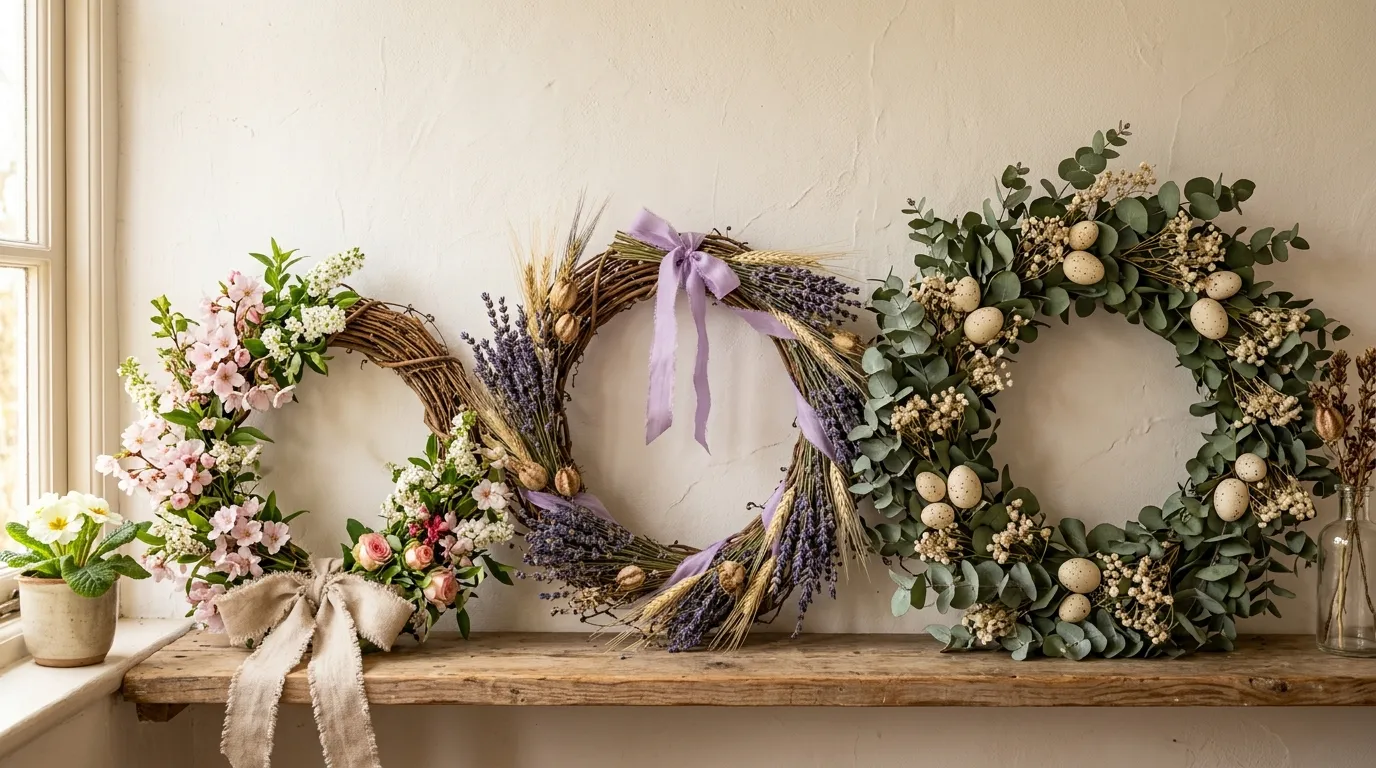
8. Easter Wreath Making with Dried and Fresh Botanicals
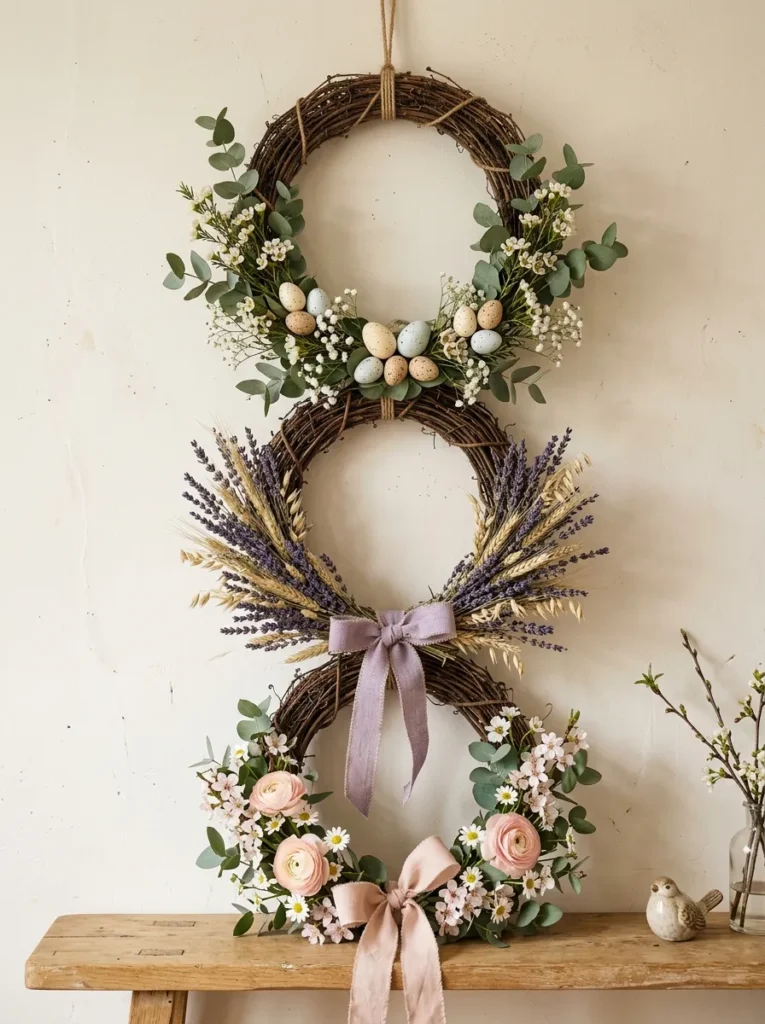
Vibe: Easter botanical wreaths feel seasonally generous — the craft night project that gives participants something to hang on their door the next morning.
Why it works: A botanical wreath is the Easter craft project with the most immediate real-world application — it goes directly from the craft table to the front door, which means participants leave the craft night with a finished piece of seasonal home decor they will use. The design principle is making for immediate use as motivation: knowing that the finished piece will be displayed at home rather than packed away gives the wreath-making activity a purposeful quality that purely decorative craft projects lack. The botanical wreath also scales gracefully to different skill levels — a beginner can make a simple but beautiful wreath with a single botanical type and a ribbon bow, while an experienced maker can create an elaborate multi-botanical composition on the same base.
How to get it: Provide grapevine wreath bases in two sizes (30 cm for beginners/children, 40–50 cm for more ambitious makers) and an abundant table of botanical materials — both dried (lavender bundles, wheat sheaves, preserved eucalyptus, dried cotton stems) and fresh (spring blossom branches, fresh herbs, fresh spring flowers). Participants attach botanicals using hot glue (for dried) or floral wire (for fresh) and finish with a ribbon bow. Having a completed sample wreath on display at the craft table gives less experienced participants a clear reference while still allowing experienced makers to explore their own composition.
Shop The Look
| Product |
|---|
| Natural grapevine wreath base 40cm |
| Dried lavender bundle for wreath |
| Preserved eucalyptus spring wreath |
| Linen ribbon Easter palette for bow |
| Hot glue gun with sticks for wreath |
9. Speckled Robin’s Egg Painted Faux Eggs
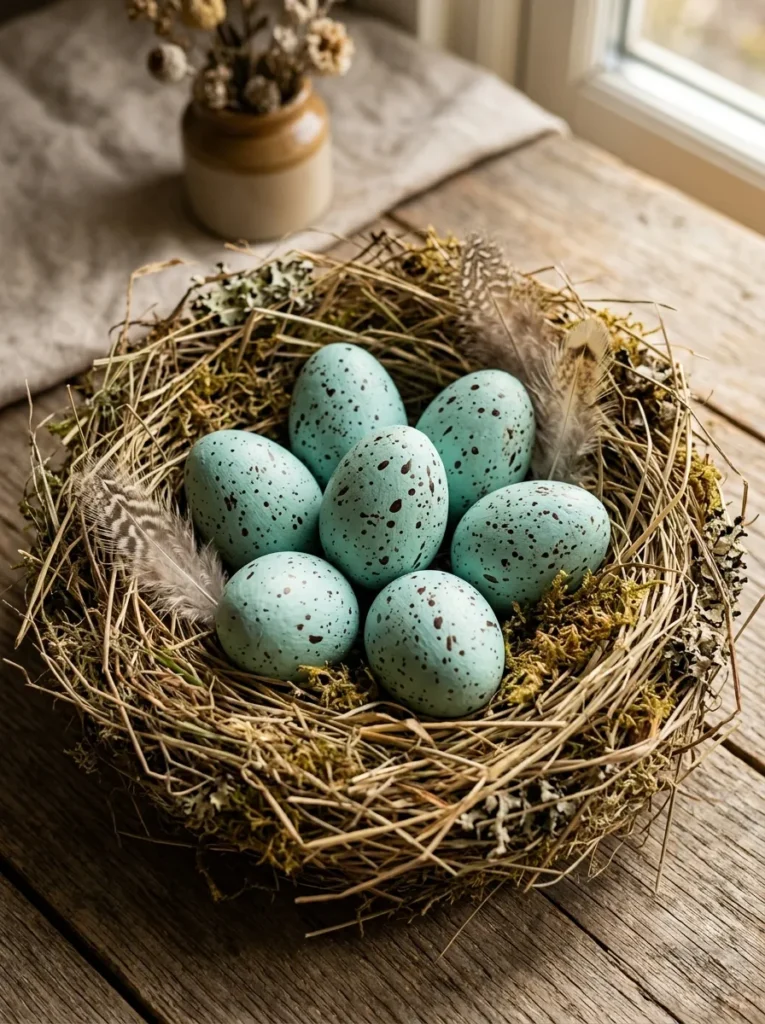
Vibe: Speckled robin’s egg faux eggs feel naturalistically perfect — the Easter object that convinces you spring has arrived even inside a craft room.
Why it works: The speckled robin’s egg technique produces one of the most satisfying craft results available in a short time — the toothbrush speckle flicking technique (dipping a toothbrush in thinned dark paint and running a thumb across the bristles to create random spatter) is simple enough for young children but produces an effect so accurately naturalistic that it delights adults equally. The design principle is gestural technique as naturalistic result: the random spatter of the toothbrush creates the organic irregularity that characterizes real bird eggs far more convincingly than any deliberate, controlled painting technique could achieve. The finished eggs look genuinely found rather than made.
How to get it: Base coat faux wooden or papier mache eggs in a pale blue-teal acrylic (mixing turquoise, white, and a small amount of grey produces the most convincing robin’s egg base). Allow to dry completely. Mix dark brown paint to a thin consistency — approximately ink-like fluidity. Dip an old toothbrush into the dark paint and run a thumb or finger across the bristles, directing the spatter toward the egg. The speckle density is controlled by how much paint is on the brush and how close the brush is held to the egg surface — practice on paper first. Apply in two or three spatter passes for the most natural looking result.
Shop The Look
| Product |
|---|
| Faux wooden egg set for painting |
| Acrylic paint turquoise white grey set |
| Old toothbrush set for speckle technique |
| Dried grass nest material natural |
| Real feather set for nest display |
10. Washi Tape Easter Egg Decorating
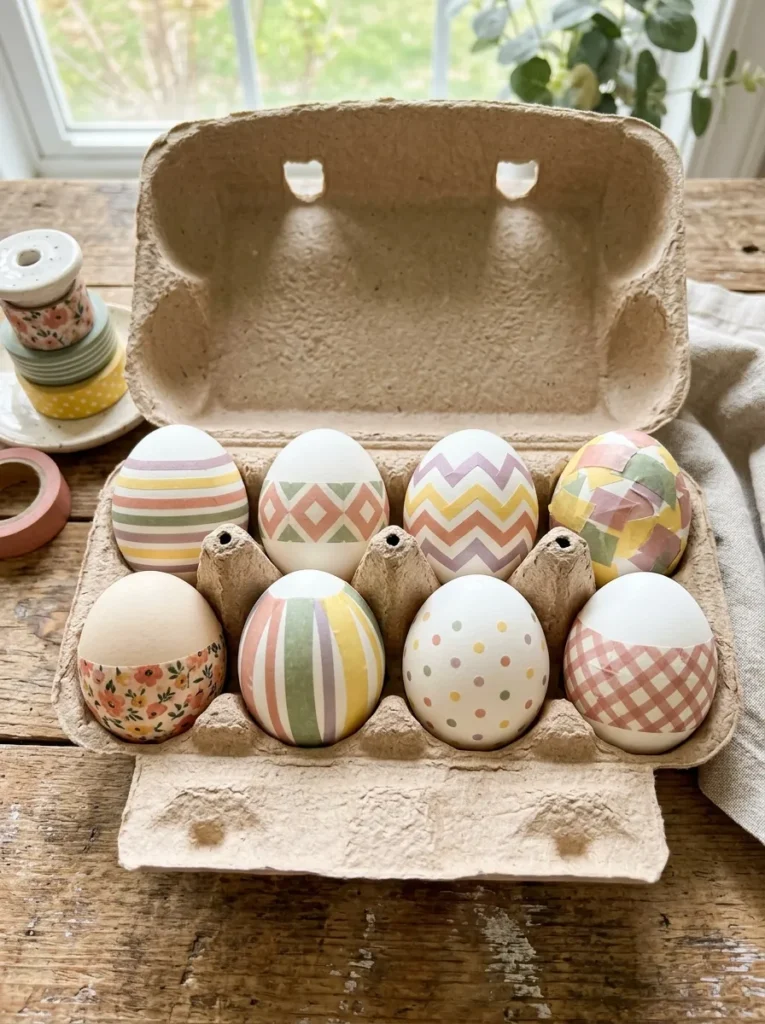
Vibe: Washi tape Easter eggs feel immediately achievable — the Easter craft that makes everyone at the table look like they knew what they were doing.
Why it works: Washi tape Easter egg decoration is the craft night project most suited to participants who feel anxious about their artistic ability — washi tape is inherently forgiving (it repositions, tears cleanly, and covers any previous attempt), produces visually appealing results immediately, and allows completely different levels of design ambition from the same materials at the same table. The design principle is material accessibility as creative confidence builder: a material that allows any result to look deliberate and attractive removes the skill anxiety that prevents many adults from engaging with craft activities, which makes washi tape the most socially inclusive of the Easter egg decoration approaches. Young children can cover an egg randomly with tape pieces and produce a result that looks as interesting as an adult’s carefully planned geometric pattern.
How to get it: Provide a wide selection of washi tape rolls in the Easter palette — thin stripes, wider solid colors, floral patterns, geometric designs, and metallic options — organized in the center of the table for all participants to share. Provide both real hard-boiled eggs (for participants who want to display and eat their eggs) and faux eggs (for participants who want permanent keepsakes). No additional tools are required — washi tape is applied with fingers and torn to length rather than cut.
Shop The Look
| Product |
|---|
| Washi tape set Easter palette spring |
| Washi tape set floral botanical spring |
| White faux eggs for permanent display |
| Hard-boiled white eggs for eating display |
| Small egg carton paper for display |
11. Easter Seed Packet Favors — Handmade and Planted
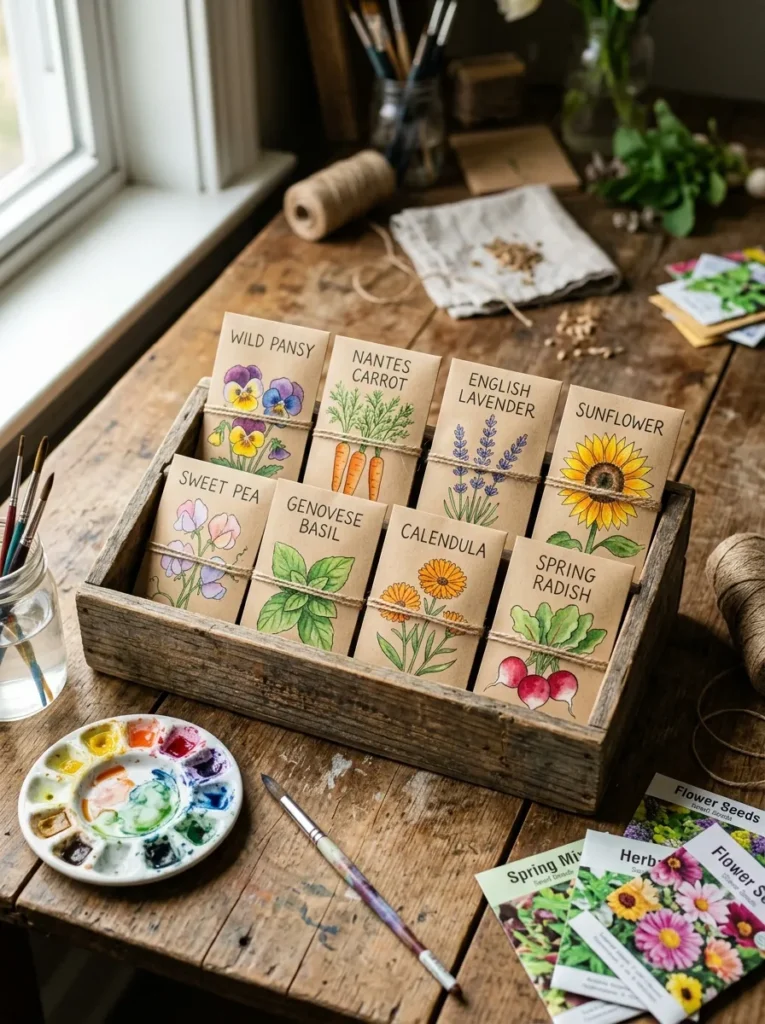
Vibe: Handmade Easter seed packets feel generatively warm — the craft night project that keeps giving through the whole growing season after the Easter gathering ends.
Why it works: Handmade seed packet favors are the Easter craft project that extends the seasonal celebration beyond the craft night itself — the seeds that participants fill their packets with will grow through spring and summer, making the handmade packet a seasonal gift whose meaning unfolds over months rather than ending at Easter morning. The design principle is living gift as extended celebration: a seed packet designed and filled during a craft night gathering contains both the creative care of a handmade object and the living potential of actual seeds, which gives it a layered meaning that no non-living craft object can match. Each participant both makes their own packet and makes packets to give to others at the table — the making and the gifting are simultaneous.
How to get it: Pre-fold small kraft paper envelopes (or purchase mini kraft paper envelope sets) and set up individual decorating stations with a small watercolor set, a fine-tip pen, and a selection of botanical stamp or hand-drawing reference cards. Participants decorate their envelopes with botanical illustrations or simple spring designs, write the seed variety name on the envelope front, and fill with a small measured quantity of seeds (pre-portioned into small glassine envelopes). Provide a variety of seed types: spring flowers (pansies, sunflowers, sweet peas), herbs (basil, lavender, chamomile), and easy vegetables (carrots, radishes, lettuce).
Shop The Look
| Product |
|---|
| Mini kraft paper envelope set for seeds |
| Spring flower seed variety pack |
| Herb seed variety pack lavender chamomile |
| Watercolor set for packet decoration |
| Fine pen for botanical writing |
12. Painted Terracotta Pot Easter Centerpiece
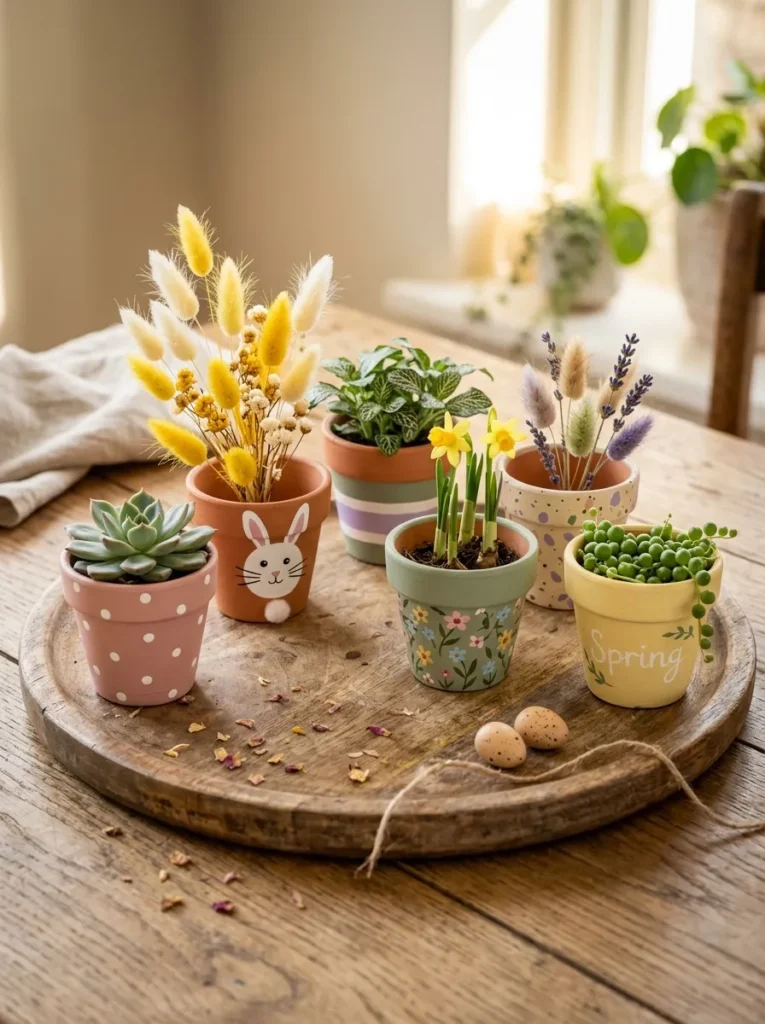
Vibe: Painted terracotta Easter pots feel warmly functional — the craft that becomes next week’s windowsill plant pot rather than a seasonal decoration to be stored.
Why it works: Painting small terracotta pots as an Easter craft activity produces objects with post-Easter utility — the pot can be planted with spring herbs, seedlings, or succulents after the holiday and continues serving as a functional, beautiful object on a windowsill or garden surface. The design principle is post-event utility as motivational design: knowing that the finished pot will be used daily after the craft night gives the painting activity a purposeful quality that purely decorative Easter crafts lack. Terracotta also accepts acrylic paint beautifully — the paint sits on the porous surface with a warm, slightly absorbed quality that reads as genuinely artisanal rather than mass-produced.
How to get it: Provide small terracotta pots (9 cm size is the most versatile) and a full acrylic paint selection in the Easter palette plus white and black. Set up simple design guide cards showing five to six easy techniques (polka dots with the back of a pencil, simple bunny faces with a fine brush, stripe patterns with masking tape, simple lettering). Participants paint their pots at the table — acrylic dries quickly enough (20–30 minutes) that participants can pot a small plant before the end of the evening. Seal with clear matte varnish for outdoor longevity.
Shop The Look
| Product |
|---|
| Small terracotta pot 9cm set of 6 |
| Acrylic paint set Easter palette |
| Fine brush set for pot painting |
| Clear matte varnish for pot sealing |
| Spring plant seedling set for potting |
13. Small-Space Easter Craft Night — Five-Person Kitchen Table Edition
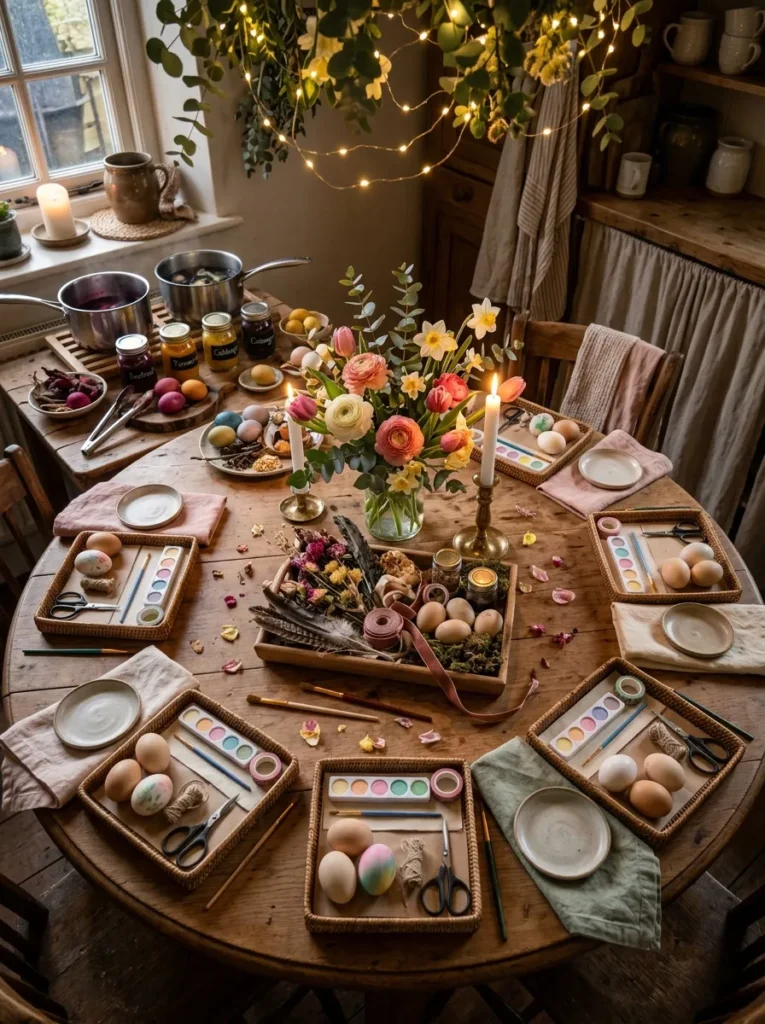
Vibe: A small intimate Easter craft night feels warmly specific — the gathering that proves five people around a kitchen table with good materials and warm light need nothing else.
Why it works: The small-scale Easter craft night — five people around a kitchen table — is the format that most naturally enables the genuine conversation and connection that a craft night gathering is ultimately for. The design principle is intimate scale as social catalyst: at a table of five, everyone can hear everyone else, no one can retreat into anonymity, and the materials passing between participants create natural sharing moments (can you pass the sage washi tape? which dye bath makes that color?) that generate the spontaneous interaction that larger gatherings must work harder to create. The craft night’s specific power is the way hands occupied with making free the social environment for conversation that feels unhurried and genuine.
How to get it: For a five-person kitchen table Easter craft night, limit the project options to two or three that share the same basic materials (the watercolor palette used for egg painting also serves the card making; the pressed botanicals used for cards also decorate blown eggs) to minimize the table’s material footprint. Pre-portion all materials into individual labeled place-setting kits before guests arrive so the evening begins with making rather than organizing. String warm fairy lights above the table, light a spring floral candle at the center, and make the table beautiful before guests arrive — the quality of the table setup determines the quality of the evening’s atmosphere before a single craft is begun.
Shop The Look
| Product |
|---|
| Warm fairy lights for table overhead |
| Spring candle floral scent for centerpiece |
| Individual craft kit bag set for pre-packing |
| Spring flower fresh posy for centerpiece |
| Linen napkin set for table place setting |
How to Host Your Easter Craft Night
The single most important hosting decision is material pre-portioning — specifically, dividing all craft materials into individual participant kits (one kit per person per project, everything contained together in a small bag or tray) before guests arrive. This single preparation step prevents the two experiences that most reliably derail craft nights: the 20-minute setup delay while everyone figures out who has what, and the mid-session scramble when someone runs out of a material. A craft night where materials are ready and waiting when guests sit down begins immediately with the pleasure of making rather than the friction of organizing — and that difference is felt throughout the entire evening.
The most common hosting mistake is offering too many project options without establishing which two or three will be the evening’s focus — presenting twelve possible Easter crafts and allowing participants to drift between them produces an evening of half-finished projects and divided attention rather than the focused, shared creative experience that makes craft nights memorable. The fix is to choose two primary projects (typically one for adults and older children, one for younger children or less experienced makers) and one optional additional project for participants who finish quickly, and to communicate these choices clearly at the beginning of the evening. The shared experience of everyone working on the same or similar projects creates the collective engagement that shared craft nights are valued for.
Three setup decisions that most determine craft night atmosphere: the table lighting (warm fairy lights or candles at the center of the table make any craft night feel intentional and special — overhead fluorescent lighting is the single fastest way to make a craft night feel institutional), a central display of the evening’s finished examples (showing completed versions of each project at the center of the table gives participants a clear target and creates immediate excitement about the session’s potential), and music (a gentle background playlist — ambient, classical, or folk at low volume — fills the silences that can feel awkward in craft settings without overwhelming the conversation that the making facilitates).
Realistic expectations for mixed-age Easter craft nights: a well-planned craft night with three project options, pre-portioned materials, and good table setup runs for approximately two to three hours for adults and older children, and one to one-and-a-half hours for younger children before attention begins to wane. Plan for the youngest participants to complete one or two projects in their session and transition to a supervised eating or playing activity while the adults continue. The most successful mixed-age craft nights have a defined beginning (everyone starts together), a flexible middle (participants work at their own pace), and a collective ending (everyone shows and discusses what they made before the evening closes).
Frequently Asked Questions About Easter Craft Nights
What age range is appropriate for Easter craft nights?
Easter craft nights can genuinely include participants from age 3 upward with appropriate project selection — the key is matching the project’s technique requirements to each age group’s motor skills and attention span. Ages 3–5 are best suited to washi tape decorating, tissue paper decoupage, and fingerprint-applied paint techniques (all from this list). Ages 6–10 can access all but the most technically precise projects (pysanky wax resist requires patience and care with a heated tool, making it more appropriate for ages 8+ with supervision). Ages 10 and above can access any project in this list. The watercolor egg painting and pressed flower cards work beautifully for adults specifically — they have a fine art quality that adults appreciate more than children typically do.
What materials should be prepared before guests arrive?
The pre-event preparation that most improves a craft night’s quality includes: natural dye baths prepared and cooled (dyeing takes 20–60 minutes and requires pre-prepared baths to begin immediately), botanical specimens pre-pressed (require 48 hours minimum), card stock pre-washed with watercolor and dried, faux eggs pre-base-coated if using the speckled robin’s egg technique, all materials pre-portioned into individual kits, and the table fully set and decorated before the first guest arrives. The evening’s materials that can be prepared same-day (within 2–3 hours of the event) include: air-dry clay portioned, watercolor palette sets assembled, washi tape rolls organized, and seed packets pre-folded.
How do I make the evening feel special rather than like an activity session?
The distinction between a craft night that feels like a special evening and one that feels like an organized activity is entirely atmospheric — the quality of the table setting, the lighting, the food and drink provided, and the tone of the hosting. Set the table beautifully before guests arrive (spring flowers at the center, warm lighting, linen napkins at each place, the first project materials already positioned). Provide seasonal food and drink that can be eaten while making — hot cross buns, lemon cake, sparkling elderflower, warm spiced tea. Put on a gentle background playlist. The craft projects are the activity; the atmosphere is the experience.
Which Easter craft from this list is best for a large group?
Washi tape Easter egg decorating (idea 10) is the most easily scaled for large groups — it requires no preparation (no pre-mixing, no pre-baking, no advance set-up beyond organizing tape rolls), no drying time, no specialist materials or tools, and produces a finished result within 15–20 minutes. It works for all ages simultaneously, requires no special facilities, and the shared tape rolls create natural interaction between participants at adjacent seats. For a large group of 15 or more, provide one set of tape rolls for every three to four participants and set up the display area (an egg crate or basket of dried grass) at the table’s center so participants can add their finished eggs to a collective display as they complete them.
What food and drink works best at an Easter craft night?
Food and drink for a craft night should be consumable with one hand (as the other hand will often be occupied with a craft tool) and compatible with light staining risk. Best choices include: finger foods (hot cross buns, small sandwiches, cheese and crackers), sweets that don’t leave fingers sticky (meringues, macarons, shortbread), and drinks served in containers with lids where children are present (to prevent craft-destroying spills). Avoid foods with strong colors that might transfer to craft materials (beetroot, berries, chocolate) at the craft table — serve these at a separate food table or after the craft portion of the evening is complete. Spring-appropriate drink options include: warm chamomile or mint tea, sparkling elderflower, lemon water with fresh herbs, and warm apple and ginger drinks.
Ready to Host Your Easter Craft Night?
These 13 Easter craft night ideas span every skill level, every age range, every group size, and every degree of hosting ambition — from the intricate beeswax pysanky technique for experienced makers to the immediately accessible washi tape decorating for first-time craft night participants, and from a five-person kitchen table gathering to a full-room multi-project celebration. The most important thing to understand about an Easter craft night is that the crafts are the vehicle, not the destination — the destination is the particular quality of an evening spent making something with your hands in the company of people you care about, in a season that provides some of the most beautiful natural materials available anywhere on the calendar. Today, choose two projects from this list, purchase the materials, pre-portion them into individual kits, string some fairy lights above the table, and invite the people you want to spend that evening with. The making will take care of itself. Pin the ideas that made you picture specific people around a specific table, and let those be the ones you gather for first.