24 Easy Book Page Crafts That Look Expensive
Book page crafts are decorative objects and home accessories made from the pages of old, damaged, or salvaged books — folded, rolled, cut, layered, or framed to create art and decor that looks intentional, curated, and expensive. This article gives you 24 book page craft ideas across wall art, sculpture, functional decor, seasonal pieces, framed art, and small-space styling so you can transform discarded pages into pieces that genuinely elevate a room.
There is something quietly compelling about a page of old text repurposed into something beautiful. The printed word becomes texture, pattern, and form — a folded book page rose carries the ghost of a sentence in every petal, a framed botanical print layered over dictionary text reads as both art and archive. Book page crafts done well don’t look like a rainy afternoon project. They look like something you paid for. Here are 24 ideas worth saving — and stealing.
Why Book Page Crafts Work So Well
Book page crafts draw from a long tradition of paper arts — Japanese origami and its Western equivalents, Victorian scrapbooking and decoupage, and the mid-century American folk tradition of altered books as art objects. What unites these traditions is the recognition that printed paper carries inherent visual richness: the texture of aged typography, the warm cream-to-ivory tone of old book pages, and the slight translucency of thin paper all contribute qualities that blank craft paper cannot replicate. The aged print itself becomes part of the aesthetic rather than something to hide.
The material palette is intentionally narrow and specific. Old hardcover books with cream or yellowed pages are the ideal source — their paper is thicker than paperback pages and ages to a warm ivory rather than a harsh white. Dictionaries, encyclopedias, vintage atlases, and sheet music all carry particularly interesting typographic texture. The supporting materials that work best are warm-toned: natural twine, beeswax, raw wood, matte black frames, aged brass hardware, and dried botanicals. Avoid paints other than soft chalk white or warm sepia tones — color-heavy additions overpower the subtle warmth of the paper itself.
The cultural moment is perfectly aligned. The intersection of sustainability, slow living, and the “quiet luxury” aesthetic — the design movement prioritizing understated, crafted, expensive-looking interiors over trend-driven decoration — has made repurposed and handcrafted objects among the most desired home accessories of the current decade. Book page crafts sit precisely at this intersection: they are zero-waste, handmade, and carry a visual sophistication that store-bought decor rarely achieves at any price point.
Small spaces benefit enormously from book page crafts because the pieces are inherently lightweight, flat-packable, and scalable — a single framed book page arrangement fits a 4×6 inch frame or a 24×36 inch gallery wall equally well. The craft scales to available space rather than demanding it.
Style at a Glance
| Element | Detail |
|---|---|
| Philosophy | Repurposed paper elevated to intentional art through form and composition |
| Key Materials | Aged book pages, raw wood, natural twine, dried botanicals, matte black frames |
| Key Colors | Warm ivory, aged cream, sepia brown, matte black, antique brass |
1. Book Page Rolled Paper Roses in a Vintage Vessel
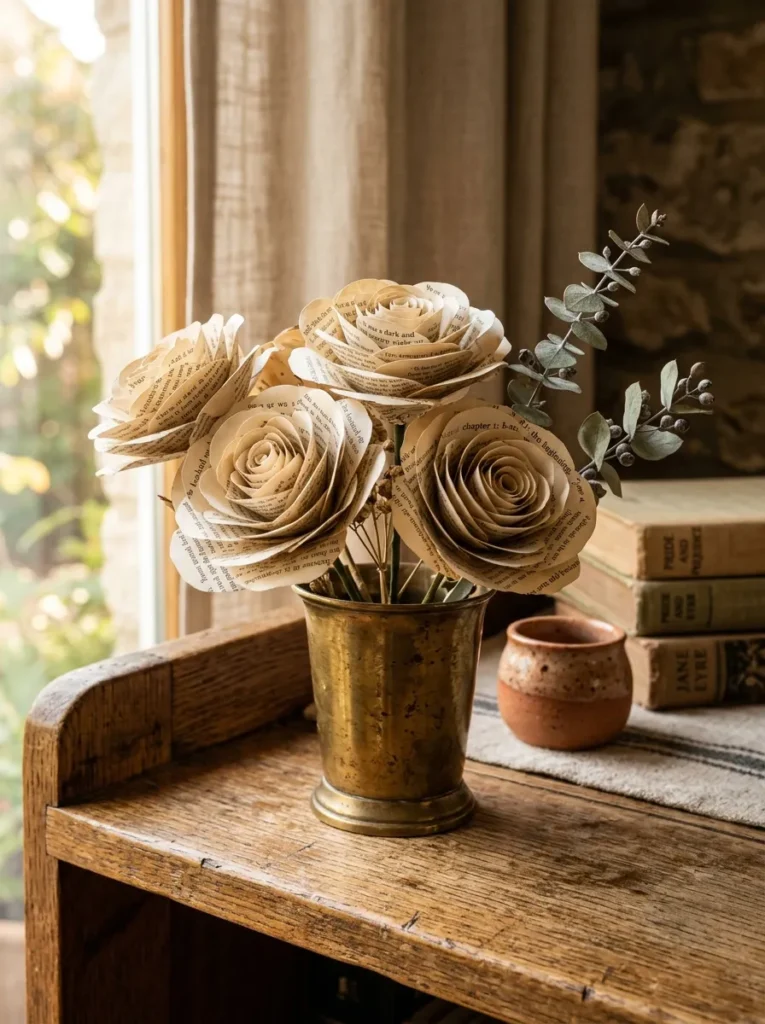
Vibe: The arrangement is warm — book page roses in a vintage vessel have the quiet elegance of a florist’s work without a single fresh flower required.
Why it works: The rolled paper rose exploits the natural curl behavior of thin paper when tension is applied — a strip cut in a spiral and rolled from the outside inward creates a form that mimics the layered petal structure of an open rose through pure geometry rather than cutting or shaping each petal individually. Aged book page paper achieves the warm ivory tone of dried flowers naturally, which means the finished rose reads as a deliberately dried botanical arrangement rather than a paper craft. Clustered in odd numbers (three or five) in a vessel with organic texture — aged brass, unglazed terracotta, rough stoneware — the arrangement reads as curated, not crafted.
How to get it: Cut a book page into a circle approximately 5 inches in diameter. Cut a spiral from the outside edge toward the center, leaving a small circle at the center as the base. Roll the outer spiral end inward tightly, then release slightly — the paper will unfurl naturally into a rose form. Apply a small dot of hot glue to the base circle to hold the rose open.
Quick Win: Five book page roses take approximately 20 minutes to make and cost nothing beyond a discarded book and a hot glue gun — placed in any vessel you already own, they transform a shelf instantly.
Shop The Look
- Aged brass bud vase small vintage style
- Terracotta ceramic vessel rough finish
- Hot glue gun craft precision tip
- Vintage dictionary hardcover old book craft
- Dried eucalyptus stems natural grey-green
Also view: 14 Mindful Crafts for Beginners to Relax and Create
2. Framed Book Page Botanical Print Layered Art
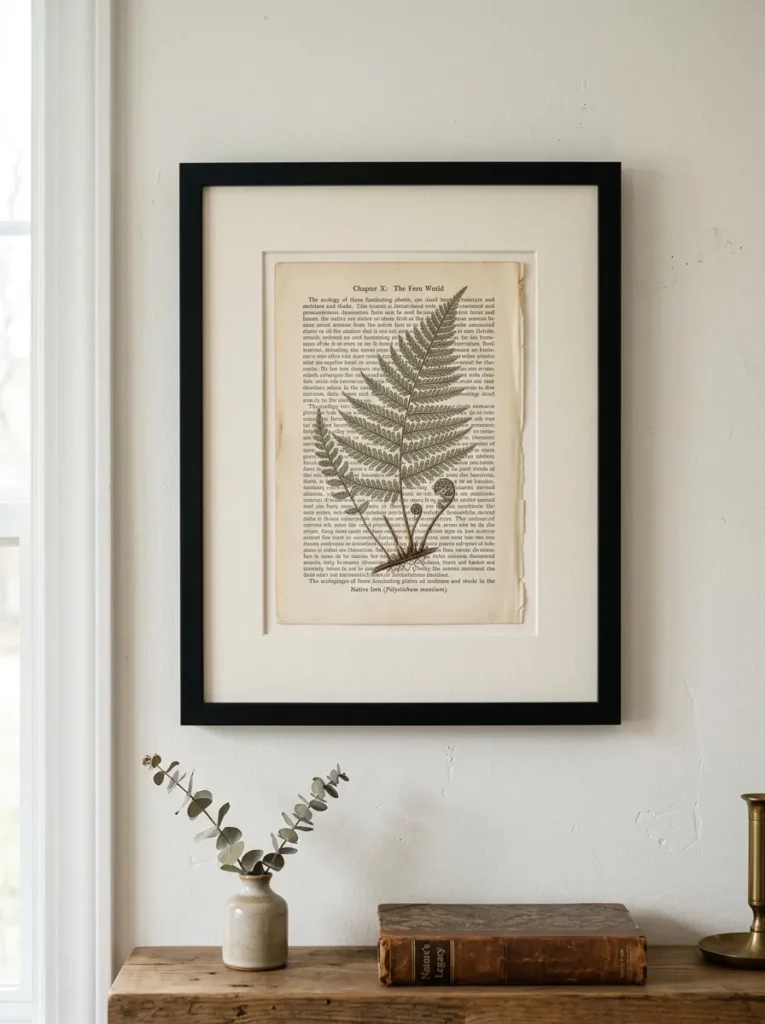
Vibe: The piece is gallery-quiet — a botanical print layered over book page text in a wide-matted black frame reads exactly like something purchased from a high-end print shop for $80.
Why it works: Layering a botanical illustration over a book page background works on the principle of visual hierarchy — the botanical forms the foreground subject while the text creates a patterned, textured background that adds depth without competing. The typography of a dense book page reads as pattern at normal viewing distance, giving the piece the complexity of a collage without the messiness of one. A wide cream mat (minimum 3 inches on all sides) and a simple matte black frame are the two elements that elevate this from craft project to gallery piece — the mat creates visual breathing room and signals intentionality.
How to get it: Print a public domain botanical illustration (available free from the Biodiversity Heritage Library at biodiversitylibrary.org) on standard printer paper, trim to fit, and layer it directly on a book page background. Mount in a frame with a wide pre-cut mat. No adhesive necessary if using a frame with a glass front that holds both layers flat.
Shop The Look
- Matte black picture frame 8×10 wide mat
- Pre-cut cream mat board 8×10 for 5×7
- Botanical illustration print vintage style
- Vintage encyclopedia hardcover craft supply
- Archival photo mounting corners adhesive
3. Book Page Decoupage Tray with Mod Podge Finish
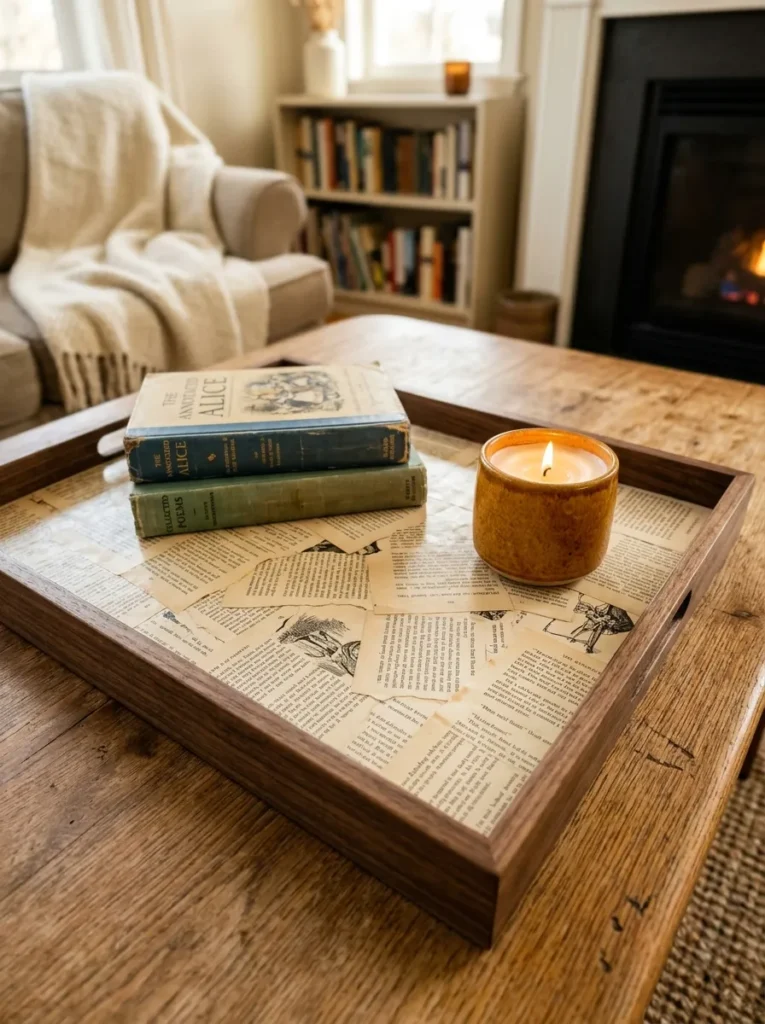
Vibe: The tray is layered — a book page decoupage surface has a depth and warmth that painted or stained wood cannot achieve, and the typography creates a pattern that reads as intentionally textured.
Why it works: Decoupage on a wooden tray works because the overlapping paper pieces create a mosaic-like surface where the slight tonal variation between pages (some warmer ivory, some cooler white) produces organic variation that a single material cannot. Torn edges (rather than cut straight edges) between page pieces produce a soft, overlapping join that reads as intentional layering rather than patched paper. The sealed finish — matte Mod Podge for a sophisticated look, gloss for a lacquered appearance — unifies all the paper pieces into a single continuous surface that looks designed rather than assembled.
How to get it: Tear book pages into irregular pieces approximately 3–4 inches across. Apply a thin layer of Mod Podge to a section of the tray, press a paper piece flat, smooth out air bubbles, and overlap the next piece by 1/4 inch. Work in sections and finish with two coats of Mod Podge sealer on top. Thin the Mod Podge slightly with water for easier brush application.
Quick Win: An unfinished wood tray from a craft store ($6–$12) decoupaged with book pages and sealed with matte Mod Podge costs under $15 total and sells for $40–$60 at craft markets — the gap between cost and perceived value is remarkable.
Shop The Look
- Unfinished wood serving tray craft blank
- Mod Podge matte sealer decoupage medium
- Foam brush set craft application
- Vintage hardcover book craft supply pages
- Ceramic taper candle holder small matte
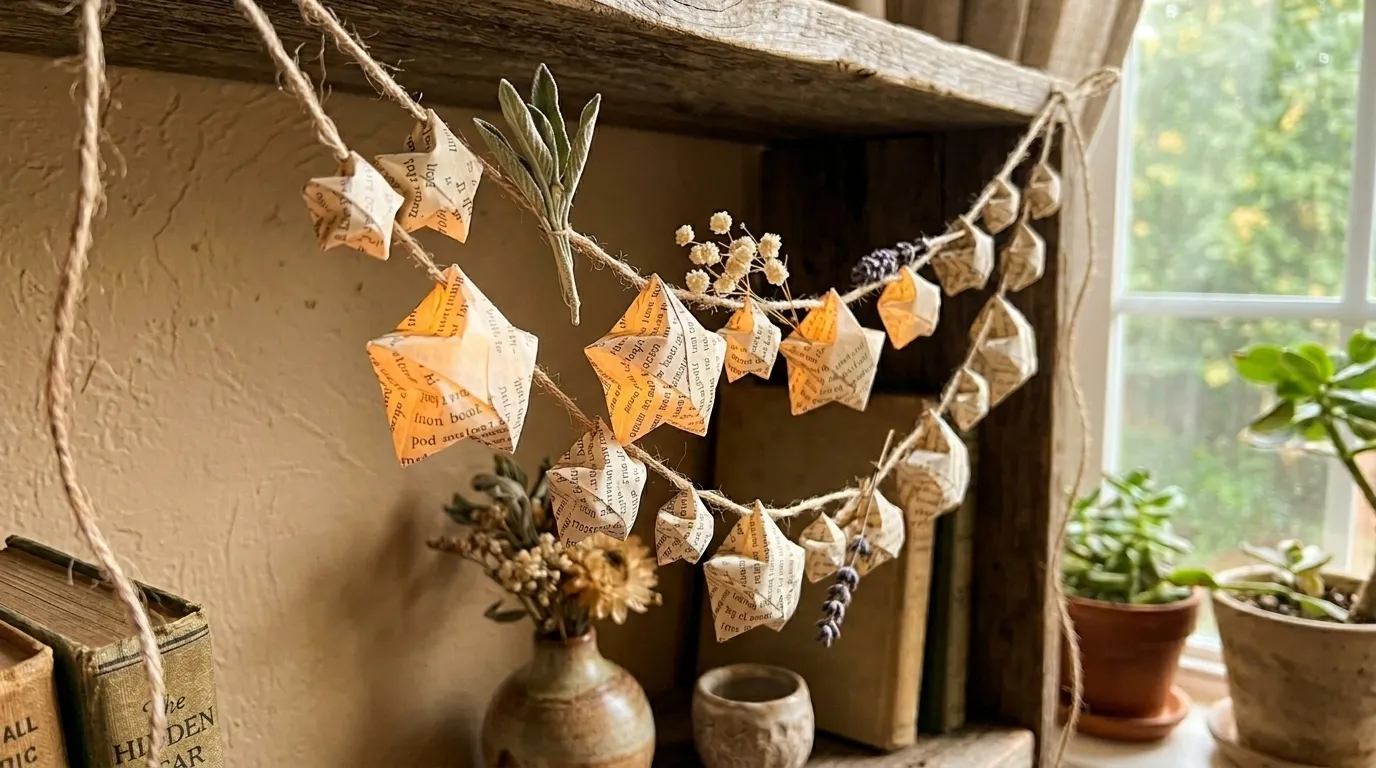
4. Book Page Origami Star Garland
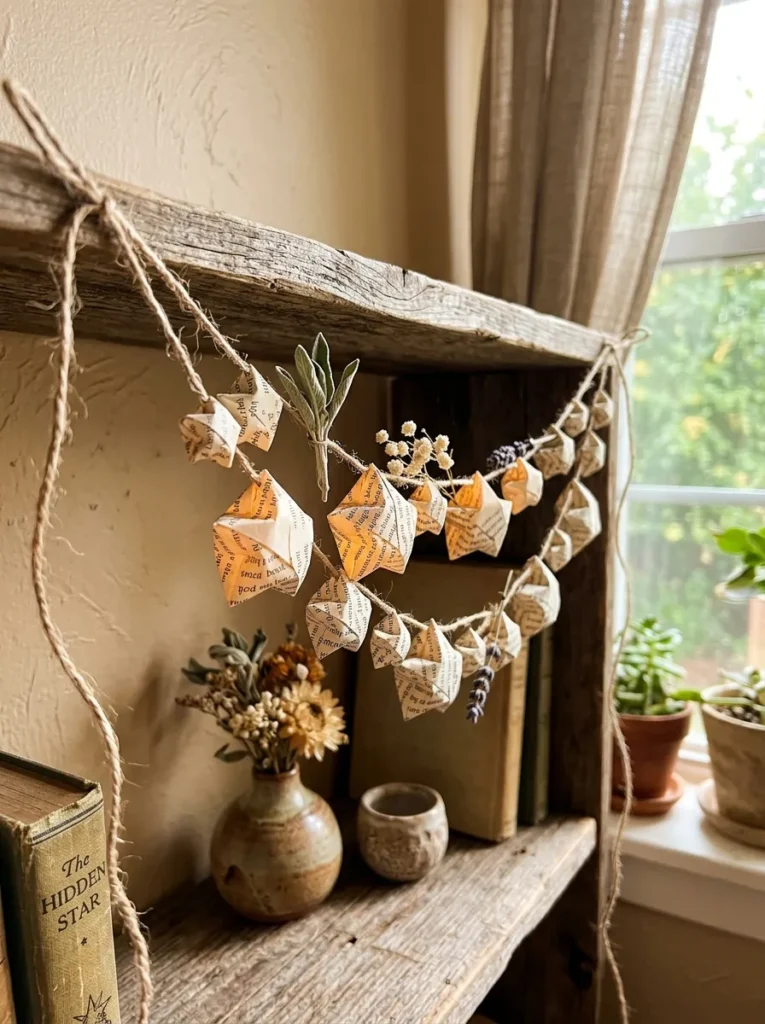
Vibe: The garland is delicate — book page origami stars strung on natural twine have a handcrafted quality that store-bought paper garlands entirely lack, and the translucent text visible through each facet adds a layer of visual interest.
Why it works: The origami lucky star (puffy star) is the ideal book page craft form because it requires only a single 1×8 inch paper strip folded into a five-pointed three-dimensional shape — no cutting tools, no adhesives, no specialist skill. The three-dimensional form catches light on its facets, creating shadow and highlight variation across each star’s surface that flat paper shapes cannot achieve. Strung at irregular intervals on natural twine (rather than evenly spaced, which looks mass-produced) the garland reads as artisan.
How to get it: Cut or tear book pages into strips approximately 1/2 inch wide and 8 inches long. Tie a small knot at one end, wrap the strip in a pentagonal loop, then continue wrapping the long tail around the pentagon. Tuck the remaining tail into a slot and gently press the five sides inward with a fingernail to puff the star into three dimensions. Thread onto natural twine with a needle.
Shop The Look
- Natural jute twine roll craft supply
- Bookbinding needle large eye craft
- Vintage paperback book lot craft supply pages
- Dried flower mini stems garland accent
- Command strip adhesive hook removable
5. Book Page Cone Trees for Seasonal Display
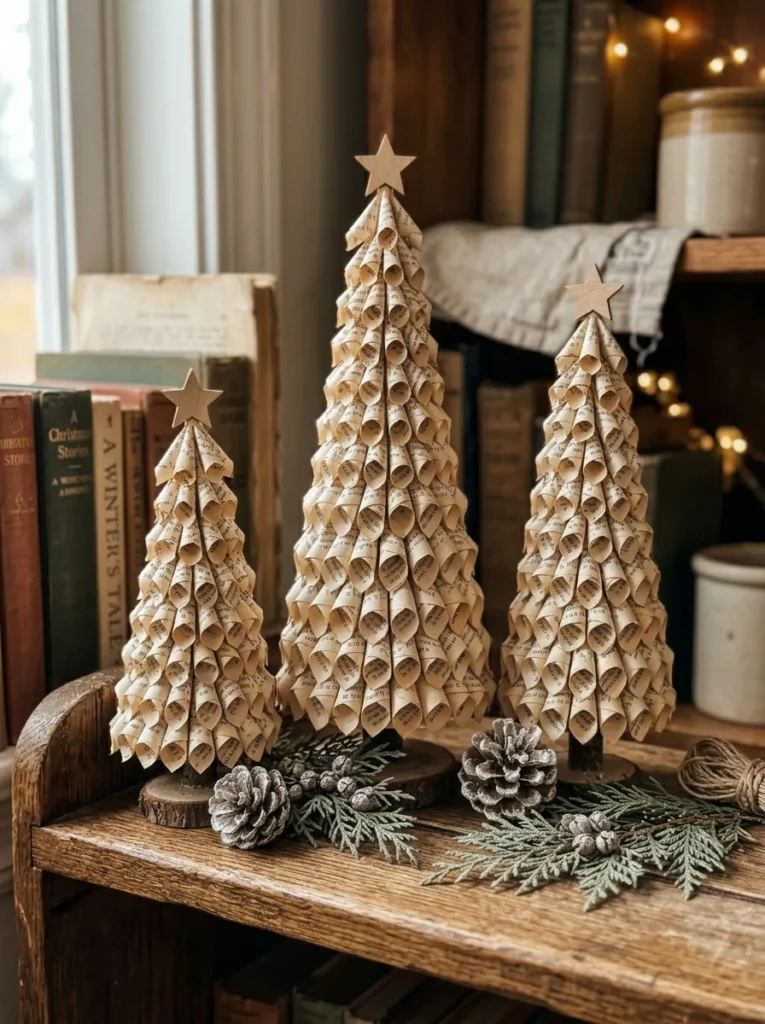
Vibe: The vignette is seasonal — a set of three book page cone trees at varying heights is the most elegant low-cost seasonal decor possible, working equally well at Christmas, Thanksgiving, or as year-round shelf decor.
Why it works: The cone tree form works through the principle of repeated unit stacking — each layer of rolled or folded pages slightly smaller than the one below creates an implied triangular silhouette through cumulative form rather than a single cut shape. This means the “tree” shape emerges from the paper itself rather than being imposed on it, which gives the finished piece a natural, organic quality. Three trees at different heights (tall, medium, squat — approximate ratio 5:3:2) create a composition that mimics a forest skyline and reads as a designed grouping rather than three identical objects.
How to get it: Roll a full book page into a tight cone, secure with hot glue, and trim the base flat so it stands. For layered trees, fan-fold individual pages and layer them around a central cone base from largest at the bottom to smallest at the top, gluing each layer. A small gold button or washi tape star at the tip completes the form.
Shop The Look
- Small gold star button embellishment craft
- Hot glue gun sticks clear craft
- Frosted mini pine cone bag natural decor
- Preserved cedar stem holiday craft
- Wooden craft base disc round display
6. Book Page Wallpaper Accent Panel Behind a Shelf
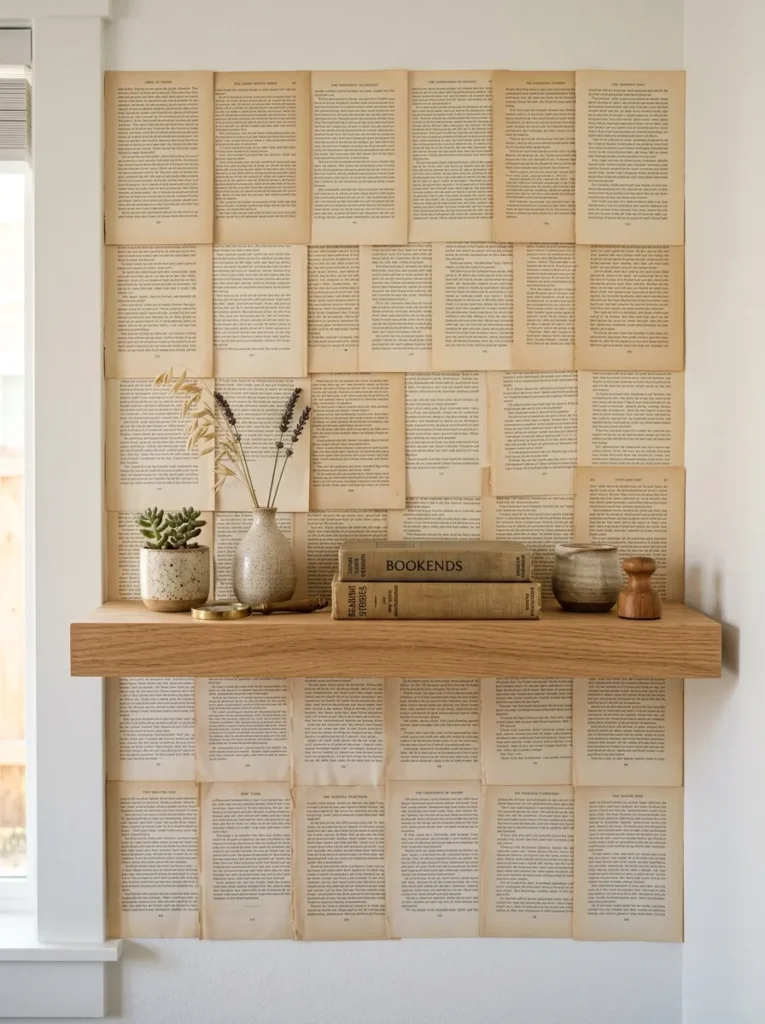
Vibe: The wall is editorial — a book page accent panel behind a shelf transforms a blank wall section into a typographic backdrop that makes every object placed in front of it look more considered.
Why it works: A book page accent panel exploits the visual principle of figure-ground contrast — objects placed against a textured typographic background have more definition and presence than objects against a plain painted wall. The warm ivory of aged book pages creates a background tone that is warmer than standard white paint, which adds overall warmth to the shelf display without any color being introduced. Applied with removable wallpaper paste (or even repositionable adhesive strips for a fully non-permanent installation), this works in rental properties with no wall damage.
How to get it: Apply pages with diluted wallpaper paste (3 parts paste to 1 part water) or liquid starch (fully removable) using a foam brush, overlapping edges by 1/4 inch and smoothing flat with a brayer roller. Work in a consistent orientation (all pages horizontal, or all pages aligned to the same text direction) for a clean, editorial appearance. Remove with warm water and a sponge — liquid starch releases cleanly from most painted wall surfaces.
Quick Win: Ten book pages applied with removable wallpaper paste behind a single floating shelf takes 20 minutes and costs nothing beyond the paste — the visual transformation of the shelf display is immediate and significant.
Shop The Look
- Removable wallpaper paste non permanent
- Foam brayer roller craft smooth
- Floating wall shelf natural wood minimal
- Liquid starch fabric craft supply
- Foam brush set wide application
7. Book Page Rolled Paper Wreath
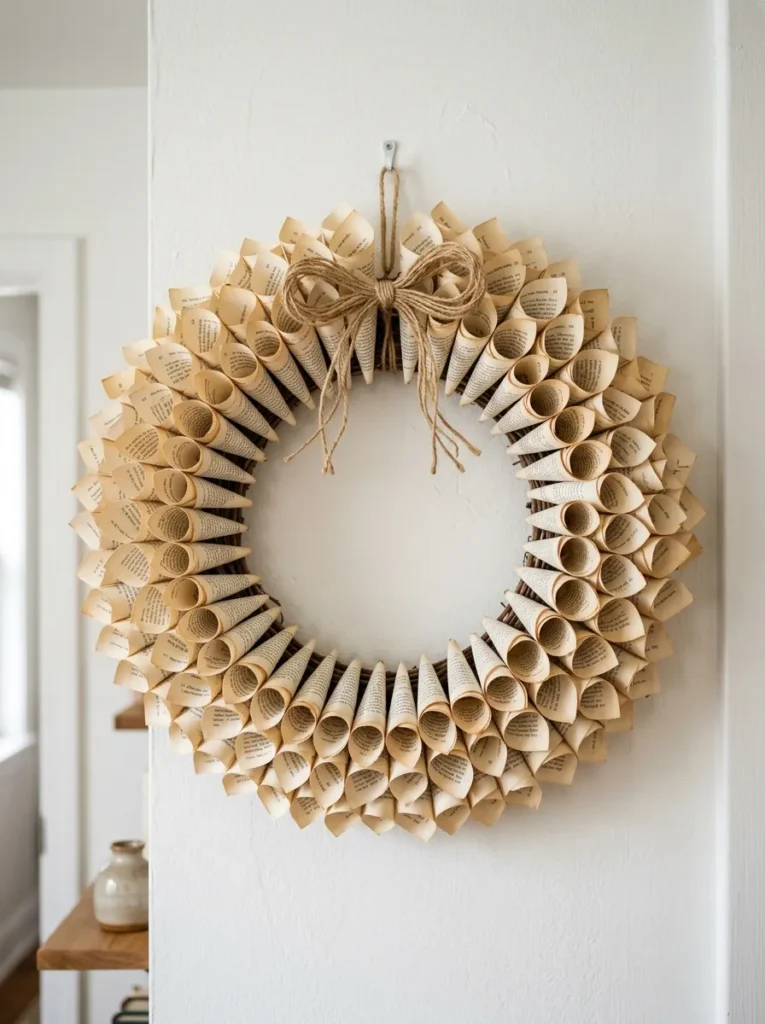
Vibe: The wreath is handcrafted — a full book page rolled wreath has a textural richness and dimensional depth that a flat paper wreath entirely lacks, and the warm ivory of aged pages reads as intentionally neutral decor year-round.
Why it works: A rolled-cone wreath works by building three-dimensional texture from repeated simple units — each page rolled into a small tight cone and glued outward from the base ring creates a bristled, dimensional surface that catches directional light and creates shadow depth. Unlike flat wreaths, the forward-pointing cones create a silhouette that projects from the wall, giving the piece the visual presence of a much more complex object. The grapevine ring base (available at craft stores for $3–$8) provides a structural armature that holds its circular shape under the weight of paper cones without additional framing.
How to get it: Cut book pages into quarters. Roll each quarter diagonally into a tight cone shape, secure the tip with a tiny dot of hot glue, and trim the open end flat. Starting at the outer ring of a grapevine wreath base, glue cones outward in tight rows, working toward the inner ring. One standard dictionary page yields four cones; a complete 12-inch wreath requires approximately 80–100 cones.
Shop The Look
- Grapevine wreath base 12 inch natural
- Natural jute twine bow craft
- Hot glue gun high temp craft
- Vintage dictionary craft supply pages
- Wreath hanger door hook over door
8. Book Page Map Art in a Vintage Frame
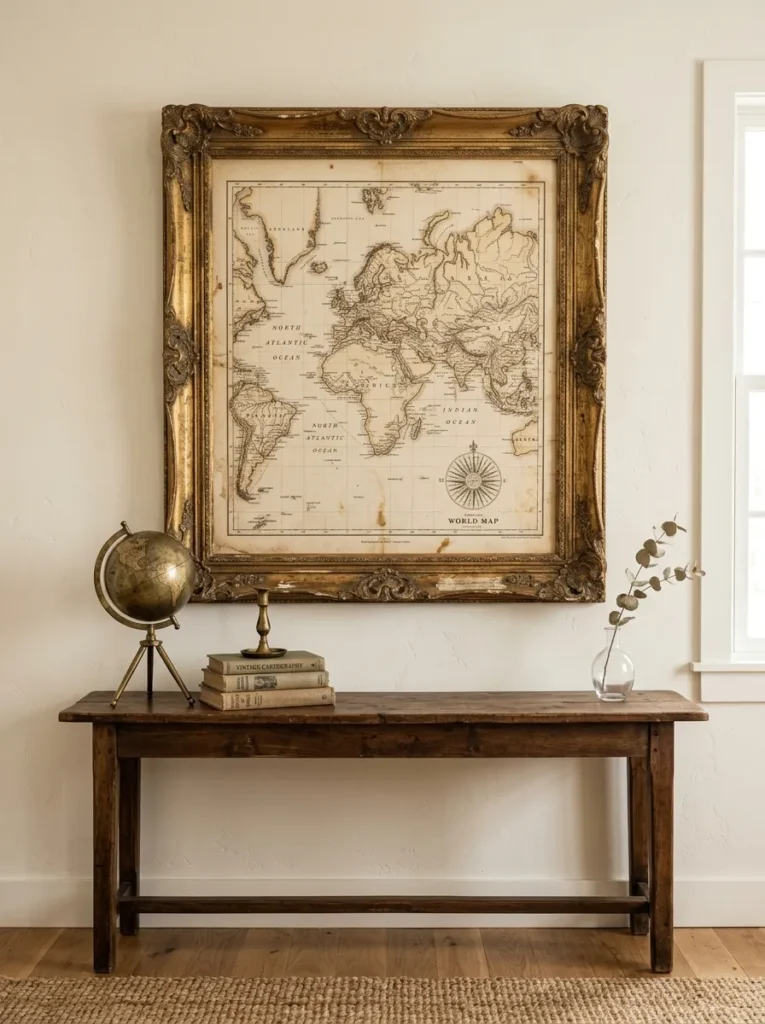
Vibe: The piece is vintage — a single atlas map page in an ornate frame reads exactly like an antique print that cost significantly more than the frame it came in.
Why it works: Vintage atlas and geography book pages carry inherent visual complexity — compass roses, illustrated coastlines, vintage typography in multiple weights, and hand-drawn topographic detail that modern digital maps cannot replicate. Framed without alteration, a single quality map page from a mid-20th century atlas is indistinguishable from a purchased antique print. The key is frame selection: a distressed gold or dark carved wood frame (thrift store frames, $4–$15) adds the period weight that a modern frame would undercut. The aged page tone and the aged frame tone exist in the same warm sepia-amber color family, creating an integrated piece.
How to get it: Source vintage atlases from thrift stores, library sales, or estate sales — damaged atlases that cannot be sold whole often have intact map pages available for pennies. Remove pages by cutting along the spine with a sharp craft knife rather than tearing (which creates a ragged edge). Frame without matting for maximum map presence, or with a narrow antique white mat for a more formal presentation.
Shop The Look
- Ornate distressed gold picture frame 11×14
- Vintage atlas map book craft supply
- Narrow antique white mat board pre-cut
- Small brass decorative globe desk
- Linen hardcover book set display neutral
9. Book Page Feathers as Wall Art or Bouquet Filler
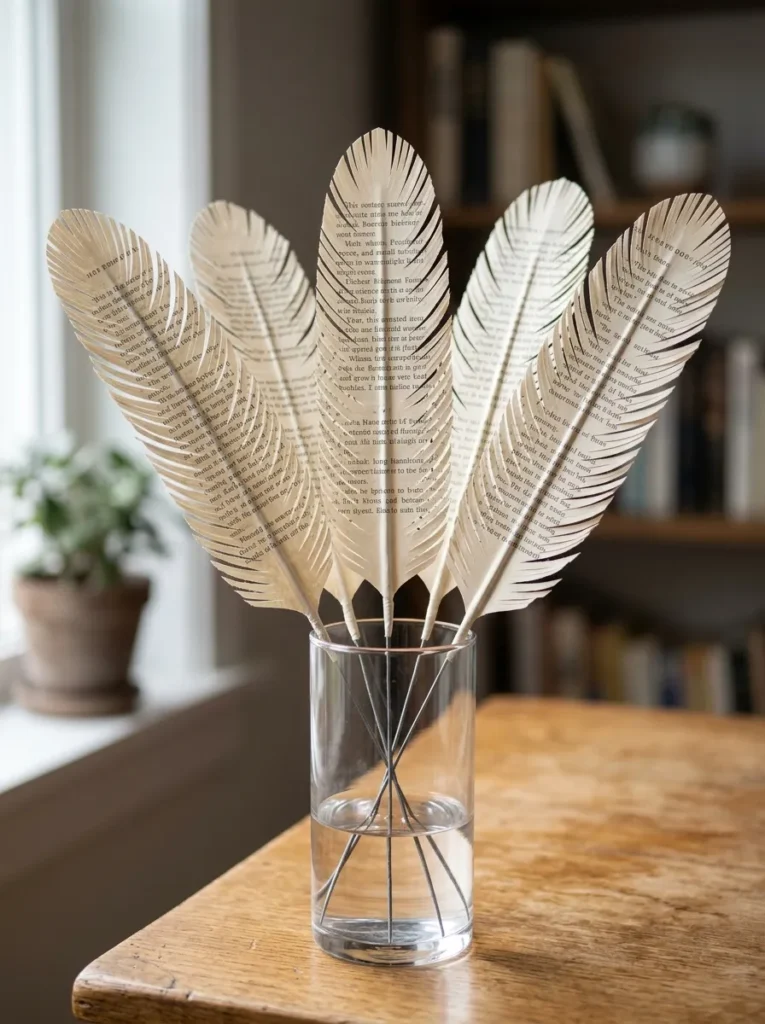
Vibe: The arrangement is delicate — book page feathers in a clear vase have the botanical elegance of a dried grass arrangement with the added visual interest of visible typography across every surface.
Why it works: The feather shape is one of the most recognizable natural forms, and the fringe-cutting technique (making parallel cuts from the outer edge toward the center spine of the feather shape, stopping just short of the spine) creates a convincing approximation of feather barb structure using nothing but scissors. The slight variation in fringe width and length that naturally results from hand-cutting adds to the organic realism. Book page paper is the ideal weight for this craft — heavy enough to hold a three-dimensional curl in the fringe tips when gently bent, light enough to move slightly in air currents.
How to get it: Draw a feather outline (6–10 inches long) on a book page and cut out the basic shape. Make parallel cuts from both outer edges toward the center spine at 1/8-inch intervals, stopping 1/4 inch from the spine. Gently curl each fringe strip slightly by rolling over a pencil. Insert a length of floral wire along the spine and secure with a thin line of hot glue to create a stem.
Shop The Look
- Floral wire green stem pack craft
- Craft scissors precision point
- Clear glass vase cylinder medium
- Bone folder scoring tool paper crafts
- Vintage paperback novel craft supply pages
10. Book Page Lampshade Lining for Warm Typographic Light
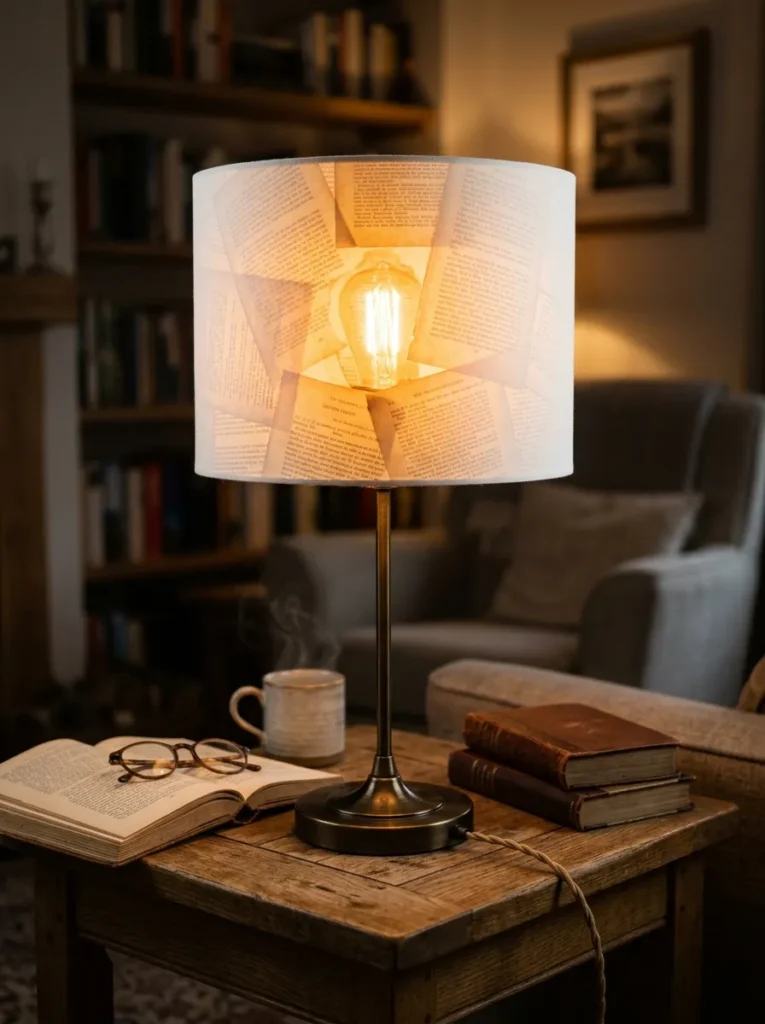
Vibe: The lamp is intimate — a book page-lined lampshade casts warm amber light with a soft typographic shadow pattern that turns any table lamp into a piece of functional art.
Why it works: Book page paper, being thin and slightly translucent, acts as a light diffusion layer when applied to the interior of a lampshade — the text and typography become a subtle backlit pattern visible on the exterior of the shade when the lamp is on. The warm ivory tone of aged book pages adds an amber quality to the transmitted light that is significantly warmer than a standard white shade, creating more flattering, intimate ambient light. The transformation requires no exterior change to the lampshade — the effect is entirely interior and entirely reversible.
How to get it: Tear book pages into pieces approximately 3×4 inches with soft torn edges. Apply to the interior of a plain white lampshade using diluted Mod Podge, overlapping pieces and working in sections from top to bottom. Use only LED bulbs (never incandescent) with this technique — LED bulbs produce negligible heat, while incandescent bulbs generate enough heat to potentially ignite paper at close range. Limit to bulbs under 10 watts.
Quick Win: A single book page pressed flat against the inside of an existing lampshade (held in place by the bulb clip) with no adhesive required gives a preview of the effect before committing to a full application — test the look at zero cost before making it permanent.
Shop The Look
- Plain white drum lampshade 10 inch
- LED bulb warm white 2700K E26 low watt
- Mod Podge matte decoupage medium
- Small foam brush set interior application
- Vintage novel paperback lot craft pages
11. Book Page Silhouette Art in Shadow Box Frame
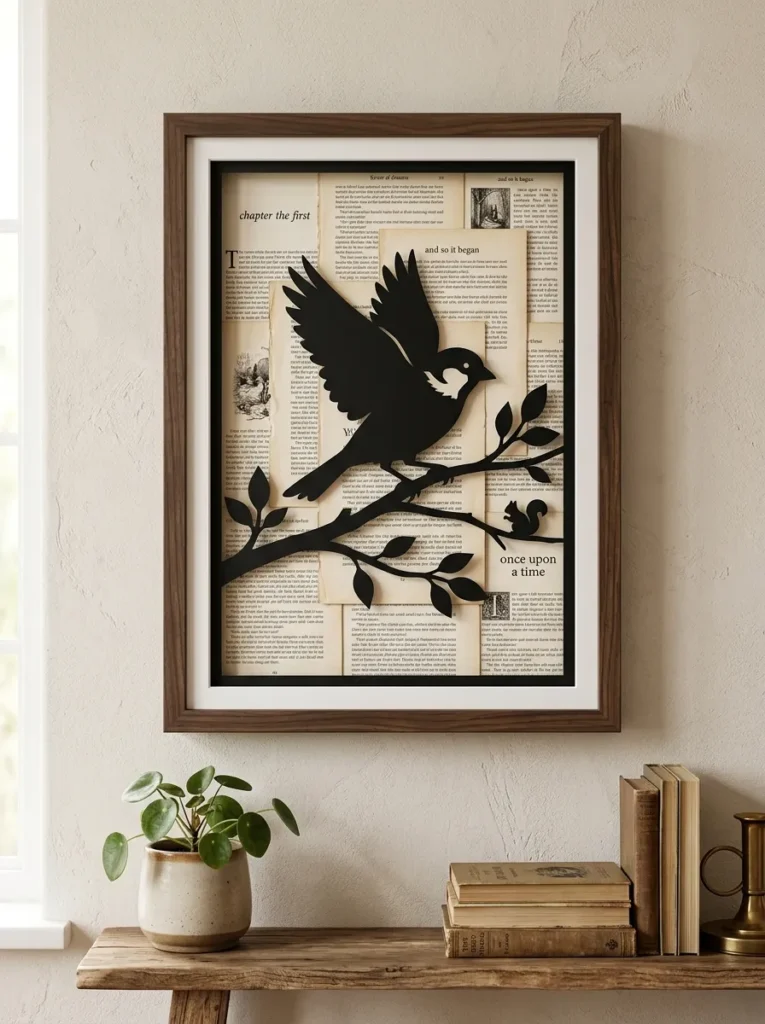
Vibe: The piece is graphic — the stark contrast between a matte black silhouette and the warm typographic background creates a visual tension that reads as professionally designed art.
Why it works: Black silhouette against a book page background exploits simultaneous contrast — the darkest possible value (matte black) against a mid-light warm ivory creates maximum figure-ground separation, making the silhouette appear to float above the surface. The shadow box frame adds literal depth by creating a physical gap between the silhouette and the background, which adds a dimensional shadow that reinforces the floating effect. This contrast principle is the same used in museum-quality botanical illustration framing, which is why the finished piece carries the same visual authority.
How to get it: Print a silhouette template (bird in flight, stag, botanical branch — all widely available as free printable templates) on black cardstock and cut with sharp scissors or a craft knife on a cutting mat. Layer 3–4 book pages as the background, mounted flat to the back of a shadow box frame, and mount the silhouette slightly proud of the surface using foam mounting squares for the dimensional gap.
Shop The Look
- Shadow box frame deep 8×10 matte black
- Black cardstock sheets craft supply
- Foam mounting squares adhesive double sided
- Craft knife precision cutting set
- Self healing cutting mat A4
12. Book Page Decoupage Planters for Herb or Succulent Display
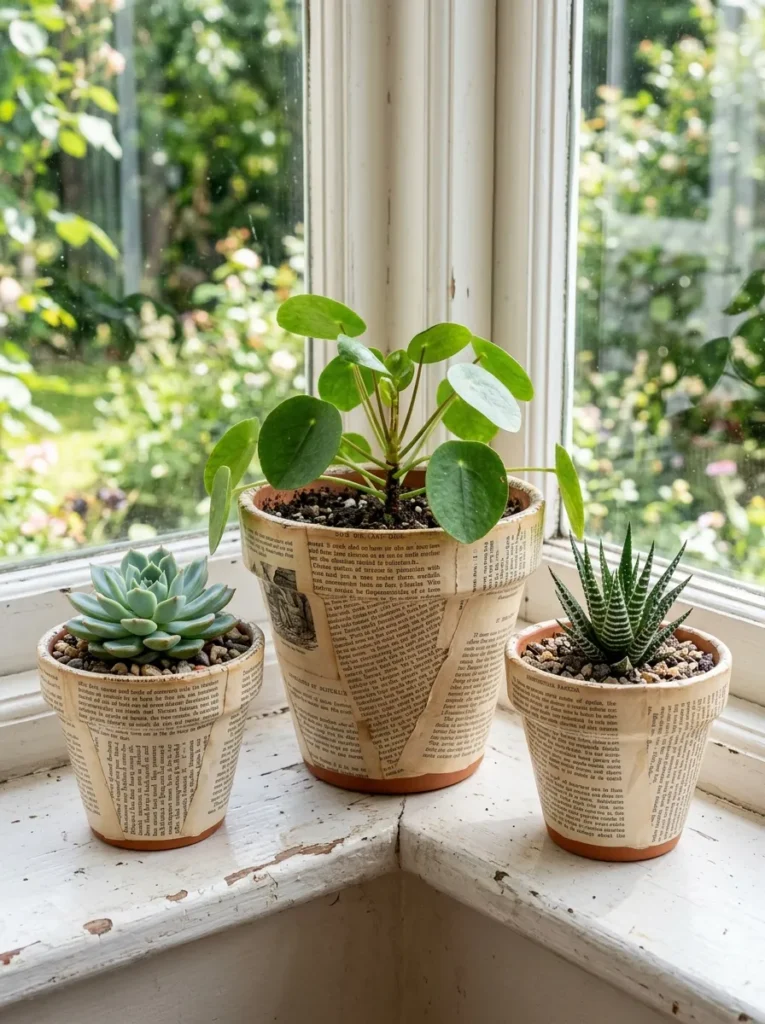
Vibe: The planters are botanical — book page decoupage on terracotta pots creates a warm, layered surface that makes a simple succulent planter look like something from an artisan garden shop.
Why it works: The terracotta pot’s curved surface and natural clay tone create a warm background that book page decoupage adheres to perfectly — the slightly rough terracotta texture creates micro-adhesion that keeps paper flat without bubbles on a curved surface more reliably than on smooth ceramics. The warm ivory of aged book pages and the warm clay of terracotta exist in the same color temperature range, so the decoupage reads as an extension of the pot material rather than a layer applied on top. The plant itself anchors the craft object to functionality, which elevates it above purely decorative status.
How to get it: Tear book pages into small irregular pieces (1–2 inches). Brush diluted Mod Podge onto a small section of the pot exterior, apply a paper piece and smooth flat, then brush Mod Podge over the top to seal. Overlap pieces and work in sections around the pot. Finish with two coats of outdoor-rated Mod Podge for planters that will be watered or placed outdoors.
Shop The Look
- Terracotta pot set three sizes classic
- Mod Podge outdoor formula weather resistant
- Small succulent plant assortment live
- Foam brush set wide craft application
- Pebble top dressing succulent display bag
13. Book Page Fan Wall Art Arrangement
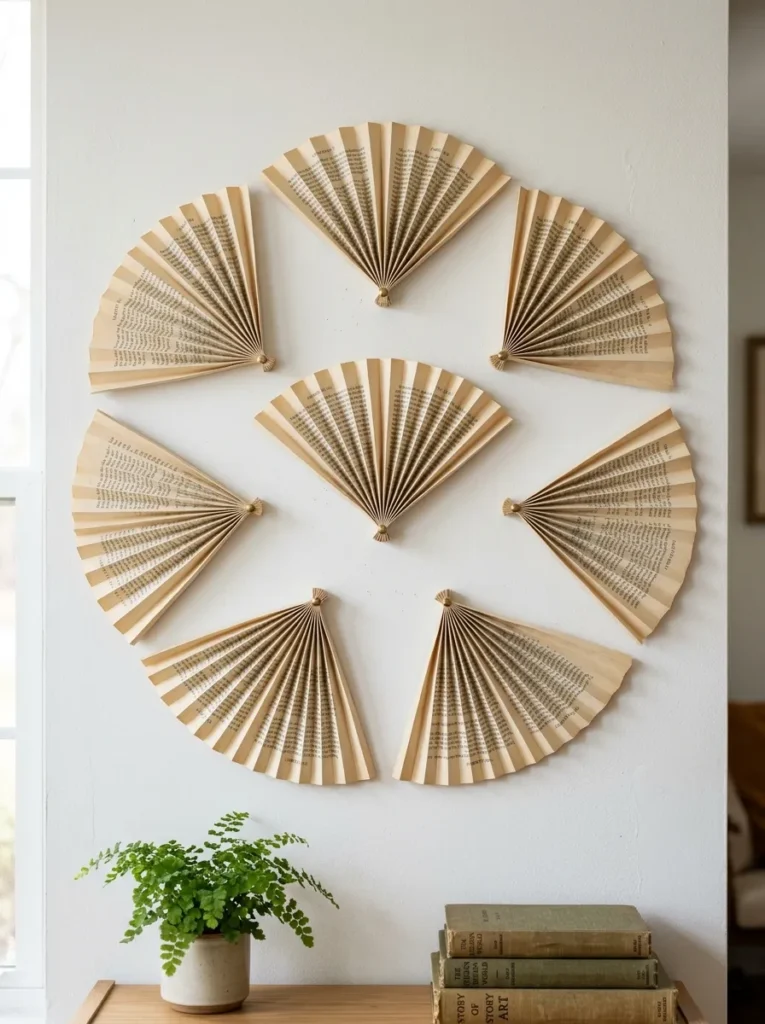
Vibe: The wall is graphic — an arrangement of spread book page fans creates a pattern of repeated folded form that reads as a deliberate installation rather than a collection of paper crafts.
Why it works: The accordion-folded fan form is the most structurally efficient paper craft — a single A5 book page accordion-folded at 1/2-inch intervals and pinched at the base creates a semicircular fan 8–10 inches in diameter that stands fully self-supporting. Mounted in a radial arrangement on a wall (all bases pointing toward a center point, fans spreading outward), the pattern creates a starburst or sunflower form at wall scale that reads as an intentional textile or sculptural installation. The fold shadows vary across each fan as the light direction changes through the day, keeping the piece visually dynamic.
How to get it: Accordion-fold a full book page at 1/2-inch intervals along the long axis. Pinch and secure the base with a brass brad fastener (pushing through all layers and spreading the prongs on the back). Mount directly on the wall with a small pin through the brad. Arrange 7–9 fans in a radial arc, with bases 2–3 inches apart.
Quick Win: Three book page fans pinned in a simple row on a plain wall takes 15 minutes and costs only the price of three brass brads ($2 for a pack of 50) — a fast preview of the full installation effect.
Shop The Look
- Brass brad fastener pack craft supply
- Push pin set small head brass
- Vintage paperback lot pages craft supply
- Picture hanging strip adhesive removable
- Bone folder scoring tool crisp folds
14. Book Page Candle Hurricane Wrap
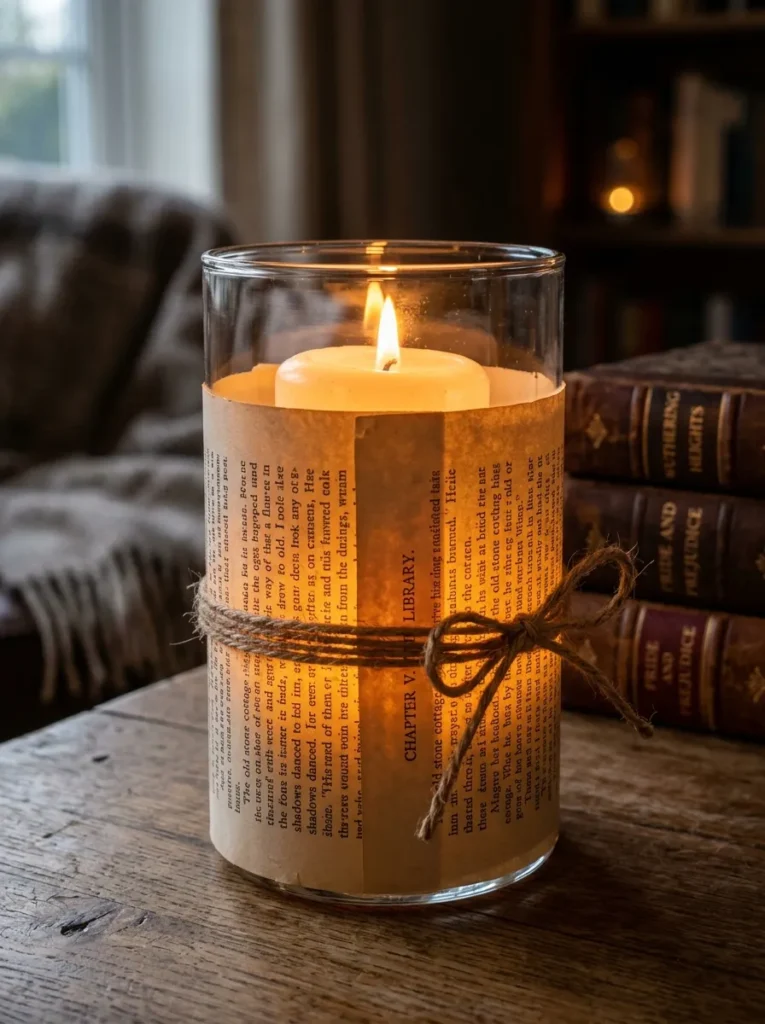
Vibe: The hurricane is intimate — candlelight filtered through a book page wrap creates the warmest, most layered light quality of any simple craft, and the text readable through the glow adds a literary quality that no store-bought candle holder can match.
Why it works: Book page paper’s translucency is its most useful optical property in this application — it diffuses the direct candle flame into a warm, even ambient glow across the entire wrapped surface while the text creates a subtle shadow pattern in the diffused light. The glass hurricane provides both the fire safety barrier (essential — never place book pages directly around an open flame without a glass barrier) and the structural form that keeps the paper wrap in a perfect cylinder. The natural twine tie at the center adds a tactile finishing element that elevates the piece above a simple paper-and-glass combination.
How to get it: Wrap a book page around a glass hurricane cylinder with the text facing outward. Secure with a single length of natural jute twine tied at the vertical center with a simple bow or knot. Use only with a battery-operated LED candle, or with a real wax candle set well below the paper wrap height inside the glass — the glass barrier must always separate paper from flame completely.
Shop The Look
- Glass hurricane candle holder cylinder large
- Natural jute twine thin craft roll
- Battery operated LED pillar candle realistic
- Vintage poetry or novel pages craft supply
- Round wood slice base candle display
15. Book Page Rolled Beads for a Statement Necklace
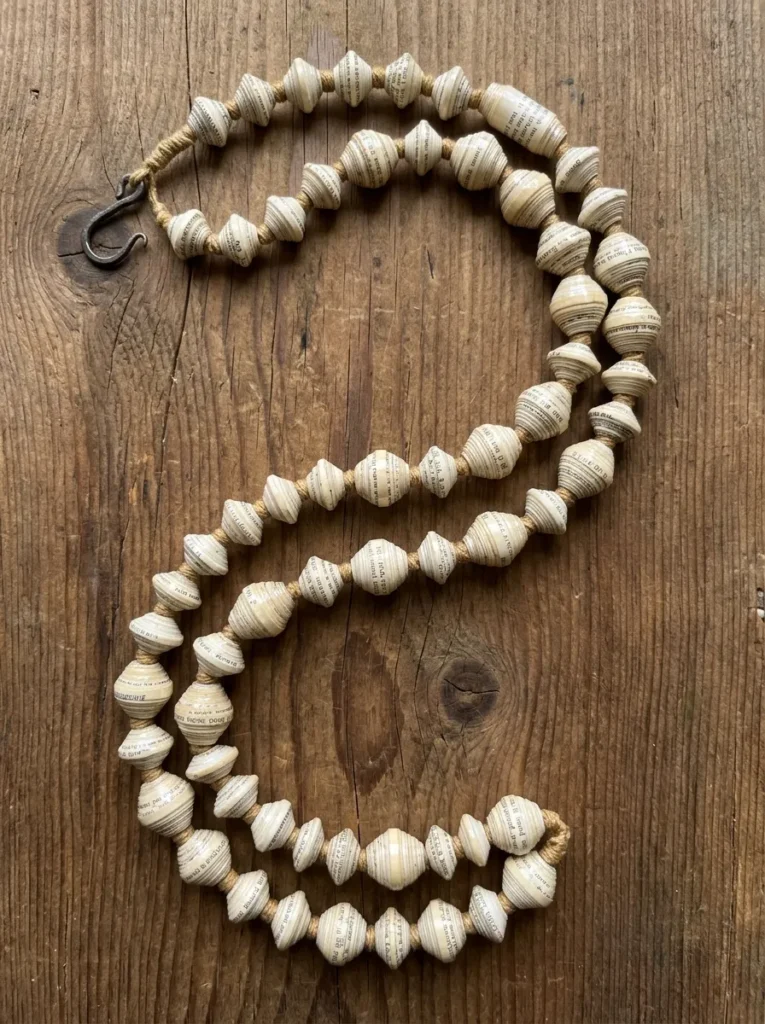
Vibe: The necklace is artisan — hand-rolled book page beads sealed to a lacquer-like finish look more like expensive resin jewelry than paper craft when finished correctly.
Why it works: Tightly rolled paper beads develop a cross-sectional pattern of concentric text rings (visible at the bead ends) that resembles natural stone banding or wood grain — this is a genuinely beautiful material property, not a compromise. Sealed with multiple coats of glossy Mod Podge or clear nail polish, the paper surface becomes hard and shiny in a way that reads as ceramic or resin rather than paper. The key to the expensive look is uniformity of tightness — a bead rolled with consistent tension is smooth and round; inconsistent tension creates an irregular, obviously craft-like surface.
How to get it: Cut book pages into long triangles (base 1/2 inch, length 8 inches). Starting at the wide base, roll tightly around a toothpick, applying a thin line of glue along the paper as you roll. Slide off the toothpick when dry and seal with 3 coats of glossy Mod Podge, allowing full drying between coats. String on waxed linen cord with small brass spacer beads between paper beads for a finished jewelry appearance.
Quick Win: Ten paper beads sealed with glossy Mod Podge and strung on waxed cord with a simple toggle clasp cost under $3 in materials and take one hour to make — the finished piece reads convincingly as artisan jewelry at a craft market price point of $15–$30.
Shop The Look
- Waxed linen jewelry cord natural
- Brass spacer bead set small jewelry
- Toggle clasp jewelry findings gold
- Toothpick round wood pack craft
- Mod Podge gloss formula seal finish
16. Book Page Decoupage Letters for Gallery Wall Spelling
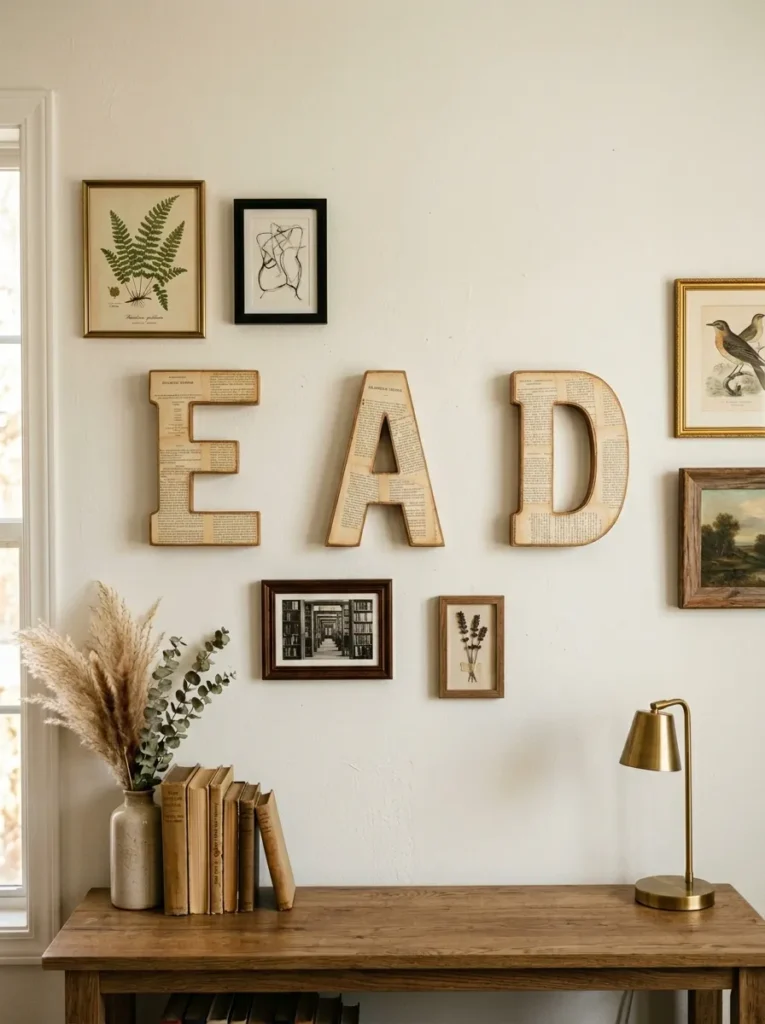
Vibe: The letters are graphic — large wooden letters covered in book page text have a typographic richness that painted letters lack, and the layered text-on-text concept carries a visual wit that elevates them above standard initial decor.
Why it works: Papier-mâché or MDF wooden craft letters provide a pre-formed structure that eliminates the technical challenge of creating dimensional letter forms from scratch — the craft effort goes entirely into surface treatment. Book page decoupage on a letter form creates a self-referential visual concept (letters covered in letters) that reads as intentionally designed rather than accidentally decorative. The scale of the letters (6–10 inch craft letters are widely available for $2–$6 each) means each piece has enough surface area for the typography to be readable and impactful.
How to get it: Apply torn book page pieces to all surfaces of wooden craft letters using diluted Mod Podge, wrapping paper pieces around edges and corners to cover the letter fully including its sides and back. Finish with two matte sealer coats. Mount on the wall with standard picture hanging strips or small nails through pre-drilled holes in the letter backs.
Shop The Look
- Wooden craft letter 8 inch MDF unfinished
- Mod Podge matte sealer medium
- Picture hanging strip adhesive removable
- Foam brush set medium application
- Vintage hardcover book lot craft supply
17. Rolled Book Page Backdrop for Flat Lay Photography
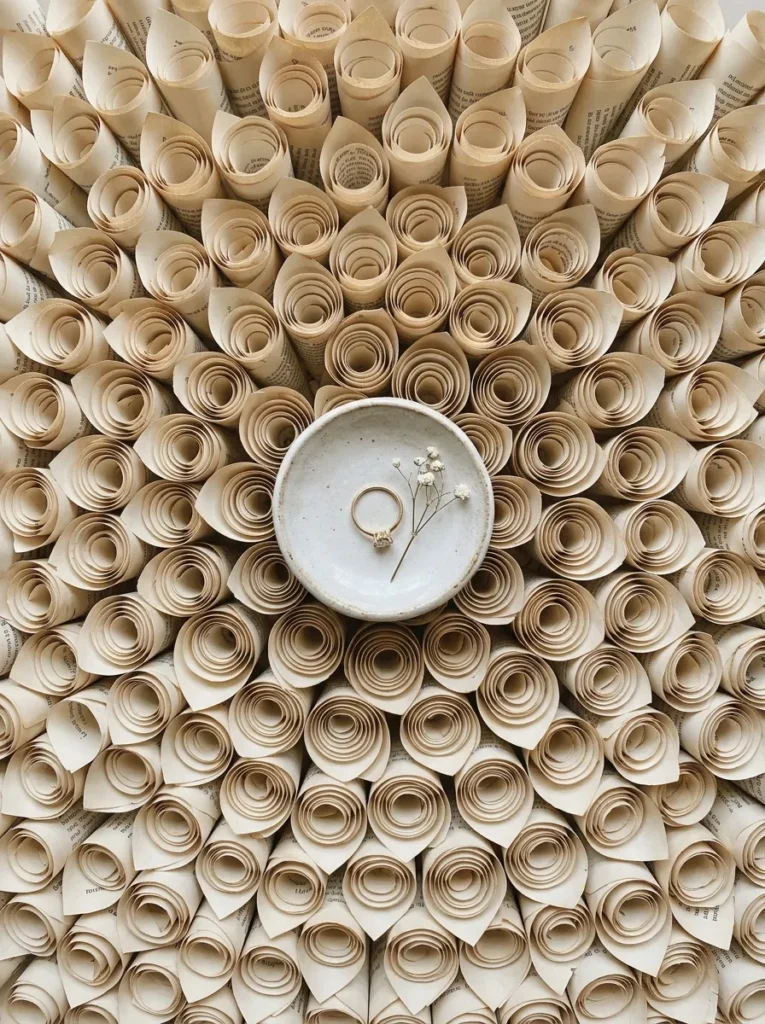
Vibe: The backdrop is editorial — a surface of tightly arranged book page rolls creates a texture board that functions as a professional flat lay photography background, giving every object placed on it an expensive, styled quality.
Why it works: A rolled book page backdrop works by creating a uniform texture that reads as a single material at camera distance — the individual rolls disappear into an overall honeycomb-like pattern that provides visual interest without competing with the subject placed on it. The warm ivory tone is the ideal flat lay background color for product photography because it reads as warmer than a white surface (which creates blue shadows) and more neutral than a wood surface (which competes with warm-toned objects). This is a functional craft that improves the quality of every photograph taken on it.
How to get it: Roll 50–80 book page sections into tight cylinders (not cones — cylinders create the consistent flat surface needed for a backdrop). Cut all rolls to the same length (2–3 inches). Arrange tightly in rows on a piece of cardboard or a shallow tray, securing with dots of hot glue between rolls. The finished panel is rigid, flat, and reusable indefinitely.
Shop The Look
- Foam core board white flat lay base
- Binder clip large set hold backdrop
- Book page lot craft supply pages
- Hot glue sticks clear craft pack
- Craft knife precision cutting blade set
18. Book Page Gift Wrapping and Tags
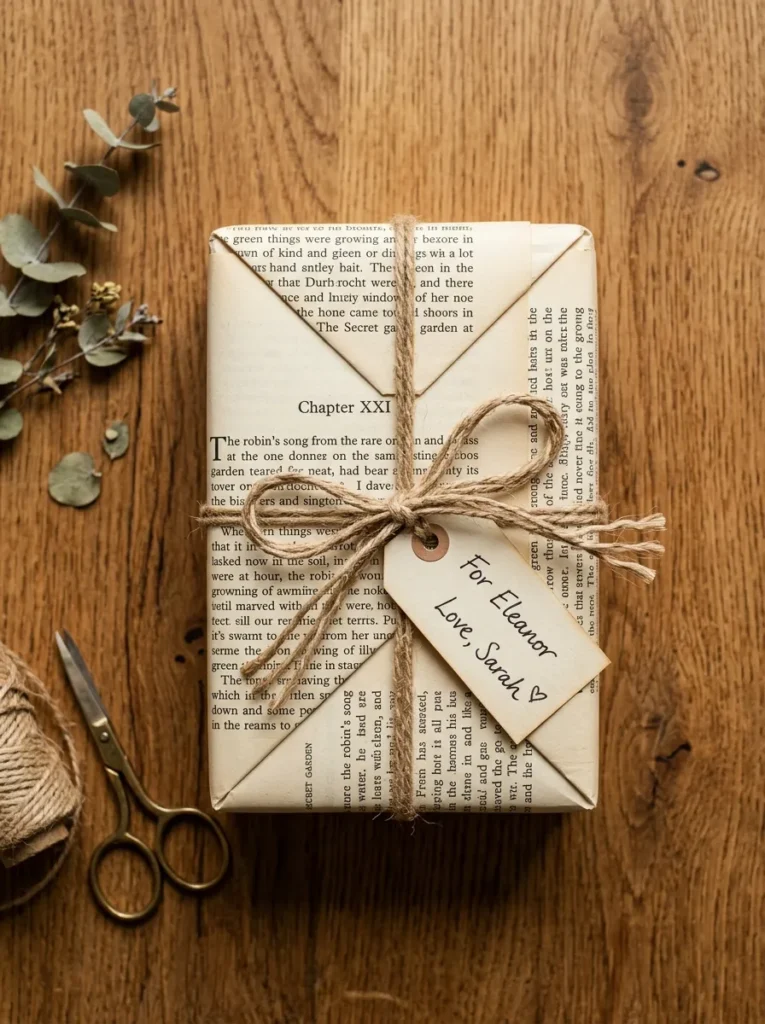
Vibe: The gift is artisan — a book page-wrapped present with a handwritten tag is the most sophisticated zero-cost gift wrapping possible, and consistently more remarked upon than expensive store-bought wrapping.
Why it works: Book page gift wrapping works through the principle of intentional material choice — the message to the recipient is that care went into the presentation, not money. Vintage typography and aged paper are inherently warm and beautiful materials that conventional wrapping paper’s printed patterns cannot rival on a tactile level. The slight imperfection of book page corners (slightly soft rather than razor-crisp, as with coated wrapping paper) reads as hand-done and personal. A hand-cut tag from the same source book, with a written note on the reverse, completes a presentation that costs nothing beyond thought.
How to get it: Choose pages with interesting text density for the outer wrapping layer (dense small-type pages look most sophisticated). Wrap as normal, using small pieces of washi tape to secure seams (washi tape in a kraft or gold tone disappears against the paper tone). Punch a hole in a small tag cut from the same book and thread with a short length of twine.
Quick Win: A single full-page dictionary entry as a gift wrap panel for a small gift (jewelry box, candle) takes 3 minutes and requires only the page, tape, and 6 inches of twine — the look consistently outperforms commercial wrapping on visual impact.
Shop The Look
- Washi tape kraft brown natural tone set
- Natural twine thin ribbon craft roll
- Hole punch single small craft
- Vintage dictionary hardcover craft pages
- Rubber stamp alphabet set small text
19. Book Page Paper Clay Bowl Form
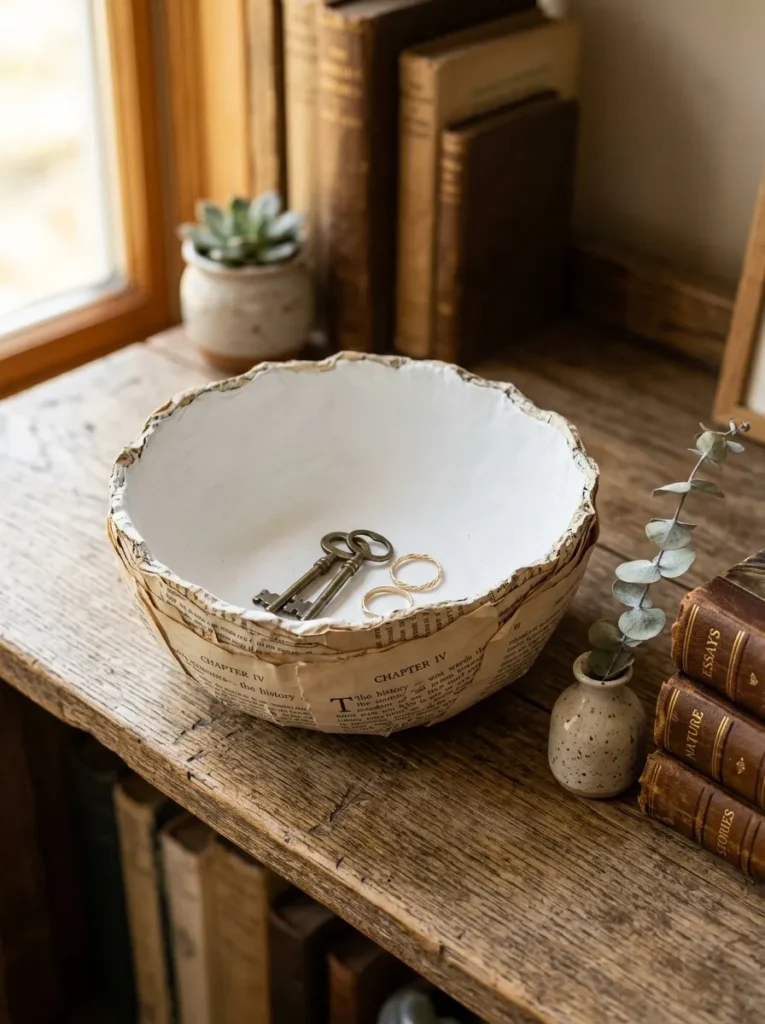
Vibe: The bowl is artisan — a hand-formed paper mache bowl with a chalk-white painted interior reads as a ceramic object from across the room, and the book page exterior visible when looking from above adds a material richness that store-bought ceramic dishes lack.
Why it works: Paper mache bowl forming over a balloon or existing bowl creates an organic, slightly irregular shape that hand-thrown ceramics share — the gentle imperfection of the rim and the slight variation in wall thickness confirm that this is handmade, which is the quality signal that elevates it from craft to object. Painting only the interior in matte chalk white (leaving the book page exterior raw and sealed) creates a two-material object that shows restraint — full painting would conceal the interesting material, while partial painting frames it.
How to get it: Tear book pages into 1-inch strips. Mix equal parts white PVA glue and water. Dip strips in the glue mixture, remove excess, and layer over an upturned bowl mold (coat the mold with petroleum jelly first for easy release). Apply 4–5 layers, allowing each to dry partially before the next. Remove from mold when fully dry and paint only the interior with chalk paint. Seal exterior with matte Mod Podge.
Shop The Look
- White chalk paint small pot craft
- PVA glue craft white multi purpose
- Round balloon pack craft mold
- Petroleum jelly mold release craft
- Matte Mod Podge sealer finish
20. Book Page Monogram Wreath with Greenery Accents
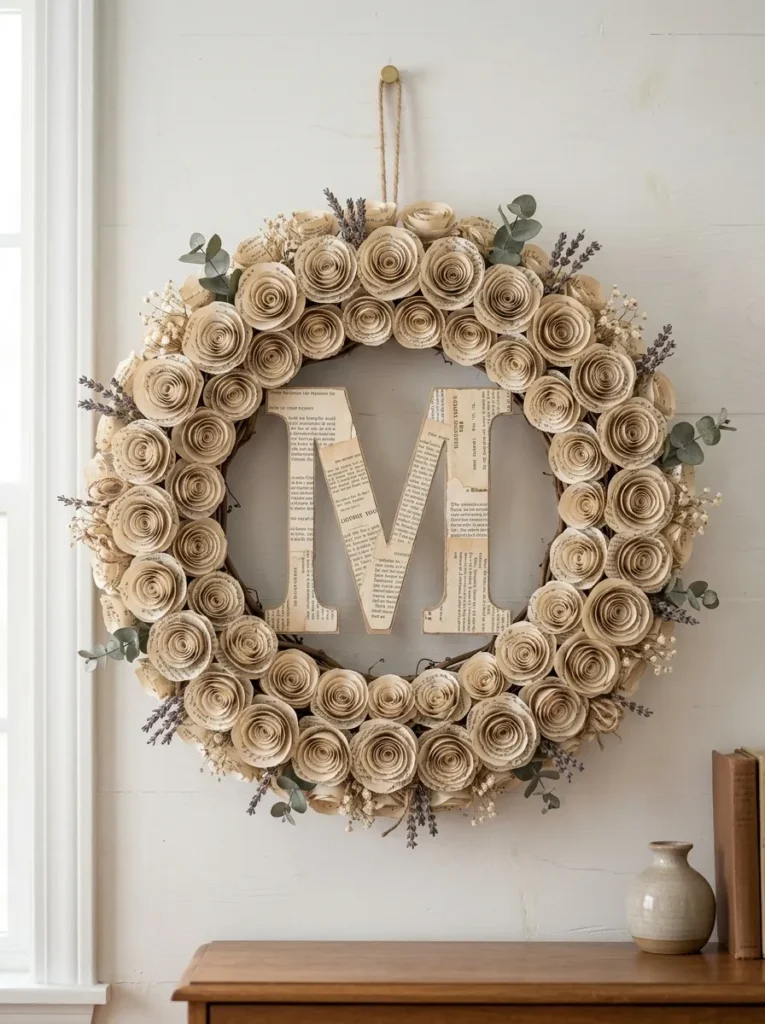
Vibe: The wreath is personal — a monogram wreath in book page materials reads as a custom, made-to-order piece rather than a craft project, and the combination of rolled roses and dried greenery gives it a florist’s structural logic.
Why it works: The monogram element transforms the wreath from decorative object to personal object — a wreath is generic; a monogram wreath is specific to one household. The book page material creates visual continuity between the wreath ring and the central letter (both warm ivory, both showing typography) so the monogram reads as integrated rather than applied. Adding dried greenery (eucalyptus, lavender, preserved fern) introduces organic color and texture that prevents the all-paper composition from reading as too uniform or flat.
How to get it: Build the rose ring following the same technique as Idea 7 (rolled cone wreath), but leave the center of the wreath open. Cut a large letter from cardstock in a font with clean, thick strokes (a bold serif font works best) and decoupage with book page pieces. Attach the completed monogram letter at the center using hot glue and wire support from the back.
Shop The Look
- Grapevine wreath base 14 inch natural
- Dried eucalyptus bunch preserved natural
- Cardstock white heavyweight sheets
- Hot glue gun craft precision tip
- Dried lavender bunch aromatic decor
21. Book Page Accordion Photo Display
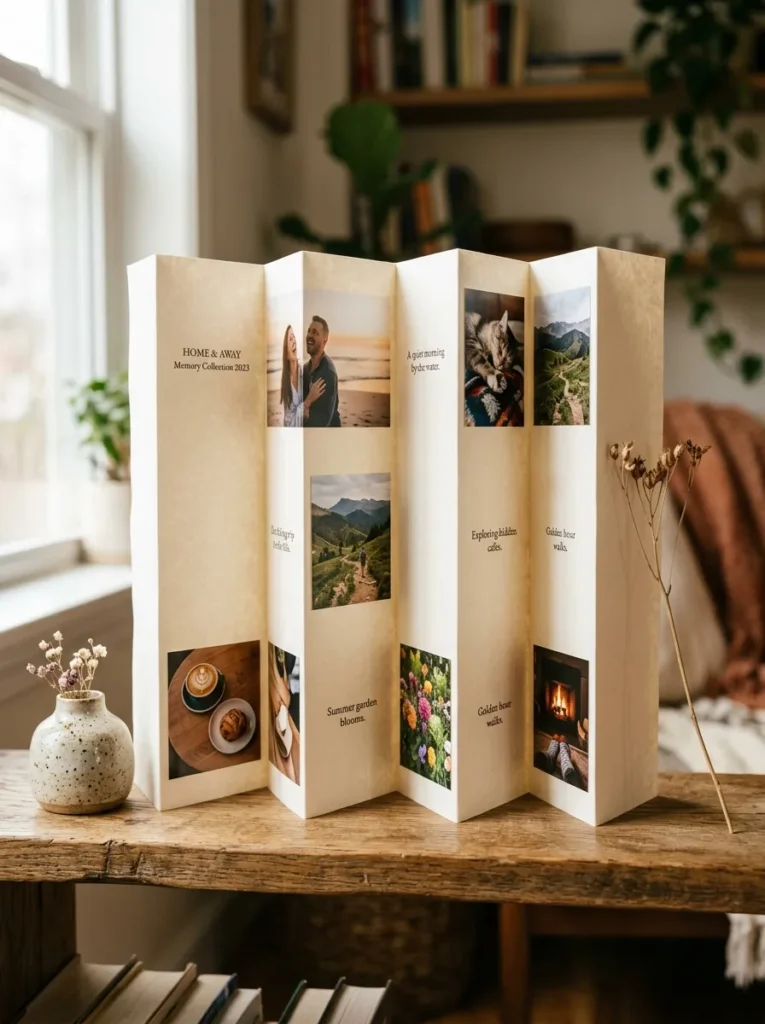
Vibe: The display is personal — an accordion photo structure that alternates book pages and photographs creates a self-standing display object that is simultaneously a craft piece and a memory archive.
Why it works: The accordion fold structure is self-supporting without any frame or stand, which is its primary functional advantage over flat photo displays — it occupies a small footprint (3–4 inches deep) while displaying 6–8 photographs at a comfortable viewing angle. Alternating book page panels between photographs creates visual breathing room between images and provides the typographic background texture that makes each photograph read as a framed piece rather than a snapshot. The structure is also interactive — it can be collapsed flat for storage and re-expanded for display.
How to get it: Cut book pages and photographs to the same size (4×4 inches or 3×5 inches). Alternate book page and photograph, adhering each to the next with a 1/4-inch overlap, accordion-folding between each piece so adjacent panels face opposite directions. Score fold lines with a bone folder for crisp, clean folds. The finished structure stands freely when placed on any flat surface.
Shop The Look
- Bone folder scoring tool paper craft
- Photo print wallet size 4×4 glossy
- PVA craft glue precision tip bottle
- Washi tape narrow accent craft
- Micro clothespin set natural wood display
22. Book Page Decoupage Clock Face
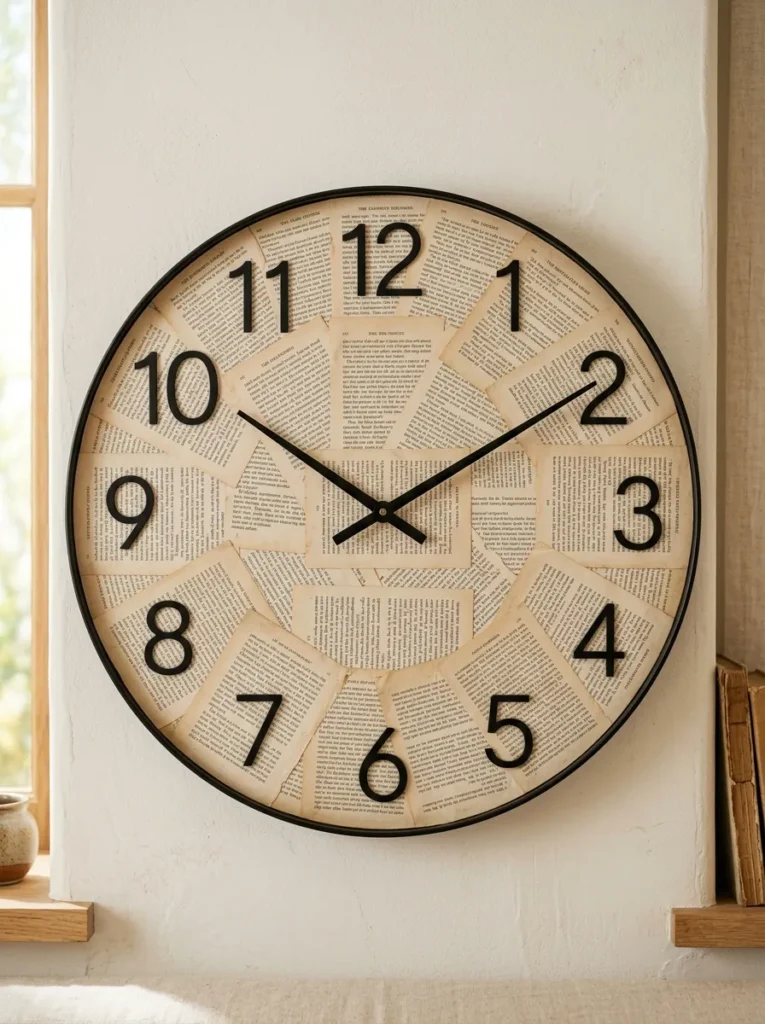
Vibe: The clock is editorial — a book page face on a wall clock creates a functional object that reads as a design piece, where the text beneath the hands creates a constant visual irony about time and narrative.
Why it works: The clock face is an ideal book page decoupage surface because its circular form with a central axis (the clock mechanism shaft) creates a natural compositional structure — the text radiates from the center in a way that maps to the clock’s visual logic. Simple hands and numerals over the book page face maintain the piece’s legibility as a clock while the typography adds the visual layer that distinguishes it from a standard timepiece. This is a functional craft, which elevates it above purely decorative objects in everyday use and therefore everyday visibility.
How to get it: Purchase a plain-face clock kit or disassemble an inexpensive clock to access the face panel. Apply book page pieces to the face with Mod Podge, covering the surface including the central hole area (pierce through after the paper dries). Reattach the clock mechanism and hands. The entire transformation costs under $20 if starting from a thrift store clock.
Quick Win: A $5 thrift store clock with a plain face, disassembled and decoupaged with book pages in 30 minutes, sells at craft markets for $25–$40 — the gap between cost and perceived value is one of the highest of any craft on this list.
Shop The Look
- Clock mechanism replacement kit quartz
- Clock hands set brass replacement
- Mod Podge matte sealer medium
- Craft knife precision piercing tip
- Thrift store plain face clock craft supply
23. Book Page Terrarium Backdrop Liner
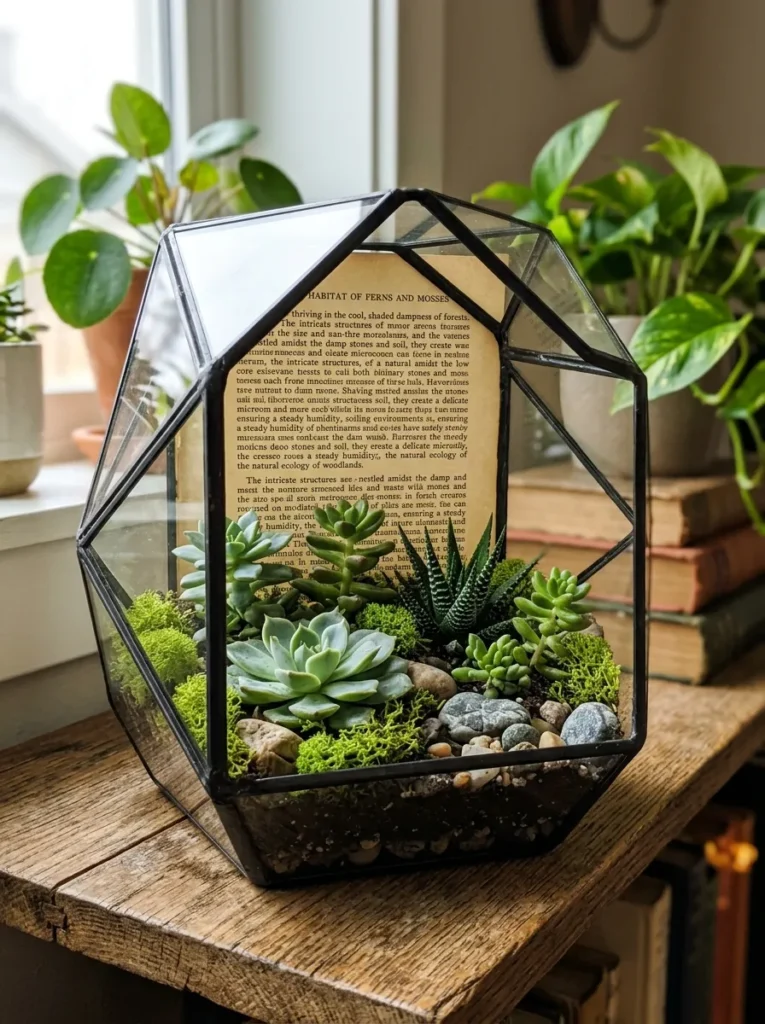
Vibe: The terrarium is warm — a book page backdrop liner inside a geometric glass terrarium adds a warm typographic layer behind the plants that transforms a simple succulent display into something far more considered.
Why it works: The book page liner inside a terrarium functions as a visual background in the same way a mat functions behind a framed print — it creates a defined field of warm color and texture behind the main subject (the plants) that gives the composition depth and warmth. Viewed through glass, the text softens slightly due to the glass’s slight diffusion, reading more as warm pattern than readable typography at normal viewing distance. The warm ivory page tone also warms the green of the plants rather than neutralizing it the way a white background would.
How to get it: Cut a book page to fit the back interior panel of the terrarium. Insert before adding the base layer (gravel, then soil) so the page is held in place by the layers above it. For open-top terrariums, simply lean the page against the back panel — no adhesive needed. Replace seasonally if desired, as the page is easily removed.
Shop The Look
- Geometric glass terrarium large open top
- Preserved sheet moss natural green craft
- Succulent mix small pot assortment
- Decorative gravel pebble terrarium base
- Activated charcoal terrarium drainage layer
24. Book Page Fringe Curtain Room Divider
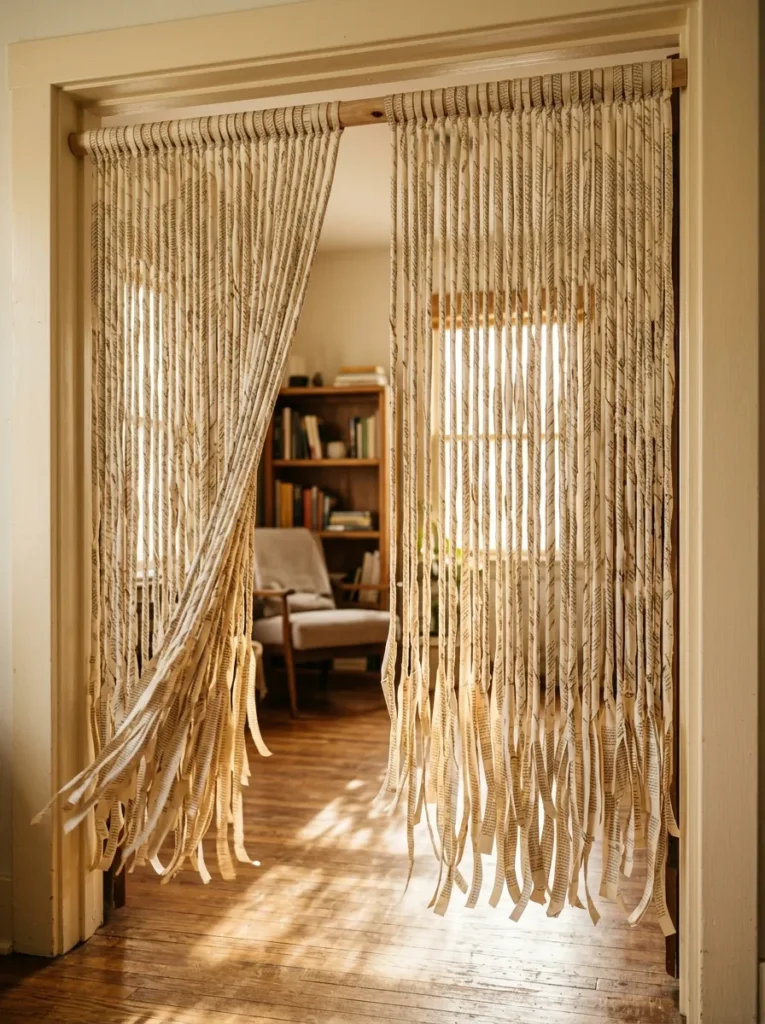
Vibe: The divider is layered — a book page fringe curtain filters light and sight lines through the warm ivory of printed text, creating a semi-private division between spaces that is far more visually interesting than a fabric curtain at the same price point.
Why it works: A fringe curtain of hanging paper strips works on the principle of translucent layering — viewed from the front, the strips create an opaque-ish surface of warm ivory; backlit, the paper becomes luminous and the text becomes visible, creating a dramatic light quality shift between day and night. The hanging strip format is naturally kinetic — the fringe moves with air currents from walking or ventilation, giving the divider a constant gentle motion that a static panel lacks. This is also the most scalable book page craft on this list — the same technique works at 12 inches wide (shelf divider) or 36 inches wide (full doorway).
How to get it: Cut or tear book pages into strips 1–2 inches wide and the full page length (approximately 10–11 inches). Twist each strip slightly along its length for dimensional texture and to prevent flat strips from sticking together. Tie or loop each strip through holes punched at 1-inch intervals along a raw wood dowel (1-inch diameter, cut to doorway width). Mount the dowel on two small cup hooks. A full doorway curtain requires approximately 60–80 strips.
Shop The Look
- Raw wood dowel rod 1 inch diameter 36 inch
- Cup hook set small brass screw in
- Hole punch single craft supply
- Vintage paperback novel lot craft pages
- Natural twine thin roll hanging craft
How to Start Your Book Page Craft Journey
The single most important first move is to source the right books before making a single craft. Not all book pages are created equal — the difference between a thin paperback page and a thick cream-toned dictionary page is the difference between a craft that looks homemade and one that looks expensive. Spend 30 minutes at your local thrift store specifically looking for hardcover encyclopedias, vintage dictionaries, and old atlases with cream or ivory pages, aged but not brittle. A $2–$4 thrift store book with 400 pages of rich cream typography is the single material investment that determines the quality ceiling of every craft you make from it.
The most common beginner mistake is using too much color. Book page crafts at their most sophisticated use only the warm ivory of the paper itself as the primary material tone — adding craft paint in bright colors, mixing in colored card, or using modern white-page paperbacks all reduce the visual sophistication of the finished piece. The fix is restraint: if you want to add color, add it only in supporting materials (a single matte black frame, a terracotta vessel, a brass brad) and let the paper remain the dominant visual element.
Three supplies under $50 that unlock the full range of book page crafting: a hot glue gun with precision tip ($8–$14) that enables three-dimensional form-building from paper; a bottle of matte Mod Podge ($6–$10) that seals and unifies paper surfaces to a finish that reads as intentional material rather than craft paper; and a pack of matte black frames in standard sizes ($15–$25 for a three-pack) that frame any flat book page creation with the gallery finish that transforms it from craft to art.
A single afternoon of book page crafting yields 3–5 finished pieces depending on complexity — rolled roses and fan arrangements in an afternoon, a decoupage tray or framed botanical in a focused 2-hour session. A fully styled shelf or gallery wall of book page art is a weekend project with a total material cost of $20–$50 for most intermediate arrangements, against a comparable store-bought aesthetic that would cost $150–$400 at retail.
Frequently Asked Questions About Book Page Crafts
What type of books are best for book page crafts?
Hardcover books with thick, cream or ivory-toned pages produce the best visual results — the paper is more durable for folding and rolling, and the warm cream tone ages to a sophisticated ivory that reads as an intentional material choice rather than plain white craft paper. Specifically, vintage dictionaries, encyclopedias from the 1950s–1980s, old atlases, vintage cookbooks, and sheet music books are the ideal sources. Avoid modern paperbacks with thin, bright white pages — they are too fragile for three-dimensional crafts and too stark in tone for the warm aesthetic that makes book page crafts look expensive. Source from thrift stores, library book sales, and estate sales — damaged books that cannot be sold whole are perfect for this purpose and often cost $0.50–$2.00.
How do I make book page crafts look expensive rather than crafty?
Three specific choices separate book page crafts that read as expensive from those that look like a school project. First, use only aged, cream-toned pages — not bright white modern paper. Second, frame any flat work with a wide cream mat and a simple matte black or distressed gold frame, never a plastic or brightly colored frame. Third, display book page crafts alongside high-quality supporting objects — a rolled paper rose arrangement looks sophisticated in an aged brass vessel; the same roses in a plastic cup look like a classroom activity. The craft quality itself matters less than the presentation context, which means a simple technique executed with careful material selection and thoughtful display consistently outperforms a complex technique displayed poorly.
Are book page crafts durable enough for long-term display?
With correct sealing, yes. Unsealed book page crafts (rolls, fans, cones) are fragile and humidity-sensitive — they are best used in dry indoor environments away from direct moisture sources. Sealed book page crafts (decoupage on trays, planters, clocks, and bowls) achieve genuine durability: Mod Podge-sealed book page surfaces are moisture-resistant and handleable, lasting years of regular contact. For long-term display pieces, apply a minimum of two sealer coats and allow full 24-hour drying between coats. For outdoor or bathroom use, use the outdoor-formula Mod Podge specifically, which has a higher moisture resistance than the standard formula.
Can book page crafts be made without any special tools?
Yes — the majority of book page crafts on this list require only scissors, a hot glue gun (the most versatile tool, available for $8–$14), and Mod Podge. The bone folder (for crisp fold lines, $5–$8) and a craft knife with cutting mat (for clean cuts, $10–$15 for both) are the two additions that most improve quality across the full range of techniques. Beyond these four items — scissors, hot glue gun, Mod Podge, and a bone folder — no specialist tools are needed. Origami, rolling, tearing, and basic paper mache all require only hands and patience.
Is it ethical to cut up old books for crafts?
This question deserves a direct answer: using damaged, water-stained, torn, or ex-library books that cannot be read or donated is fully ethical and strongly preferable to using intact books in good condition. The book page craft community overwhelmingly sources from books that are beyond restoration — missing covers, water damage, torn spines, or pages so foxed they are unreadable. A book with 50 usable pages and a destroyed binding is destined for landfill without a craft use. Thrift store workers and librarians regularly set aside unsellable damaged books for crafters at no charge when asked. Never cut an intact, readable book — the entire premise of book page crafting is repurposing material that would otherwise be discarded.
Ready to Start Crafting with Book Pages?
These 24 ideas cover the full range of what book page crafts can offer — from the dimensional warmth of rolled paper roses and cone wreaths to the graphic sophistication of silhouette shadow boxes and decoupage clock faces, from functional items like gift wrapping and photo displays to ambient objects like lampshade linings and fringe curtains. You don’t need to attempt all 24 — the most satisfying approach is to start with the single idea that most closely matches a space or need you already have, and let the material itself teach you what it can do. Start today by visiting one thrift store specifically to find two or three hardcover books with cream pages for under $5 total — that single material investment unlocks every technique on this list. Book page crafts done with good materials and thoughtful display don’t look like crafts. They look like collected objects, made by someone who knows what they’re doing. Pin the ideas that stopped you — and then actually make them.