15 Organized Craft Closet Ideas for Creative Homes
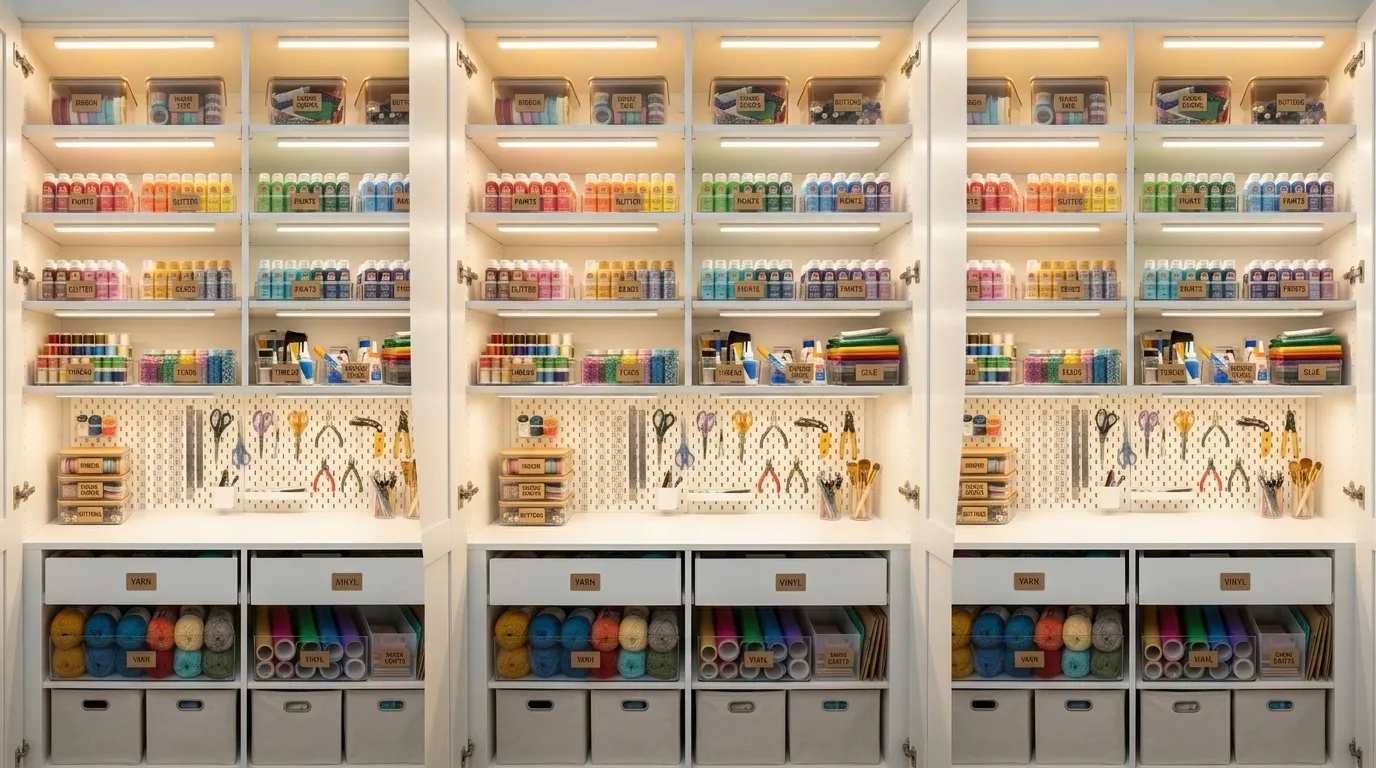
A craft closet is a dedicated storage and workspace system — built into an existing closet, converted from a spare room cabinet, or purpose-designed within a nook — that consolidates all creative supplies, tools, and materials into a single organized, accessible, and visually considered space. This article gives you 15 genuinely creative, buildable craft closet organization ideas that serve your creative practice completely without the chaos that most craft storage defaults to.
Most craft closets tell the story of good intentions abandoned: a bin of tangled ribbon on the floor, acrylic paints sorted by neither color nor medium, fabric scraps in a bag that has not been opened since 2019. The closets in this list make a different choice — they treat the creative space with the same design intention as the rooms that surround it, and the result is a system that makes you want to create rather than apologize for the mess. Here are 15 ideas worth saving — and stealing.
Why Organized Craft Closet Design Works So Well
The organized craft closet as a serious interior design and functional systems category emerged from two converging cultural movements that gathered momentum between 2015 and 2022. The first was the professional organizing movement — catalyzed by Marie Kondo’s global influence and the subsequent Netflix era of home organization content — which elevated storage design from a practical concern to an aesthetic and emotional one. The second was the dramatic growth of the home crafting community during the pandemic, which saw crafting supply sales increase by over 40% in 2020 alone according to the Craft and Hobby Association, creating millions of households with significantly more creative materials than their existing storage could accommodate. The craft closet sits precisely at that intersection: it is functional necessity elevated to design opportunity.
The materials that define a well-executed craft closet are those that balance accessibility with visual calm. Clear acrylic or glass storage containers — in consistent sizes from a single brand — are the premier storage choice because they allow instant visual inventory without opening lids, eliminating the search behavior that breaks creative momentum. Adjustable shelving systems in white-painted MDF or powder-coated steel provide the flexibility to accommodate materials that change in volume seasonally or as creative interests evolve. Pegboard or slatwall panels in the rear wall of the closet create a fully customizable vertical storage surface for tools, scissors, and frequently accessed items. Label systems in a consistent font and finish — whether handwritten on kraft tags, printed on clear acetate, or stamped on leather tabs — complete the visual coherence that distinguishes a designed system from organized chaos.
The trend has genuine depth in both the interior design and productivity communities. The Container Store reported craft and hobby storage as their fastest-growing category between 2020 and 2023, and YouTube channels dedicated exclusively to craft room organization collectively accumulated over 500 million views in the same period. The aesthetic of the organized craft closet has also evolved significantly — away from the purely utilitarian wire-shelf-and-plastic-bin approach of the early 2000s and toward a considered, cohesive visual system where the storage itself is beautiful enough to leave the closet doors open as a design feature of the room.
Small homes and apartments can achieve a fully functional craft closet system within a standard 600mm deep wardrobe or a reach-in closet of any size. The key is density without chaos: the difference between a closet that feels organized and one that feels stuffed is not the quantity of items stored but the consistency of the containers and the logic of the system. A small closet with 30 identical clear acrylic containers, a pegboard tool wall, and a consistent label system reads as more organized and more spacious than a large closet with mismatched bins, bags, and loose supplies, because the eye reads the consistent container system as a single unified element rather than individual competing objects.
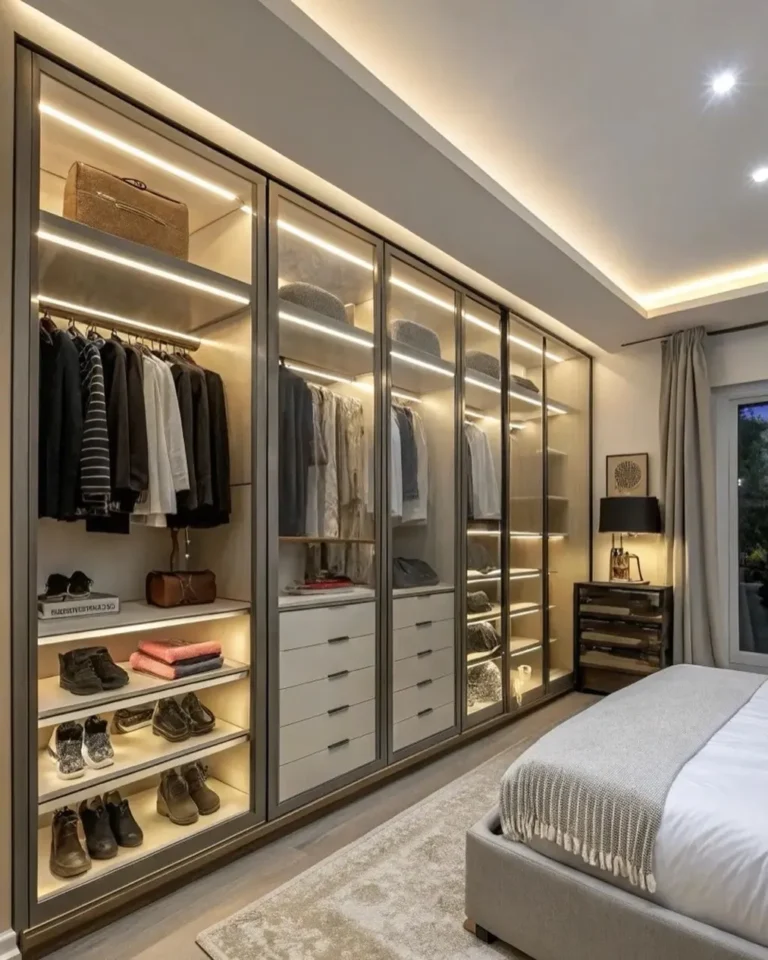
Style at a Glance
| Element | Detail |
|---|---|
| Philosophy | The craft closet is designed as carefully as the creative work it enables — systems that inspire rather than obstruct |
| Key Materials | Clear acrylic containers, white-painted MDF shelving, pegboard, powder-coated steel, kraft label tags, adjustable dividers |
| Color Palette | Warm white, natural kraft, clear acrylic, soft sage accents, aged brass hardware |
1. Floor-to-Ceiling Adjustable Shelf System with Clear Acrylic Bins
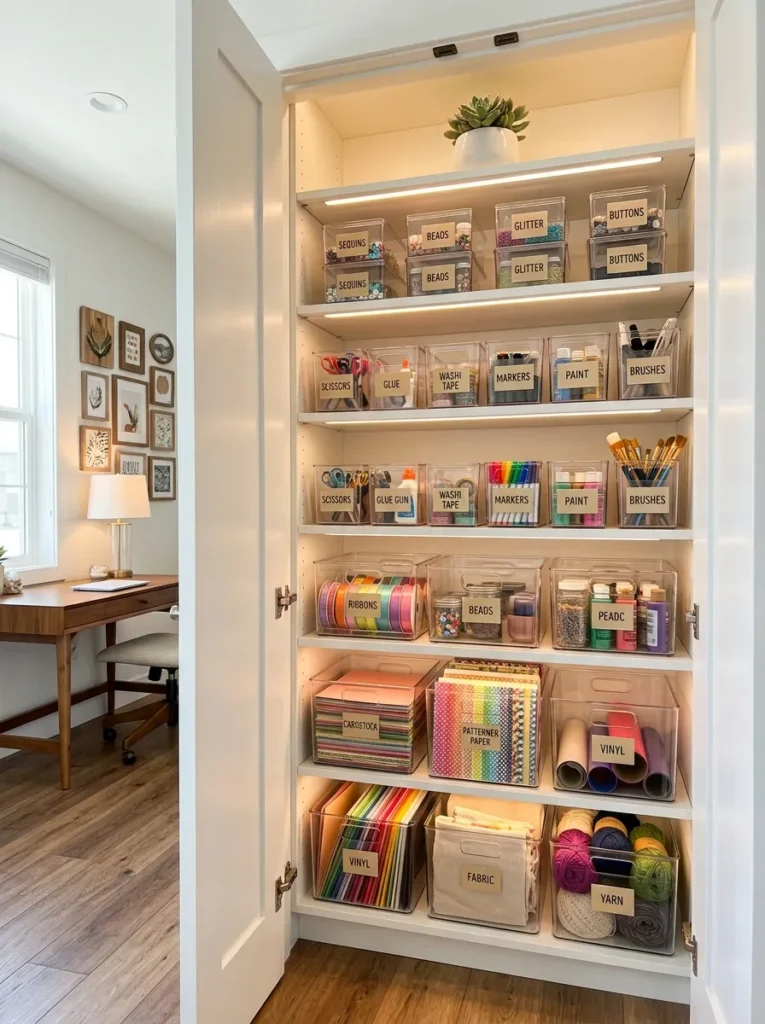
Vibe: Clean and inspiring — a craft closet that makes you want to open the doors every morning just to look at it.
Why it works: The floor-to-ceiling adjustable shelf system with identical clear acrylic bins is the organizational framework that every other idea in this list builds from — it is the foundation system that creates visual calm from material complexity. The design principle at work is cognitive load reduction: when every container is identical in brand, finish, and label style, the eye reads the entire closet wall as a single unified system rather than individual competing objects, which dramatically reduces the sense of visual overwhelm that most craft closets produce. Clear acrylic specifically — rather than colored plastic or opaque bins — allows instant visual inventory from the doorway: you can locate the watercolor pencils, the washi tape, and the bone folder without opening a single container. The kraft label system provides the text layer that completes the identification without introducing visual noise.
How to get it: Source bins from a single supplier — IKEA’s SAMLA series, The Container Store’s Latch boxes, or Muji’s polypropylene storage range all provide the consistent sizing and finish that make a unified system work. Install adjustable shelf pins at 32mm spacing to allow precise shelf positioning for bins of every height. Add a warm white LED strip along the interior ceiling of the closet — a closet without interior lighting defeats the visual inventory advantage of clear bins entirely.
Quick Win: Purchasing every bin in your craft closet from a single brand and a single color family — even if it means replacing existing mismatched containers — is the single most transformative organizational decision available, and the new bins can be purchased gradually as the old ones are retired rather than all at once.
Shop the Look
| Product |
|---|
| Clear acrylic storage bin set graduated sizes |
| White adjustable shelf system tall |
| Kraft paper label tags set |
| LED strip light warm white closet |
| Fine tip black marker label writing |
Also view: 15 Easy Paper Craft Ideas for Creative Adults
2. Pegboard Tool Wall with Color-Coded Hook System
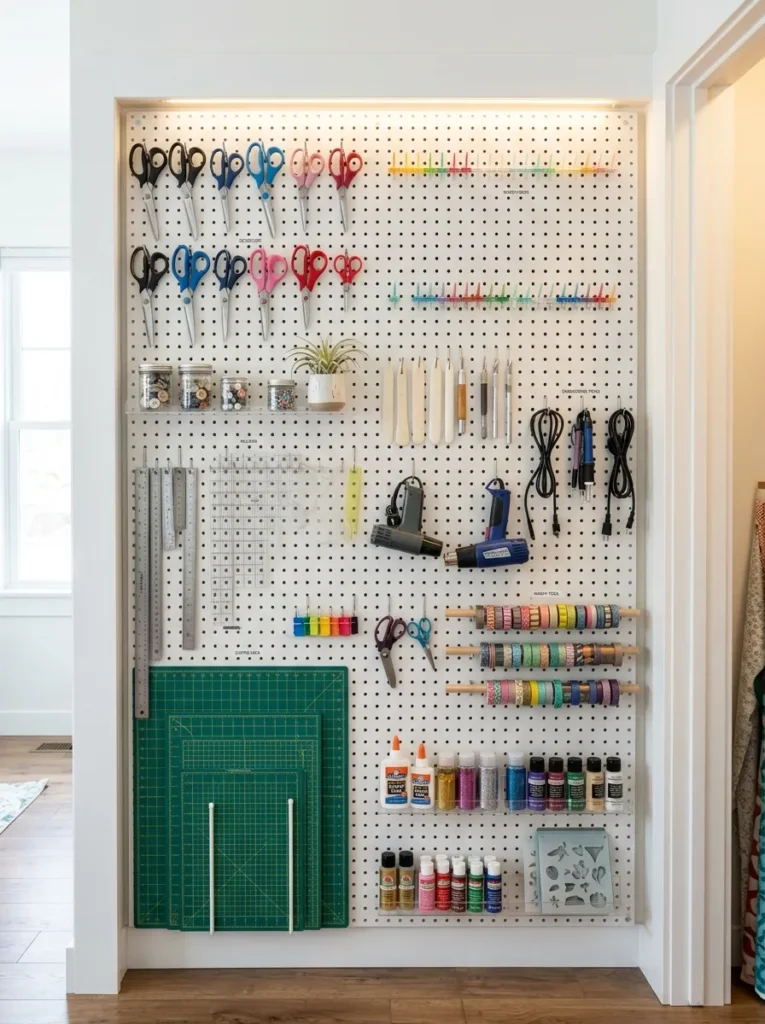
Vibe: Professional and personal — a tool wall that looks like it belongs in a design studio.
Why it works: The pegboard tool wall applies the single most powerful principle in workshop and studio design to the craft closet: tool silhouette organization. When every tool hangs on a visible hook at its designated position, the absence of a tool is immediately apparent — you know at a glance whether the large scissors are in the closet or on the craft table across the room, without searching a bin or drawer. This visual inventory principle, borrowed from professional workshop design where tool silhouette boards have been standard practice for decades, reduces the pre-project setup time that most crafters cite as the primary barrier to starting creative work spontaneously. The color-coded hook system — grouping cutting tools on black hooks, adhesive tools on brass hooks, measuring tools on white hooks — adds a secondary organizational layer that accelerates location without requiring label reading.
How to get it: Install white-painted 6mm MDF pegboard on the rear closet wall using 25mm standoff spacers — the standoff gap behind the pegboard is essential for hook clearance, and without it no hooks can be inserted. Map your tool categories before purchasing hooks: cutting, adhesive, measuring, heat, and decorative tools each benefit from dedicated hook zones. Trace each tool’s silhouette on the pegboard with a pencil so the correct position is marked when tools are returned.
Shop the Look
| Product |
|---|
| White painted pegboard panel MDF |
| Pegboard hook assorted set |
| Pegboard standoff spacer kit |
| Acrylic pegboard shelf small insert |
| Ceramic mini planter pegboard mount |
Also view: 14 Crochet Wall Hangings for Cozy Home Decor
3. Fabric and Ribbon Organization System with Dowel Display
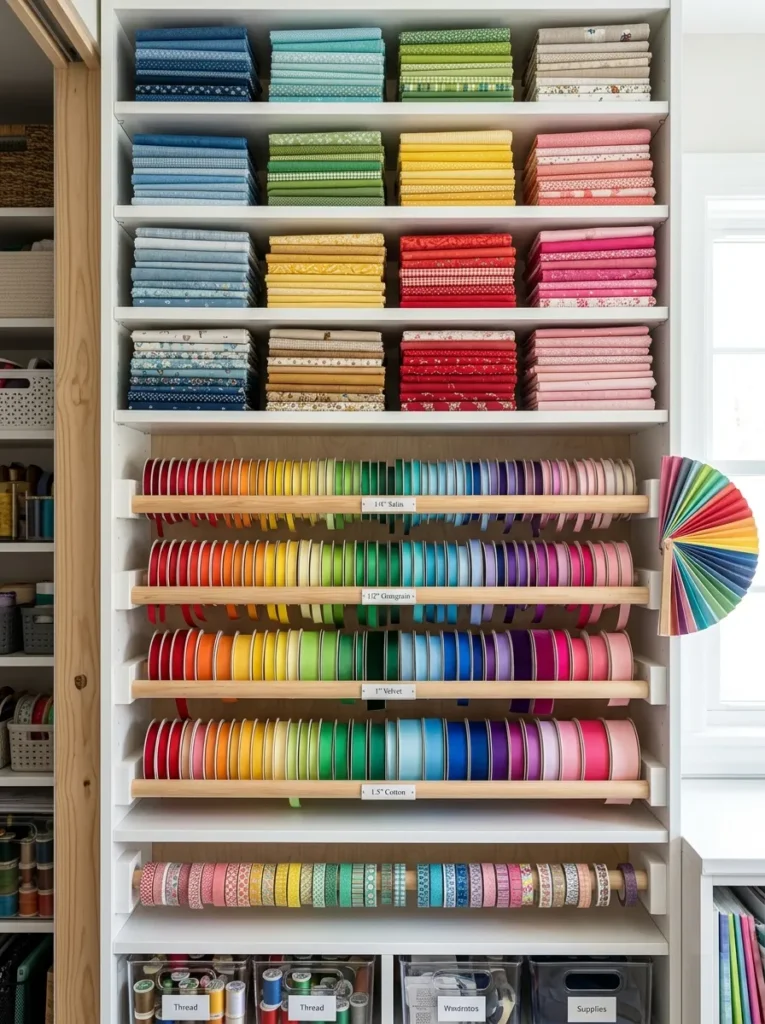
Vibe: Colorful and calm — the rare craft section where color variety reads as organized abundance rather than chaos.
Why it works: Fabric and ribbon are the two craft materials that create the most visual complexity in a craft closet when stored loosely — a single tangled bag of ribbon communicates disorder more powerfully than an entire shelf of mismatched bins. The dowel display system solves this by converting ribbon spools from a jumbled collection into a color-gradient display: spools hung on a horizontal dowel rod, organized by color from warm to cool, read as a curated palette rather than a storage problem. The uniform fabric fold — each bolt refolded to the same width and displayed spine-out on a deep shelf — applies the same principle of consistency that makes a bookshelf read as organized: when every element is the same dimension in the same orientation, quantity reads as abundance rather than excess.
How to get it: Cut 20mm diameter timber dowel rods to the interior width of the closet shelf and rest them on small timber bracket mounts screwed to the shelf uprights — this allows the entire dowel to be lifted out for access rather than sliding spools along a fixed rod one at a time. Refold all fabric bolts to a consistent width of 200mm using a cardboard template cut to that dimension — the fold consistency is the detail that makes the fabric section read as designed.
Quick Win: A 200mm wide cardboard template used to refold every fabric bolt to a consistent width takes 20 minutes for a full fabric collection and produces the single most visually transformative result in a craft closet — the fabric section goes from chaotic to curated in one afternoon without purchasing a single storage product.
Shop the Look
| Product |
|---|
| Timber dowel rod 20mm natural |
| Dowel bracket mount shelf pair |
| Washi tape organizer dowel mount |
| Fabric storage shelf deep white |
| Ribbon spool assorted collection |
4. Paper and Cardstock Vertical Filing System
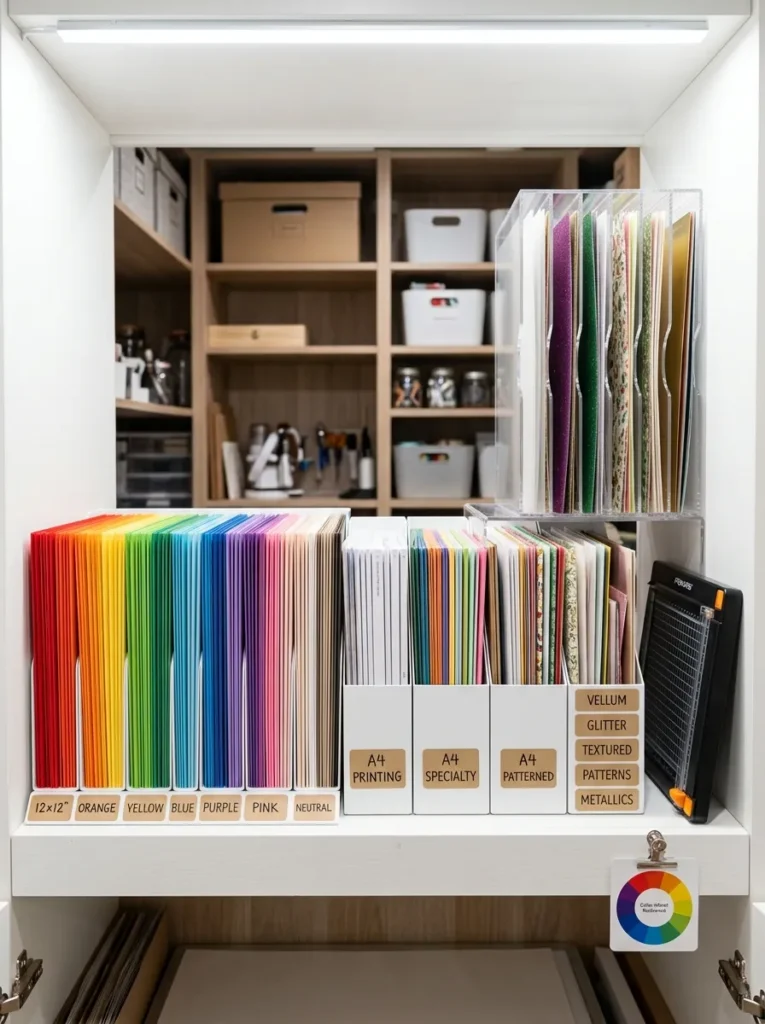
Vibe: Systematic and satisfying — the paper section that makes you want to start a project just by opening the closet.
Why it works: Paper storage is the organizational challenge that defeats more craft closets than any other material category — flat paper stacked horizontally in piles creates an archaeology problem where the sheet needed is always at the bottom of the pile, and paper stored loosely in a drawer creases, tears, and becomes unusable. Vertical filing is the correct system because it allows every sheet to be accessed individually without disturbing adjacent sheets — the same principle that makes file cabinets more functional than flat drawers for document storage. Color-gradient sorting within the vertical system adds a navigational layer that makes color selection a visual pleasure rather than a search task: scanning the gradient from warm to cool to find the right cardstock takes seconds rather than minutes.
How to get it: Use 12×12 scrapbook paper dividers with tabbed color labels for the cardstock section — these are sized specifically for 30cm square paper and hold 50–75 sheets per divider without warping. Magazine files in a consistent white or kraft finish for standard A4 and letter paper provide the structural support that prevents paper from fanning and creasing at the base. Label every divider and file at the top edge — not the front face — so labels are visible from above when scanning along the shelf.
Shop the Look
| Product |
|---|
| 12×12 paper storage vertical dividers |
| Magazine file set white cardboard |
| Clear acrylic vertical paper organizer |
| Color gradient label tabs set |
| Paper trimmer compact craft |
5. Craft Supply Drawer Tower with Labeled Pull-Out Drawers
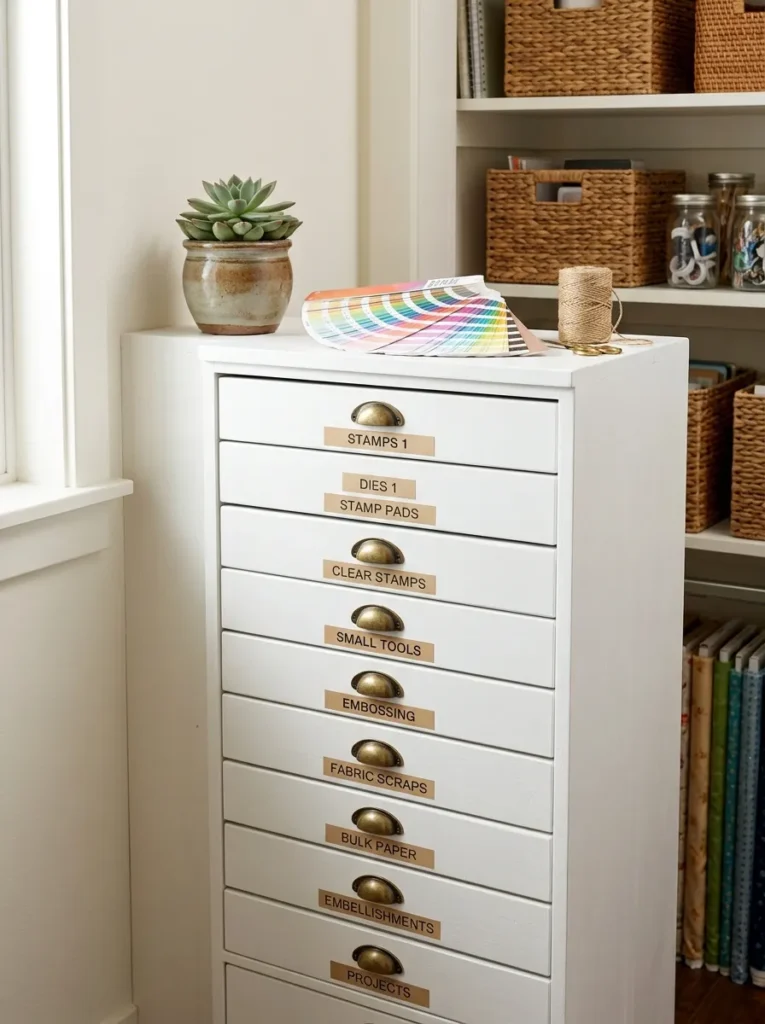
Vibe: Considered and calm — a drawer tower that makes every supply feel deliberately housed rather than merely stored.
Why it works: The graduated drawer tower is the organizational solution for the craft supplies that are too small for bins and too numerous for pegboard hooks — stamps, dies, embossing powders, ink pads, brads, eyelets, and the other small-format tools that comprise the most complex inventory management challenge in most craft closets. The graduated depth principle — shallow drawers at the top for flat items like stamps and dies, medium drawers in the middle for tools and ink pads, deep drawers at the base for bulky items like foam rolls and cutting mats — matches the drawer volume to the stored item’s physical profile, which prevents the dead-space problem of storing small flat stamps in a deep drawer where they become buried under other items added on top.
How to get it: Build from 18mm MDF with full-extension soft-close drawer runners — the full-extension specification is essential for craft drawer towers because it allows the complete drawer contents to be seen and accessed without removing items from the back. Install a single brass drawer pull centered on each drawer front for consistent visual rhythm. Line drawer interiors with non-slip shelf liner in a warm ivory tone to prevent small items from sliding.
Shop the Look
| Product |
|---|
| Drawer tower unit white MDF 12 drawer |
| Soft close full extension drawer runner |
| Aged brass drawer pull set |
| Non-slip shelf liner roll ivory |
| Printed kraft label set adhesive |
6. Color-Sorted Paint and Ink Storage with Tiered Spice Rack Display
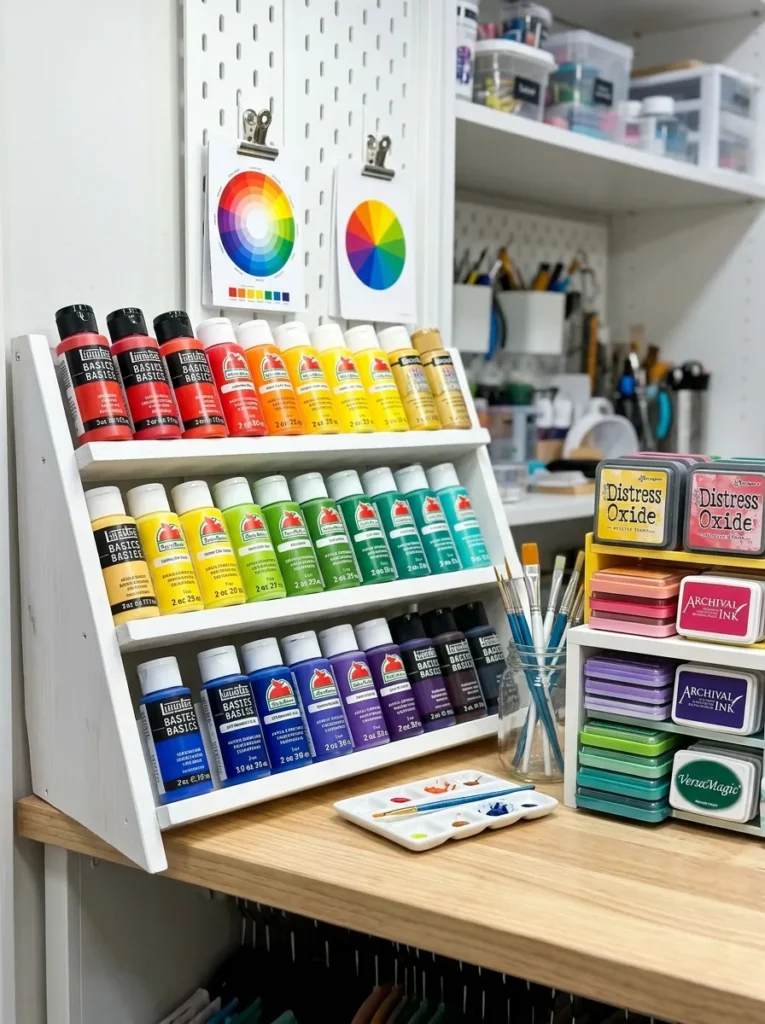
Vibe: Colorful and resolved — a paint collection that reads as a palette rather than a stockroom.
Why it works: Paint bottles and ink pads share the same organizational failure mode in most craft closets: they are stored upright in rows where only the front row of bottles is visible, the label faces are turned in inconsistent directions, and color selection requires picking up and replacing every bottle to find the right hue. The tiered angled display — borrowed directly from kitchen spice rack design, where the identical problem of small labeled bottles in rows is solved by angling each row upward — resolves all three failure modes simultaneously. The 15-degree angle brings every label face into the line of sight, the graduated tiers make every row independently visible, and the color gradient organization across the tiers allows color selection by visual scanning rather than label reading.
How to get it: Install tiered spice rack inserts on a dedicated paint shelf — the Yamazaki Home tiered shelf riser and the OXO Good Grips expandable drawer organizer are both appropriately sized for standard acrylic paint bottles. Sort the collection by color temperature: warm colors (red, orange, yellow) on the left tier, cool colors (blue, purple, green) on the right, neutrals (white, black, grey, brown) in a separate section. Re-sort after every creative session rather than at a designated clean-up time — in-session re-sorting takes 30 seconds per bottle and prevents the gradient from degrading.
Quick Win: A $12–20 tiered spice rack insert placed on an existing paint shelf — with paint bottles re-sorted by color gradient — transforms a paint storage section from functional to visually inspiring in under 20 minutes, without purchasing new containers or rebuilding the shelf.
Shop the Look
| Product |
|---|
| Tiered spice rack shelf riser |
| Acrylic paint storage organizer |
| Ink pad storage case craft |
| Paint brush holder ceramic |
| Color mixing palette white ceramic |
7. Sewing and Needlecraft Station with Thread Bobbin Wall
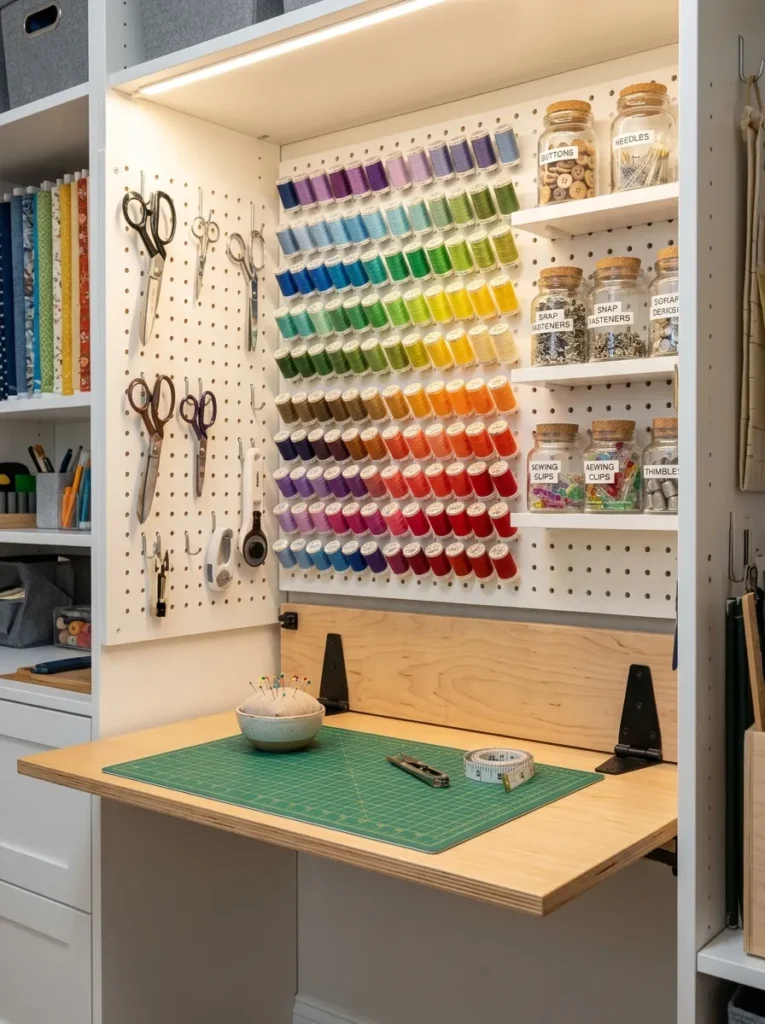
Vibe: Warm and considered — a sewing station that makes you want to sit down and start a project immediately.
Why it works: The sewing and needlecraft station is the most spatially complex craft organization challenge because it combines large flat surfaces (for cutting and pinning), small precise tools (scissors, seam rippers, needles), and a thread collection that can number in the hundreds of individual bobbins — all of which have different storage requirements that compete for the same limited closet space. The fold-down cutting surface resolves the flat surface problem: a piano-hinged MDF panel folds flush to the closet wall when not in use, freeing the full shelf below for storage, and folds down to provide a working surface without requiring a separate piece of furniture in the room. The bobbin color gradient wall — bobbins pinned to pegboard in color order — is simultaneously the most functional and the most visually compelling element in the closet, turning a thread collection into a textile palette display.
How to get it: Build the fold-down surface from 18mm MDF on a 75mm piano hinge, supported by two fold-down leg brackets rated for 15kg — the surface needs to support fabric weight, pattern pieces, and the pressure of pinning and cutting. Mount the bobbin pegboard above the fold-down surface on the rear wall — use standard small pegboard hooks turned upward as bobbin spindles, or dedicated thread rack pegs designed for the purpose.
Shop the Look
| Product |
|---|
| Piano hinge 75mm continuous |
| Fold-down leg bracket pair |
| Thread rack peg set pegboard |
| Clear glass jar set labeled |
| Ceramic pincushion bowl |
8. Craft Closet Lighting System with Under-Shelf LED Bars
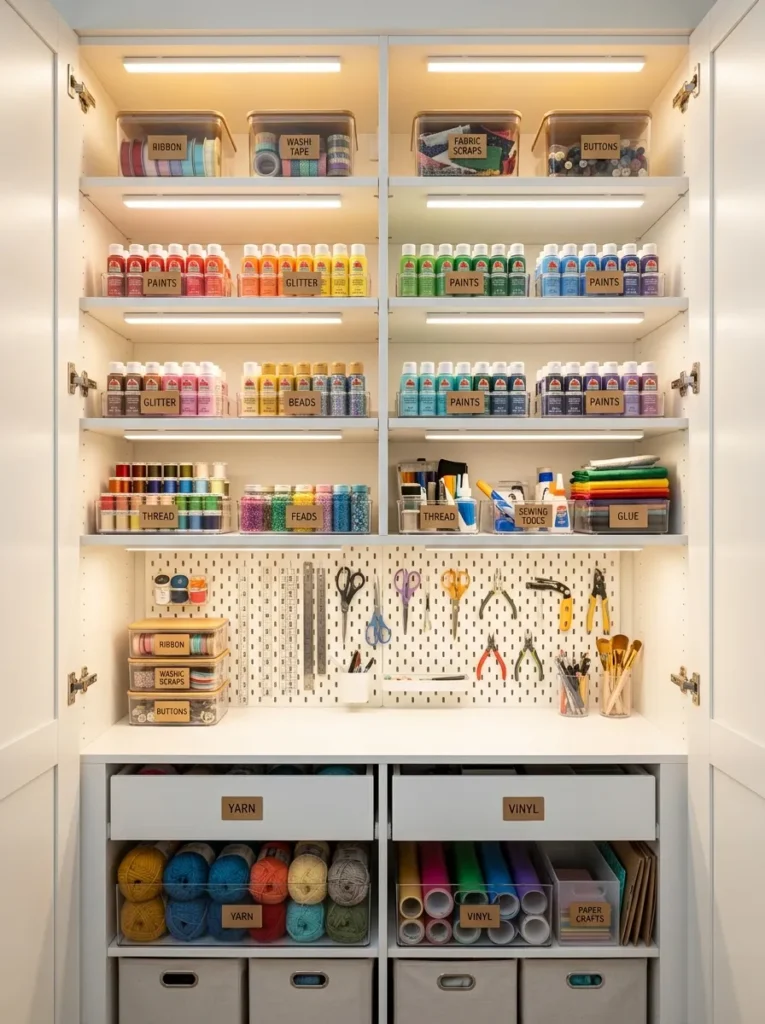
Vibe: Bright and professional — a craft closet that looks as good at 10pm as it does at noon.
Why it works: Craft closet lighting is the most underinvested element in the vast majority of organized craft closets — and the one that most directly affects daily usability. A closet with excellent organization but poor lighting produces the same search behavior and frustration as a disorganized closet with good lighting, because visual inventory relies on the ability to read labels and distinguish colors from the doorway. Under-shelf LED bar lights mounted on the underside of each shelf edge eliminate the shadow problem that makes deep shelves visually inaccessible — each light illuminates the shelf below it at a consistent angle, creating uniform top-to-bottom brightness without shadows between levels. At 4000K color temperature (cool daylight white rather than warm amber), the light renders colors accurately — critical for a space where color selection is a primary creative activity.
How to get it: Install linkable LED bar lights — available in 30cm, 50cm, and 90cm lengths — under each shelf edge using the adhesive backing or screw-mount option. Connect all bars to a single power supply with a single plug for clean cable management. Choose 4000K (cool daylight) rather than 2700K (warm white) specifically for a craft closet — warm light shifts color perception and makes accurate color selection difficult, while cool daylight renders hues at their true values.
Quick Win: A single linkable LED bar light set ($20–35 for a pack of three 30cm bars with connectors) installed under the top three shelves of a craft closet — the shelves most likely to cast shadows — transforms visual accessibility without rewiring or professional installation.
Shop the Look
| Product |
|---|
| Under shelf LED bar light linkable set |
| LED bar light power supply |
| Cable management clip adhesive |
| 4000K cool white LED strip |
| Shelf edge clip cable holder |
9. Stamp and Die Storage System with Flip-File Binders
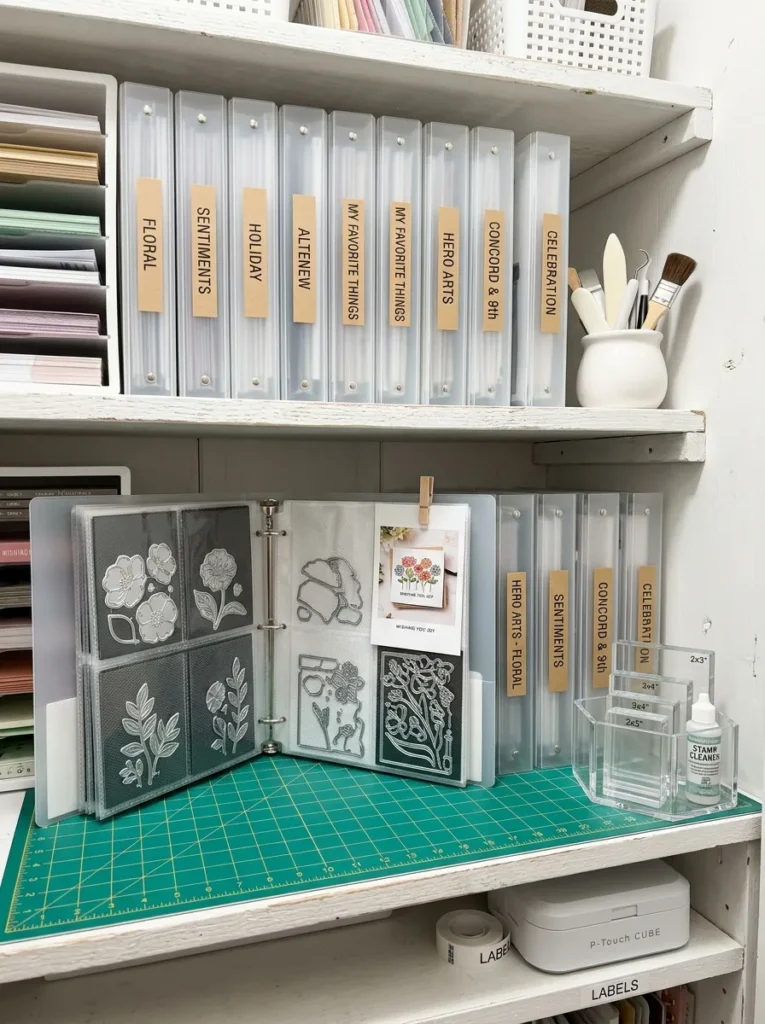
Vibe: Systematic and satisfying — a stamp collection that can be browsed like a library and accessed like a filing system.
Why it works: Rubber stamps and metal dies are the two craft supply categories that suffer most acutely from inventory invisibility — when stored in their original packaging boxes, the collection becomes a stack of identical cardboard boxes that requires opening every box to find a specific set. The flip-file binder system — clear A4 flip-file document pockets, each holding one stamp set with its image printed on the front of the pocket — converts the collection from an opaque archive to a browsable visual catalog. The magnetic die storage adaptation (magnetic sheets cut to A4 size, inserted into the same flip-file pockets so dies cling to the magnetic surface and are visible through the clear pocket) applies the same principle to the die collection. A 50-set stamp and die collection that occupies a full shelf of boxes occupies four or five binders on the same shelf.
How to get it: Purchase A4 clear flip-file document binders — 40-pocket versions hold 40 stamp sets per binder and are available from any office supply store for $8–15. Print a clear photo of each stamp set’s full image at A4 size and insert as the cover sheet in the pocket — this image serves as the visual catalog reference when browsing the binder. Purchase A4 magnetic sheets from a craft supplier and cut to fit inside the pockets for die storage.
Shop the Look
| Product |
|---|
| A4 clear flip file document binder 40 pocket |
| A4 magnetic sheet craft storage |
| Acrylic stamp block holder set |
| Label maker with clear tape |
| Bone folder embossing tool set |
10. Craft Closet Command Center with Inspiration Board
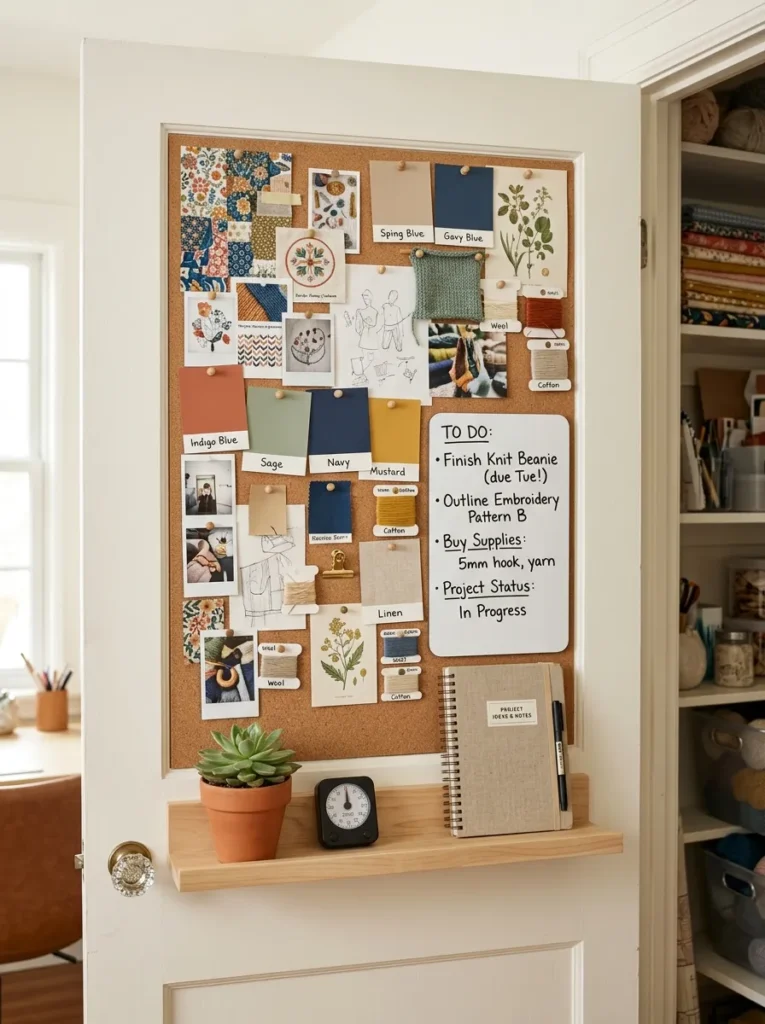
Vibe: Inspired and personal — the craft closet door that makes you stop and think before you start.
Why it works: The closet door interior is one of the most consistently wasted organizational surfaces in any craft closet — it is a full-height, always-accessible panel that faces the crafter every time the closet is opened. Converting the door interior into a command center applies the design principle of contextual information display: project inspiration, color references, and work-in-progress notes are displayed at the point of creative decision-making rather than in a notebook that may be on a different table or a phone screen that requires unlocking. The corkboard-and-whiteboard combination is the correct pairing because corkboard handles the permanent-ish reference material (inspiration images, color swatches, project plans) while the whiteboard handles the in-progress variable information (current project notes, supply lists, measurements) that changes with each creative session.
How to get it: Mount a full-height corkboard panel (cut to the interior door width) directly to the door face using construction adhesive — no frame required if the cork sheet is 6mm thick, which is self-supporting against the flat door surface. Add a 200mm × 300mm whiteboard section at eye height for daily notes. Install a narrow 80mm deep shelf across the door at mid-height using door-face-specific shelf brackets — 80mm is the minimum depth for a standard timer or small plant pot, and the shallow profile keeps the door clearance within standard closet depth tolerances.
Shop the Look
| Product |
|---|
| Cork sheet roll 6mm thick |
| Small whiteboard self-adhesive |
| Door face shelf bracket narrow |
| Corkboard push pin set |
| Linen cover notebook A5 |
11. Yarn and Fiber Storage with Open Cubby Display
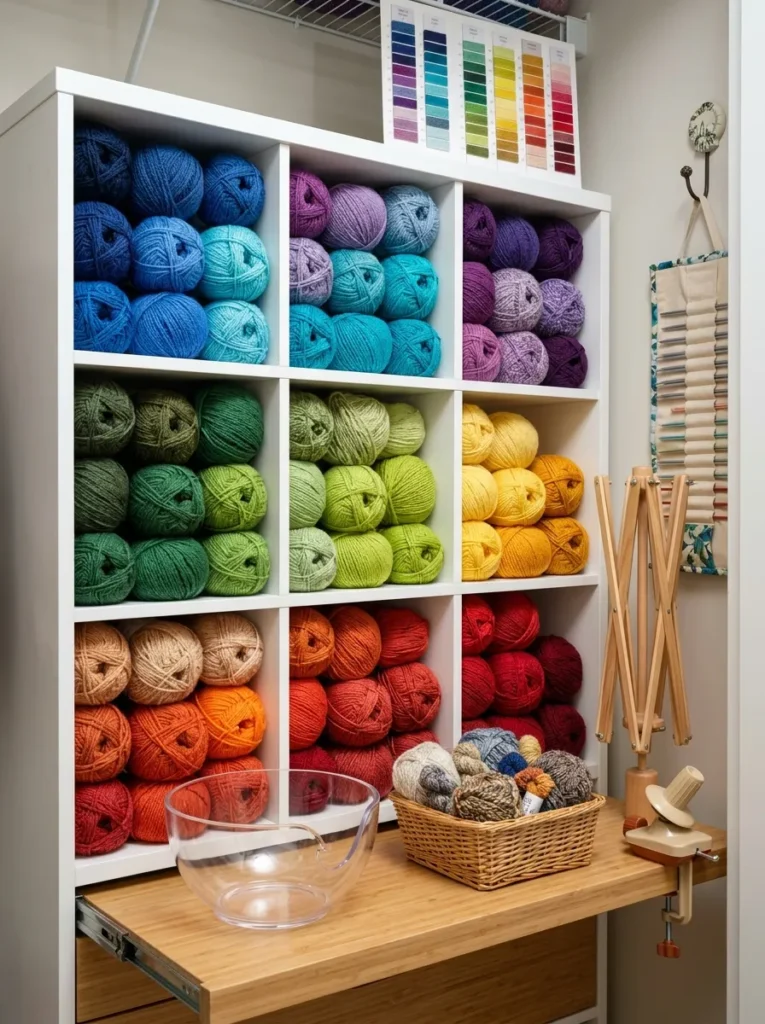
Vibe: Colorful and warm — a yarn collection that looks like a textile gallery edited into a closet shelf.
Why it works: Yarn storage is the craft material category where the container choice most directly affects the material’s longevity — yarn stored in sealed plastic bins or bags develops a flattened texture over time as the fibers are compressed without air circulation, while yarn stored in open cubbies retains its loft and texture because the fibers breathe. The open cubby system is the correct structural choice for yarn specifically because it provides air circulation, allows color browsing from the doorway without touching, and presents the yarn’s natural visual interest — the color and texture of the wound ball — as the primary organizational aesthetic. Color gradient sorting within each cubby row (warm to cool, light to dark within each color family) turns the yarn section into a display that reads as intentional curation rather than accumulation.
How to get it: Size each cubby opening at 250mm × 250mm — large enough for 6–8 standard 100g yarn balls side by side, small enough to prevent the balls from rolling around within the cubby. Build with 18mm MDF painted in warm white — the white interior behind colored yarn maximizes color vibrancy and makes the gradient organization most legible. Install a single pull-out surface below the cubbies on drawer runners for yarn winding and swatching — this surface stores flush when not in use and provides a working area without requiring a separate furniture piece.
Quick Win: Re-sorting an existing yarn collection by color gradient — warm to cool, light to dark within each color family — into open cubby shelves takes one afternoon and produces the most visually dramatic single-session craft closet transformation in this list, requiring no new storage products if the cubbies already exist.
Shop the Look
| Product |
|---|
| Open cubby shelf unit white |
| Clear acrylic yarn bowl |
| Yarn swift tabletop clamp |
| Ball winder manual yarn |
| Knitting needle roll case |
12. Small Supply Organization with Labeled Glass Jar System
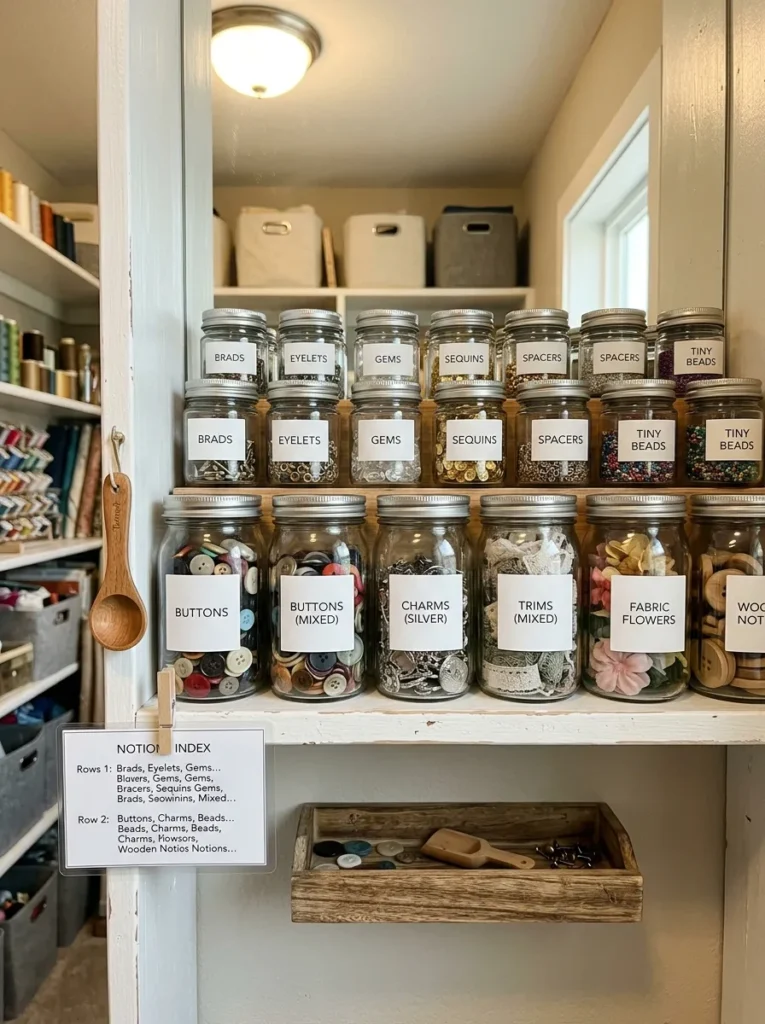
Vibe: Organized and warm — the small supply section that proves the smallest things deserve the most considered storage.
Why it works: Small craft embellishments — brads, eyelets, rhinestones, mini buttons, seed beads, charms — are the organizational challenge that defeats craft closets at the detail level. Stored in their original plastic packaging, they create a collection of differently sized bags and boxes that stack inconsistently and become a tangled, visually chaotic section even when the rest of the closet is well-organized. The uniform glass jar system resolves this by imposing consistent geometry on an inherently inconsistent supply category: when every small embellishment is in the same size jar with the same style label, the section reads as a designed pharmacy or apothecary display rather than a collection of loose supplies. Glass specifically — rather than clear plastic — is the correct material choice because it provides visual clarity without the static electricity that causes small metallic embellishments to cling to plastic container walls.
How to get it: Source jars from a single supplier in two sizes — 200ml for small embellishments and 500ml for larger notions — for visual consistency. IKEA’s RAJTAN jars, Weck canning jars, or Ball mason jars all provide the glass quality and label-compatible surface that the system requires. Print labels in a single consistent font at the same point size for every jar — Helvetica Neue or Futura in 10pt on a white rectangular label creates the clean, professional label system that makes the collection read as a designed archive.
Shop the Look
| Product |
|---|
| Glass storage jar set with metal lids |
| White rectangular label stickers |
| Wooden tray organizer small |
| Label printing service or template |
| Measuring spoon mini set |
13. Wrapping and Gift Supplies Station with Roll Holder
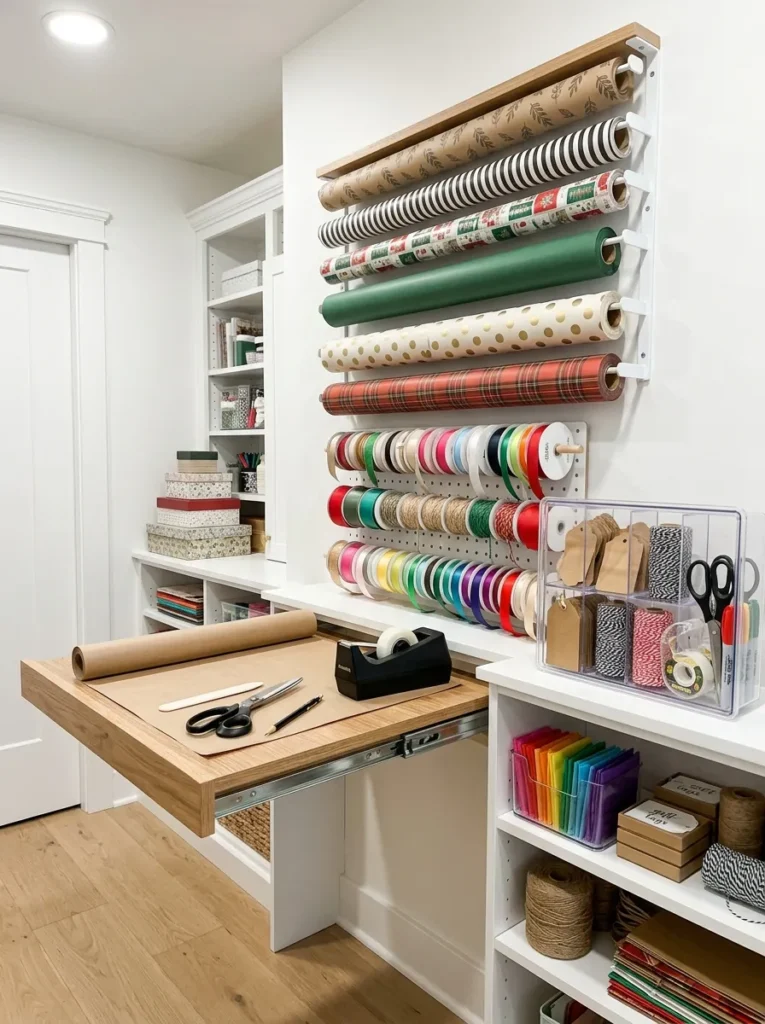
Vibe: Practical and considered — a wrapping station that makes gift wrapping feel like a creative pleasure rather than a floor-level scramble.
Why it works: Gift wrapping supplies are the craft category most consistently stored incorrectly — wrapping paper rolls in a floor-standing cylinder, ribbon in a tangled drawer, tags in a bag that has not been opened since last Christmas. The failure mode is the same in every household: the supplies exist but are stored in a way that makes accessing them for a single gift-wrapping session feel like more effort than it is worth. The vertical wall-mounted roll holder converts wrapping paper from a floor-level cylinder problem to a wall-displayed collection where each roll is individually accessible and the pattern is visible from the end of the roll. The pull-out waist-height surface provides the flat working area that gift wrapping requires without consuming permanent floor space — it functions as a dedicated wrapping table that stores in the closet wall between uses.
How to get it: Mount the vertical roll holder on the closet side wall rather than the rear wall — a standard closet depth of 600mm accommodates a wrapping paper roll of standard width (500mm) with 100mm of clearance on each side. The pull-out surface should extend to 450mm depth when open — enough for a standard gift box with wrapping paper draped over the edges — and retract to 80mm when closed. Install at 900mm height — standard kitchen bench height — for a comfortable standing wrapping position.
Shop the Look
| Product |
|---|
| Wall mounted wrapping paper roll holder |
| Pull-out shelf surface drawer runner |
| Ribbon spool wall organizer |
| Gift tag assorted set |
| Tape dispenser desk weighted |
14. Craft Closet Aesthetic Upgrade with Removable Wallpaper Back Panel
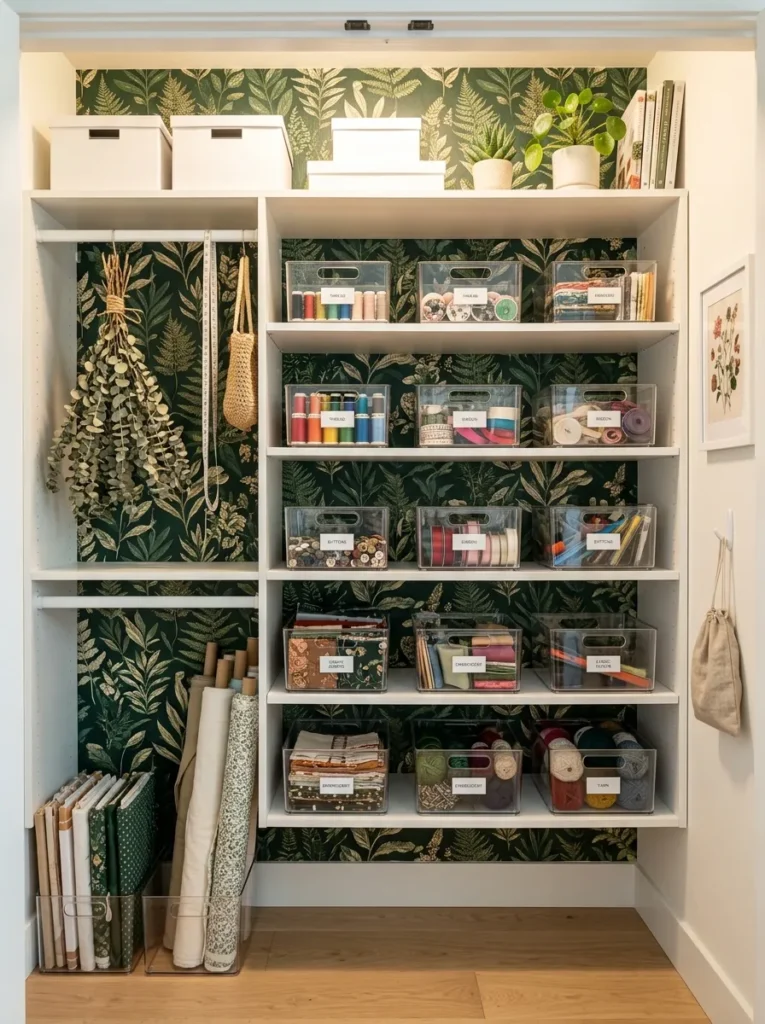
Vibe: Editorial and warm — a craft closet that looks like a magazine feature even with the doors open.
Why it works: The removable wallpaper back panel is the aesthetic upgrade that converts a functional craft closet into a designed space — it adds visual depth, personality, and the kind of considered detail that makes the difference between a closet that is organized and one that is genuinely inspiring to open. The design principle at work is backdrop contrast: a deep, richly patterned wallpaper behind white shelving and clear acrylic bins creates a figure-ground relationship that makes the organized system read more clearly and more visually interesting than it would against a plain white wall. The removable format — peel-and-stick — means it is appropriate for rental spaces and can be changed as aesthetic preferences evolve, without the permanence commitment of traditional wallpaper.
How to get it: Choose a botanical or geometric pattern in a color that coordinates with the room the closet opens into — deep forest green, dusty blush, warm mustard, and soft sage are all colors that read as editorial backdrop without competing with the stored supply colors. Apply to the rear closet wall only, leaving side walls in the existing paint color — the rear wall is the only surface visible from the room when the closet doors are open, and limiting the wallpaper to this single surface makes the installation installation a 30-minute project.
Quick Win: A single roll of peel-and-stick botanical wallpaper ($25–45 per roll, sufficient for a standard closet rear wall) applied to the back panel of a craft closet is the highest aesthetic-impact-per-dollar upgrade in this list — it takes 30 minutes to apply and transforms the visual quality of the entire closet from the doorway.
Shop the Look
| Product |
|---|
| Botanical peel and stick wallpaper roll |
| Wallpaper smoothing tool kit |
| White shelf liner roll |
| Hanging eucalyptus bundle dried |
| Small framed print botanical |
15. Craft Closet Reset Station with End-of-Session Tray System
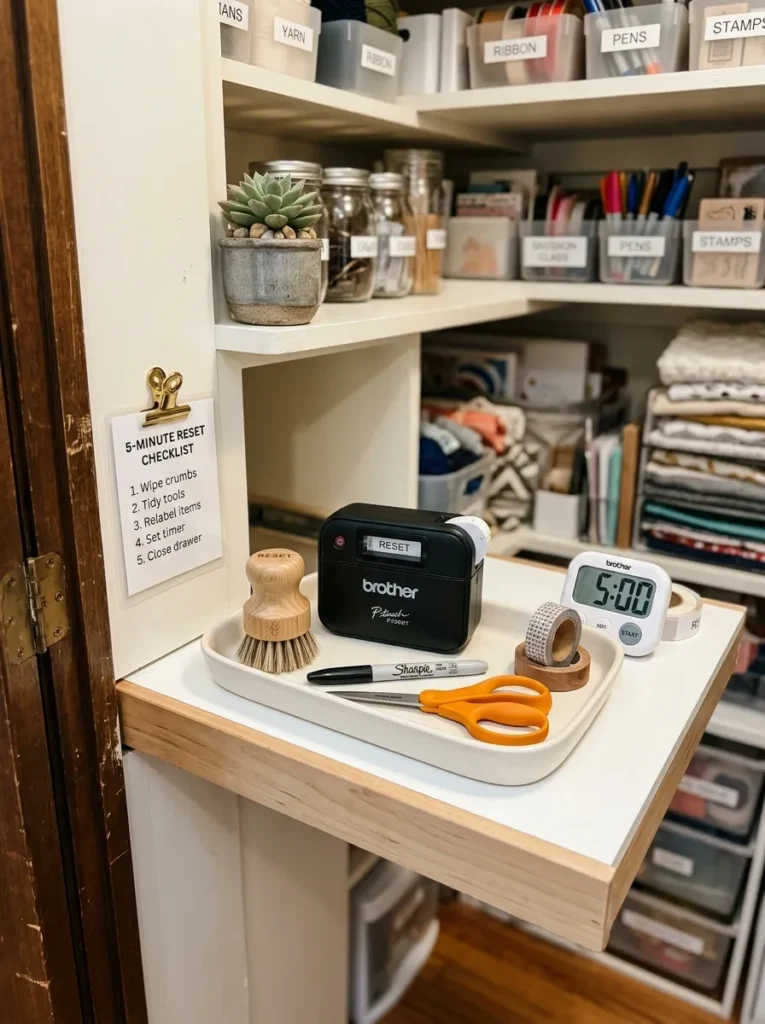
Vibe: Practical and considered — the reset station that makes maintaining the system as easy as using it.
Why it works: The reset station is the organizational idea that determines whether every other system in this list holds its quality over time or gradually degrades back to the chaos it replaced. The single most common reason well-organized craft closets deteriorate is not a lack of organizational intention but a lack of a defined reset routine — without a specific set of tools, a specific location, and a specific time allocated to the end-of-session reset, items return to the wrong bins, labels fall off unreplaced, and the system loses its coherence one small deviation at a time. The reset tray contains exactly the tools needed for a 5-minute end-of-session restoration: a label maker for replacing any labels that have worn or changed, a fine-tip marker for hand-writing temporary labels, scissors for re-attaching escaped ribbon ends, a brush for clearing the cutting surface of paper scraps, and a roll of washi tape for temporarily marking unlabeled supplies before they are properly sorted.
How to get it: Position the reset tray on the closet’s most accessible pull-out surface — the one at closet entry height that requires the least reaching. Print and laminate a 5-point reset checklist (return all tools to pegboard, replace all bin lids, re-sort any mis-filed paper, wipe cutting surface, check label legibility) and clip it to the closet wall beside the tray. The checklist makes the reset routine explicit and learnable — within 2–3 sessions it becomes automatic, and within a month it requires no checklist at all.
Shop the Look
| Product |
|---|
| Label maker with clear and white tape |
| Shallow wooden tray organizer |
| Fine tip permanent marker black |
| Washi tape assorted roll set |
| Laminator small pouch home |
How to Start Your Craft Closet Organization Transformation
Your single first move is to empty the closet completely — not partially, not by category, but completely — and sort everything into four physical piles on the floor before returning a single item to the shelf: Keep and Use Regularly, Keep and Use Occasionally, Donate or Rehome, and Discard. This sorting step, which most people skip in favor of reorganizing what is already in the closet, is the only step that determines whether the new organization system is built around the supplies you actually use or around the supplies you have accumulated. A craft closet organized around the wrong supplies — hoarded materials from abandoned interests, duplicates purchased because the original could not be found in the previous system — will fill to capacity with unusable items before the supplies you actually reach for every session have been properly housed.
The most common mistake is purchasing all the organizational products before the sorting and system-planning is complete. Bins purchased before the inventory is known end up in the wrong sizes for the actual supplies; shelves installed before the system logic is established end up at the wrong heights for the actual containers; label systems created before the categories are finalized require replacement within the first month. The correct sequence is always: empty and sort first, then plan the system on paper with the actual inventory in front of you, then purchase storage products sized to the actual items, then install, then label. Every step in the wrong order creates rework.
Three specific items under $50 that create immediate craft closet impact: (1) A set of under-shelf LED bar lights ($20–35 for three linkable bars) installed under the top three shelves of any craft closet transforms visual accessibility instantly — a well-lit craft closet with existing organization reads as dramatically more organized than an identical closet with poor lighting. (2) A roll of peel-and-stick botanical wallpaper ($25–45) applied to the closet’s rear wall elevates the aesthetic quality of the entire space in 30 minutes without touching a single container or shelf. (3) A label maker with clear tape ($18–30 at any office supply store) used to re-label every container in a single session creates the visual consistency that makes a mixed collection of containers read as a unified system rather than an assorted accumulation.
Realistically, organizing a standard reach-in craft closet — sorting, installing adjustable shelves, purchasing consistent clear bins, adding under-shelf lighting, and creating a label system — takes one full weekend and a materials budget of $200–500 depending on the closet size and the bin quantity required. A fully custom-built craft closet with a dedicated drawer tower, pegboard tool wall, fold-down work surface, and wallpaper back panel costs $800–2,500 depending on whether the cabinetry is custom-built, flat-pack, or DIY from MDF. Most people start with the sorting session and the clear bin system on a Saturday, see the transformation immediately, and invest in the drawer tower and pegboard wall over the following 2–3 months as the categories and volumes of their actual supply use become clear.
Frequently Asked Questions About Organized Craft Closet Ideas
What is the best storage system for a small craft closet with limited space?
The highest-density storage system for a small craft closet is the combination of floor-to-ceiling adjustable shelving at the rear wall, a pegboard tool panel on the rear shelf face, and clear acrylic bins in the smallest size that accommodates each supply category. The key principle for small closets is vertical maximization: most standard reach-in closets have 2.1–2.4 meters of usable height, but standard shelf installations use only 1.2–1.5 meters of that height, wasting 600–900mm of usable storage space above the standard shelf line. Installing shelves to within 150mm of the ceiling — using a step stool for access — can increase a small closet’s storage capacity by 40–60% without any structural modification.
What colors work best for a craft closet interior?
Warm white is the definitive craft closet interior color for three reasons that compound each other: it maximizes light reflection in what is typically a north-facing or interior space with limited natural light; it provides a neutral backdrop that allows supply colors to read accurately rather than being shifted by a colored wall surface; and it creates the visual calm that allows a complex, densely stored inventory to read as organized rather than cluttered. Accent color should be introduced through the wallpaper back panel, the label system color, and any fabric-covered storage elements — never through the shelving or bin color, which should remain consistent and neutral throughout. Deep forest green, dusty sage, and warm terracotta are all effective accent colors for the back panel, chosen to coordinate with the room the closet opens into.
How much does a craft closet organization system cost?
A basic craft closet organization system — adjustable shelving, consistent clear bins, a label system, and under-shelf lighting — costs $200–500 in materials for a standard reach-in closet with DIY installation. A mid-range system adding a drawer tower, pegboard tool wall, and wallpaper back panel costs $500–1,200. A custom-built full craft closet with dedicated cabinetry, fold-down work surface, built-in lighting, and professional installation runs $2,000–6,000 depending on finish level and closet size. The highest-value investments in order of impact per dollar are: under-shelf lighting ($25–40), a clear bin system from a single supplier ($80–200 depending on quantity), and a pegboard tool wall ($30–60 for the board plus hooks) — these three investments produce the most significant organizational improvement at the lowest combined cost.
How do I organize a craft closet if I have multiple different crafts?
The correct approach for a multi-craft closet is zone definition rather than integration — each craft discipline receives a dedicated zone within the closet (a set of shelves, a section of the pegboard, a specific drawer tower level) rather than being interleaved with other disciplines. Zone boundaries can be defined by shelf dividers, by label color coding (blue labels for paper crafting, green for sewing, orange for painting), or by physical separation with a vertical divider panel. The organizational logic within each zone can then be tailored to that discipline’s specific storage requirements — vertical filing for paper, dowel display for fabric, tiered racks for paint — without needing to compromise with a system that serves multiple disciplines equally poorly. A multi-craft closet organized in zones reads as a professional studio; a multi-craft closet with integrated storage reads as a supply room.
What is the best way to maintain a craft closet organization system over time?
The single most effective maintenance strategy is the end-of-session reset routine — a defined 5-minute process at the end of every creative session where tools are returned to their pegboard positions, bins are re-lidded, paper is re-filed in the correct vertical divider, and the cutting surface is cleared. This routine prevents the gradual degradation that destroys well-organized closets: one session of not resetting produces a manageable disorder; three sessions of not resetting produces a moderate mess; ten sessions of not resetting produces the original chaos that triggered the organization project in the first place. The reset station idea (Idea 15) provides the specific physical infrastructure that makes the routine take five minutes rather than twenty — when all reset tools are in a single dedicated tray at closet entry height, the friction of completing the routine is low enough that it becomes habitual within 2–3 weeks.
Ready to Create Your Dream Organized Craft Closet?
These 15 ideas span the full range of what a craft closet can be — from a floor-to-ceiling clear bin system and a color-gradient yarn cubby wall to a botanical wallpaper back panel, a flip-file stamp library, and a dedicated end-of-session reset station — so whether you are working with a shallow reach-in wardrobe, a deep walk-in closet, or a single section of open shelving in a spare room, there is a genuinely buildable organizational system here for your creative practice and your available space. The transformation works best when it begins with the empty-and-sort session rather than with a trip to the container store — the supplies you actually use, in the quantities you actually have, determine every storage decision that follows, and no beautifully designed system built around the wrong inventory will hold its quality through a full year of creative use. Today’s specific action: open your craft closet right now, identify the single supply category that creates the most daily friction — the paint bottles you cannot find, the ribbon that tangles every time, the stamps that require opening fifteen boxes — and address that one category first, completely, before touching anything else. When the closet is finished, organized, lit from within, and wallpapered behind the white shelving, and you open it on a Tuesday morning with a specific project in mind and find every supply you need in under thirty seconds without moving a single container out of the way, you will have built something that genuinely serves your creative life. Save the ideas that matched your specific craft disciplines and your closet’s actual dimensions — those are the ones that will still be working perfectly in three years.