Book Page Crafts Ideas for Small Apartments and Tiny Spaces
Small apartments have one rule: every object has to earn its space. That is why book page crafts ideas for small apartments work so well. Old pages are flat, light, and almost free. You can turn a handful into wall art, a garland, or a tray, and none of it needs a spare room or a toolbox.
I think paper crafts get a bad name for being clutter. I feel that is only true when the project is bulky. In my opinion, the trick is to keep things flat, small, and finished fast. A glue stick and a tiny table can create a surprising amount of chaos, but a finished piece on a shelf looks calm.
Here is what you get. Ten book page craft ideas, from a 10 minute bookmark to a weekend side table. Most supply lists run roughly $5 to $70, depending on the project (prices vary). Every idea has exact sizes, one honest warning, and a shop list, so you can plan before you buy.
So grab a used paperback and a ruler. The first projects need almost nothing, and the later ones show how far one old book can go. Keep reading, because the cutting sizes and sealing steps decide whether the result looks neat or messy.
Book Page Crafts Ideas Starting With Bookmarks and Gift Tags

Bookmarks and gift tags are the easiest book page craft ideas to try, and they use almost no space. Cut a standard paperback page into strips about 2 by 6 inches, glue each to thin card backing, and punch one hole. Supplies cost roughly $5 to $12, prices vary. Each piece takes about 10 minutes.
Cutting size: Use a ruler and a craft knife or sharp scissors, and mark each strip before you cut so the edges stay straight. Glue the page to the card with a glue stick instead of wet glue, which wrinkles thin paper. Always cut on a mat, and keep blades away from children and pets.
Gift tag swap: For tags, cut a 2 by 3 inch rectangle, trim one corner at an angle, and add a 6 inch loop of twine. Pick pages with a wide margin so the paper looks clean. This suits tiny desks, shared flats, and anyone with only a kitchen table to work on.
- Use one page per bookmark so both sides show print
- Round the corners with a hole punch or scissors
- Make a batch of five or six at once to save time
Shop This Look
Book Page Garland for a Small Window or Shelf

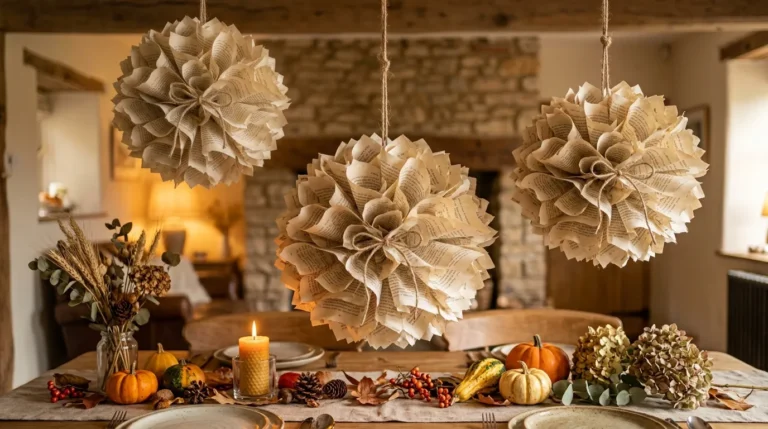
A garland looks bigger than it is, and it hangs without using any floor space. Cut 3 inch circles from 20 to 30 pages and sew or glue them along 6 feet of twine. Roughly $5 to $15 for supplies, prices vary. Plan about 45 minutes. Hung over a window, the paper also softens daylight.
String length: Measure the wall or window first, then add 6 to 8 inches for knots at each end. Space the circles roughly 2 inches apart so the line does not sag. Hang it with removable hooks and check the label for the weight limit, since wall damage can cost renters money.
Window option: Swap the circles for triangles about 3 inches wide to make a bunting style, or hang the line along a shelf edge instead of a window. It suits studio apartments, dorm rooms, and narrow living rooms with little wall space.
- Punch holes with a standard hole punch for faster work
- Use a bone folder or ruler to crease triangles cleanly
- Keep the garland away from candles and other open flames
Shop This Look
Rolled Book Page Flowers in a Bud Vase
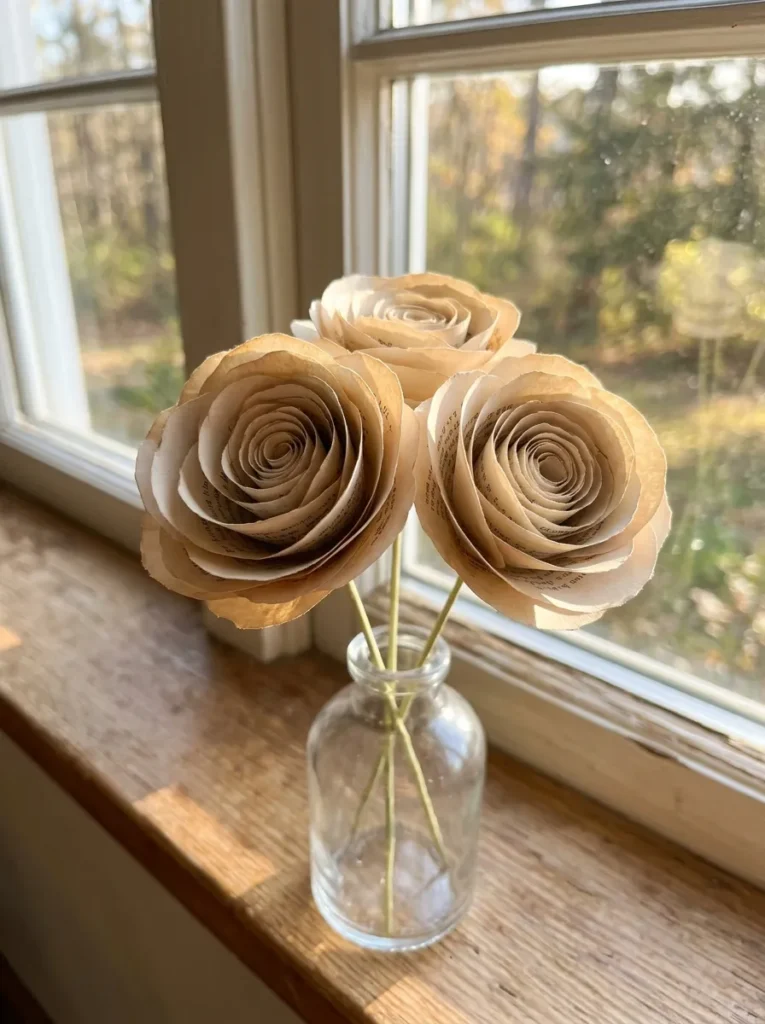
A rolled flower stands about 6 to 8 inches tall and fits in a small jar, so it works on a windowsill or a nightstand. One flower uses a paper strip about 2 by 20 inches. Supplies cost roughly $8 to $18 for a small bunch, prices vary. Expect about 15 minutes for each bloom.
Petal method: Cut the strip with a wavy edge, roll it tightly around a pencil, then keep winding to form a rose shape. Secure the end with a dab of craft glue. If you use a hot glue gun, follow the product label, keep it away from children, and let it cool fully before storing.
Vase swap: Use a clean jam jar or small bottle if you have no vase, and cut floral wire stems to about 8 inches. These flowers need no water, so they suit apartment shelves, entryway tables, and desks where real flowers would die in a week.
- Mix three to five flowers for a small bunch
- Use pages with lighter print for a softer look
- Dust them with a dry soft brush, not water
Shop This Look
Folded Book Page Art for a Narrow Shelf

Folded pages turn an old paperback into a small sculpture about 7 inches tall. A book with 200 pages is enough to make a heart, a star, or a simple wave pattern. A used book costs roughly $2 to $6, prices vary. The folding takes about an hour, and the finished piece stands on any shelf.
Folding rule: Fold the top corner of each page toward the center, then fold the top edge down again, and press with your thumb. Repeat the same fold on every page so the pattern lines up. Never fold a collectible or rare book. Pick a cheap used copy that nobody will miss.
Shelf placement: Stand it on a narrow shelf, windowsill, or desk corner, and keep it out of damp air so the paper does not warp. It suits tiny bookcases and bedrooms where one decorative object has to replace several.
- Start with a thin paperback for a first try
- Use a pencil and ruler to mark fold lines on the first page
- Keep the book closed with a rubber band while it settles
Shop This Look
Framed Book Page Wall Art for Small Apartments
Flat framed pages are among the best book page crafts ideas for walls because they stick out only about 1 inch. Mount a single page in a 5 by 7 inch frame, or hang three pages in 8 by 10 inch frames. Roughly $15 to $40 for supplies, prices vary. Plan on about 30 minutes.
Frame size: Choose frames with a mat so the page seems to float, and cut each page about 0.25 inches smaller than the opening. Use acid-free tape so the paper does not yellow faster. Hang frames with removable adhesive strips or hooks that suit your lease, and check the weight limit on the pack.
Layout step: Lay the frames on the floor first, with about 2 inches between them, and trace each on scrap paper to plan the wall. Add one colored page for contrast. It suits studios, hallways, and the strip of wall above a desk.
- Pick pages with a clean margin or a small illustration
- Keep frame colors in one family
- Hang the center of the group at roughly eye level
Shop This Look
| FRAMES | TAPE | STRIPS |
|---|---|---|
| 5×7 Frames With Mat | Acid Free Photo Tape | Removable Picture Hanging Strips |
| Shop → | Shop → | Shop → |
Book Page Coasters for a Small Coffee Table

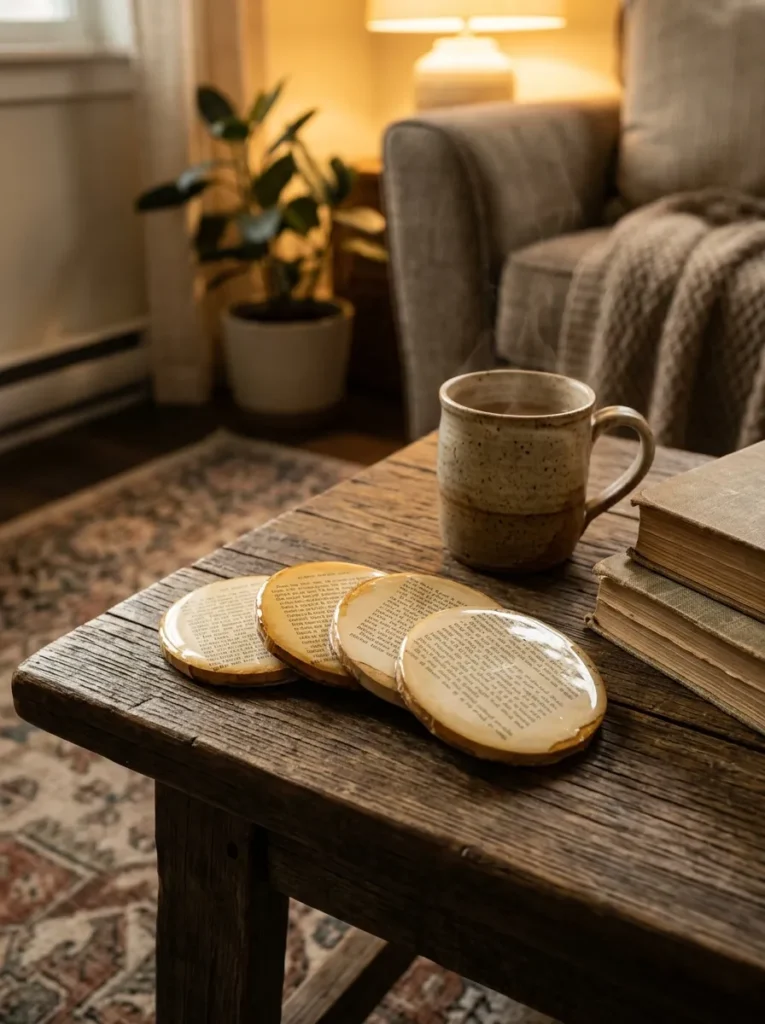
Coasters give a small table a finished look and take almost no space. Cut a page into a 4 inch circle, glue it to a cork round, and seal it. A set of four costs roughly $10 to $25 in supplies, prices vary. It takes about an hour, plus drying time listed on the product label.
Sealing warning: Coat each coaster with 2 to 3 thin layers of water-based sealer, and let each layer dry before adding the next. Check the label for ventilation and cure times. Hot mugs and wet glasses can still damage paper, so treat these as light-use pieces.
Set of four: Use four different pages for variety, and add a thin cork base so the coasters do not slide. They fit side tables, serving trays, and desks where drinks sit near books and laptops.
- Trim each circle slightly smaller than the cork
- Press out bubbles with a clean cloth
- Keep spare coasters flat while they dry
Shop This Look
| CORK | SEALER | BRUSH |
|---|---|---|
| Cork Round Coasters 4 Inch | Water Based Craft Sealer | Foam Craft Brushes |
| Shop → | Shop → | Shop → |
Book Page Wreath for the Back of a Door
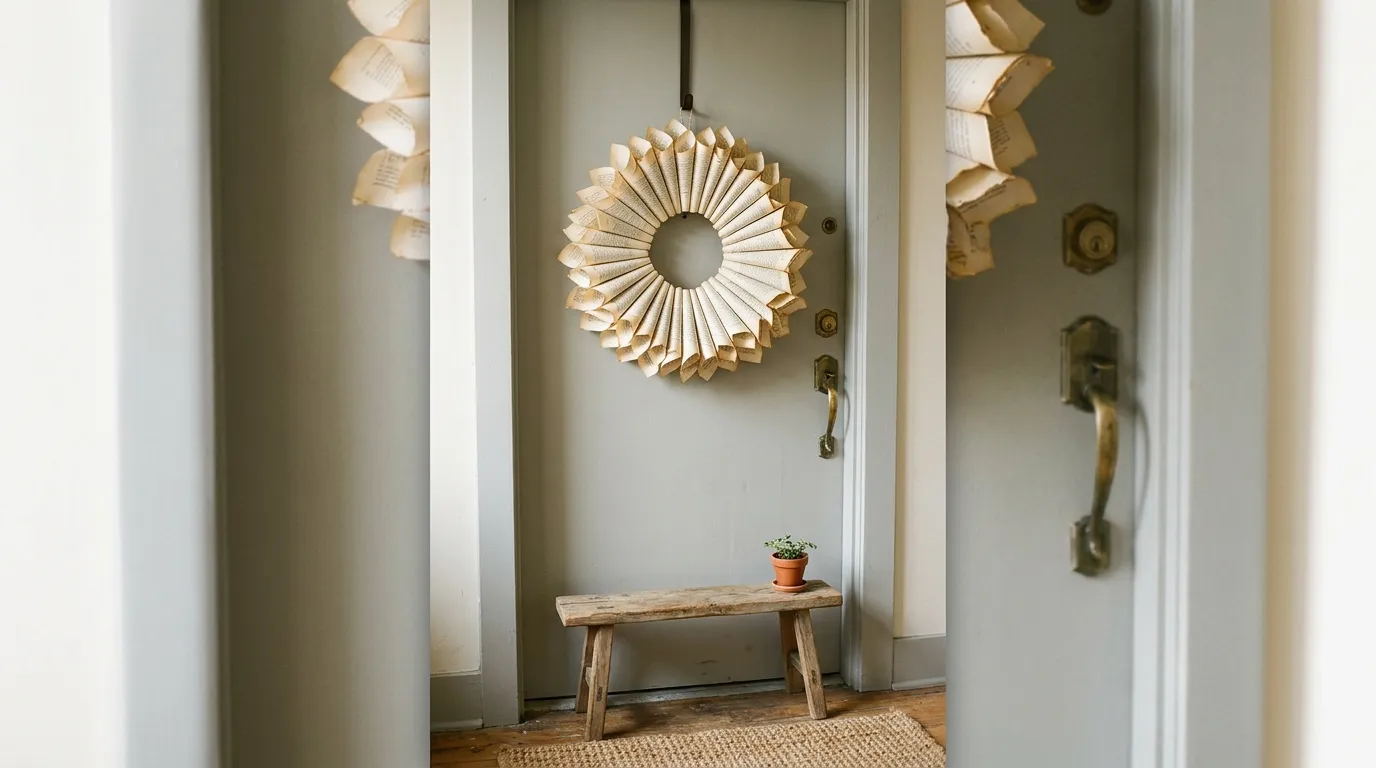
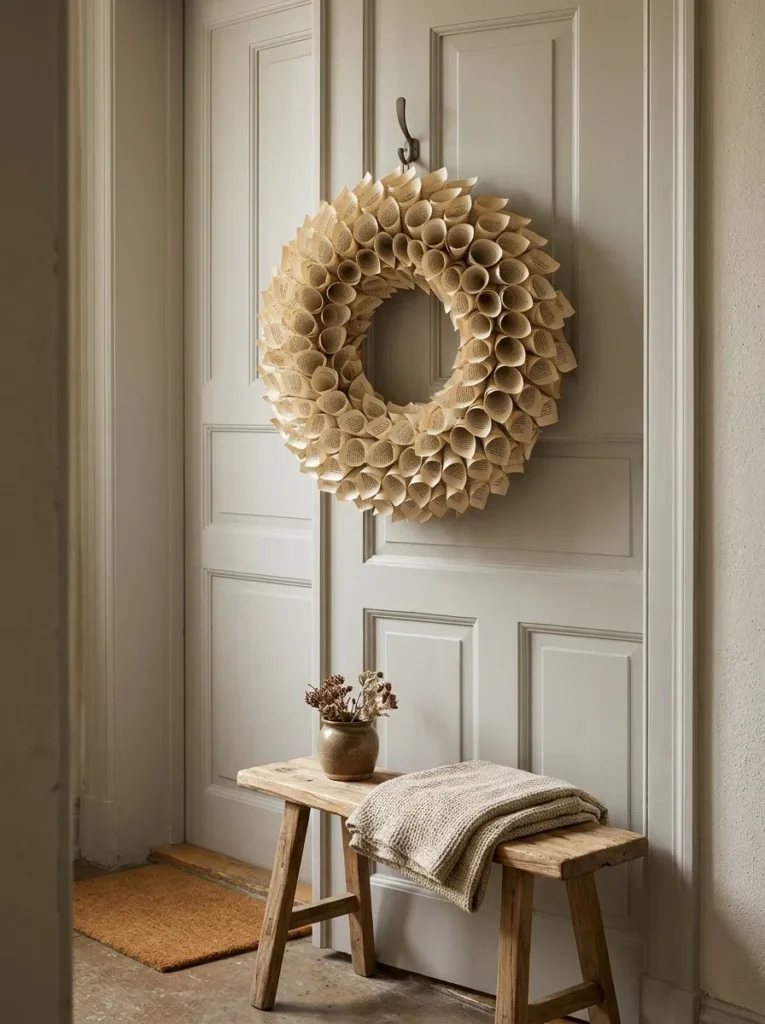
A wreath uses the back of a door, which is empty space in most apartments. Roll or fold about 40 pages into small cones and glue them to a 10 to 12 inch cardboard or foam ring. Supplies cost roughly $10 to $25, prices vary. Plan on 1 to 2 hours.
Base warning: You can cut a cardboard ring from a box if you want a near-free base, but keep it at least 1 inch wide so it holds its shape. Glue cones in overlapping rows. Use an over-door hook instead of nails, and avoid heavy foam that may scratch paint.
Door fit: Measure the gap between the door and the frame, since some are tight and the hook may not fit. Add a 2 inch wide ribbon at the top as a hanger. It suits entrance doors, bedroom doors, and closet doors.
- Roll cones tight so they hold their shape
- Work from the outer edge toward the inner ring
- Hang the wreath at about chest height
Shop This Look
Decoupaged Book Page Storage Box or Tray
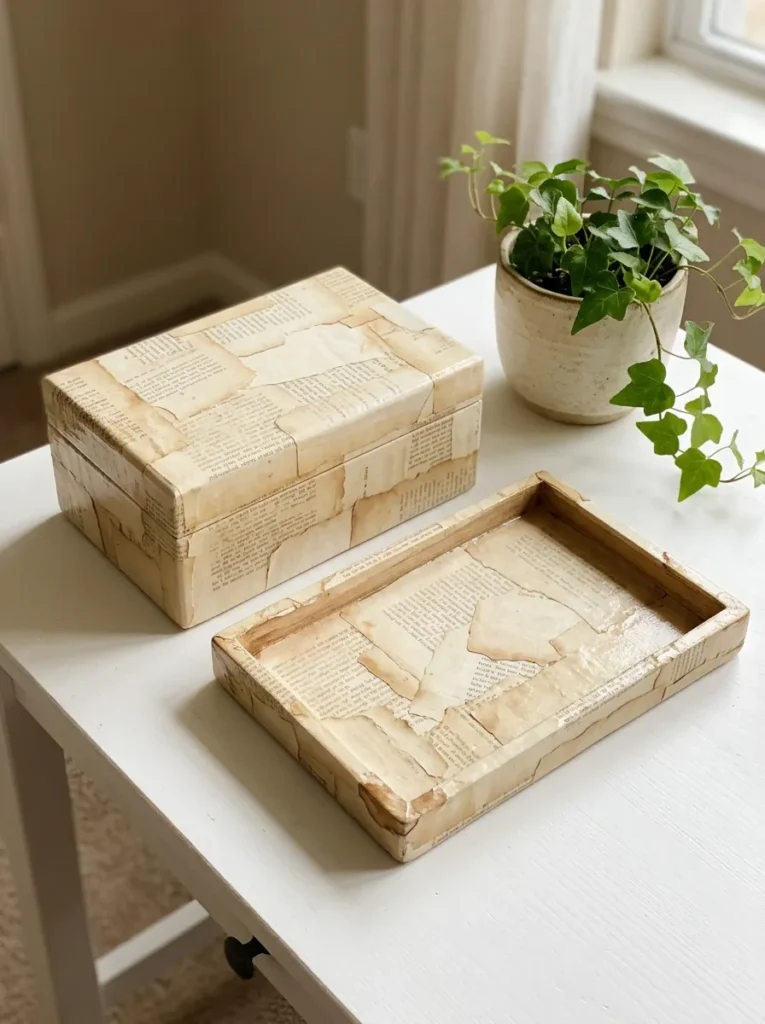
A storage box covered in book pages solves two small-apartment problems: clutter and bare surfaces. Use an 8 by 10 inch cardboard box or a wooden tray, and tear pages into 2 inch pieces for a mosaic look. Roughly $10 to $25 in supplies, prices vary. Plan on a half day with drying time.
Gluing order: Brush decoupage medium on a small section, press the pages on, smooth out bubbles, and overlap edges by about 0.25 inches. Seal the outside with two coats. Work in a ventilated room and keep products away from pets, children, and heat, following the label.
Lining option: Line the inside with plain paper or fabric so loose items do not catch on rough edges. It suits desks, bookcases, and shelves. Avoid damp spots like bathrooms, where paper can warp.
- Tear pages by hand for softer edges
- Start with the sides before the lid or top
- Let each coat dry fully before stacking items
Shop This Look
| MEDIUM | BRUSH | BOX |
|---|---|---|
| Decoupage Medium Matte | Wide Foam Brush Set | Cardboard Storage Box With Lid |
| Shop → | Shop → | Shop → |
Book Page Lampshade Cover for a Small Lamp
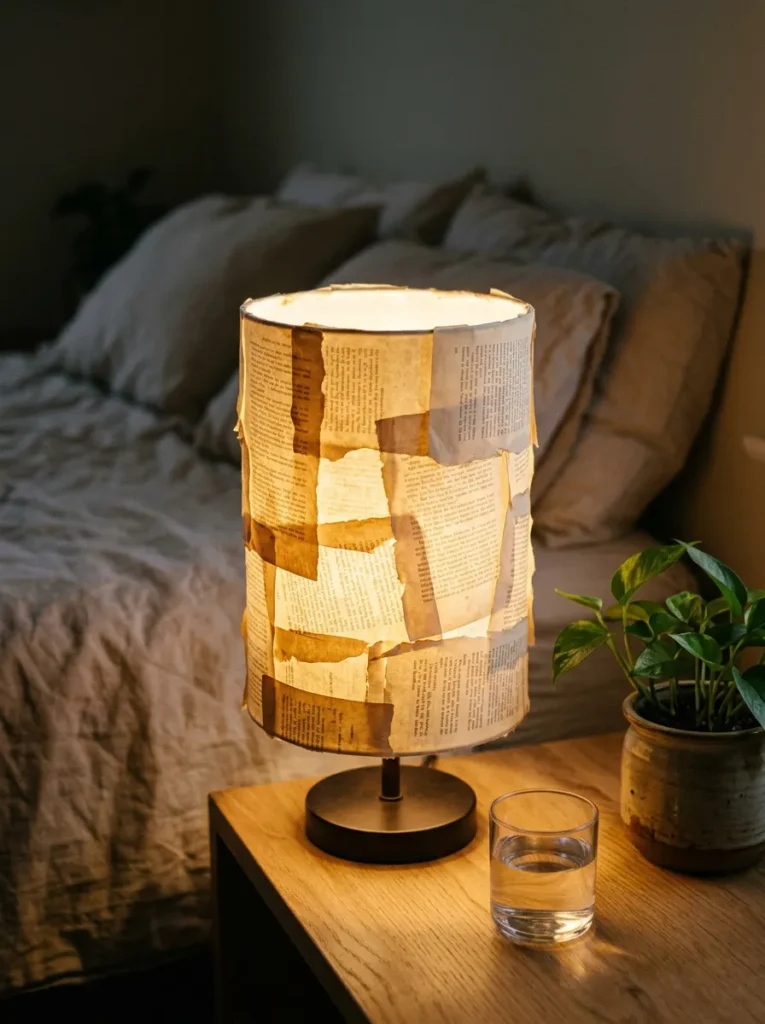
A paper-covered shade gives a warm glow, and a small 8 to 10 inch drum shade is a manageable size. Cut pages to the height of the shade, glue them in overlapping strips, and let them dry. Supplies cost roughly $15 to $35, prices vary. Plan on about 2 hours.
Heat warning: Paper near a hot bulb is a fire risk. Use only a cool LED bulb at or below the wattage on the lamp’s label, and keep the bulb clear of the paper. Do not use incandescent bulbs. Read the lamp instructions, and ask an electrician if you are unsure.
Light choice: A warm white LED, around 2700K, gives a soft glow through the pages. Test the shade in a dim room before the glue sets. It suits bedside tables, reading corners, and desks where you want gentle light.
- Cut strips the same height as the shade
- Overlap strips by about 0.25 inches
- Keep the lamp unplugged while you glue
Shop This Look
| SHADE | BULB | MEDIUM |
|---|---|---|
| Plain Drum Lampshade 8 Inch | Warm White LED Bulbs 2700K | Decoupage Medium Matte |
| Shop → | Shop → | Shop → |
Decoupaged Book Page Side Table for Tiny Living Rooms
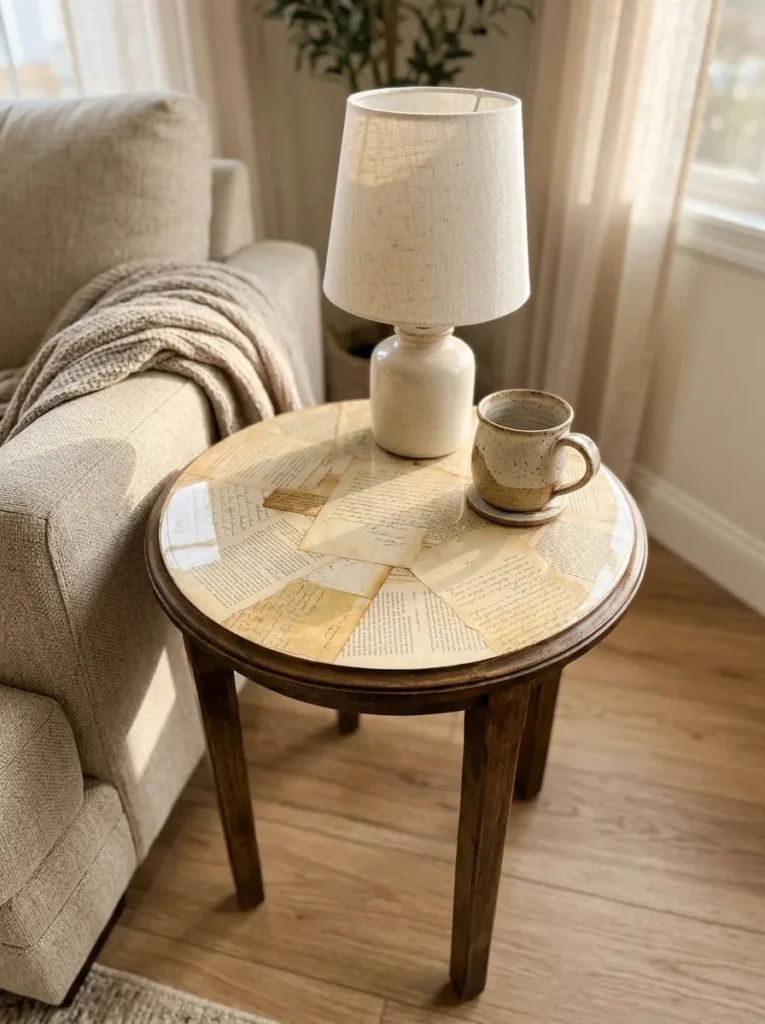
A decoupaged side table is the biggest project here, and it gives you a one-of-a-kind piece. A small round table about 16 inches wide takes roughly 60 to 80 pages. Supplies run roughly $30 to $70 if you buy a basic table, prices vary. Plan on a weekend.
Surface prep: Sand the top lightly, wipe it clean, and prime if the product label says so. Glue pages in overlapping layers, then seal with 3 to 4 thin coats. Work in a ventilated room, wear gloves and a mask if the label says so, and let the table cure fully before use.
Finish option: Choose a matte sealer for a soft look or a satin one that wipes clean more easily. It suits living rooms, bedsides, and entryways where one small table has to do the work of two.
- Sand between coats with fine sandpaper if the label allows
- Overlap pages in different directions for a mosaic look
- Place felt pads under the legs to protect floors
Shop This Look
| TABLE | SANDING | SEALER |
|---|---|---|
| Unfinished Wood Side Table | Fine Grit Sandpaper Pack | Water Based Furniture Sealer |
| Shop → | Shop → | Shop → |
How to Start
Start with one old paperback and one flat surface. Pick a book you do not mind cutting, such as a damaged copy or a cheap used one. Skip anything rare or collectible. Clear a small table, spread a sheet of scrap paper over it, and keep your tools in one tray.
Work in this order: choose one project, measure the space where it will go, cut your pages, glue, then seal if the project needs it. Do the quick ones first, like bookmarks, to learn how the paper behaves. Save the lampshade and side table for later, when your hands are used to the work.
If you buy supplies, keep to a small budget. Three starter items under roughly $30 in total could be:
- A glue stick or small bottle of craft glue
- A ruler and sharp scissors
- A spool of twine or a set of removable hooks
Plan about an hour for the first project and a few weeks to finish three or four. Expect roughly $15 to $40 for a starter kit, approximate, prices vary. Many people already own half of it.
Shop This Look
Common Mistakes
- Cutting rare books: Old books can be worth money or have sentimental value. Use damaged, duplicate, or cheap used copies instead.
- Using too much glue: Wet glue wrinkles thin paper and can bleed through the print. Apply a thin, even layer and smooth it out with a dry cloth.
- Skipping the sealer: Unsealed paper marks, tears, and yellows quickly on tables, coasters, and boxes. Add two to four thin coats and follow the label for drying time.
- Crowding the wall: Too many framed pages in a small room makes the space feel smaller. Start with one or three frames and leave 2 to 3 inches of space around each.
- Ignoring heat near paper: Bulbs, candles, and heaters can scorch or ignite paper. Use cool LED bulbs and keep paper away from open flames.
- Buying supplies first: A big craft haul often ends up as clutter in a small apartment. Buy only what the next project needs.
- Leaving projects half done: Half-finished pieces take up the exact space you are trying to save. Pick a project you can finish in one session and clear the table when you are done.
Frequently Asked Questions
What are easy book page crafts for small apartments?
Bookmarks, garlands, and framed pages are the easiest. They are flat or light, and they use one or two tools. A bookmark takes about 10 minutes, and a garland takes about 45.
What kind of books should I use for book page crafts?
Use used paperbacks, damaged copies, or books you already plan to discard. Avoid rare, collectible, or sentimental books. Thrift shops and library sales often sell paperbacks for roughly $1 to $3 each, prices vary.
How do you seal book pages so they last?
Use a water-based sealer or decoupage medium and apply 2 to 4 thin coats. Let each coat dry fully before the next. Follow the product label for ventilation and cure time, and test on a scrap page first.
Can I do book page crafts in a rental apartment?
Yes, if you avoid wall damage. Use removable adhesive hooks or strips, and check the weight limit on the pack. Door wreaths, shelf art, and tabletop pieces need no holes at all.
How much do book page crafts cost?
Most small projects cost roughly $5 to $25, and bigger ones like a side table run roughly $30 to $70 (prices vary). The book itself is often under $5. You can cut costs by using glue and scissors you already own.
The Finishing Touch
Step back and check four things before you call a piece done: edges and cuts are straight, glue is dry and flat, the sealer has no sticky spots, and the piece fits its spot without crowding anything. Check in daylight if you can, since lamps hide small flaws. This takes about two minutes.
Then change one thing and look again. Move the garland up 2 inches, swap a frame for a smaller one, or take one item off the shelf. If the space looks calmer, keep the change. If not, move it back. Small edits show you what your room can hold.
Today, take one old paperback and make one bookmark or tag before dinner. It takes about 10 minutes and costs almost nothing. Then save your favorite book page crafts ideas for small apartments to a Pinterest board, so you have a plan for the next free weekend.