15 Clay Craft Ideas for Creative DIY Projects
Clay crafts are hand-worked projects using air-dry clay, polymer clay, or earthenware clay to create functional objects, decorative pieces, and sculptural forms — accessible to complete beginners while offering sufficient depth to reward years of practice. Here are 15 ideas for using clay to make genuinely beautiful, display-worthy objects that carry the warmth and specificity of the human hand.
Clay is the oldest creative material in human history — humans have been shaping it for over 25,000 years. What makes it endlessly compelling is the same quality that made it compelling to the first person who picked it up: it responds directly to the hand. Every fingerprint, every tool mark, every deliberate shaping decision is recorded and held permanently. The finished object carries the evidence of its own making, which is the quality that gives clay objects their particular warmth and authority. Here are 15 ideas worth making — and keeping.
Why Clay Crafts Work So Well
What makes clay the most expressive craft material available to beginners? Clay occupies a unique position in the craft material spectrum — it is simultaneously the most physically immediate material (it responds to the lightest touch and records every deliberate gesture) and the most forgiving (unlike glass, ceramic slip, or resin, air-dry and polymer clay can be reworked, added to, and corrected throughout the making process). This combination of immediate responsiveness and forgiveness makes clay the craft material most likely to produce a genuinely satisfying first result regardless of the maker’s prior experience. The design principle at the heart of clay craft is honest material expression: the most beautiful clay objects are those that show how they were made rather than hiding it.
Core materials and approaches. Clay craft divides into three primary material categories with distinct properties: air-dry clay (water-based, dries at room temperature over 24–48 hours, paintable, no kiln required — the most accessible starting point), polymer clay (oil-based, requires oven baking at 130°C for 15–30 minutes, holds fine detail, available in dozens of colors — the best choice for small detailed work and jewelry), and earthenware or stoneware clay (requires kiln firing, produces the most durable and genuinely ceramic results — accessible through community pottery studios). The techniques that produce the most satisfying results for beginners are hand-building methods — pinch, coil, and slab — which require no wheel and no specialist equipment beyond the hands.
Why clay crafts are experiencing a sustained creative resurgence. The clay craft resurgence documented in pottery class enrollment data, Etsy seller growth in handmade ceramics, and social media content around hand-building and wheel throwing reflects multiple converging cultural currents: the tactile pleasure of working with a physical material in an increasingly digital daily life, the sustainability of clay as a natural material with minimal environmental impact at the craft scale, and the interior design shift toward objects with visible material warmth and handmade specificity. Clay objects — with their surface texture, slight asymmetry, and fingerprint evidence — are the exact opposite of the algorithmic smoothness of mass-manufactured home goods.
Can complete beginners produce beautiful results? With the right project selection and the right material choice, consistently yes. Air-dry clay pinch bowls, simple slab-built tiles, and hand-rolled bead necklaces are all achievable in a first session and produce genuinely beautiful objects — their slight imperfections and surface irregularities are not flaws to be overcome but qualities to be embraced as the evidence of hand-making.
Style at a Glance
| Element | Detail |
|---|---|
| Philosophy | Show how the object was made — never hide the hand |
| Key Materials | Air-dry clay, polymer clay, earthenware, tools, texturing materials |
| Key Techniques | Pinching, coiling, slab building, stamping, carving |
15 Clay Craft Ideas for Creative DIY Projects
1. Air-Dry Clay Pinch Bowl Set
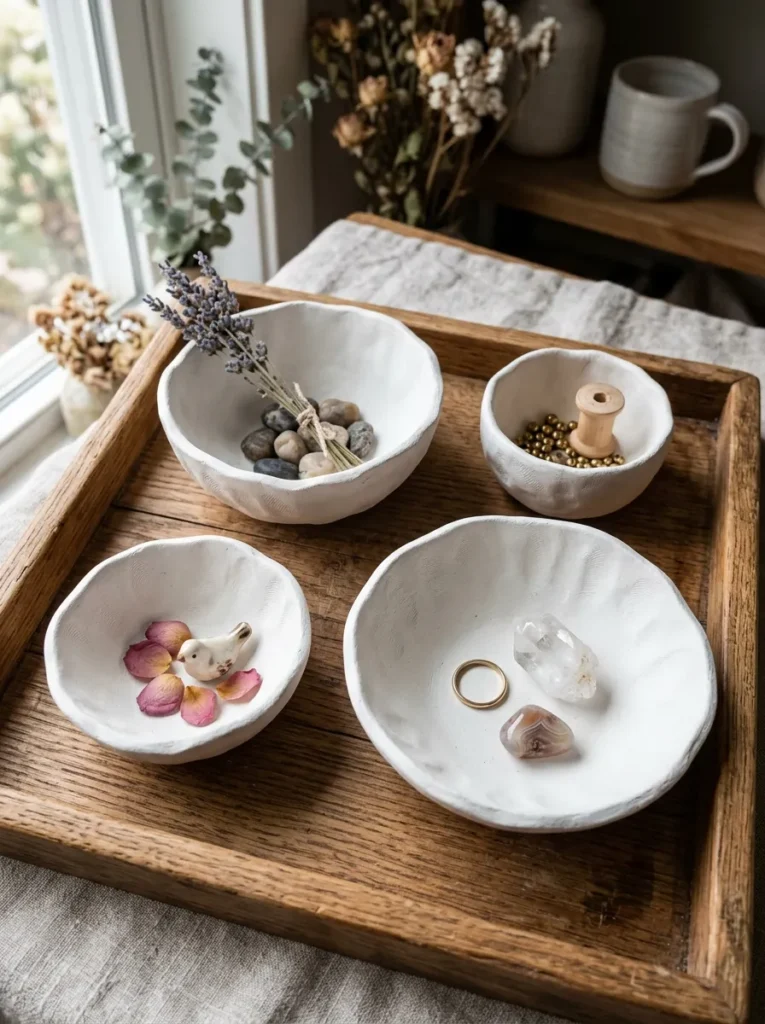
Vibe: A set of pinch bowls feels warmly handmade — the objects that make jewelry, keys, and small treasures feel worth displaying.
Why it works: The pinch bowl is the foundational clay project that requires no tools and no prior experience — it is made entirely by thumb and finger pressure, which means every pinch bowl carries the literal imprint of its maker’s hand. The design principle is honest process evidence as aesthetic quality: the slight irregularity of the rim, the fingerprint impressions on the exterior surface, and the organic variation in wall thickness are not imperfections to be sanded away but the qualities that give a pinch bowl its warmth and authenticity. A set of four in graduated sizes creates a composed collection more interesting than any single piece.
How to get it: Take a golf-ball-sized piece of air-dry clay and press your thumb into the center to a depth of approximately 1 cm from the base. Rotate the ball slowly while pinching the wall upward and outward with thumb inside and two fingers outside, maintaining consistent wall thickness of approximately 5–7 mm. When the bowl reaches the desired form, smooth the rim lightly with a damp finger. Allow to dry on a flat, non-porous surface for 24–48 hours, turning once after 12 hours to prevent base cracking. When fully dry, sand lightly with 220-grit sandpaper and seal with two coats of matte Mod Podge before painting.
Quick Win: Four pinch bowls from a single 500g block of air-dry clay costs under $6 in materials and takes two hours of making plus 48 hours of drying — one of the highest-value handmade home accessory projects available at any skill level.
Shop The Look
| Product |
|---|
| Air dry clay white 500g block |
| Fine grit sandpaper 220 for clay smoothing |
| Matte white chalk paint for finish |
| Matte Mod Podge sealer for clay |
| Small wooden display tray for bowl cluster |
Also view: 14 Easy Book Page Crafts for Creative Adults
2. Polymer Clay Earrings in Abstract Shapes
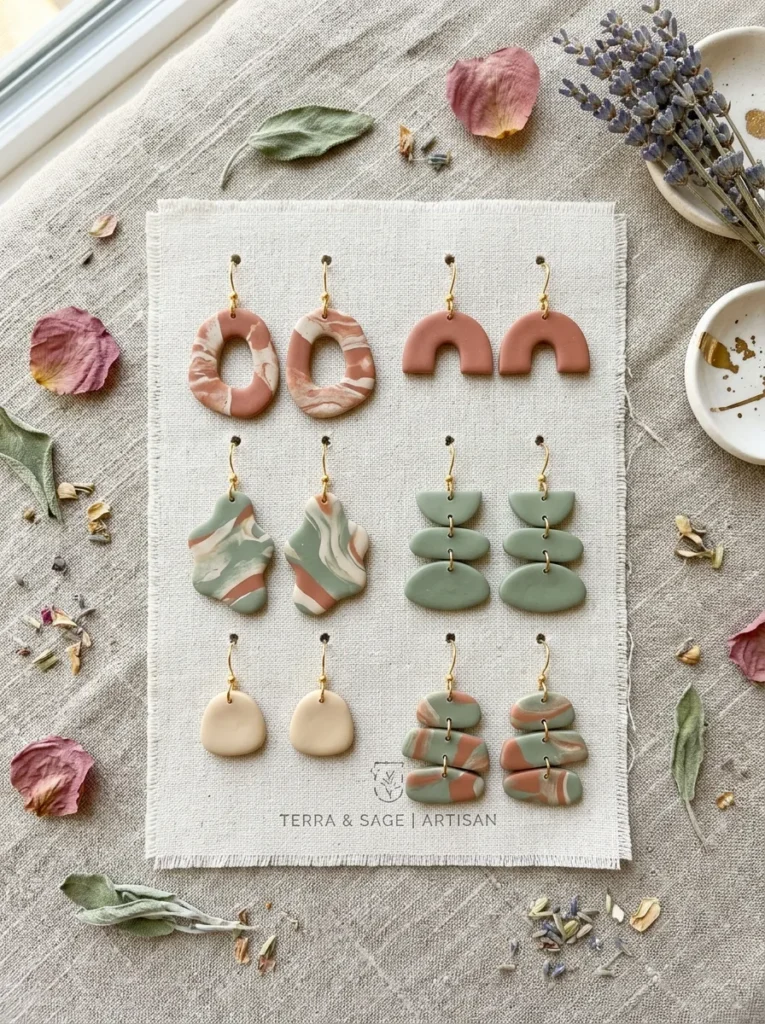
Vibe: Polymer clay earrings feel wearably artisan — jewelry that carries the warmth of handmade objects at the scale of daily accessories.
Why it works: Polymer clay earrings are the clay project with the highest perceived value relative to material cost — a pair of handmade polymer clay earrings reads as artisan jewelry worth $20–$50, while the material cost per pair is $0.50–$2.00 in clay plus $0.30–$0.80 in findings. The design principle is color palette discipline as design sophistication: the distinction between polymer clay earrings that read as handmade crafts and those that read as artisan jewelry lies almost entirely in the color palette chosen. Muted, desaturated tones (dusty terracotta, sage green, warm cream, dusty blush) produce earrings that read as considered and wearable; bright primary colors or neon tones read as craft fair generic. Abstract organic shapes — irregular ovals, arched crescents, soft triangles — are both the most accessible forms for beginners and the most aesthetically current.
How to get it: Condition polymer clay by kneading for 2–3 minutes until pliable. Roll to 3–4mm thickness using a rolling pin or pasta machine. Cut shapes freehand with a sharp craft knife — organic irregular forms are more successful than geometric precision for beginners. Pierce a hole near the top edge with a headpin or toothpick before baking — the hole must be made before baking as drilling after is difficult without cracking. Bake at 130°C for 20 minutes on a ceramic tile. When cool, sand with 400, then 800, then 1500 grit wet-dry sandpaper for a smooth surface, or leave the natural baked texture for a more matte artisan quality. Attach gold ear wires through the baked holes.
Shop The Look
| Product |
|---|
| Polymer clay set muted tones terracotta sage cream |
| Gold ear wire finding set 20 pairs |
| Rolling pin small for polymer clay |
| Craft knife set for clay cutting |
| Wet dry sandpaper set 400 800 1500 grit |
3. Slab-Built Clay Tiles for Wall Art
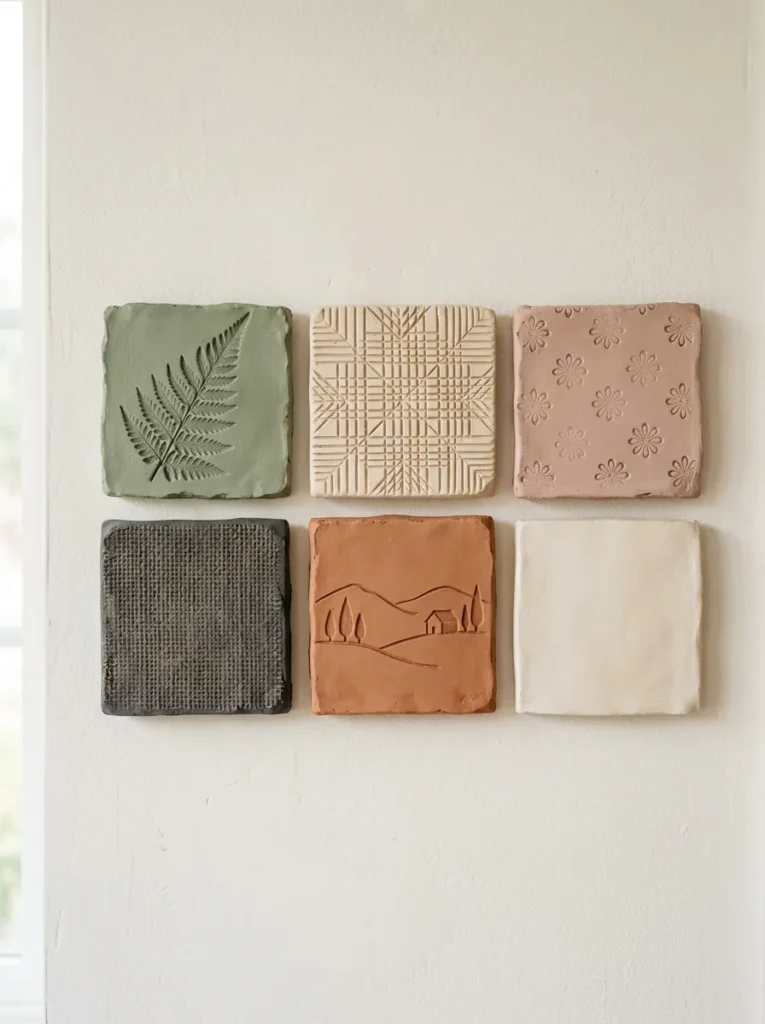
Vibe: A grid of clay tiles feels warmly architectural — wall art that belongs to the wall rather than hanging on it.
Why it works: Slab-built clay tiles combine the accessibility of flat clay work with the dimensional quality of wall art — the impressed, stamped, or carved surface of each tile creates shadow and texture that flat paper or canvas art cannot achieve. The design principle is surface variety as collection coherence: when six tiles share the same format (square, consistent size) but each has a different surface treatment (impressed, carved, stamped, textured), they form a collection with visual variety within a unifying structure — the format coherence allows the surface variety to be interesting rather than chaotic. Different muted paint colors across the six tiles add color variation that reinforces the individual character of each tile while the consistent format maintains the collection’s visual unity.
How to get it: Roll air-dry clay to a consistent 8–10mm thickness between two wooden guide rails (two pieces of 8mm dowel work perfectly). Cut into 10×10 cm squares using a ruler and craft knife. Impress textures immediately — pressed leaves, carved patterns, fabric textures, stamp impressions — while the clay is still wet. Allow to dry slowly between two pieces of parchment paper under a light weight to prevent warping. When completely dry, paint in muted colors and seal with matte Mod Podge. Mount on the wall using clear adhesive mounting squares or small picture hooks glued to the tile back.
Shop The Look
| Product |
|---|
| Air dry clay 1kg for tile making |
| Wooden guide rail set 8mm for rolling |
| Clay stamp set botanical for impressions |
| Craft knife and ruler for tile cutting |
| Clear adhesive mounting square for wall |
4. Coiled Clay Planter with Textured Exterior
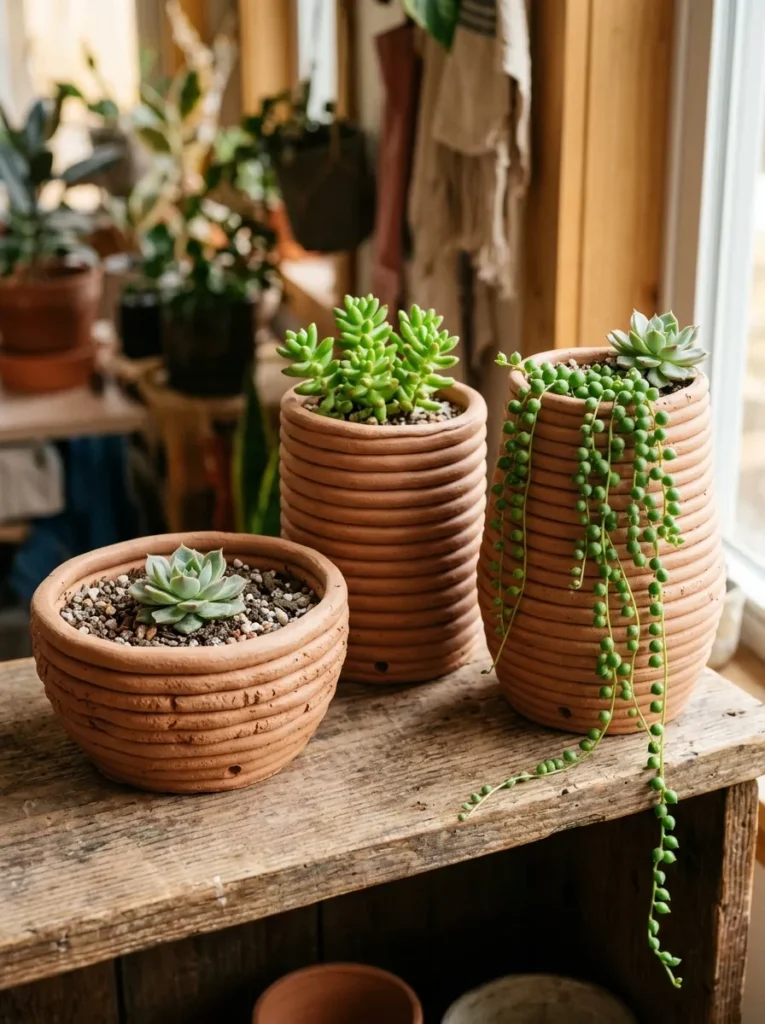
Vibe: A coiled clay planter feels organically textured — the pot that looks like it grew rather than was made.
Why it works: The coil-building technique — rolling clay into long ropes and stacking them into a vessel form — is the clay technique that most visibly records its own construction process. When the coil ridges are deliberately left visible on the exterior rather than smoothed away, the finished planter carries its process as its primary aesthetic surface — a decision that references the ancient pottery traditions of cultures across every inhabited continent. The design principle is process visibility as aesthetic — the coil marks are the decoration, which means the technique produces its own visual richness without requiring any additional surface treatment.
How to get it: Roll air-dry clay into coils 1–1.5 cm diameter using palm pressure on a smooth surface. Begin with a flat coiled base disk. Stack coils on top of each other, scoring and slipping the join between each coil (scratch the joining surfaces with a fork and apply a small amount of water) for structural adhesion. Smooth the inside surface with a damp finger or sponge for watertightness (or use a waterproof sealant after drying). Leave the exterior coils unsmoothed for the textural effect. Poke a drainage hole in the base with a pencil before the clay dries. Seal the interior with two coats of waterproof Mod Podge or liquid latex after drying.
Shop The Look
| Product |
|---|
| Air dry clay terracotta tone 1kg |
| Clay scoring tool for coil joining |
| Waterproof sealant for clay planter interior |
| Small succulent plant set of 3 |
| Wooden display surface for planter cluster |
5. Polymer Clay Pendant Necklaces
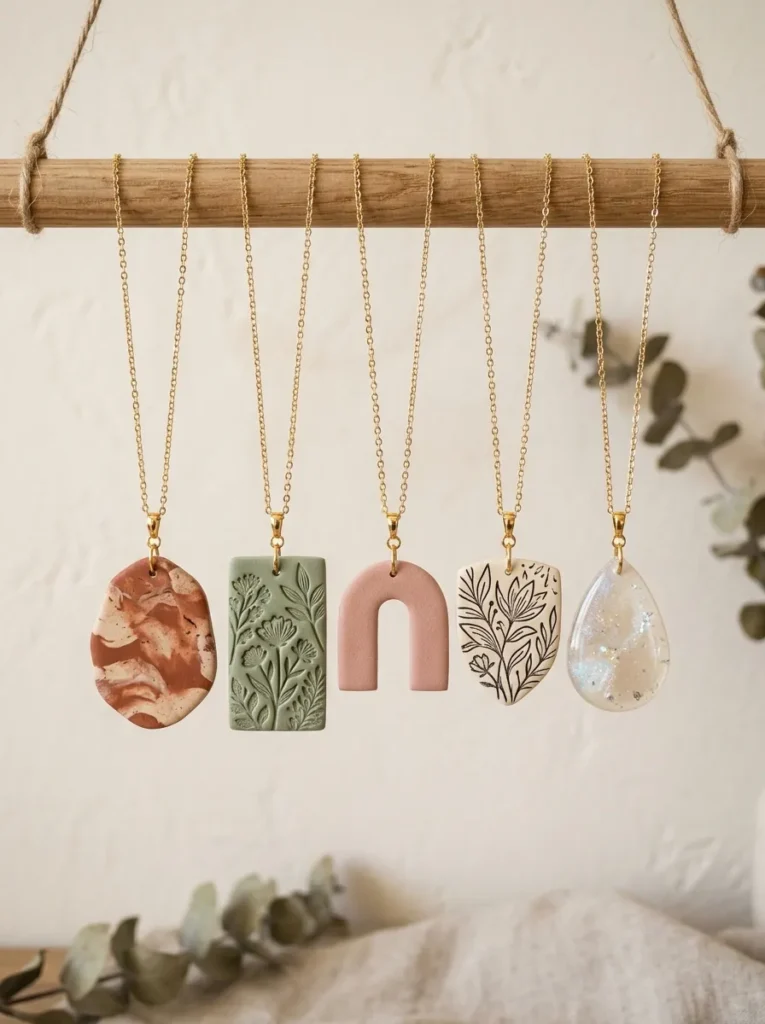
Vibe: Polymer clay pendant necklaces feel wearably specific — jewelry that communicates handmade without shouting craft fair.
Why it works: A polymer clay pendant necklace is the clay jewelry project that most effectively demonstrates the material’s unique qualities — the ability to hold impressed detail, the marble effect achievable through partial color blending, the mica shift effect available with specific clay types, and the warmth of muted clay tones against gold chain. The design principle is material surface as primary design: the pendant’s most interesting quality is its surface — the marble pattern, the impressed detail, the carved line — which means the form can be simple (an arch, an oval, a rectangle) while the surface carries the design’s complexity. This surface-complexity-in-simple-form approach produces pendants that read as designed rather than merely shaped.
How to get it: Condition polymer clay and roll to 4mm thickness. For marble effect: condition two colors separately, press together, twist three to four times, fold, and roll out — stop before the colors fully blend to maintain the marble pattern. Cut pendant shapes with a sharp craft knife or small cookie cutter. Impress surface textures with stamps, lace fabric, or carved details with a stylus before baking. Thread a headpin through a hole made before baking, create a loop after baking using round-nose pliers, and attach to a gold jump ring and chain.
Shop The Look
| Product |
|---|
| Polymer clay set marble effect muted tones |
| Gold chain necklace findings 45cm set |
| Gold bail pendant fitting set |
| Round nose pliers for jump ring |
| Polymer clay stylus tool set |
6. Air-Dry Clay Herb Garden Markers
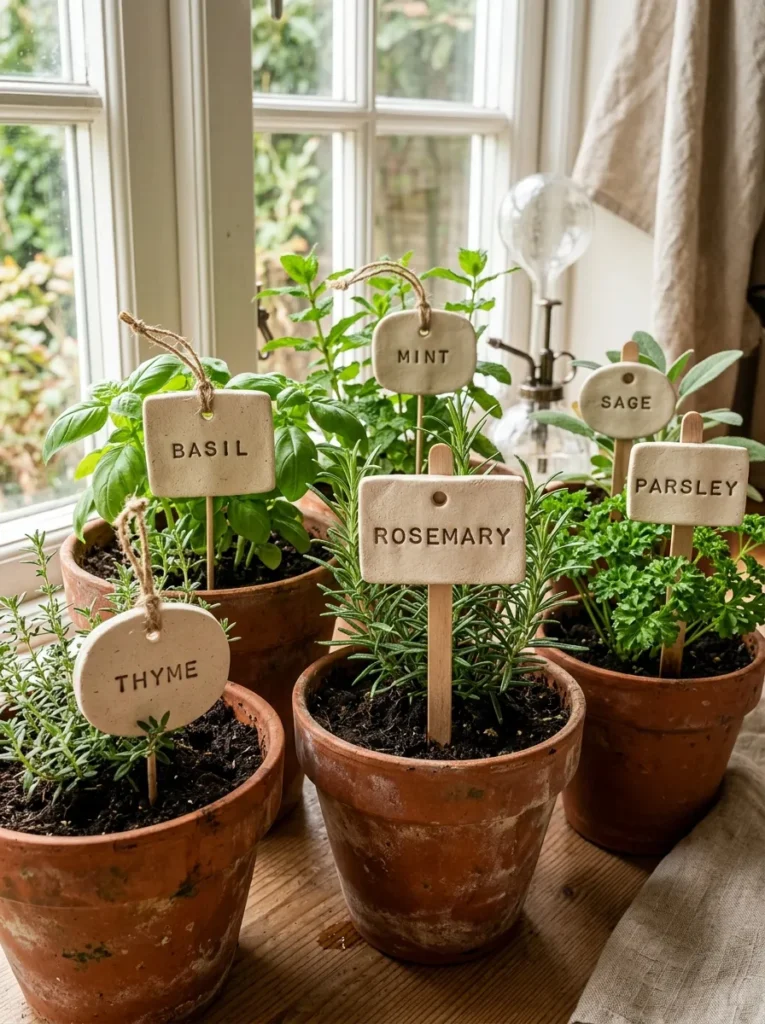
Vibe: Hand-lettered clay herb markers feel domestic and considered — the kitchen garden detail that makes growing herbs feel like a designed practice rather than an afterthought.
Why it works: Clay herb markers are the functional craft project with the highest daily-use visibility — they sit in the kitchen herb garden seen multiple times every day, which gives them an outsized decorative presence relative to their small scale. The design principle is functional object as personal expression: a herb marker with a name carved by hand (rather than printed or stamped from a commercial source) reads as a made thing in a way that a purchased label cannot. The slight irregularity of hand-lettered text — no two letters quite the same depth or spacing — is the quality that makes these markers read as personal rather than produced.
How to get it: Roll air-dry clay to 6mm thickness and cut into oval or rectangular tags using a craft knife and template. Impress herb names using letter stamps, a blunt stylus, or a toothpick before the clay dries. Pierce a hole near the top with a straw or toothpick (make the hole slightly larger than needed — clay shrinks as it dries). Allow to dry completely, then seal with matte Mod Podge for outdoor durability. Thread jute twine through the hole for tying to plant stems, or score and attach to a small wooden skewer with PVA glue for a stake-style marker.
Shop The Look
| Product |
|---|
| Air dry clay white or terracotta 250g |
| Letter stamp set small for clay |
| Jute twine thin for marker loops |
| Matte Mod Podge sealer for outdoor use |
| Small wooden skewer set for marker stakes |
7. Polymer Clay Abstract Wall Sculpture
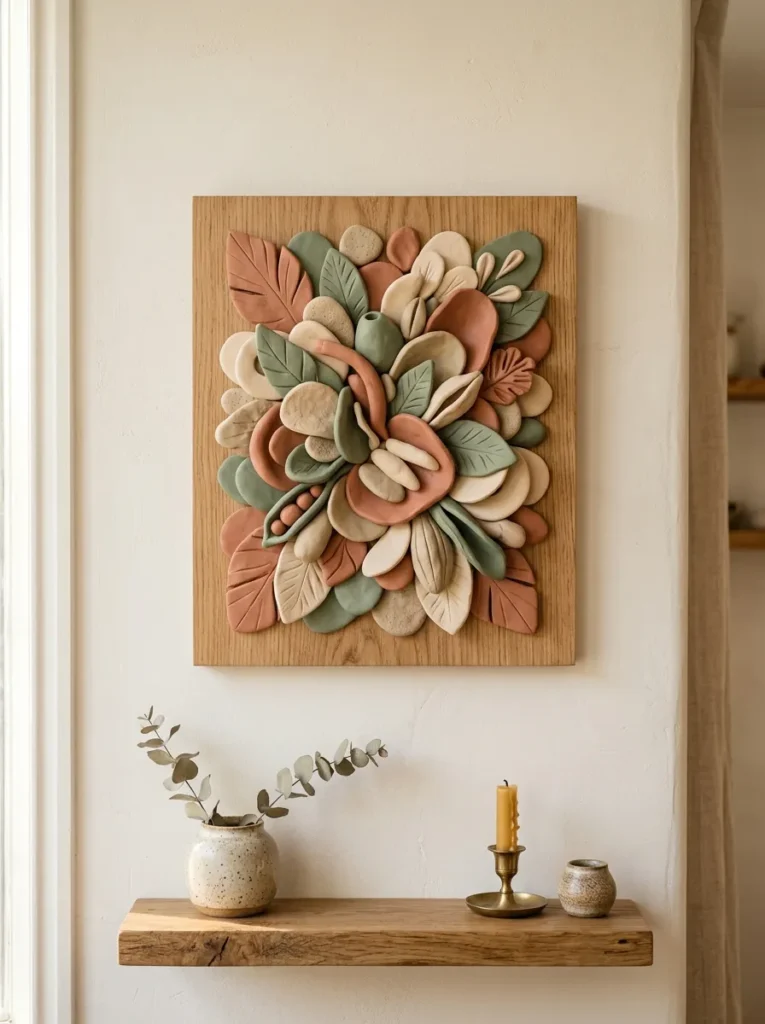
Vibe: A polymer clay wall sculpture feels warmly dimensional — wall art that exists in real space rather than simply on the wall’s surface.
Why it works: A wall-mounted arrangement of individual clay forms creates sculpture that operates at the intersection of art and craft — the organic forms, the muted color palette, and the shadow play between dimensional elements produce a wall piece with the visual authority of professional ceramic wall art. The design principle is compositional arrangement as sculpture: the individual clay elements (which can be simple — smooth pebbles, leaf shapes, abstract curves) derive their artistic quality not from their individual complexity but from their arranged relationship to each other on the mounting panel. The overlapping, layered arrangement creates depth, and the three-color palette (terracotta, sage, cream) creates the tonal complexity that a single-color arrangement would lack.
How to get it: Model individual organic polymer clay forms — smooth rounded pebbles, flattened leaf shapes, gentle curves, simple abstract forms — in three muted clay colors. Keep individual elements simple; the composition does the design work. Bake per manufacturer instructions on a ceramic tile. Arrange baked elements on a natural wood panel (18×23 cm, 6mm MDF or plywood) in an overlapping composition that has a clear focal center. Attach each element using strong two-part epoxy adhesive. Mount the panel on the wall using two D-ring hangers on the back.
Shop The Look
| Product |
|---|
| Polymer clay set terracotta sage cream |
| Natural wood MDF panel 18x23cm |
| Two-part epoxy adhesive for mounting |
| D-ring picture hanger set for panel |
| Ceramic tile for baking polymer clay |
8. Impressed Clay Coasters with Natural Textures
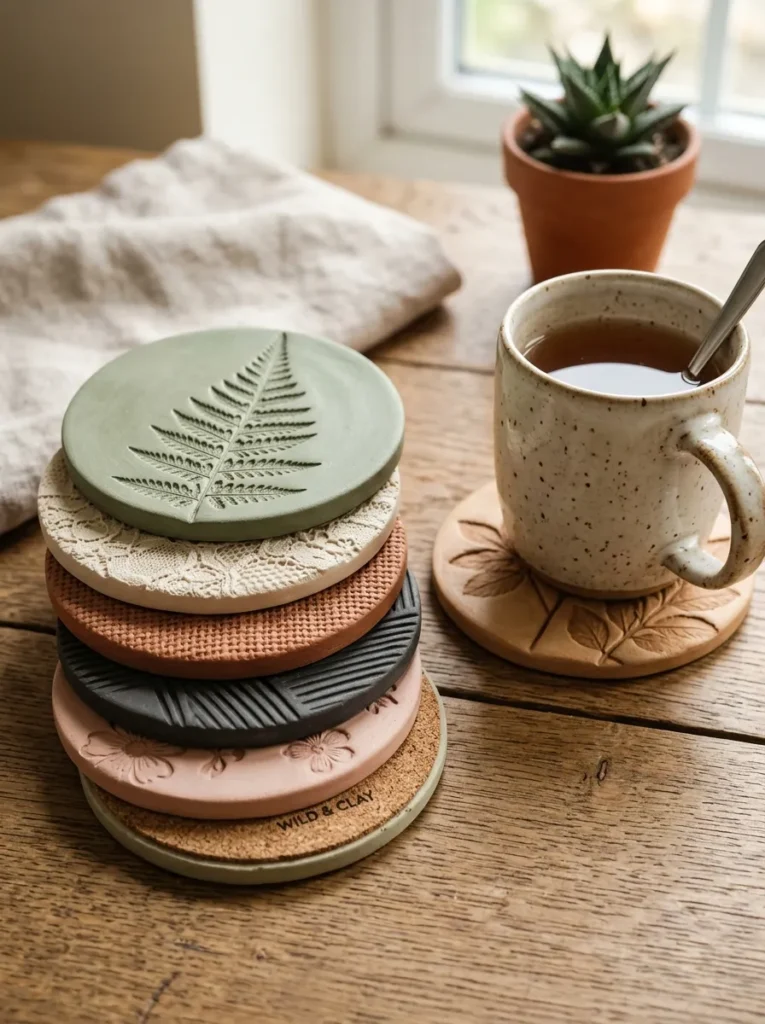
Vibe: Impressed clay coasters feel warm and specific — the functional object that makes setting a mug down feel like placing it somewhere considered.
Why it works: Impressed clay coasters exploit the material’s most distinctive quality — its ability to capture fine surface detail — to create functional objects that are individually beautiful and collectively diverse. The design principle is natural material impression as surface design: pressing a fern frond, a piece of lace, or a woven fabric into wet clay creates a surface pattern of extraordinary detail and warmth that no manufactured stamp can replicate, because the natural original is three-dimensionally complex in ways that any reproduction simplifies. A set of six coasters, each with a different impressed texture but a consistent size, format, and color palette, reads as a designed set with individual character in each piece.
How to get it: Roll air-dry clay between guide rails to a consistent 8mm thickness. Cut circles using a 10 cm diameter cookie cutter or template. Immediately press texture materials into the clay surface — fern fronds, lace fabric, burlap, leaves — using gentle, even pressure. Remove the texture material carefully by lifting straight up. Allow to dry slowly. Sand lightly when dry, paint in muted tones, and seal with three coats of matte polyurethane for water resistance. Apply self-adhesive cork sheet circles to the base of each coaster for surface protection.
Shop The Look
| Product |
|---|
| Air dry clay 500g for coaster making |
| 10cm circle cookie cutter for coaster shape |
| Self-adhesive cork sheet for coaster backing |
| Matte polyurethane topcoat for water resistance |
| Natural lace fabric piece for texture pressing |
9. Air-Dry Clay Moon Phase Wall Hanging
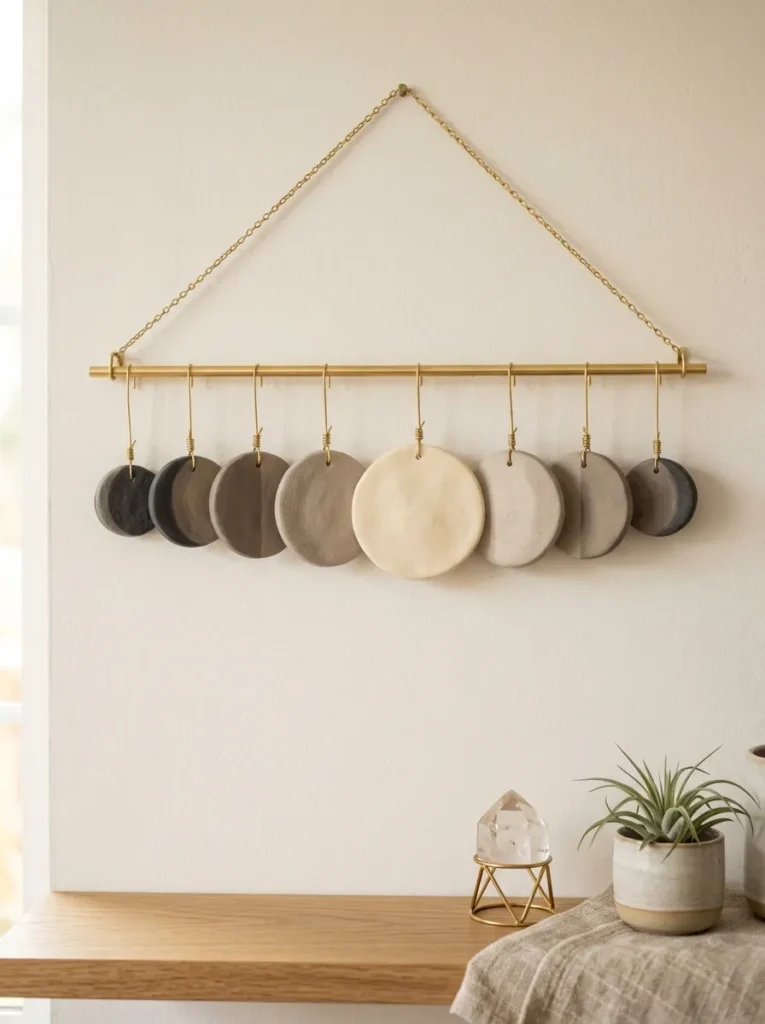
Vibe: A clay moon phase hanging feels quietly cosmic — wall art that references the natural world’s oldest calendar.
Why it works: The moon phase wall hanging is the clay project that most effectively converts a simple technique (cutting circles in graduated sizes) into a composed wall installation through the power of sequence and color graduation. The design principle is sequential variation as composition: eight circles in graduated sizes painted in a tonal progression (from deep charcoal for the new moon through warm greys to cream for the full moon and back) create a visual narrative that a random arrangement of the same circles would not. The brass hanging rod and wire loops give the installation its floating quality — the discs appear to hover rather than hang.
How to get it: Roll air-dry clay to 5mm thickness and cut eight circles using round cookie cutters in sizes from 3 cm to 8 cm diameter (3, 3.5, 4.5, 6, 8, 6, 4.5, 3.5 cm — the sequence of lunar phases). Pierce a hole at the top and bottom of each disc before drying (for stringing). Allow to dry, sand smooth, and paint in a tonal graduation from deep charcoal through warm greys to cream white. Thread brass wire through each disc’s hole pair and wrap around a 30 cm brass rod, spacing discs evenly at 3 cm intervals. Hang the rod from two brass wire loops at each end.
Shop The Look
| Product |
|---|
| Air dry clay white 500g |
| Circle cookie cutter set graduated sizes |
| Brass rod 30cm thin for hanging |
| Brass wire thin 24 gauge for connecting |
| Acrylic paint set warm greys and charcoal |
10. Polymer Clay Succulent Pot with Textured Exterior
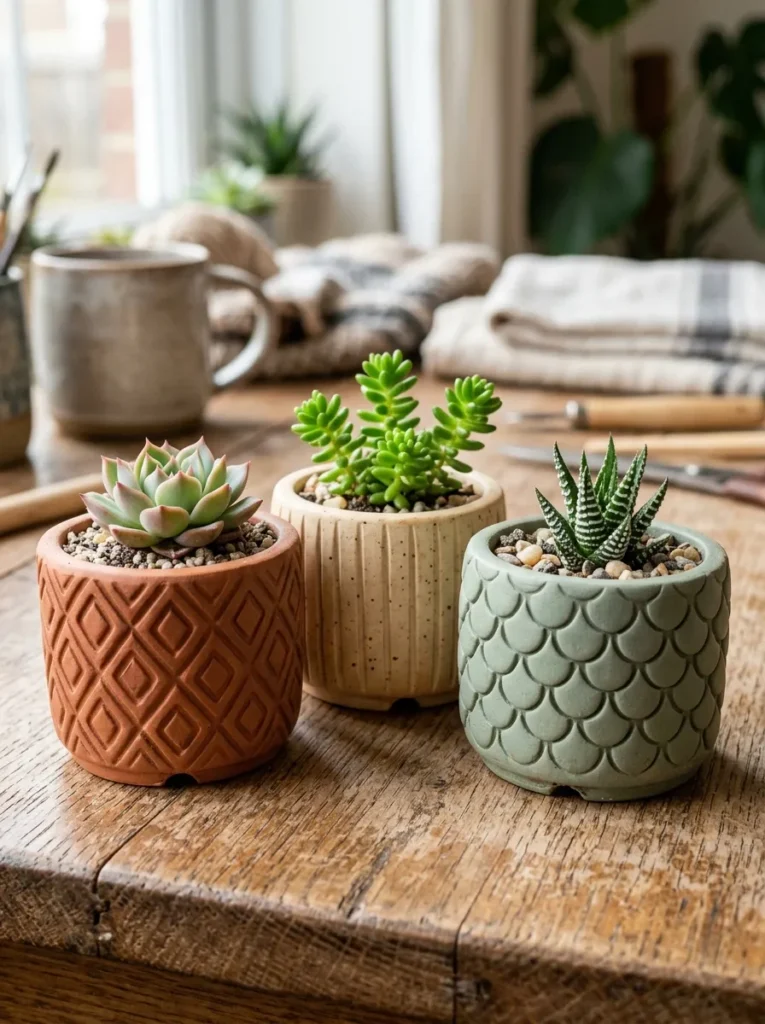
Vibe: A textured polymer clay succulent pot feels small-scale precious — the desk or shelf object that makes the most modest plant feel thoughtfully housed.
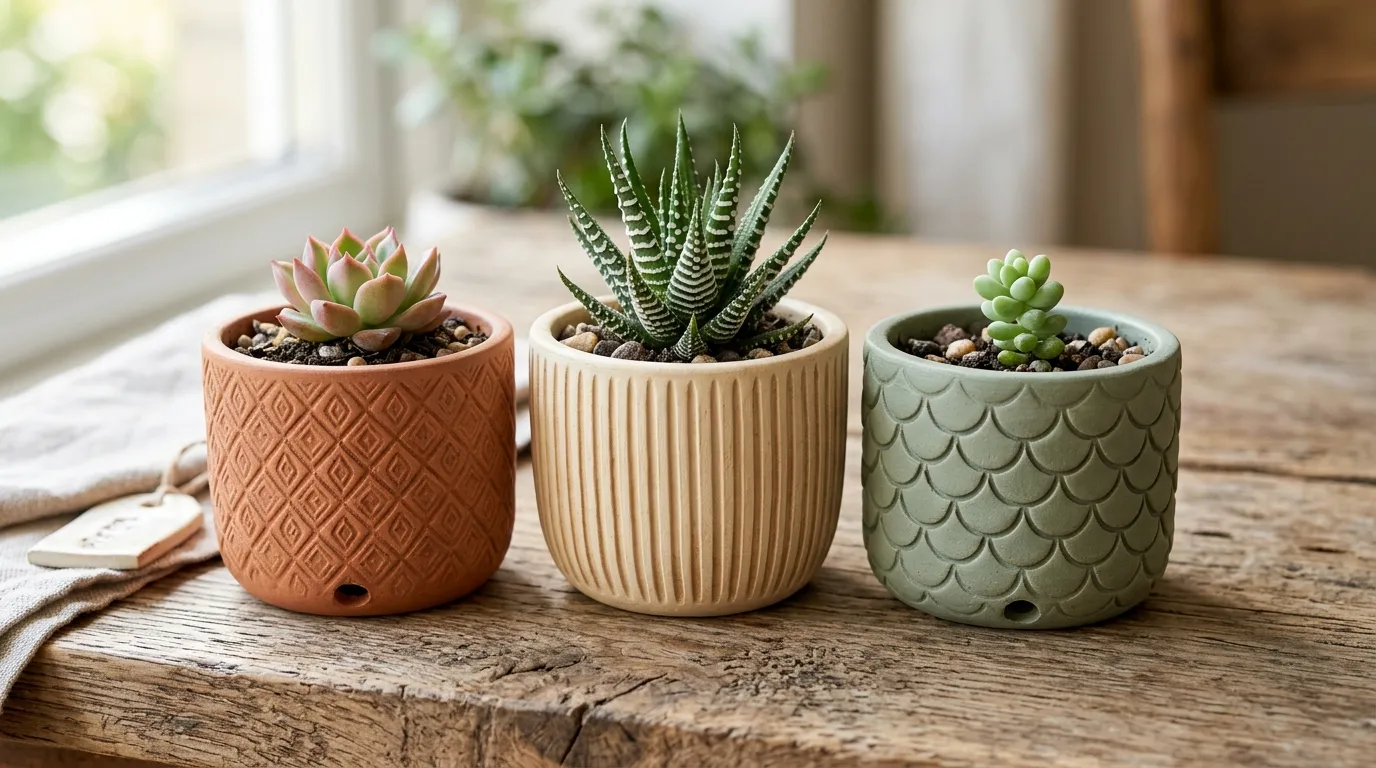
Why it works: Polymer clay succulent pots combine functional object-making with surface design in a small, achievable format — the pot’s small scale (5–7 cm diameter) makes it appropriate for a first clay project while the textured exterior treatment creates visual interest that a plain smooth pot cannot achieve. The design principle is small-scale texture as magnified detail: at the small scale of a succulent pot, surface texture is seen up close and appreciated in detail — the diamond pattern, the scale impression, the vertical line texture all read at a scale of engagement that larger objects don’t achieve. These are objects examined by hand as well as seen by eye.
How to get it: Roll a thick slab of polymer clay (12mm thickness) and cut a circle for the base (5–6 cm diameter) and a rectangular strip for the walls (2 cm height × circumference length). Press exterior texture into the wall strip before assembling — the flat strip is much easier to texture than an assembled cylinder. Join the strip into a cylinder around the base, blending the join on the inside. Pierce a drainage hole in the base with a pencil. Bake at 130°C for 25 minutes. Allow to fully cool before planting.
Shop The Look
| Product |
|---|
| Polymer clay terracotta sage cream set |
| Small succulent plants live set of 3 |
| Clay texture mat diamond and scale patterns |
| Sculpting tool set for clay texturing |
| Cactus potting mix for succulent planting |
11. Stamped Clay Gift Tags and Labels
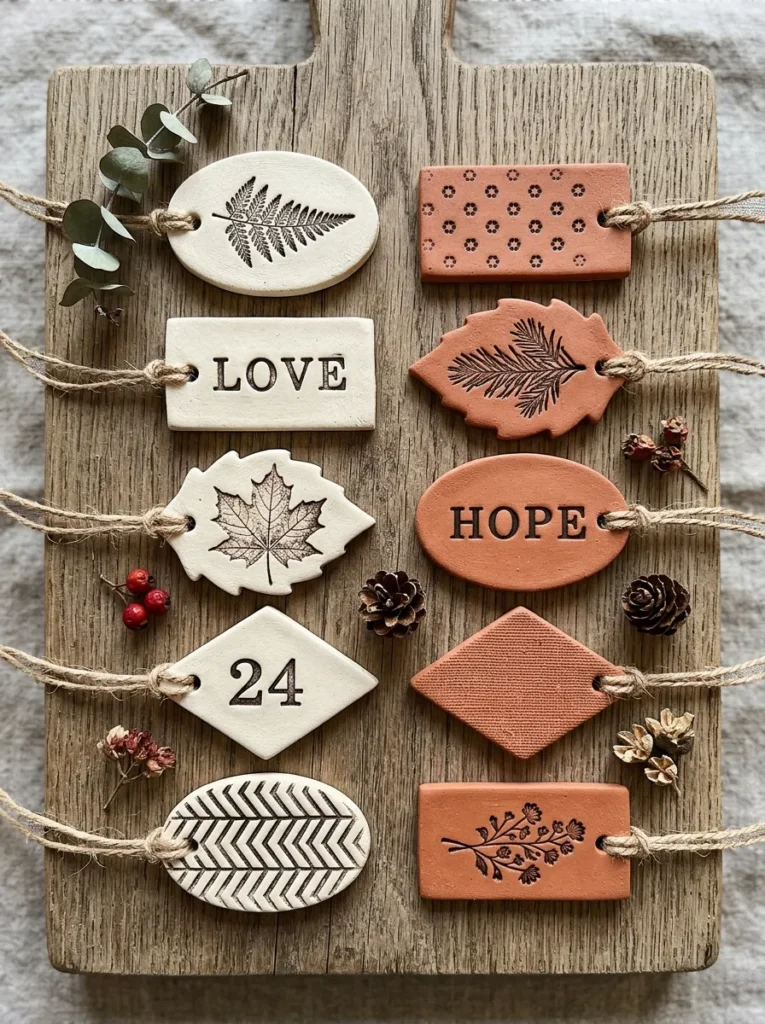
Vibe: Handmade clay gift tags feel deeply personal — the gift label that becomes part of the gift itself.
Why it works: Clay gift tags convert a normally discarded packaging element into a permanent keepsake — a recipient who receives a gift with a handmade clay tag often keeps the tag long after the gift has been used. The design principle is elevated ephemera as extended gift gesture: when a gift label is made from clay rather than paper, it transitions from disposable packaging to a miniature handmade object that the recipient keeps, which extends the gift-giver’s gesture indefinitely beyond the gift-giving moment. Stamped impressions in clay are particularly suited to gift tags because the impression captures fine detail at the small scale of a tag — botanical stamps, letter stamps, and simple geometric stamps all read clearly and warmly at the 4–5 cm scale.
How to get it: Roll air-dry clay to 5mm thickness and cut tag shapes with a craft knife and cardstock template. Immediately stamp each tag with botanical stamps, letter stamps, or geometric stamps — press firmly and directly, then lift the stamp straight up to prevent smearing. Pierce a hole at the top with a straw or toothpick. Allow to dry completely, paint in muted tones, and seal with matte Mod Podge. Thread jute twine through each hole and loop. Make a batch of 20–30 in a single session for a complete gift-wrapping supply.
Shop The Look
| Product |
|---|
| Air dry clay white 250g for tag batch |
| Botanical rubber stamp set small |
| Jute twine thin for tag loops |
| Matte chalk paint cream terracotta for tags |
| Craft knife for tag shape cutting |
12. Clay Candle Holder with Carved Geometric Pattern
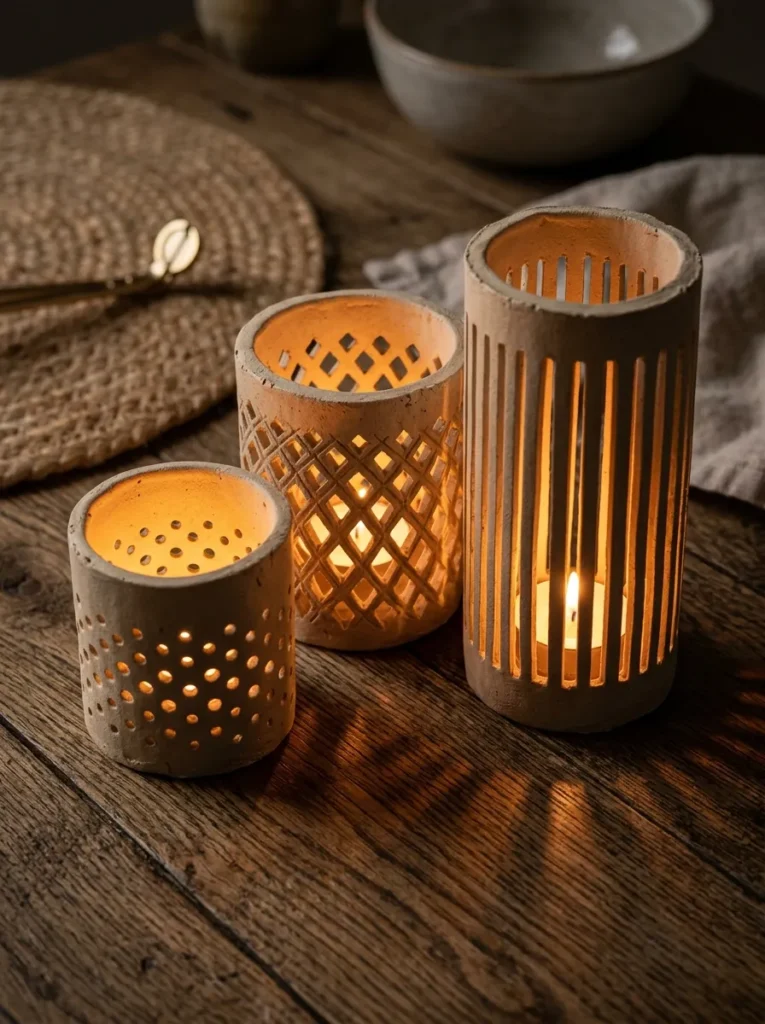
Vibe: Carved clay candle holders feel luminously geometric — objects that are beautiful unlit and transformatively warm when lit.
Why it works: Carved geometric clay candle holders exploit the material’s suitability for carving and the visual drama of backlighting simultaneously — the geometric perforations that are simply carved pattern when unlit become lantern windows when the candle inside is lit, projecting warm geometric light patterns onto surrounding surfaces. The design principle is functional dual-state design: the holder exists in two aesthetic states (the geometric pattern as carved surface decoration when cold, and the projected light pattern as dynamic extension of the object when lit) — an object that performs differently in different conditions is intrinsically more interesting than one that performs identically regardless of context.
How to get it: Roll a thick slab of air-dry clay and wrap it around a cylindrical form (a tin can or cardboard tube) to create a cylinder, joining the seam with scoring and slip. Use a straw to pierce circular perforations or a craft knife to cut geometric slot patterns through the clay wall before it dries — the clay must still be leather-hard (firm but slightly yielding) for the cleanest cuts. Remove from the inner form after cutting. Allow to dry, sand lightly, and apply a thin wash of ochre or terracotta watercolor to warm the natural clay tone. Use LED tea lights inside only — real candles generate heat that can crack fragile air-dry clay.
Shop The Look
| Product |
|---|
| Air dry clay 500g for candle holders |
| Metal straw set for perforations |
| LED tea light set warm amber flicker |
| Craft knife for geometric cutting |
| Tin can set for cylinder form |
13. Polymer Clay Marbled Plant Pot Covers
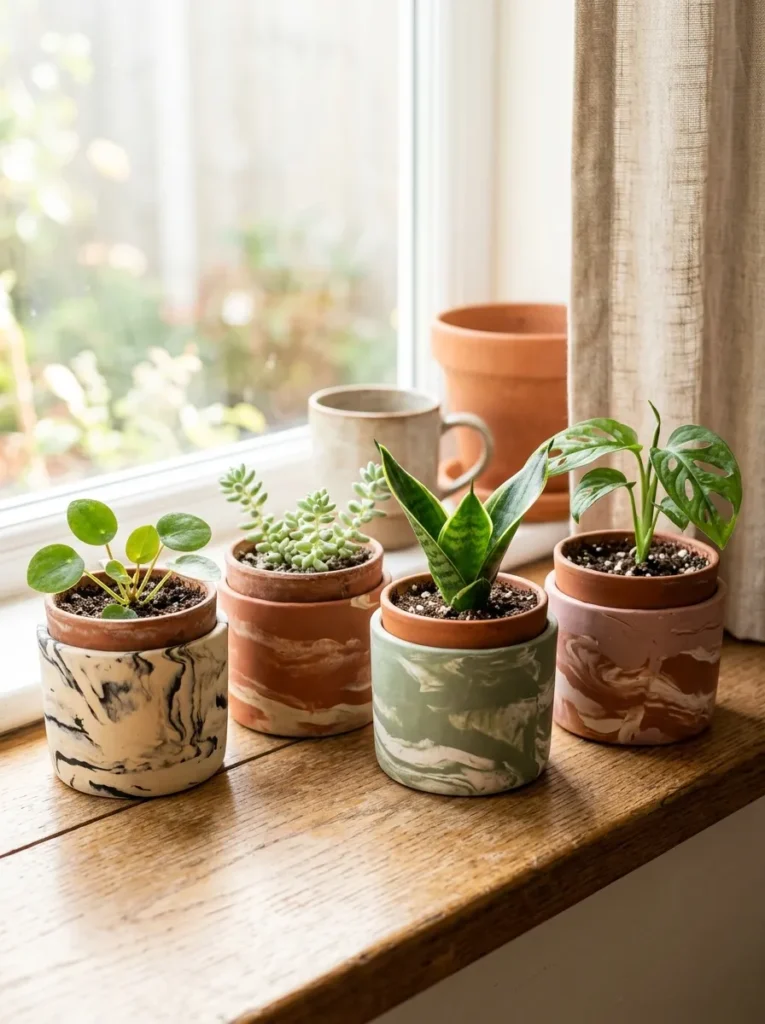
Vibe: Marbled polymer clay pot covers feel designerly and specific — the plant accessory that makes a grocery store succulent look like it was purchased from a boutique plant shop.
Why it works: Polymer clay pot covers are the plant accessory project that most immediately elevates a plant display — a $2 nursery succulent in its plastic pot reads as a plant; the same succulent in a marbled polymer clay sleeve reads as a curated home decor object. The design principle is vessel transformation through material upgrade: the nursery pot’s form remains unchanged beneath the clay sleeve, but the sleeve’s marbled surface transforms the visual register of the entire plant display. The marble effect in polymer clay is the technique with the highest sophistication-to-difficulty ratio — it is achievable in a first session and produces results that consistently surprise makers with their professional quality.
How to get it: Condition two polymer clay colors separately. Press them together side by side, then twist once and roll into a log. Fold the log in half and twist again. Roll out to 3mm thickness — stop before the colors fully blend to maintain distinct marble veining. Wrap the marbled sheet around a cylindrical form (a glass jar of the target diameter) and trim the seam cleanly with a craft knife. Bake on the jar form at 130°C for 25 minutes. When cool, slide off the jar — the clay sleeve slides easily over smooth glass or lightly oiled surfaces. Trim the top and bottom edges with a sharp blade if needed.
Shop The Look
| Product |
|---|
| Polymer clay marble effect colors set |
| Glass jar set for forming sleeve |
| Craft knife sharp for seam trimming |
| Ceramic tile for oven baking |
| Small indoor plant set for display |
14. Air-Dry Clay Decorative Bowls with Botanical Inlay
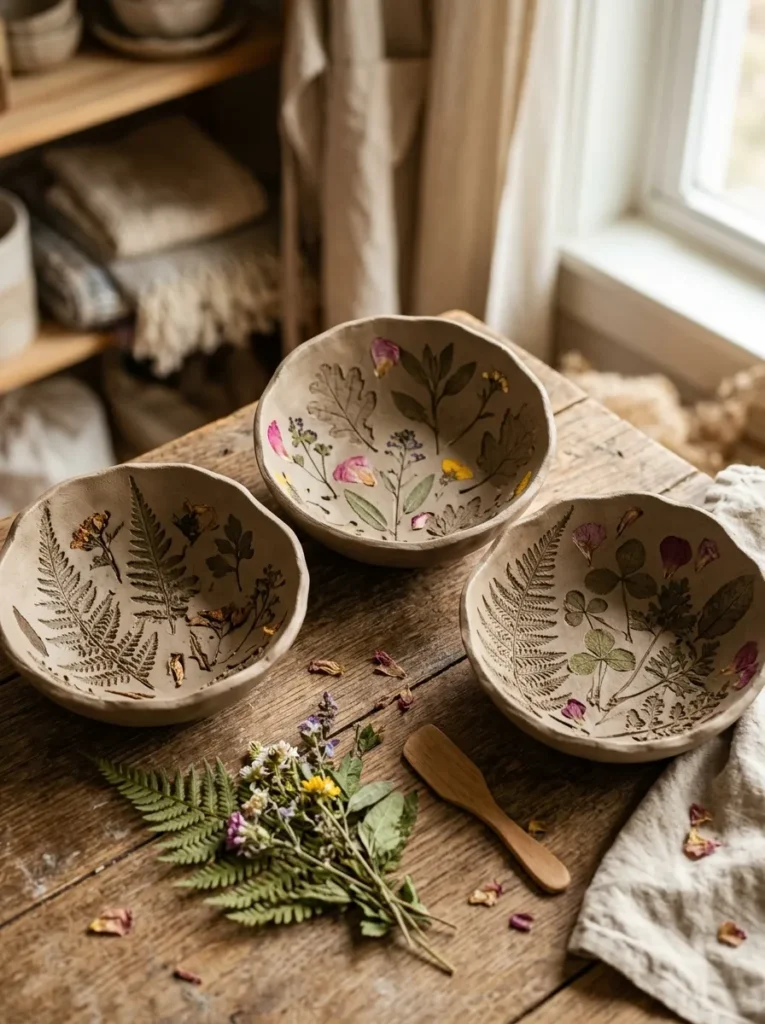
Vibe: Botanical inlay clay bowls feel organically specific — the functional object that preserves a specific natural moment in its surface.
Why it works: Pressing actual botanical material into wet clay and allowing some fragments to remain embedded creates bowls where the natural world’s detail is literally preserved in the object’s surface — a more direct connection to natural material than any painted or stamped botanical reference can achieve. The design principle is natural material as literal surface content: the fern frond’s vein structure, the leaf’s edge serration, and the flower petal’s delicacy are all captured at their actual scale and detail in the clay surface, which gives the bowl a specificity of natural reference that makes it genuinely different from every other bowl. No two botanical inlay bowls are the same because no two pressed specimens are the same.
How to get it: Create a simple pinch bowl (as per project 1) or press clay into a bowl-shaped mold (a cereal bowl lined with plastic wrap). Before the clay is fully leather-hard, press botanical specimens into the interior surface — fern fronds, large leaves, flower petals, or herbs. Press firmly enough to leave a clear impression. For the inlay effect, leave small fragments embedded in the clay; for a purely impression effect, remove the botanicals cleanly after pressing. Allow to dry completely (botanical material dries within the clay and may darken slightly). Seal with matte Mod Podge — do not paint over, as the natural clay tone is the most beautiful finish for botanical inlay work.
Shop The Look
| Product |
|---|
| Air dry clay natural tone 500g |
| Fresh fern frond for botanical pressing |
| Matte Mod Podge sealer clear |
| Bowl shaped mold or cereal bowl for forming |
| Plastic wrap for lining mold |
15. Small-Space Clay Project — Miniature Succulent Garden in a Clay Tray
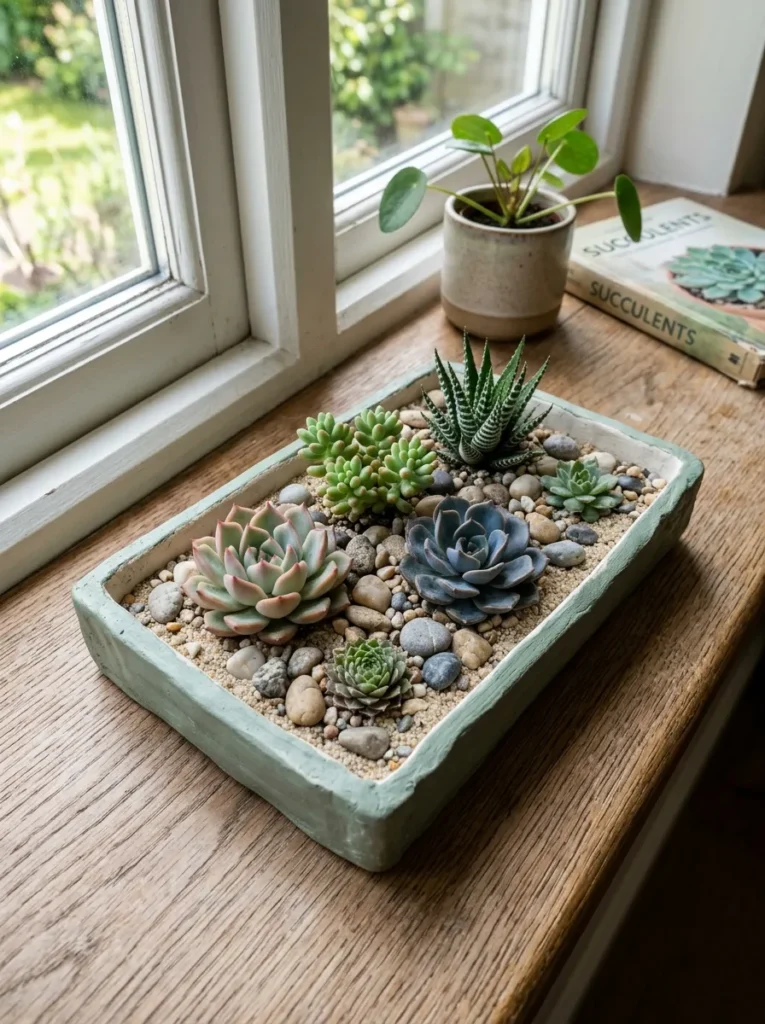
Vibe: A clay succulent garden tray feels designed at small scale — the desk or windowsill object that makes a 20×12 cm surface feel like a considered landscape.
Why it works: The slab-built succulent tray is the clay project that most efficiently creates a complete designed object in minimal space — in a 20×12 cm footprint, it combines clay craft, plant care, and landscape composition into a single object that serves as both functional planter and desktop decor. The design principle is miniature landscape design: arranging five small succulents of varied height and form in a shallow clay tray, filling the spaces between plants with decorative pebbles and sand, and painting the tray exterior in a muted color creates the visual quality of a designed landscape in a footprint that fits on any desk, windowsill, or shelf. The painted exterior distinguishes the tray’s decorative nature from an ordinary garden container while the natural clay interior provides the appropriate growing environment.
How to get it: Roll air-dry clay to 8mm thickness and cut a 20×12 cm rectangle. Cut four strips 2 cm wide and press them upright against the rectangle’s four edges, smoothing the inner join for strength. Allow to dry slowly (under a loose piece of plastic wrap to prevent cracking during the first 12 hours). When completely dry, paint the exterior in dusty sage chalk paint and seal with matte Mod Podge. Seal the interior with waterproof sealant or line with a thin layer of gravel for drainage. Plant small succulents in a composed arrangement and fill spaces with horticultural sand and small pebbles.
Shop The Look
| Product |
|---|
| Air dry clay 500g for tray making |
| Dusty sage chalk paint for tray exterior |
| Waterproof sealant for tray interior |
| Small succulent variety pack 5 plants |
| Decorative pebble and sand set for planting |
How to Start Your Clay Craft Practice
The single first move is to purchase one 500g block of white air-dry clay and make the pinch bowl set (project 1) before any other clay project is considered. The pinch bowl requires no tools, no additional materials, and no prior experience — it is the project that introduces the fundamental quality of working with clay (the material’s responsiveness to hand pressure, its memory of touch, its transition from wet pliability to dried permanence) in the most direct possible way. Making four pinch bowls in a single session teaches more about clay’s properties than any instructional video or written guide, and it produces four functional, displayable objects at the end. Every subsequent clay project builds on the material knowledge acquired in this first session.
The most common mistake in clay crafting is rushing the drying process — specifically, placing air-dry clay projects in an oven or near a heat source to accelerate drying, which causes cracking, warping, and surface damage. Air-dry clay must dry at room temperature over the manufacturer’s recommended 24–48 hour period, and for thicker pieces (coil planters, candle holders) even longer. Drying too fast creates surface cracks because the outer surface dries and contracts while the interior remains wet — the tension between the two states causes the clay to crack. The fix is patience: place the drying project on a non-porous surface (a ceramic tile, a piece of glass), turn it once after 12 hours to ensure even drying, and resist the urge to handle it before it feels completely cold and solid throughout.
Three clay craft materials under $20 each that unlock the most projects: a 500g block of white air-dry clay ($6–$12) that covers projects 1, 3, 6, 8, 9, 11, 12, 14, and 15 in this list, a set of three polymer clay colors in muted tones — terracotta, sage, and cream ($8–$15 for three 57g blocks) — that covers projects 2, 5, 7, 10, and 13, and a bottle of matte Mod Podge ($8–$12) that serves as both adhesive and sealant for all air-dry clay projects across the full list. These three purchases totaling $22–$39 provide the foundation for thirteen of the fifteen projects in this list.
Realistic expectations: clay crafts are genuinely accessible at every skill level, and the most important expectation to set correctly is about imperfection — the slight asymmetry of a pinch bowl rim, the variation in coil thickness on a planter, the slight smearing at a stamp’s edge on a clay tile are not failures but the visible evidence of hand-making that gives these objects their warmth and authenticity. A first pinch bowl will be less even than a fifth pinch bowl, which will be less refined than a fiftieth — but all will be beautiful in the specific way that hand-made objects are beautiful, and all will carry the quality that mass-manufactured objects can never achieve: the record of a specific person’s hand, working with a specific piece of clay, at a specific moment.
Frequently Asked Questions About Clay Crafts
What is the best type of clay for beginners with no pottery equipment?
Air-dry clay is the most accessible starting material for beginners — it requires no kiln, no wheel, and no specialist equipment beyond the hands and a flat work surface. White air-dry clay in the 500g to 1kg block range provides enough material for multiple projects at the beginner stage. For small detailed work and jewelry, polymer clay is the second-best beginner choice — it holds much finer detail than air-dry clay, its colors are pre-mixed and require no painting, and oven baking produces a durable, finished result. The distinction is scale and application: air-dry clay for objects larger than approximately 10 cm (bowls, planters, tiles), polymer clay for objects smaller than approximately 10 cm (earrings, pendants, small pots, beads).
How do I prevent air-dry clay from cracking?
The four most effective crack-prevention practices for air-dry clay projects are: maintain consistent wall thickness throughout the project (walls that vary significantly in thickness dry at different rates, creating internal tension that cracks the thinner sections), keep the work surface non-porous during drying (ceramic tile or glass prevents the base from drying slower than the sides), cover the project loosely with plastic wrap for the first 12 hours to slow the surface drying rate, and avoid placing drying clay near heat sources. For larger projects, scoring and slipping all clay joins thoroughly is essential — unscored joins are the most common source of crack formation in coil-built and slab-built pieces.
Can air-dry clay be used outdoors?
Air-dry clay is not suitable for unsheltered outdoor use — it is water-soluble in its natural state, and while sealants significantly improve moisture resistance, heavy or sustained rainfall will eventually cause even well-sealed air-dry clay to soften and lose structural integrity. For outdoor clay projects (garden markers, outdoor planters), earthenware clay fired in a kiln or polymer clay (which is fully waterproof when baked) are the appropriate materials. Air-dry clay garden markers in a covered outdoor position (under a porch or eave) can be made weather-resistant with a thorough sealing of two coats of matte polyurethane applied to all surfaces including the base.
How long does air-dry clay last once opened?
An opened block of air-dry clay begins drying from the moment of exposure to air. Properly wrapped and stored — tightly sealed in its original plastic packaging, placed in a resealable plastic bag, and stored at room temperature away from heat sources — an opened block of air-dry clay can remain workable for two to four weeks. If the clay becomes slightly firm but not fully dried, it can be reconditioned by wrapping it in a damp cloth for 30 minutes or by kneading water into it gradually (add small amounts of water at a time — overhydrating produces sticky, weak clay). Fully dried clay scraps can be broken into small pieces, covered with water, and left to slake for 24 hours, then kneaded back to a workable consistency.
What is the difference between polymer clay and air-dry clay for jewelry making?
Polymer clay is significantly superior to air-dry clay for jewelry applications for four specific reasons: it holds finer detail (the small scale of earrings and pendants requires sharp impression definition that air-dry clay cannot maintain reliably at that scale), it is fully waterproof when baked (air-dry clay jewelry dissolves or softens when exposed to sweat, rain, or hand washing), it is available in dozens of pre-mixed colors that do not require painting (eliminating paint chipping at small scales), and it does not shrink significantly during curing (air-dry clay shrinks approximately 5–10% during drying, which can cause small jewelry pieces to crack or distort). For any jewelry application smaller than approximately 5 cm, polymer clay is the correct material choice.
Ready to Start Making with Clay?
These 15 clay craft ideas span every material type, every skill level, and every application from functional home objects to wearable jewelry and wall sculpture — from the absolute beginner’s air-dry pinch bowl to the intermediate polymer clay wall sculpture and the functional botanical inlay bowl — so whether you have 30 minutes and a ball of clay or an afternoon and a full craft table, there is a specific, achievable, and genuinely rewarding starting point here for exactly where you are. The most important thing to understand about clay as a creative material is that it does not require perfection — it requires only presence. Every fingerprint the material records, every slight asymmetry in a rim, every variation in wall thickness is evidence that a human being sat with this material and paid attention to it. That quality — the presence of a maker’s hand — is the thing that makes clay objects irreplaceable by any manufactured alternative, and it is available to every person who picks up a piece of clay and begins. Today, find one ball of air-dry clay, press your thumb into the center, and make a pinch bowl — that first bowl will teach you everything the material wants you to know. Pin the ideas that made your hands want to start, and let those be the ones you make first.