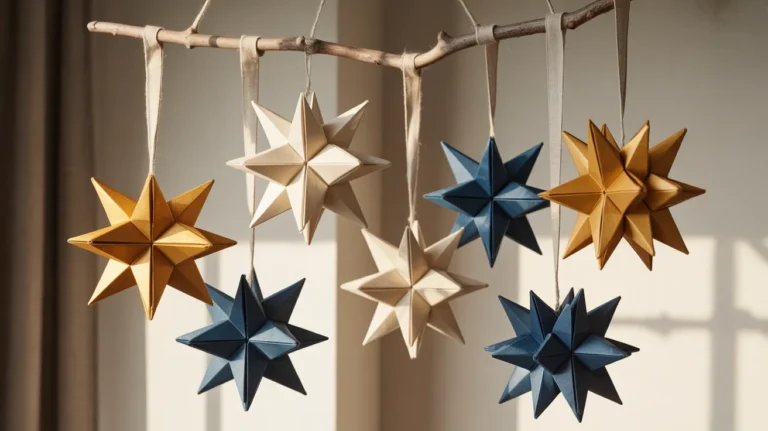
16 DIY Paper Garland Ideas Worth Saving
DIY paper garlands are handmade decorative strings, chains, and hanging installations crafted from cut, folded, or shaped paper — used to add color, texture, pattern, and festive atmosphere to parties, weddings, nurseries, holiday spaces, and everyday home interiors at a fraction of the cost of store-bought decorations. This article gives you 16 creative, beginner-friendly paper garland ideas that work across every occasion and aesthetic — from minimalist kraft paper streamers to intricate honeycomb tissue fans — all achievable with basic craft supplies and an afternoon of making.
Picture a birthday table with a burst of color overhead that took 45 minutes and cost under $5 to make. A nursery wall draped in soft pastel paper stars that the child will remember long after they stop fitting in the crib. A holiday mantel strung with kraft paper trees and twine that looks more considered than anything sold in a seasonal pop-up store. Paper garlands are the most democratic decoration in existence — they ask only for scissors, glue, and the willingness to make something with your hands. Here are 16 ideas worth saving — and stealing.
Why DIY Paper Garland Works So Well
DIY paper garlands occupy the creative intersection of accessible craft and genuine interior impact — they are one of the few decorative elements that can transform an entire room’s atmosphere in under an hour, using materials available at any grocery store, office supply shop, or craft retailer. The design philosophy draws from the long global tradition of paper craft celebration — Japanese origami chains, Mexican papel picado, Victorian paper chains, and Indian festival bunting — all sharing the same essential insight that cut and folded paper, strung together and repeated, creates visual abundance from almost nothing.
The materials that make paper garlands work are honest and varied: kraft paper rolls, tissue paper in every color, cardstock in matte and metallic finishes, crepe paper streamers, vellum, recycled newspaper, watercolor paper, and double-sided scrapbook paper. The tools required are minimal — scissors, a hole punch, twine, fishing line, a bone folder for crisp folds, and a glue stick or double-sided tape for joining. Colors can follow any palette from the natural (kraft, cream, sage, terracotta) to the vivid (primary tissue colors, metallic gold, deep jewel tones) depending on the occasion and the space.
The DIY paper garland trend has maintained strong momentum across craft communities precisely because the technique scales effortlessly — the same basic skill set produces a simple party bunting for a child’s birthday and an intricate geometric origami installation for a wedding ceremony backdrop. Pinterest engagement with paper garland content remains consistently high year-round, with holiday-specific content generating enormous seasonal spikes, and the combination of low cost, high visual impact, and complete customizability keeps the category permanently relevant regardless of changing aesthetic trends.
Even the most design-forward, aesthetically rigorous interiors benefit from a thoughtfully made paper garland. A simple kraft paper tassel garland above a dining table reads as considered and artisanal. A geometric paper star chain in a single neutral color becomes sculptural wall art. A crepe paper streamer ceiling installation transforms any room into an event space. The key in all cases is intentionality — choosing the right paper, the right color palette, and the right scale for the specific space and occasion.
Style at a Glance
| Element | Trait 1 | Trait 2 |
|---|---|---|
| Philosophy | Maximum visual impact from minimum material investment | Handmade warmth through repetition and color |
| Materials | Kraft paper, tissue paper, cardstock, crepe paper, twine | Vellum, watercolor paper, scrapbook paper, fishing line |
| Color Palette | Natural kraft, cream, sage, terracotta, dusty rose | Metallic gold, deep jewel tones, primary brights, matte black |
1. Classic Kraft Paper Triangle Bunting
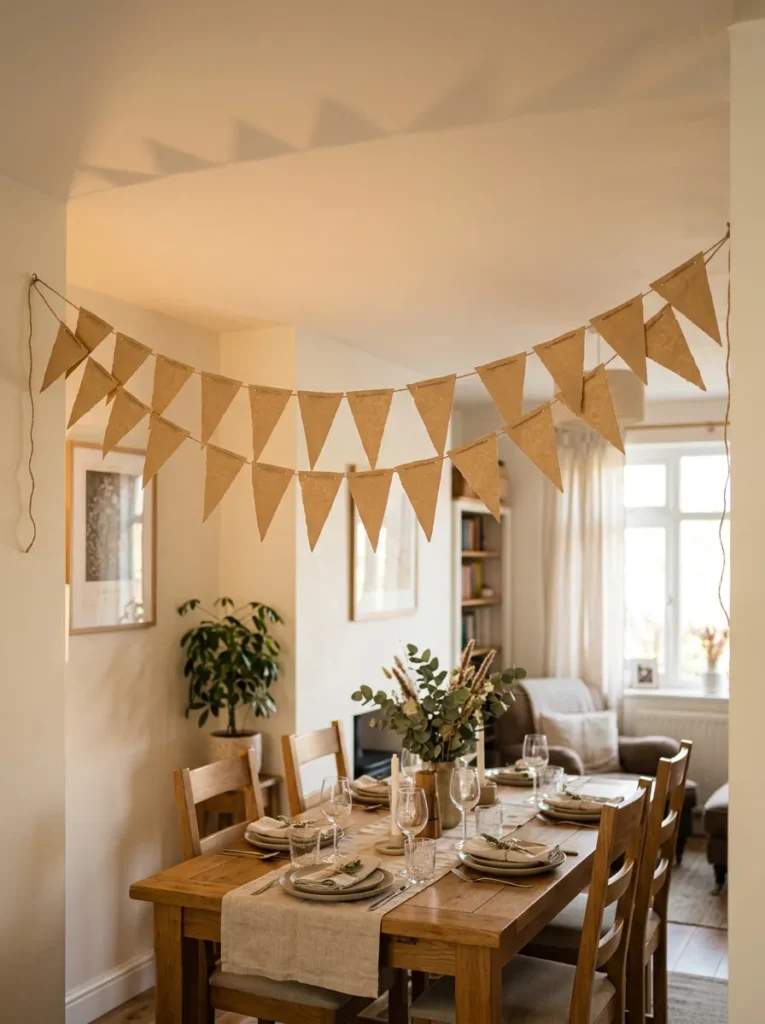
Vibe: Warm and festive — the decoration that makes any gathering feel intentional without trying too hard.
Why it works: Kraft paper triangle bunting is the foundational paper garland form because it embodies the simplest possible version of the medium’s core principle — repetition of a single cut shape creates visual rhythm and abundance from the most basic material available. The natural kraft color is the garland world’s equivalent of an undyed linen fabric: it works with every color palette, suits every aesthetic from rustic farmhouse to contemporary minimal, and makes every other color in the room look better by providing a warm neutral backdrop. The slight hand-cut irregularity of each triangle — edges that aren’t perfectly straight, points that aren’t perfectly sharp — is the handmade quality signal that distinguishes a kraft bunting from a manufactured equivalent.
How to get it: Cut a cardboard triangle template approximately 15cm tall and 12cm wide. Trace and cut as many pennants as your desired bunting length requires — a standard dining room bunting needs 18–24 pennants for visual fullness. Fold the top 2cm of each triangle over a length of jute twine and secure with a glue stick, leaving 3–4cm of twine between each pennant. For perfectly consistent spacing without measuring, cut a 3cm cardboard spacer and use it as a gap guide between pennants as you work along the twine.
Quick Win: A single roll of kraft paper ($6) produces enough triangle pennants for three full dining room buntings — make one natural kraft version, one lightly watercolor-washed version in a single tone, and one stamped with simple botanical rubber stamps for three completely different looks from the same material investment.
Shop The Look
- Kraft paper roll 24 inch natural brown
- Natural jute twine roll thin
- Glue stick set large size
- Cardboard template sheets for cutting
- Botanical rubber stamp set small
Also view: 14 Smart MOSSLANDA Storage Hacks for Small Spaces
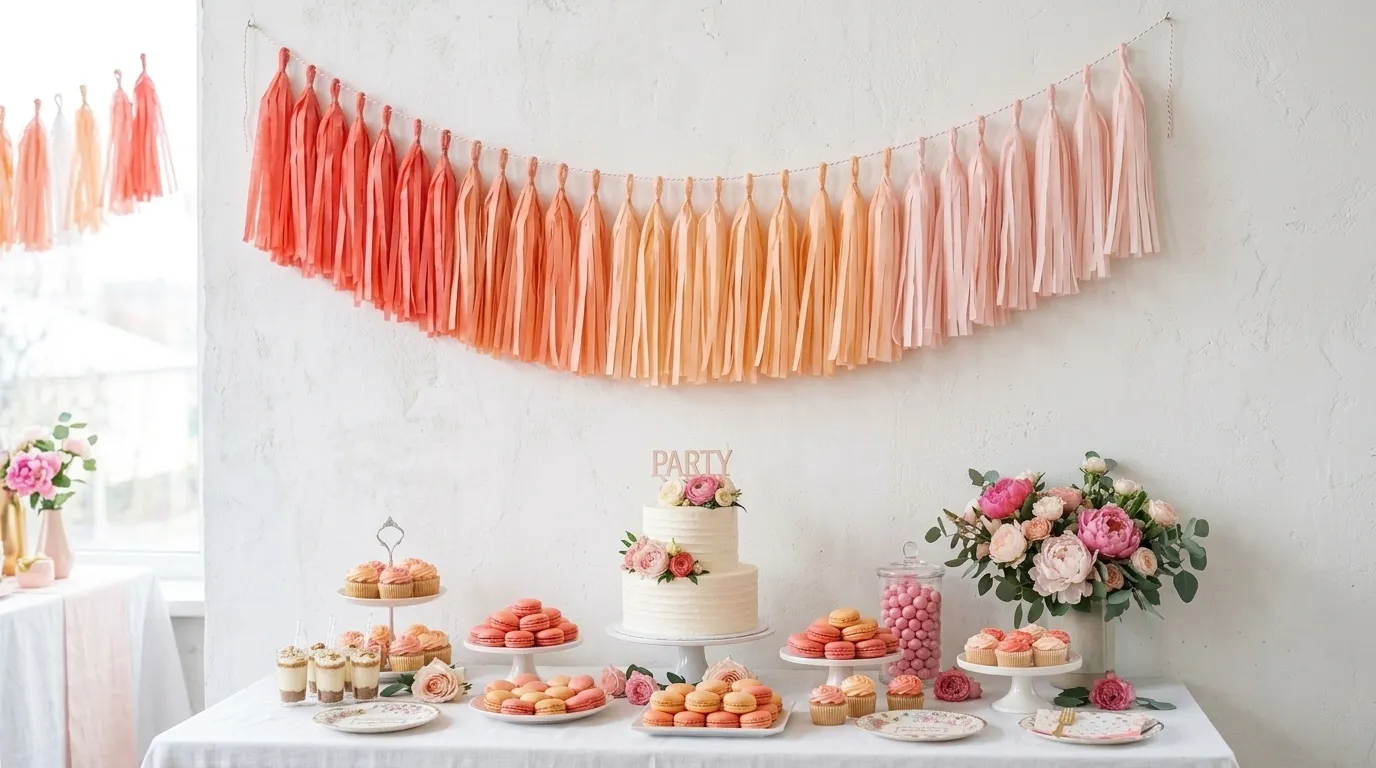
2. Tissue Paper Tassel Garland
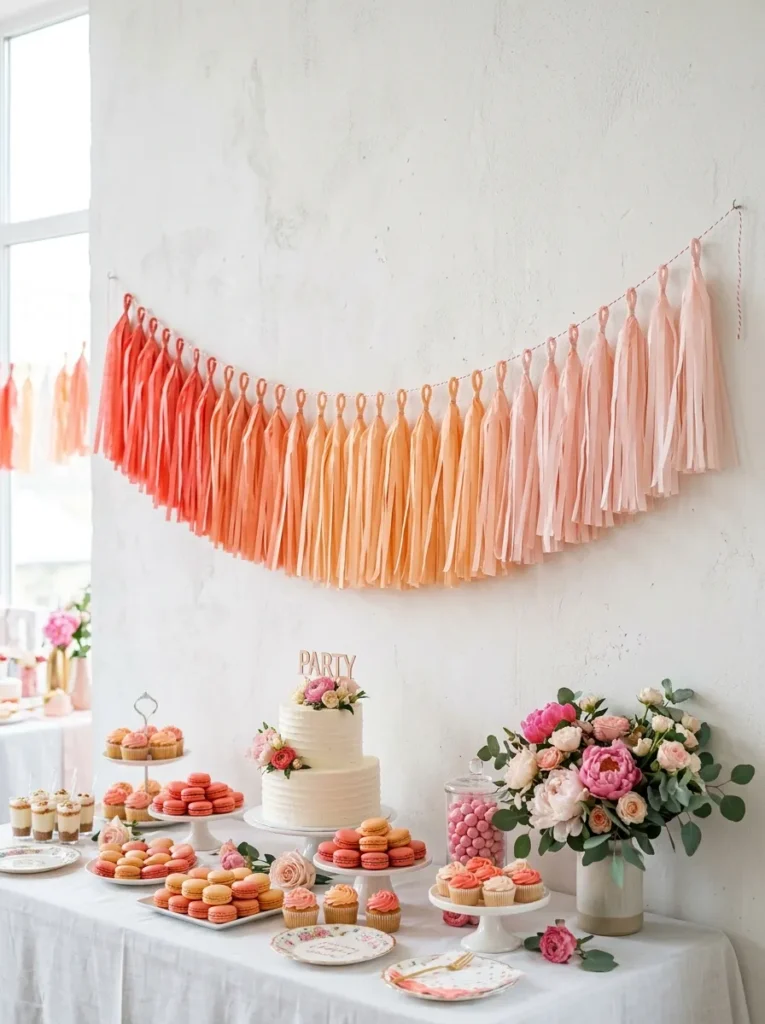
Vibe: Festive and joyful — the garland that makes a backdrop feel like a proper celebration.
Why it works: Tissue paper tassels use the design principle of material transformation through simple manipulation — a flat sheet of tissue paper becomes a three-dimensional hanging object through nothing more than folding, cutting, and looping. The fringe cut creates movement in even the gentlest air circulation, giving the garland a kinetic quality that flat-cut paper shapes cannot achieve. A color gradient sequence across the garland length — deepest tone at one end graduating through mid-tones to the palest at the other — creates visual sophistication through color theory rather than construction complexity, making this one of the most impactful paper garlands achievable with beginner skill level.
How to get it: Stack three sheets of tissue paper and fold accordion-style in 2cm folds along the long edge of the sheet. Pinch the folded stack at its center and twist a small piece of wire or bind with a small strip of tissue paper. Cut fringe from both ends of the folded stack, stopping 2cm from the center bind. Gently separate and fluff each layer of tissue outward from the center. Loop the center binding over baker’s twine and secure. For a color gradient, arrange tassels in a deliberate sequence from darkest to lightest colorway across the full garland length.
Shop The Look
- Tissue paper pack coral peach blush gradient
- White baker’s twine roll 100 ft
- Floral wire thin gauge green
- Tissue paper folding tool bone folder
- Party backdrop stand adjustable
3. Origami Crane Chain
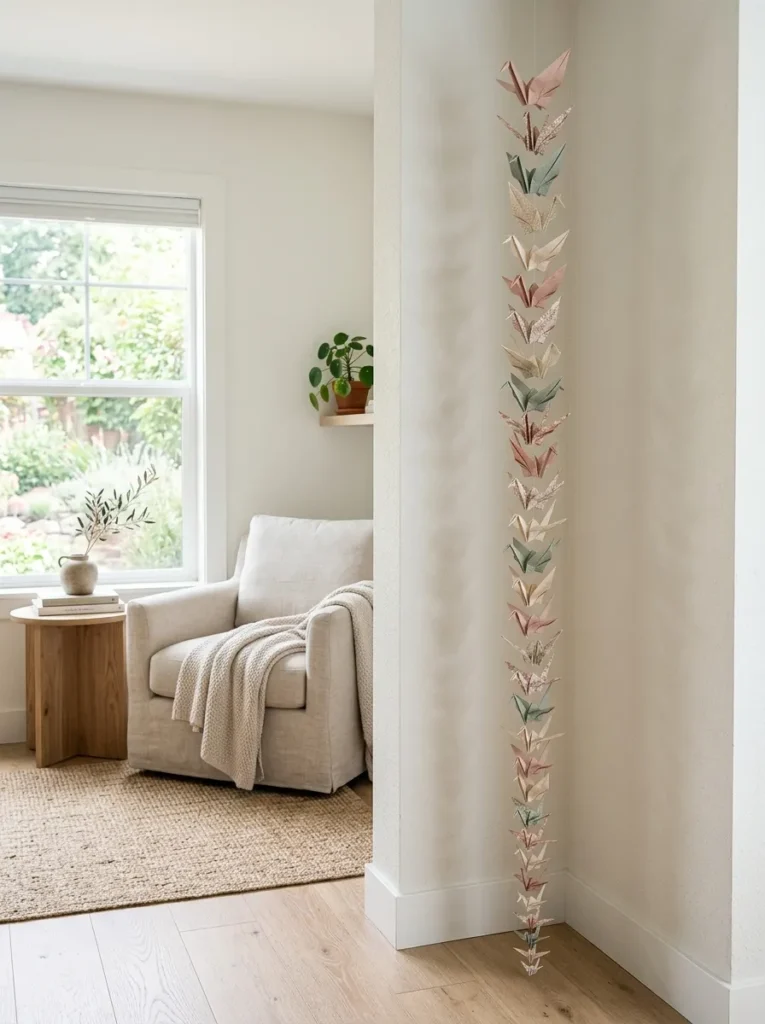
Vibe: Serene and meditative — the decoration that makes a corner of a room feel like an installation.
Why it works: A vertical origami crane chain applies the design principle of dimensional repetition — the same folded form repeated at graduated sizes creates a visual sequence that draws the eye from the largest element at the top through decreasing scales to the smallest at the base, producing a sense of perspective and depth within a single hanging object. Traditional Japanese paper crane folding carries cultural resonance beyond its decorative function — the senbazuru tradition of 1,000 folded cranes is associated with wishes, healing, and longevity — which gives the craft object emotional depth that few purely decorative garlands can claim. Washi paper in muted natural tones produces cranes with enough textural presence to read as intentional art objects rather than craft party decorations.
How to get it: Fold cranes from square washi paper sheets in three sizes — 15cm, 10cm, and 7cm squares — folding 8–10 of each size. Thread a needle with clear fishing line and pass it through the underside of each crane’s body at the center point, knotting between each crane to hold position. Arrange cranes in size order from largest at top to smallest at base, with 4–6cm spacing between each. Mount the top of the fishing line to a ceiling hook using a small adhesive hook rated for lightweight hanging.
Shop The Look
- Washi paper sheets assorted muted tones pack
- Clear fishing line thin 0.3mm
- Beading needle set fine
- Adhesive ceiling hook small removable
- Origami crane folding tutorial card set
4. Honeycomb Tissue Paper Ball Garland
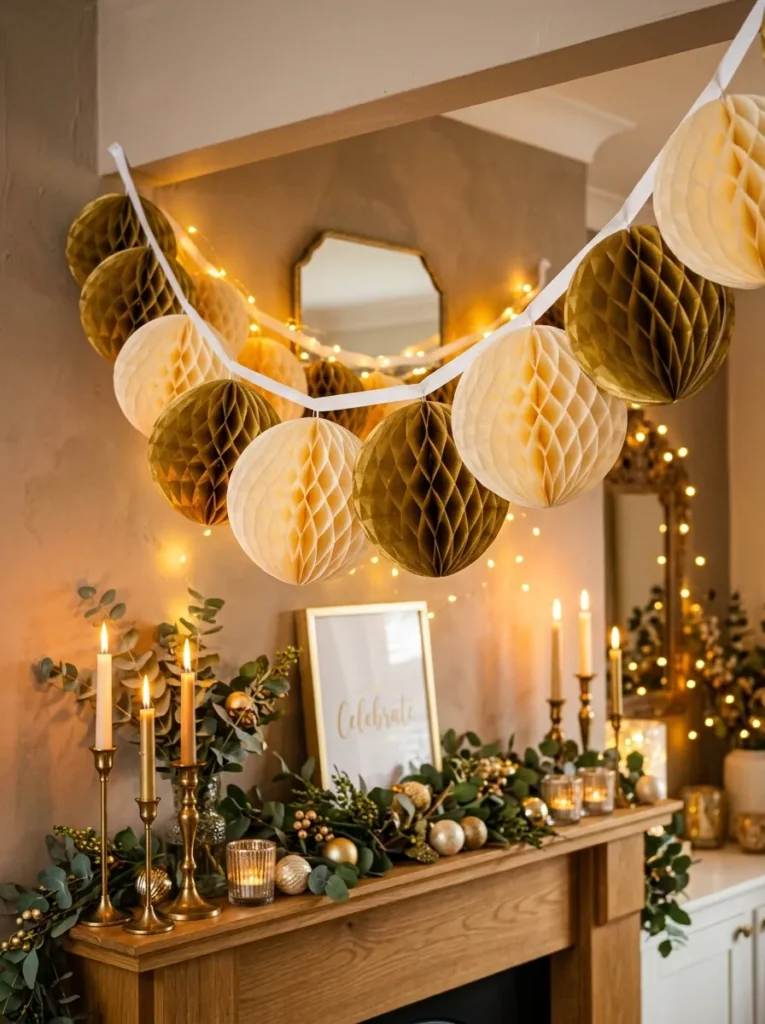
Vibe: Warm and celebratory — the garland that makes a party feel like it cost ten times what it did.
Why it works: Honeycomb tissue balls achieve three-dimensional sculptural form from flat sheets of tissue paper through the accordion-fold-and-glue technique — the structural principle is identical to a honeycomb: alternating glued strips that expand from flat to volumetric when the accordion stack is opened and formed into a circle. The visual impact of honeycomb balls dramatically exceeds their material cost because the expanded sphere reads as a substantial, expensive-looking decoration at a scale achievable for under $2 per ball. The backlit glow effect — warm light passing through the tissue layers from behind — is a quality that no solid decoration achieves, giving the garland an ambient light contribution beyond its decorative role.
How to get it: Stack 12–16 sheets of tissue paper and accordion-fold in 2cm folds across the shorter dimension of the stack. Staple or bind the folded stack at both ends. Cut the short ends into a rounded or pointed petal shape. Glue alternate layers together at one flat face to create the honeycomb bonding pattern — every other layer bonded together on each face. Allow glue to dry, then gently pull the two ends of the bound stack away from each other until the stack opens into a full sphere. Join the two end layers with a small piece of glue to hold the sphere closed. Thread ribbon through the stapled center of each ball.
💡 Quick Win: Pre-made flat honeycomb ball packs ($8–$12 for a pack of 12) are available in craft stores — simply expand, thread on ribbon, and hang for the same visual effect as fully handmade versions in a fraction of the time, reserving full DIY construction for custom colorways unavailable in retail packs.
Shop The Look
- Tissue paper pack gold and cream sheets
- White satin ribbon roll 1 inch
- Mini stapler and staples craft size
- Craft glue stick strong hold
- String light strand warm white backdrop
5. Watercolor Paper Star Garland
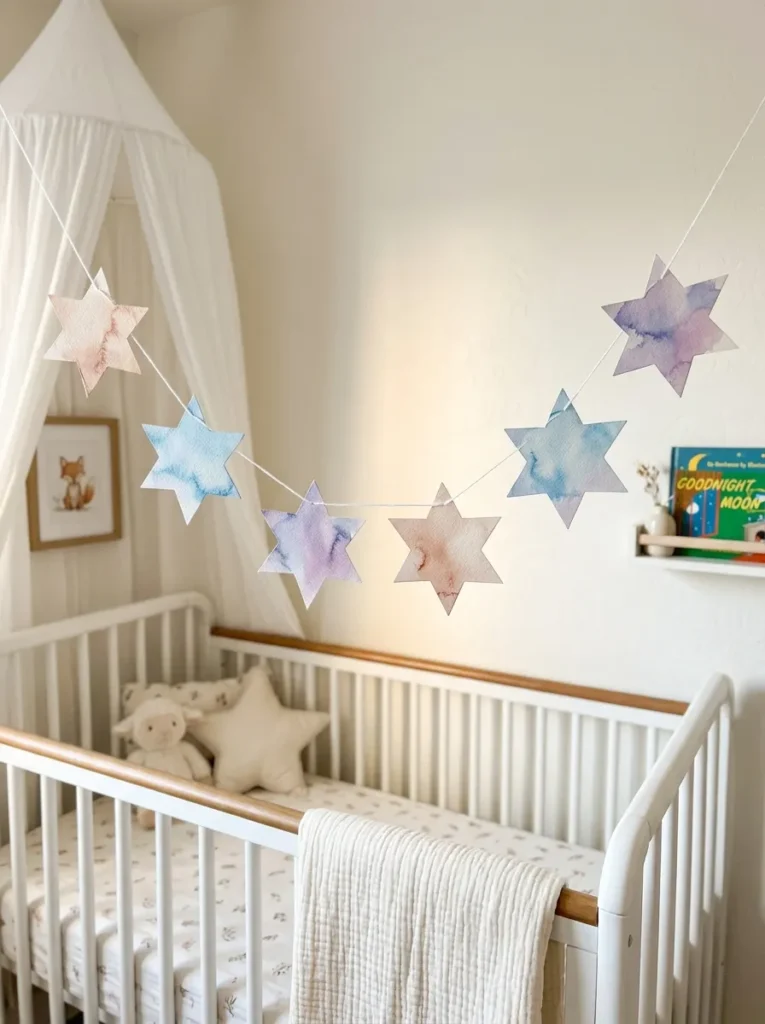
Vibe: Soft and dreamy — the nursery garland that looks handmade in the best possible way.
Why it works: Watercolor paper star garlands combine two craft techniques — wet-on-wet watercolor washing and geometric paper cutting — to produce an object where the handmade quality is visible at two scales simultaneously: the loose, unpredictable watercolor wash is visible across the whole star, and the precise geometric cut of the six-pointed form is visible at the detail level. This dual-scale handmade evidence — organic at the macro level, precise at the micro level — creates a visual sophistication that single-technique garlands rarely achieve. The combination of soft nursery colors and hand-washed texture produces the quality most associated with heirloom-feeling children’s decoration.
How to get it: Paint full sheets of 300gsm cold-press watercolor paper with loose wet-on-wet color washes — wet the paper first with clean water, then drop in two or three colors from a wet brush and allow them to bloom and bleed naturally without controlling the edges. Allow to dry completely before cutting. Create a six-pointed star template by overlapping two equilateral triangles and trace onto the painted paper, positioning the template to capture the most interesting area of each wash. String completed stars on thin white thread using a needle, knotting between each star at 5cm intervals.
Shop The Look
- Watercolor paper cold press 300gsm sheets
- Watercolor paint set soft pastel tones
- Star template set geometric brass
- Thin white thread sewing spool
- Beading needle set fine point
6. Recycled Newspaper and Book Page Garland
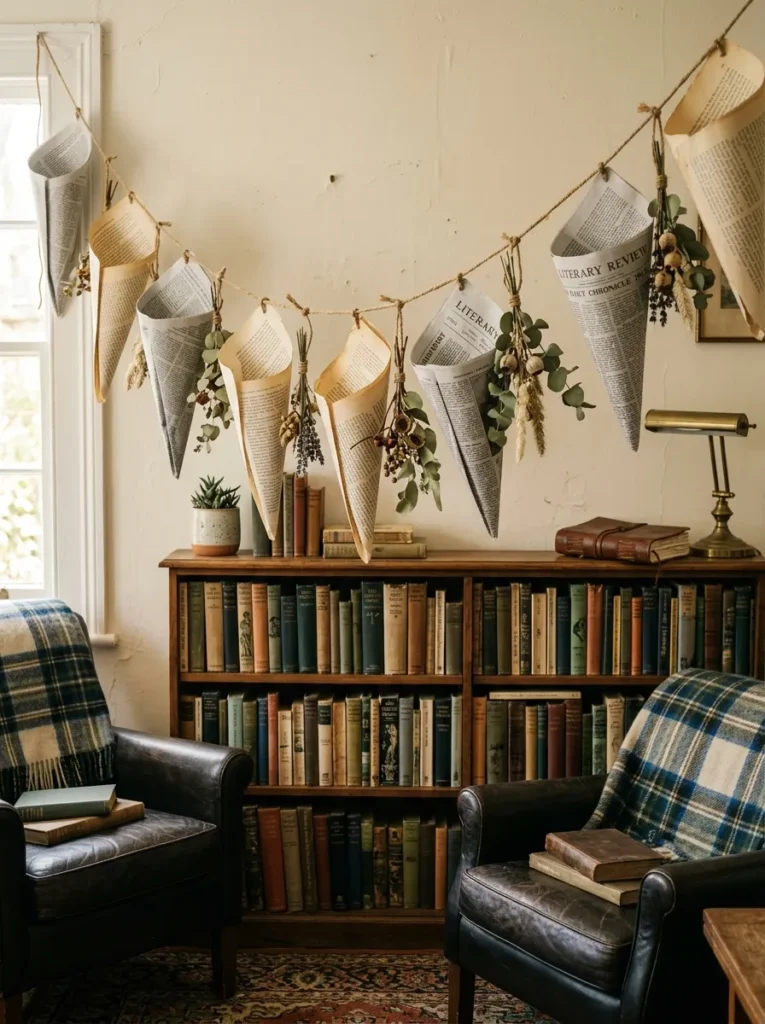
Vibe: Warm and literary — the garland that belongs above a bookshelf and nowhere else.
Why it works: Recycled newspaper and book page garlands apply the principle of material narrative — the paper itself carries meaning before it is cut or folded, and that prior meaning (news text, literary passages, musical notation from old sheet music) becomes part of the garland’s visual and conceptual content. The text and print patterns visible across the surface of each cone or folded pennant create a complex micro-texture that no single-color paper can replicate. Paired with dried botanicals as spacers, the garland reads as genuinely artisanal — the combination of printed paper, natural materials, and jute twine creates a consistent material language that feels deliberately composed rather than assembled from whatever was to hand.
How to get it: Cut newspaper or book pages into 20x15cm rectangles. Roll each rectangle diagonally into a cone shape, starting from one corner, and secure with a small dot of glue at the tip. Allow to dry, then punch a small hole through the cone just below the open rim and thread jute twine through. Alternate paper cones with small bundles of dried lavender or eucalyptus tied to the twine between cones using a simple overhand knot. Distress the paper edges slightly by tearing rather than cutting the short ends for an authentically aged appearance.
Shop The Look
- Vintage book pages bundle decorative
- Natural jute twine roll
- Dried lavender bunch small
- Craft hole punch single
- Glue stick pack strong hold
7. Paper Circle Confetti Garland on Fishing Line
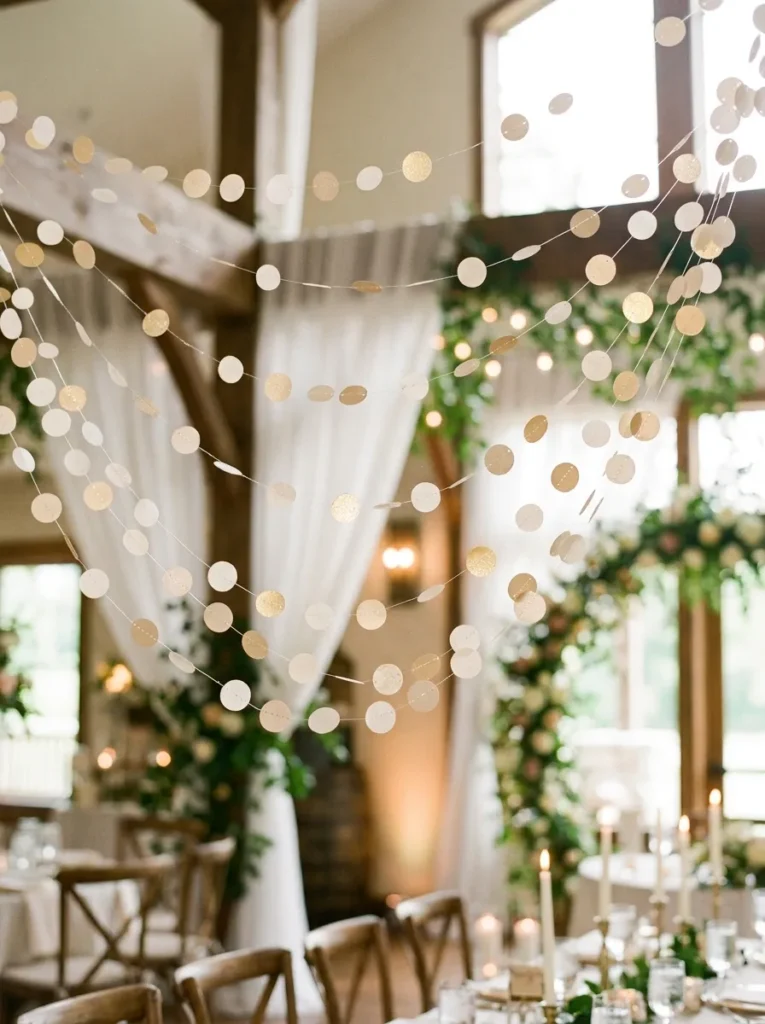
Vibe: Ethereal and elegant — the garland that makes a venue look like it was styled by someone who really understood light.
Why it works: A paper circle confetti garland on invisible fishing line exploits the principle of apparent dematerialization — the shapes appear to float without visible support, which creates a sense of magic that garlands on visible twine or ribbon cannot achieve. The small circle format maximizes light-catching surface area while minimizing visual weight, and metallic or shimmer-finish paper circles catch and reflect light differently at every angle, creating a dynamic visual effect that changes as the viewer moves through the space. This is the garland for spaces where the installation should feel like atmosphere rather than decoration.
How to get it: Use a standard hole punch or a 2cm circle punch to cut circles from cardstock in ivory, champagne, and pale gold shimmer paper. Thread a hand-sewing needle with clear 0.3mm fishing line and pierce each circle at its center, sliding to position. Vary the spacing between circles irregularly — 3cm, 7cm, 2cm, 10cm — rather than maintaining even gaps, as irregular spacing reads as more organic and less machine-like. Hang multiple parallel strands at slightly different heights for a layered cloud effect.
Quick Win: A handheld electric hole punch ($12) cuts clean circles through cardstock in seconds and holds enough punched circles for an entire garland in its reservoir — empty directly onto a surface and thread immediately without the handling time of cutting individual circles.
Shop The Look
- Shimmer cardstock pack ivory champagne gold
- Clear fishing line 0.3mm thin spool
- Electric hole punch handheld
- Hand sewing needle set assorted
- Adhesive ceiling hook removable small
8. Crepe Paper Streamer Twisted Arch Garland
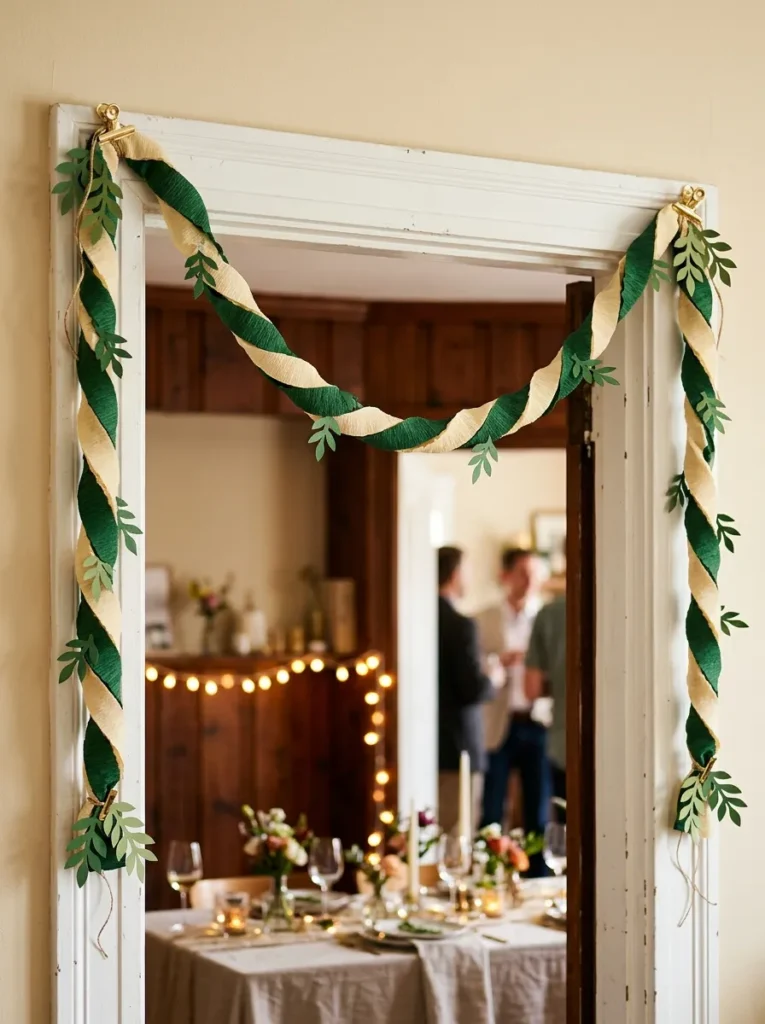
Vibe: Festive and lush — the doorway decoration that makes every entrance feel like an arrival.
Why it works: A twisted crepe paper streamer garland uses the design principle of structural color mixing — two colors of paper twisted together create a third visual color impression in the spiral zones where both papers are simultaneously visible, producing more tonal complexity than either color alone would achieve. The arch format above a doorway or table edge frames a threshold or focal point in a way that horizontal bunting cannot, creating a defined moment of celebration that gives the space visual hierarchy. Crepe paper’s natural texture — the slight crinkle and stretch inherent in the material — adds surface interest that flat tissue or cardstock garlands lack.
How to get it: Hold one roll of forest green and one roll of warm cream crepe paper together at one end. Secure the joined end to an anchor point and walk backward while holding both rolls, allowing the streamers to drop and twist together naturally under their own tension. Once you have reached the desired garland length, secure the other end. The twist tightness increases the more you rotate the joined end before securing — tighter twists read as more formal, looser twists as more relaxed. Glue small leaf shapes cut from green cardstock at 20cm intervals along the finished twist.
Shop The Look
- Crepe paper streamer roll forest green
- Crepe paper streamer roll warm cream
- Green cardstock sheet pack
- Craft glue dots adhesive
- Washi tape floral pattern for end securing
9. 3D Geometric Paper Diamond Garland
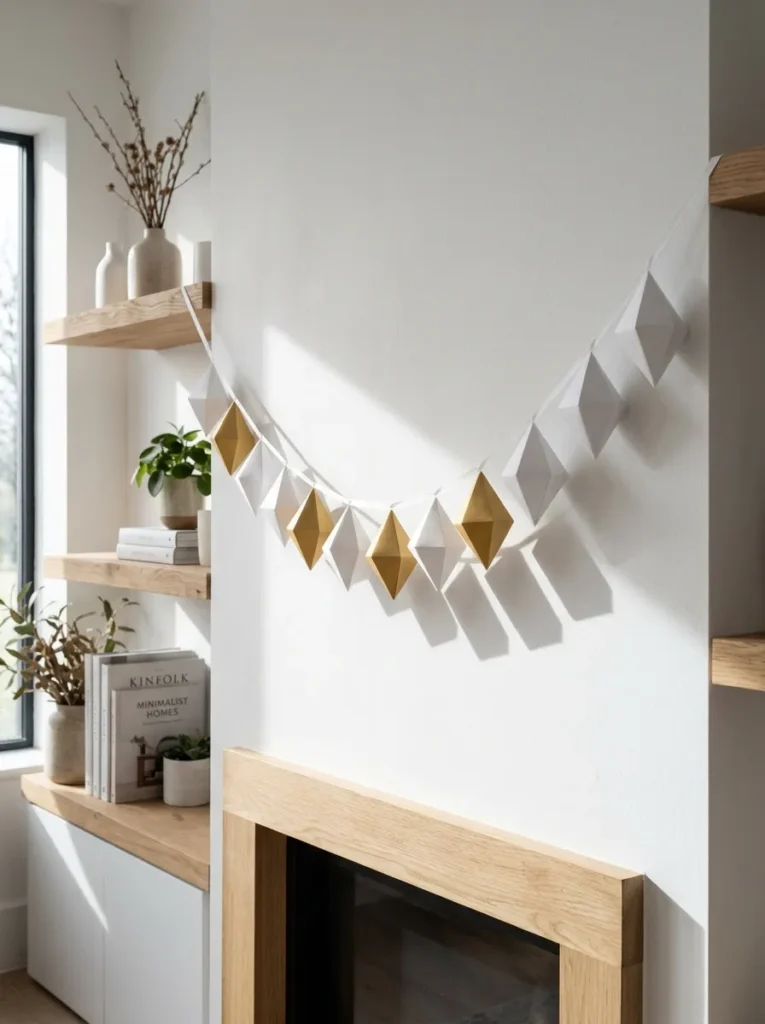
Vibe: Clean and modern — the paper garland for people who think they don’t like paper garlands.
Why it works: Three-dimensional geometric paper diamonds apply the principle of form complexity through simple fold logic — each diamond shape is constructed from a single scored-and-folded square of cardstock requiring only four fold lines and four glued tabs, yet the finished form reads as architecturally sophisticated. The shadow-casting quality of the dimensional form is the key design contribution: each diamond projects geometric shadows onto the wall behind it that are as visually interesting as the object itself, effectively doubling the visual presence of the garland in directional light. Alternating matte white and warm gold maintains visual rhythm while creating enough tonal contrast to read clearly across a room.
How to get it: Score and fold a square of cardstock into four equal triangles meeting at a center point — this creates the top pyramid. Repeat for the bottom pyramid. Glue the base edges of both pyramids together to form the complete diamond. Reinforce all fold edges by pressing firmly with a bone folder after scoring — clean fold lines are the difference between a geometric diamond that reads as precise and one that reads as lumpy. Thread ribbon through a small hole punched at the top point of each diamond, knotting at each diamond to maintain spacing.
Shop The Look
- White cardstock heavy weight sheets 110lb
- Gold metallic cardstock sheets
- Bone folder scoring tool
- Scoring stylus and ruler set
- White satin ribbon roll thin 6mm
10. Paper Flower Garland with Tissue Blooms
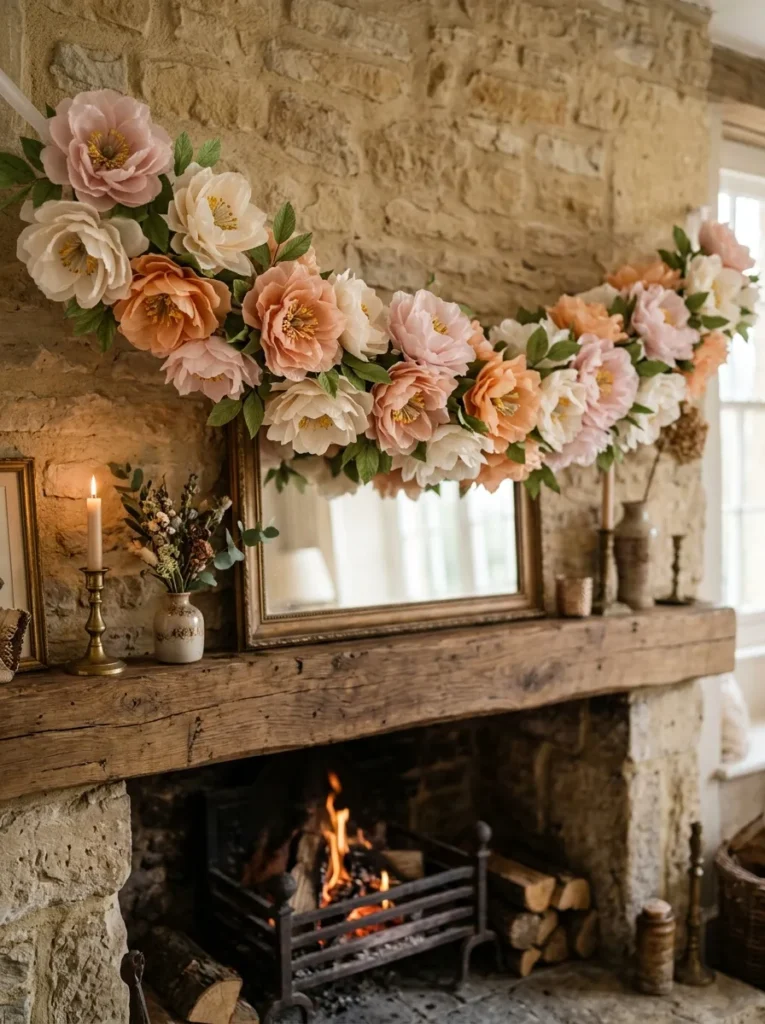
Vibe: Romantic and lush — the paper flower garland that makes guests ask if they’re real.
Why it works: Tissue paper flowers achieve the visual complexity of real floral garlands through layered petal construction — each flower is built from 6–8 individual petal layers that are separately shaped, curled, and assembled, creating enough three-dimensional depth and tonal variation between layers that the flower reads as genuinely botanical from a normal viewing distance. The design principle is layered scale: each individual flower is already a complex object in its own right, and stringing multiple flowers together creates cumulative abundance that overwhelms any sense of the construction complexity required to produce it. A paper flower garland of 12–15 blooms takes 2–3 hours to make and produces a result that would cost $150–$300 in fresh florals.
How to get it: Stack five sheets of tissue paper and cut petal shapes freehand — no template required. Gently curl the tip of each petal by rolling over a pencil. Layer petals in graduated sizes (largest at base, smallest at top) around a twisted wire stem, securing each layer with a wrap of floral wire. Fluff and shape the completed flower by gently separating and adjusting individual petals. String completed flowers on ribbon by threading the wire stem through the ribbon and bending to secure, alternating bloom colors across the garland length.
Shop The Look
- Tissue paper blush peach ivory pack
- Floral wire thin gauge green 24-inch
- White ribbon roll satin 1 inch
- Green cardstock for paper leaves
- Wire cutter jewelry tool
11. Accordion Fold Paper Fan Garland
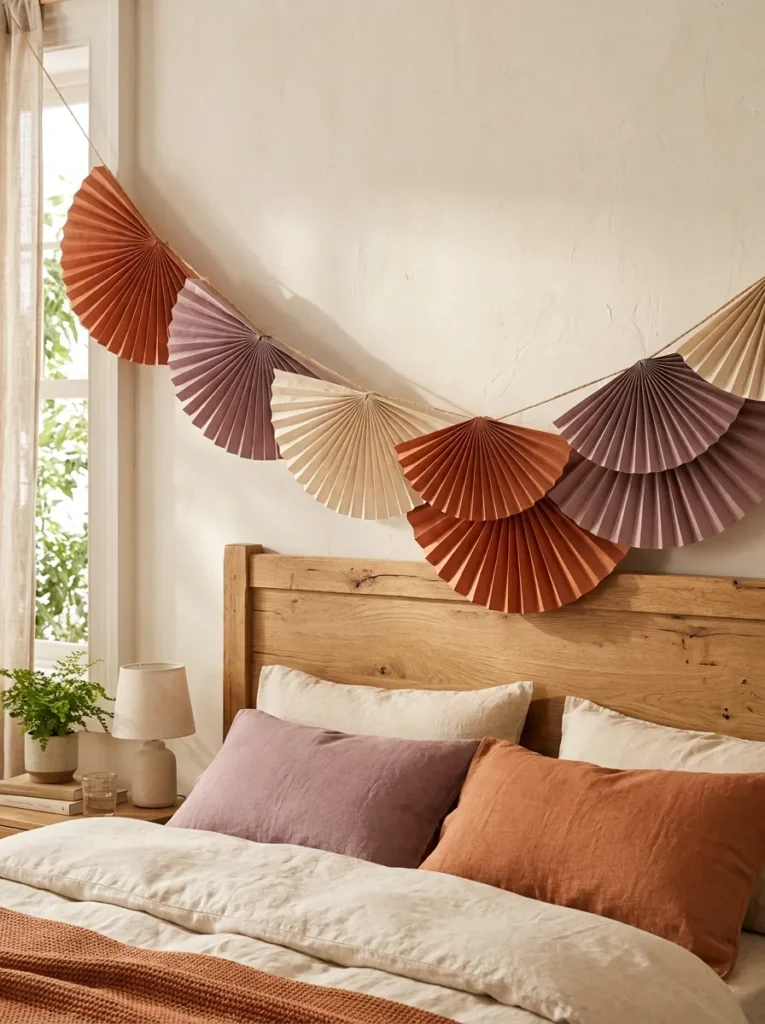
Vibe: Warm and festive — the wall installation that looks designed rather than decorated.
Why it works: Accordion fold paper fans apply the principle of geometric expansion — the same pleated stack that folds flat for storage expands into a dramatic semicircular form that occupies significant visual space per unit of material used. The ruffled wave effect created by slightly overlapping fans along the garland creates a continuous flowing form that reads as a single designed installation rather than a collection of individual objects, applying the principle of visual continuity through edge overlap. The three-color sequence — repeating terracotta, mauve, cream — creates color rhythm across the full garland length that draws the eye from end to end.
How to get it: Stack five sheets of matching-color cardstock or tissue paper and accordion-fold across the shorter dimension in 1.5cm folds. Pinch the folded stack at its center, bind tightly with floral wire or a staple, and open both halves into a flat semicircle. Apply glue to one face of the two outer folds and press the next fan’s outer fold against it — this overlap join creates the continuous ruffled wave. After completing all joins, thread natural twine through the wire binding at the center of each fan, spacing fans so they slightly overlap their neighbors.
Quick Win: Pre-cut cardstock fan kits ($6–$10 for 24 fans) eliminate the cutting and measuring steps — purchase in your chosen color combination and proceed directly to the accordion folding and joining, cutting the total project time to under 30 minutes for a full garland.
Shop The Look
- Cardstock paper pack terracotta mauve cream
- Floral wire thin gauge pack
- Natural jute twine roll thin
- Mini stapler with staples
- Paper fan garland kit assorted colors
12. Punched Snowflake Garland for Winter Decor
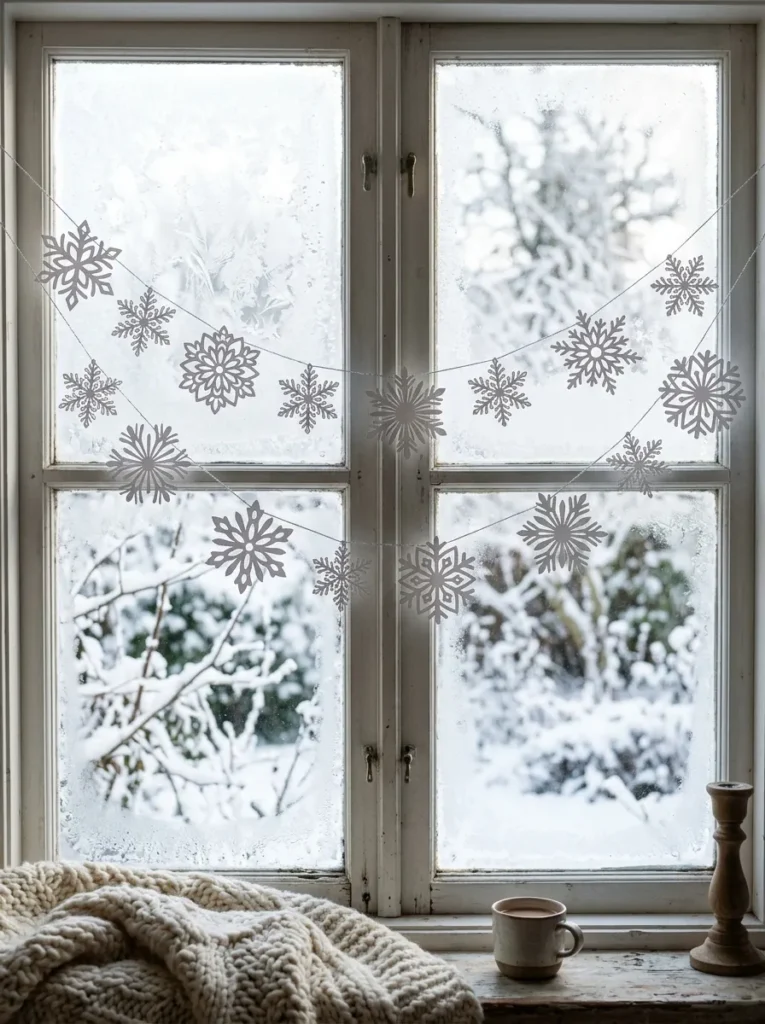
Vibe: Serene and wintry — the window garland that uses natural light as part of the design.
Why it works: A punched snowflake garland hung across a window uses the design principle of backlighting as design material — the cold winter light passing through the intricate cutout patterns of each snowflake creates a lace-like silhouette effect that transforms simple white cardstock into something that reads as delicate and complex. This is the paper garland equivalent of a stained glass window: the light source behind the object is as important as the object itself, and choosing the window as the hanging location is a design decision as significant as the snowflake design. The varied punch patterns across the garland prevent visual monotony while the consistent white color and silver thread maintain cohesion.
How to get it: Purchase a set of snowflake paper punches in two or three different designs (large, medium, and small sizes of each design). Punch snowflakes from heavy white cardstock — 80–110lb weight produces snowflakes stiff enough to hang flat rather than curling. Thread silver metallic sewing thread through a small needle and pierce through one point of each snowflake at the center hole or between two outer points. Alternate designs and sizes along the garland length to maintain variety. Hang the completed garland across a window using small adhesive hooks at each end.
Shop The Look
- Snowflake paper punch set assorted designs
- White cardstock heavy 110lb sheets
- Silver metallic sewing thread spool
- Adhesive window hook small removable
- White velum paper sheet for layering
13. Dried Flower and Paper Leaf Mixed Garland
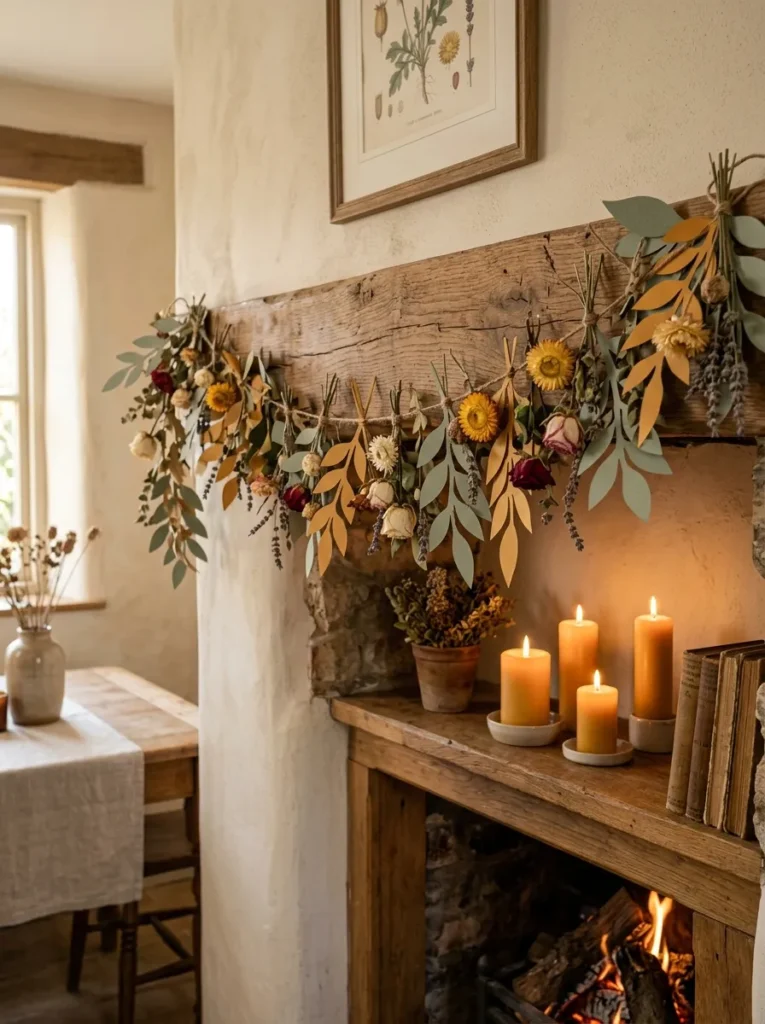
Vibe: Warm and botanical — the garland that blurs the line between craft and nature.
Why it works: A mixed dried flower and paper leaf garland applies the principle of material dialogue — the juxtaposition of real dried botanicals and hand-cut paper shapes creates a conversation between natural and made that makes both elements more interesting than they would be in isolation. The viewer’s eye moves between real dried petals and paper leaves, processing the comparison between the two and finding the handmade paper elements more convincing and more beautiful because they exist beside their real counterparts. The color palette of dusty sage and warm ochre in the paper elements bridges naturally to the dried rose, strawflower, and lavender tones without requiring exact color matching.
How to get it: Cut leaf shapes freehand from dusty sage and warm ochre cardstock — freehand cutting produces more organic leaf shapes than template cutting, and the slight variation between leaves reads as botanical rather than machine-cut. Score a central vein line down each leaf using a bone folder or the tip of a craft knife (score only, do not cut through). Fold the leaf gently along the scored vein to create a slight three-dimensional curve. Thread leaves and dried flower heads alternately onto jute twine, securing each element with a small knot or dot of craft glue.
Shop The Look
- Cardstock pack dusty sage and ochre
- Dried rosebud bunch small craft
- Dried strawflower bunch assorted
- Natural jute twine thin roll
- Bone folder scoring tool
14. Paper Pom-Pom Garland
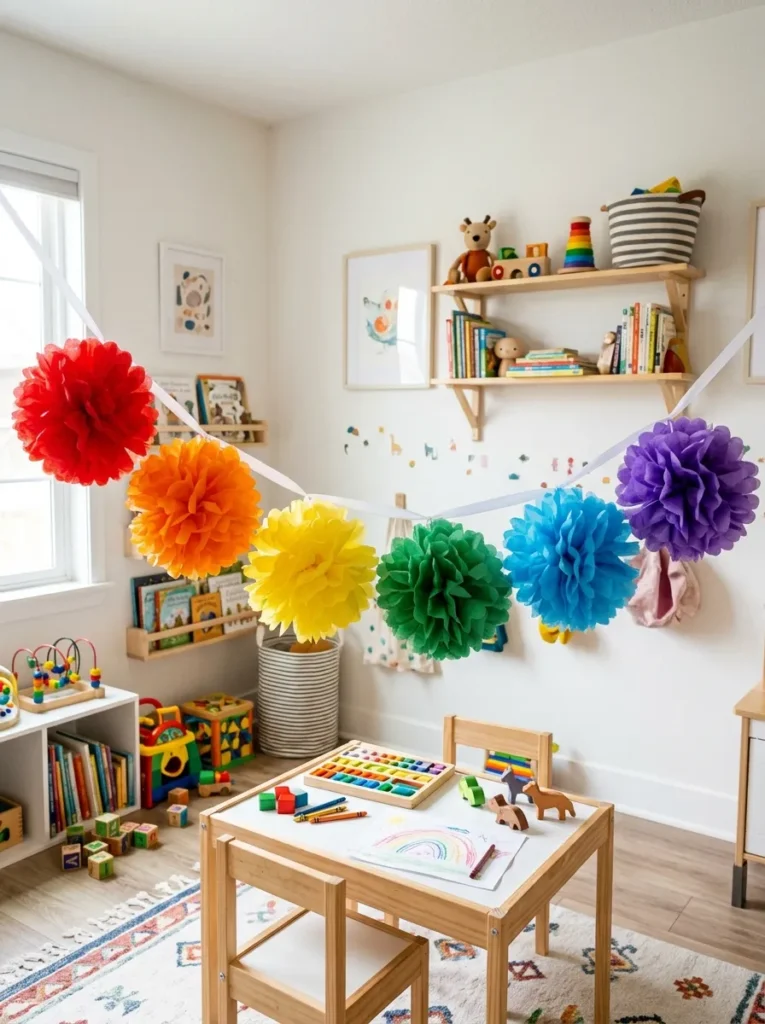
Vibe: Cheerful and playful — the decoration that makes children run into a room with their arms open.
Why it works: Tissue paper pom-poms are the high-impact, low-skill paper garland format — they require no precision cutting, no template, and no specialist tools, yet produce results at a scale and visual fullness that justify the 10 minutes of making time per pom-pom. The design principle is dimensional volume through material accumulation: each pom-pom is simply a stack of tissue sheets accordion-folded and spread into a sphere — the more sheets stacked, the fuller and more impressive the result. A rainbow sequence garland creates maximum visual energy through color theory — the full spectrum progression carries inherent movement and joy that any partial color selection lacks.
How to get it: Stack eight sheets of same-color tissue paper. Accordion-fold the full stack in 2.5cm folds across the short dimension. Bind the center tightly with floral wire or a pipe cleaner. Cut both short ends into a rounded petal shape using scissors. Gently separate and pull each individual tissue layer upward toward the center from both sides, fluffing into a full sphere shape. Thread white ribbon through the wire binding at the center. Repeat in each rainbow color and string at 15cm intervals on the ribbon.
Shop The Look
- Tissue paper rainbow colors pack multicolor
- White ribbon roll 1 inch satin
- Pipe cleaners assorted colors
- Scissors sharp craft size
- Ribbon end clip set
15. Paper Chain Classic Loop Garland
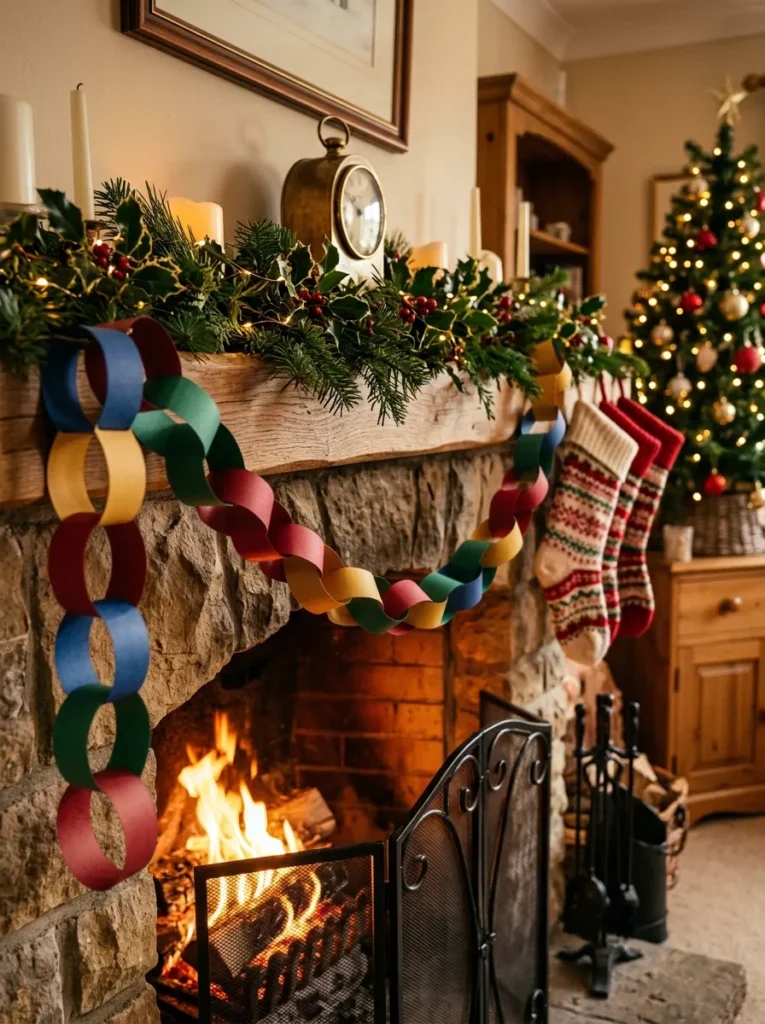
Vibe: Warm and nostalgic — the garland that carries the memory of every childhood holiday in its loops.
Why it works: The paper chain loop garland is the oldest paper garland construction in Western craft tradition, and its persistent popularity across generations is not nostalgic sentimentality — it is genuine design logic. The interlocked loop construction creates a chain with inherent structural integrity that hangs with a natural drape no other paper garland format achieves, because the weight distribution across interlocked links produces the smooth catenary curve of a real chain rather than the stiff horizontal hang of a strung garland. Deep jewel tones in the loop sequence — sapphire, emerald, ruby, gold — transform the childhood classic into an adult-appropriate holiday decoration through color elevation alone.
How to get it: Cut cardstock into strips approximately 25cm long and 2.5cm wide — a paper trimmer produces perfectly consistent strips significantly faster than scissors. Form the first strip into a loop and glue or staple the overlapping ends. Thread the next strip through the closed loop before forming and joining its ends. Continue, alternating colors in sequence, until the chain reaches the desired length. For a fireside garland, choose cardstock weights of at least 80lb — lighter paper produces loops that flatten and lose their circular geometry when hung over long spans.
Quick Win: A paper trimmer ($15–$25) cuts 10–12 consistent cardstock strips per pass, reducing the strip cutting time for a full room paper chain from 45 minutes with scissors to under 10 minutes — the single tool investment that most dramatically speeds up paper garland making across all projects.
Shop The Look
- Jewel tone cardstock pack sapphire emerald ruby gold
- Paper trimmer guillotine 12 inch
- Glue stick pack strong hold
- Mini stapler with staples
- Fireplace mantel hook set removable
16. Botanical Block-Printed Paper Pennant Garland
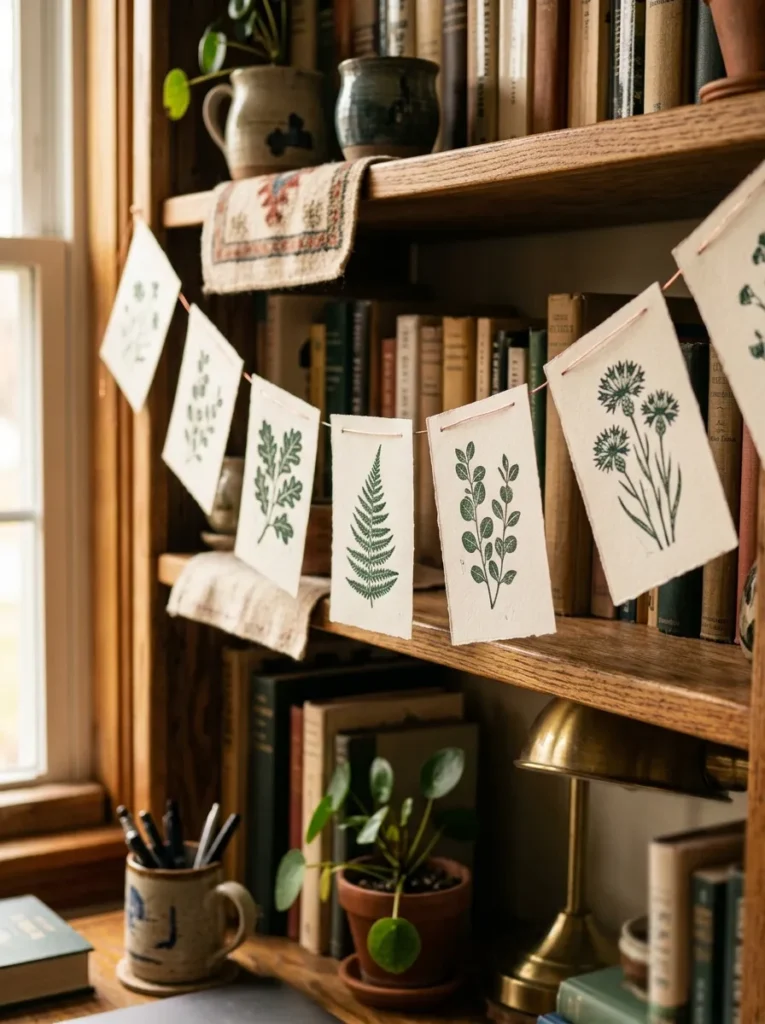
Vibe: Warm and considered — the garland for the desk or bookshelf of someone who makes things thoughtfully.
Why it works: A botanical block-printed paper pennant garland combines the printmaking tradition of block printing with the garland format to produce a decorative string where each individual pennant is a small original artwork — no two prints are identical in ink density, stamp pressure, or edge definition. The design principle is serial original art: unlike a printed or cut garland where every element is mechanically identical, each block-printed pennant carries the specific evidence of one impression, making the garland a sequence of related but individual prints rather than a repeated pattern. Copper wire threading adds a warm metallic material contrast to the natural paper and green ink combination that elevates the overall palette toward something more sophisticated.
How to get it: Cut watercolor paper into 8x5cm rectangles — the small scale makes each pennant a concentrated composition rather than a diluted one. Carve simple botanical motifs — single leaves, seed pods, small branches — into rubber erasers or lino blocks using a V-gouge tool. Apply deep forest green block printing ink or fabric ink to the carved stamp using a small foam brayer or brush, and press firmly onto each paper rectangle in a centered composition. Punch a small hole at the top center of each dried pennant and thread onto thin copper wire using a wire needle or by threading the wire through the hole directly.
Shop The Look
- Watercolor paper small sheets 300gsm cut
- Lino block carving kit V-gouge set
- Block printing ink deep forest green
- Foam brayer roller small
- Thin copper wire craft gauge 28
How to Start Your DIY Paper Garland Transformation
Start with the classic kraft paper triangle bunting. Before attempting tissue pom-poms, origami cranes, or three-dimensional diamonds, cut 12 kraft paper triangles with scissors, fold the tops over a length of jute twine, and glue them in place. Hang the finished bunting above your dining table. This 20-minute project teaches every principle that applies to every more complex garland on this list — how many elements create visual fullness, how spacing between elements affects rhythm, how the garland’s drape relates to the hanging points’ distance apart. Once you have made the simplest version, every subsequent garland project is a variation on the same fundamental logic rather than a new skill from scratch.
The most common mistake first-time paper garland makers make is working with paper that is too light for the chosen construction method. Thin copy paper makes triangle pennants that droop and curl at their tips. Standard tissue paper makes accordion fans that collapse rather than holding their shape. Single-ply newspaper makes chains whose loops flatten into ovals under their own weight. Match paper weight to construction method: tissue paper (lightweight, 17–20 gsm) for pom-poms, tassels, and honeycomb balls where volume and movement are the goal; cardstock (medium weight, 65–110 lb) for geometric shapes, pennants, and chain loops where structural rigidity is required; watercolor paper (heavy weight, 200–300 gsm) for printed or painted pennants where surface absorbency and flatness matter. This single material decision determines whether a paper garland project succeeds or frustrates.
Three items under $50 that make an immediate impact: A paper trimmer ($18) that cuts consistent strips, rectangles, and pennant tops in seconds rather than the minutes required with scissors — the single tool that most dramatically reduces garland-making time across all projects; a multicolor tissue paper pack in 50–100 sheets ($10) that provides enough material for pom-poms, tassels, and honeycomb balls in any color combination for months of garland making; and a 100-foot roll of natural jute twine ($6) that serves as the stringing material for every natural-aesthetic garland on this list and stores indefinitely between projects.
Realistic expectations: A single simple garland — triangle bunting, paper chain, or tassel garland — takes 20–45 minutes and costs $3–$8 in materials. A medium-complexity garland — paper flower string, geometric diamond chain, or watercolor star garland — takes 1.5–3 hours and costs $10–$20 in materials including tool amortization. A full room paper garland installation — ceiling pom-poms, wall bunting, table edge fan garland, and window snowflake strand — can be completed in a single crafting day for under $40 in total materials, producing a room transformation that would cost $150–$300 in equivalent purchased decorations.
Frequently Asked Questions About DIY Paper Garland Ideas
What type of paper is best for making DIY paper garlands that last?
Paper weight and finish are the two variables that most determine garland longevity. For structural garlands — geometric shapes, chain loops, pennant bunting — 80–110 lb cardstock in a matte finish lasts significantly longer than lighter paper, maintaining its shape and color for months of indoor display. For soft garlands — pom-poms, tassels, fans — 17–20 gsm tissue paper is the correct weight for the intended construction, but these garlands are inherently more temporary and should be expected to last weeks rather than months before colors fade or paper begins to soften at edges. Laminating finished pennants with a self-adhesive laminating sheet extends their lifespan dramatically for garlands intended to be stored and reused seasonally.
How do I hang paper garlands without damaging walls or ceilings?
Removable adhesive hooks are the standard no-damage solution for both walls and ceilings — Command brand hooks rated for 450–900g hold most paper garlands without damage to painted surfaces when removed according to the package instructions (slow horizontal pull, never outward). For temporary party garlands, painter’s tape folded into a loop provides adequate support for lightweight tissue and kraft paper garlands without leaving adhesive residue on any painted surface. For ceiling installations, adhesive ceiling clips specifically designed for hanging decorations grip ceiling crown molding or ceiling tiles without penetrating the surface.
Can paper garlands be made waterproof for outdoor use?
Standard paper garlands are not suitable for outdoor use in any weather conditions — even light moisture softens and distorts paper construction within minutes. For outdoor garland installations, substitute materials entirely: fabric bunting in outdoor canvas or weather-resistant polyester uses the same construction methods as paper pennant bunting with indefinite weather resistance. For a paper-like outdoor aesthetic, Tyvek material (the white housewrap used in construction) is waterproof, tearproof, and can be cut, folded, and printed with water-resistant ink markers to produce garlands that survive outdoor party conditions completely.
How many elements does a paper garland need to look full and complete?
Visual fullness in a paper garland is determined by the ratio of element size to garland span rather than a fixed number of elements. The practical guideline is that elements should cover at least 60% of the garland’s visible length — meaning gaps between elements account for no more than 40% of the total span. For a standard 10-foot dining room bunting: triangle pennants at 15cm width need approximately 16–18 pennants. Tissue pom-poms at 20cm diameter need approximately 8–10 pom-poms. Origami cranes at 10cm wingspan need approximately 20–25 cranes. Increasing element density beyond this ratio tips from full to overcrowded, which reduces the visual impact of individual elements by eliminating the breathing space that allows each one to read distinctly.
What is the easiest paper garland to make for a complete beginner?
The paper chain loop garland is the most accessible starting point because it requires only three materials (cardstock strips, glue or a stapler, and scissors or a trimmer), one technique (form a loop and join), and produces its result incrementally — each loop added is a visible increment of progress that provides immediate satisfaction and motivates continuation. The accordion fan garland is a close second — the accordion fold is one of paper craft’s most fundamental techniques, and once learned, it unlocks the construction logic of fans, honeycomb balls, and pom-poms simultaneously. Both projects are completable by anyone who can fold paper and operate scissors, regardless of any prior craft experience.
Ready to Create Your Dream DIY Paper Garland Collection?
These 16 ideas cover the complete spectrum of what paper garlands can achieve — from the timeless nostalgia of an interlocked paper chain and the lush romance of a tissue paper flower swag to the architectural precision of a geometric diamond chain and the ethereal elegance of floating paper circles on invisible thread. Every paper garland journey starts with a single cut — the kraft triangle bunting this afternoon is a genuinely complete decoration, not a warm-up exercise for something more ambitious — and the skills built in that first simple project transfer directly to every more complex garland you make afterward. This weekend, roll out a sheet of kraft paper, cut twelve triangles, fold them over a length of jute twine, and hang them above your table — then stand back and notice what the room feels like with something handmade in it. Save the ideas that match your occasion, your space, and your color palette, and begin from that first triangle.