15 Mason Jar Crafts That Look Surprisingly Luxe
Mason jar crafts that look surprisingly luxe use the humble, inexpensive glass jar as a base for transformations — paint, metallics, texture, cord wrapping, etching, floral styling, and lighting installations — that produce finished objects reading as boutique homeware rather than craft store makes. This article gives you exactly 15 ideas spanning candles, vases, lighting, storage, wedding decor, and seasonal displays so every crafter and every home finds a mason jar project that genuinely surprises with its quality.
The mason jar’s particular gift to craft is its geometric honesty — a clean cylinder of glass with a threaded neck and a flat base, nothing pretending to be anything other than what it is. That structural simplicity is why transformations read so well: the jar provides the armature, and the craft provides the character, and the result is almost always more than the sum of its parts. Here are 15 ideas worth saving — and making.
Why Mason Jar Crafts That Look Surprisingly Luxe Work So Well
Mason jars have occupied a specific cultural position in American domestic life since John Landis Mason patented the original design in 1858 — initially as a utilitarian food preservation vessel, then through successive waves of cultural repurposing that include the Depression-era drinking glass (when glassware was unaffordable), the 1960s counterculture storage and display vessel, the 1990s country-craft staple, and the contemporary craft and lifestyle object that has persisted from approximately 2010 to the present. What makes the mason jar a uniquely durable craft substrate is the combination of its very low base cost (standard wide-mouth pint jars retail for approximately $1–1.50 per jar in standard multipacks), its precise geometric form, its material transparency (which makes it the ideal vessel for both illuminated and colored liquid applications), and its cultural familiarity (which means transformations are read against the known original, making the distance between base and finished object a source of genuine surprise and delight).
The material transformations that produce the most luxe results from mason jars draw from several specific techniques: mercury glass effect (achieved through the reaction of metallic spray paint applied to a water-misted interior surface), frosted etching cream (which permanently etches a monogram or botanical design into the glass surface, reading as genuinely expensive custom glassware), cord and rope wrapping (which converts the glass cylinder into a textural tactile object referencing high-end boutique vases), concrete and plaster coating (which produces the matte, mineral-heavy aesthetic of contemporary designer homeware), and color-tinted glass effects (achieved through a diluted white glue and paint mixture applied to the interior, producing the appearance of colored art glass). These techniques share the property of being achievable by a crafter with basic skill and patience while producing results that most observers attribute to manufactured boutique objects rather than DIY makes.
The mason jar craft category has maintained consistent engagement across craft media since approximately 2012, when the broader farmhouse and rustic-chic aesthetic movement made the jar’s utilitarian origins a design asset rather than a liability to be disguised. Pinterest’s mason jar categories show sustained strong engagement year over year, and the transition from purely rustic applications (burlap wrapping, twine) to genuinely contemporary luxe applications (concrete coating, gold dipping, etching, mercury glass) has brought new audiences to the category who would previously have dismissed it as too country or too casual for their aesthetic preferences.
Wedding and events decorators have been the most commercially significant adopters of luxe mason jar techniques — the tension between the jar’s informal origins and the precision of a mercury glass or etched finish creates an accessible-luxury aesthetic that suits contemporary weddings, which frequently aim for a “effortlessly elegant” rather than formally expensive register. A table set with fifteen hand-etched mason jar vases reads as considerably more considered than the same number of standard florist vases and costs a fraction of the equivalent commercial purchase. The honest consideration for all mason jar craft: the quality of the mason jar itself matters — thick-walled Ball brand wide-mouth jars in the standard pint and quart sizes provide the most satisfying craft substrate, and thin-walled cheaper alternatives produce less predictable results in etching, painting, and heat applications.
Style at a Glance
| Element | Craft Base | Luxe Edge |
|---|---|---|
| Philosophy | Humble vessel, considered transformation | The distance between original and result is the surprise |
| Materials | Ball mason jar, metallic spray, etching cream | Mercury glass, concrete, cord wrap |
| Color Palette | Mercury silver, warm gold, matte white, concrete gray |
15 Mason Jar Crafts That Look Surprisingly Luxe
1. Mercury Glass Effect Mason Jar Vases
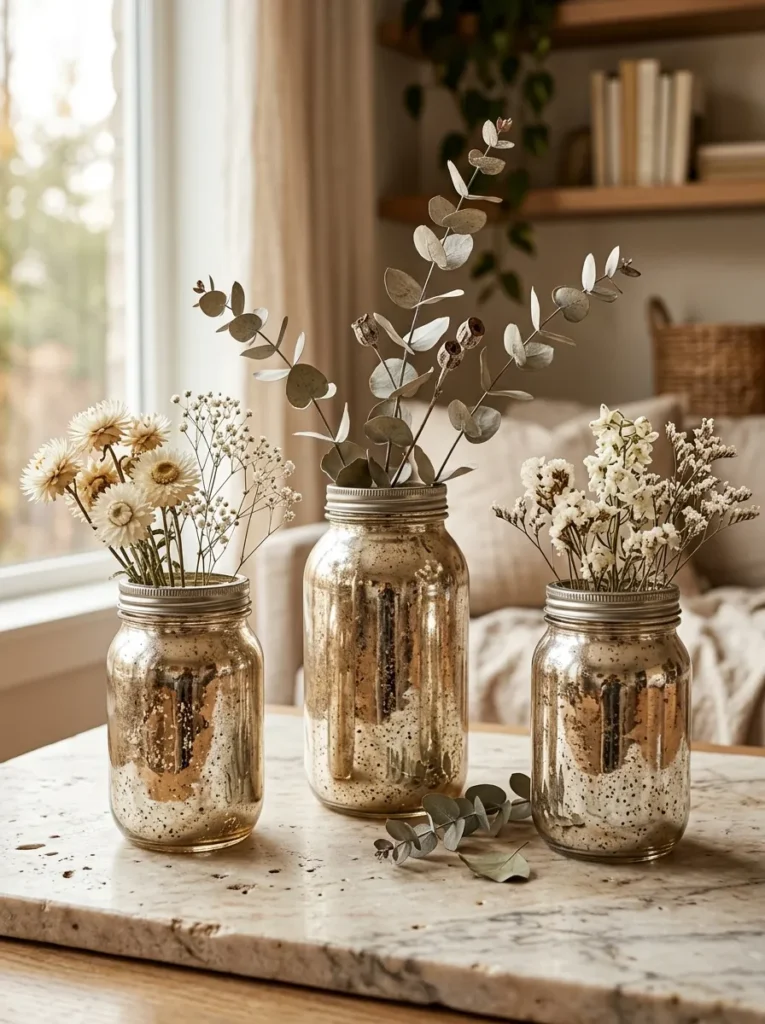
Vibe: The mercury glass jars feel like genuine antiques from a European flea market — the finish too warm and too varied to read as anything other than aged material.
Why it works: Mercury glass effect applied to mason jars exploits the specific visual property of metallic paint applied to a wet glass interior surface — when metallic silver spray paint is applied to the inside of a glass jar that has been misted with water, the paint reacts with the water droplets to create the characteristic irregular, mottled appearance of genuine antique mercury glass (which was produced through a similar chemical process using real mercury, banned in the 19th century). The glass surface reads the metallic paint as a reflective interior layer while allowing the exterior glass to remain clear and smooth — producing the antique mirror depth of genuine mercury glass at a fraction of its cost. Three jars in different sizes (half-pint, pint, and quart) create a graduated composition that reads as a deliberately designed vase collection.
How to get it: Working in a well-ventilated area, lightly mist the interior of a clean, dry mason jar with water from a small spray bottle — a fine, even mist rather than heavy droplets. Immediately spray the interior with a metallic silver spray paint (Rust-Oleum Metallic Silver or equivalent) from approximately 30cm away, rotating the jar to cover all interior surfaces. The paint will interact with the water to create the mottled effect. Allow to dry completely before applying a second coat for additional coverage and depth. Do not shake or disturb the jar while the paint is wet — the water-paint interaction continues for several minutes. The finished interior metallic coating is permanent and food-safe once fully cured.
Quick Win: A single can of metallic silver spray paint ($6–10) is sufficient for six to eight standard mason jars — making a complete mercury glass vase collection for a table setting or gift achievable for under $20 in total materials including the jars.
Shop The Look
| Product |
|---|
| Ball mason jar wide mouth set pint |
| Metallic silver spray paint Rust-Oleum |
| Small spray bottle fine mist |
| Dried eucalyptus stem bundle natural |
| Dried white flower stem set |
Also view: 15 Ladybug DIY Ideas Perfect for Adult Crafters
2. Rope-Wrapped Mason Jar Coastal Vases
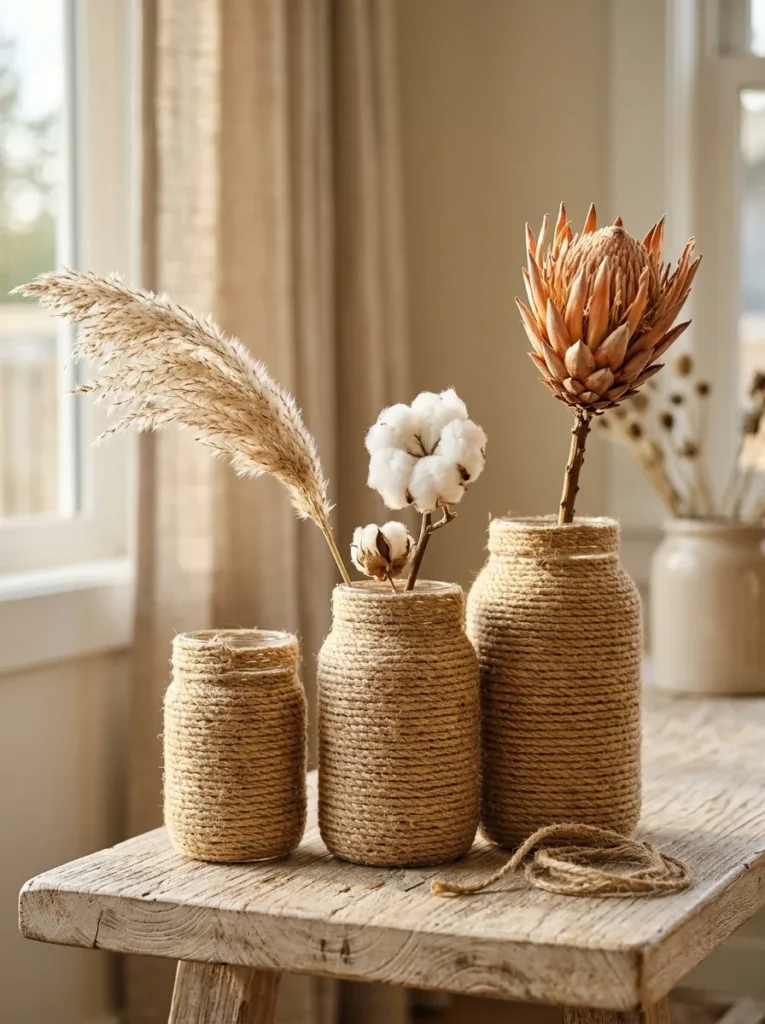
Vibe: The rope-wrapped jars feel like something from a coastal boutique hotel — the jute wrapping converting a food jar into a considered object.
Why it works: Rope-wrapped mason jars apply the surface material replacement principle — the glass jar, once completely covered, ceases to read as a mason jar and becomes a cylindrical vase of natural fiber. The jute rope’s warm honey tone and rough organic texture are precisely the material qualities of high-end coastal decor objects, and a set of three in graduated heights directly replicates the vase grouping format used in boutique interiors and high-end homeware displays. The technique requires no tools beyond scissors and craft glue, producing a result with a material richness that belies its minimal cost and skill requirement.
How to get it: Apply a thin, even coat of strong craft glue (Gorilla Glue Clear or E6000) to a 5cm section of the jar base. Press the starting end of 4mm natural jute rope against the glued section, pulling it snug around the jar base circumference. Continue applying glue in small sections and winding the rope in tight, adjacent coils working upward — the critical detail is maintaining consistent tension and keeping each coil pressed firmly against the previous one with no glass visible between rows. Secure the final coil at the jar’s neck with an additional dot of glue and trim the rope end cleanly. Allow to dry for four hours before handling or filling.
Shop The Look
| Product |
|---|
| Natural jute rope 4mm 50m roll |
| Strong clear craft adhesive Gorilla |
| Ball mason jar set varied sizes |
| Dried pampas grass stem tall |
| Dried protea flower stem natural |
Also view: 14 Handmade Gift Ideas That Feel Extra Special
3. Gold-Dipped Mason Jar Pencil and Brush Holders
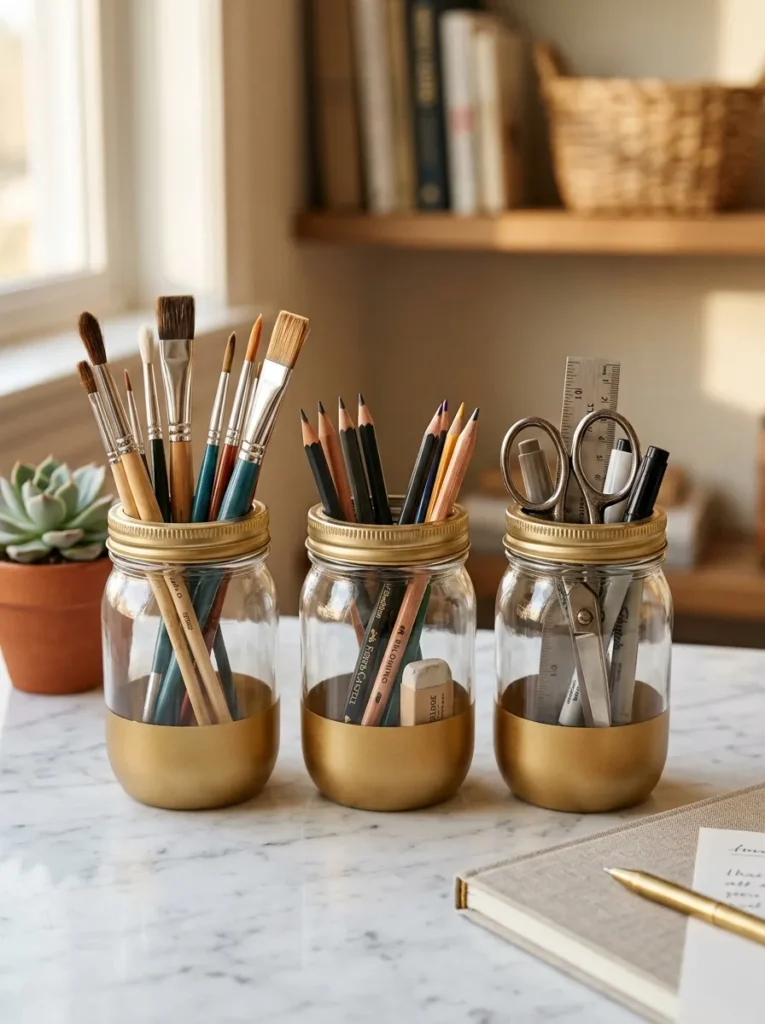
Vibe: The gold-dipped jars feel like desk accessories from a design stationery boutique — the gold base giving a utilitarian object a considered, finished quality.
Why it works: Gold-dipped mason jars apply the design principle of material accent at the base plane — dipping the lower third of a clear glass jar in metallic gold creates a two-material composition (glass above, gold below) that reads as a designed object specification rather than a craft modification. The clean horizontal boundary line between the gold and the clear glass is the critical detail that determines whether the result reads as luxe or amateurish — a precise, level line communicates controlled execution, while a wavering or dripped boundary undermines the design quality regardless of the gold’s surface quality. As desk organizers, the three-jar format (pencils, brushes, scissors) creates a matching set that reads as a designed stationery collection.
How to get it: Tape a precise horizontal line using painter’s tape applied level to the jar exterior at one-third height from the base — use a rubber band placed around the jar at the desired level as a guide for placing the tape accurately. Apply two to three coats of gold spray paint (Rust-Oleum Metallic Gold or a brush-on gold paint in a matte finish) to the section below the tape, allowing complete drying between coats. Remove the tape carefully while the final coat is still slightly tacky (not fully dry) for the cleanest edge — removing tape from fully dried paint creates micro-chips at the edge. Allow to cure for 24 hours before filling.
Shop The Look
| Product |
|---|
| Gold metallic spray paint matte warm |
| Painter’s tape precise line 1 inch |
| Ball mason jar pint wide mouth set |
| Small desk plant ceramic pot |
| Marble desk mat white gray |
4. Etched Monogram Mason Jar Drinking Glasses
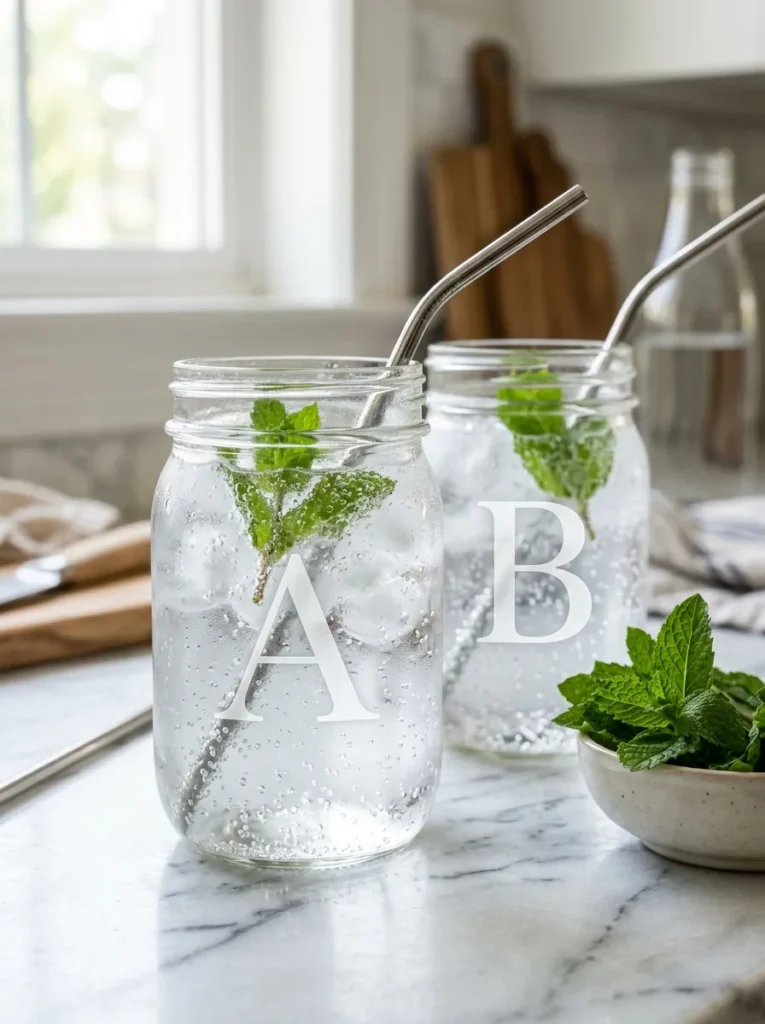
Vibe: The etched monogram glasses feel like personalized barware from a specialty glass shop — the frosted initial communicating the specific without announcing it.
Why it works: Glass etching cream applied through a vinyl stencil produces a permanently frosted surface that is visually indistinguishable from professionally sand-blasted monogrammed glassware — the same technique used for high-end personalized barware costing $25–45 per glass, achieved here for under $5 per jar including materials. The monogram application specifically is the most commercially appropriate design choice for drinking glasses because it references the long tradition of monogrammed household glassware (silver-rimmed monogrammed crystal, hotel glassware, personalized wedding glasses) while the mason jar format provides the casual-luxury tension that contemporary entertaining aesthetic most values.
How to get it: Cut a vinyl stencil with the desired initial in a clean serif or sans-serif capital font, using a craft cutting machine (Cricut, Silhouette) or purchase a pre-cut vinyl letter stencil from a craft store. Apply the stencil firmly to the clean, dry exterior jar surface, pressing all edges absolutely flat to prevent etching cream bleeding under the stencil. Apply Armour Etch cream generously within the stencil opening, ensuring complete, even coverage. Allow to sit for exactly 60 seconds — no less (incomplete frosting) and no more (cream eats beyond the stencil edge). Rinse thoroughly with cold water, remove the stencil, and dry. The frosting is permanent and dishwasher safe.
Shop The Look
| Product |
|---|
| Armour Etch cream glass etching |
| Vinyl letter stencil initial set |
| Ball mason jar wide mouth pint set |
| Craft cutting machine vinyl set |
| Small fresh mint bunch bar |
5. Concrete-Coated Mason Jar Planters
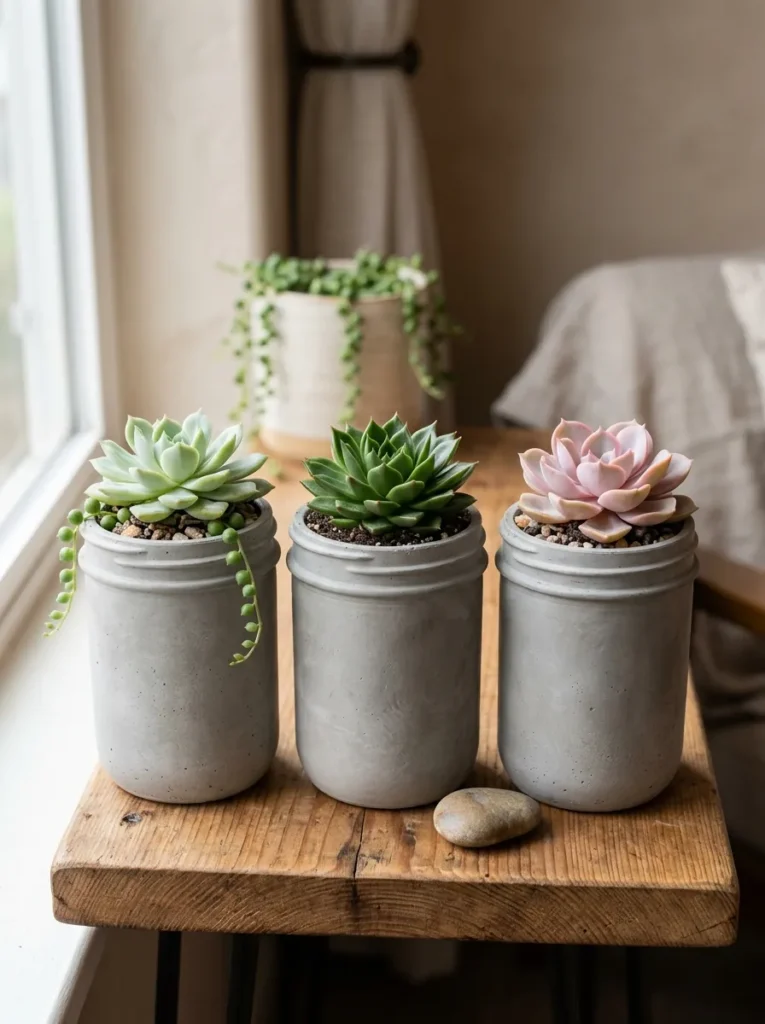
Vibe: The concrete-coated jars feel like something from a Scandinavian design shop — the concrete finish giving a glass vessel the weight and material presence of genuine cast objects.
Why it works: Concrete-coated mason jar planters apply the material transformation principle of weight and density signaling — a concrete-surfaced object reads as heavy, permanent, and materially serious regardless of the actual material beneath it, because concrete’s visual and tactile properties (matte gray, slightly gritty texture, cool to the touch) are so strongly associated with architectural mass and permanence. The glass mason jar beneath the concrete coating provides the impermeable base that genuine concrete cannot — this hybrid construction offers the aesthetic of concrete without concrete’s weight, drainage complexity, or expense. Succulent planters are the most appropriate application because succulents’ geometric rosette forms contrast beautifully with concrete’s linear minimalism and require only minimal watering, which the sealed concrete exterior can accommodate.
How to get it: Mix a concrete or plaster coating using dry mix concrete or fine plaster of Paris with PVA glue and water to a thick paste consistency (approximately the consistency of thick yogurt). Apply to the exterior of a clean mason jar using a palette knife or gloved hand, working in patches and smoothing to a consistent depth of approximately 3–4mm. Embed a layer of concrete onto the jar’s base as well — this prevents the jar from sliding on smooth surfaces. Allow to cure for 24–48 hours before handling. Sand lightly with fine-grit sandpaper for a smoother surface, or leave as-applied for a more textural artisan quality. Seal with a matte concrete sealer if used outdoors.
Shop The Look
| Product |
|---|
| Fine plaster of Paris powder craft |
| PVA glue bonding primer craft |
| Small succulent plant set 3 varied |
| Palette knife set craft plaster |
| Matte concrete sealer spray |
6. Color-Tinted Glass Mason Jar Vase Collection
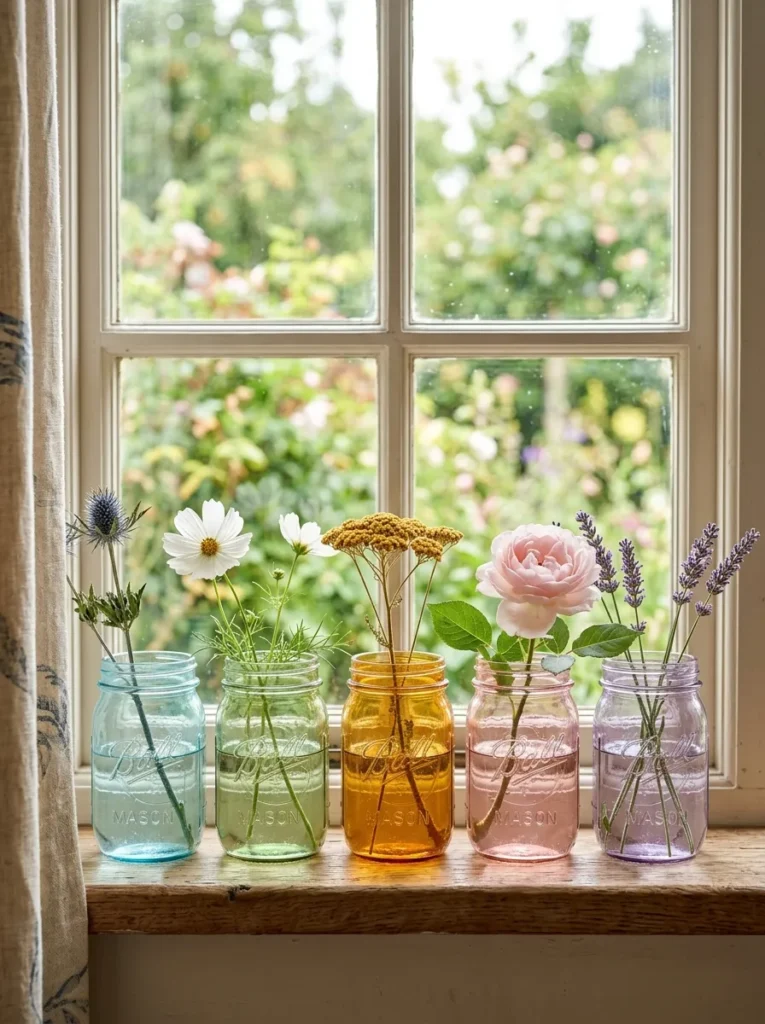
Vibe: The tinted glass jars feel like genuine art glass on a windowsill — the backlit colors glowing in a way that reads as genuinely beautiful rather than painted.
Why it works: Color-tinted mason jars exploit the specific optical property of transparent medium applied to glass — when a transparent colorant (a mixture of Mod Podge and acrylic paint) is applied to the interior of a glass jar, it tints the glass from within rather than coating it from without, producing a color depth that resembles genuine colored art glass rather than painted glass. The key is the transparency of the medium — opaque paint applied to glass reads as painted; transparent tinted medium applied to glass reads as the glass itself being colored. Backlighting (placing the jars on a windowsill) amplifies this effect dramatically, as natural light passes through the tinted medium and creates the luminous, jewel-like quality of genuine stained or art glass.
How to get it: Mix a transparent glass tinting medium: two parts Mod Podge gloss with one part acrylic paint in the desired color — the mixture should remain transparent and slightly runny rather than opaque. Pour a small amount into the clean, dry mason jar and swirl to coat the entire interior surface evenly. Tip upside down over a paper towel to drain excess — a thin, even coat produces the best color quality; thick pooling creates uneven color density. Allow to dry completely (12–24 hours) before handling. The tinted interior is not food-safe or water-resistant for prolonged submersion — use with fresh-cut flower stems in a small amount of water, or with dried stems requiring no water, for longest lasting results.
Shop The Look
| Product |
|---|
| Mod Podge gloss medium sealer |
| Acrylic paint set transparent colors |
| Ball mason jar pint set clear |
| Dried flower stem single assorted |
| White windowsill ledge styling surface |
7. Farmhouse Chalk-Painted Mason Jar Storage Set
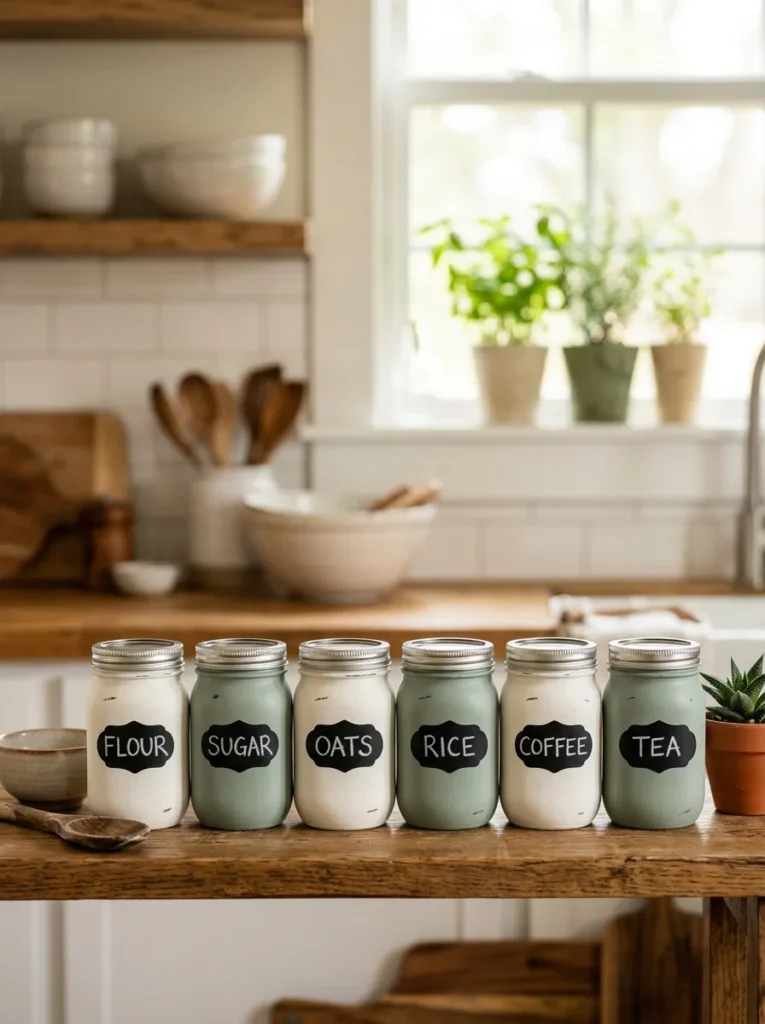
Vibe: The painted pantry set feels like something from a styled cookbook kitchen — the chalk labels and matte finish making a storage system look genuinely considered.
Why it works: Chalk-painted mason jar pantry storage applies the visual design principle of system cohesion — six individually purchased jars in their standard form read as a functional collection; six chalk-painted in two coordinating tones read as a designed system. The chalk paint’s matte surface absorbs light rather than reflecting it, reading as more refined and considered than the glass jar’s standard reflective surface. The alternating two-tone arrangement (warm white and dusty sage) adds visual rhythm to the shelf without introducing a disruptive color contrast — the two tones are close enough in tone family to read as a coherent set while different enough to create visual interest across the shelf line.
How to get it: Apply chalk paint (Annie Sloan Chalk Paint in Old White and Provence, or Rust-Oleum Chalked in Linen White and Aged Gray, or two custom tones of any furniture chalk paint) directly to clean, dry mason jar exteriors — chalk paint bonds directly to glass without priming. Apply two coats using a small foam roller for the smoothest surface, allowing full drying between coats. Apply oval self-adhesive chalkboard labels to the jar front after the chalk paint is fully dry. Write category names on the chalkboard labels using a white chalk marker (not stick chalk — chalk marker produces crisp, permanent-enough writing that doesn’t smear with handling). Seal with a matte furniture wax if the jars will be handled frequently.
Shop The Look
| Product |
|---|
| Chalk paint warm white furniture 250ml |
| Chalk paint dusty sage furniture 250ml |
| Oval chalkboard self-adhesive label set |
| White chalk marker fine tip |
| Matte furniture wax clear |
8. Gold Leaf Mason Jar Candle Holders
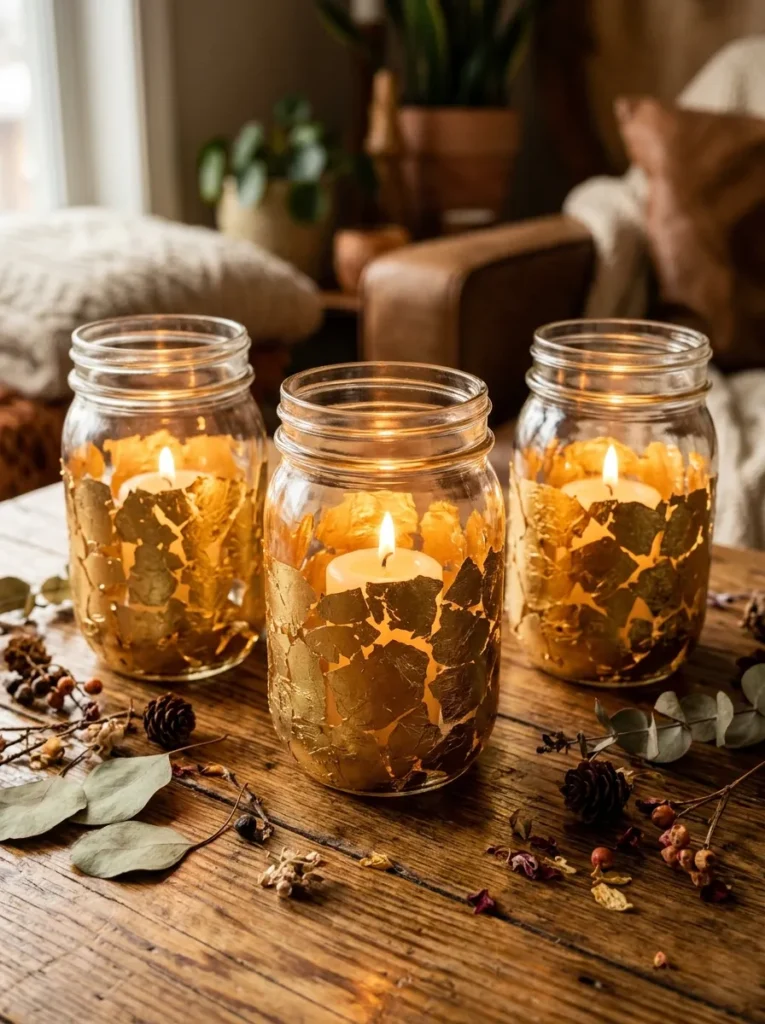
Vibe: The gold leaf jars feel genuinely celebratory — the irregular gold patches catching candlelight in a way that produces a warmth no solid-gold surface could replicate.
Why it works: Gold leaf applied to mason jar exteriors in irregular patches applies the design principle of material fragmentation as visual richness — rather than applying gold leaf as a uniform coating (which would read as gold paint), the intentional gaps between leaf patches allow the glass to show through, creating a mosaic of gold and transparency that catches and scatters candlelight in multiple directions simultaneously. This fragmented reflection is more beautiful and more luxe than a solid metallic surface because the eye reads it as complex and varied — the same principle that makes mosaic tile and craquelure finishes read as more expensive than solid equivalents. With a candle inside, the reflected and transmitted candlelight creates a warm, glowing effect around the jar that is difficult to achieve through any other technique at this material cost.
How to get it: Apply gold leaf sizing (the adhesive medium specific to gold leaf application — do not substitute with other adhesives) to the lower two-thirds of a clean mason jar exterior, in irregular patches with deliberate gaps between applications. Allow the sizing to reach the “tacky” stage (typically 15–30 minutes after application, when the sizing is clear rather than white and pulls slightly at a fingertip touch). Apply sheets of imitation gold leaf (significantly less expensive than genuine gold leaf and visually indistinguishable at this application scale) by placing the sheet over the sized area and pressing gently with a soft brush — the leaf adheres only where the sizing was applied. Brush away excess leaf and seal with a spray varnish to prevent tarnishing.
Shop The Look
| Product |
|---|
| Imitation gold leaf sheets set 25 |
| Gold leaf sizing adhesive brush on |
| Soft gold leaf application brush |
| Spray varnish matte gold seal |
| Small pillar candle set warm white |
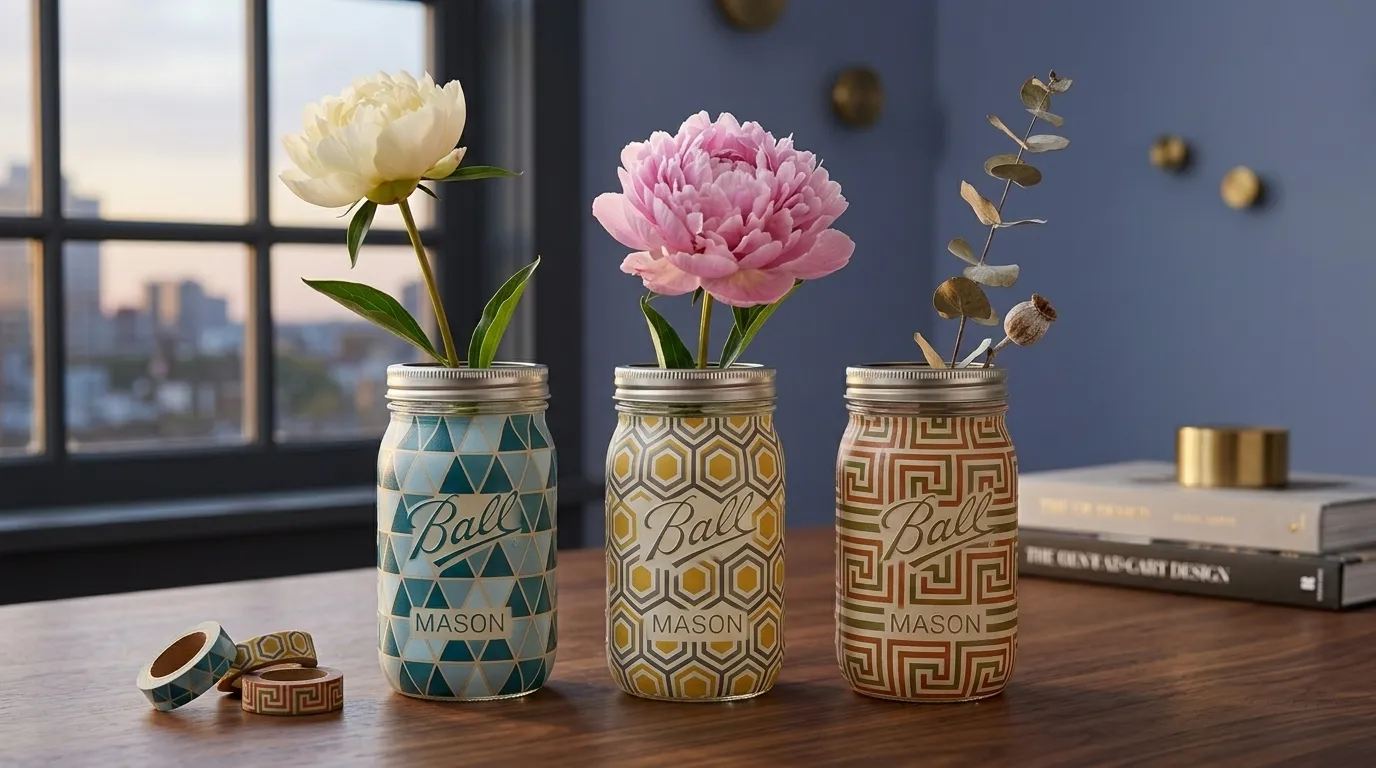
9. Washi Tape Geometric Mason Jar Vases
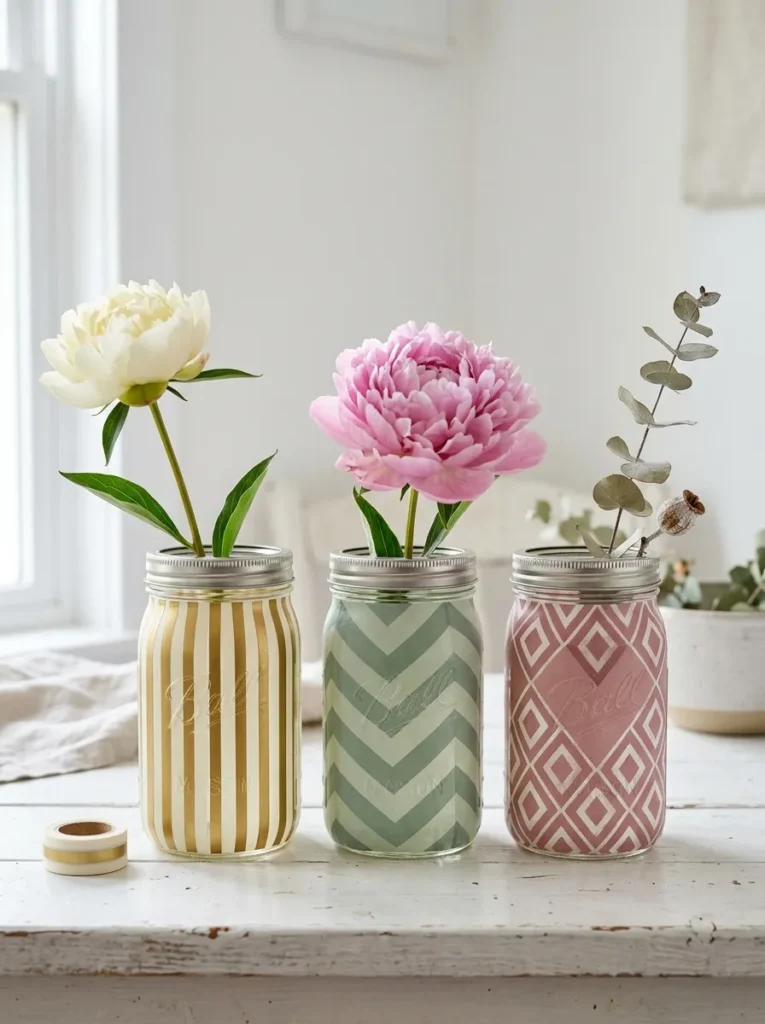
Vibe: The washi tape jars feel graphic and cheerful — a quick-change decoration that transforms the jar as easily as it can be reversed.
Why it works: Washi tape geometric patterns on mason jars apply the design principle of surface pattern through material tape — washi tape’s clean, precise edges and consistent width allow the creation of geometric patterns (stripes, chevrons, diamonds, triangles) with the same visual quality as printed pattern on a commercial vase, achieved through precise physical placement rather than design software. The critical difference from painted geometric patterns is reversibility — washi tape is pressure-sensitive and removes cleanly without residue, meaning the jars can be repurposed for other applications and the pattern changed for different occasions or seasons without any permanent commitment. A coordinated set of three using different patterns from the same color family reads as a designed collection.
How to get it: Plan the geometric pattern on paper before applying tape to the jar — calculate the stripe width, chevron angle, or diamond dimensions to ensure the pattern repeats evenly around the jar’s circumference. Apply tape carefully using a metal ruler as a guide for horizontal and vertical applications, pressing firmly at every stage to prevent lifting at the edges. For diagonal applications (chevrons, diamonds), use a protractor or phone-based angle app to ensure consistent angles across the full jar surface. Trim tape ends cleanly at the jar’s back seam — this is the “join” point where the pattern meets and should be placed at the rear of the jar for a seamless front-face presentation.
Quick Win: A single roll of narrow gold metallic washi tape ($3–5) applied in evenly spaced vertical stripes around a standard pint jar produces a striking gold-striped bud vase in under ten minutes — the quickest luxe jar transformation in this entire list.
Shop The Look
| Product |
|---|
| Washi tape set geometric patterns assorted |
| Gold metallic washi tape narrow |
| Sage green washi tape set |
| Dusty rose washi tape set |
| Ball mason jar pint clear set |
10. Macramé-Wrapped Mason Jar Boho Vases
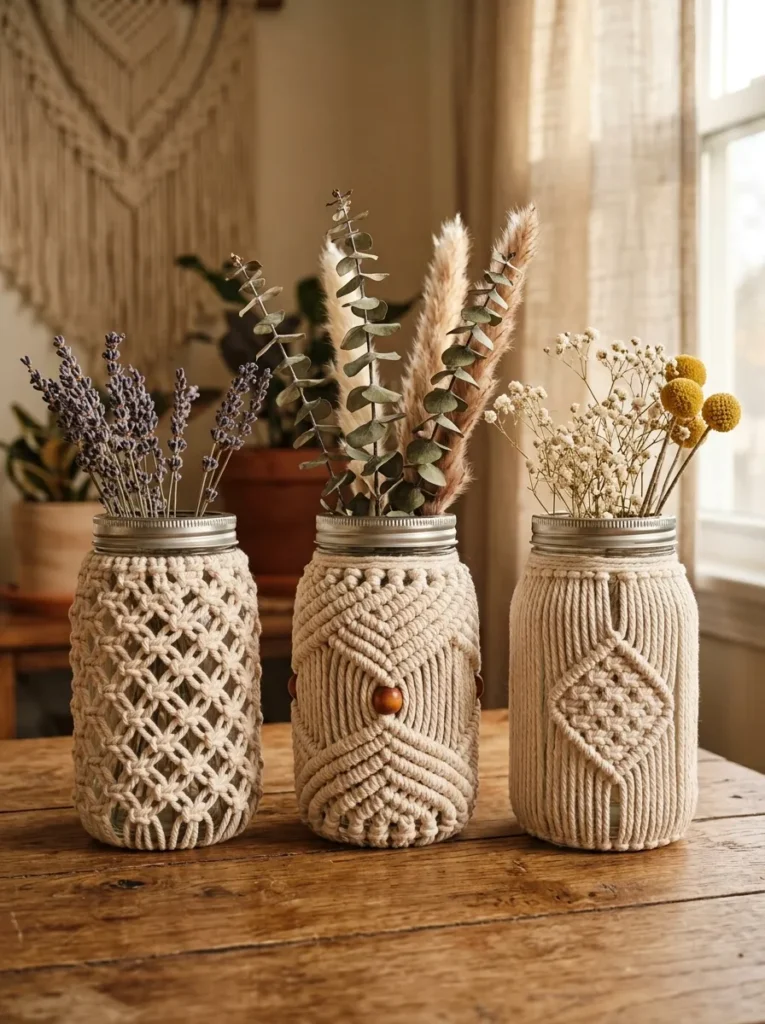
Vibe: The macramé jars feel like a botanical shop display — the knotted cord adding the specific warmth and texture that contemporary boho interiors seek.
Why it works: Macramé cord wrapping on mason jars applies the fiber craft principle of surface structure — unlike simple rope wrapping (which covers the glass in coils), macramé knotwork creates a net-like structure that sits proud of the glass surface, with the glass visible through the gaps between knots and the cord creating a three-dimensional textural layer around the jar. This structural quality is what distinguishes macramé-wrapped jars from simple rope-wrapped ones and produces the more genuinely artisan-quality result. Different knot patterns (square knots, spiral half-hitches, diamond patterns) can be applied to the same jar form to create a family of varied textural finishes from the same base material.
How to get it: Cut eight lengths of 3mm natural cotton macramé cord, each approximately three times the jar’s height. Secure all eight cords around the jar’s neck with a gathering knot or simple winding. Work downward from the neck using the chosen knot pattern: square knots (using groups of four strands) for a net effect, spiral half-hitches (one strand working around the remaining bundle) for a twisted column effect, or alternating square knots at offset intervals for a diamond effect. Secure the final row of knots at the jar base with a gathering wrap. Trim all cord ends to the same length below the jar base for a clean fringe finish.
Shop The Look
| Product |
|---|
| Natural cotton macramé cord 3mm 100m |
| Small wooden bead set cord detail |
| Ball mason jar pint set clear |
| Dried botanical stem set small |
| Warm wood tray display surface |
11. Frosted Lavender Field Mason Jar Lanterns
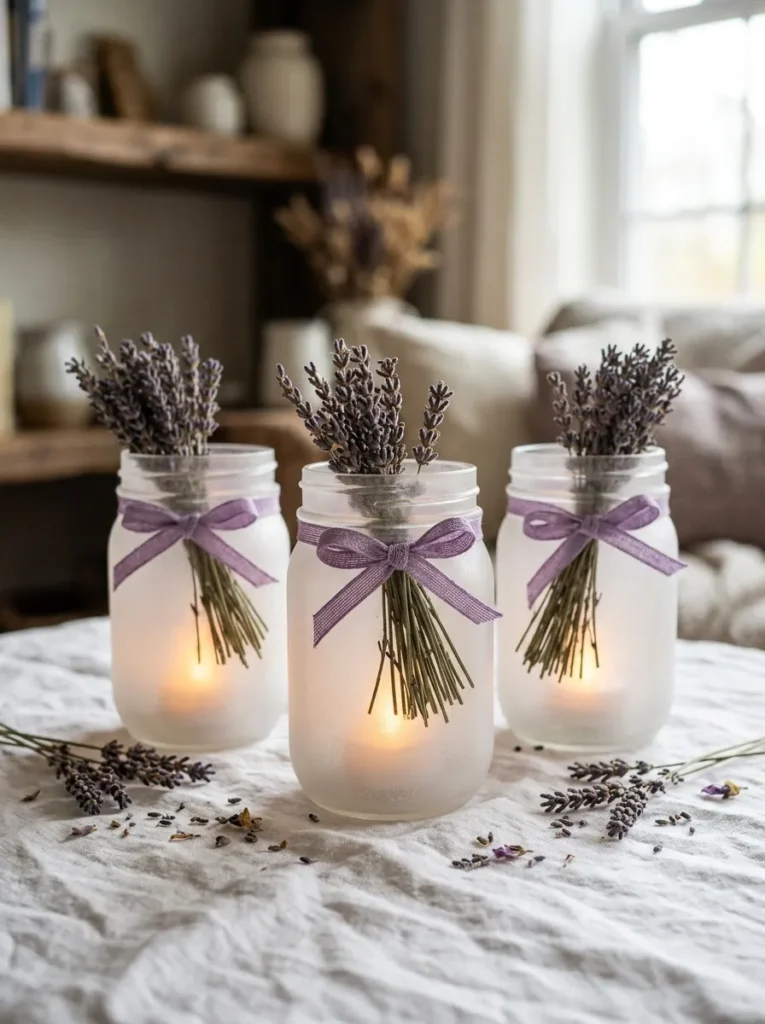
Vibe: The frosted lavender lanterns feel like the best kind of wedding table decoration — elegant, fragrant, and impractical to improve on.
Why it works: Frosted glass spray applied to mason jar exteriors applies the light diffusion principle — a fully transparent glass jar allows a candle inside to produce sharp, concentrated light points rather than the soft, enveloping glow that makes candlelit rooms feel atmospheric. A frosted exterior converts the same candle light source into a diffused, even glow across the entire jar surface — the same effect that frosted globe lights and lanterns with opaque panels produce at significantly higher cost. The dried lavender bundle tied to the neck adds a second sensory dimension (fragrance) to the visual decoration, creating a multi-sensory gift or table decoration that engages the recipient through both sight and smell.
How to get it: Spray the exterior of a clean, dry mason jar with frosted glass spray paint (Rust-Oleum Frosted Glass Spray or Krylon Frosted Glass) in two light coats, allowing each coat to dry before the next — the frosting builds gradually and two light coats produces a better, more even result than one heavy coat. Tie a small bundle of five to seven dried lavender stems to the jar neck using a length of narrow lavender satin ribbon, finished with a simple bow. Place a battery-operated LED tea light inside — real candles inside frosted jars can leave soot marks on the interior surface over time.
Shop The Look
| Product |
|---|
| Frosted glass spray paint Rust-Oleum |
| Dried lavender stem bundle natural |
| Narrow lavender satin ribbon roll |
| Battery LED tea light set warm |
| Ball mason jar wide mouth pint set |
12. Terrarium Mason Jars with Miniature Landscape
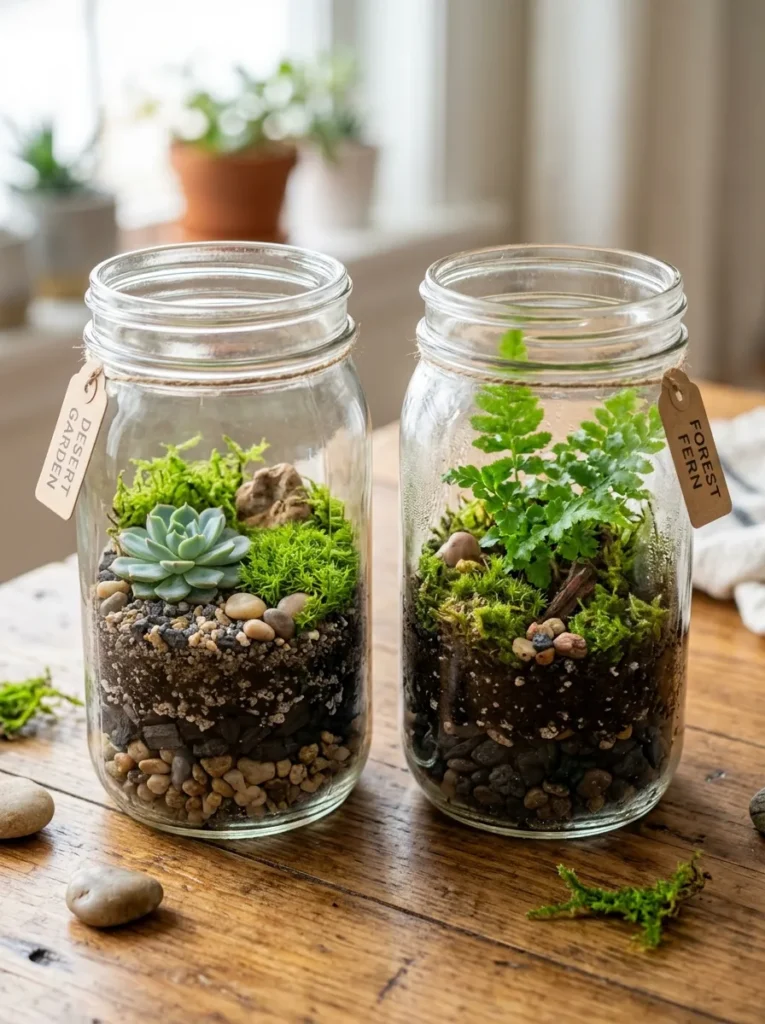
Vibe: The terrarium jars feel like living dioramas — small ecosystems that reward close inspection and communicate the maker’s patience.
Why it works: Terrarium mason jars apply the living object principle — a craft that contains genuinely living plant material has a different quality from any decorative craft because it continues to change and grow, making the gift or object dynamic rather than static. The visible layering through the glass jar (pebbles, activated charcoal, potting mix, moss, plants) communicates the maker’s understanding of what a terrarium requires to function — it reads as knowledge made visible, which elevates it above a purely decorative arrangement. Wide-mouth quart mason jars are the ideal terrarium vessel because their 10cm opening allows sufficient access for planting, their 15cm internal diameter provides adequate root space for small succulent and fern arrangements, and their clear glass allows full viewing of the interior landscape.
How to get it: Place 2–3cm of small pebbles or aquarium gravel at the base for drainage. Add a thin layer of activated charcoal (sold in aquarium supply sections) to prevent bacterial growth. Top with the appropriate growing medium — fast-draining succulent mix for desert terrariums, moisture-retaining potting mix for humid terrariums. Plant the chosen miniature plants using long tweezers for precise placement in the narrow jar opening. Tuck moss around the base of plants to cover the soil surface. For succulents and cacti, top dress with fine gravel or sand. Water sparingly — the enclosed glass reduces evaporation significantly compared to a standard planter.
Shop The Look
| Product |
|---|
| Ball mason jar quart wide mouth set |
| Small pebble drainage layer aquarium |
| Activated charcoal terrarium small |
| Miniature succulent plant set 3 |
| Sheet moss natural terrarium |
13. Dipped Beeswax Mason Jar Candles
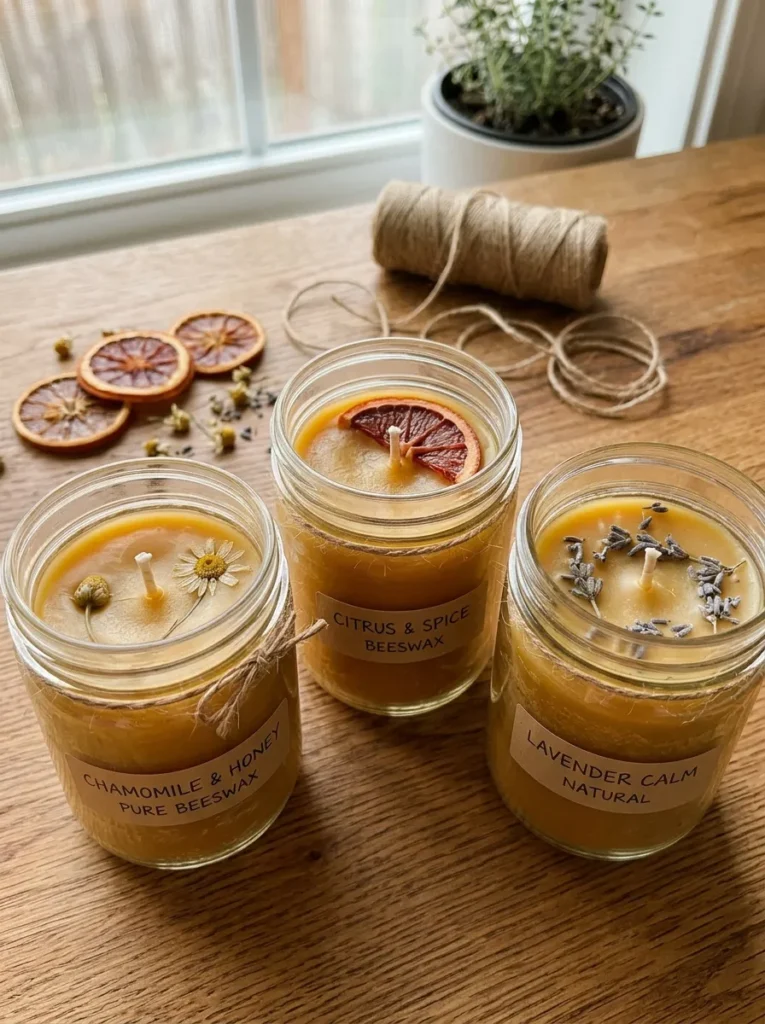
Vibe: The beeswax candles feel naturally luxurious — the amber wax color and honey fragrance communicating a material quality that white paraffin cannot replicate.
Why it works: Beeswax candles poured in mason jars apply the material quality principle — beeswax has an inherent visual quality (the warm amber color, the slight surface texture, the natural honey fragrance it releases when burned) that communicates premium material without any additional finish or decoration. Beeswax is genuinely expensive relative to paraffin and soy (typically 3–4 times the cost per pound) and the recipient who knows candles will recognize the material quality immediately; the recipient who doesn’t know candles will recognize the warmth and fragrance quality when the candle burns. The dried botanical pressed onto the wax surface (a dried citrus slice, a chamomile flower, a sprig of rosemary) adds a visual detail that communicates maker care and is the specific aesthetic signature of artisan botanical candle making.
How to get it: Melt beeswax pellets in a double boiler to 75°C — beeswax requires higher temperatures than soy wax and should never be melted directly over a heat source due to fire risk. Add fragrance oil at 60°C (beeswax carries fragrance less efficiently than soy, so use 6–8% fragrance load). Pour at 65°C into a pre-warmed mason jar with a centered, pre-tabbed cotton wick. Press the chosen dried botanical onto the surface approximately 20–30 minutes after pouring, when the wax has begun to set but the surface is still slightly soft. Allow to cure at room temperature for 48 hours before burning.
Shop The Look
| Product |
|---|
| Beeswax pellets craft candle grade |
| Pre-tabbed cotton wick set wide jar |
| Dried citrus slice set decorative |
| Dried chamomile flower set candle |
| Ball mason jar pint wide mouth |
14. Painted Botanical Pattern Mason Jar Vases
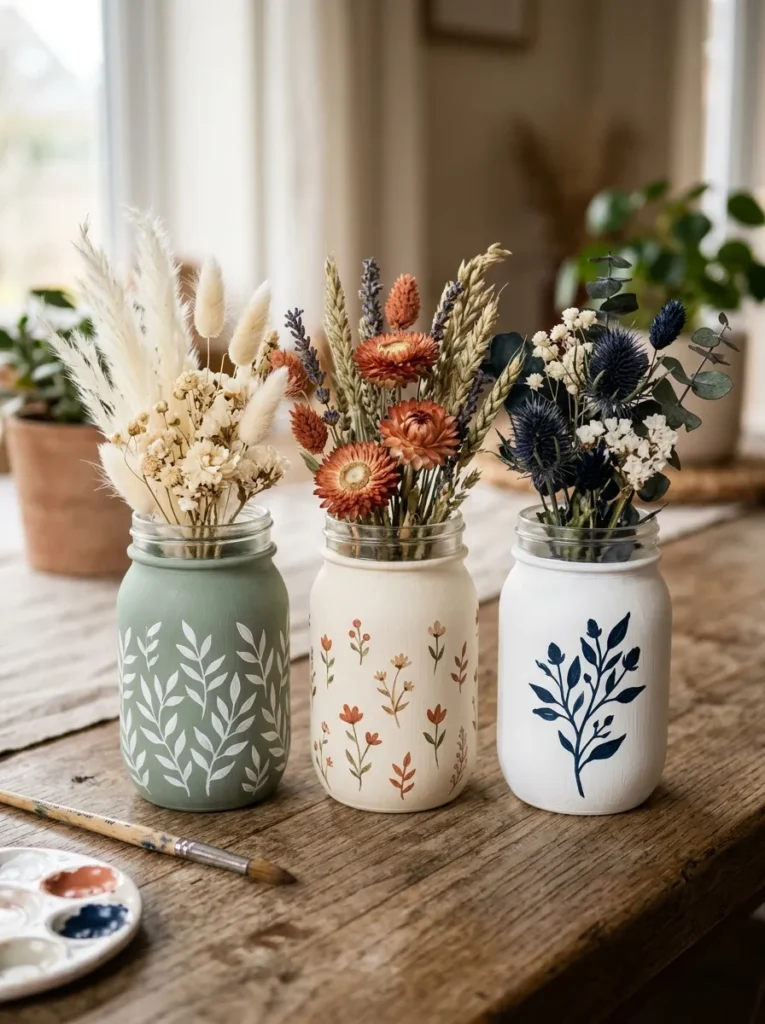
Vibe: The hand-painted botanical jars feel like small ceramic artworks that happen to hold flowers — the maker’s hand visible in every imperfect but considered brushstroke.
Why it works: Hand-painted botanical patterns on chalk-painted mason jar surfaces apply the artistic expression principle at a scale that is achievable without advanced painting skill — botanical motifs (leaves, branches, simple wildflowers) are forgiving subjects for hand-painting because their natural irregularity means slight asymmetry or variation in the painted line reads as natural rather than as technical error. The chalk paint base provides a matte, slightly absorbent surface that accepts acrylic detail paint directly without requiring a separate sealer between base coat and detail work, simplifying the technique. The consistency of the base color family across three jars (with different pattern types) creates a set rather than three unrelated painted objects.
How to get it: Apply chalk paint base coats in the chosen colors (two coats, foam roller application for the smoothest base surface). Allow to cure for four hours. Plan the botanical motif on paper first — trace simple leaf shapes, wildflower silhouettes, or branch forms at the correct scale for the jar. Transfer the design to the jar surface lightly using chalk, then paint over the chalk marks with a fine acrylic detail brush in the contrasting color. Keep brushstrokes loose and confident rather than tentative and labored — slower, more careful brushwork paradoxically produces less natural-looking botanical marks than quicker, committed strokes. Seal the completed painted surface with two coats of matte Mod Podge or a matte varnish spray.
Shop The Look
| Product |
|---|
| Chalk paint set sage cream white 3 |
| Acrylic paint detail set botanical |
| Fine brush set detail 2 4 round |
| Matte Mod Podge sealer finish |
| Dried flower small arrangement set |
15. Wedding Centerpiece Mason Jar Collection — String Light Edition
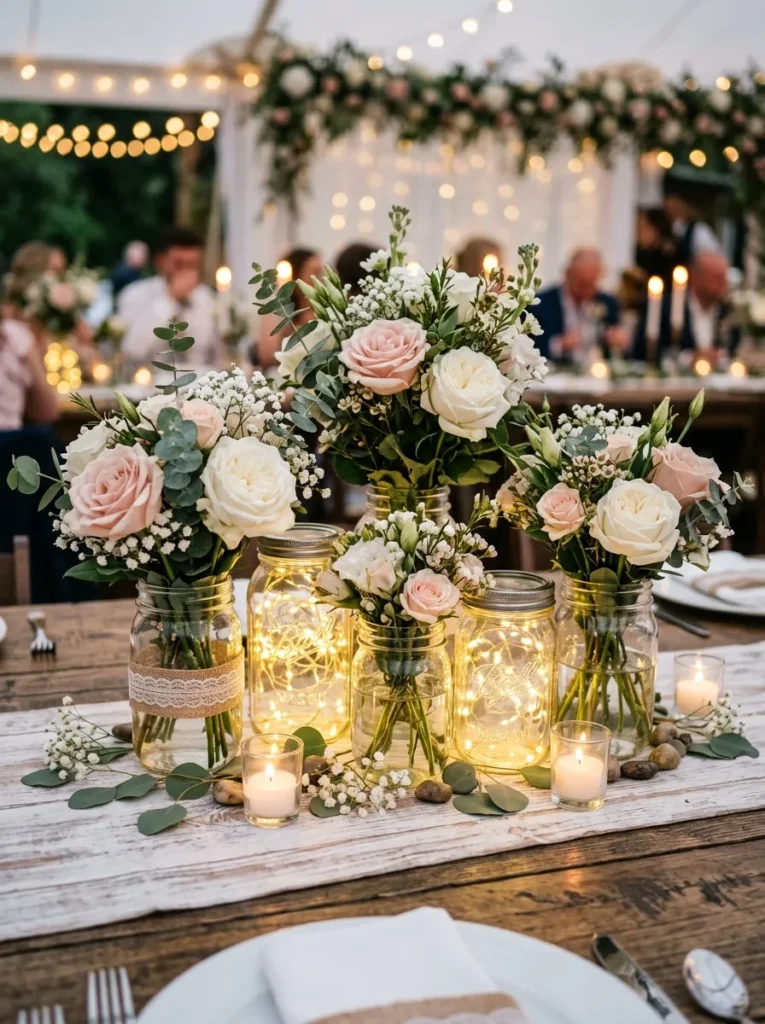
Vibe: The wedding centerpiece cluster feels warm, romantic, and genuinely beautiful — the fairy-light jars and flower jars working together to create a table decoration that costs a fraction of professional floristry while reading as genuinely designed.
Why it works: A mixed-function mason jar cluster (some holding flowers, some holding fairy light strings) applies the lighting design principle of distributed warm point sources — rather than a single large candle or a tall centerpiece that provides one focal light source, a cluster of five jars creates multiple small pools of warm light across the table surface, producing a more enveloping, romantic ambient quality. The two light-containing jars with fairy string lights provide continuous warm illumination that real tea lights cannot (no flame management during the event), while the three flower jars provide the botanical freshness and fragrance that lighting alone cannot. This hybrid function makes the centerpiece both more beautiful and more practical than either a purely floral or purely illuminated approach.
How to get it: Select five mason jars in at least three different sizes (two half-pint, two pint, one quart) for the height variation that makes a cluster visually interesting rather than uniform. Into three of the jars, place small hand-tied bouquets in the chosen wedding color palette — white garden roses, blush spray roses, and eucalyptus stems work for three-stem arrangements that fill a pint jar at the correct scale. Into the remaining two jars, coil a 2-metre battery-operated warm-white LED fairy light string (the micro-LED style with thin wire, not bulb string lights — these coil compactly and produce a more delicate light effect). Arrange the cluster with the tallest jar at the back and the shortest at the front, ensuring both light-containing jars are visible.
Shop The Look
| Product |
|---|
| Ball mason jar set assorted sizes |
| Battery fairy light 2m warm white micro |
| White garden rose fresh or silk |
| Fresh eucalyptus bundle wedding |
| White-washed wood table runner |
How to Start Your Mason Jar Craft Practice
The single best first move before beginning any mason jar craft project is completing the mercury glass technique on one test jar before committing to a full set. The mercury glass effect (Idea 1) is both the most impressive transformation in this list and the most technique-sensitive — the water misting level, the distance of the spray application, and the timing all affect the final mottled pattern in ways that are better understood through a single test jar than through any written instruction. A successful test jar (achievable in under twenty minutes) provides both the technique confidence and the specific learned adjustments (more or less misting, closer or further spray distance) that the full set requires for consistency.
The most common mistake in mason jar crafting is using thin-walled jars from non-specialist sources (discount stores, some supermarket own-brand jars) rather than Ball or Kerr brand standard mason jars. Thin-walled jars produce less satisfying results in etching (the glass is thinner and less responsive to etching cream), inconsistent results in painting (the surface quality is less even), and practical safety concerns in heated applications (candle heat in a thin-walled jar presents a cracking risk that thick-walled Ball jars do not). Ball wide-mouth pint jars in a standard 12-pack ($12–16 per pack) are the correct starting specification for all techniques in this list.
Three specific items under $50 that enable the broadest range of mason jar crafts: a can of Rust-Oleum Metallic Silver spray paint ($7–10, enabling the mercury glass technique and gold-dipped variations); a jar of Armour Etch glass etching cream ($14–18, enabling permanent monogram and pattern etching on any glass surface); and a bottle of Mod Podge Gloss medium ($6–9, enabling the color-tinted glass technique, painted botanical sealant, and pressed flower bookmark applications across multiple ideas). These three items combined for under $40 enable Ideas 1, 4, 6, and 14 entirely, and partially enable Ideas 9 and 12.
A simple single-technique mason jar project (mercury glass vases, gold-dipped holders, washi tape geometric) takes 30–60 minutes plus drying time for a set of three, with materials costing $15–30 total. A mid-complexity project (concrete coating, macramé wrapping, botanical candles, terrarium) takes 2–4 hours for a set of three, with materials costing $25–55. The wedding centerpiece collection (Idea 15) requires the most planning and sourcing time (fresh flowers must be sourced close to the event) but the most material cost-effective execution — a full 10-jar centerpiece installation for a table of ten typically costs $45–85 in all materials versus $150–350 for an equivalent professional floristry arrangement.
Frequently Asked Questions About Mason Jar Crafts
What size mason jar is most versatile for crafts?
The wide-mouth pint mason jar (16oz, approximately 10cm diameter and 12cm height) is the most universally useful size for craft projects because it provides the ideal proportions for vases, candle holders, drinking glasses, and storage — wide enough to hold a meaningful number of stems or a small candle, tall enough to display contents attractively, and small enough to be used in groups without overwhelming a surface. The wide-mouth format specifically is critical for craft applications because it provides full access to the interior for painting, planting, and lighting installations that the regular-mouth format’s narrower opening prevents. The quart jar (32oz) is best for terrarium applications where interior depth and planting space matter; the half-pint (8oz) is best for small gift presentations and single-stem bud vases.
Which paint adheres best to glass mason jars?
Chalk paint adheres directly to glass without priming and produces a matte finish that reads as genuinely considered — it is the most accessible and versatile option for full exterior coverage applications. Acrylic paint with a glass-specific bonding medium (often labeled “multi-surface” acrylic, not standard artist’s acrylic) adheres well for painted pattern and detail work on clean glass. Spray paint in metallic or frosted formulations (Rust-Oleum Metallic and Frosted Glass ranges specifically) adheres to glass with no priming required. The only paints that reliably fail on glass without specialized priming are standard water-based emulsion paint (formulated for porous surfaces) and standard oil-based paint (which requires an acid etching primer on glass for reliable adhesion). Sealing any painted glass surface with a compatible matte varnish or Mod Podge extends paint adhesion and resistance to handling significantly.
Are mason jar crafts food-safe after painting or etching?
The answer depends on the specific technique: glass etching (Idea 4) produces a permanently frosted surface that is food-safe and dishwasher-safe on the exterior of drinking glasses because the etching cream modifies the glass surface itself rather than applying a coating. Interior paint applications (mercury glass, color-tinted glass) using metallic spray paint or acrylic-Mod Podge mixtures are not food-safe for liquid contact — jars with interior coatings should be used for display, candles, or dry storage rather than for food or liquid consumption. Exterior paint applications (chalk paint, concrete coating, gold dipping) are safe for use as vases with water if the paint is fully cured and the interior glass is undamaged. As a general rule: if the interior glass surface is uncoated and intact, the jar can hold food and liquid; if any coating has been applied to the interior, do not use for food or drink.
How do you make mason jar crafts look high-end rather than rustic?
The distinction between a high-end mason jar craft and a rustic one comes from four specific choices: material quality (natural fiber rather than synthetic, real botanical rather than artificial, quality paint rather than craft-store acrylic), finish precision (a clean horizontal boundary line on gold-dipping, a level and consistent rope wrap, a precisely applied etching stencil), context (styled on marble, natural wood, or linen rather than on a plain table or craft mat for photography and display), and restraint (three objects in a considered grouping rather than six objects competing for attention). The same mercury glass technique on a Ball mason jar styled on a marble surface with a single dried stem reads as boutique homeware; the same technique on a mismatched jar with a mixed floral arrangement reads as craft. The object is the same — the decisions around it determine how it reads.
What is the most impressive mason jar craft for a gift?
The etched monogram drinking glass set (Idea 4) is consistently the most impressive gift application because it produces a result that recipients overwhelmingly describe as “I can’t believe you made this” — the frosted etching is literally indistinguishable from professionally produced personalized glassware at first glance, and the permanence of the finish (dishwasher-safe, non-fading) communicates a durability that most craft gifts lack. The mercury glass vase collection (Idea 1) is the most impressive purely decorative gift application because its visual quality is genuinely comparable to antique mercury glass that sells for $30–80 per piece in vintage shops, produced here for under $5 per jar. For food lover recipients, the beeswax botanical candles (Idea 13) with handwritten labels and dried botanical surface decoration read as a premium artisan candle ($28–35 commercial equivalent) achieved for under $8 per candle in materials.
Ready to Start Making Your Luxe Mason Jar Crafts?
These 15 ideas move through every dimension of what makes a mason jar craft genuinely surprising in its quality — from the antique visual depth of mercury glass vases, to the designer material weight of concrete-coated planters, to the professional personalization of etched monogram drinking glasses, to the romantic warmth of fairy-light wedding centerpieces. Starting with that one test jar — the mercury glass experiment in a well-ventilated corner, spray can in hand, the water misting bottle ready — is not a small beginning. It is the beginning that gives every subsequent idea in this list its foundation, because the technique confidence that a successful first test jar produces is the difference between making the full set with conviction and stopping at one uncertain attempt. Order the jars and the metallic spray this week, clear a ventilated space this weekend, and mist and spray one test jar before committing to the technique. When the mottled silver surface reads as genuine antique mercury glass and not a craft project, every other idea in this list becomes possible. Pin the techniques that match the surfaces and recipients in your life, and return to the more time-intensive concrete and macramé ideas when the simpler transformations have proven what the mason jar can become in practiced hands.