15 Ladybug DIY Ideas Perfect for Adult Crafters
Ladybug DIY crafts for adults are handmade decorative objects, wearable accessories, garden art, and functional home pieces built around the ladybug’s distinctive visual language — the round form, the red-and-black palette, the spotted pattern, and the natural botanical associations of a beneficial garden insect — executed with the material sophistication, design restraint, and craft technique that distinguishes adult making from childhood classroom projects. This article gives you 15 ladybug DIY ideas across home decor, garden art, wearable craft, seasonal display, and functional accessories so you can work with this beloved motif in ways that read as genuinely designed rather than novelty-crafted.
There is a particular design challenge in working with a motif as immediately recognizable as the ladybug — the risk of producing something that reads as a children’s party favor rather than a considered adult craft. The opportunity is to use the ladybug’s inherently strong visual elements (the bold red-black contrast, the circular form, the repeating spot pattern) as a legitimate design vocabulary rather than a decorative shortcut. Done with good materials, thoughtful technique, and compositional restraint, a ladybug-motif craft piece can occupy a shelf, a garden, or a wrist with the same quiet confidence as any other well-designed natural object. Here are 15 ideas worth saving — and stealing.
Why Ladybug DIY Crafts Work So Well for Adults
Ladybug crafts for adults draw from multiple converging craft traditions that give them genuine design legitimacy. The use of insect motifs in decorative arts has a long and distinguished history — from the scarab beetle in Egyptian decorative tradition to the dragonfly in Japanese art glass to the butterfly in Tiffany’s Art Nouveau studio, insects have been treated as legitimate subjects for high-quality decorative work across cultures and centuries. The ladybug specifically has been used in folk art traditions across Europe (German Marienkäfer folk painting, Polish wycinanki paper cutting, Swedish Midsommar decoration) in ways that translate naturally into contemporary adult craft practice.
The material palette for sophisticated ladybug crafts is specific and important. Air-dry clay and polymer clay in crimson and matte black create the rounded, smooth forms that reference the insect’s actual body structure. Resin casting in red with embedded black dots produces jewelry and decorative pieces with the depth and translucency of genuine semi-precious stone. Glass painting on wine glasses, terrarium panels, and mosaic pieces exploits the ladybug’s bold graphic pattern at the scale where it becomes genuinely architectural rather than merely decorative. Metallic paints in deep red and matte black on ceramic, terracotta, and stone provide the material richness that differentiates adult craft from children’s work. Natural materials — wood rounds, river stones, gourd forms, birch bark — provide organic bases that contextually connect the ladybug motif to its natural garden environment.
The cultural moment is particularly well-suited to ladybug craft work. The broader craft revival — driven by the mental health benefits of focused manual activity, the sustainability appeal of handmade objects, and the aesthetic shift toward natural and organic motifs in home decor — has created a context in which ladybug-motif craft work reads as part of the cottagecore and botanical design movements rather than as a children’s activity. A stone-painted ladybug placed among garden succulents or a resin ladybug pendant worn with natural fiber clothing reads as on-trend rather than novelty.
Small-space crafters and apartment dwellers particularly benefit from ladybug DIY projects because the insect’s small natural scale means that most projects require minimal workspace, minimal material investment, and produce compact finished pieces — a set of ladybug painted river stones can be produced on a kitchen table in an evening and stored in a small container when complete.
Style at a Glance
| Element | Detail |
|---|---|
| Philosophy | The ladybug’s bold visual language used with material sophistication and compositional restraint |
| Key Materials | Polymer clay, air-dry clay, resin, river stones, terracotta, glass paint, wire, natural wood |
| Key Colors | Crimson red, matte black, cream white, deep forest green, warm gold, natural stone grey |
15 Ladybug DIY Ideas Perfect for Adult Crafters
1. Polymer Clay Ladybug Earrings with Gold Wire Detail
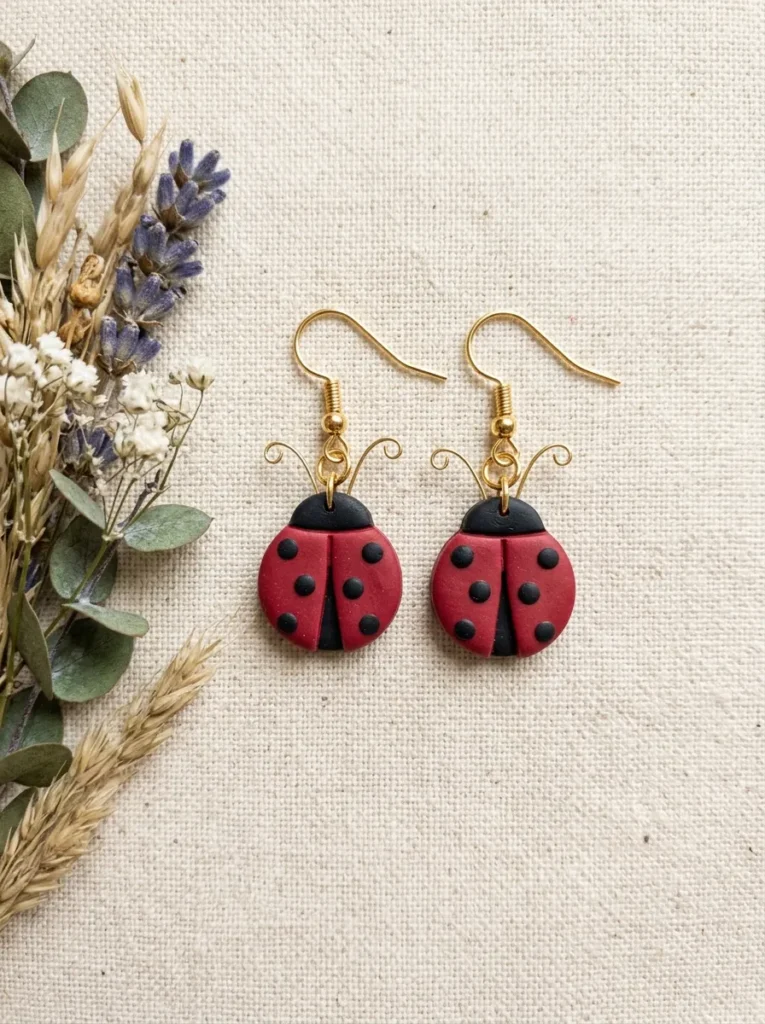
Vibe: The earrings are artisan — small polymer clay ladybug earrings with gold wire antennae and a matte finish read as handmade jewelry with genuine material intention rather than novelty accessories, where the restraint of the palette (crimson, black, gold) elevates the motif to wearable design.
Why it works: Polymer clay is the ideal material for ladybug jewelry because its smooth, rounded surface after baking and sanding mimics the elytra (wing cover) of an actual ladybug — the high-gloss, dome-shaped surface that gives the insect its characteristic appearance. The key to an adult-quality result is in the finishing sequence: after baking, sand progressively through 400, 800, and 1200-grit sandpaper, then buff with a soft cloth for a smooth matte finish, or apply a thin gloss varnish coat for the wing-cover sheen. The gold wire antennae detail is the finishing touch that moves the piece from children’s craft to adult jewelry — fine 24-gauge wire (approximately 1-inch length per antenna, curled at the tip with round-nose pliers) provides the correct scale and material quality.
How to get it: Condition a small amount of crimson polymer clay (Sculpey Premo in red, $3–$5 for a 2-ounce block) and form two matching round domes approximately 3/4-inch diameter. Press a gold-filled jewelry eye pin through the top of each dome before baking (this becomes the earring bail). Mark the wing division line with a craft knife. Bake according to clay package instructions (typically 275°F for 15–30 minutes). After cooling, paint the head section and spots in matte black acrylic. Thread fine gold wire through the eye pin loop for antennae, curl the wire tips with round-nose pliers, and attach gold ear hooks.
Quick Win: Pre-made polymer clay ladybug forms ($8–$15 for a set of 10 from craft suppliers) can be sanded, painted, and finished with wire antennae and gold findings in under an hour — converting a craft supply item into finished jewelry without the clay-forming step.
Shop The Look
- Crimson polymer clay Sculpey Premo red
- Gold filled ear hook jewelry findings
- Fine gold wire 24 gauge jewelry craft
- Round nose pliers jewelry making
- Matte black acrylic paint small tube
Also view: 14 IKEA KALLAX TV Unit Hacks for Modern Homes
2. River Stone Ladybug Garden Markers
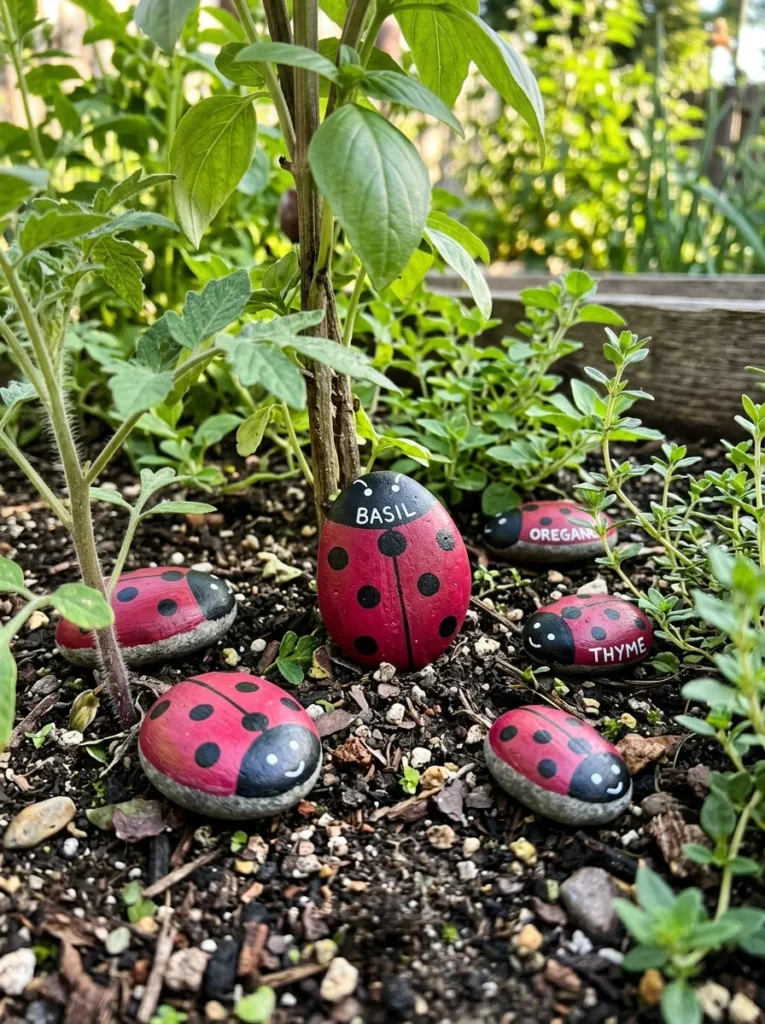
Vibe: The garden is natural — painted river stone ladybugs among garden plants read as a discovered presence rather than a placed decoration, where the stone’s organic form and the ladybug’s natural garden association create a decoration that belongs in the garden rather than merely visiting it.
Why it works: River stones are the optimal base for ladybug garden craft because their naturally rounded oval or circular form closely resembles the actual body shape of a ladybug — the stone’s natural form does half the design work before any paint is applied. Smooth, dense river stones (sourced from stream beds, garden centers, or landscape suppliers) have a surface that holds acrylic paint well without priming when the stone is clean and dry. The craft technique that most improves the garden stone’s finished quality is layering: a base coat of crimson, followed by a second crimson coat after drying, followed by detailed black markings in a fine brush — this three-coat approach prevents the dark stone color from showing through the red and ensures the finished color reads as richly saturated even in outdoor light.
How to get it: Collect or purchase smooth river stones in varied sizes ($5–$10 for a bag of mixed smooth stones from a garden center). Clean with soap and water. Apply two coats of outdoor-rated crimson acrylic craft paint (allow full drying between coats). Paint the head section in matte black, add the wing division line, and add spots using the blunt end of a round toothpick dipped in black paint for consistent circular dots. Seal with two coats of clear outdoor-rated sealant ($4–$8 per can) to weatherproof for garden use. Letter plant names on adjacent stones with a white paint marker.
Shop The Look
- Smooth river stone bag garden center
- Outdoor acrylic craft paint crimson red
- Matte black outdoor acrylic paint
- Clear outdoor sealant spray matte
- White paint marker fine tip outdoor
3. Resin Ladybug Pendant Necklace with Botanical Inclusion
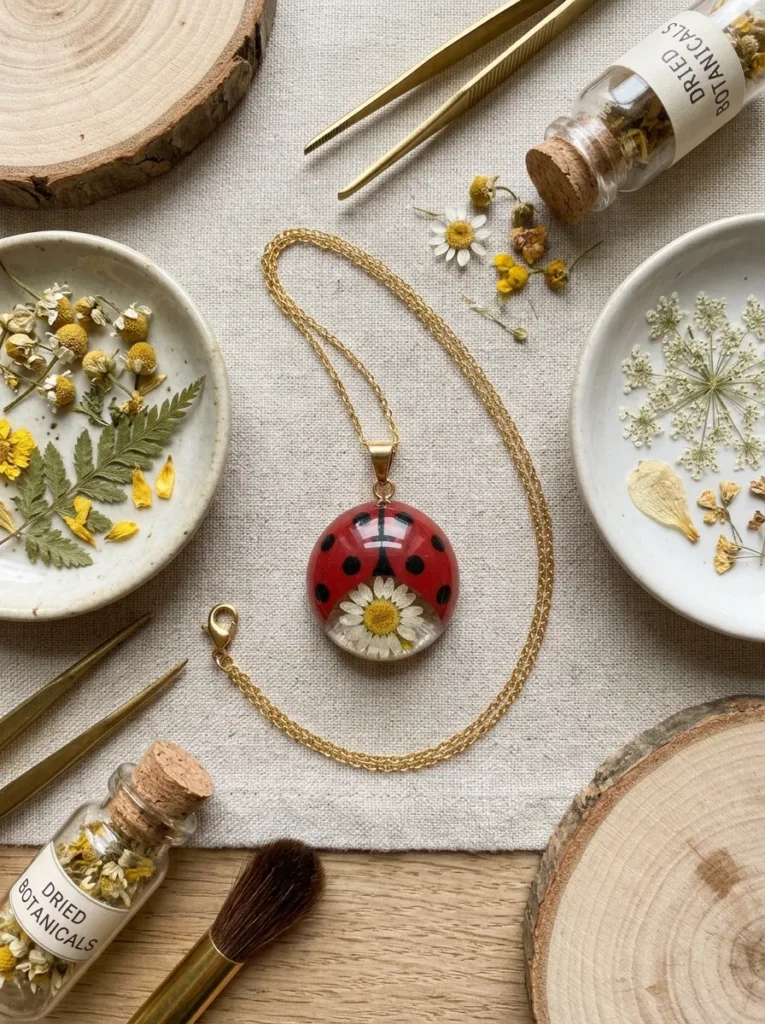
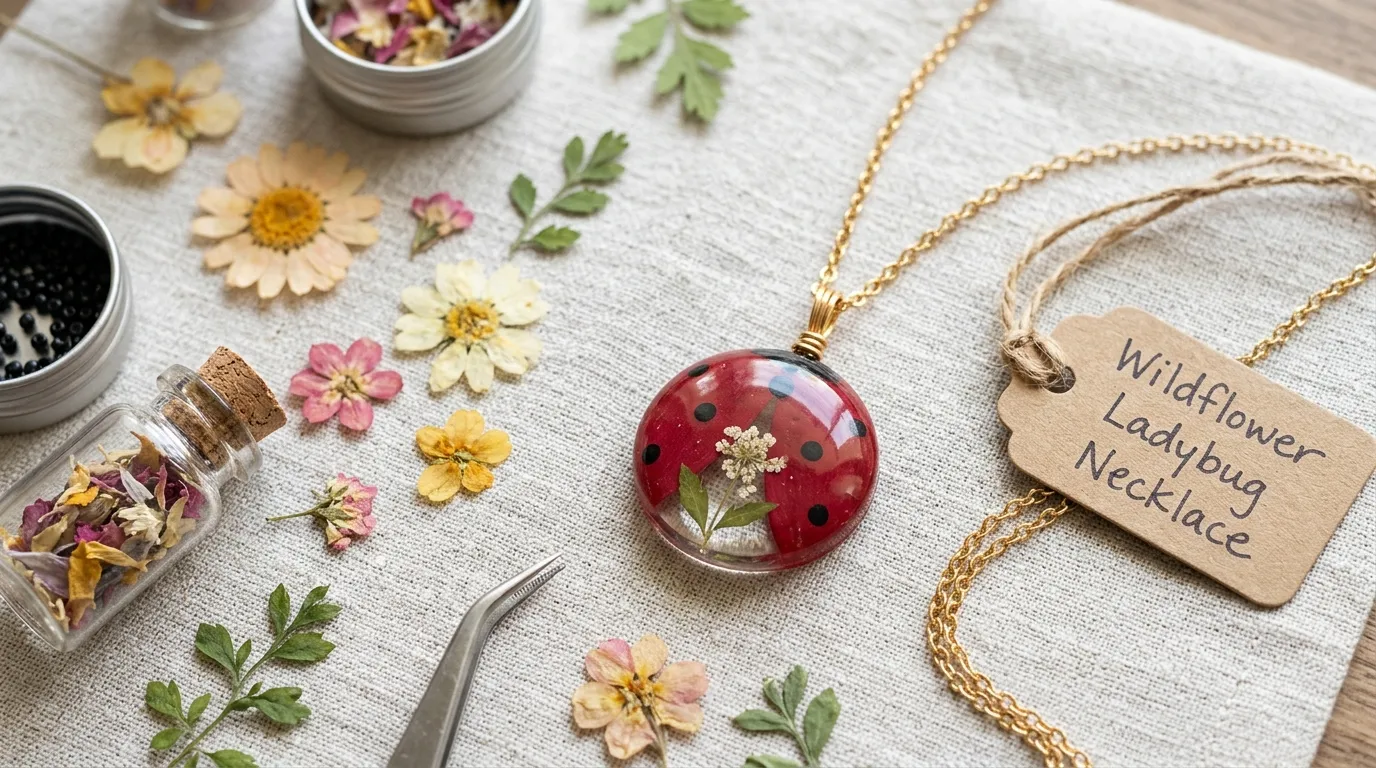
Vibe: The pendant is delicate — a resin ladybug pendant with a botanical inclusion visible beneath the ladybug form creates a jewelry piece with the specific magic of something preserved — a tiny world of dried flower and insect captured in clear mineral depth.
Why it works: The botanical inclusion resin technique works for ladybug jewelry because it contextualizes the insect motif within its natural environment — the ladybug appears to sit on a real dried flower, suspended in time within the clear resin. This contextual placement gives the piece a narrative quality that a plain ladybug motif lacks, and the actual preserved botanical material (a real dried flower, a real leaf, or a real pressed petal) provides the material authenticity that makes the piece read as genuinely made with intention. The domed resin form mimics the ladybug’s elytra shape, and the translucency of the base layer (through which the botanical is visible) creates a depth that painted or clay surfaces cannot achieve.
How to get it: Use a half-sphere silicone mold in the desired pendant size (20–25mm diameter works well for pendants). Pour a thin base layer of clear UV resin or two-part epoxy resin, position a small dried flower face-down on the clear layer while still uncured, and cure. Pour a second clear layer over the flower and cure. Pour a final layer of red-tinted resin mixed with a small amount of red pigment powder to the 60–70% depth of the mold, leaving the center slightly lower for visual effect. Add black dot details with a fine craft brush and black resin pigment after the red layer is fully cured. Add a bail finding and chain.
Shop The Look
- Half sphere silicone mold 25mm pendant
- UV resin clear jewelry grade
- Red resin pigment powder
- Pressed dried flower set small
- Gold filled pendant bail and chain set
4. Terracotta Pot Ladybug Planter Stack
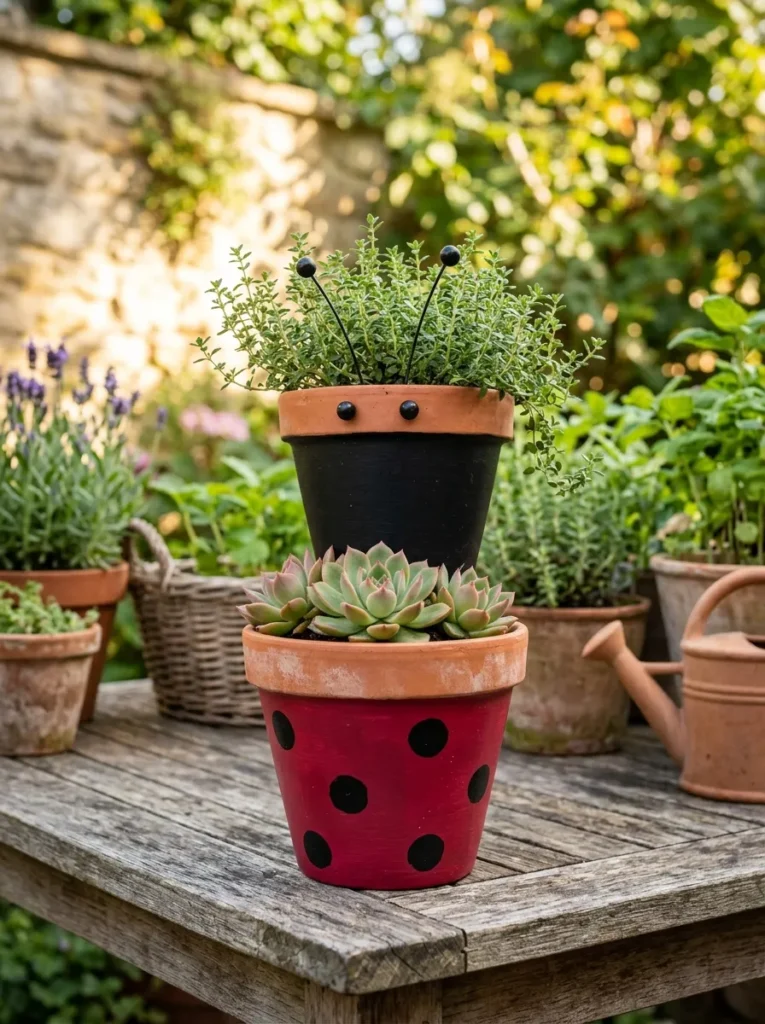
Vibe: The planter is charming — a ladybug terracotta pot stack where the stacked pots read as body and head creates a garden or windowsill display piece that is simultaneously a functional planter and a dimensional sculpture, where the craft transforms familiar materials into a composed character.
Why it works: The terracotta pot ladybug stack works through the same principle as trompe l’oeil — the deliberate arrangement of ordinary objects (pots of different sizes) into a recognizable form that the viewer discovers rather than being told. Two terracotta pots in a 3:1 size ratio (a 6-inch body pot and a 2-inch head pot) create the correct ladybug body-to-head proportion. The terracotta’s warm orange-clay tone showing at the pot rims (left unpainted) adds an organic quality that completely painted pots lack — the material’s own color becomes part of the composition.
How to get it: Choose a standard 6-inch terracotta pot (body) and a 2-inch pot (head). Apply two coats of crimson outdoor acrylic to the 6-inch pot body, leaving the top 1 inch and the rim unpainted. Add black spots using a round brush or the eraser end of a pencil dipped in black paint. Paint the 2-inch pot entirely in matte black. Stack the black pot on top of the red pot (the drainage hole of the upper pot naturally nestles on the soil of the lower pot’s planting). Plant a small succulent or herb in each pot. Apply outdoor sealant to all painted surfaces.
Shop The Look
- Terracotta pot 6 inch classic drainage
- Terracotta pot 2 inch mini set
- Crimson outdoor acrylic paint
- Small succulent plant assortment live
- Outdoor matte sealant craft spray
5. Wire and Bead Ladybug Garden Stake
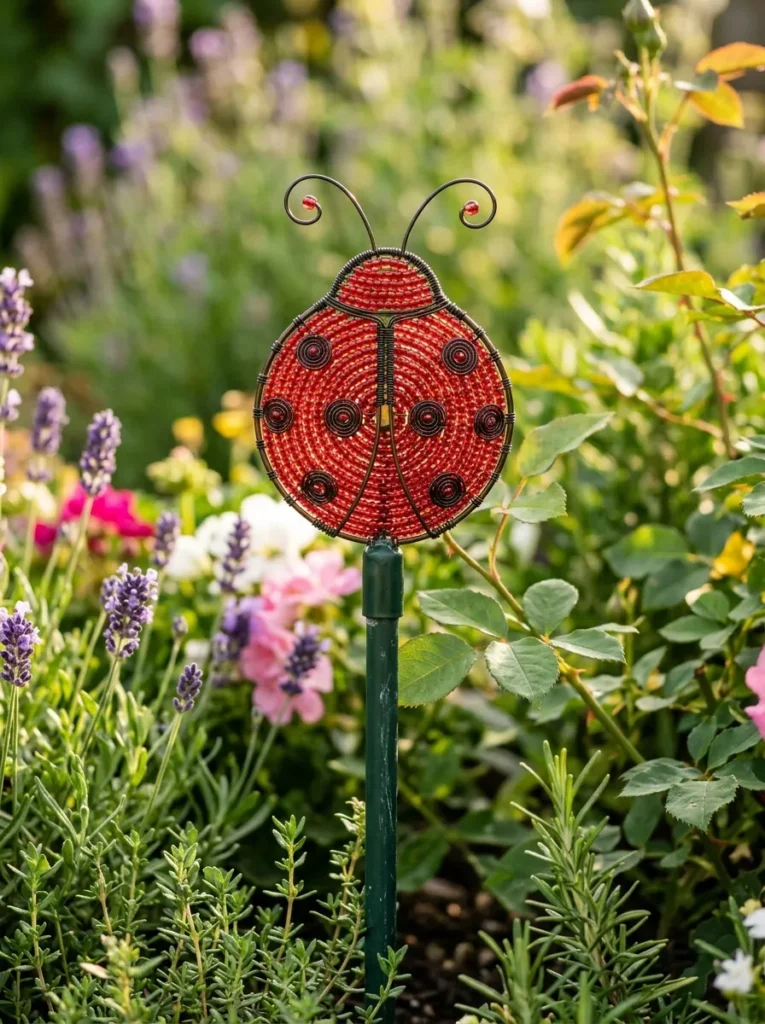
Vibe: The garden stake is delicate — a wire and bead ladybug garden stake catching light through translucent red seed beads creates a garden accent piece with the ethereal quality of stained glass at garden scale, where light becomes part of the craft.
Why it works: Wire and bead construction is specifically effective for the ladybug form because the round body shape is achievable through a simple circular wire frame, and the bead-filling technique creates a translucent surface that changes quality dramatically as the light direction shifts throughout the garden day. Red seed beads (glass, not plastic) have a light transmission quality that paint on stone or clay cannot approach — in backlit conditions, the beaded body glows with the specific depth of red stained glass. The wire antennae (fine 26-gauge black-coated wire, approximately 3 inches per antenna, curled at the tip with round-nose pliers) provide the element of movement that differentiates a wire craft piece from a static object — antennae sway slightly in garden breeze, giving the piece a kinetic life that other materials lack.
How to get it: Create a circular frame from 18-gauge red-coated wire (approximately 10-inch length bent into a 2.5-inch diameter circle, ends twisted together to secure). Fill the frame interior with red glass seed beads threaded on thin wire strung across the frame in parallel passes. Add a black wire circle for the head (approximately 1-inch diameter), wire spots onto the body frame at the correct positions, and add a wing division line in black wire. Mount on a 12-inch piece of 18-gauge green garden wire. Insert into the garden at stake depth.
Shop The Look
- Red glass seed bead pack craft jewelry
- 18 gauge red coated wire roll craft
- Black coated wire 26 gauge fine
- Round nose pliers wire craft set
- Green garden wire 18 gauge roll
6. Mosaic Ladybug Stepping Stone
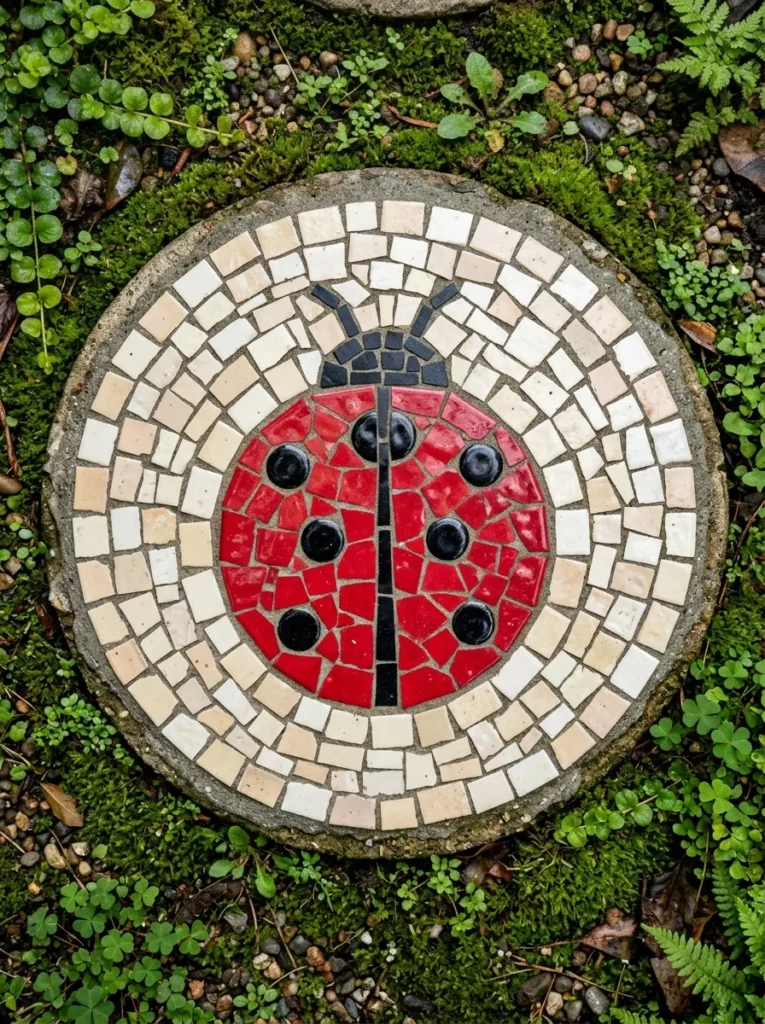
Vibe: The stepping stone is artisan — a mosaic ladybug stepping stone with ceramic tile and grey grout is a garden art piece with genuine craft permanence, where the mosaic technique’s ancient pedigree elevates the ladybug motif to the level of architectural decoration.
Why it works: Mosaic is one of the oldest and most culturally legitimate decorative arts — its Roman, Byzantine, and Moorish traditions give any mosaic-technique craft piece a design authority that paint-on-stone cannot approach. The stepping stone format is specifically well-suited to mosaic because the flat, circular working surface accommodates the regular grout lines of tile mosaic work, and the outdoor use context justifies the material choice (ceramic tile in exterior grout is genuinely permanent in outdoor applications rather than merely decorative). The ladybug’s bold graphic design — large areas of single color (red body, black head) with defined spot pattern — translates perfectly to the mosaic medium where large color areas are more effective than fine detail.
How to get it: Purchase a pre-cast concrete stepping stone blank ($8–$15) or cast your own using a round plastic mold and concrete mix. Draw the ladybug design on the stone surface with a marker. Cut red and black ceramic tiles into appropriate shapes using tile nippers ($12–$20). Apply tiles with tile adhesive, following the design, leaving consistent 1/4-inch gaps for grout. Allow adhesive to cure fully (24 hours minimum). Apply unsanded tile grout in grey, working into all gaps and removing excess with a damp sponge. Allow to cure and buff with a dry cloth.
Shop The Look
- Concrete stepping stone blank round 12 inch
- Red ceramic tile small tesserae craft
- Black ceramic tile mosaic craft
- Tile nippers mosaic cutting tool
- Unsanded tile grout grey outdoor
7. Painted Glass Ladybug Sun Catcher
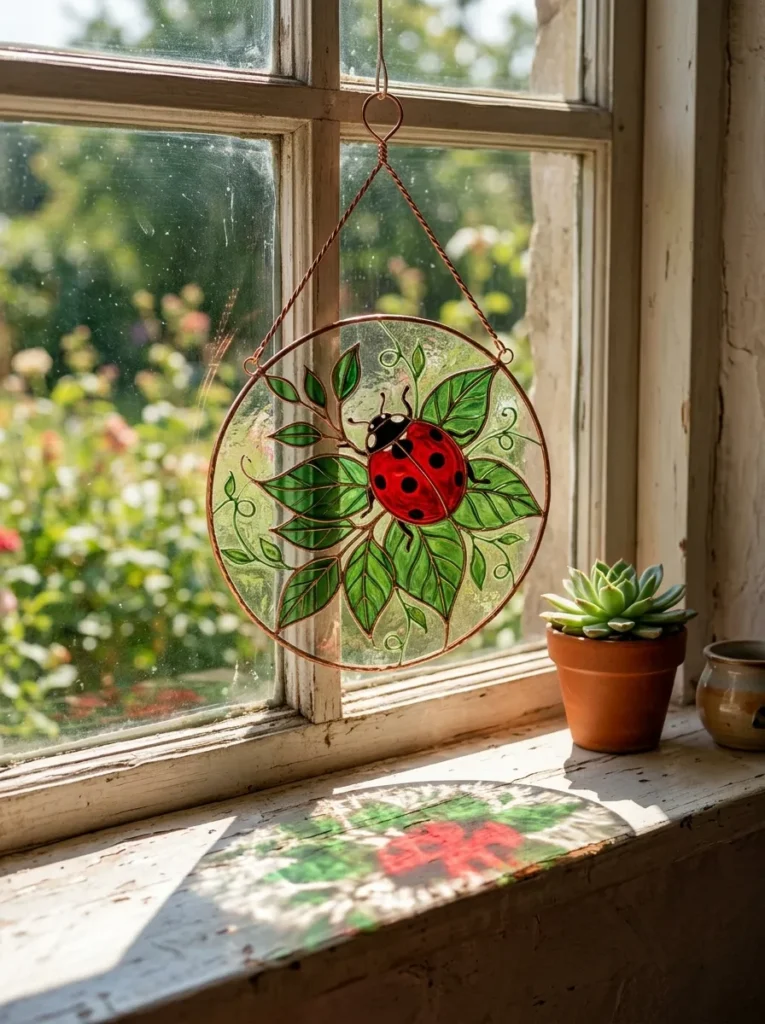
Vibe: The sun catcher is luminous — a glass-painted ladybug sun catcher transmitting colored light through transparent glass paint creates the specific warm magic of stained glass at craft scale, where the craft becomes most beautiful at the moment it catches the light it was designed to transform.
Why it works: Transparent glass paint (specifically formulated for glass surfaces) has a light transmission property that no other craft paint category shares — it colors the light rather than blocking it, producing colored shadows and light projections that change throughout the day as the sun’s angle shifts. The ladybug’s red and the leaf’s green are complementary colors that create the most visually dynamic colored light interaction — red-transmitted and green-transmitted light create warm-cool contrast in the projected patterns. The sun catcher format (a circular or shaped glass disc hung at the window with a copper wire or chain) is the design that most directly exploits this light property — a glass painting on a wall receives only reflected light, while a sun catcher receives transmitted light.
How to get it: Purchase a round clear glass disc (4–6 inch diameter, available from craft suppliers, $2–$5 each) or use a clean glass jar lid. Draw the ladybug and leaf design on paper, tape beneath the glass as a template, and trace with a black glass paint liner (sets to a raised outline that defines color zones). Fill color zones with transparent glass paint in crimson and forest green. Allow to cure fully (48 hours for most transparent glass paints). Add a copper wire loop hanger and hang in a south or east-facing window for maximum light transmission.
Shop The Look
- Clear glass disc round craft 4 inch
- Transparent glass paint set red green
- Black glass paint liner outliner
- Copper wire 20 gauge hanger craft
- Glass paint brush set fine detail
8. Air-Dry Clay Ladybug Bowl or Trinket Dish
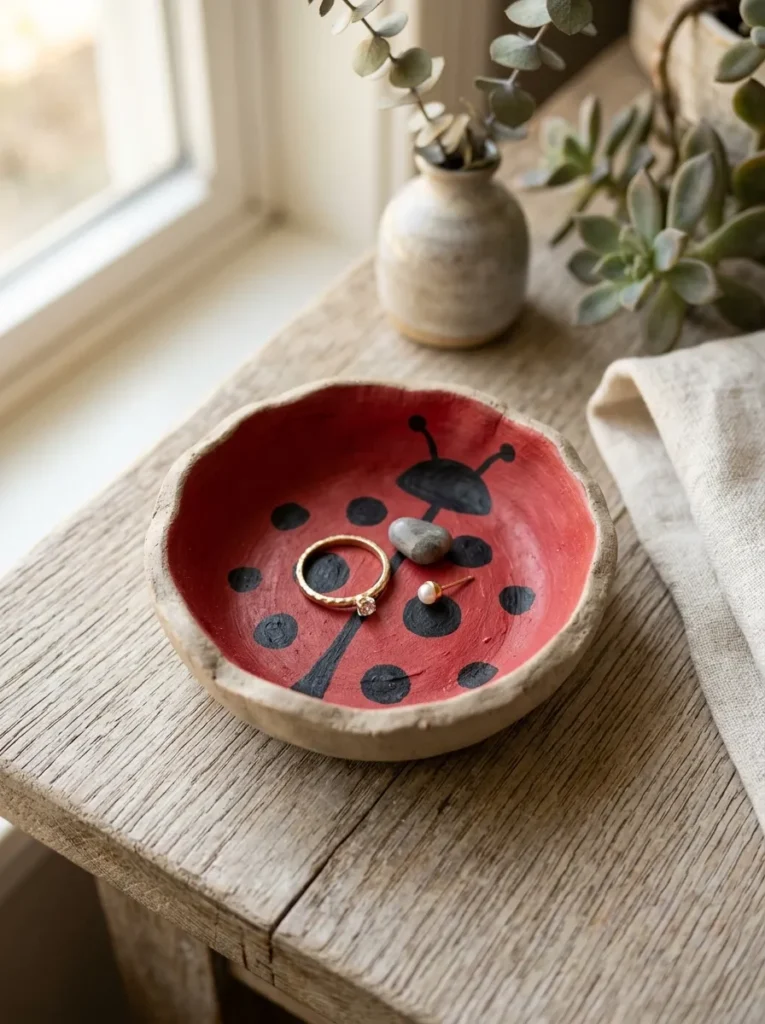
Vibe: The bowl is artisan — a hand-formed air-dry clay ladybug trinket dish with a painted interior and natural clay exterior has the quality of a studio pottery piece, where the contrast between the colorful interior and the honest raw exterior creates material sophistication from a simple craft technique.
Why it works: The shallow clay bowl format is specifically effective for the ladybug motif because the interior surface, when viewed from above, presents as a complete circular canvas — the ladybug design fills a round surface that references the insect’s own round body form. Leaving the exterior in natural clay color (not painted) is the critical design decision that elevates this from a fully painted craft piece to something with material sophistication — the natural clay exterior reads as an honest material expression while the painted interior reads as a considered design surface, and the transition between the two at the rim creates a visual boundary that defines the bowl’s two functional surfaces. Air-dry clay’s surface slightly absorbs acrylic paint in a way that creates a matte, naturalistic paint quality rather than the plastic sheen of paint on a sealed surface.
How to get it: Roll air-dry clay ($4–$8 for a 2.2-pound block) to approximately 1/4-inch thickness. Drape over an upturned bowl mold (coat the mold with petroleum jelly first) and shape the rim by hand to the desired organic form. Allow to dry slowly (24–48 hours). Gently remove from the mold when fully dry. Sand any rough areas with 220-grit sandpaper. Paint the interior with crimson acrylic (two coats for full coverage), add black spots with a fine brush. Leave the exterior unpainted and apply a matte sealant to the interior painted surface only.
Shop The Look
- Air dry clay white natural 2.2 lb block
- Crimson acrylic paint tube craft
- Fine detail paint brush set small
- Matte acrylic sealant spray craft
- Petroleum jelly mold release craft
9. Painted Ladybug Rocks as Paperweights or Desk Accessories

Vibe: The desk is warm — painted ladybug stones used as functional desk paperweights create the specific quality of a workspace that has been considered at every detail, where the decorative and the functional overlap in a way that makes both more interesting than either alone.
Why it works: Using painted stones as functional paperweights rather than purely decorative objects gives the craft piece a daily purpose that elevates it beyond seasonal display — a paperweight is used, touched, and moved regularly, and the painted surface develops a lived-in quality over time. The desk setting specifically contextualizes ladybug stones as adult objects rather than children’s crafts, where the association with orderly organization and serious work activity shifts the visual register entirely. The slight tonal variation between stones in a set (one painted in crimson, one in scarlet, one in vermillion — all within the red family but distinctly different) creates a collection quality that a set of identically-painted stones does not achieve.
How to get it: Select three smooth stones in genuinely varied sizes — the size variation is as important as the painting for the collection quality. Seal the stone surface with a gesso base coat for better paint adhesion and color saturation. Apply a crimson base coat in a slightly different shade on each stone (mix a touch of orange into one for scarlet, a touch of deep red into another for a deeper crimson). Apply matte black wing division, head section, and spots. Seal with multiple coats of a glossy craft sealant for a durable paperweight finish that can withstand daily handling.
Shop The Look
- Smooth oval rock large paperweight craft
- Gesso white primer base coat art supply
- Acrylic paint crimson scarlet vermillion set
- Gloss craft sealant durable desk use
- Fine paint brush set detail work
10. Ladybug Embroidered Patch or Hoop Art
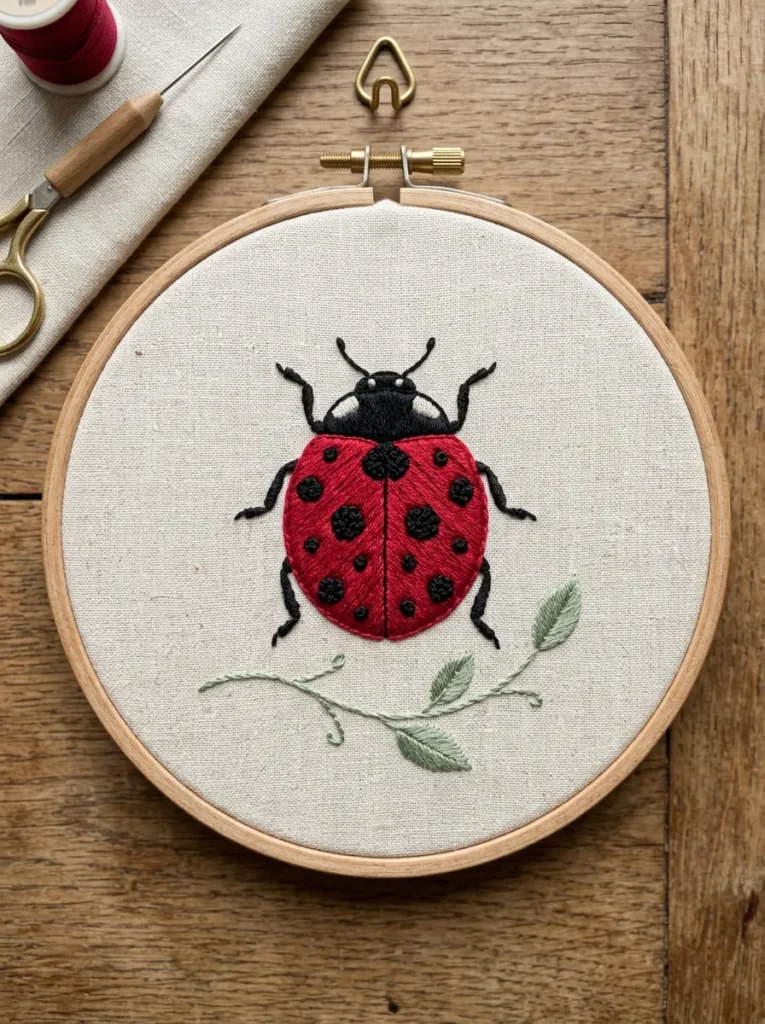
Vibe: The hoop is handcrafted — a ladybug embroidered in satin stitch and French knots on cream linen in a natural wood hoop is a wall art piece with the legitimacy of the embroidery tradition behind it, where the visible hand stitching communicates craft skill and patience in a way that no printed textile can replicate.
Why it works: Embroidery hoop art has become one of the most respected forms of contemporary adult craft — its combination of traditional textile technique, material quality (fine linen, quality embroidery thread), and the display format of the hoop itself creates objects that occupy gallery wall space with the same authority as framed prints. The ladybug motif translates particularly well to embroidery because its three main visual elements (the round red body, the black spots, and the wing division line) each correspond to a classic embroidery stitch: satin stitch for the smooth fill of the body, French knots for the dimensional raised spots, and stem stitch for the linear wing division. This one-motif, three-stitch approach makes the piece accessible to intermediate embroiderers while producing a result with genuine visual completeness.
How to get it: Transfer the ladybug design to cream linen fabric using a water-soluble marking pen. Mount the fabric in a 6-inch natural wood hoop. Work the body in satin stitch using two strands of crimson embroidery thread (DMC 321 or equivalent), keeping stitches parallel and smooth. Add French knots for spots using one strand of black thread — place the needle into the fabric at the correct spot position, wrap the thread twice around the needle, and insert the needle back through the fabric beside the same point. Work the leaf and stem in two strands of sage green. Trim the fabric backing to 1 inch beyond the hoop and fold to the back for a clean display.
Shop The Look
- Natural wood embroidery hoop 6 inch
- Cream linen fabric embroidery quality
- DMC embroidery thread crimson set
- Black embroidery thread satin finish
- Water soluble marking pen embroidery
11. Decoupage Ladybug Wooden Tray
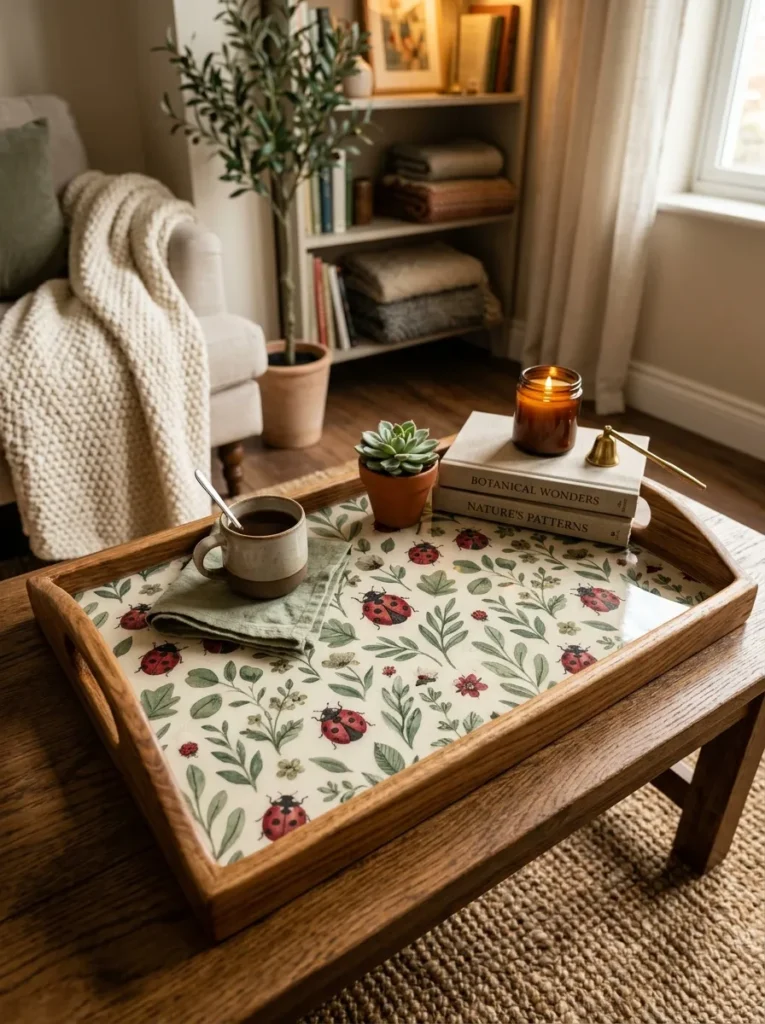
Vibe: The tray is designed — a decoupage wooden tray with a botanical ladybug pattern reads as a purchased decorative tray rather than a craft project when the pattern is well-chosen and the decoupage finish is smooth and professional, and its dual function (display surface and pattern display) gives it daily relevance.
Why it works: Decoupage on wooden trays achieves its most sophisticated results when the design source is itself sophisticated — using high-quality botanical illustration prints, vintage nature encyclopedia pages with ladybug and leaf imagery, or custom-printed pattern sheets rather than mass-market craft paper produces a tray that reads as designed object rather than craft project. The botanical association (ladybugs naturally appearing among leaves and stems in a repeating botanical print style) provides the design context that makes the ladybug motif read as part of a wider natural pattern rather than as an isolated cute motif. The sealed finish (minimum three coats of gloss Mod Podge or clear polyurethane) is what creates the finished object quality — an unsealed or lightly sealed decoupage surface reads as unfinished.
How to get it: Source or print a botanical ladybug pattern (public domain botanical illustrations featuring ladybugs are available from the Biodiversity Heritage Library, or create a simple repeating pattern in a free design tool). Cut individual design elements and arrange on the tray surface without adhesive first. Apply Mod Podge to the tray surface, press each element flat, smooth out air bubbles, and brush Mod Podge over the top. Apply five or more coats of clear gloss Mod Podge over the entire design, allowing full drying between coats. Finish with a polyurethane top coat for maximum durability.
Shop The Look
- Unfinished wood serving tray blank craft
- Mod Podge gloss formula decoupage
- Botanical print paper ladybug design
- Foam brush set decoupage application
- Gloss polyurethane top coat durable
12. Felted Wool Ladybug Brooch or Pin
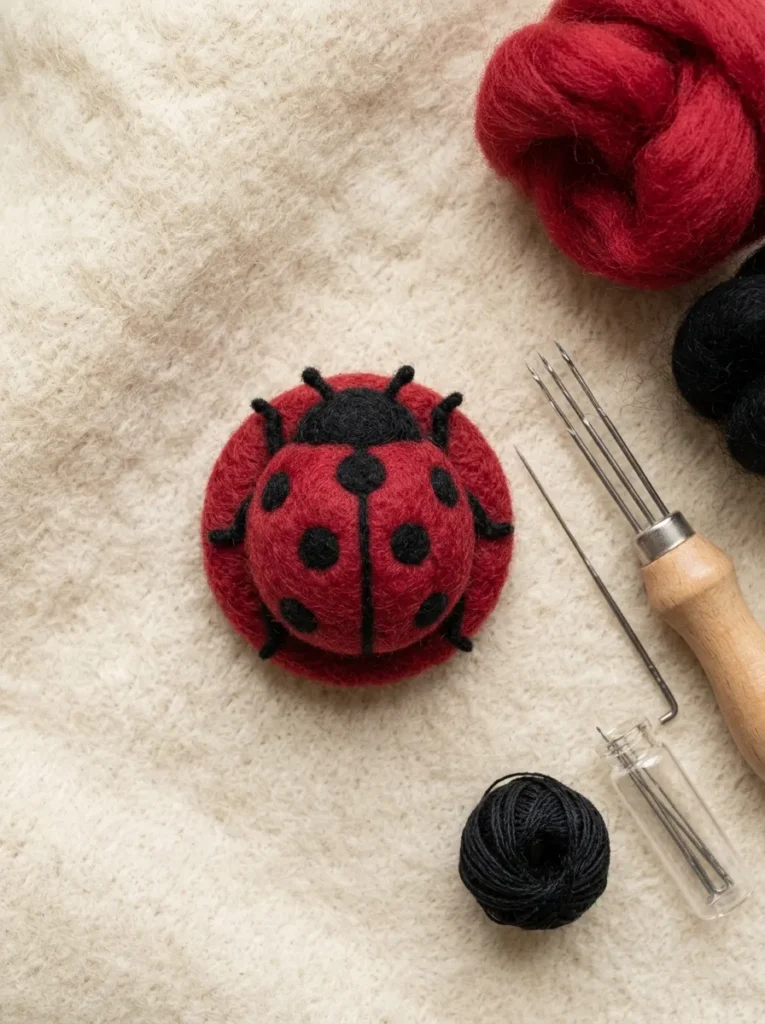
Vibe: The brooch is textile-rich — a needle-felted wool ladybug brooch with visible felting texture and a three-dimensional raised form is a wearable textile art piece with the specific warmth of wool as a material, where the hand-felted surface communicates craft labor and material care simultaneously.
Why it works: Needle felting is one of the few craft techniques that creates genuine three-dimensional fiber sculpture — the felting needle’s repeated stabbing motion entangles wool fibers into a dense, sculptural mass that holds its shape permanently without any adhesive or binding agent. The ladybug form (a round dome of crimson wool with black detail) is an ideal needle felting subject because its simple geometry — a hemisphere — is achievable without advanced felting skill, and the scale (approximately 1.5–2 inches diameter for a brooch) is manageable for a single felting session of 2–3 hours. Wool as a material carries inherent warmth and quality associations that synthetic fiber brooches cannot replicate — a felted wool brooch is warm in visual tone and warm to the touch, giving it a wearable quality that other craft jewelry materials lack.
How to get it: Start with a felting foam block as a working surface. Form a small ball of crimson wool roving (approximately the size of a walnut for a 1.5-inch finished brooch) by repeatedly stabbing with a single felting needle until the roving compacts into a dense round form. Continue working to flatten one side slightly so the brooch lies flat against a garment. Add black wool roving details (head section, spots) by layering small amounts on the surface and felting in place. Attach a stainless steel pin back using a tapestry needle and strong thread through the back of the felted form.
Shop The Look
- Crimson wool roving felting craft
- Black wool roving felting detail
- Felting needle set multi gauge
- Felting foam block work surface
- Stainless steel pin back brooch finding
13. Ladybug Resin Serving Board with Embedded Design
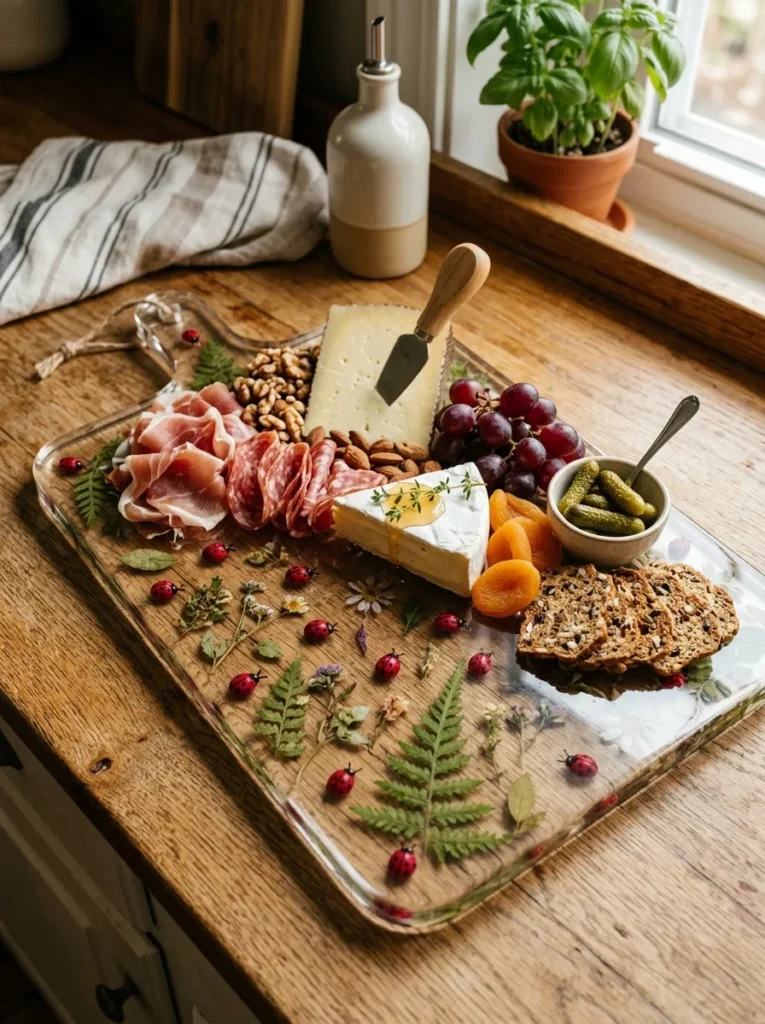
Vibe: The board is functional art — a clear resin charcuterie board with embedded ladybug and botanical elements is the kitchen object that reads as a considered design piece when displayed and as a conversation piece when in use, where the functional and the decorative are inseparable.
Why it works: Resin serving boards with embedded decorative elements are among the most sophisticated resin craft applications because they require the maker to engineer both the aesthetic design and the functional surface quality simultaneously — the board must be food-safe, smooth, and level while containing embedded elements that are fully sealed beneath a clear surface. The ladybug botanical design (small dried leaves and grass stems embedded as a garden scene, with ladybug forms cast in tinted resin sitting among the botanicals) creates a seasonal, naturalistic composition visible through the clear surface. The functional format justifies the material cost (resin is more expensive than most craft materials) by producing a piece that is used regularly rather than only displayed.
How to get it: Use a food-safe clear epoxy resin system (ArtResin or similar food-safe rated product) in a silicone serving board mold. Pour a thin base layer and cure partially. Arrange dried botanical elements (small pressed leaves, dried grass stems) and pre-cast red resin ladybug forms on the partially cured base. Pour the final clear layer over all elements to full board depth. Sand progressively to 2000-grit after full curing for a food-safe smooth surface. Apply a final food-safe mineral oil treatment to the finished surface.
Shop The Look
- Food safe clear epoxy resin ArtResin
- Silicone serving board mold large
- Pressed dried leaf assortment small
- Red resin pigment food safe
- Wet dry sandpaper 400 800 1500 2000 set
14. Ladybug Wire Sculpture Garden Art
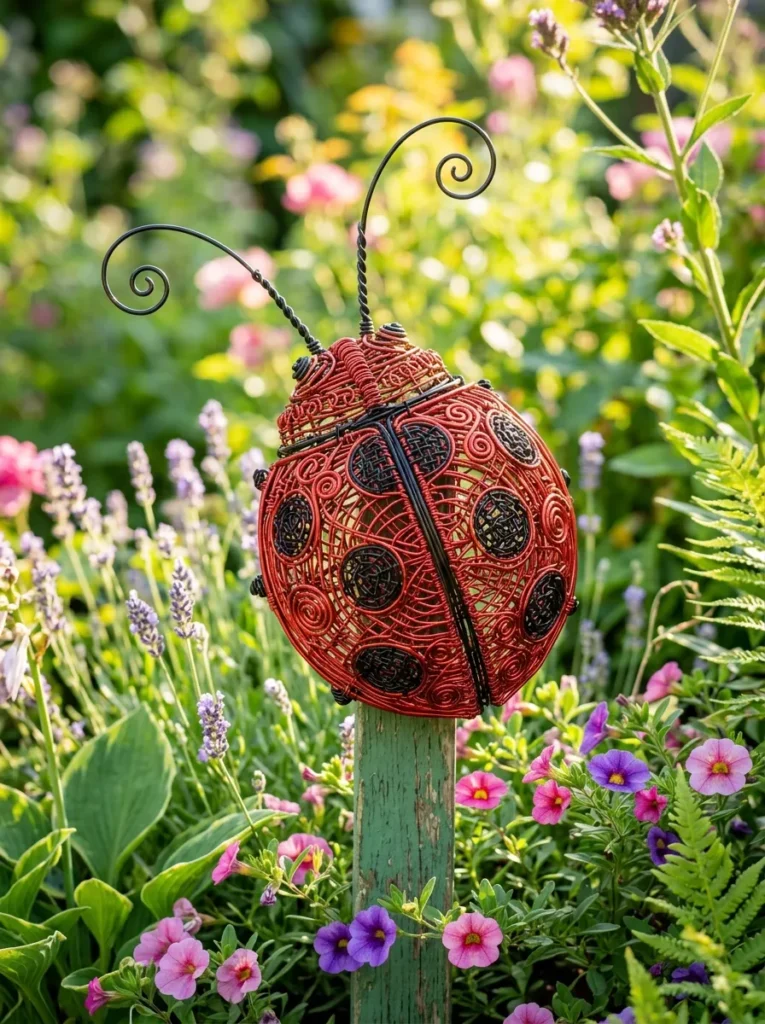
Vibe: The sculpture is garden-sculptural — a three-dimensional wire ladybug sculpture among garden plants reads as an artist’s garden installation at craft scale, where the wire form’s transparency (visible through to the garden behind it) and dimensional construction create a presence that painted flat surfaces cannot approach.
Why it works: Wire sculpture is the craft technique that most directly references fine art sculptural tradition — the wire ladybug’s three-dimensional construction in metal wire has a lineage in Alexander Calder’s wire sculpture and contemporary wire art that gives the garden piece design authority. The transparency of wire construction (the garden is visible through the wire form rather than being blocked by a solid surface) is specifically garden-appropriate because it allows the piece to exist in the garden space rather than occupying it — the plants visible through the wire body become part of the composition. The dimensional body form (a hollow oval constructed from multiple wire passes) casts a shadow that changes throughout the garden day, giving the piece a kinetic quality as light shifts.
How to get it: Construct the body frame from 14-gauge red-coated wire — form an oval ring approximately 6 inches long and 4.5 inches wide, then add structural passes of wire at 90 degrees to the ring plane to create the dome shape of the body. Add smaller wire loop passes to complete the three-dimensional form, filling in the dome structure. Wrap black wire around specific structural points to create spots. Create wing division with a single black wire pass through the body’s longitudinal center. Add long 18-inch antennae of thin black wire and curl the tips. Mount on a copper or green garden stake using wire wrapping.
Shop The Look
- Red coated wire 14 gauge craft roll
- Black coated wire 18 gauge roll
- Round nose pliers wire sculpture
- Copper garden stake 18 inch
- Wire sculpture plier set complete
15. Ladybug Painted Gourd as Seasonal Display Piece
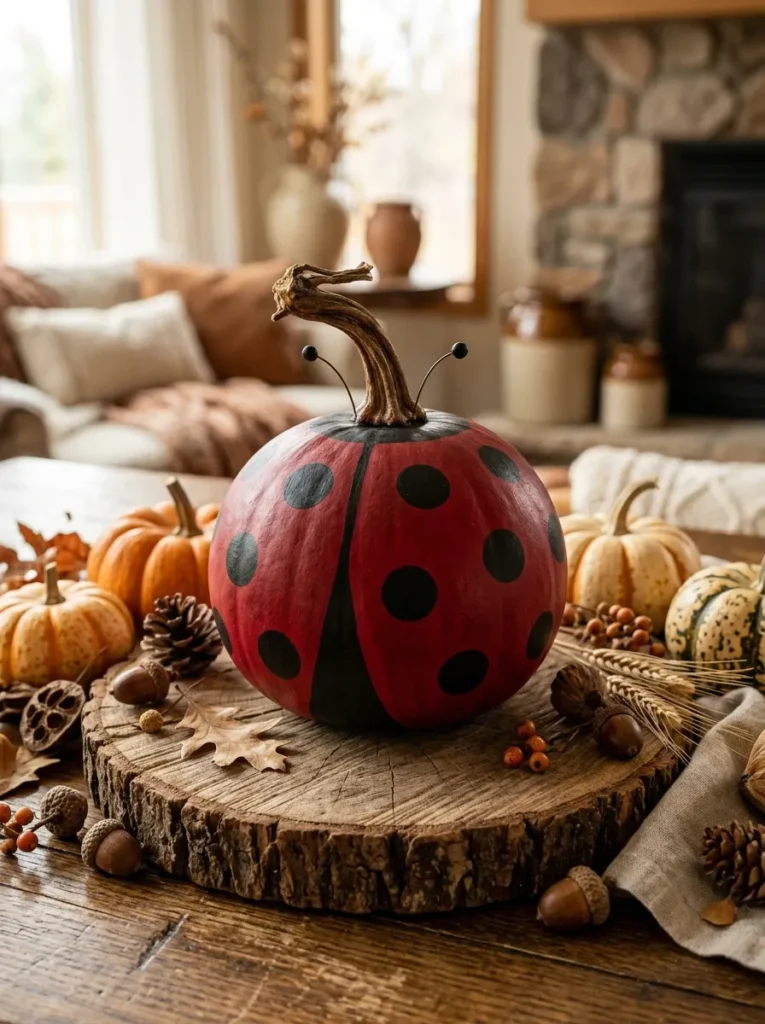
Vibe: The display is seasonal — a dried gourd painted as a ladybug in a harvest display creates the specific quality of a seasonal art object that belongs to a particular time of year, where the natural gourd form and the painted ladybug identity exist in genuinely interesting tension.
Why it works: Dried decorative gourds are an ideal base for ladybug craft because their natural body form — round, smooth, and dome-shaped — is already closely aligned with the ladybug’s actual body morphology. The natural stem of the gourd (which points upward when the gourd rests on its base) becomes either a natural head accent for the ladybug or a display prop that references the gourd’s agricultural origin — both contextual readings are appropriate and neither competes with the painted design. Gourds that have been dried over a growing season have a surface that absorbs acrylic paint naturally for a matte, non-plastic result that references the insect’s genuine matte elytra surface. The seasonal display format (autumn harvest grouping with corn husks, small pumpkins, and dried botanicals) contextualizes the ladybug gourd as part of a seasonal composition rather than an isolated craft piece.
How to get it: Purchase dried decorative gourds from farm stands or craft suppliers in autumn ($2–$8 each depending on size). Clean the surface with a slightly damp cloth. Apply a thin coat of gesso as a primer for better paint adhesion and color saturation. Apply two coats of rich crimson outdoor acrylic paint. Mark and paint the wing division line and head section in matte black using a fine detail brush. Add spots using the blunt end of a skewer dipped in black paint. Seal with a matte outdoor sealant for display longevity. Display on a wood slice among a seasonal autumn arrangement.
Shop The Look
- Dried decorative gourd assorted natural
- Gesso primer white art supply
- Rich crimson acrylic paint outdoor rated
- Fine detail paint brush set small
- Matte outdoor sealant craft spray
How to Start Your Ladybug DIY Practice
The single most important first principle in adult ladybug craft work is material restraint — specifically, keeping the color palette to the ladybug’s actual three colors (crimson red, matte black, and the natural color of whatever base material is being used) rather than introducing additional colors that dilute the motif’s inherent graphic power. The ladybug’s design authority comes from its bold, high-contrast simplicity: red against black, with nothing else competing. Adding orange accents, white highlights, or decorative borders around a ladybug craft piece almost always reduces rather than enhances its visual impact. The craft discipline required is restraint — trusting that the three-color combination of the motif is sufficient.
The most common mistake in adult ladybug craft work is scale error — making the ladybug too large for the context (an oversized painted stone that reads as a prop rather than a garden piece) or too small (a pendant so tiny that the detail is lost). The correct scale for each application is determined by the distance from which it will be most often viewed: garden stakes are viewed from standing height (24–36 inches away), so they need to be at least 4 inches in diameter to read clearly; desk paperweights are viewed from seated distance (12–18 inches), so 2–3 inches is the correct range; jewelry is viewed at arm’s length (18–24 inches) and at the scale of other jewelry (1/2–3/4 inch for earrings, 3/4–1 inch for pendants).
Three ladybug DIY upgrades under $20 that produce immediately satisfying results for any skill level: river stone ladybug paperweights ($5–$8 in stones and paint) that create a functional desk accessory from a one-evening craft session; a single polymer clay ladybug pendant ($6–$10 in clay, findings, and wire) that produces a wearable piece demonstrating the full range of the technique; and a painted glass sun catcher ($4–$8 in materials) that demonstrates the light-transmission quality that makes glass painting distinctly different from every other ladybug craft technique. Each of these three projects can be completed in a single session of 2–3 hours, and the material investment is low enough that a first attempt without prior experience is entirely reasonable.
A complete ladybug DIY practice that covers the full range of techniques on this list — jewelry, garden art, home decor, textile, and functional accessories — develops over months of intentional project selection. Total material investment for a comprehensive craft practice ranges from $60–$120 for basic supplies across all technique categories to $200–$400 for quality materials and tools in specific techniques like resin casting and wire sculpture. The most effective approach is to begin with the technique that uses the tools you already own (paint and brushes for stone painting, needle and thread for embroidery, wire cutters and pliers for wire work) before investing in technique-specific tools and materials.
Frequently Asked Questions About Ladybug DIY Crafts for Adults
What paint works best for ladybug crafts on different surfaces?
The paint choice depends on both the base material and the intended display environment. For stone, terracotta, and wood in outdoor garden applications: outdoor-rated acrylic craft paint (FolkArt Outdoor or similar, $1.50–$3.00 per bottle) sealed with an outdoor-rated clear sealant is the most durable choice — indoor acrylic without weatherproofing will fade and flake after one wet season. For glass surfaces: glass paint specifically formulated for glass adhesion (Pebeo Vitrea or Folkart Enamel, $3–$5 per bottle) is required — standard acrylic scratches off glass easily, while glass-specific paint cures to a hard, scratch-resistant surface. For polymer clay: acrylic paint applied after baking and before sealing works well, or sculpting the color into the clay itself before baking for a more integrated result. For fabric and textiles: fabric paint or textile medium mixed with acrylic prevents cracking and fading through washing.
How do I get perfectly round, consistent spots on a ladybug craft piece?
The two most reliable techniques for consistent circular dots are the pencil eraser dot method and the round toothpick dot method, chosen by the scale of spot needed. For larger spots (4–8mm diameter): the eraser end of a standard pencil dipped in matte black paint and pressed directly onto the surface produces a consistent, slightly textured circular spot that looks organic rather than mechanical. For smaller spots (2–4mm): a round wooden toothpick’s blunt end dipped in paint creates the correct smaller scale. For very precise spots of any size: a dotting tool set (a double-ended stylus with varied ball tip sizes, $4–$8 for a set of 5) provides the most controlled and consistent results. The critical technique in all three methods is loading the tool with the correct amount of paint — too much creates spread and bleed, too little creates an incomplete circle — testing on scrap paper before applying to the final piece resolves the paint loading quickly.
Can ladybug crafts be sold at craft markets and what materials should be disclosed?
Yes, ladybug DIY craft pieces are popular at craft markets, particularly for seasonal spring and garden-themed markets. Material disclosure requirements vary by jurisdiction and product type, but best practice for adult craft sellers includes: disclosing all materials for items that contact skin (jewelry, brooches) including metal alloy content for findings (nickel-free, sterling silver, gold-filled); disclosing food-safe status for any resin board or functional kitchen item (only food-safe certified resin should be labeled as such); and providing care instructions for textile pieces (embroidered hoops are display only, not washable; felted wool brooches require dry cleaning only). Resin jewelry requires specific attention — low-quality epoxy resins may continue to off-gas for weeks after curing, which can cause skin irritation; use UV resin or fully cured, high-quality two-part epoxy specifically rated for jewelry use.
How do I create a ladybug motif that reads as adult-sophisticated rather than children’s-craft?
The distinction between adult-sophisticated and children’s-craft ladybug work comes from four specific design decisions applied consistently. First, material quality — genuine materials (real stone, actual wool, quality polymer clay, glass) rather than foam, plastic, or synthetic craft materials communicate adult intent. Second, palette restraint — limiting to the ladybug’s actual three colors (crimson, black, and the base material’s natural color) without adding additional colors, glitter, googly eyes, or decorative borders. Third, surface finish quality — a matte, professionally sealed surface reads as adult; a rough, partially finished, or glossy-without-quality surface reads as incomplete craft work. Fourth, scale and proportion — the ladybug form at its correct proportions (body approximately 3–4 times the head diameter, spots appropriately scaled and distributed in the correct pattern of 7 spots total in the standard 7-spot ladybug configuration) reads as botanically informed; cartoon proportions with oversized spots or round eyes reads as children’s design.
What is the most challenging and most rewarding ladybug DIY technique for experienced adult crafters?
Wire sculpture ladybug garden art (Idea 14) is the most technically challenging technique on this list because three-dimensional wire construction requires the maker to plan and execute a structural form without any template or mold support — the wire must be self-supporting in three dimensions from the first construction decisions. The skills required (wire bending precision, structural planning, the ability to correct errors in a rigid material without starting over) are the same skills used in professional metal sculpture, and the technique rewards practice over many sessions rather than producing immediate results. The most rewarding for experienced crafters, however, is typically the botanical resin ladybug pendant (Idea 3) because the combination of preserved real botanicals within a ladybug-shaped clear resin creates a genuinely unique object — no two are identical because no two dried flowers are identical — and the light transmission through the clear resin beneath the red ladybug surface creates an optical quality that requires genuine craft skill to achieve cleanly.
Ready to Start Your Ladybug DIY Practice?
These 15 ideas cover the full range of what ladybug DIY crafting can be for adult makers — from the wearable intimacy of a polymer clay earring and a needle-felted brooch, to the garden presence of a wire sculpture and a mosaic stepping stone, from the domestic warmth of a clay trinket dish and a decoupage tray to the functional sophistication of a resin charcuterie board and a glass sun catcher that transforms its window’s light. You do not need to attempt all 15 to build a satisfying ladybug craft practice — the most rewarding approach is to begin with the technique that uses the tools and skills you already have, produce one genuinely well-executed piece in that technique, and let the success of that single piece guide the decision to explore the next. The ladybug’s visual simplicity — three colors, one round form, a handful of spots — makes it an ideal motif for developing craft technique, because the motif’s constraints are clear and the design decisions within those constraints are few and deliberate. Start this week with river stones and outdoor paint for the garden, or with a block of polymer clay for the jewelry box, and discover that the smallest and most familiar of insects has been waiting all along to become something made with genuine adult craft intention. Pin the ideas that made you reach for your craft supplies — those are the ones worth making first.