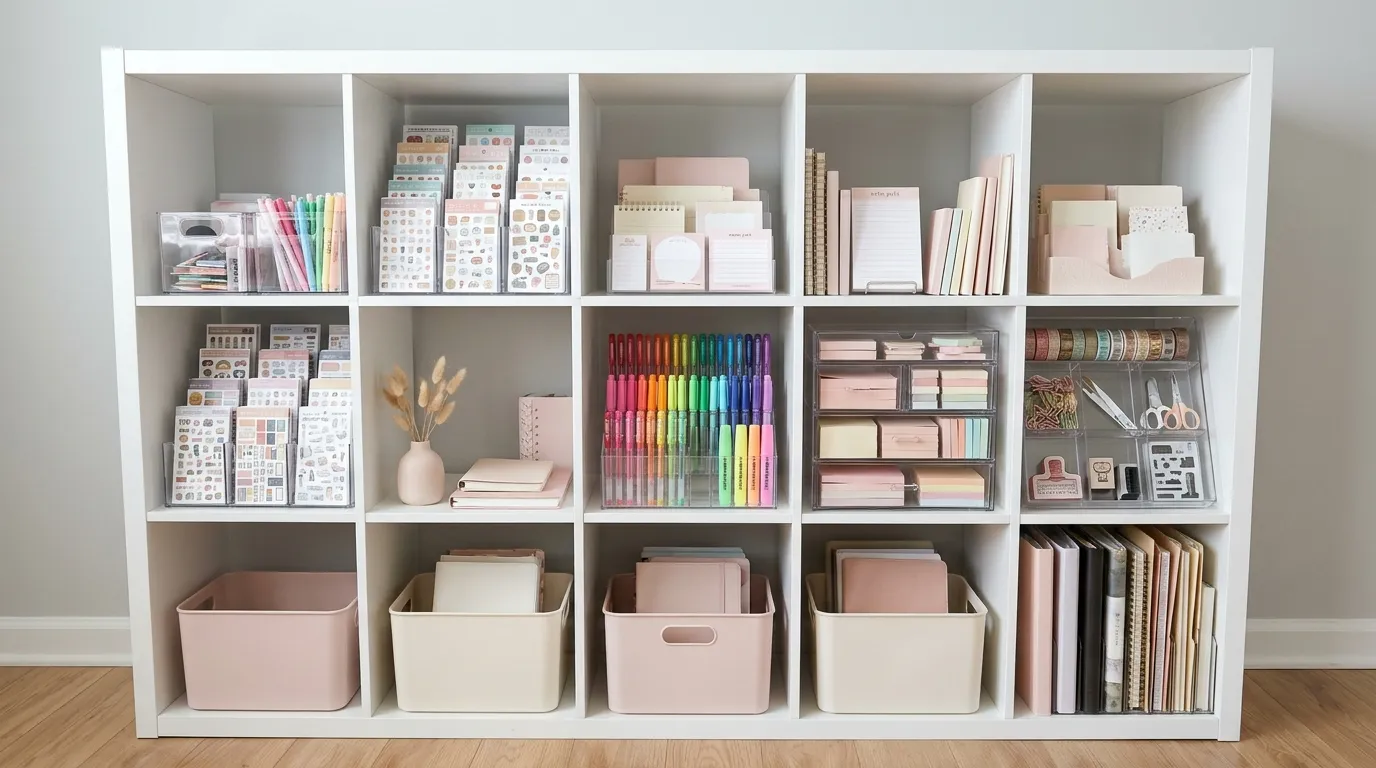
19 IKEA KALLAX Craft Room Ideas for Creative StorageMeta Description
A plain cube shelf can become the hardest-working piece in your studio. These IKEA KALLAX craft room ideas turn simple squares into creative storage that keeps every supply visible, tidy, and ready to use.
This article shares 19 beginner-friendly ways to organize your space, from yarn walls and paper trays to sewing nooks, rolling carts, and hidden doors. Each idea solves a real problem: lost supplies, crowded tables, or tiny rooms with no spare floor. I’ve noticed that most crafters don’t need more furniture. They need one flexible system that fits everything. In my experience, a single cube unit can clear a whole table in an afternoon. Scroll through, save your favorites, and start with the idea that fits your hobby.
Yarn Cube Wall
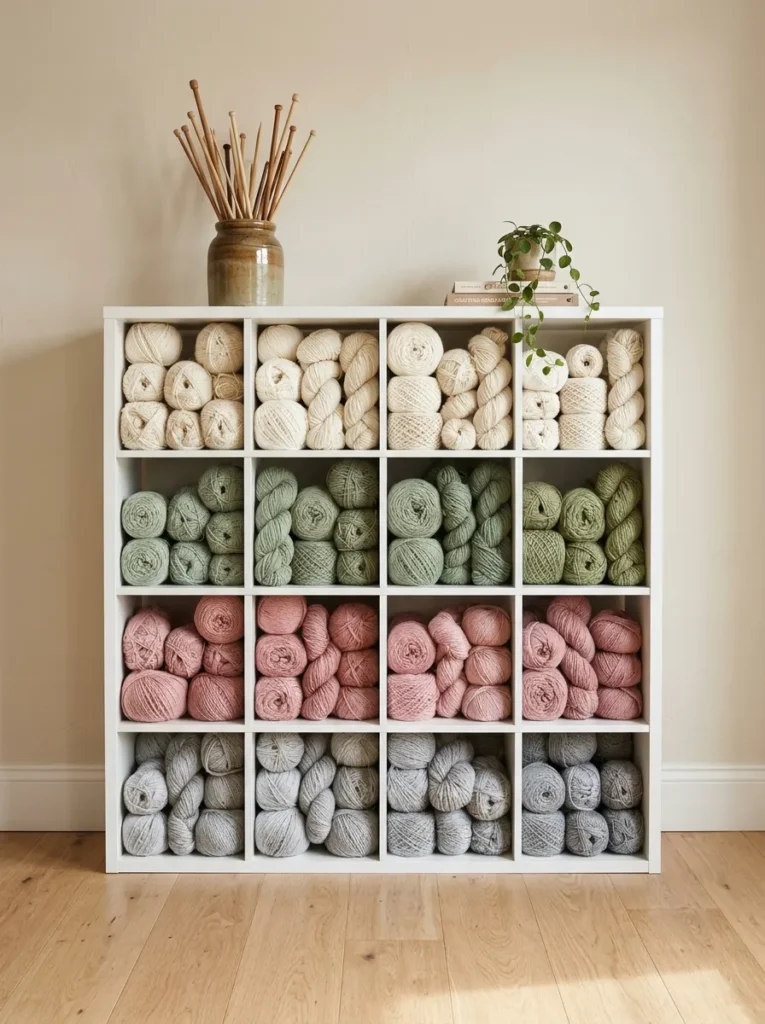
- Shows your whole yarn stash at a glance
- Keeps balls clean, untangled, and easy to grab
- Turns color families into soft wall decor
- Gives needles and projects a home nearby
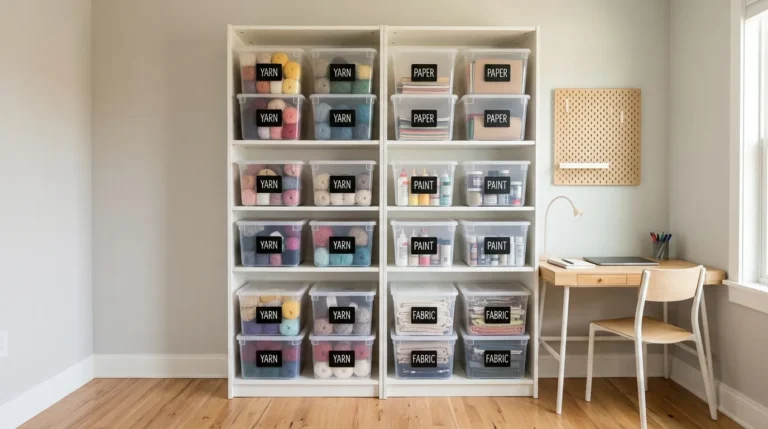
Yarn looks best when it lives in the open. Stack a cube unit against the wall, and drop one color family into each cube, from cream and sage to dusty rose. The grid turns your stash into a soft, textured display. I’ve noticed that knitters start more projects once they can actually see their yarn. Balls stay clean and easy to grab, so nothing gets lost at the bottom of a bag. Pick a white or birch finish for a calm look. The corner feels cozy and colorful, and it makes every project feel like a fresh start.
Sorting makes the display work. Group yarn by color or weight, then keep one cube for projects in progress with needles tucked inside. Slide a small basket into any cube that holds loose odds and ends. Place heavier cones in the bottom row, since the unit carries more weight low down. Anchor the shelf to the wall with the included bracket for safety. Add a tiny label on the edge of each cube if you share the room. The finished wall looks soft, tidy, and cheerful, and it saves you from digging through bins every time.
Paper Tray Inserts
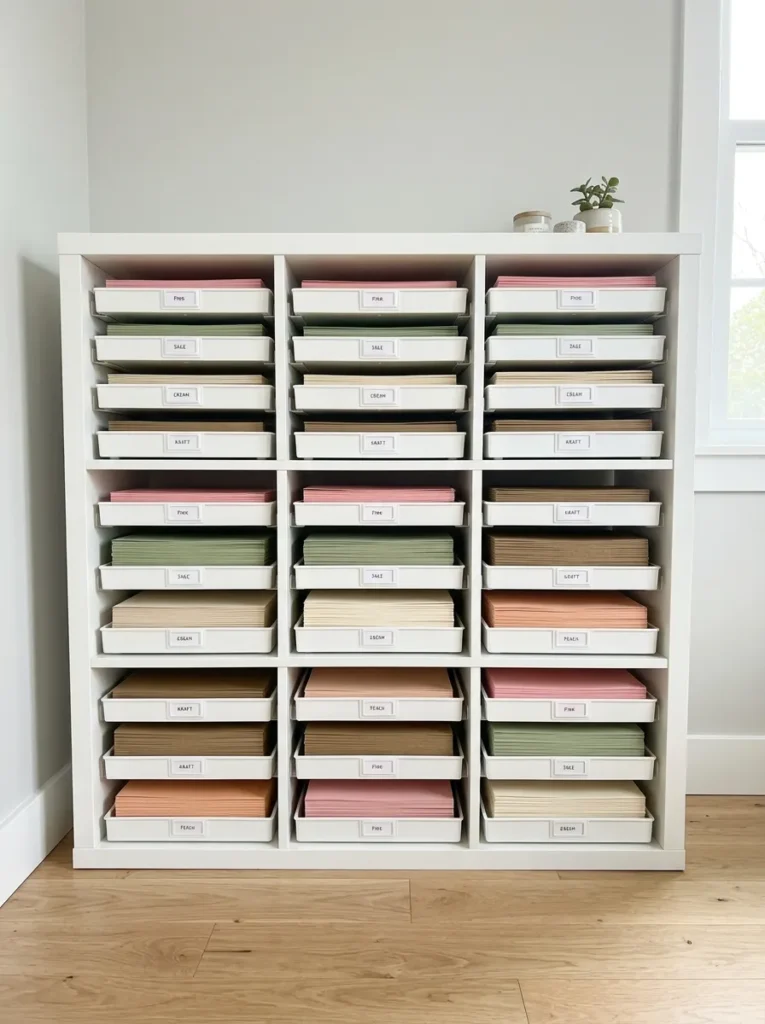
- Keeps paper flat, clean, and uncreased
- Sorts colors in trays you can slide out
- Fits standard cardstock sizes perfectly
- Turns a messy stack into a pretty rainbow
Paper hates being crushed, and cubes can protect it. Slide shallow trays into each opening, and sort cardstock by color or size. I’ve tried keeping paper in folders, and the corners always bent. Trays fixed that within a day. Pull out one tray, pick a sheet, and push it back in. The cube width suits most standard sheets, so nothing hangs over the edge. Pastels, kraft, and white look lovely lined up in a row. The shelf feels organized, colorful, and calm, and it makes starting a card or scrapbook page fast and easy.
Choose trays with a little depth, about five centimeters, so sheets stay flat without overflowing. Label each front in large, clear letters, such as “pink,” “kraft,” or “patterned.” Keep scraps in a separate bin so full sheets stay crisp. Place the heaviest paper in the bottom row, since weight builds up quickly. In humid rooms, tuck a few silica packets into the back to prevent curling. Review the stash each season and pass along sheets you won’t use. The finished unit looks neat, bright, and practical, and your favorite papers stay perfect for the next project.
Fabric Fold Grid
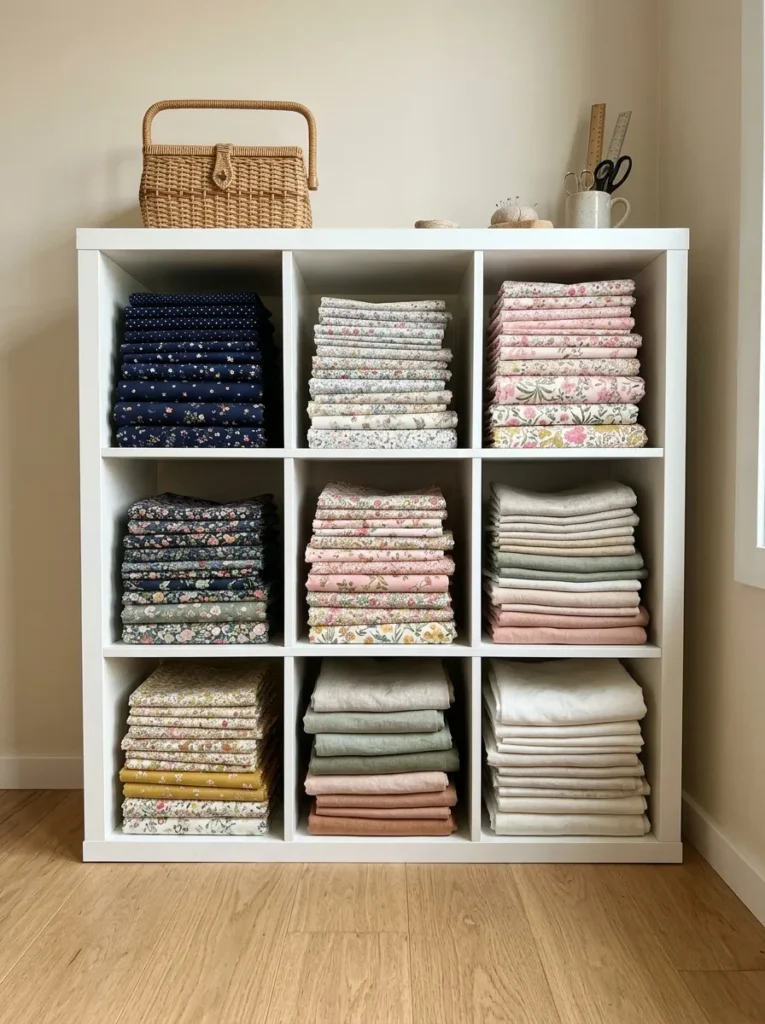
- Shows every fabric print without unfolding
- Keeps cloth clean, flat, and wrinkle-free
- Sorts by color, type, or project
- Makes the stash look like a boutique display
Fabric stacks look pretty when they are folded with care. Fold each piece into a neat rectangle that fits the cube width, then place the folded edge facing out. Every print becomes visible without touching the pile. I’ve seen sewists stop buying duplicates once they could actually see their stash. Group cottons, linens, and felts in their own cubes, or sort by color for a soft rainbow. The shelf feels organized, calm, and a little like a fabric shop, and picking the next project becomes the fun part instead of a chore.
Folding the same way every time keeps the grid tidy. Wrap each piece around a piece of cardboard, such as a comic book board, so it stands straight and keeps its shape. Keep small scraps in a lidded basket inside one cube. Add lavender sachets or cedar blocks to protect against moths. Keep the shelf out of direct sun, because daylight fades dyed cloth over time. Place bulky fleece and batting in the lowest row. The finished grid looks crisp, colorful, and orderly, and it keeps every yard of fabric ready for use.
Ribbon Drawer Insert
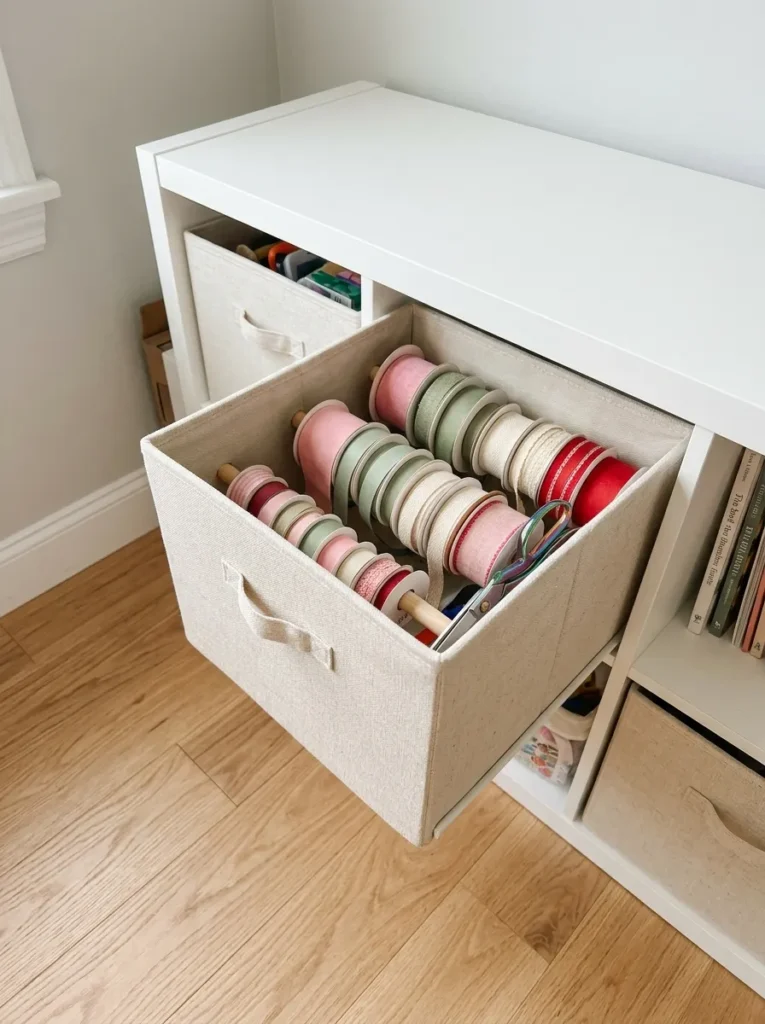
- Gives ribbon spools a tangle-free home
- Keeps colors visible from above
- Hides the mess behind a clean front
- Pulls out like a drawer when you need it
Tangled ribbon can slow down any project. A drawer insert fixes that in seconds. Slide spools onto thin dowels inside the drawer, and every color lines up neatly. I’ve tried storing ribbon in a bag, and finding one shade took ages. The drawer turned it into a quick pick. Pull it out, choose your color, and close it again. The cube front stays calm, while the inside holds a cheerful rainbow. The shelf feels organized, boutique-like, and satisfying, and ribbons stay smooth instead of crumpled and knotted.
Build a simple holder for the inside. Cut a few wooden dowels about twelve centimeters long and glue them upright into a thin board that fits the drawer base. Slide on spools from the widest to the narrowest. Keep a small pair of scissors in a clip on the side. Wind loose ends around cardboard to stop them unraveling. Sort colors from light to dark for a gradient that is easy to scan. Wipe the drawer monthly to clear dust. The finished insert looks tidy, bright, and useful, and every ribbon stays ready to use.
Washi Tape Cubes
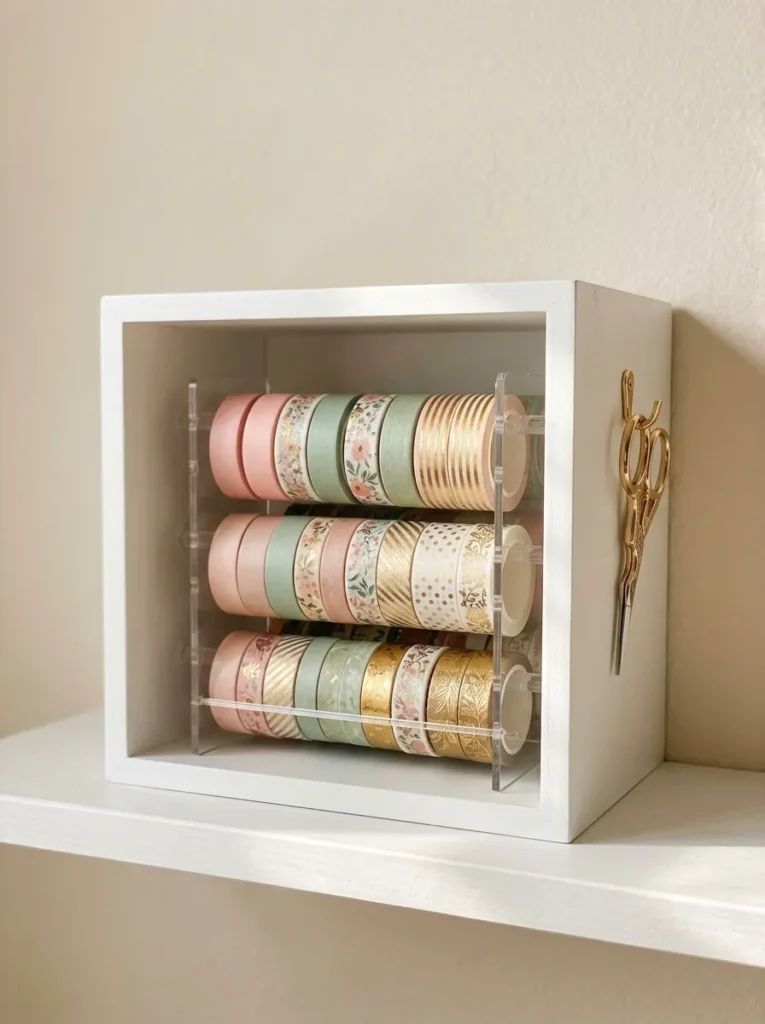
- Turns tape rolls into a colorful display
- Prevents sticky clumps in drawers
- Keeps scissors and rolls together
- Works for planners, journals, and cards
Washi tape deserves a spotlight. Give it one cube, and your collection turns into a tiny gallery. Slide rolls onto a short dowel or a clear stand, and every pattern stays easy to reach. I’ve noticed that people use their tape far more once they can see it. No more sticky rolls glued together at the bottom of a drawer. Group rolls by color for a soft gradient, or by pattern for faster picking. The cube feels playful, tidy, and inspiring, and planning or journaling becomes a little more joyful.
A few small habits keep it neat. Fold a tiny tab at the end of each roll so the tape is easy to start. Put the cube at eye level near your desk, so reaching takes only a second. Hang a small pair of scissors from a hook on the inside edge. Keep the rolls out of direct sun, since heat can weaken the adhesive. Dust the display weekly. Store spare rolls in a labeled box in a lower cube. The finished spot looks bright, organized, and charming, and it keeps your favorite tapes within easy reach.
Paint Supply Cube
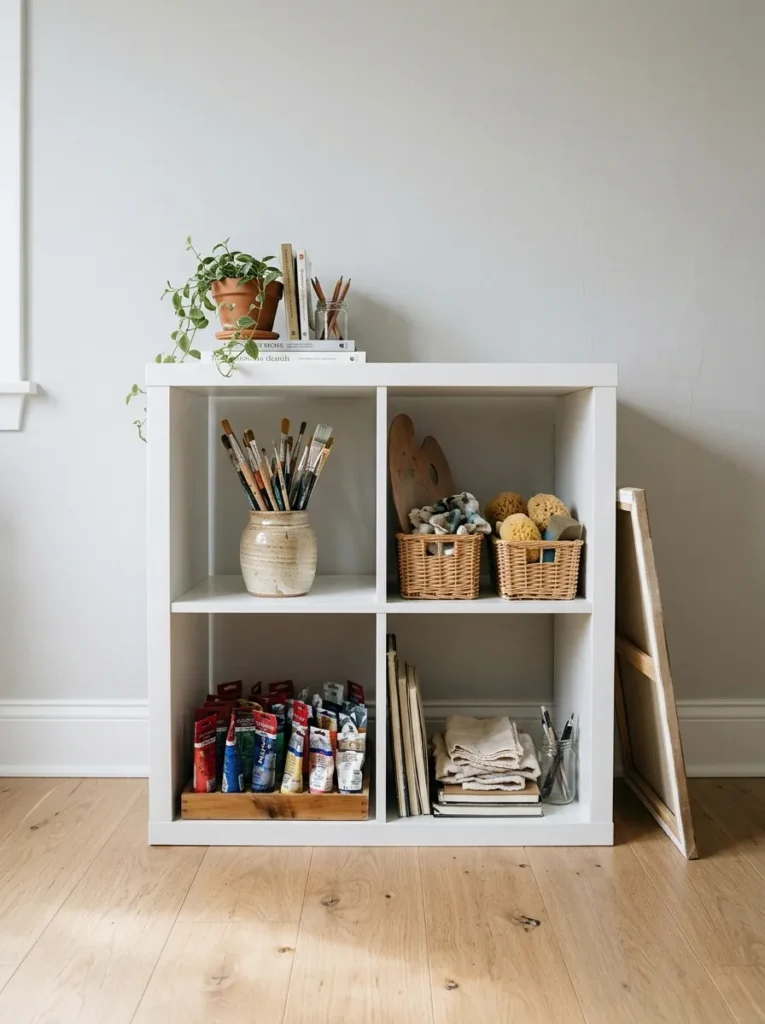
- Gives paints, brushes, and palettes one home
- Keeps tubes upright and easy to see
- Fits small canvases beside the shelf
- Makes cleanup fast and simple
Painters need supplies that stay close. Dedicate a few cubes to paint, and everything sits within arm’s reach. Use a small tray for tubes, a jar for brushes with bristles up, and a basket for palettes and sponges. I’ve seen this setup save artists from buying duplicate colors. The grid keeps shades visible, so you can plan a palette in seconds. The shelf feels creative, tidy, and ready for action, and starting a painting no longer requires clearing a whole table first.
Protect your paints so they last. Store tubes with caps tightly closed and wipe the threads before sealing. Keep the cube away from heaters and windows, since heat and sunlight dry paint out. Place heavy jars of medium or gesso in the lowest row for stability. Add a small waterproof mat or tray inside the cube to catch drips. Group warm colors and cool colors separately for faster picking. Check supplies every season and toss anything stiff or dried. The finished corner looks cheerful, professional, and organized, and painting sessions begin with ease.
Sewing Machine Nook
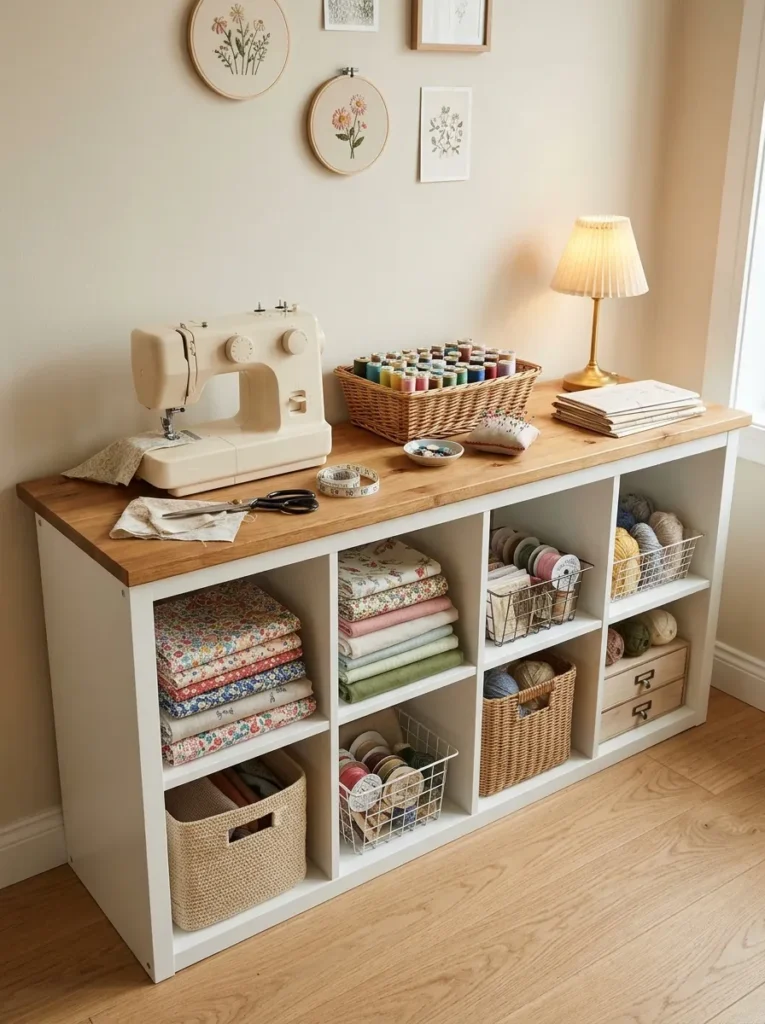
- Turns a shelf into a sewing table
- Stores fabric and notions right below
- Keeps thread and tools within reach
- Works in small rooms and corners
A sewing station can fit into a surprisingly small corner. Place a wooden board across two low cube units, and you get a sturdy table with storage underneath. I’ve seen this setup work in apartments where a full sewing desk wouldn’t fit. Fabric, thread, and notions sit in the cubes below, so you rarely need to stand up. Add a small lamp and a pincushion on top. The nook feels compact, practical, and inviting, and it gives you a real workspace without taking over the whole room.
Height and stability matter for sewing. Choose a board deep enough for your machine, usually about fifty centimeters, and fasten it to the shelf tops so it can’t slide. Keep the table at a comfortable elbow height, which often means two stacked rows under the board. Use a cord clip to keep the machine plug tidy. Slide small drawer inserts into a few cubes for bobbins, scissors, and pins. Place a soft mat under the machine to reduce noise. The finished nook looks neat, efficient, and cozy, and it makes sewing feel like a pleasure.
Cutting Machine Station
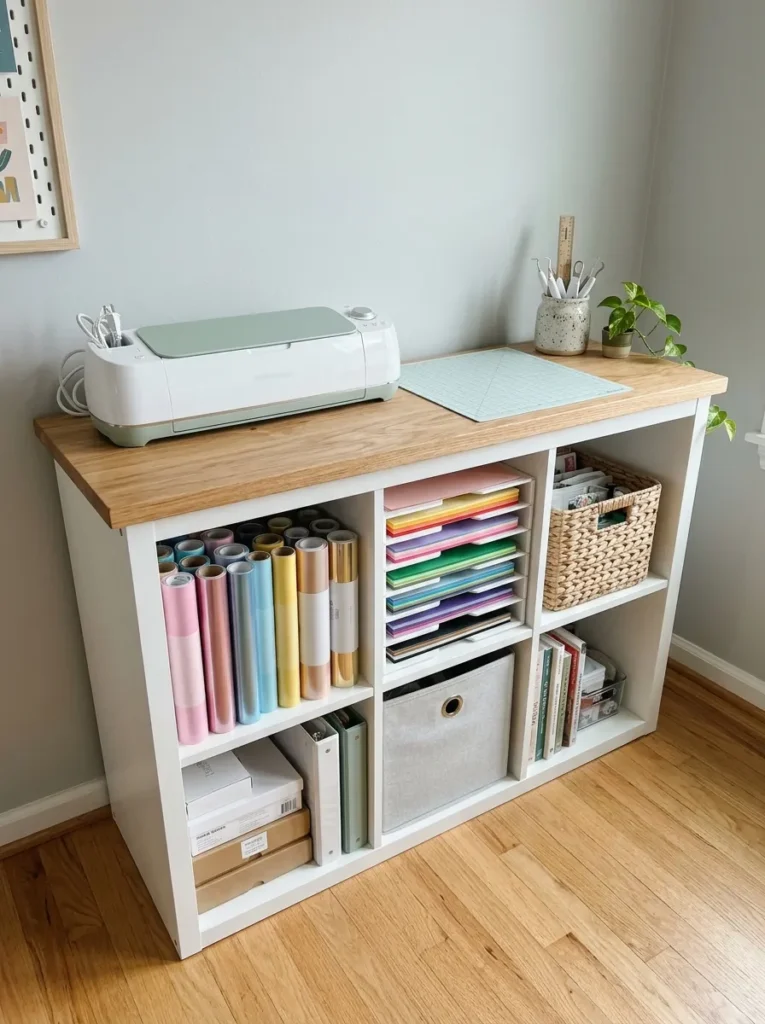
- Gives a cutting machine a stable base
- Keeps vinyl rolls standing and unbent
- Stores mats, blades, and tools nearby
- Cuts setup time before every project
Cutting machines are heavy and need a dependable home. A wide cube shelf with a sturdy top gives it one. Stand vinyl rolls upright in a cube, keep cutting mats flat in a tray, and store blades and weeding tools in a small jar. I’ve noticed that crafters use their machine more when it lives on a ready-to-go shelf. Everything sits within reach, so a project starts in a minute. The station feels smart, organized, and efficient, and your machine never ends up buried in a closet.
Plan the layout around your workflow. Place the machine at one end, so the mat has room to feed through. Keep frequently used vinyl and cardstock in the cubes closest to the top. Use a power strip fixed to the side of the unit, and tuck the cord into a clip. Slide mats into a slim file sorter to prevent bending. Wipe dust away from the machine and the shelf weekly. Keep scrap vinyl in a labeled bin. The finished station looks clean, modern, and ready for action, and every project begins smoothly.
Bead Jar Cubes
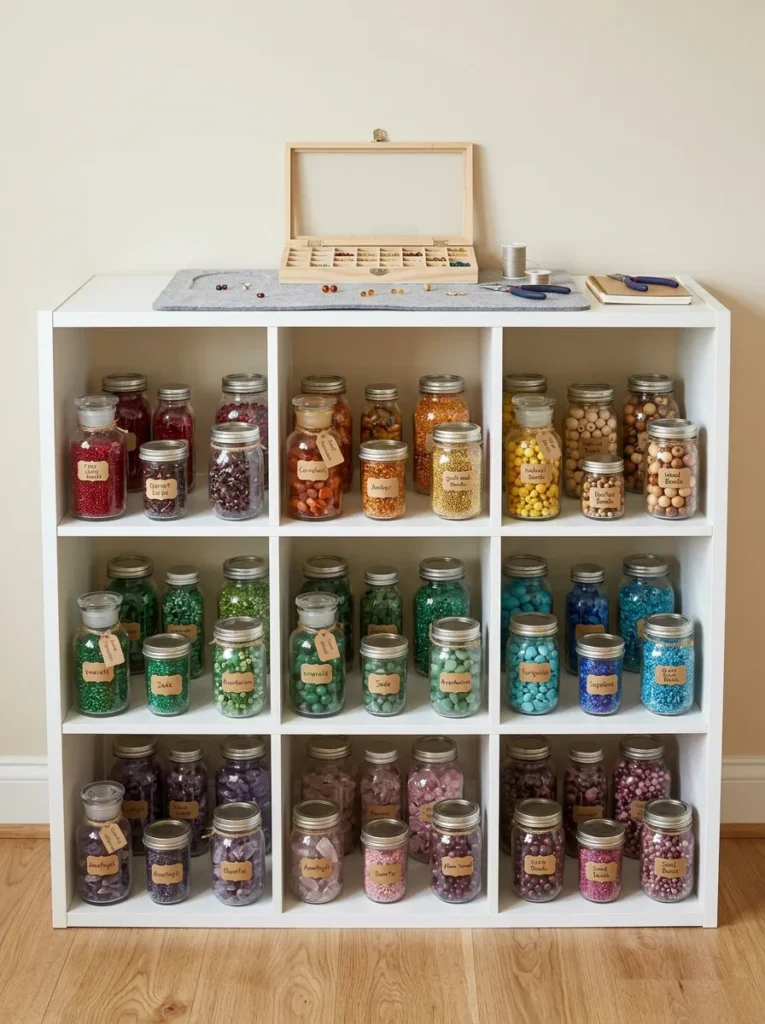
- Shows every bead color at a glance
- Keeps tiny pieces from rolling away
- Makes labeling and sorting simple
- Doubles as a colorful wall display
Tiny beads need tidy homes. Place clear jars in each cube, sorted by color or material, and your collection turns into jewelry-store decor. I’ve tried storing beads in loose bags, and half of them escaped within a week. Jars with tight lids solved that. A small kraft tag on each one makes picking easy. The cubes keep jars from rolling or tipping, which is a bonus. The shelf looks colorful, neat, and delightful, and designing a bracelet or necklace becomes easy because every shade is in view.
Choose the jars wisely. Use wide-mouth jars that fit a scoop or small spoon, and keep sizes consistent so they line up neatly. Sort seed beads by size, then by color, because mixing sizes causes frustration later. Place heavy glass jars in the lowest cubes. Keep a bead mat and a small tray on top for sorting while you work. Wash and dry each jar thoroughly before filling to prevent moisture. Check the lids monthly. The finished shelf looks pretty, ordered, and inspiring, and your beads stay safe, visible, and ready for the next design.
Stamp and Ink Cubes
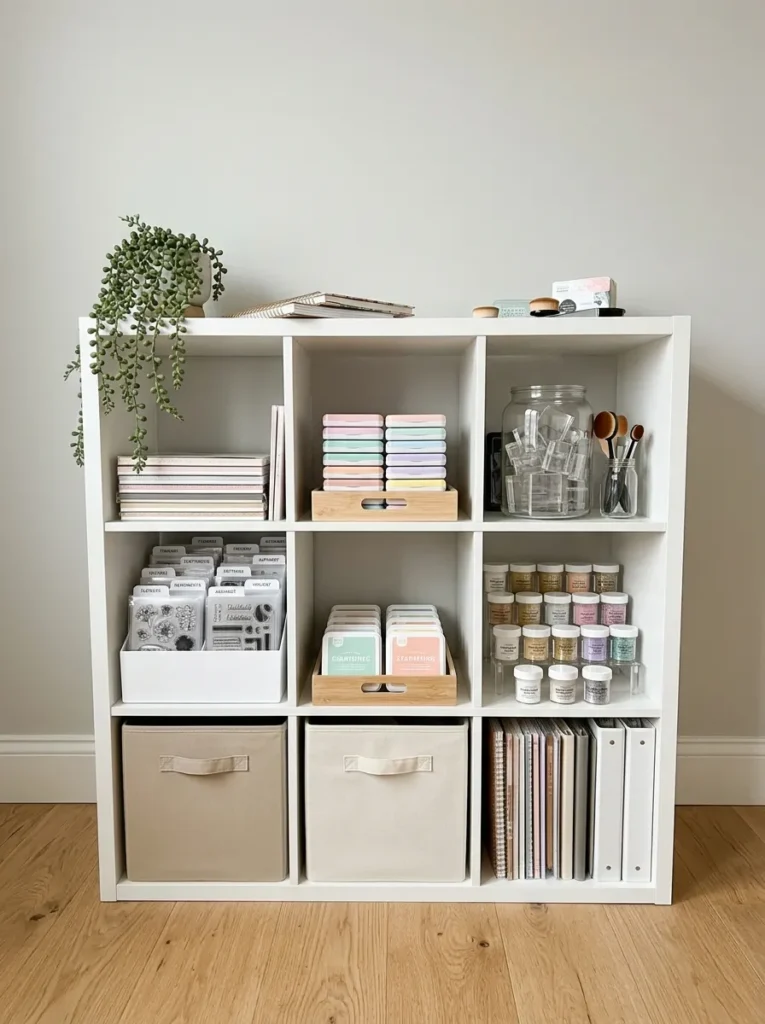
- Keeps stamps flat, clean, and sorted by theme
- Stores ink pads in rainbow order
- Protects delicate stamp surfaces from dust
- Makes card-making setup much faster
Card makers collect stamps fast, and storage can feel like a puzzle. Give each stamp set a pocket and label it by theme, such as florals, greetings, or holidays. I’ve seen this save so much time, because you can find the right set in seconds. Stack ink pads in a tray with the color facing up, and the shelf becomes a small palette. The cubes keep everything flat and clean. The corner feels organized, crisp, and creative, and card making starts with a quick pull, not a long search.
Protect your tools so they last. Store ink pads upside down, so ink collects at the surface and stays juicy. Keep stamps away from heat and sunlight, since both can warp the rubber. Wipe stamps clean after each use with a damp cloth, then let them dry flat. Use a small jar for acrylic blocks and a basket for embossing powders. Add a label on the cube edge to keep themes clear. Review the collection yearly and pass on sets you no longer use. The finished shelf looks neat, helpful, and inspiring.
Craft Desk Combo
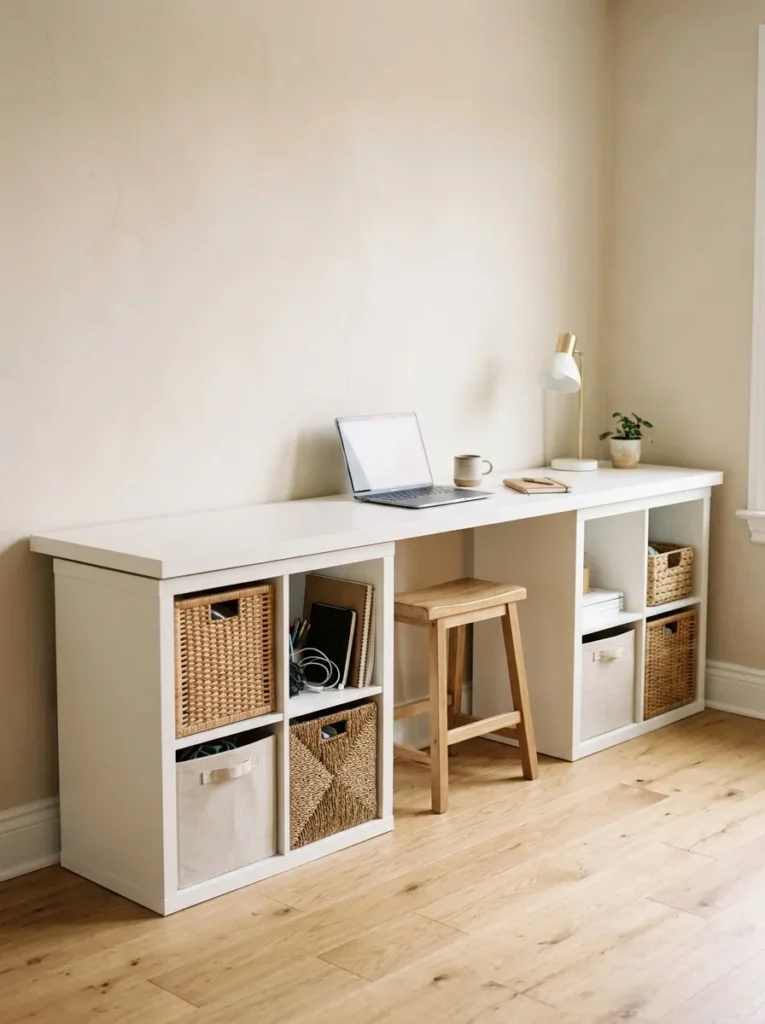
- Builds a custom desk with storage on both sides
- Fits any wall length and any budget
- Keeps supplies at arm’s reach
- Easy to take apart and move
A craft desk doesn’t have to be a single piece. Place two low cube units a few feet apart, rest a long board across the top, and you have a desk with built-in storage on both ends. I’ve seen this setup work in dorms, spare rooms, and shared spaces. A stool slides into the center gap, and baskets in the cubes hold everyday supplies. You choose the length, color, and height, so the desk fits your wall exactly. The corner feels flexible, clean, and personal, and it costs far less than a custom piece.
Stability comes first. Secure the board to the cube tops with metal brackets or strong screws, so it never slides. Check the height before you build, since most people work comfortably at about seventy-five centimeters. Add felt pads under the units to protect the floor. Anchor both shelves to the wall with the included brackets. Cover the board with a self-healing mat for cutting, and keep a clip-on lamp nearby. Use one cube for daily tools and another for paper. The finished desk looks neat, sturdy, and creative, and it gives you a flexible workspace.
Rolling Cube Cart
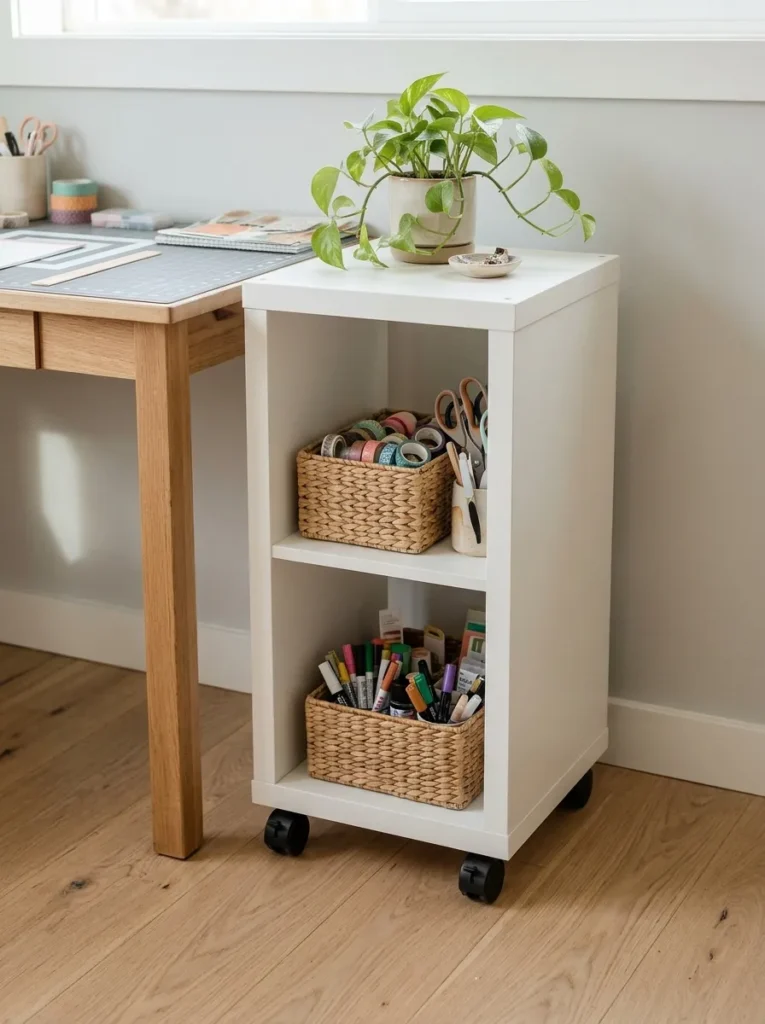
- Rolls supplies right to your work spot
- Tucks away when the project ends
- Casters turn any cube into a cart
- Perfect for small or shared rooms
Wheels can make a shelf far more useful. Attach four locking casters to a small unit, and you have a cart that follows you around the room. I’ve tried this beside a sewing table, and I stopped walking back and forth for supplies. Fill the cubes with baskets for scissors, tape, and paint pens. When the project ends, roll it into a corner. The setup feels flexible, tidy, and clever, and it suits small rooms where every inch has to work hard.
Pick casters that carry more than the loaded weight. Choose locking wheels so the cart stays put while you work. Attach a thin wooden base under the shelf to spread the weight, then screw the casters into the corners. Keep heavy items in the lowest cube for balance. Add a hook on the side for a tote bag or apron. Check the screws every few months, since movement can loosen them over time. Roll it on smooth floors only, or add soft wheels for rugs. The finished cart looks compact, light, and helpful.
Project Basket Cubes
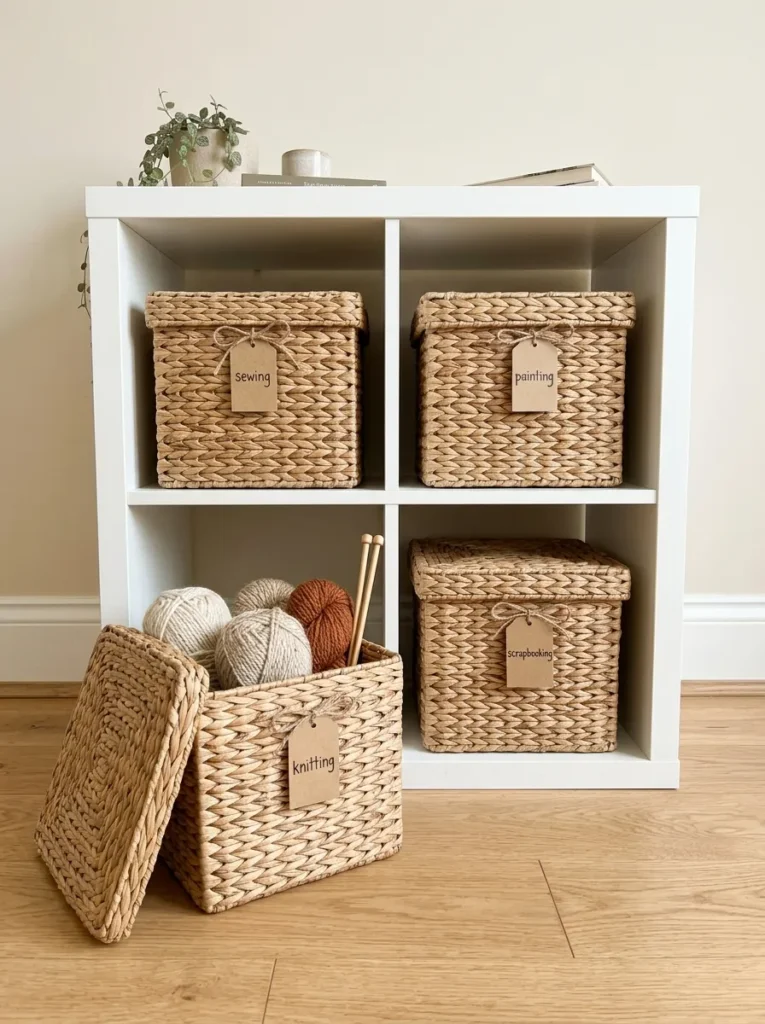
- Gives every project its own portable basket
- Stops half-finished work from spreading
- Lets you switch hobbies in seconds
- Hides mess behind a calm, woven front
Half-finished projects can overwhelm a room. Give each one a basket, and the clutter disappears. Pack the tools, materials, and notes for a project into a single basket, then slide it into a cube. I’ve tried this with a knitting project, and I could pick it up a month later without hunting for needles. Natural woven baskets keep the shelf calm and cozy. The grid shows exactly how many projects are in progress. The room feels tidy, flexible, and low-stress, and returning to a project feels welcoming.
Keep the system simple to stay consistent. Limit yourself to one basket per active project, and cap the total at about six. Slip a small card inside with notes, measurements, or the next step. Choose baskets with sturdy handles that fit the cube snugly, so they slide in and out easily. Label each front, so you can spot the right one from across the room. Review the baskets each season and finish or donate anything you no longer love. The finished shelf looks neat, soft, and inviting, and your unfinished work feels manageable instead of messy.
Pattern Pocket Files
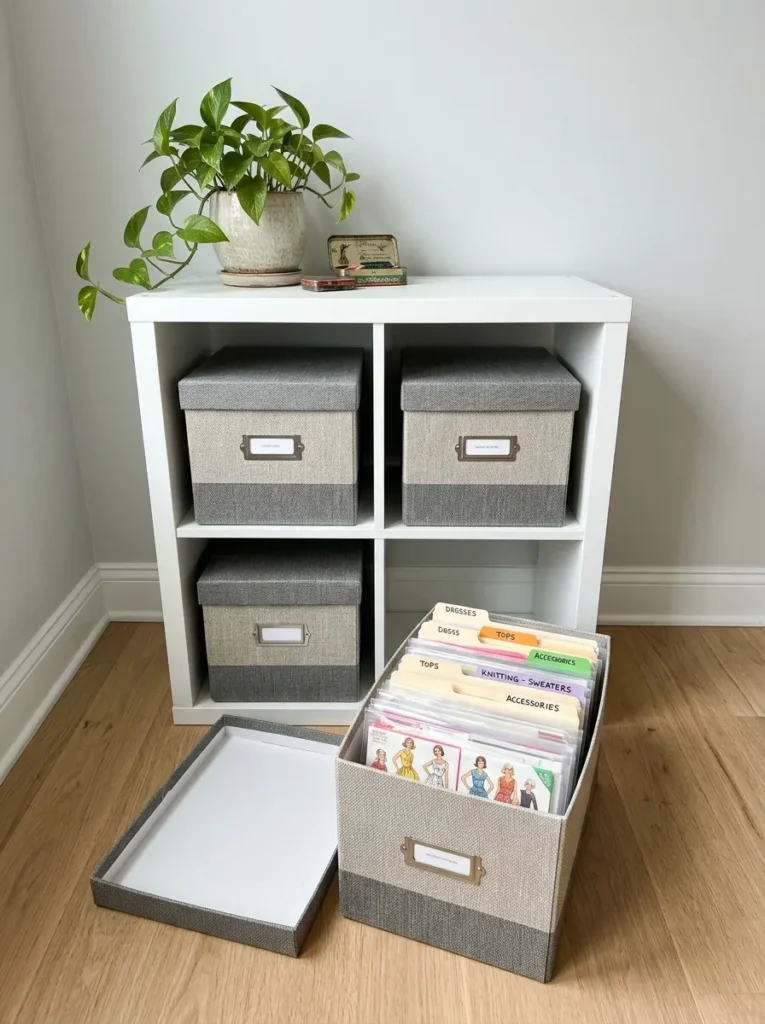
- Keeps paper patterns flat and easy to browse
- Sorts by type, size, or difficulty
- Protects envelopes from torn corners
- Fits standard file boxes in cube openings
Paper patterns tear and fade when they are crammed in drawers. A set of file boxes inside the cubes gives them a safe, flat home. Sort envelopes by type, such as dresses, tops, bags, and home decor, and add tabbed dividers for quick browsing. I’ve noticed that sewists make more of their patterns once they can find them. Clear sleeves protect delicate pieces. The shelf feels orderly, professional, and calm, and choosing the next pattern becomes enjoyable instead of stressful.
Sorting makes the difference. Group by project type first, then by size, so you can grab the right one in seconds. Store tissue pieces in clear zip bags with the instructions, and label each bag with the name of the pattern. Choose file boxes that fit the cube depth neatly. Keep spare tracing paper in a separate tray. Review your collection yearly and donate patterns you no longer use. Place the boxes at eye level for easy flipping. The finished shelf looks clean, helpful, and tidy, and it protects your pattern library for years.
Sticker Stationery Cubes
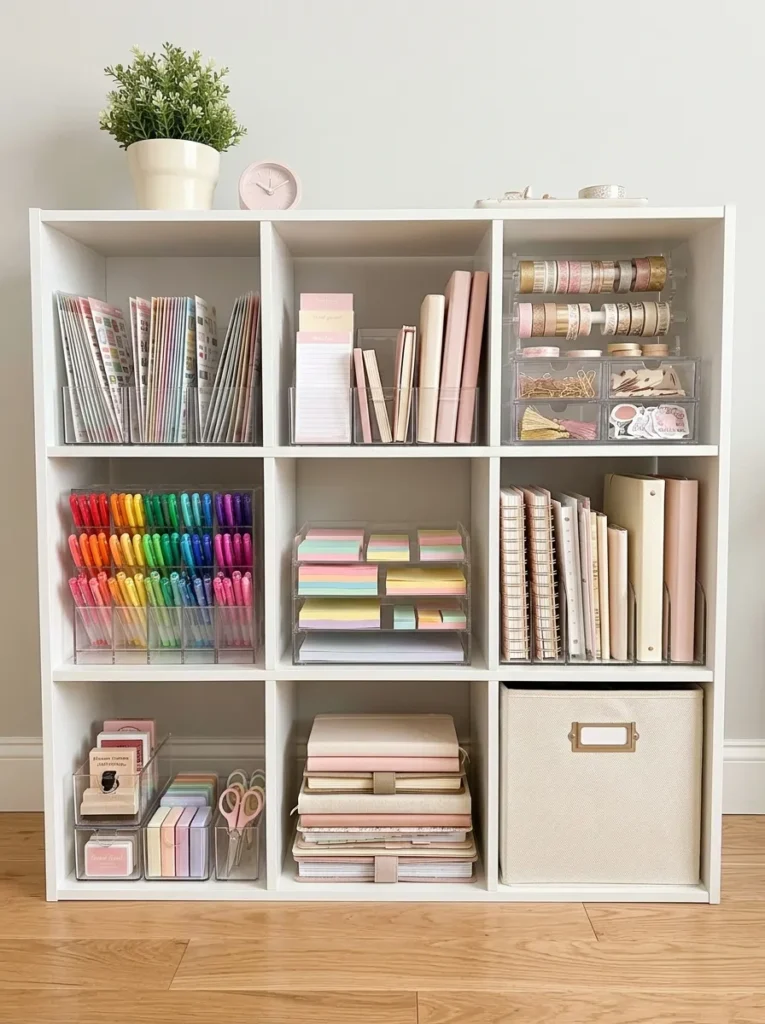
- Gives planner and journal supplies one home
- Keeps sticker sheets flat and uncurled
- Sorts pens in a rainbow for easy picking
- Makes the shelf look like a stationery shop
Stationery lovers need a place where everything looks as good as it works. Small acrylic bins in each cube keep stickers, pens, notepads, and sticky notes sorted. I’ve seen planner fans cheer after a quick reorganization, because they could finally see every color. Stand sticker sheets in a file holder, so they stay flat and uncurled. Line pens up by shade for a pretty rainbow effect. The shelf feels bright, cheerful, and organized, and decorating a planner turns into a relaxed, creative ritual.
Sorting by use keeps the system easy. Keep daily items, like pens and sticky notes, in the top row. Store seasonal stickers in a lower cube, and rotate them with the calendar. Use small trays inside the bins for paper clips and tabs. Label each bin with a clear name, such as “stickers” or “pens.” Wipe the acrylic bins monthly to keep them clear. Throw out pens that no longer write. The finished shelf looks fresh, playful, and neat, and it makes planning and journaling easy to start.
Scrapbook Album Display
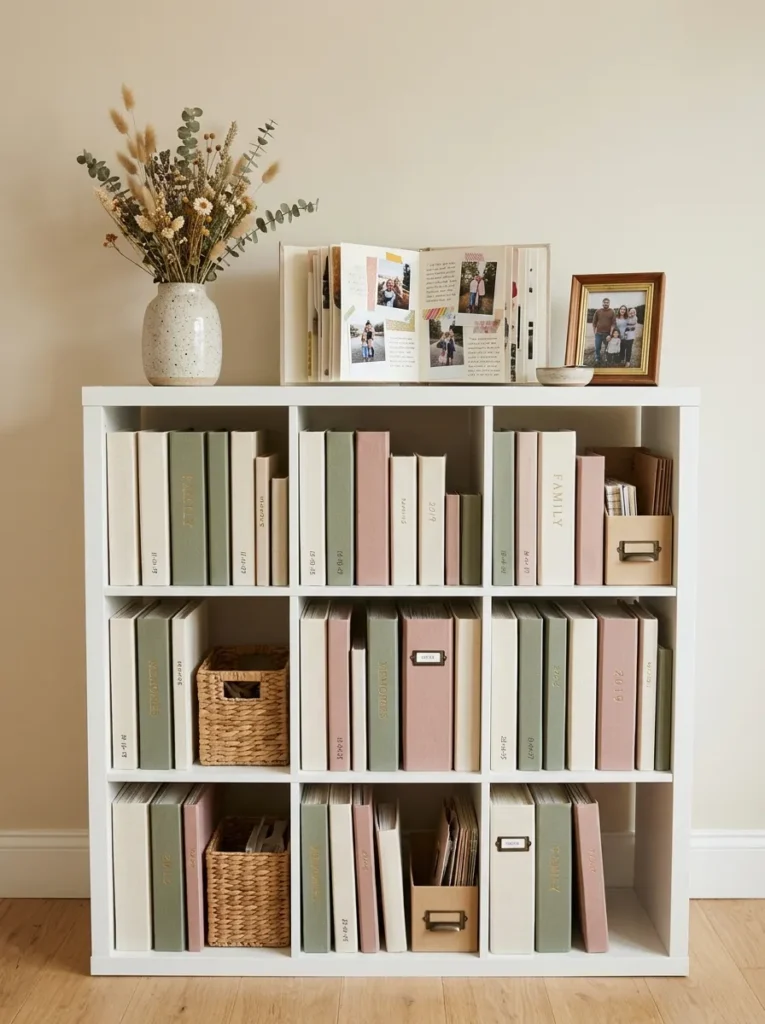
- Gives finished albums a proud home
- Keeps books upright and dust-free
- Doubles as a memory display
- Lets you rotate favorites on top
Finished albums deserve to be seen. Stand them upright in the cubes, and your memories turn into a beautiful display. I’ve noticed that people flip through their albums more often when they sit within easy reach. Pick a few matching spines in cream, sage, or blush for a cohesive look. Rest one open album on top beside a framed photo and a few dried flowers, and the shelf feels warm and personal. The unit looks nostalgic, organized, and inviting, and guests often stop to browse.
Care keeps albums beautiful for years. Choose archival albums and acid-free pages, so photos don’t fade or stick. Keep the shelf away from direct sun and damp walls. Stack larger albums at the bottom, since they weigh more, and keep smaller ones at eye level. Use bookends or a small basket to keep partly filled cubes from tipping. Rotate the open album on top every few weeks. Wipe the covers with a dry cloth. The finished display looks curated, cozy, and meaningful, and it turns a simple cube shelf into a quiet memory wall.
Door Insert Hideaway

- Hides messy supplies behind clean doors
- Keeps dust off paper, fabric, and thread
- Mixes open and closed storage for balance
- Gives the unit a furniture-like finish
Not every supply needs to be on show. Add door inserts to a few cubes, and the shelf looks calm, even when the contents are not. I’ve seen this work wonderfully in living rooms where the craft corner is open to guests. Keep favorites, like yarn and ribbon, in the open cubes, and hide glue guns, bins, and spare scraps behind the doors. Brass knobs add a boutique feel. The shelf looks polished, balanced, and tidy, and it blends into your home instead of looking like a studio.
Think about how you use each cube. Place daily tools in open cubes and rarely used items behind doors. Choose white doors to match the frame, or paint them a soft sage for a gentle accent. Add felt bumpers inside the door edges so they close quietly. Use clear bins behind the doors, so you can still see what’s inside. Anchor the unit to the wall, because doors add weight to the front. Wipe the knobs and fronts monthly. The finished unit looks refined, flexible, and clean, and it keeps visual clutter out of sight.
Wallpapered Cube Backs
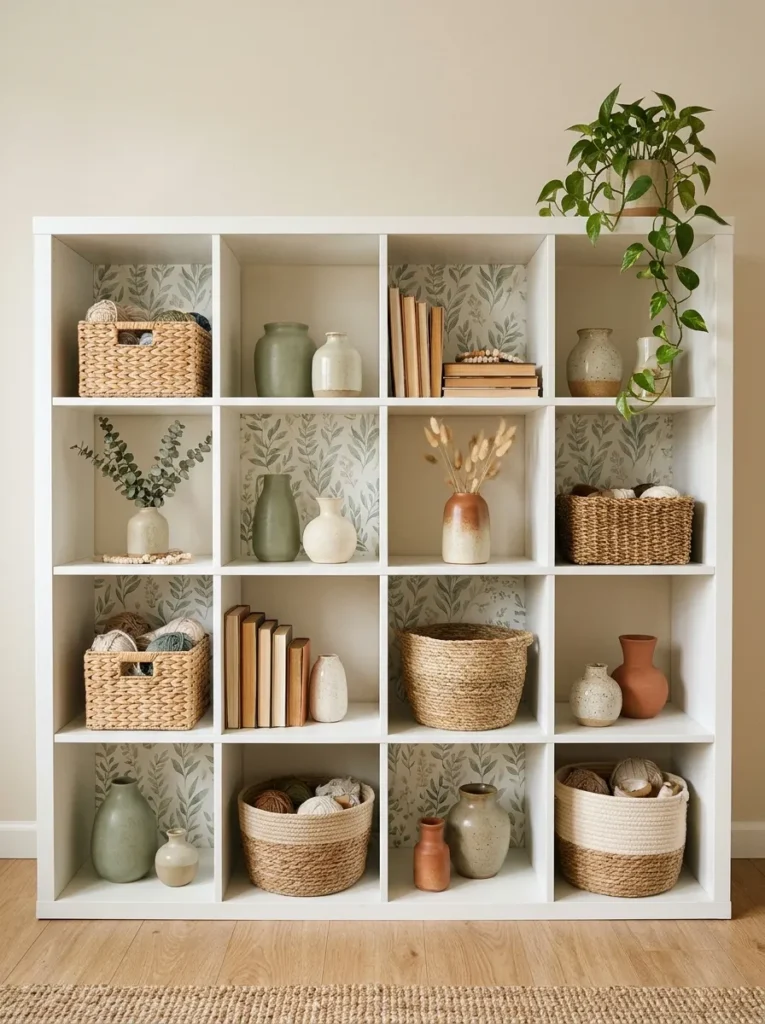
- Adds pattern to plain white cubes
- Peels off easily if you change your mind
- Makes supplies pop against a pretty backdrop
- Costs only one roll of paper
Plain white cubes can be pretty with the right backdrop. Line the back of a few cubes with peel-and-stick wallpaper in a soft botanical or geometric pattern, and the shelf gains instant personality. I’ve tried this with a sage floral print, and the whole unit looked custom. Supplies like jars, baskets, and spools look richer against the pattern. Pick two or three cubes for a bold accent, or line them all for a unified look. The shelf feels charming, designed, and fresh, and it costs very little to change.
Precision keeps the paper looking polished. Measure each cube back, then cut the wallpaper about a centimeter larger than needed. Peel and smooth it from the center outward with a plastic card, pressing out air bubbles. Trim the edges with a sharp craft knife and a metal ruler. Choose a thick paper that hides the shelf color and resists wear. Keep the pattern direction the same across all cubes. Wipe the backs with a dry cloth when needed. The finished shelf looks styled, soft, and distinctive, and it brings the feeling of a boutique studio.
Styled Top Display
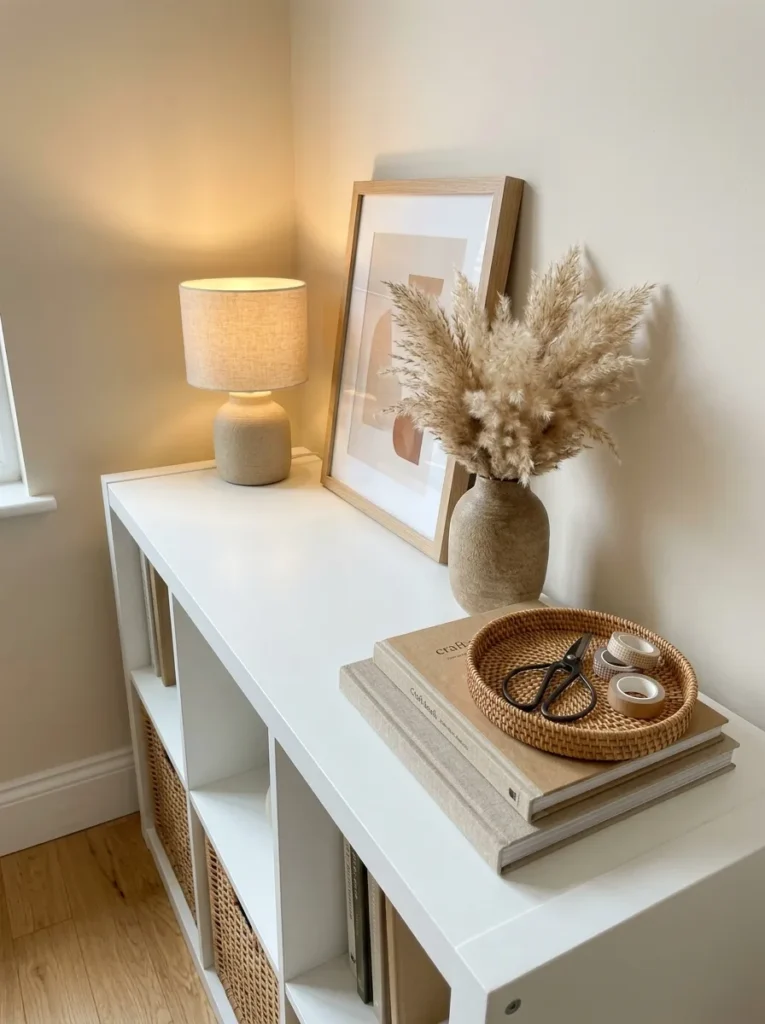
- Turns the shelf top into a styled vignette
- Adds warm light and personality
- Keeps small tools in one pretty tray
- Makes the unit feel like furniture
The top of the shelf is prime display space. Add a small lamp, a framed print, and a plant, and the whole unit looks styled. I’ve noticed that a few well-chosen items make a craft corner feel like part of the home. Place a woven tray beside them to hold scissors, tape, and pens, so daily tools stay close. The golden lamp glow warms the room in the evening. The shelf feels curated, welcoming, and personal, and it lifts the whole craft corner above ordinary storage.
Use simple styling rules for a polished look. Group items in odd numbers, and place the tallest piece slightly off center. Keep the palette to two or three tones, such as cream, sage, and warm wood. Leave about a third of the surface empty, because breathing room signals calm. Use a warm bulb around 2700 Kelvin for a soft glow. Avoid heavy items near the edge, since the surface may be lighter than it looks. Reset the arrangement weekly and wipe away dust. The finished top looks warm, balanced, and inspiring.
Conclusion
A creative space doesn’t need fancy furniture. It needs a simple grid that gives every supply a home. Whether you start with a yarn wall, a paper tray shelf, or a rolling cube cart, these IKEA KALLAX craft room ideas help you spend less time searching and more time making. I’ve seen how small changes like these can completely shift the way a space feels. Save this post on Pinterest, try one idea this weekend, and share it with a fellow crafter who needs a tidier studio. Your most inspiring corner starts with one cube.