15 Book Page Crafts Ideas Using Only Basic Craft Supplies
That broken paperback on your shelf is not trash. It is a stack of free, textured craft paper waiting for a second life. These book page crafts need nothing more than scissors, glue, and a little patience, so you can start today without a shopping trip.
Many crafters feel stuck when they see an old book, unsure whether cutting it up is worth the effort. I’ve noticed that most people hesitate until they make one small project, and then they cannot stop. That is why every idea below is simple, low cost, and beginner friendly. You will find roses, wreaths, lanterns, boxes, and more, each with exact measurements and easy finishing tips. Scroll through, save your favorites to Pinterest, and pick one to try this weekend.
Paper Roses
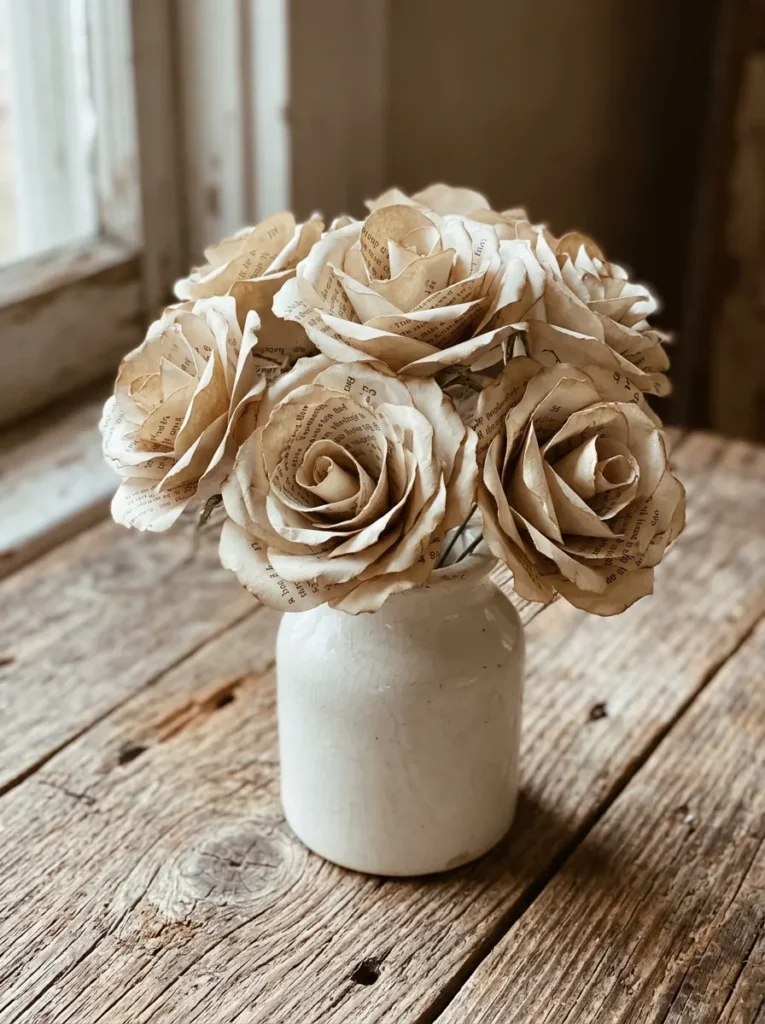
Old paperbacks make surprisingly realistic flowers. Cut a spiral from a single page, starting at the outer edge and curving inward. Roll it from the wide end and let it bloom. Add a dot of glue at the base to hold the shape in place.
I’ve noticed that yellowed pages give the best color, so pick a thrift store paperback with dense text. Glue each rose to a skewer or floral wire for a stem. A bunch of seven fills a small vase and costs almost nothing at all.
Folded Page Stars
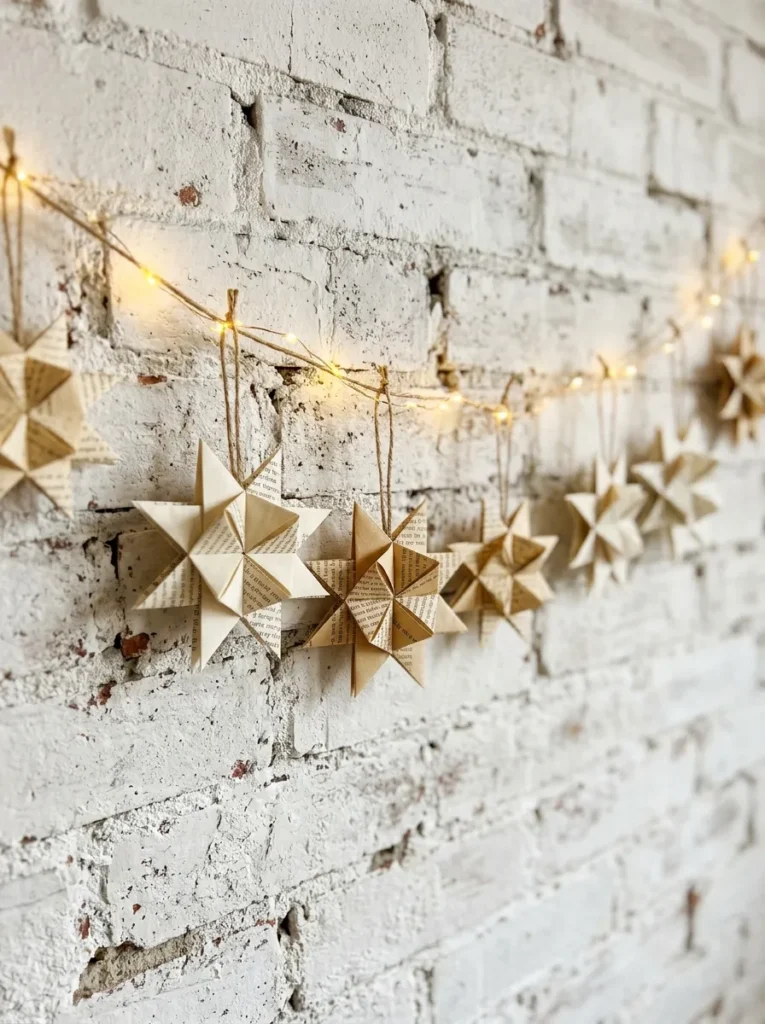
- Cut pages into strips about half an inch wide and 10 inches long. Tape two strips together if your paperback is small.
- Tie a loose knot at one end of the strip. Flatten it gently into a pentagon.
- Fold the long tail around each edge of the pentagon, keeping every fold snug.
- Tuck the leftover end inside the pentagon. Pinch each side so the star puffs up.
- Thread a needle with twine and pass it through the center of each star to make a garland.
Folded stars are a calm, repetitive craft, so they suit evenings with a podcast. I’ve found that a batch of twenty fills a mantel garland. Crisp paper from newer books holds the puffy shape better than soft, old pages, so save those for roses and other book page crafts. Space the stars six inches apart.
Decoupage Mason Jars

Quick Tip:
Tear the pages into small pieces instead of cutting them. Torn edges blend into each other, so you will not see hard seams on the glass. Wipe the jar with rubbing alcohol first so the glue grips.
A plain jar becomes a glowing lantern in about an hour. Brush decoupage glue on the glass, press each piece down, and smooth out air bubbles with your finger. Seal with two coats on the outside and let it dry overnight. Drop in a battery tea light for a safe glow.
Butterfly Wall Art
DO:
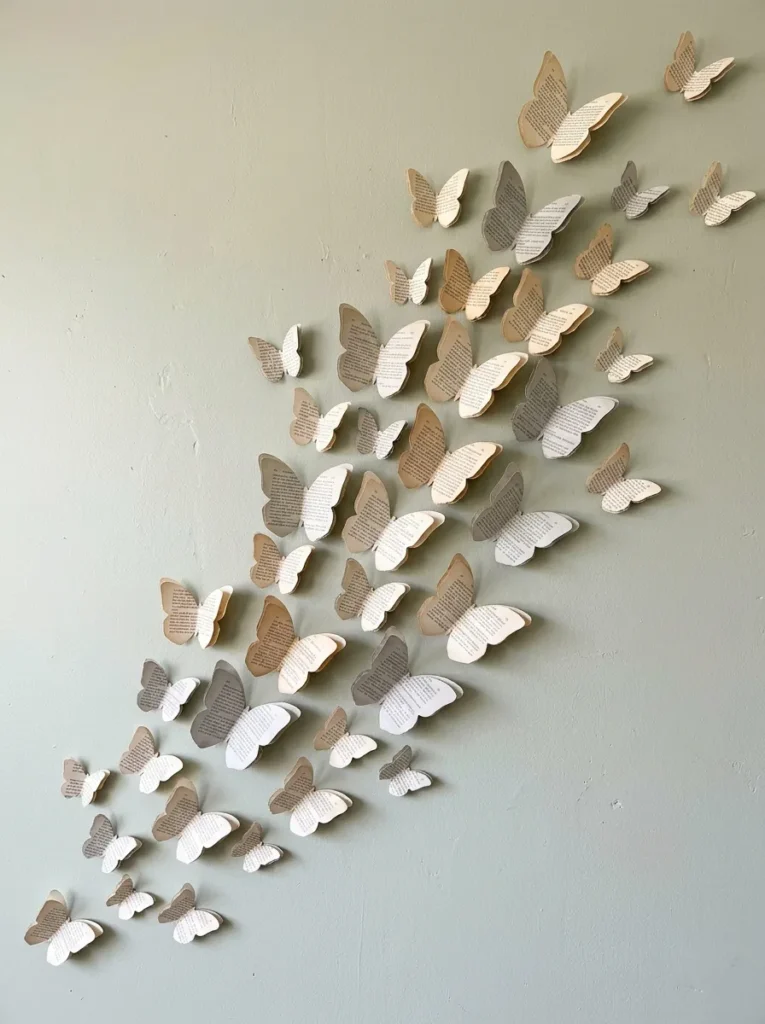
- Trace a butterfly template onto the page and cut it out with sharp scissors.
- Fold each wing gently upward along the center line for depth.
- Glue only the center body so the wings stay lifted.
- Use removable adhesive dots if you rent your home.
DON’T:
- Don’t press the wings flat against the wall.
- Don’t use thin, brittle pages that crack when folded.
- Don’t crowd the butterflies into one tight clump.
- Don’t skip a test layout on the floor before sticking anything up.
Wall art does not get easier than this. I’ve made a set of twenty in one evening, and the diagonal flow looked like they were drifting upward. Vary the sizes from two to five inches so the group feels natural. Hang the largest first, then fill the gaps.
Mini Page Envelopes
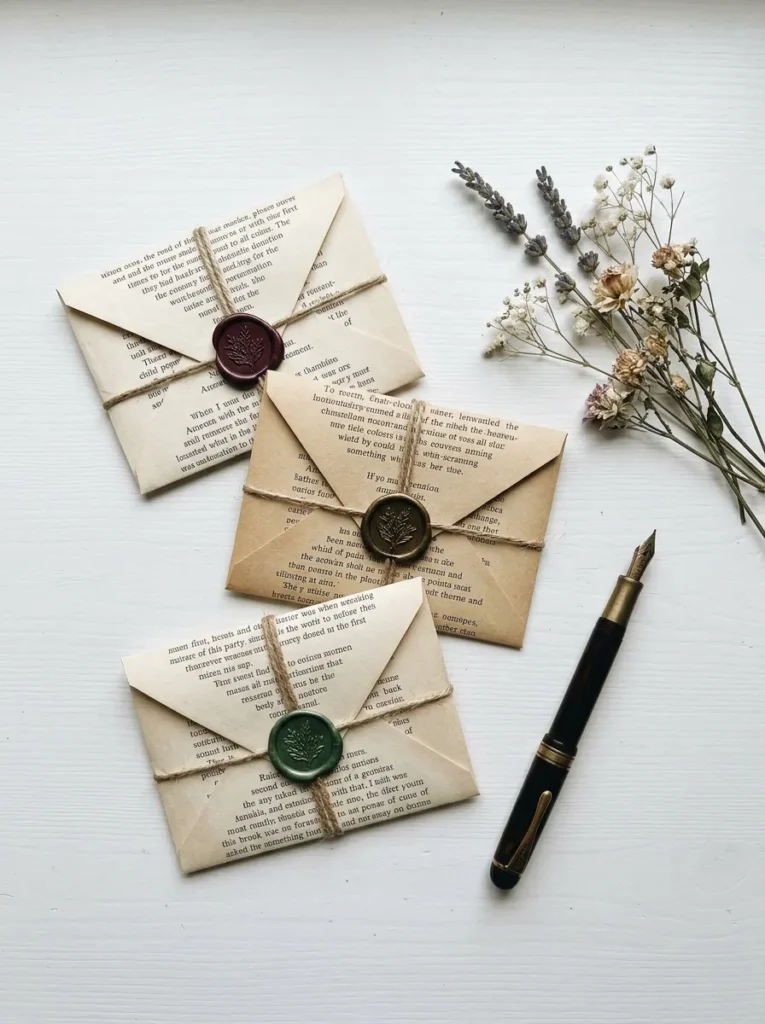
Cost: Free | Time: About 10 minutes each
Skill Level: Beginner | Best For: Gift cards, notes, and seed packets
Small notes feel special in a handmade envelope. Wrap a page around an index card to find the fold lines, then glue the side flaps and tuck the top. I’ve noticed that pages from hardcovers fold more crisply than paperbacks. Slip in a gift card or a handwritten note, then seal with washi tape.
Paper Page Pumpkins
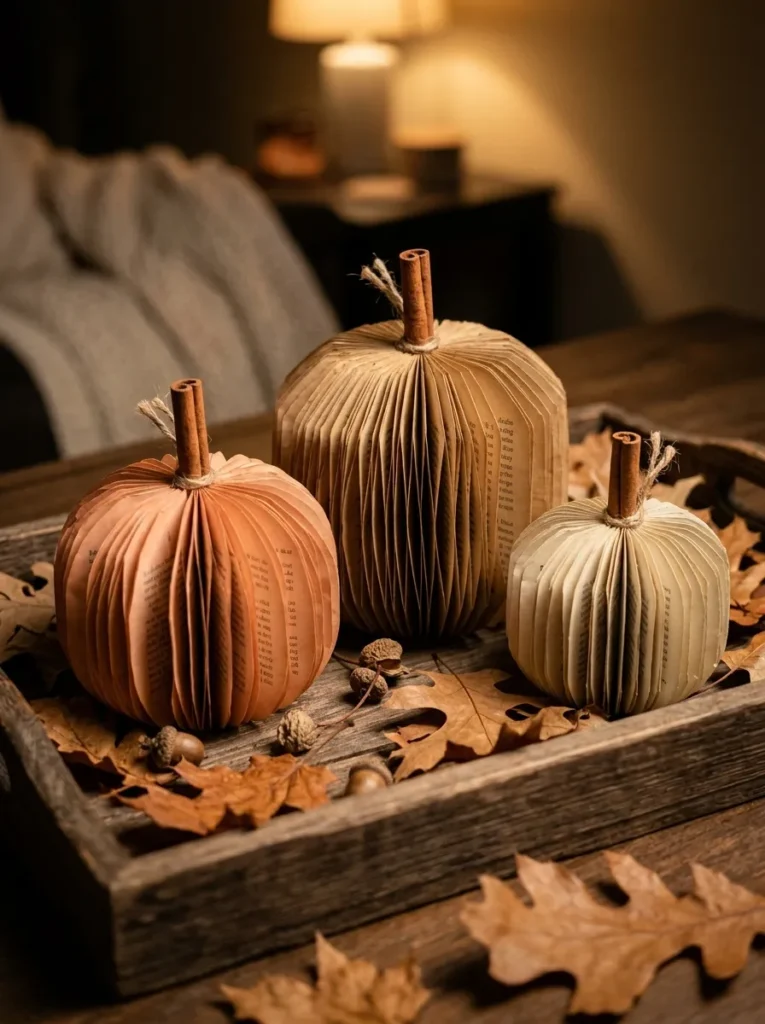
Fall decor does not have to cost a thing. Cut ten circles from book pages, fold each one in half, and stack them. Pierce the middle with a needle, thread a string through, and pull gently so the folds fan out into a full round pumpkin.
Brush the edges with diluted orange acrylic paint or strong tea for a warm glow. In my experience, circles about five inches wide make the best size. Add a cinnamon stick stem with hot glue and a few paper leaves, then group three together on a tray.
Book Page Wreath
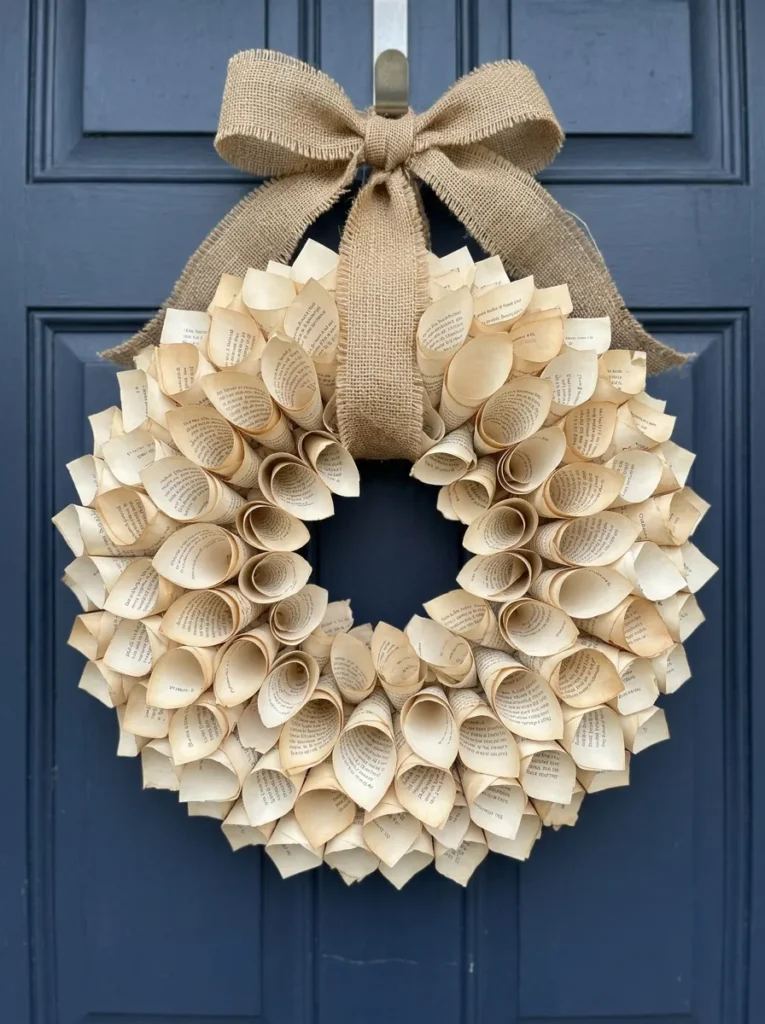
BEFORE: A paperback with a broken spine usually ends up in a donation bin or the trash. Even a small stack of damaged books can feel like clutter.
AFTER: That same book becomes a full, textured wreath for your front door. Rolled cones of paper catch the light and show tiny lines of text.
Roll each page into a cone, secure it with a dab of hot glue, and glue the cones in rows onto a cardboard ring. I’ve seen a wreath take about 60 pages and two hours. Start at the outer edge and work inward so no gaps show. Hang it indoors or under a covered porch.
Rolled Paper Beads
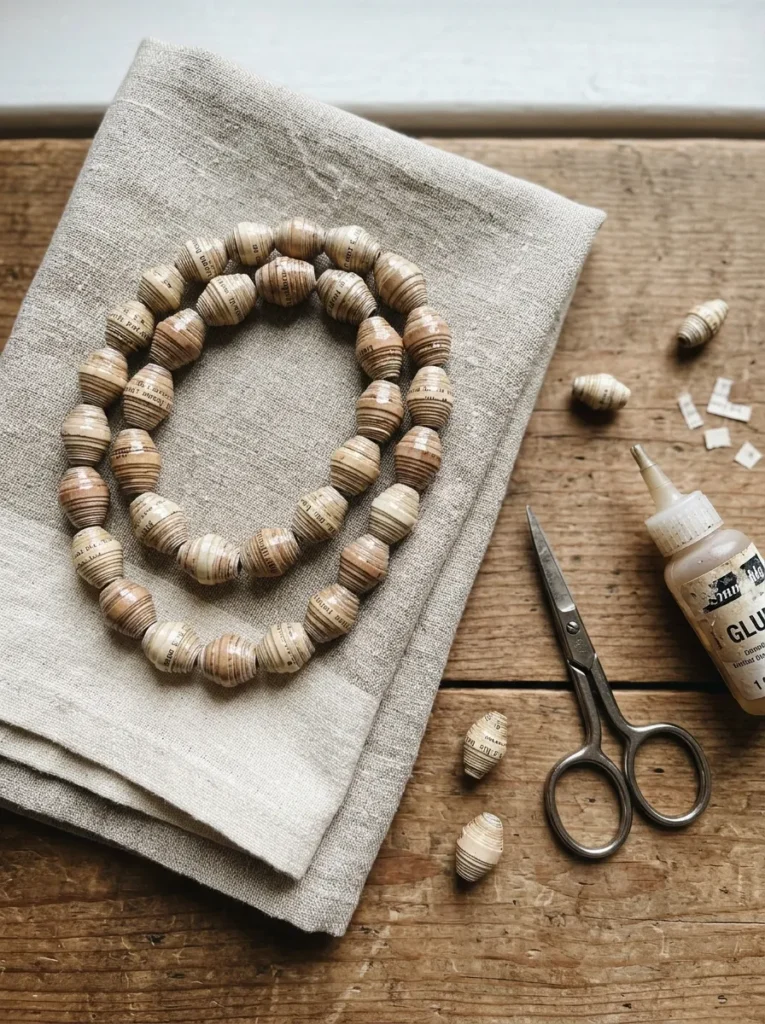
- Cut a page into long triangles, about one inch wide at the base and six inches tall.
- Place a toothpick at the wide end and roll the paper tightly toward the tip.
- Dab glue on the tip to secure it, then slide the bead off the toothpick.
- Brush on two coats of clear glue or varnish, letting each coat dry fully.
- Thread the beads onto string or elastic cord and tie a secure knot.
Paper beads feel almost like wood once they are sealed, which surprises most beginners. A necklace needs about 25 beads, so a few dozen pages is plenty. Mix in a few painted beads for color. Seal them well, since water softens paper fast, and keep the necklace away from rain and showers.
Page Gift Wrap

| Store Wrapping Paper | Book Page Wrap | |
|---|---|---|
| Cost | Moderate per roll | Nearly free |
| Look | Bright and uniform | Vintage and textured |
| Waste | Often not recyclable | Reuses old pages |
| Large gifts | One sheet covers a big box | Tape several pages together |
Wrapping paper lasts about ten seconds before it hits the trash. Book pages make that moment prettier. Small gifts like candles and cards suit this best. Overlap two pages and tape them on the back to hide the seam. Add twine and a dried orange slice. A taped double layer resists tearing at corners.
Woven Heart Baskets
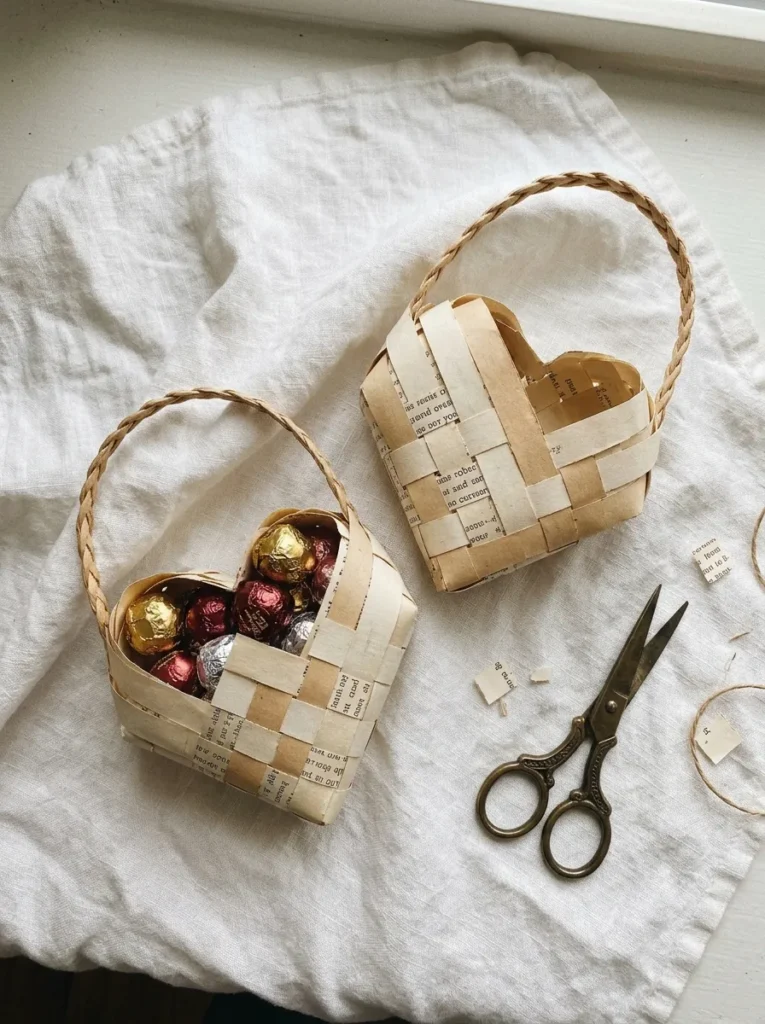
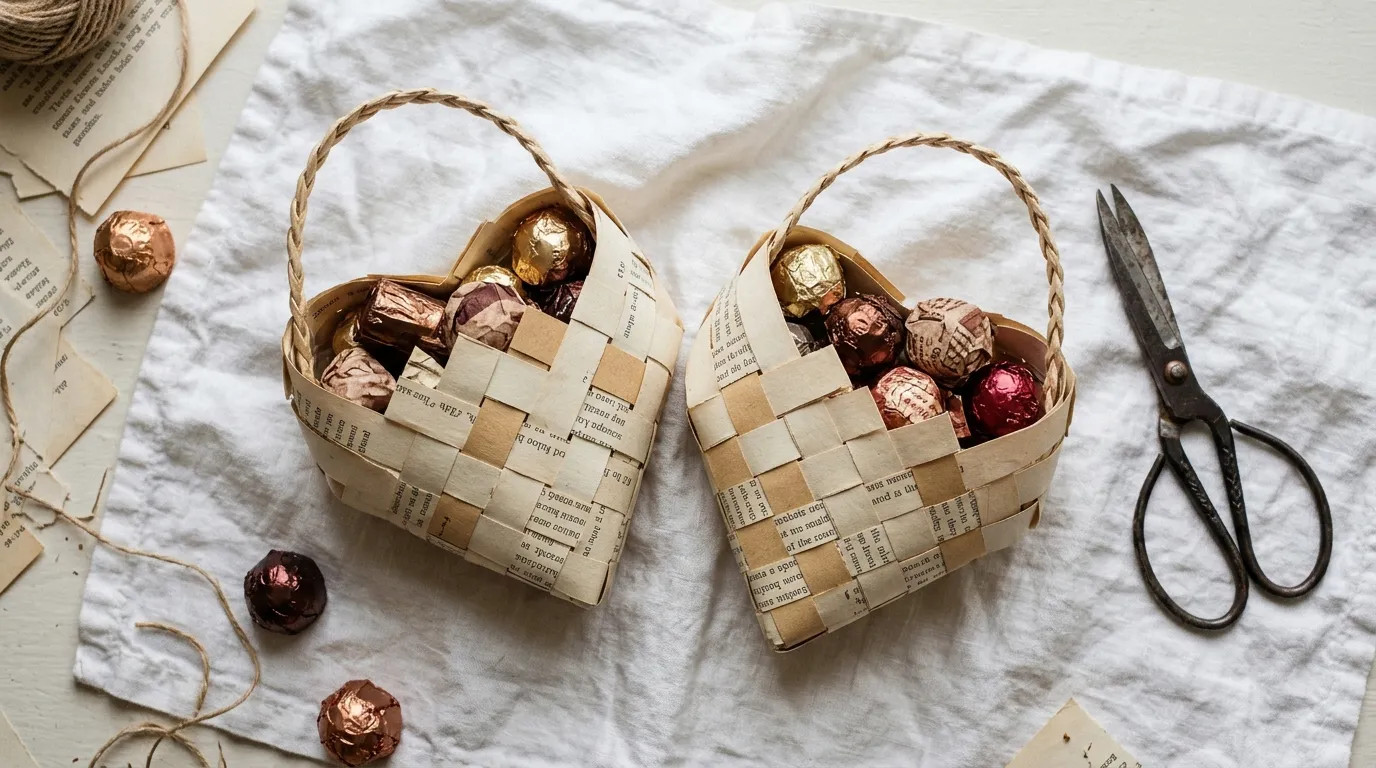
- Cut two rectangles from a sturdy page, each about 3 by 9 inches, and fold both in half lengthwise.
- Round the folded end of each one, then cut slits from the fold up to one inch from the open edge, spaced an inch apart.
- Weave the two pieces together, alternating over and under, until a heart-shaped pocket forms.
- Glue a thin paper strip inside the top edge to make a handle.
- Fill with candy, a tiny note, or dried petals.
Weaving looks tricky, but the pattern is just over, under, repeat. I’ve noticed that the first basket takes twenty minutes and the second takes ten. Choose sturdy hardcover pages so the loops hold their shape. These make sweet party favors, and a stack of ten costs nothing but an old book.
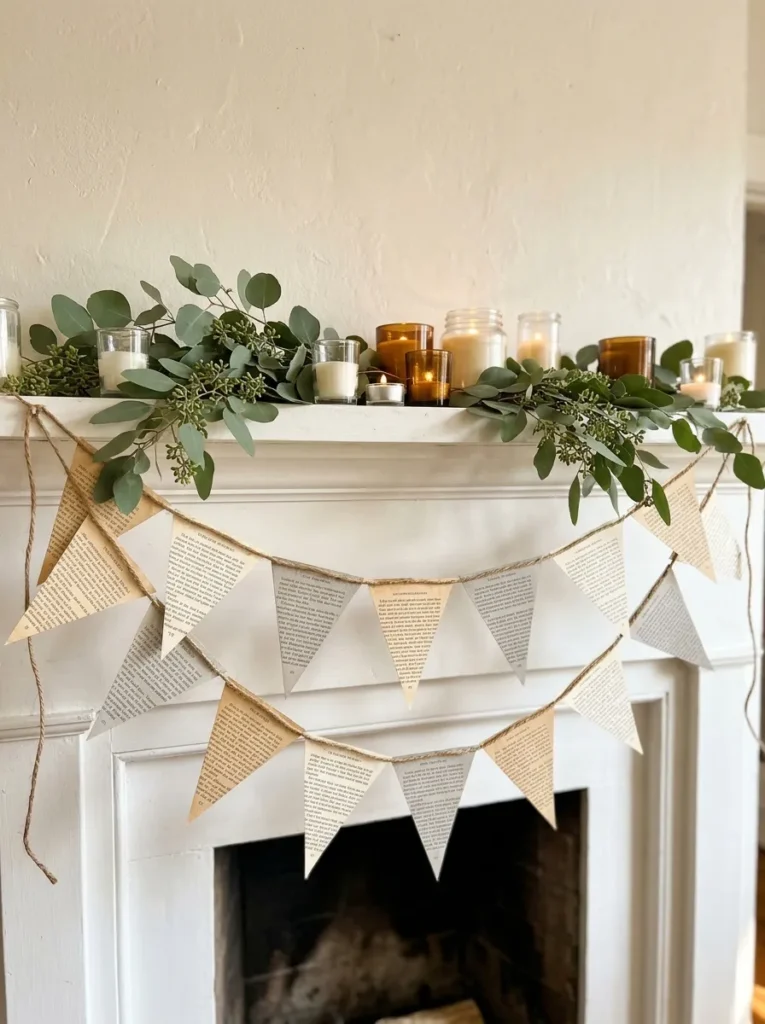
Page Bunting Banner
Quick Tip:
Cut one cardboard triangle, five inches wide and seven tall, and trace it onto every page. Matching shapes make the banner look tidy. Fold the top edge over the twine and glue it down.
Parties need color, but pages give you texture instead. Add one letter per triangle with a black marker to spell WELCOME, or leave the printed text alone. I’ve seen a ten triangle banner stretch across a mantel in under an hour. Leave a two inch gap between flags.
Coiled Paper Bowl
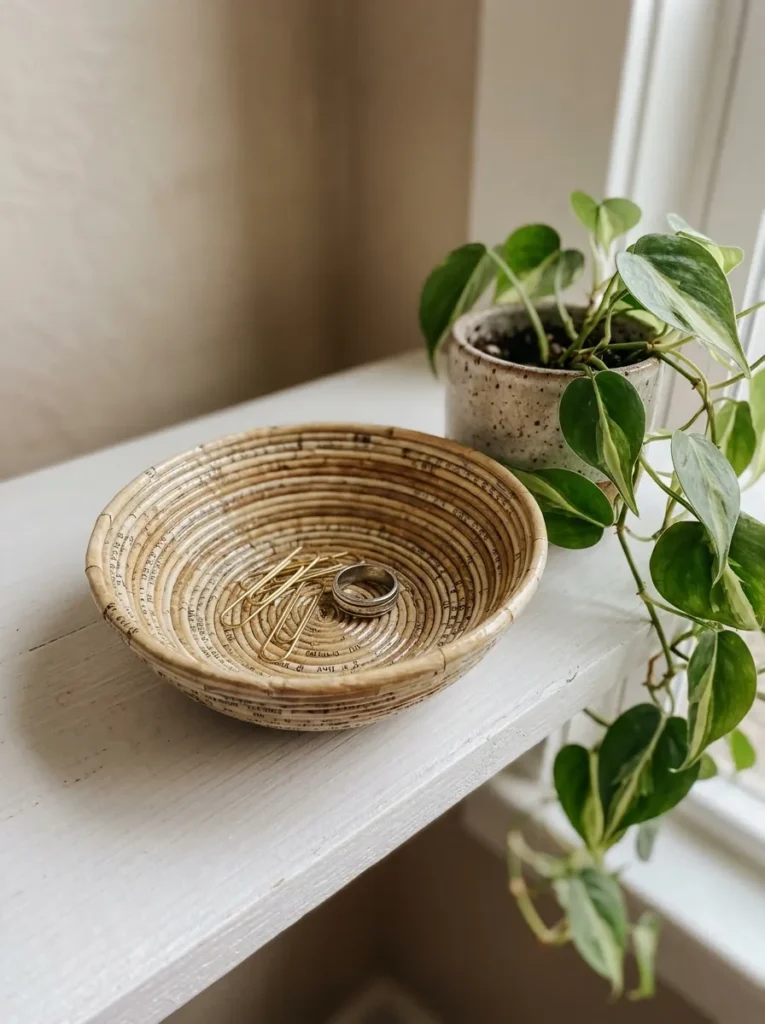
BEFORE: Keys, rings, and loose change end up scattered across the desk. Nothing has a home, so everything gets lost.
AFTER: A coiled page bowl sits by the door and catches it all. It holds its shape, shows tiny lines of text, and costs only glue and a few pages.
Cut pages into strips one inch wide, roll the first strip tightly into a flat spiral, and glue the end. Keep adding strips, then press the coil up the sides over a small bowl. I’ve found that two coats of glue make it firm. Wrap the mold in plastic first so it lifts off.
Folded Page Boxes
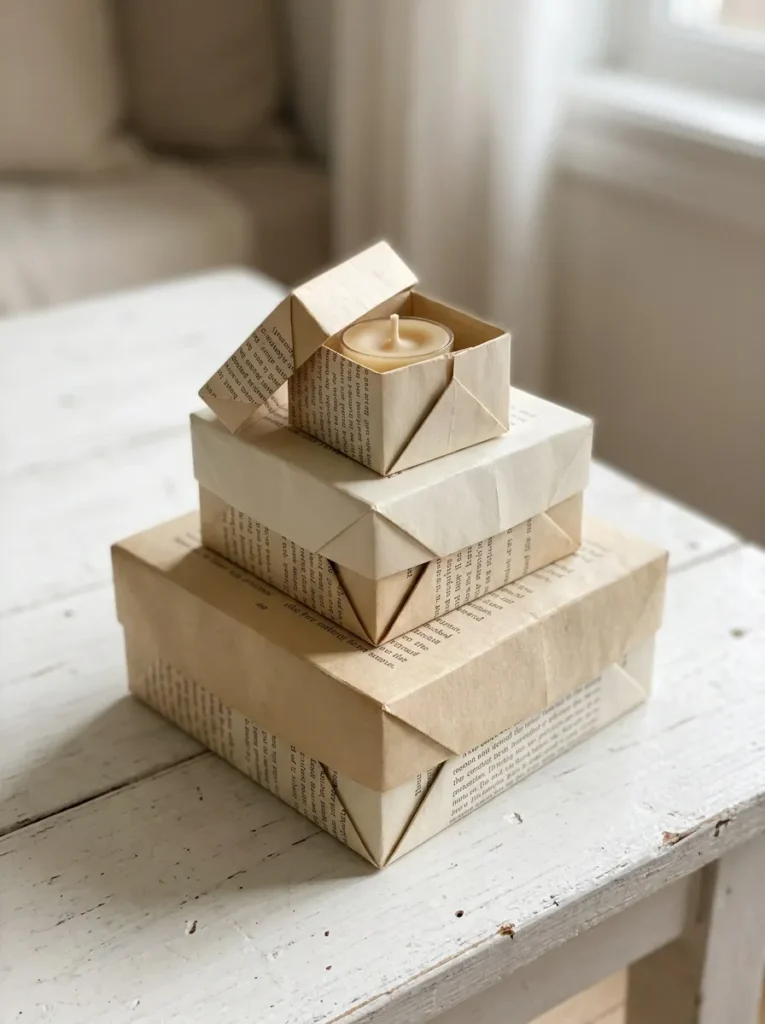
- Fold the top corner of a page down to the opposite edge, then trim the leftover strip to make a square.
- Fold all four corners into the center to form a smaller square.
- Fold two opposite edges into the center line, then unfold them.
- Stand up the open sides, pinch the corners, and tuck the flaps into the box walls.
- Repeat with a square about a quarter inch larger to make the lid.
Boxes hold small gifts without any tape. Thinner pages fold best, which is why many crafters reach for old paperbacks. Fill them with earrings, candy, or seed packets. Stack three sizes together for a tidy display.
Framed Word Art

| Store Print | Book Page Frame | |
|---|---|---|
| Cost | Moderate to high | Pennies |
| Meaning | Generic quote | A page from your favorite novel |
| Texture | Flat and glossy | Layered, aged paper |
| Size | Fixed options | Any size you want |
Favorite books deserve a spot on the wall. Pick a page with a line you love, tape it behind the glass, and trim the edges to fit. Tea stain the page first for a warmer tone. I’ve tried black cardstock behind the page, and the text stood out sharply.
Cone Christmas Trees

DO:
- Roll a sheet of cardstock into a cone and tape it as a stiff base.
- Cut pages into strips, fold each one in half, and glue them in rows from the bottom up.
- Overlap each row by half so no cardstock shows through.
- Finish with a paper star or a button on top.
DON’T:
- Don’t glue the first row crooked, since every row follows it.
- Don’t use wet glue that soaks through thin pages.
- Don’t leave the cone edges bare near the seam.
- Don’t skip the stiff base, or the tree will lean.
Tabletop trees are a calm evening craft. I’ve made a set of three in different heights, and they looked like a tiny forest on the mantel. Spray them lightly with white paint for a snowy look. Keep them away from candles and open flames, since paper burns fast.
Conclusion
Old books hold more beauty than most of us realize. A few pages, a dab of glue, and one quiet evening can turn clutter into decor, gifts, and keepsakes. I’ve seen how a single finished project can spark a whole new habit of crafting with what you already own. Whether you start with the paper roses or the framed word art, these book page crafts prove that simple supplies can create something special. Save this post on Pinterest, try one idea this week, and share it with a friend who loves a good upcycle.