Book Page Crafts Ideas for Christmas Decorations
Book page crafts for Christmas decorations are ornaments, garlands, trees, wreaths, and gift toppers made from the paper inside old books, using folding, rolling, cutting, and a bit of glue. This article covers what to check before you start, the techniques that carry across projects, and 13 projects from a ten-minute gift tag to a weekend wreath. Most cost between $5 and $25 in supplies, and the books can cost a dollar or two at a thrift shop.
The usual problem with paper decorations is that they look thin and flat on a tree or a mantel, and they can wilt in a warm, humid room. Another problem is safety. Paper burns easily, so these pieces need to stay away from candles, fireplaces, and hot bulbs. Most of the fixes are small: choose the right paper, seal what you make, and use LED lights only.
You don’t need all 13 projects. Pick two or three, make them well, and add more next year.
Jump To
- What to Check Before You Start
- The Basic Principles of Book Page Christmas Crafts
- Essential Materials
- Book Page Craft Techniques
- Book Page Christmas Craft Projects
- How to Start
- Common Mistakes
- Frequently Asked Questions
- The Finishing Touch
What to Check Before You Start
Start with the book. Thrift store paperbacks, old dictionaries, library sale leftovers, and damaged books are the best sources. Don’t cut up a rare, signed, or sentimental book, and ask before you use one from home. If you plan to sell what you make, check the rules for the book, since newer books are still under copyright. Older public domain titles are safer for anything you sell.
Fire safety comes next. Paper burns fast. Keep book page decorations away from candles, fireplaces, space heaters, and hot bulbs, and use LED lights only when you light a paper piece or hang it on a tree. Check that string lights are rated for indoor use and aren’t warm to the touch. Don’t leave lit lights on paper decorations unattended.
Tools are third. Hot glue guns and craft knives can burn or cut. Use a low-temperature glue gun, cut on a mat with a sharp blade, and keep a bowl of cold water close for burns. If younger children are helping, have an adult handle the knife and the glue gun.
Last is storage. Paper bends and yellows, so decide where the decorations go in January. A flat box with tissue paper keeps them in shape for next year.
Quick Reference
- Best starting point: Paper stars or gift tags
- Biggest impact: Using one or two page colors and repeating a shape
- Budget to start: Roughly $5 to $25 for glue, scissors, and a few extras (approximate, prices vary)
- Time: 10 minutes for the easiest, a weekend for the biggest
The Basic Principles of Book Page Christmas Crafts
These ideas apply to almost every project.
Match the Paper to the Job: Thin, tissue-like pages from old paperbacks and dictionaries fold and curve well. Thicker pages hold their shape for stars, trees, and stiff shapes. Fold a page a few times to test it.

Stay With One Look: A mix of cream, tea-stained, and white pages looks warm. Add one accent color, like red, green, or gold, and keep the rest the same. Too many colors makes paper decorations look cluttered.
Repeat One Shape: A tree full of similar stars or a garland of the same rosette looks planned. Cut a cardboard template so every piece is the same size.
Use Thin Glue Layers: Heavy glue soaks through, wrinkles, and shows. Use a thin coat, press, and wait. Hot glue works for 3D pieces, but use a low-temperature gun.
Seal for Longevity: A thin coat of decoupage medium or a clear matte sealer protects paper from handling and light moisture. It doesn’t make it waterproof, and it doesn’t make it fireproof, so keep the same safety rules.
Plan the Weight: Paper is light, but big wreaths and garlands can sag. Use a sturdy base, like a foam ring or strong string, and hang with removable hooks rated for the weight.
Essential Materials
A short list covers most of the projects below.
Books: One paperback of about 200 to 300 pages gives you plenty of material for several smaller projects. Old hymnals, sheet music books, and dictionaries have a classic look at Christmas.

Glue: White craft glue, a glue stick for flat paper, a low-temperature hot glue gun for 3D pieces, and decoupage medium for sealing.
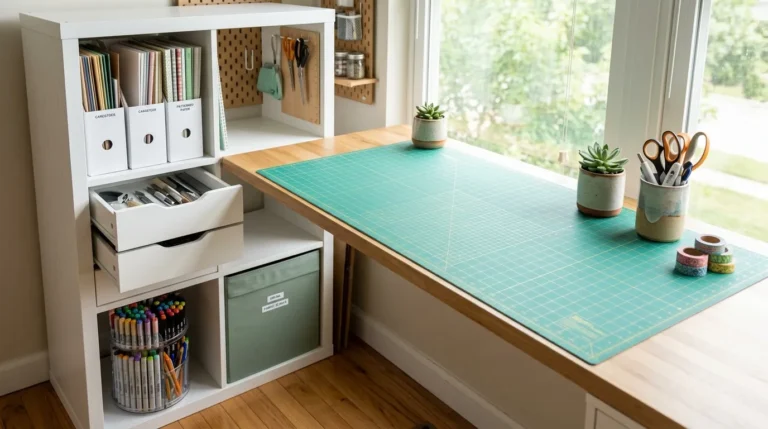
Cutting Tools: Sharp scissors, a craft knife, a metal ruler, a self-healing mat, and a paper trimmer for even strips.
Shaping Tools: Toothpicks, skewers, a bone folder or ruler edge for crisp folds, and a hole punch.
Base Pieces: Foam or cardboard cones and rings, string or twine, wire, and ribbon.
Finishing Supplies: Clear matte sealer, gold or white paint pens, a bit of glitter if you like it, and tea or coffee for staining pages a warm tone.
Lighting: Battery-powered LED string lights and flameless tea lights.
Shop This Look
Book Page Craft Techniques
These methods repeat across the projects.
The Straight Strip: Cut pages into even strips with a paper trimmer, or with a ruler and knife. Strips about half an inch to two inches wide cover most projects. Cut a stack of pages at once to save time.

The Accordion Fold: Fold the page back and forth in equal sections, like a fan. It makes garlands, rosettes, and fan trees. A ruler keeps the folds even.
The Cone Roll: Roll a page into a cone and glue the seam. It’s the base of paper trees and rolled flowers. Trim the base flat so the cone stands up.
The Tea Stain: Brush weak tea or coffee on pages and let them dry flat for a warm, aged look. Don’t soak, since wet paper tears. Press under a heavy book once dry.
The Template Cut: Trace a cardboard template on the page and cut. It keeps stars, hearts, and circles the same size and speeds up batches.
The Seal Coat: Brush on a thin coat of decoupage medium or spray a matte sealer. Let it dry fully. Two thin coats beat one thick one.
Book Page Christmas Craft Projects
Each project below includes what to know before you start.
Folded Book Page Christmas Tree
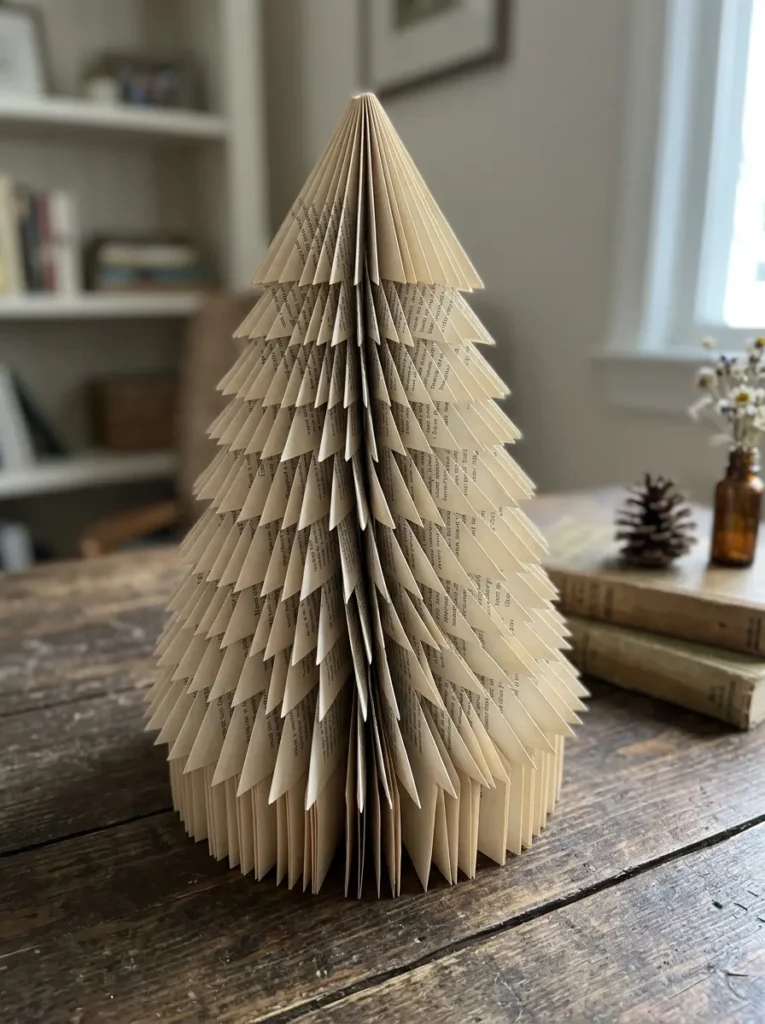
A small tree made from a single book is one of the best-known book page crafts. You fold each page into a triangle, so the pages fan out as branches, and the book stands on its pages like a tree. It works on a shelf, a mantel, or a table.
Fold note: Use a hardcover or a thick paperback with at least 200 pages. Fold the top corner of each page down to the spine to make a triangle, then fold the new edge in again. Do every page, and the stack turns into a cone when you stand the book up. It takes patience and a few hours, but each fold is the same.
Display tip: Spray with a light coat of white or gold paint, and add a small star on top. Place it away from candles and heat, and don’t wrap lit lights around it unless they’re LED and cool to the touch. It suits teens and adults who like a long, calm project and want a table centerpiece.
Shop This Look
Paper Star Ornaments

Stars are the easiest ornament to make from book pages. A flat star is quick, and a folded 3D star looks fancier. Hang a few on a tree or in a window with thread.
Cut note: Trace a star template onto thick page or cardstock backed with book page, and cut out about 20 for a batch. For a 3D star, fold each in half and glue two halves back to back. Use a hole punch or a needle to make a small hole at the top for thread.
Sparkle tip: Brush a thin line of glue around the edge and dip it in fine glitter, or draw a thin outline with a gold paint pen. Let it dry flat. It suits first-time crafters and anyone who wants a batch of ornaments in an evening.
Shop This Look
Rolled Page Cone Trees
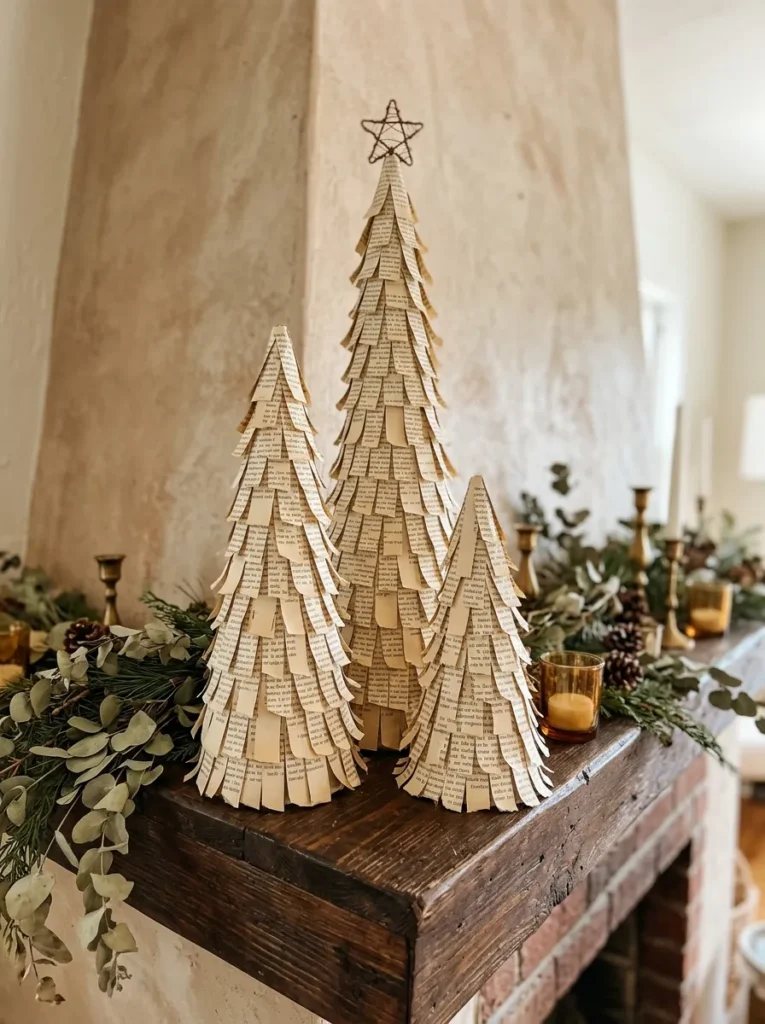
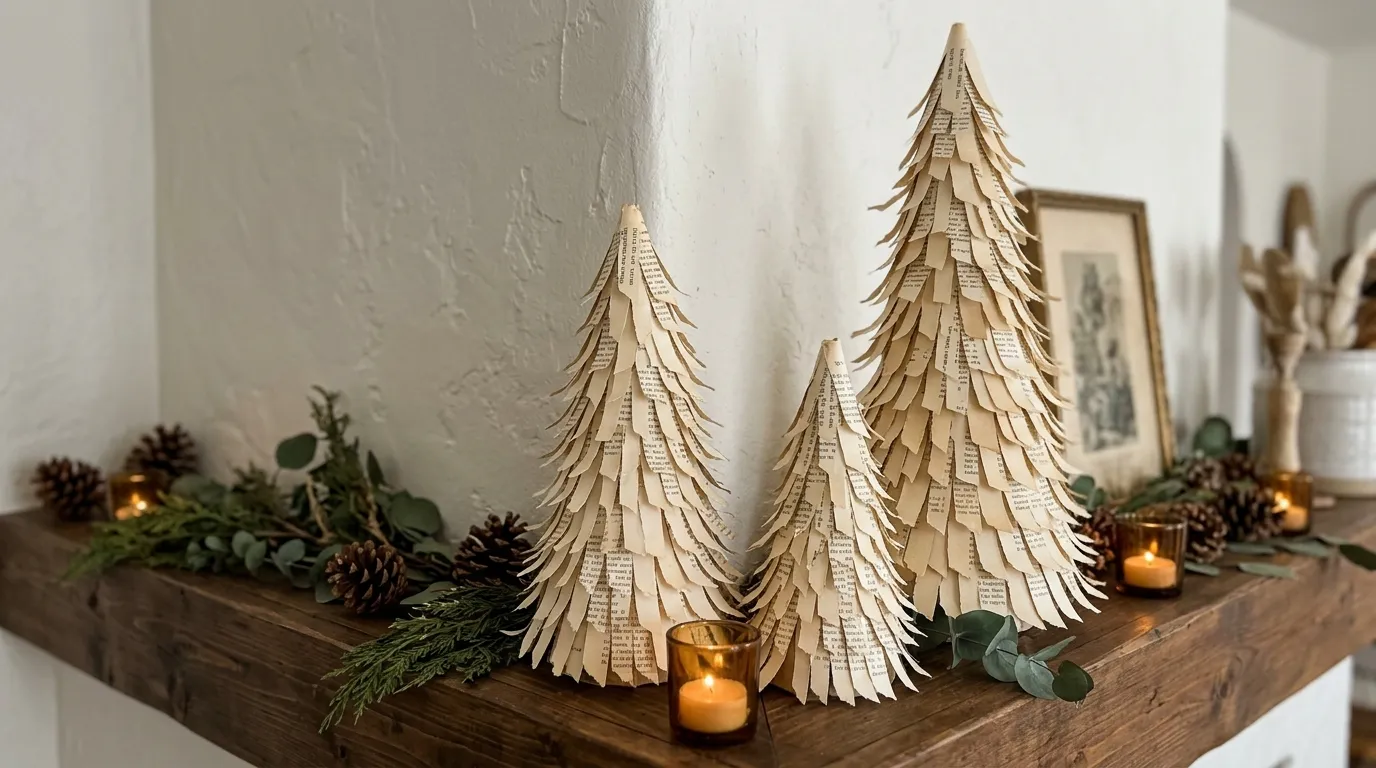
A cone covered in strips of book page makes a small tabletop tree. Make a group of three in different heights for a mantel or a console table, and it looks like a little forest.
Layer note: Use foam or cardboard cones in sizes of about 6, 9, and 12 inches. Cut strips about 1 inch wide, fold each in a loop or a petal shape, and glue them in rows from the bottom up, overlapping each row. Keep the rows even and the glue thin.
Finish tip: Add a star on top, or spray the tips with a light coat of white for a frosted look. Keep the trees away from candles and heaters, and avoid placing them on a mantel above an active fireplace. It suits mantels, shelves, and tables where you want a handmade look.
Shop This Look
Accordion Fan Garland

A garland of folded paper fans hangs well across a mantel, a window, or a bookshelf. Each fan is an accordion-folded page with the ends glued into a half circle, and a row of them looks like a string of rosettes.
Fold note: Cut pages into strips about 3 inches wide, fold them back and forth in half-inch sections, then glue the ends together in a fan. Make 15 to 20 for a garland about 6 feet long. Glue each fan to a piece of twine, spacing them evenly.
Hang tip: Use removable hooks, and keep the garland away from any open flame or heat source. A fireplace mantel is fine if the fireplace is unused or you use a screen, but check the heat. It suits living rooms and entryways that need a quick, low-cost decoration.
Shop This Look
Book Page Wreath With Rolled Flowers
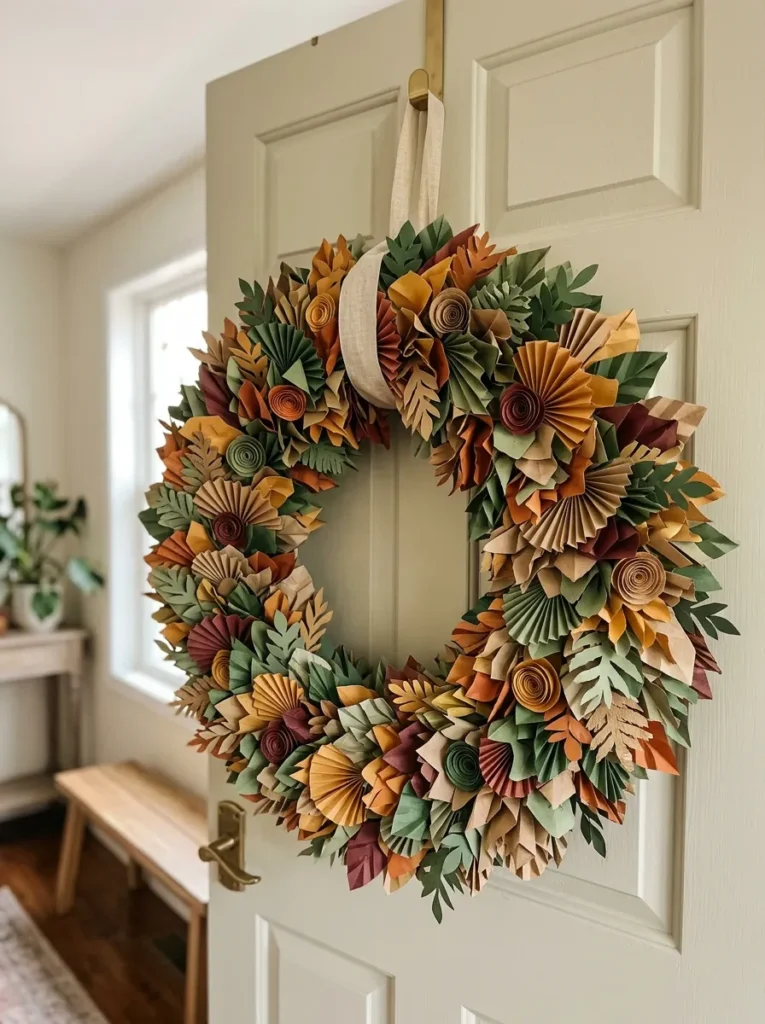
A wreath is the biggest paper project here, and it makes a strong first impression on a wall or an interior door. You glue many small pieces onto a ring, so it uses a lot of paper.
Base note: Use a foam or cardboard ring about 10 to 12 inches wide. Make a few dozen rolled flowers or cones from strips of page, and glue them from the outer edge inward, overlapping so the ring doesn’t show. A low-temperature glue gun holds well, so go slowly and watch for burns.
Display tip: Paper doesn’t like moisture or sun, so hang it indoors, away from windows with strong light and from heat sources. Add a ribbon loop at the back and a bow at the front. It suits people who want a centerpiece for a bedroom, a hallway, or an interior door.
Shop This Look
Paper Snowflakes From Book Pages

Folded and cut like classic snowflakes, book page versions have a soft, vintage look. Hang them at a window, string them as a garland, or stick them on a wall.
Fold note: Start with a square page, fold it in half diagonally, then in thirds, and cut shapes along the edges. Unfold gently. Thin pages cut easily, and thick pages are harder, so choose thin ones for fine cuts. Cut small, simple shapes first, then try more detail.
Press tip: Press finished snowflakes flat under a heavy book overnight. Use clear thread or tiny dots of removable putty to hang them. It suits kids, teens, and adults who want a low-cost craft and a window decoration.
Shop This Look
Decoupage Glass Ornaments

Clear glass or plastic ball ornaments covered in torn book page look like old-fashioned keepsakes. Use shatterproof plastic if there are children or pets around.
Cover note: Tear pages into pieces about 1 inch wide, brush decoupage medium onto the ball, and press each piece on, overlapping a little. Smooth wrinkles outward. Add two thin topcoats, letting each dry. Thin pages follow the curve better.
Hang tip: Remove the metal cap before you decoupage, and replace it after the ball dries. Tie on a ribbon loop for hanging. Keep these ornaments dry, and don’t put them near candles. It suits people who want a classic ornament to give as a gift.
Shop This Look
Gift Tags and Wrapping Toppers

Book page gift tags and toppers turn plain kraft wrap into something that looks handmade. They also use very little paper, and you can make a batch in half an hour.
Tag note: Cut tags about 2 by 3.5 inches from page glued onto cardstock, round the corners, and punch a hole. Add a small paper star, a tiny pine sprig, or a line of ink. For toppers, make a small rosette from a folded strip and glue it to the gift.
Wrap tip: Use brown kraft paper and red or green twine for contrast. Write names with a fine pen. Keep wrapped gifts away from open flames. It suits anyone who wants a personal finish on gifts without spending much.
Shop This Look
Mason Jar Luminaries With LED Lights

A mason jar covered in book page glows when you put a light inside. It looks warm on a shelf, a table, or a windowsill, and the text shows through as a soft pattern.
Light note: Use battery-powered LED tea lights only. Never put a real candle inside a paper-covered jar, since the paper can catch fire. Wrap thin book page around a jar with a thin coat of decoupage medium, then seal.
Pattern tip: Cut small shapes, like stars and trees, from the page before gluing it on, so the light shines through. Test the glow in a dim room, and thin the paper if it’s too dark. Keep jars on stable surfaces, away from edges. It suits mantels, tables, and shelves.
Shop This Look
Advent Calendar With Book Page Pockets
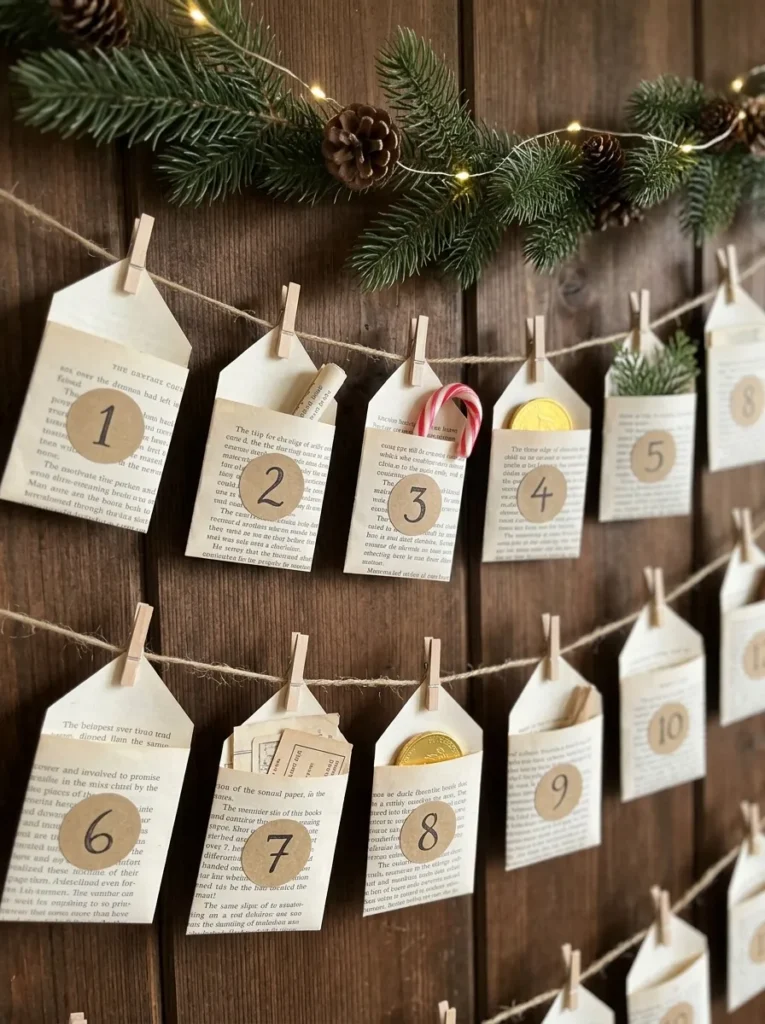
A set of small pockets made from folded book page and hung on a string makes a simple advent calendar. Each pocket holds a small treat, a note, or a coin, and a number on the front marks the day.
Pocket note: Cut 24 rectangles about 4 by 6 inches, fold up the bottom third, and glue the sides to form a pocket. Add a number with a stamp or a pen. Use stiff paper or glue the page onto cardstock so the pockets hold their shape.
Hang tip: Clip the pockets to twine across a wall, and check that the string can carry the weight of the treats. Keep treats light and wrapped. If there are allergies in the house, check the contents. It suits families who want a handmade countdown.
Shop This Look
Book Page Table Centerpiece and Place Cards
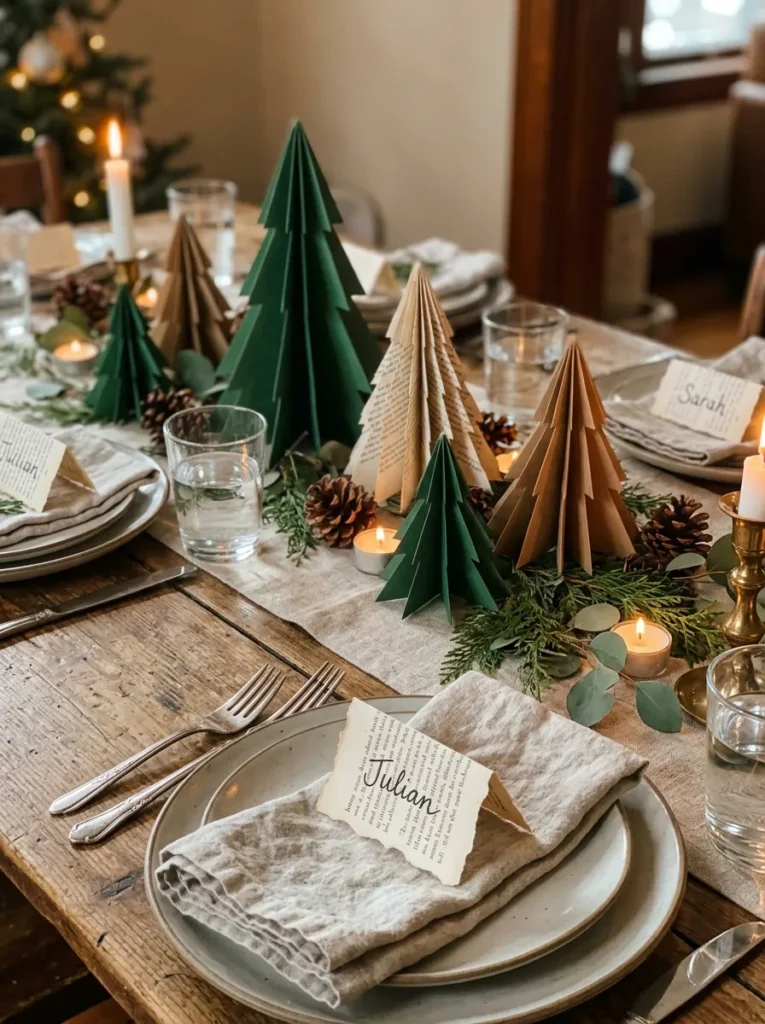
A holiday table looks good with a simple centerpiece of paper trees and place cards made from book page. Together they give a table a cohesive look without much cost.
Table note: Use two or three small cone trees down the middle of the table, with a few LED tea lights between them. Fold small pieces of book page into tent cards and write each name with a fine pen. Keep paper pieces away from any candles and hot dishes.
Layout tip: Leave space for plates and serving dishes, and keep the centerpiece low so guests can see each other. A runner in plain linen or kraft paper ties it together. It suits family dinners and small gatherings.
Shop This Look
How to Start
Start with one small project, such as a paper star or a gift tag. Pick a thrift paperback, tear out a few pages, and test them. Fold, glue, and seal one piece before you plan a big one. It takes about 15 to 30 minutes, and you’ll learn how your pages behave.
Next, gather the basics in one box: scissors, a glue stick, decoupage medium, a ruler, and a few toothpicks. A cutting mat protects your table. Keep a small bowl of cold water close if you use a hot glue gun.
Three things under $25 get most projects going: a bottle of decoupage medium, a pack of foam brushes, and a set of battery LED tea lights. Prices vary by brand and size, so check the quantity you need.
For timing, plan about 15 minutes for tags, an hour for stars or a jar, and a weekend for a folded book tree or a wreath. For budget, most projects need under $25 in supplies. Start a few weeks before Christmas, so glue and sealer can dry fully.
Shop This Look
Common Mistakes
Most problems with paper Christmas crafts come from the same few habits.
Real Flames Near Paper: Candles and paper don’t mix. Use LED lights, and keep paper decorations away from fireplaces and heaters.
Wrong Paper: Thick or glossy pages wrinkle on curves. Use thin pages for curved and folded projects.
Too Much Glue: Heavy glue soaks through and wrinkles. Use thin layers, and wait for each to dry.
Skipping Test Pieces: Starting with the final piece wastes paper. Practice a fold or a cut on scrap first.
Hot Glue Burns: A hot glue gun can burn skin. Use a low-temperature gun, and keep cold water nearby.
Using Valued Books: Rare, signed, or sentimental books should stay as they are. Use thrift store books, and ask before using one from home.
Poor Storage: Paper crushes and yellows in a damp box. Store decorations flat in a dry box with tissue.
Frequently Asked Questions
What kind of book pages work best for Christmas crafts?
Thin pages from paperbacks, dictionaries, and old hymnals are the easiest to fold and curve. Thicker pages work for stars and stiff shapes. Test a page by folding it a few times before you start.
Are paper Christmas decorations safe around lights and candles?
Only with care. Use LED lights, which stay cooler, and never put real candles near or inside paper pieces. Keep decorations away from fireplaces and heaters, and don’t leave lit lights on paper unattended.
Where can I find books for crafts?
Thrift stores, library sales, garage sales, and used book shops are the cheapest sources. Ask for damaged or leftover books. Don’t cut up a book that’s rare, signed, or meaningful to someone.
How do I make book page decorations last?
Seal finished pieces with a thin coat of decoupage medium or a clear matte sealer, and keep them dry and out of strong sun. Store them flat in a box with tissue paper. Paper yellows and weakens over time.
How long do book page Christmas crafts take?
Gift tags and stars take 10 to 15 minutes each, jars and ornaments about an hour, and a folded book tree or a wreath a few hours to a weekend. Add drying time for glue and sealer.
The Finishing Touch
When a project is done, step back and look at it in good light. Check four things: whether the edges are clean, whether the glue shows, whether the paper lies flat, and whether anything sits near a heat source or a flame.
If something feels off, fix one thing and look again. A wrinkled page needs a thinner coat. A messy edge needs a trim. A weak joint needs more glue and more time. Keep going until it settles.
Book page decorations look simple, but they come from small steps done with care. Pick one project today, find a thrift paperback, and make a test piece. Save your favorite book page crafts ideas for Christmas decorations to a Pinterest board so you can come back to them before the season starts.