IKEA Bedroom Hacks for Making a Basic Bedroom Look Expensive
IKEA bedroom hacks are small changes to flat-pack furniture, such as new hardware, legs, paint, trim, and fabric, that make a standard bed, dresser, or wardrobe look custom. A wardrobe frame that is about 79 or 93 inches tall, for example, can be trimmed and painted to look built into the wall. This article covers 12 hacks, a rough cost range of $15 to $400 or more depending on how far you go (approximate, prices vary), and a time range of 15 minutes to several weekends.
The main practical problem is that basic furniture looks basic because of the surface, not the shape. Plain handles, flat white fronts, visible gaps at the ceiling, and a floor-level base all say “flat-pack”. Most of these hacks fix one of those four things. The harder ones also need a drill, a saw, or paint, so the real cost is often your time, not the materials.
You do not need every hack here. Start with the cheap, fast ones, such as hardware, lighting, and bedding, and add one bigger project only if the room still feels plain. One well-done hack looks better than five rushed ones.
Jump To
- What to Check Before You Build
- The Basic Principles of IKEA Bedroom Hacks
- Essential Elements
- IKEA Bedroom Hack Techniques
- The 12 Hacks, from simplest to most involved
- How to Start
- Common Mistakes
- Frequently Asked Questions
- The Finishing Touch
What to Check Before You Build
Start with the rules. If you rent, read the lease before drilling, painting walls, or gluing panels. Removable options, such as peel-and-stick wallpaper and vinyl wraps, are safer for rentals, but test a small area first. Many hack projects use furniture that must be fixed to the wall, and the maker’s instructions say so, so check where you can put screws.
Then check the furniture itself. Look at the exact product name and material on the label or the maker’s product page, because many hacks only work on certain materials. Stain, for example, only works on bare solid wood, not laminate or veneer. Product lines also change, so a piece used in a hack article may be renamed or discontinued by the time you look, and availability differs by country. Check the current range before you plan around a specific item.
Next, think about safety. Tall or top-heavy furniture, especially dressers and chests, should be anchored to the wall, and anchoring matters even more if you raise a dresser on legs. In 2015, IKEA and the US Consumer Product Safety Commission announced a free wall anchoring kit for older chests and dressers after reported child deaths, and advised anchoring chests and dressers above certain heights. Read the maker’s current guidance for your model. Use studs or suitable wall anchors, follow the instructions that came with your furniture, and ask a professional if you are unsure about your walls.
Last, plan tools, ventilation, and time. Wear eye protection and a dust mask when sanding or cutting MDF, work in a ventilated room when painting or staining, and read every product label. Keep lighting changes to plug-in or battery products unless an electrician does the wiring. Allow drying time between coats, since rushing paint is the most common reason a hack looks homemade.
Quick Reference
- Best starting point: Replace the handles and swap the bulbs.
- Biggest impact: A built-in wardrobe look with trim and matching paint.
- Budget to start: Roughly $20 to $60 (approximate, prices vary).
- Time: 15 to 30 minutes for hardware and lighting, a weekend or more for paint and carpentry.
The Basic Principles of IKEA Bedroom Hacks

These rules apply whichever pieces you start with.
Buy basic, change the surface: Plain frames are cheaper and easier to modify than furniture with built-in details. Put the effort into fronts, hardware, and finish, not the structure.
Match the finish across pieces: Use the same metal tone and the same paint family on the bed, dresser, and nightstands. A single finish makes separate pieces look like one set.
Add trim and shadow lines: Molding, skirting, and panels create depth. Flat surfaces look cheaper than surfaces with edges and shadows.
Go heavier on hardware: Solid, weighty pulls and knobs change how a drawer feels and looks. Cheap lightweight hardware can undo the rest of the work.
Keep the color family short: Choose two or three colors, such as warm white, a deep green or blue, and brass. Too many colors make a hack look like a project, not a design.
Fix the room, not only the furniture: Lighting, bedding, and walls affect how expensive a room looks as much as the dresser does. A hacked dresser under a harsh ceiling light still looks plain.
Essential Elements
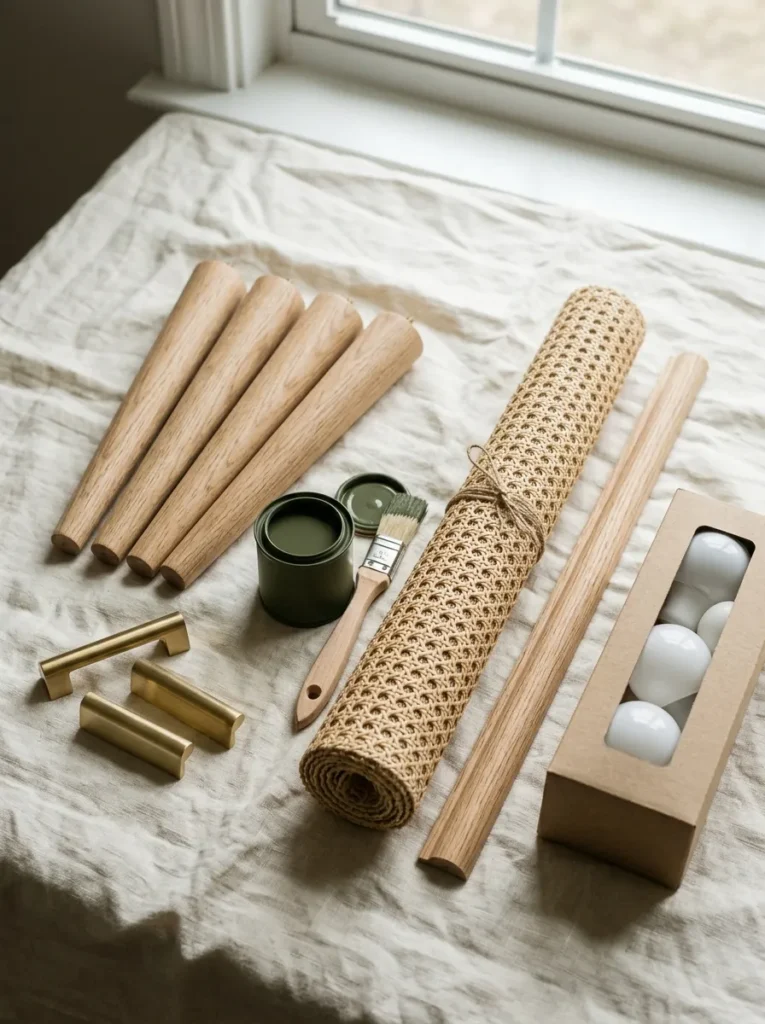
You do not need to buy all of these. Use what you have first.
Hardware: Pulls or knobs in brass, black, or nickel. Measure the center-to-center hole spacing on your drawers before buying, since common pull sizes include 3, 3.75, and 5 inches. Many dressers and wardrobe doors also come without handles, so check first.
Furniture legs: Four or six legs, usually 4 to 6 inches (about 100 to 150 mm) tall, in wood or metal. Check the load rating, the screw thread, and the mounting plate size.
Primer and paint: A primer made for slick or laminate surfaces, plus a durable furniture or cabinet paint. Sample pots of 8 to 16 ounces are often enough for a nightstand.
Trim and molding: Half-round molding, baseboard, and small crown molding in MDF or pine. Buy lengths of 6 to 8 feet, and plan on about 10 percent extra for cuts.
Fabric and cane: Cane webbing, linen, or wallpaper for inserts and panels. Cane webbing is often sold in widths of about 24 inches (60 cm), so measure your opening first.
Fixings and anchors: Wall anchors, screws, and a stud finder. Fixing devices are often sold separately, and the right type depends on your wall material.
Warm bulbs and lamps: Bulbs rated 2200K to 2700K and one or two lamps with fabric shades. Check the wattage on each socket before buying.
Shop This Look
- Brass cabinet pulls, 3.75 inch hole spacing
- Tapered wood furniture legs, 6 inch
- Bonding primer for laminate furniture
IKEA Bedroom Hack Techniques

These are the methods used again and again in the hacks below.
Sand, prime, paint: Scuff the surface with fine sandpaper (about 220 grit), wipe off the dust, apply a bonding primer, and paint in two thin coats. Let each coat dry for the time on the label.
Caulk the seams: Fill gaps between furniture and wall with a paintable caulk before painting. It hides shadows and makes a unit look built in.
Template first: Cut cardboard or paper to the size of any panel, door, or hole before you cut real material. Tape it up to check the position and the proportions.
Stain test: Try stain on a hidden spot or a scrap piece of the same wood. Check the color after it dries, since stain often looks darker or redder than the can.
Shim and level: Use thin wedges under a unit and check with a level in both directions. A crooked base makes every later step harder.
Hinge dry fit: Hang a door with the hinges before painting, check it closes and aligns, then take it off. Fixing alignment later is much harder once the paint is dry.
Swap the Pulls: The Simplest of IKEA Bedroom Hacks

New hardware is the fastest way to make a dresser or nightstand look more expensive. Unscrew the old handles, measure the hole spacing, and fit brass, matte black, or leather pulls with the same spacing. It takes about 15 to 30 minutes for a dresser.
Spacing note: Measure center to center, not hole to edge. If the new pulls have a different spacing, you would have to fill and redrill, which is hard to hide. Many drawers are single hole, so a knob avoids the issue.
Finish tip: Choose one metal tone for the whole room, and match it to lamp bases and frames. Check the weight of the hardware in the product description, since heavier metal looks better. This suits any bedroom and costs roughly $15 to $60 for a dresser (approximate, prices vary).
Shop This Look
- Matte black drawer pulls, 3 inch spacing
- Brass cabinet knobs, set of 10
- Leather drawer pulls, 3.75 inch
Warm Layered Lighting for an Expensive Looking Bedroom
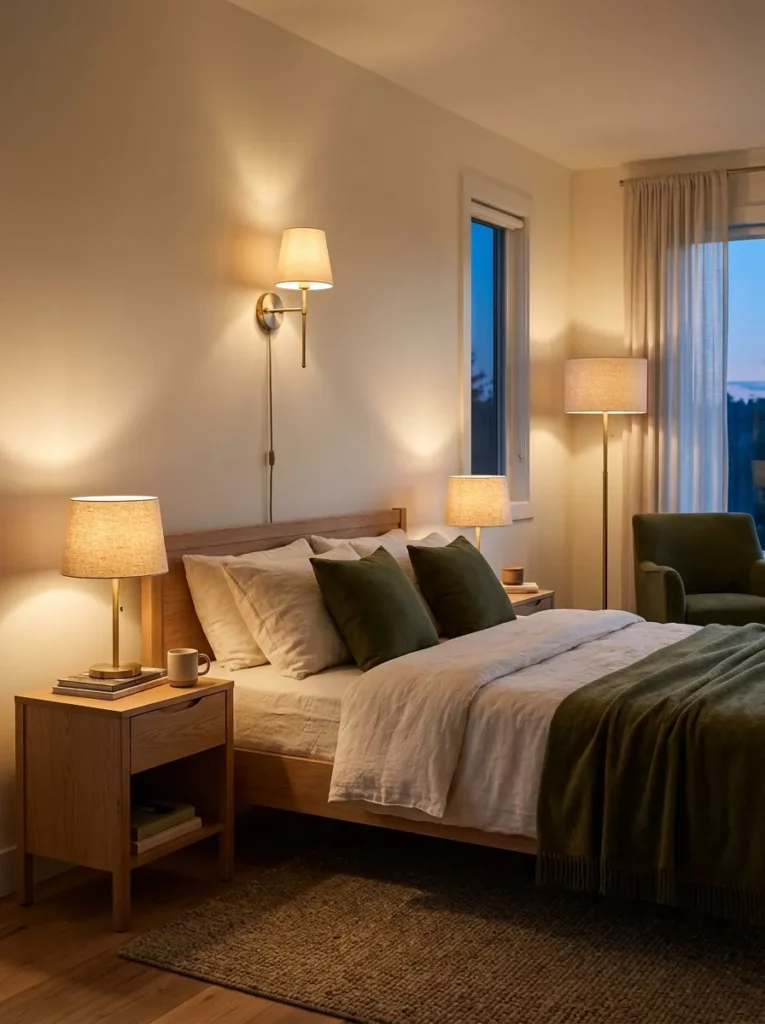
Bright overhead light flattens furniture and makes a hack look cheap. Replace the bulbs with 2200K to 2700K warm white ones, and add two table lamps and one wall or floor lamp. Three light sources at different heights make a room look styled.
Bulb note: Check the base type and the maximum wattage printed on each socket, and replace every bulb in the room at once. One cool white bulb left in a lamp makes a room look uneven. Use plug-in or battery products unless an electrician does the wiring.
Placement tip: Put a lamp on each nightstand at about eye level when you sit up in bed, and keep the cords tidy with clips. A dimmer or a smart plug helps in the evening. This suits any bedroom, and it costs roughly $20 to $80 for bulbs and a pair of lamps (approximate, prices vary).
Shop This Look
- Warm white LED bulbs, 2700K, dimmable
- Fabric shade bedside table lamp, pair
- Plug in wall sconce with cord cover
Hotel Style Bedding on a Basic Bed Frame

A basic bed frame looks different once the bedding changes. Use a white or warm neutral duvet cover in linen or washed cotton, a duvet insert that fills it, a folded quilt across the foot, and four sleeping pillows plus two decorative ones. It takes about 30 minutes and no tools.
Duvet note: Choose an insert that is the same size as the cover, or slightly larger, so the corners fill out. A queen bed commonly uses a cover of about 90 by 90 inches, but check your mattress. Check the care label before washing.
Texture tip: Mix two textures, such as linen and a knit throw, and keep the colors to one or two shades. Fold the top edge of the duvet back about 12 to 18 inches. This suits any bed, and it costs roughly $80 to $250 for a full set (approximate, prices vary).
Shop This Look
Raise the Dresser: Leg Swaps Among IKEA Bedroom Hacks
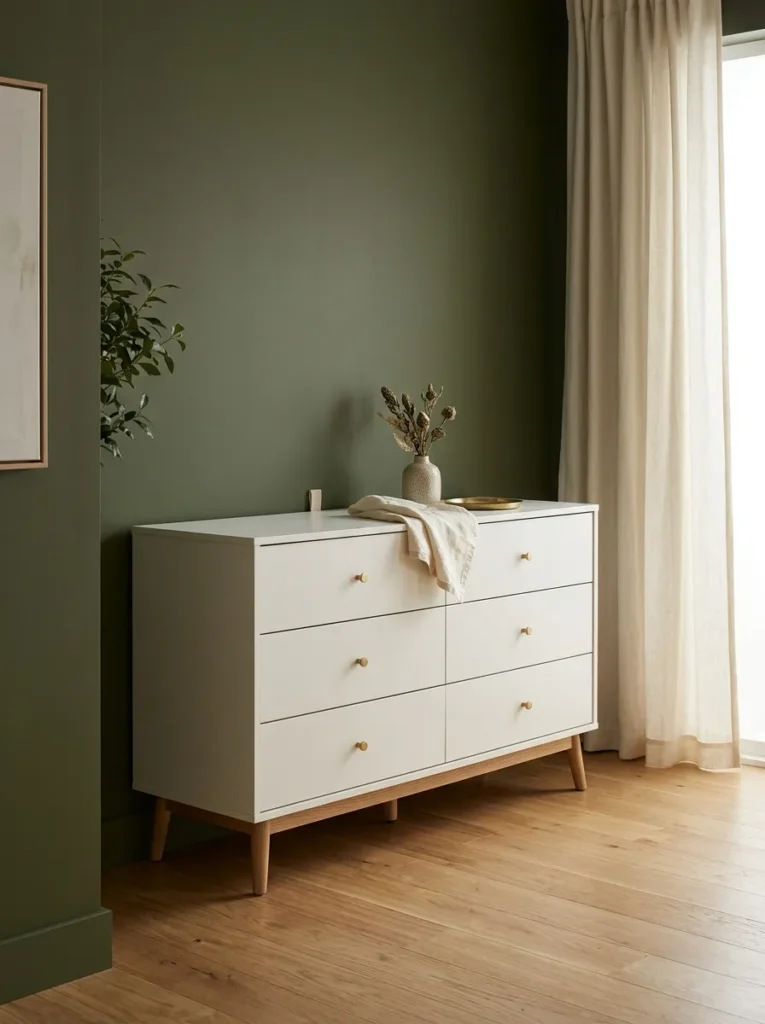
Putting a dresser or nightstand on legs makes it look lighter and more like designer furniture. Fit legs of about 4 to 6 inches to the base, and the unit looks like a mid-century piece. Some dressers already have legs, and some projects add new ones in wood or brass.
Leg note: Check that the base is strong enough, since legs on a thin base can split it. Use a mounting plate if the legs need one, and check the weight rating. Measure the extra height against drawer clearance and the wall.
Anchor tip: A raised dresser is a bit less stable, so anchor it to the wall using the maker’s hardware and fit it into a stud or a suitable anchor. Check the maker’s guidance for your model. This suits adult rooms, and rooms with children need extra care.
Shop This Look
- Mid century furniture legs with mounting plates
- Furniture anti tip wall straps
- Stud finder, magnetic or electronic
Peel and Stick Wallpaper on the Back of Open Shelving

Lining the back of an open bookcase or shelf unit adds color and depth without paint. Cut peel-and-stick wallpaper to the size of each back panel, which is often a thin fiberboard sheet, and press it on. A textured or linen-look paper works well, and one roll is often enough for a bookcase.
Paper note: Measure each bay and add about 1 inch on each side for trimming. Clean the surface and test a small piece first, since adhesive can mark some finishes. Peel-and-stick rolls are often about 20 inches wide, so check the pattern repeat.
Edge tip: Smooth from the center outward with a squeegee, and trim with a sharp blade against a metal ruler. Add a few small baskets or books for balance. This suits rentals, and it costs roughly $25 to $60 for a roll (approximate, prices vary).
Shop This Look
- Peel and stick wallpaper, linen texture
- Wallpaper smoothing tool and craft knife
- Woven storage baskets for bookshelves
Floating Nightstands With Half Round Trim

Plain laminate nightstands can look tailored with a coat of paint, a strip of half-round molding, and a solid knob. Sand the surface, prime it, and add trim around the drawer front or the top edge. Dark green, deep blue, or warm white all look more expensive than builder white.
Trim note: Cut the molding with a miter saw or a hand miter box at 45 degrees for corners, and glue it with wood glue and small nails. Fill nail holes and seams, and paint after the filler dries. Wear eye protection when cutting.
Paint tip: Use a bonding primer first, since regular paint peels off slick laminate. Apply two thin coats with a small foam roller, and let each dry fully. A floating look comes from a wall-mounted unit or a base with legs, and any wall mounting must be fixed into a stud or a suitable anchor.
Shop This Look
A Padded Headboard Panel Behind a Plain Bed Frame
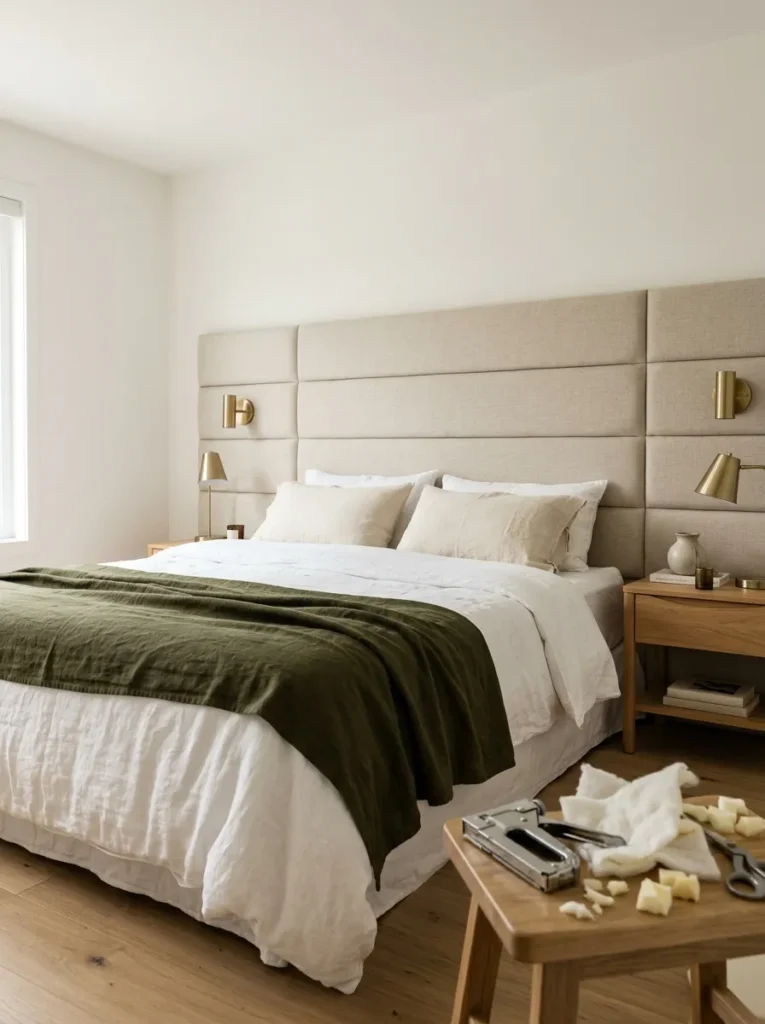
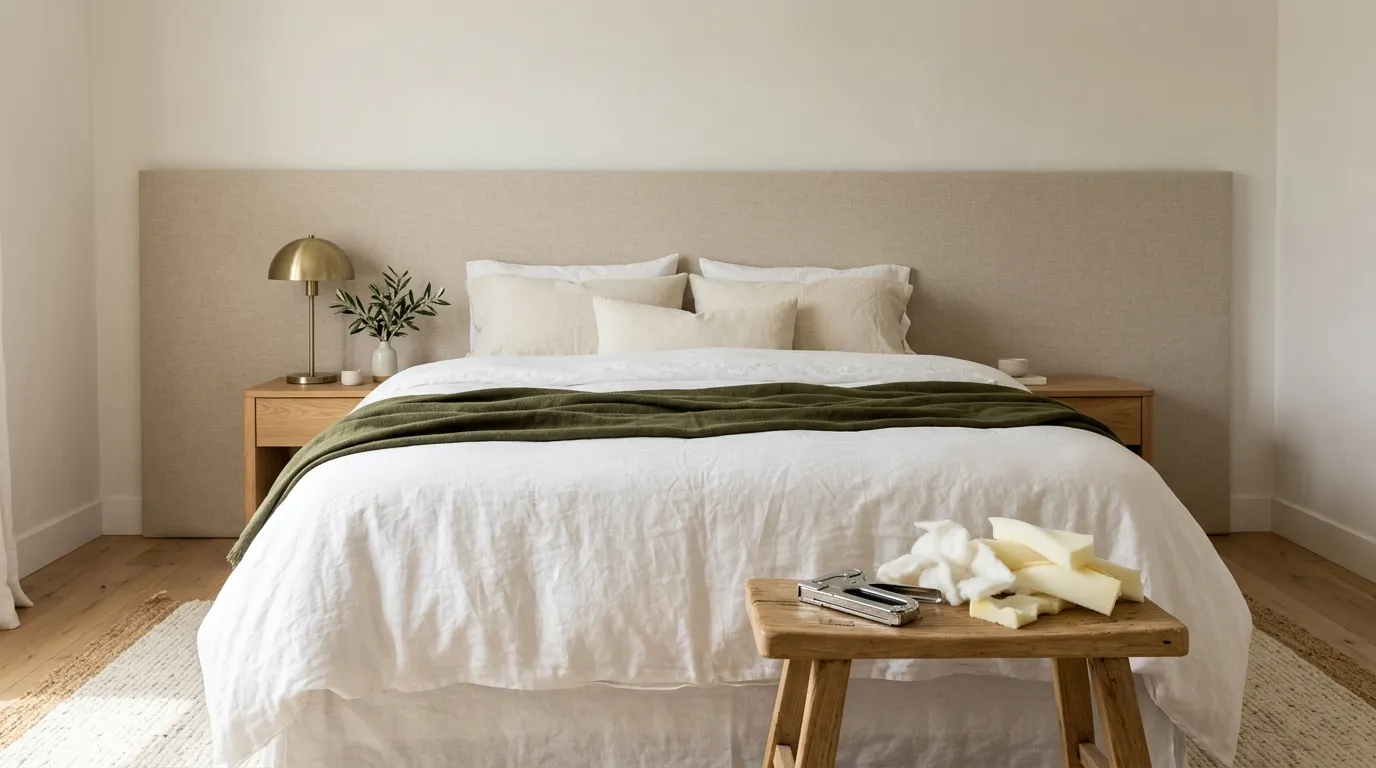
An upholstered headboard makes a basic bed look like a hotel bed. Cut a plywood panel about 1/2 inch (12 mm) thick, a few inches wider than the mattress, cover it with 1 to 2 inches of foam and batting, and wrap it in fabric with a staple gun. Mount it on the wall behind the bed.
Foam note: Use high-density foam so it does not flatten, and wrap the batting tightly over the edges. Choose a fabric with some weight, such as linen blend or velvet, and check the care label. Plywood panels are heavy, so ask someone to help you lift.
Mount tip: Hang it with a French cleat or heavy-duty hanging hardware into studs, and do not rely on the bed frame. Check the weight rating of the hardware, and ask a professional if you are unsure about your wall. The headboard should rise about 24 to 30 inches above the mattress.
Shop This Look
- High density upholstery foam, 2 inch
- Heavy duty staple gun for upholstery
- French cleat hanger kit, heavy duty
A Fluted Panel Wall Behind the Bed

Fluted or ribbed wall panels add a sculpted look and are a common feature in current hack articles. Mini fluted MDF panels are often sold in lengths around 8 feet (2.4 m) and widths around 23 inches (590 mm), so about three panels cover a queen bed width. Paint them in a deep color.
Panel note: Check the thickness, which is often about 1/2 inch (12 mm), and the glue the maker recommends. Use a level at the first panel, since any error carries across the wall. Seal and paint the panels before or after fitting, following the label.
Dust tip: MDF dust is fine and irritating, so cut outdoors or in a ventilated space with a mask and eye protection. Mark outlet positions before gluing. This suits owners more than renters, since panels are hard to remove cleanly.
Shop This Look
- Fluted MDF wall panels, paintable
- Construction adhesive for wall panels
- Dust mask and safety glasses set
Cane Doors on a Bookcase or Cabinet

Cane gives a plain cabinet a natural, textured look. One project in a published hack roundup added cane-style doors to a bookcase to hide books and shoes, and another cut openings in wardrobe doors and filled them with cane webbing. Cane webbing is lightweight and easy to staple.
Cane note: Many guides soak the webbing in water for a short time so it bends easily and tightens as it dries. Follow the maker’s instructions, and use a frame or backing so the edges look clean. Check that the product is made for furniture.
Cut tip: Mark the opening with a template, drill a starter hole, and cut with a jigsaw, going slowly at the corners. Sand the edge smooth, and cover staples with a thin trim strip. This suits confident DIY users, and it costs roughly $30 to $100 for a project (approximate, prices vary).
Shop This Look
A Walnut Stain and Brass Hardware Dresser Hack

A stained wood dresser with brass pulls looks like a vintage piece. One roundup project took a plain solid-wood dresser, added scalloped trim, stained it walnut, and fitted aged brass hardware. It needs bare wood and several days for drying.
Stain note: Stain only works on raw solid wood. Laminate, veneer, and painted surfaces will not take it, so check the material on the label first. Sand to bare wood, wipe off the dust, test on a hidden spot, and apply a protective finish.
Brass tip: Choose aged or unlacquered brass for a warm look, and check the care instructions. Ventilate the room, keep rags flat to dry because some stain-soaked cloths can heat up, and follow the product label. This suits solid wood furniture only.
Shop This Look
A Built In Wardrobe Look With IKEA Bedroom Hacks

The most popular large hack is making a wardrobe look built in. Wardrobe frames in one common range come in heights of about 79 or 93 inches (201 or 236 cm), depths of about 14 or 23 inches (35 or 58 cm), and widths of about 20, 29.5, or 39 inches (50, 75, or 100 cm), according to a regional buying guide. Raise the units, add a base, and fill the side and top gaps with painted MDF.
Gap note: Measure the ceiling height before you choose a frame, since the buying guide lists minimum ceiling heights a little above the frame height. Fill the top and side gaps with MDF strips cut to fit, and caulk the seams before painting. The frames must be fixed to the wall, using fixings suited to your wall.
Ceiling tip: Add baseboard to the bottom and a simple crown or flat trim along the top, and paint the whole unit the same color as the wall. Use a level on every step. This suits owners, and it is a weekend project at the least, with a cost that varies a lot (approximate).
Shop This Look
- MDF strips for filler panels, 8 foot
- Paintable caulk, acrylic latex
- Baseboard molding, primed, 8 foot
Custom Wardrobe Doors for the Most Expensive Looking IKEA Bedroom Hacks

This is the most involved hack. Make new doors from MDF or hardboard, add cane inserts or a molding frame, paint them in a deep color such as green, and finish with brass pulls. Many roundups show this as the step that makes a wardrobe look truly custom, and it takes several weekends.
Door note: Plan the door size from the opening, and check the hinge count in the maker’s instructions, since taller doors need more hinges. Do a dry fit with the hinges before painting. Heavy doors need strong hinges and a firm frame, so check the load limits.
Light tip: Add battery-powered motion-sensor puck lights inside, which avoids wiring. Hard-wired lighting should be done by an electrician. Paint with a bonding primer, and let each coat cure before closing the doors. This suits experienced DIY users and owners.
Shop This Look
- Battery motion sensor puck lights for closets
- MDF sheet, 3/4 inch, project panel
- Soft close cabinet hinges, overlay
How to Start
Start with the room, not the furniture. Take a photo of the bedroom, list the three things that look most basic, and match each to a hack. For most rooms those are handles, lighting, and the bed.
Then work in order: hardware, lighting, bedding, legs and anchoring, then paint and trim, and last the large projects such as panels and wardrobe doors. The first four take a few hours in total and cost little. Paint and carpentry need drying time, so plan them for weekends and clear the room first.
If you have about $50 to $80 (approximate, prices vary), buy three things: a set of solid hardware for your dresser, a pack of warm white bulbs, and a linen duvet cover. That alone changes the look. Add legs or paint later, once you see what still looks plain.
Be realistic about time and budget. A hardware and lighting refresh takes about an hour. A painted nightstand takes a weekend with drying. A built-in wardrobe look can take several weekends and cost roughly $100 to $400 or more beyond the furniture (approximate, prices vary by materials and location).
Shop This Look
- Dresser hardware set, brass, 3 inch spacing
- Warm white LED bulbs, 4 pack
- Washed linen duvet cover, neutral
Common Mistakes
Skipping primer: Paint peels off laminate and slick surfaces within weeks. Sand lightly, use a bonding primer, and apply thin coats.
Forgetting to anchor: Tall furniture, especially dressers and wardrobes, can tip, and raised dressers are less stable. Fix every tall piece to the wall using suitable hardware, and follow the maker’s instructions.
Buying before measuring: Hardware spacing, ceiling height, and panel sizes all vary. Measure first, write the numbers down, and check them against the product page.
Using stain on laminate: Stain will not soak into laminate or veneer, so the result looks patchy. Check the material first, or paint instead.
Choosing hardware that looks cheap: Thin, lightweight pulls undo the rest of the work. Pick solid pieces, and check the weight and finish in the description.
Mixing too many finishes: Brass, chrome, black, and gold in one room look random. Choose one or two metals and repeat them.
Frequently Asked Questions
What are the easiest IKEA bedroom hacks?
Changing the handles, swapping the bulbs, and upgrading the bedding are the easiest. They need no saw, take under an hour, and cost roughly $20 to $80 (approximate, prices vary). Many IKEA bedroom hacks start with hardware, since it changes the whole look of a dresser.
Can I paint IKEA laminate furniture?
Yes, if you prepare it. Lightly sand the surface, wipe off the dust, use a bonding primer made for slick surfaces, and apply two thin coats of durable paint. Let each coat dry fully, and check the labels for the cure time.
How do I make an IKEA wardrobe look built in?
Measure the ceiling, choose a frame height that fits, fix it to the wall, and fill the gaps at the top and sides with painted MDF. Add baseboard and trim, caulk the seams, and paint it the same color as the wall. It is a weekend project at least, and it takes patience.
Do I need to anchor IKEA furniture to the wall?
Yes, for tall furniture, and the maker’s instructions say to fix wardrobes and chests to the wall. In 2015, IKEA and the US Consumer Product Safety Commission advised anchoring chests and dressers above certain heights. Check the current guidance for your model, and ask a professional if you are unsure about your wall.
How much do IKEA bedroom hacks cost?
Small hacks cost roughly $15 to $80, and larger projects such as panels or a built-in wardrobe can cost $100 to $400 or more beyond the furniture (approximate, prices vary by materials and location). You can lower the cost by doing one hack at a time and reusing paint and hardware you already own.
The Finishing Touch
Stand in the doorway and check four things. First, do all the metals match? Second, are the gaps and edges filled, caulked, and painted? Third, is every tall piece anchored? Fourth, is the light warm and low in at least three places? If one fails, fix that first.
If something still looks plain, change one thing and look again. Swap one handle style, repaint one door, add a lamp, or fold the duvet differently. Do one change at a time, and take a photo each time, since IKEA bedroom hacks often look different in a photo than in the room.
Today, do one thing: measure the hole spacing on your dresser drawers and order one set of solid hardware. It takes about 10 minutes and gives you a quick result. When you find the hacks you like, save your favorite IKEA bedroom hacks to a Pinterest board so you can come back to them for the bigger projects.
Keep Exploring
- [Replace with a related post on small bedroom storage ideas]
- [Replace with a related post on how to paint laminate furniture]
- [Replace with a related post on renter friendly bedroom upgrades]