Book Page Crafts Ideas for Teens Who Love DIY Projects
Book page crafts are projects made from the paper inside old books, such as flowers, garlands, folded sculptures, jewelry, and wall art, using glue, scissors, and a bit of patience. This article covers what to check before you start, the materials and techniques that matter, and 12 projects for teens, from a 15-minute bookmark to a weekend folded book. Most cost between $5 and $25 in supplies, and the books themselves can cost almost nothing.
The usual problem is the paper. Book Page Crafts tear unevenly, curl when they get wet, and yellow in different shades, so a project that looks neat in a photo can come out wrinkled and lumpy. Most of the fixes are small: choose the right kind of page, glue in thin layers, and let each step dry.
You don’t need all 12 projects. Page Crafts Pick two or three that match your skill level and your free time, and start there.
Jump To
- What to Check Before You Start
- The Basic Principles of Book Page Crafts
- Essential Materials for Book Page Crafts
- Book Page Craft Techniques
- Book Page Craft Projects for Teens
- How to Start Page Crafts
- Common Mistakes
- Frequently Asked Questions
- The Finishing Touch
What to Check Before You Start
Page Crafts Start with the book. Use thrift store paperbacks, library sale leftovers, damaged books, old dictionaries, and discarded textbooks. Don’t cut up a book that’s rare, signed, or meaningful to someone, and ask before you use one from home. If you plan to sell what you make, check the rules for the book you use, since newer books are still under copyright. Public domain titles, usually older ones, are safer for anything you sell. When in doubt, ask a parent, a teacher, or a librarian.
Tools come second. Hot glue guns, craft knives, and scissors can burn or cut, and teens often use them for long sessions. Use a low-temperature glue gun if you can, keep a bowl of cold water nearby for burns, and cut on a mat with a sharp blade, since dull blades slip. If you’re under 18, have an adult around for the first session with a craft knife.
Fumes and mess are third. Spray sealers and some glues need fresh air, so work near an open window or outside, and read the label. Cover your table with newspaper or a mat.
Last, plan your space. Many of these projects need hours to dry. A shelf or a cardboard box lid lets you leave things alone without losing them.
Quick Reference
- Best starting point: A rolled paper flower or a simple bookmark Page Crafts
- Biggest impact: Choosing thin, even paper and gluing in thin layers
- Budget to start: Roughly $5 to $25 for glue, scissors, and a few extras (approximate, prices vary)
- Time: 15 minutes for the easiest, a weekend for the biggest Page Crafts
The Basic Principles of Book Page Crafts
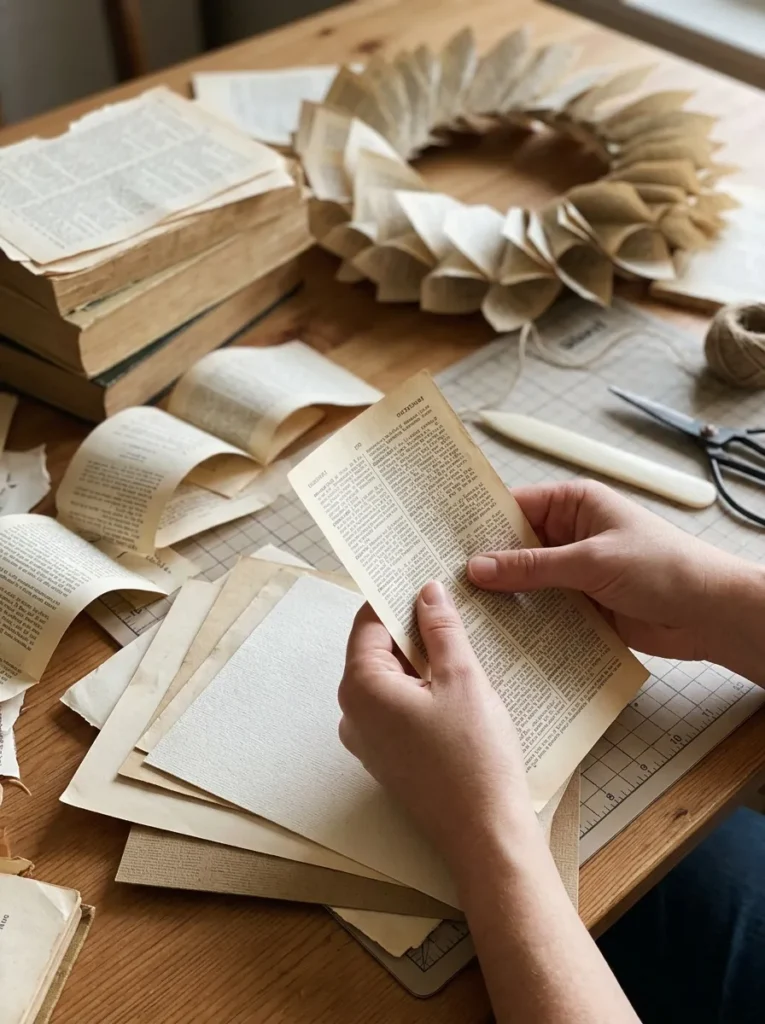
These ideas apply to almost every project.
Match the Paper to the Job: Thin, tissue-like pages from dictionaries and old paperbacks fold and curve well, while thick pages hold shape better for stiff pieces like garlands and wreaths. Test a page by folding it a few times before you commit.
Cut Clean or Tear on Purpose: A clean cut gives a sharp edge, and a torn edge looks soft and feathered. Choose one for each project and stay with it. A mix of both in one piece looks accidental.
Thin Layers of Glue: Too much glue soaks the paper, wrinkles it, and shows through. Use a thin coat, press the paper down, and wait. A second thin coat beats one thick one.
Repeat Shapes: Many book page crafts rely on making the same shape many times, such as petals, beads, or stars. Cut a cardboard template so every piece matches.
Seal What You Want to Keep: Paper yellows, fades, and attracts moisture. A clear sealer or a coat of decoupage medium protects it, though it’s not waterproof, so keep finished pieces dry.
Mind the Words: Page text adds charm, but a busy page can distract. Choose pages with a good mix of text and white space, or turn them so the words run in one direction.
Essential Materials for Book Page Crafts

A short list covers most of the projects below.
Books: Thrift paperbacks and old dictionaries are the best starters. One paperback of about 200 to 300 pages gives you plenty of material for several smaller projects.
Glue: White craft glue, a glue stick for flat paper, and a low-temperature hot glue gun for 3D pieces. Decoupage medium works as both glue and sealer.
Cutting Tools: Sharp scissors, a craft knife, a metal ruler, and a self-healing cutting mat. A paper trimmer helps with strips.
Shaping Tools: Toothpicks, skewers, a pencil, and a bone folder or the edge of a ruler for crisp folds.
Base Pieces: Foam or cardboard rings for wreaths, mason jars, thin wire, string, and elastic cord for jewelry.
Finishing Supplies: Clear matte sealer, acrylic paint in a few colors, and tea bags or coffee for staining pages a warmer tone.
Shop This Look
Book Page Craft Techniques

These methods carry over from one project to the next.
The Straight Strip: Cut pages into even strips with a paper trimmer or a ruler and knife. Strips about half an inch to two inches wide, depending on the project, are the base of flowers, stars, and chains. Cut a stack of pages at once to save time.
The Tight Roll: Roll a strip or a triangle around a toothpick or skewer, then slide it off and glue the end. It’s the basis for paper beads and rolled flowers. Keep tension even, so pieces match.
The Accordion Fold: Fold the page back and forth in equal sections, like a fan. It makes garlands, rosettes, and fans, and it needs a ruler to keep the folds even.
The Tea Stain: Brush weak tea or coffee onto pages and let them dry flat to get a warm, aged look. Keep a test page, and don’t soak, since wet pages tear. Pressing under a heavy book once dry flattens them.
The Template Cut: Trace a cardboard or card template on the page and cut. It keeps petals, hearts, and leaves the same size, and it makes a big batch less boring.
The Seal Coat: Brush a thin coat of decoupage medium or spray a matte sealer on the finished piece. Let it dry fully before handling. Two thin coats beat one thick one.
Book Page Craft Projects for Teens
Each project below includes what you need to know before you start.
Rolled Book Page Flowers
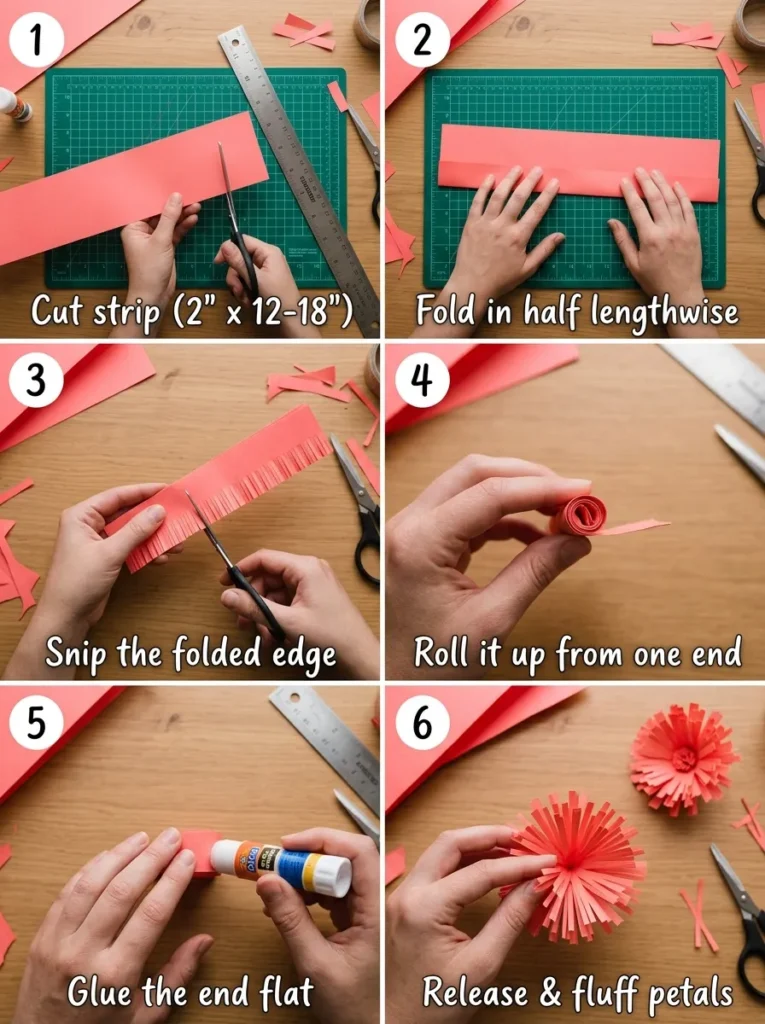
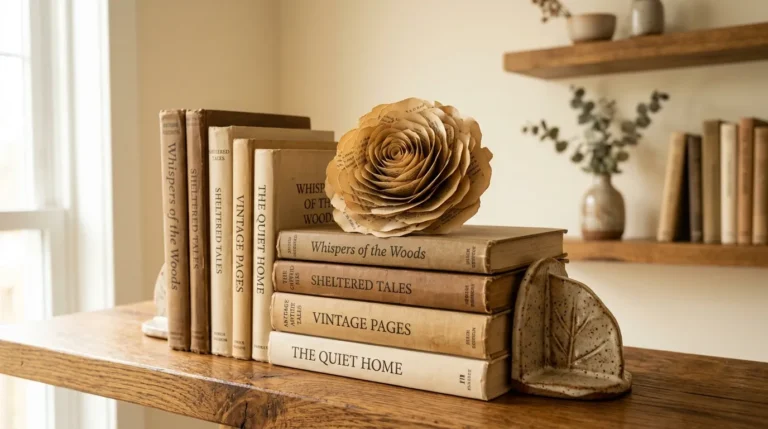
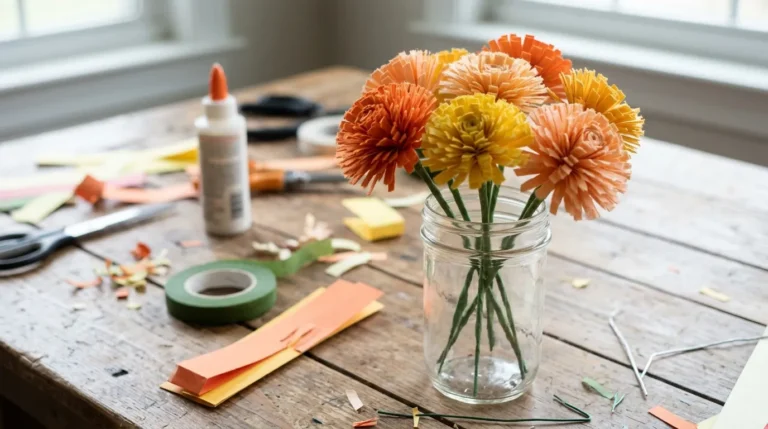
Rolled paper flowers are a good first project. You cut a long strip, curl it into a spiral, and glue the end, and the result looks like a rose. A bunch looks good in a jar, on a gift, or on a wall.
Strip note: Cut strips about 2 inches wide and 12 to 18 inches long. Fold the strip in half lengthwise, snip small cuts along the folded edge, and roll it up from one end. The cuts open up as petals when you release the roll. Glue the end flat and trim any extra. It takes about 10 minutes once you’ve done two or three.
Stem tip: Wrap a thin wire or a wooden skewer in green paper or floral tape for the stem, and glue the flower on top. Keep flowers away from open flames and candles, since paper burns easily. It suits teens who want a quick, low-cost gift or room decor.
Shop This Look
Book Page Bookmarks With Tassels
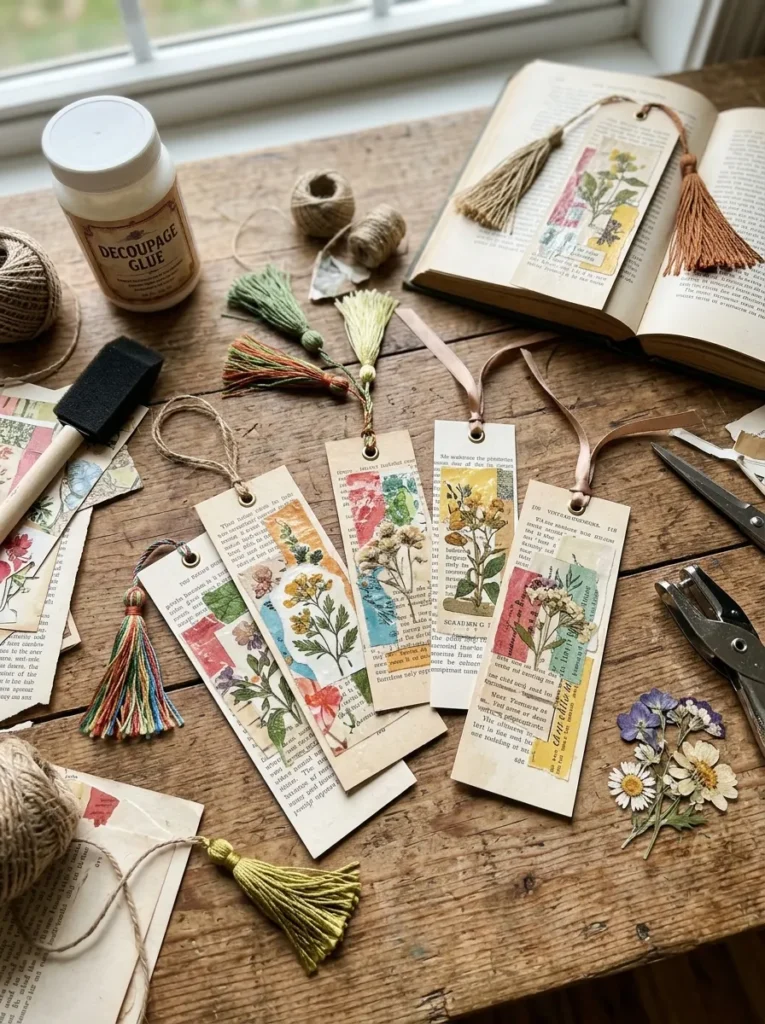
Bookmarks are quick, useful, and good for gifts. A strip of stiff book page or cardstock covered with decoupage medium works, and a tassel or ribbon finishes it.
Layer note: Cut a piece about 2 inches wide and 6 to 7 inches long. Glue book page onto cardstock, so it’s stiff enough not to bend, then brush a thin coat of decoupage medium on top. Let it dry and add a second coat. Cover both sides if you want it to last.
Finish tip: Punch a small hole at the top and tie on a tassel made from embroidery thread. Round the corners with scissors, since sharp corners wear quickly. It suits teens who want a small project they can finish in one sitting.
Shop This Look
Book Page Garland for a Bedroom Wall
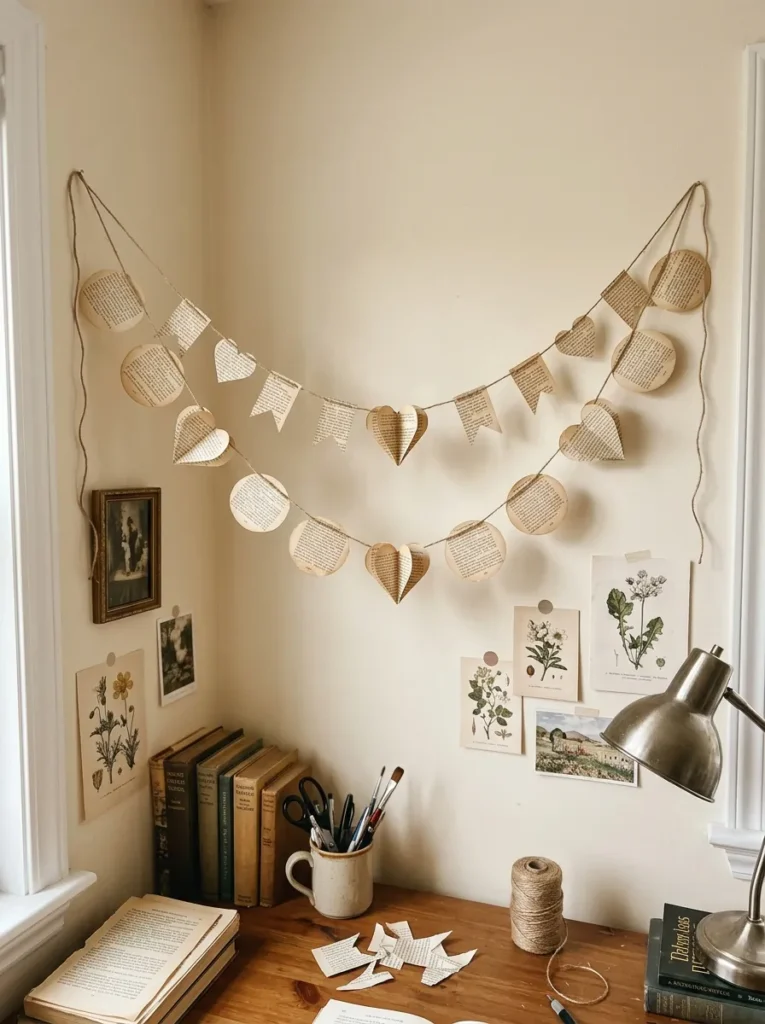
A garland strung with folded or cut book page shapes adds a soft, vintage look to a bedroom or desk wall. Circles, hearts, and small flags are all easy, and you can make a long one in an afternoon.
Cut note: Use a round cutter or a template to cut 30 to 40 circles about 2 to 3 inches wide. Fold each in half and glue it over a piece of string or twine, so half sits on each side. Space them an inch or so apart. A stack of shapes makes the garland look full.
Hang tip: Use removable adhesive hooks so you don’t damage the wall, and hang it away from lamps and heaters. Paper is light but burns easily. It suits dorm rooms and bedrooms where you want a low-cost way to change the look.
Shop This Look
Decoupage Mason Jar Vases and Pen Holders
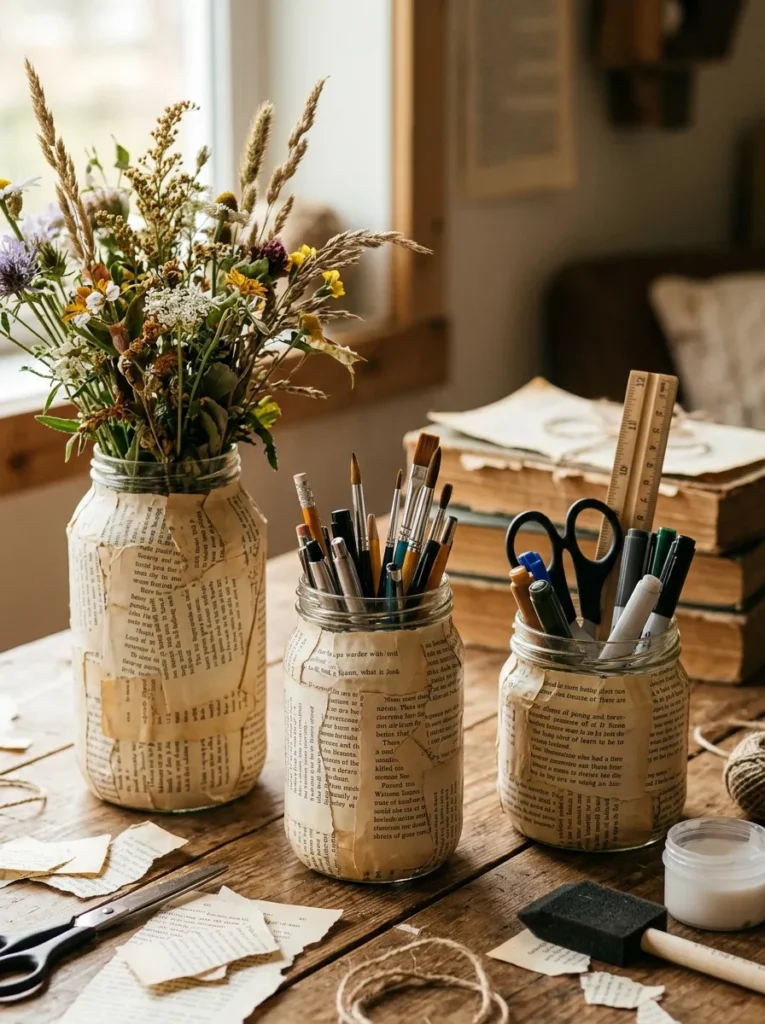
Covering a jar with torn book page gives you a vase, a pen holder, or a desk organizer. It’s an easy way to use up scraps, and the glass shows the writing through the layers.
Method note: Tear pages into pieces about 1 to 2 inches wide, brush decoupage medium onto the jar, and press each piece on from the center outward. Overlap the edges a little. Add two thin topcoats, letting each dry fully. Thin pages follow the curve best, and thick pages wrinkle.
Care tip: The finished jar is decorative, so wipe it with a dry or slightly damp cloth, and don’t put water inside unless you line it with a small glass jar. Don’t put it in a dishwasher. It suits teens who want a pen holder for their desk or a gift for a friend.
Shop This Look
Folded Book Art Hearts and Words

Folded book art turns a whole book into a sculpture. You fold each page by a set pattern, and when the pages stand together, they form a heart, a letter, or a word. It takes time, and it looks impressive.
Pattern note: Use a paperback with at least 200 to 300 pages, since you need enough pages to form the shape. Print a free pattern, mark each page with a pencil at the measurements, and fold each page along the marks. Take your time, because one wrong fold shows. Test on a few pages first.
Time tip: Work in short sessions, and put on music or a podcast, since it can take several hours. Keep the book closed with a rubber band between sessions. Use a book you don’t mind altering. It suits teens who like long, calm projects and want something to display on a shelf.
Shop This Look
Book Page Envelopes and Greeting Cards
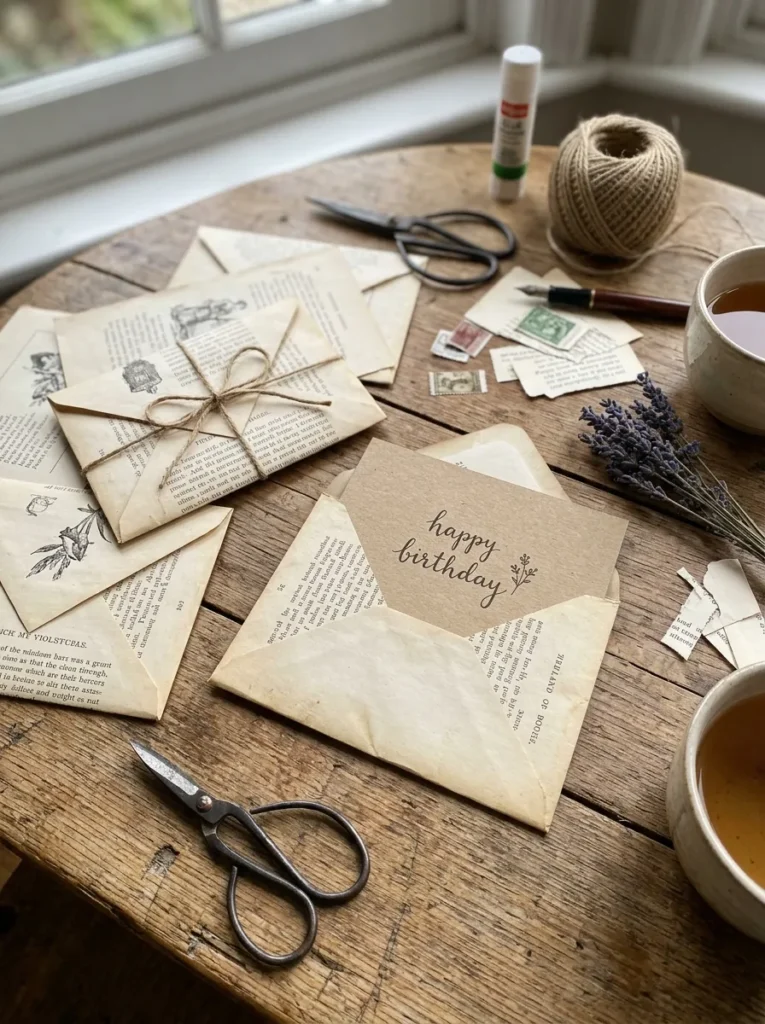
Handmade envelopes from book pages look vintage and cost nothing. Pair one with a simple card, and you have a gift for a birthday or a thank-you. They’re good for notes to friends.
Template note: Unfold a store-bought envelope to use as a template, trace it onto a page, cut it out, and fold along the lines. Glue the side flaps and bottom with a glue stick. Use thin pages so the envelope folds cleanly, and a stiff card inside to protect the contents. A wax seal or a sticker closes the flap.
Mail tip: Handmade envelopes may not go through the post well, since thin paper tears. For mail, line the envelope with a plain sheet, or hand-deliver it. Check postal rules if you want to mail it. It suits teens who like to write notes or make small gifts.
Shop This Look
Rolled Paper Bead Jewelry
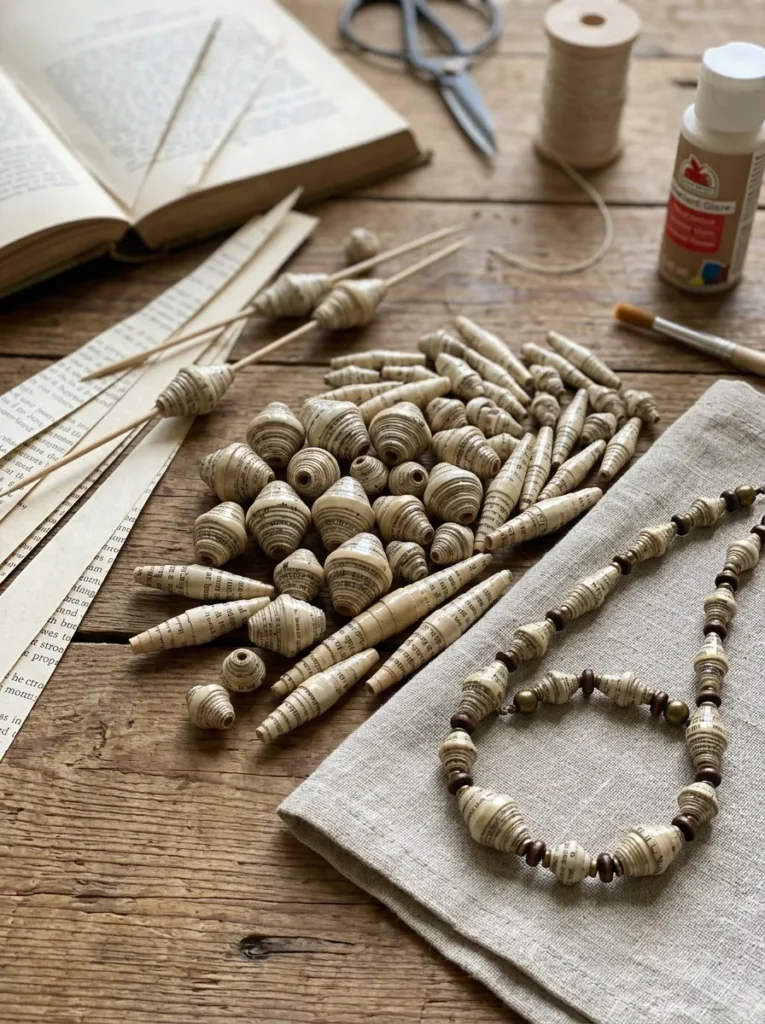
Paper beads made from book page triangles look surprisingly polished once they’re sealed. You can string them into a necklace or bracelet, and different widths give different looks.
Cut note: Cut long, thin triangles about 1 inch wide at the base and 8 to 10 inches long. Put glue on the back, then roll the wide end tightly around a toothpick and keep rolling toward the point. Seal each bead with a thin coat of decoupage medium and let it dry on a skewer. Sizes match best if you trace a template.
Wear tip: Paper beads aren’t waterproof, so remove jewelry before showers and swimming, and keep it dry. String them on elastic cord for bracelets and sturdy thread for necklaces. It suits teens who want something wearable to make and share.
Shop This Look
Book Page Silhouette Wall Art
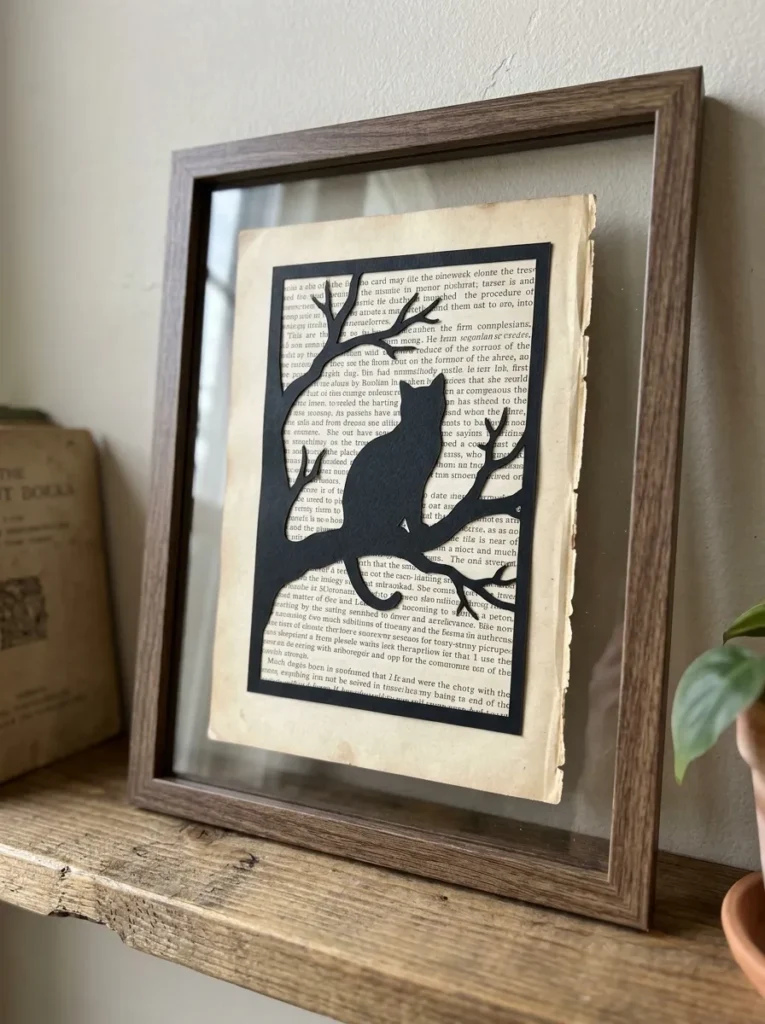
Cut a simple shape, such as a tree, a cat, or a skyline, from black paper and glue it onto a framed book page. The text behind the shape adds texture, and the contrast makes the picture clear.
Frame note: Pick a frame 5 by 7 or 8 by 10 inches, and cut the book page to fit. Use a simple shape with clean edges, such as a bare tree or a bird, since detailed cuts tear. A craft knife on a mat gives sharp lines, and scissors work for curves.
Mount tip: Glue with a thin layer of acid-free glue, or use double-sided tape, and let it dry flat. Keep the frame away from direct sun, since both paper and ink can fade over time. It suits teens who want art for their room without a big cost.
Shop This Look
Book Page Wreath for a Door or Wall
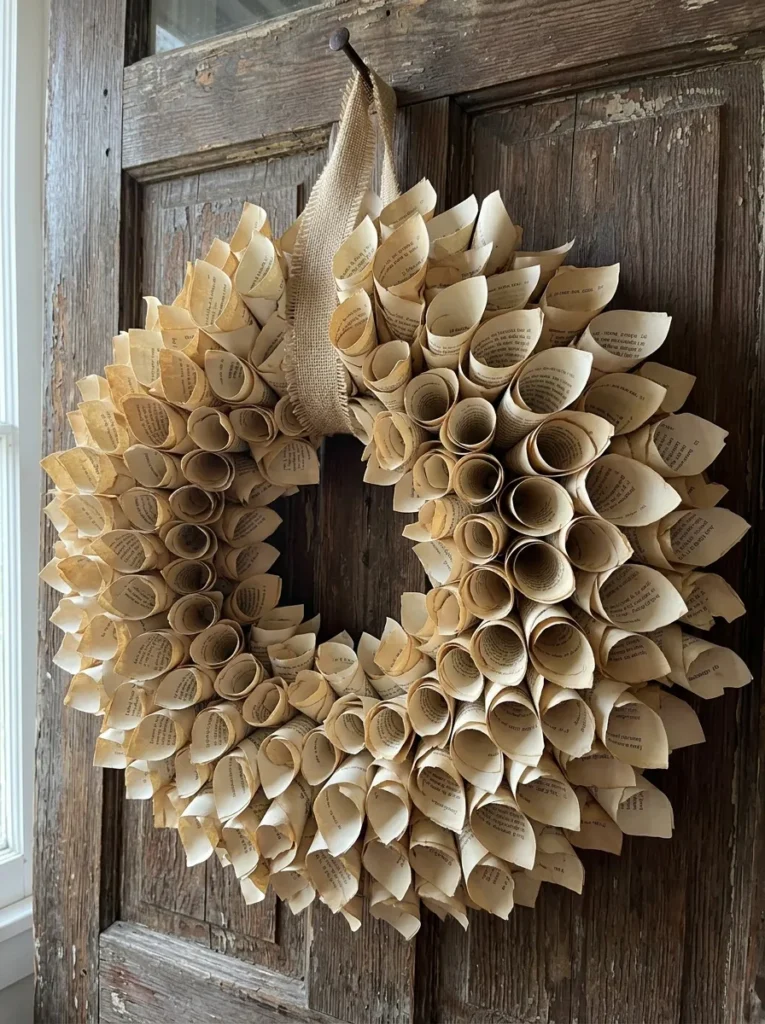
A wreath made from rolled or folded book pages looks vintage and textured. You glue many small pieces onto a ring, so it’s a bigger project and uses a lot of paper.
Base note: Use a foam or cardboard ring about 10 to 12 inches wide. Make a few dozen cones, rosettes, or rolled flowers, and glue them on from the outer edge inward, overlapping so the base doesn’t show. Hot glue holds well, so use a low-temperature gun and be careful with burns.
Display tip: Paper is sensitive to moisture and sun, so hang the wreath indoors, away from windows with strong light and from heat sources. Add a ribbon loop at the back for hanging. It suits teens who want a showpiece for a bedroom wall or a gift.
Shop This Look
Origami Lucky Stars in a Jar

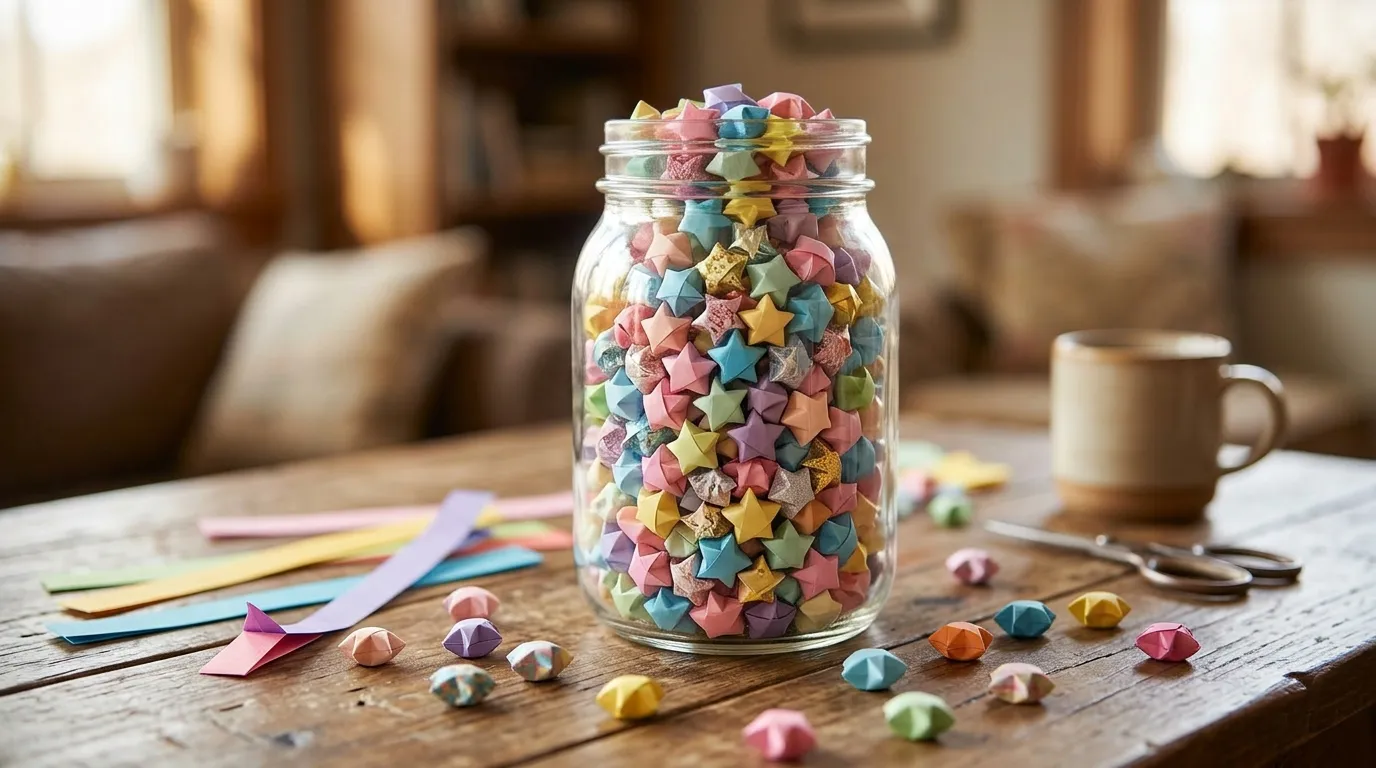
Lucky stars are small folded stars made from thin strips of paper. A jar full of them looks bright and personal, and you can make them while watching a show. Each star takes about a minute once you know the fold.
Strip note: Cut strips about half an inch wide and 10 to 12 inches long. Tie a loose knot at one end, flatten it into a pentagon, wrap the strip around the edges, and tuck the end in. Pinch the sides to puff each star. Practice with a few before you cut a lot.
Jar tip: Keep stars dry, and fill a glass jar with a lid. Add a message on a small tag, or write short notes on the strips before folding. It suits teens who want a gift for a friend or a calm project for a study break.
Shop This Look
Book Page Lanterns With LED Lights
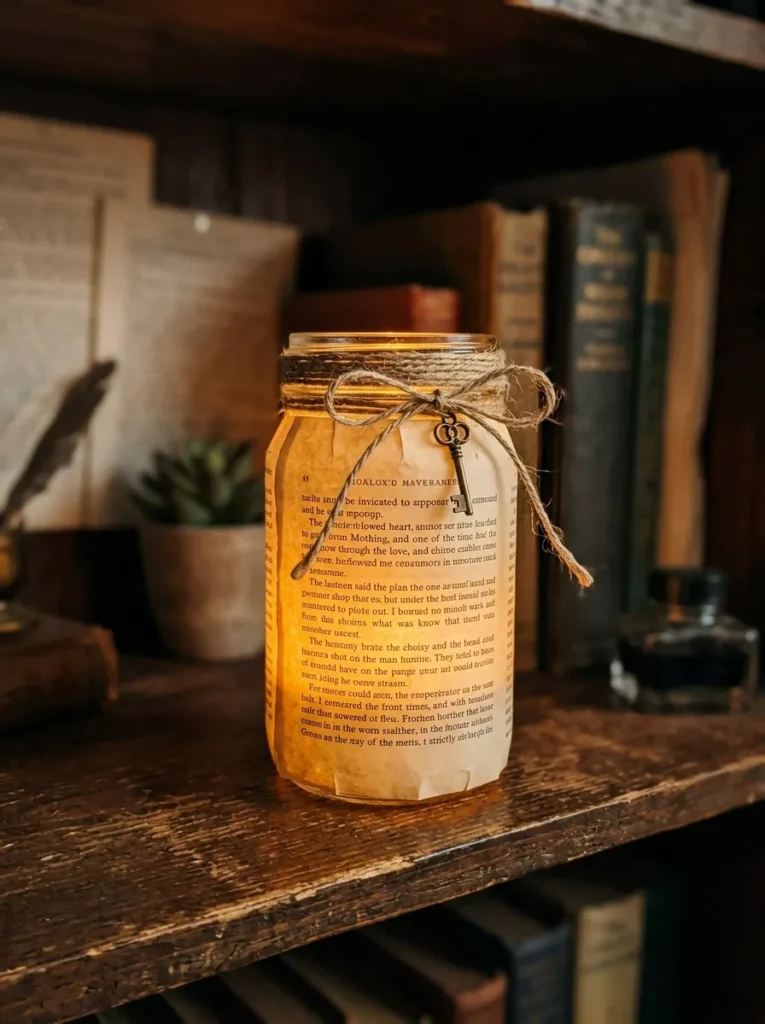
A lantern made from book page wrapped around a jar or a paper frame glows warmly when a light is inside. It’s a nice desk or shelf decoration, and it works with the pages’ text showing through.
Light note: Use battery-powered LED tea lights only. Never use a real candle inside a paper lantern, since paper burns easily. Wrap thin book page around a jar with a thin coat of decoupage medium, and cut small shapes out of it to let light through.
Placement tip: Keep lanterns away from heat and moisture, and turn the light off when you’re not around. Test the glow in a dim room, and thin the paper if it’s too dark. It suits teens decorating a bedroom, a desk, or a room for a party.
Shop This Look
Book Page Covered Notebooks and Journals
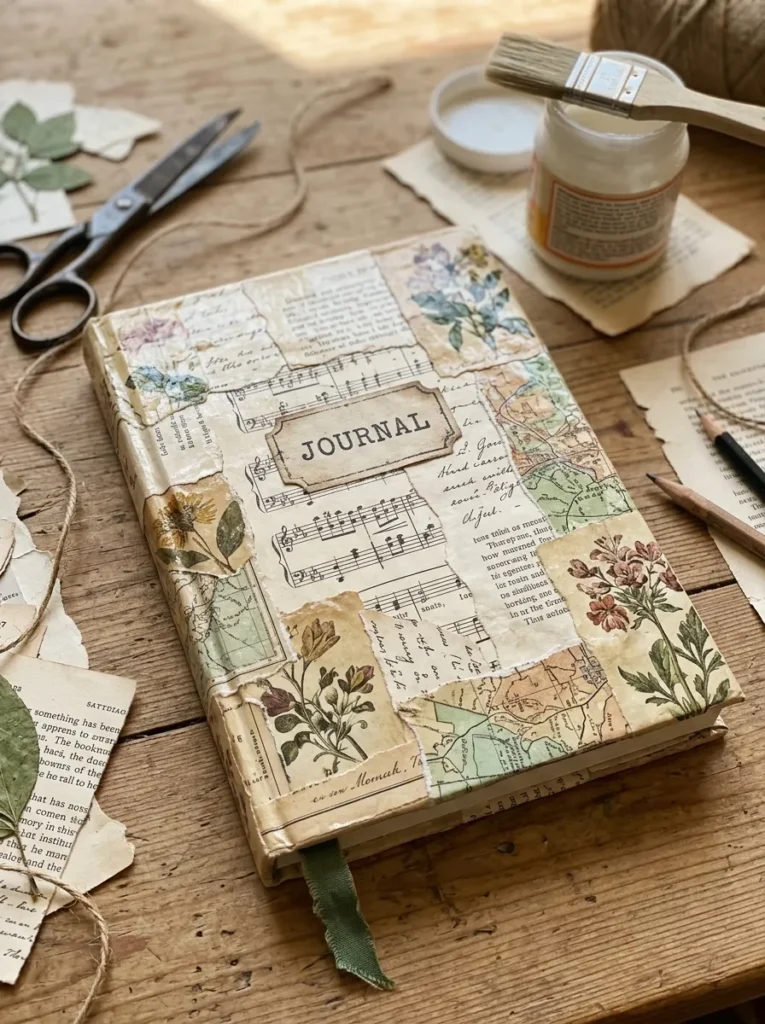
Cover a plain notebook with decoupage book page to make a journal that looks one of a kind. It’s useful, it makes a good gift, and it uses just a few pages.
Cover note: Cut book pages to fit the front and back, with about half an inch to fold over the edges. Brush a thin coat of decoupage medium on the cover, press the paper on, smooth out bubbles with a ruler, and let it dry. Add two thin topcoats. A plain, hardcover notebook works best.
Finish tip: Let the cover cure for a day before closing the book, so the pages don’t stick. Add a ribbon bookmark or a small charm. It suits teens who journal, sketch, or want something to give to a friend.
Shop This Look
How to Start
Start with one small project, like a bookmark or a few rolled flowers. Pick a thrift paperback, tear out a few pages, and test them. Fold, glue, and seal one piece before you plan a big one. It takes about 15 to 30 minutes, and you’ll learn how your pages behave.
Next, gather the basics in one box: scissors, a glue stick, decoupage medium, a ruler, and a few toothpicks. A cutting mat protects your table, and a craft knife makes clean cuts. Keep a small bowl of cold water close if you use a hot glue gun.
Three things under $25 get most of these projects going: a bottle of decoupage medium, a pack of foam brushes, and a self-healing cutting mat or a paper trimmer. Prices vary by brand and size, so check the amounts you need.
For timing, plan about 15 minutes for a bookmark, an hour for flowers or a jar, and a weekend for a folded book or a wreath. For budget, most projects need under $25 in supplies, and the books cost a few dollars at a thrift store. Do one project a week, and you’ll have a collection by the end of the month.
Shop This Look
Common Mistakes
Most book page craft problems come from the same few habits.
Using the Wrong Paper: Thick or glossy pages wrinkle on curves and don’t fold well. Use thin paperback or dictionary pages for curved and folded projects.
Too Much Glue: Heavy glue soaks through, wrinkles, and shows. Use thin layers and wait for each to dry.
Skipping Test Pieces: Starting with the final piece leads to waste. Practice a fold or a cut on scrap pages first.
Rushing the Dry Time: Closing a notebook or stacking pieces too soon makes things stick. Let each coat dry fully, and leave pieces flat.
Unsafe Tool Use: Hot glue burns and craft knives slip. Use low-temperature glue, cut on a mat, keep fingers behind the blade, and ask an adult for help if you’re unsure.
Using Real Flames: Paper burns easily. Use LED lights in lanterns, and keep paper pieces away from candles and heaters.
Cutting Up Valued Books: Rare, signed, or sentimental books should stay as they are. Use thrift store books and ask before using one from home.
Frequently Asked Questions
What kind of book pages are best for crafts?
Thin pages from paperbacks and old dictionaries are the easiest, since they fold, curve, and glue well. Thicker pages work for stiff shapes like garlands and wreaths. Test a page by folding it a few times before you start.
Where can I get books for crafts?
Thrift stores, library sales, garage sales, and used book shops are the cheapest sources. Ask for damaged or leftover books. Don’t cut up a book that’s rare, signed, or meaningful to someone.
How do I stop book pages from wrinkling when I glue them?
Use thin layers of glue or decoupage medium, press the paper down smoothly from the center out, and let it dry flat. Thin pages follow curves better than thick ones. A second thin coat is better than one thick coat.
Are book page crafts safe for teens?
Most are, with some care. Use a low-temperature glue gun, cut on a mat with a sharp blade, work in a ventilated space with sprays, and keep paper away from open flames. Have an adult around for the first craft knife session.
How do I make book page crafts last?
Seal finished pieces with a thin coat of decoupage medium or a clear matte sealer, and keep them dry and out of direct sun. Paper yellows and fades over time, and it isn’t waterproof. Store pieces flat or in a box.
The Finishing Touch
When you finish a project, step back and look at it in good light. Check four things: whether the edges are clean, whether the glue shows, whether the paper lies flat, and whether anything looks unsafe, such as a loose wire or a sharp edge.
If something feels off, fix one thing and look again. A wrinkled page needs a thinner coat or a flatter press. A messy edge needs a trim. A weak joint needs more glue and more time. Keep going until it settles.
Book page crafts look easy, but the results come from small steps done with care. Pick one project today, find a thrift paperback, and make a test piece. Save your favorite book page crafts ideas to a Pinterest board so you can come back to them when you want your next project.