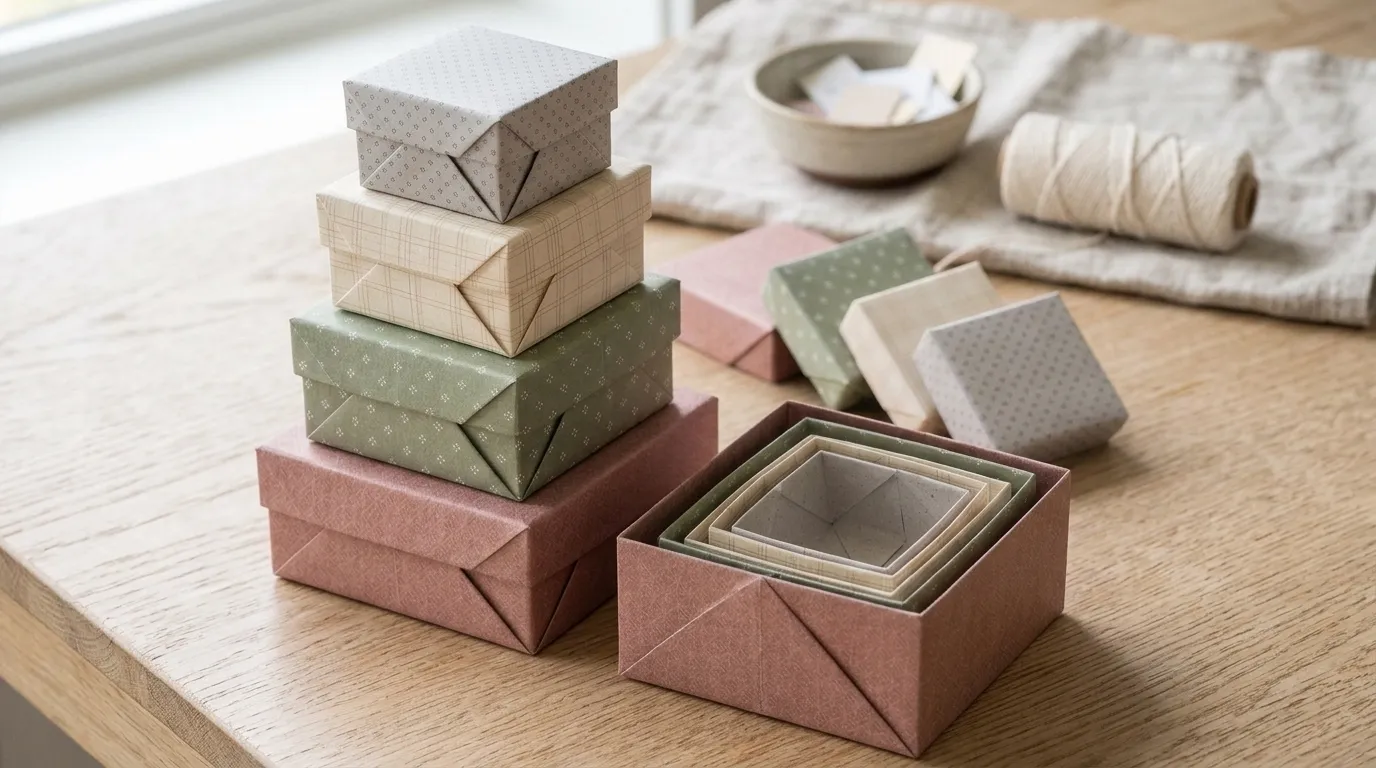
14 DIY Paper Craft Projects for Every Skill Level
DIY paper craft projects are handmade creations built from paper — cut, folded, scored, layered, painted, or shaped — that range from five-minute beginner projects requiring only scissors and glue to complex multi-hour constructions demanding precision tools, practiced technique, and spatial reasoning. This article gives you 14 paper craft projects distributed across every skill level from complete beginner to confident intermediate maker, using materials that cost under $25 per project and produce results worth displaying, gifting, or using in everyday life.
Picture an afternoon where a single sheet of paper becomes something genuinely surprising — a lantern that glows from within, a sculptural star that fills a corner of the room, a book of hand-bound pages that holds a year of daily writing. Paper is the most democratic craft material in existence: available everywhere, forgiving of mistakes, inherently beautiful in its simplest form, and capable of producing objects of genuine architectural complexity in the hands of someone who has learned to work with it. Here are 14 projects worth saving — and stealing.
Why DIY Paper Craft Works So Well
DIY paper craft occupies a creative territory where material accessibility and aesthetic potential intersect more generously than in almost any other craft discipline — paper is available at every price point from free (newspaper, junk mail, recycled packaging) to artisanal (handmade Japanese kozo, Italian Fabriano, Ethiopian bark paper), and the transformation from flat sheet to dimensional object through cutting, folding, and construction techniques produces results that reward both the five-minute beginner project and the five-hour advanced construction with genuinely beautiful outcomes. The design philosophy of paper craft draws from traditions spanning every culture globally — Japanese origami, Mexican papel picado, German scherenschnitte (paper cutting), Moroccan geometric paper mosaic, and the European bookbinding tradition all share the same essential insight: paper transformed by hand is capable of beauty that far exceeds the humility of its raw material.
The materials that make paper craft projects successful are simple and honest: the paper itself in weights appropriate to the construction method (lightweight 20lb copy paper for origami, medium-weight 65lb cardstock for structural forms, heavy 110lb cardstock for book covers and dimensional sculpture, 300gsm watercolor paper for painted paper crafts), scoring and cutting tools (bone folder, craft knife, cutting mat, steel ruler), adhesives in the right format for the application (glue stick for light paper layering, PVA for bookbinding, double-sided tape for clean edge joining, Mod Podge for decoupage and sealing), and finishing materials (acrylic paint in earth tones, metallic wax for gilding, natural twine and ribbon for binding and hanging). Colors follow the specific creative direction of each project — from the monochromatic sophistication of all-white sculptural paper art to the full-spectrum vibrancy of a rainbow tissue paper installation.
The paper craft movement has maintained consistent cultural relevance across generational and technological shifts because paper working produces a specific satisfaction that digital creation cannot replicate: the physical transformation of a flat material into a dimensional object through actions of the hands provides a direct sensory feedback loop — the resistance of cardstock under a bone folder, the clean snap of a craft knife through a scored line, the way a folded form opens into three dimensions — that is genuinely different from any screen-based creative experience. The recent growth of paper craft communities on Instagram, Pinterest, and YouTube has introduced increasingly sophisticated paper construction techniques to audiences without formal art education, making complex paper architectures accessible to enthusiastic home crafters for the first time.
Even a single afternoon of paper craft produces objects with a quality that purchased decorations cannot replicate — a paper lantern folded from patterned washi paper carries the specific warmth of something made rather than bought, and that quality is immediately perceptible in any room it occupies.
Style at a Glance
| Element | Trait 1 | Trait 2 |
|---|---|---|
| Philosophy | Material transformation through hand technique — flat to dimensional as the core creative act | Accessibility at every skill level — the same material serves both beginner and expert |
| Materials | Copy paper, cardstock 65–110lb, watercolor paper, tissue paper, washi paper | Bone folder, craft knife, cutting mat, PVA glue, scoring tool, natural twine |
| Color Palette | Natural kraft, bright tissue primaries, watercolor wash tones, metallic gold | White sculptural, indigo block print, warm cream origami, matte black geometric |
1. Paper Bead Necklace (Beginner)
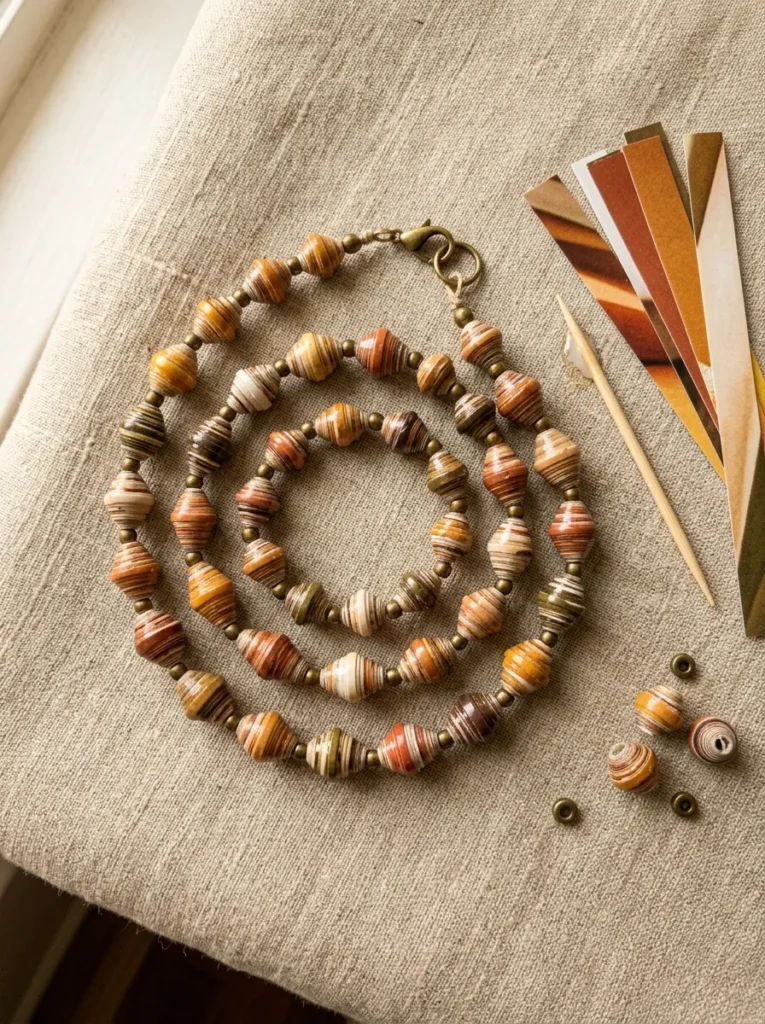
Vibe: Warm and handcrafted — the jewelry project that uses magazine pages and produces something genuinely wearable.
Why it works: Paper bead necklaces apply the principle of material transformation through geometric rolling — a long triangular paper strip, rolled tightly from the wide end toward the pointed tip around a thin mandrel (a toothpick or bamboo skewer), produces a tapered cylindrical bead whose cross-section reveals the paper’s layered pattern as a decorative surface. Magazine pages are the ideal paper source for this technique because the printed inks produce complex color patterns at the bead’s cross-section that cannot be replicated with intentionally patterned paper — the bead’s surface carries the compressed visual complexity of the full magazine page visible in its cross-sectional end rings. Sealed with two coats of Mod Podge or clear nail polish, the finished beads are hard, durable, and water-resistant enough for regular wear.
How to get it: Cut magazine pages into long isosceles triangles approximately 25cm long and 3cm wide at the base. Starting at the wide end, roll tightly and evenly around a toothpick, applying a thin line of glue stick along the last 3cm of the strip to seal. Seal each completed bead with two coats of clear Mod Podge while still on the toothpick — the toothpick doubles as a drying holder. String on waxed linen thread with brass spacer beads between each paper bead for visual rhythm and structural separation.
Quick Win: Cutting 20 paper triangles in a single session before rolling any of them creates the production efficiency that makes paper beads genuinely enjoyable to make — the cutting step is the most time-consuming, and batching it separately from the rolling step reduces total project time by approximately 30%.
| Product |
|---|
| Magazine selection assorted earth tone pages |
| Clear Mod Podge sealer brush-on |
| Natural waxed linen thread jewelry |
| Brass spacer bead set small |
| Bamboo skewer set for rolling mandrel |
Also view: 14 IKEA Kids Furniture Designs for Every Home
2. Origami Box with Lid (Beginner)
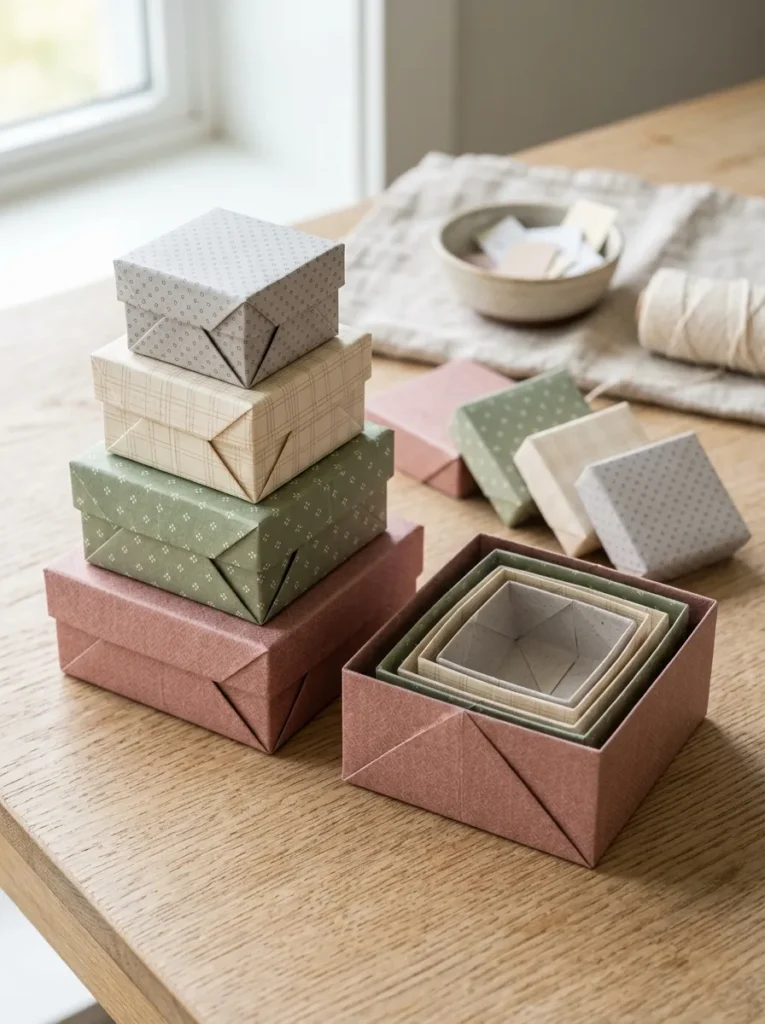
Vibe: Neat and satisfying — the project where the fold logic reveals itself in the finished object.
Why it works: The origami masu box (the traditional Japanese square box construction) applies the design principle of structural geometry through fold sequence — a square sheet of paper folded through a specific sequence of valley and mountain folds produces a rigid, functional box whose walls are held in position by the mechanical tension of the folds rather than any adhesive. This structural integrity is the surprising quality of a well-executed origami box: the walls hold their vertical position under the weight of small objects placed inside, which makes the box genuinely functional rather than merely decorative. Making the lid requires an identical sequence of folds on a square of paper approximately 5mm larger than the box base sheet — this slight size difference is the only modification between the two constructions that creates the lid-to-box fit.
How to get it: Begin with a 20x20cm square of medium-weight washi paper or 80gsm patterned paper — paper lighter than 80gsm produces walls that flex under load, while paper heavier than 120gsm resists the fold sequence and produces bulging corners. Fold in half horizontally, unfold, fold in half vertically, unfold, fold each corner to the center point, fold the top and bottom edges to the center line, unfold the left and right side corners, raise the side walls by folding the left and right edges upward along the existing fold lines, fold the corner triangles inward as the final step to lock the walls in position. For the lid, repeat with paper 5mm larger in each dimension.
| Product |
|---|
| Patterned washi paper set assorted designs |
| Square origami paper pack 20x20cm |
| Bone folder for crisp fold lines |
| Origami box instruction card set |
| Gift ribbon set for box decoration |
3. Watercolor Resist Gift Wrap (Beginner)
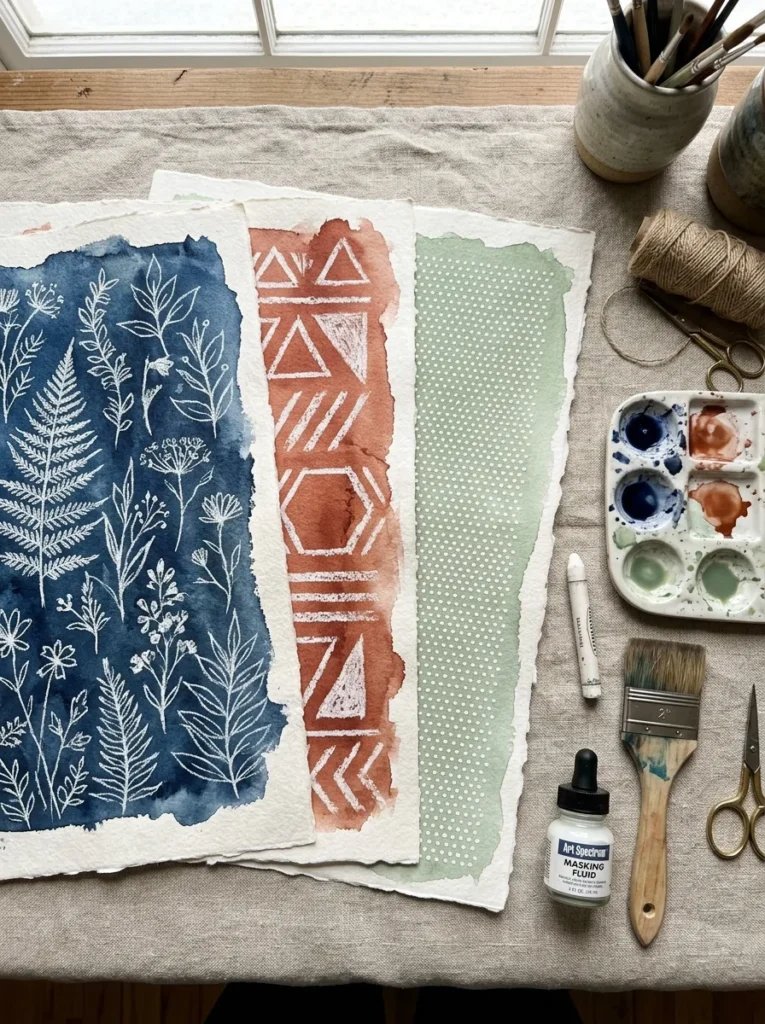
Vibe: Creative and colorful — the gift wrap that makes the wrapping as considered as the gift inside.
Why it works: Watercolor resist gift wrap applies the design principle of selective surface repellency — wax-based drawing tools (crayons, oil pastels) repel water-based paint, meaning any design drawn with a white crayon on paper is rendered invisible by its whiteness against the white paper surface but becomes dramatically visible when a watercolor wash is applied over it — the drawn areas reject the wash while the undrawn paper absorbs it, revealing the drawing in the color difference between the resisted and absorbed areas. This technique produces professional-looking patterned wrapping paper in 20 minutes using materials available in any household with children, and the slight irregularity of the hand-drawn resist design gives each sheet an organic quality that printed gift wrap cannot replicate.
How to get it: Draw botanical, geometric, or abstract designs onto white cartridge paper or 90gsm drawing paper using a white wax crayon or oil pastel — press firmly to deposit enough wax to create a genuine resist barrier. Mix watercolor paint to a medium consistency (translucent rather than opaque) and wash across the full paper surface in a single direction using a wide flat brush. The resist areas reveal themselves as the wash is applied. Allow to dry completely before using as wrap — watercolor paper dries slightly stiff, which actually makes it easier to fold neatly around boxes than soft patterned tissue.
| Product |
|---|
| White wax crayon set for resist technique |
| Watercolor paint set 12 colors |
| Wide flat wash brush 2 inch |
| 90gsm white cartridge paper sheet pack |
| Oil pastel set for alternative resist |
4. Accordion Book (Beginner to Intermediate)
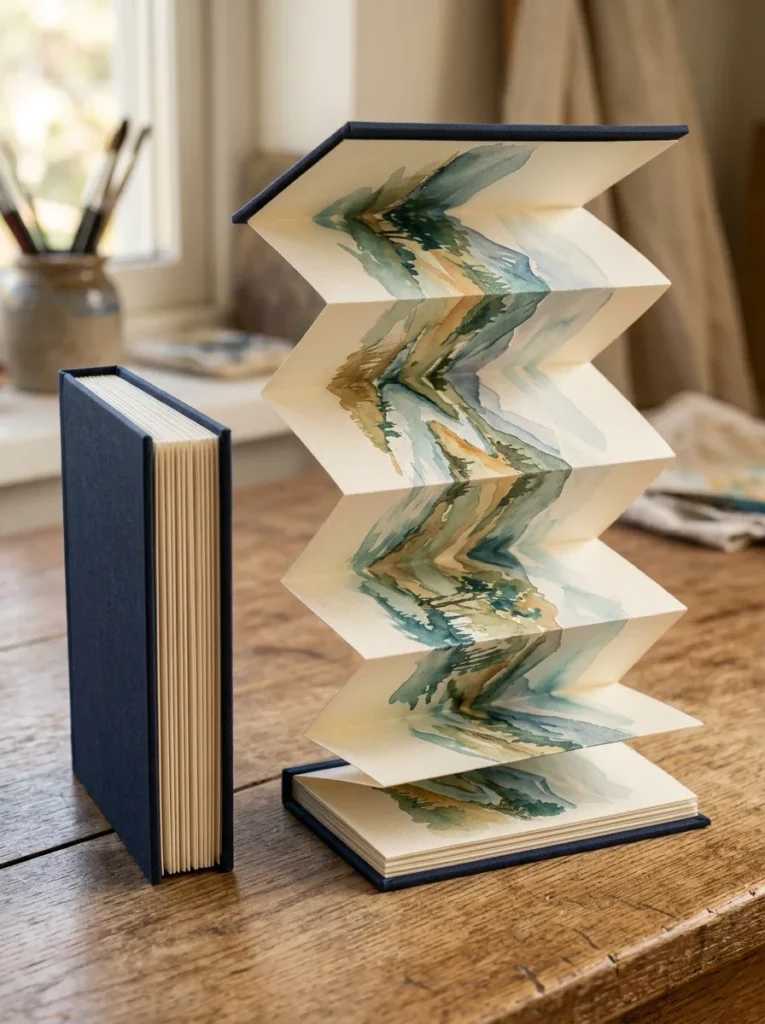
Vibe: Considered and artful — the book structure that reads as architecture when it is open and object when it is closed.
Why it works: An accordion book applies the design principle of expandable sequential space — the accordion fold structure creates a single continuous surface that reads as a sequence of individual pages when browsed panel by panel and as a unified panoramic field when fully extended. This dual reading — sequential and panoramic simultaneously — makes the accordion book the most versatile book structure in the hand-bookbinding tradition, appropriate for everything from daily journals to artist books to illustrated narratives. The construction requires only a long strip of paper, a bone folder, and two cover boards — no sewing, no adhesive binding, and no complex book structure knowledge — making it the ideal first book structure for anyone new to book arts.
How to get it: Cut a strip of 90gsm cartridge paper to the desired panel width multiplied by the number of panels required — a 12-panel accordion requires a strip 12 times the panel width in length. Fold the entire strip accordion-style by folding in half, then folding each half in half again, until the desired panel count is achieved — this binary folding method produces panels of perfectly consistent width without measuring. Cut two cover boards slightly larger than the panel dimensions, cover with bookcloth or decorative paper, and adhere the first and last accordion panels to the cover board interiors using PVA glue. Press under weight overnight.
| Product |
|---|
| Cartridge paper 90gsm cream pack |
| Bone folder for accordion folds |
| Bookcloth navy for cover material |
| Book board heavyweight for covers |
| PVA bookbinding glue brush-on |
5. Paper Flower Bouquet (Beginner to Intermediate)
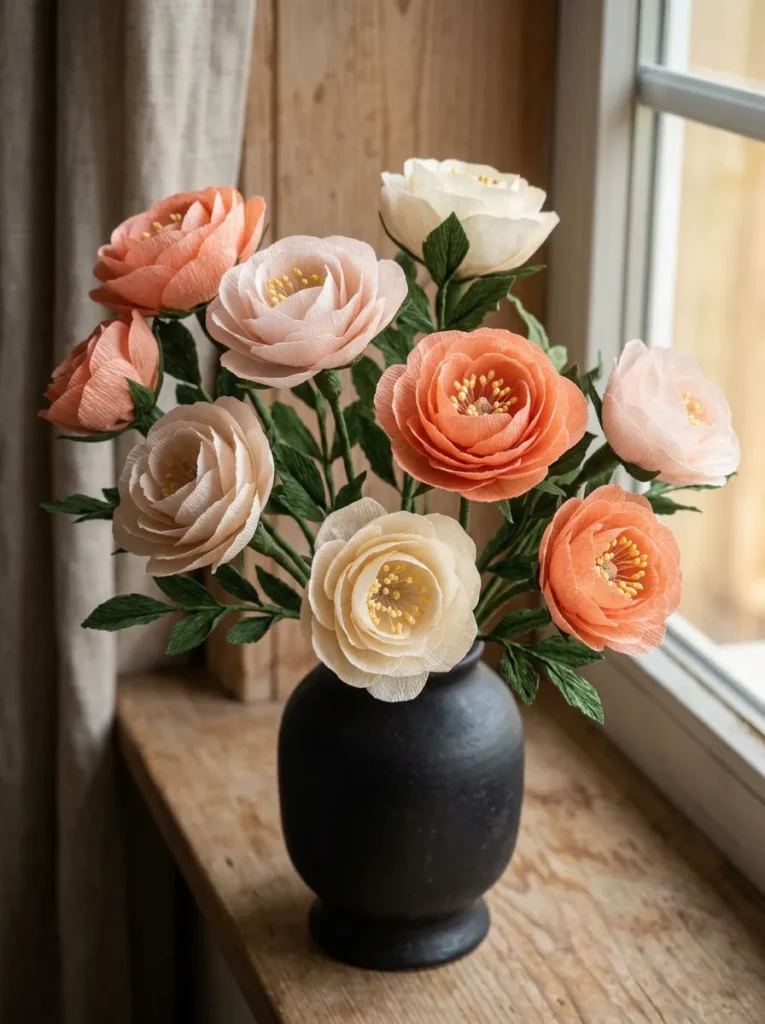
Vibe: Warm and delicate — the paper flowers that guests mistake for real from across the room.
Why it works: Crepe paper flowers achieve their convincing botanical quality through the material’s specific properties — crepe paper’s longitudinal stretch allows petals to be shaped three-dimensionally by stretching along the grain, producing the natural cupped and ruffled forms that flat paper cannot replicate. Each petal is individually shaped by applying gentle outward pressure from the center of the paper rectangle along the grain direction — this 10-second shaping motion transforms a flat paper rectangle into a naturally cupped petal form that, when assembled with 5–8 similarly shaped petals around a wire stem with paper stamens, produces a flower convincing enough from a normal viewing distance to prompt genuine uncertainty about whether it is real.
How to get it: Cut petal shapes from crepe paper, cutting perpendicular to the grain direction so the grain runs vertically up the petal from base to tip — this orientation allows the stretch that produces the cupped shape. Shape each petal by placing thumbs at the center of the petal and pulling outward while holding the petal edges with fingers, stretching the center to create a cup. Assemble petals around a wire stem fitted with a small ball of green crepe as the flower center, wrapping each petal base tightly with floral wire before covering the wire and stem with a continuous strip of green crepe paper tape.
| Product |
|---|
| Crepe paper roll set peachy blush cream |
| Floral wire 24 gauge green set |
| Green crepe paper tape stem wrap |
| Paper flower stamen set assorted |
| Wire cutter jewelry tool small |
6. Marbled Paper with Shaving Cream (Beginner)
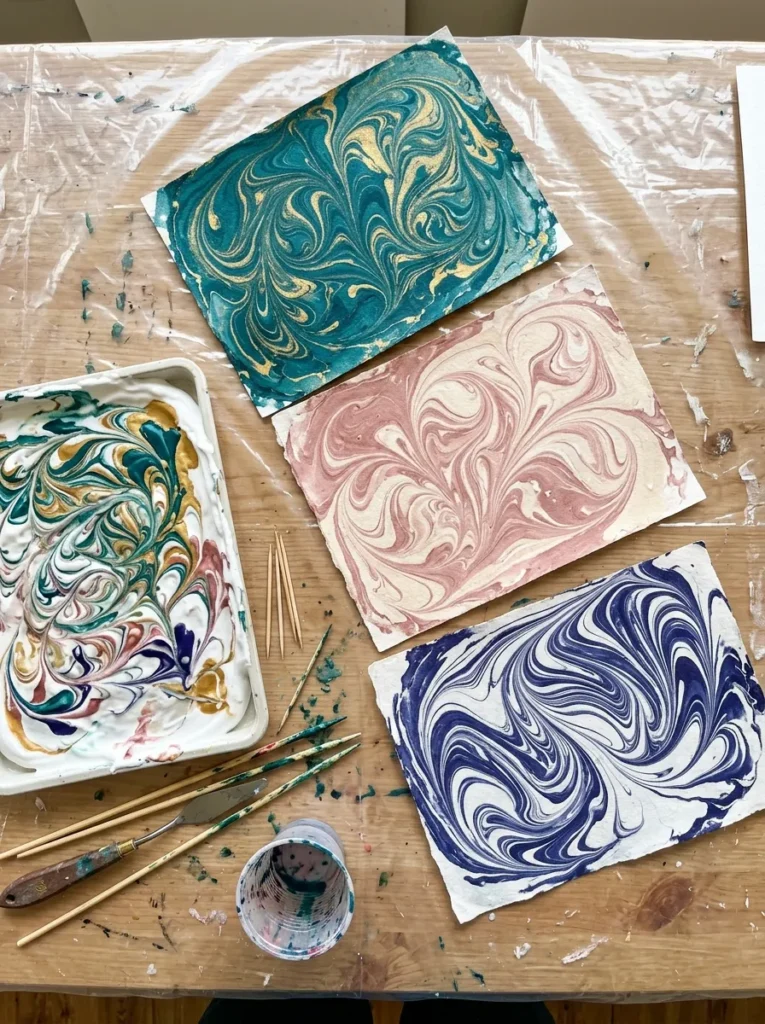
Vibe: Colorful and process-rich — the craft where the act of making is as satisfying as the result.
Why it works: Shaving cream marbling applies the principle of surface tension pattern transfer — acrylic paint dropped onto a foam of shaving cream floats on the foam surface rather than sinking into it (because the paint’s density is close to the foam’s and surface tension supports it), creating a flat color pool on the foam surface that can be swirled and dragged with a toothpick without the colors mixing. When a sheet of paper is pressed flat onto the foam surface and peeled away, the paint layer on the foam transfers to the paper in the exact pattern it held on the foam surface — each sheet produced by this method is genuinely unique because no two foam surface patterns are identical. The shaving cream itself does not transfer to the paper — it wipes cleanly from the finished print, leaving only the paint pattern behind.
How to get it: Spread a layer of white shaving cream approximately 1cm deep in a baking tray. Drop acrylic paint from a squeeze bottle or dropper onto the shaving cream surface in small puddles across the tray — 3–4 colors create the most visually dynamic marble patterns. Drag a toothpick through the paint puddles in swirling, figure-eight, or comb patterns to create the marble design. Press a sheet of paper flat onto the surface, press gently with a smooth roller, and peel away in a single smooth motion. Use a card scraper to wipe the shaving cream from the paper surface, revealing the marble print beneath. Allow to dry flat — marbled sheets curl slightly as they dry and can be pressed flat under heavy books once completely dry.
| Product |
|---|
| White shaving foam can standard |
| Acrylic paint set assorted colors |
| White cartridge paper 90gsm pack |
| Baking tray for marbling surface |
| Card scraper or old gift card for wiping |
7. Paper Lantern from Patterned Paper (Intermediate)
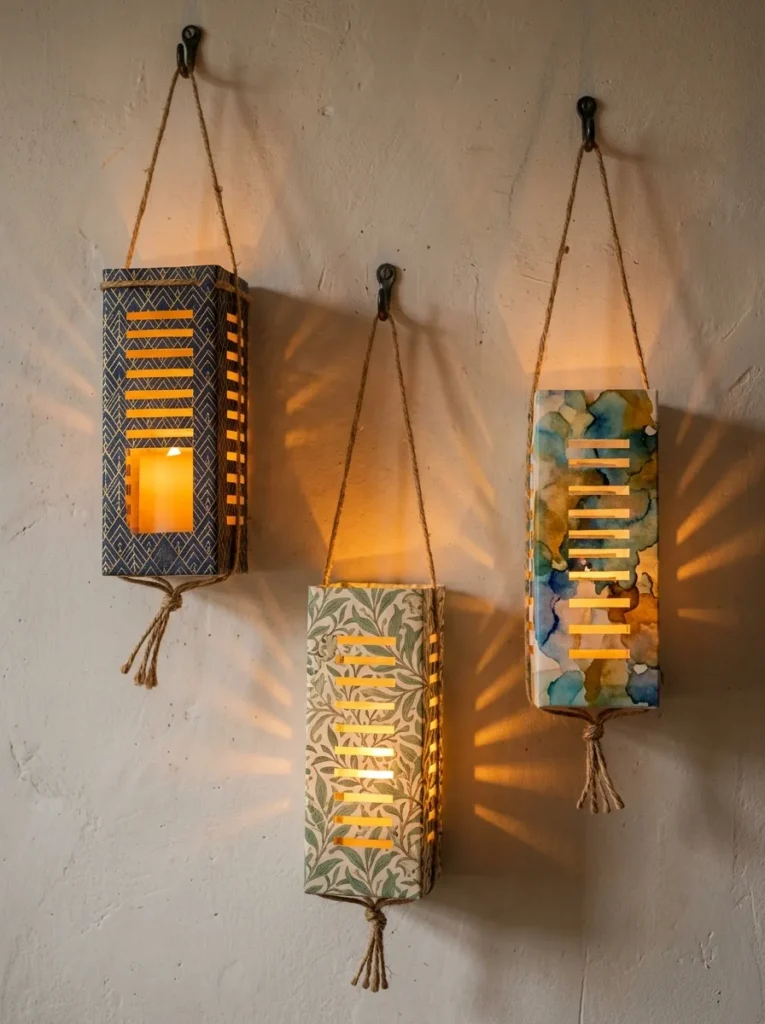
Vibe: Warm and atmospheric — the paper lanterns that transform the quality of a room’s light as much as they decorate it.
Why it works: A paper lantern applies the design principle of light diffusion through material translucency — the patterned paper’s semi-transparent quality allows the warm LED light source inside to glow through the paper surface, creating an object that is both a decorative form and a light-modifying element. The cut slots in the lantern sides serve two functions: they create the pattern of projected light and shadow on surrounding surfaces (making the lantern a light projection device as well as a decorative object) and they allow the heat from the LED candle to escape rather than accumulating within the paper enclosure. The use of battery-operated LED candles rather than real flame candles is the safety specification that makes this project appropriate for indoor hanging.
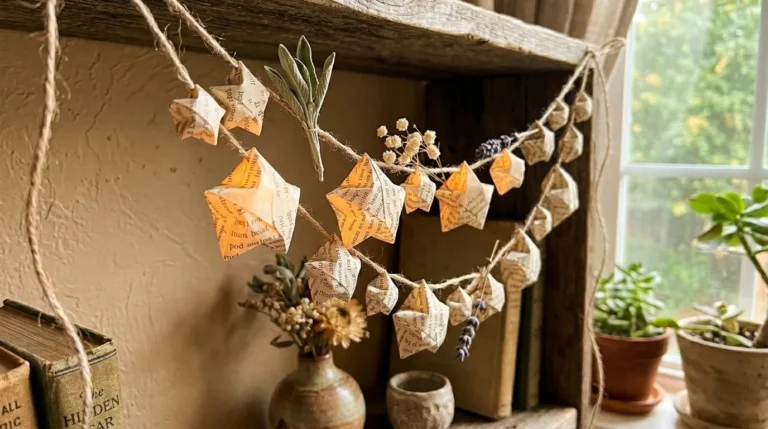
How to get it: Cut a rectangle of patterned paper 30x40cm for the lantern body. Along the length of the paper, cut parallel vertical slots starting 2cm from the top edge and ending 2cm from the bottom edge, spaced 1cm apart — these slots create the lantern’s characteristic parallel light projections. Roll the cut paper into a tube, overlapping the short edges by 1cm, and secure with double-sided tape along the seam. Press the tube gently to flatten it into a rectangular prism — the parallel cuts in the paper allow this reshaping. Thread jute twine through small holes punched at each top corner for hanging, and tie the bottom closed with a jute bow around a battery LED tea light placed inside.
| Product |
|---|
| Patterned washi paper set assorted |
| Battery LED tea light set warm white |
| Natural jute twine thin roll |
| Double-sided tape roll strong |
| Craft hole punch single |
8. Hand-Bound Notebook with Coptic Stitch (Intermediate)
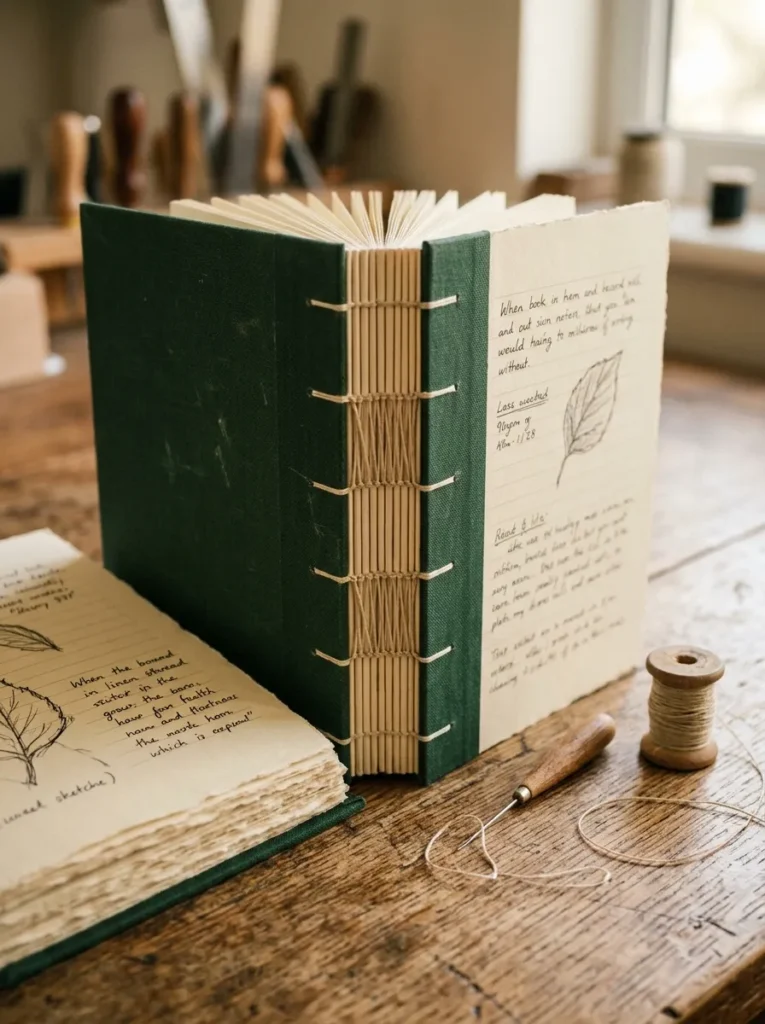
Vibe: Warm and considered — the notebook that makes writing in it feel like a genuine act of craft.
Why it works: The coptic stitch binding is the most functionally advanced and visually distinctive of the beginner-accessible bookbinding structures — it produces a notebook that opens completely flat at 180 degrees (unlike commercially bound notebooks that resist flat opening and create a gutter at the center where the spine meets the pages), has a beautiful exposed chain stitch spine that is the book’s primary decorative feature, and requires no adhesive or book press in its construction, only a needle, thread, an awl for hole punching, and the material of the text block and covers. The flat-opening property is the functional quality that makes a coptic-bound notebook significantly more pleasant to write in than any perfect-bound or spiral-bound alternative — the page lies completely flat under the writing hand with no resistance from the spine.
How to get it: Fold sheets of 90gsm writing paper in half to create signatures (groups of folded sheets) — four sheets per signature, folded to create an 8-page section, produces a good signature weight for coptic binding. Punch holes through each signature using a bookbinding awl and a template — typically five holes evenly spaced along the fold. Create covers from book board covered with bookcloth slightly larger than the text block. Sew signatures to each other through the punched holes using natural linen thread on a bookbinding needle, creating the characteristic chain stitch pattern on the exposed spine as each signature is attached to the previous one.
| Product |
|---|
| Bookbinding linen thread waxed natural |
| Bookbinding awl for hole punching |
| Bookbinding needle curved large eye |
| Book board heavyweight 2mm for covers |
| Forest green bookcloth for cover |
9. Paper Mosaic Wall Art (Intermediate)
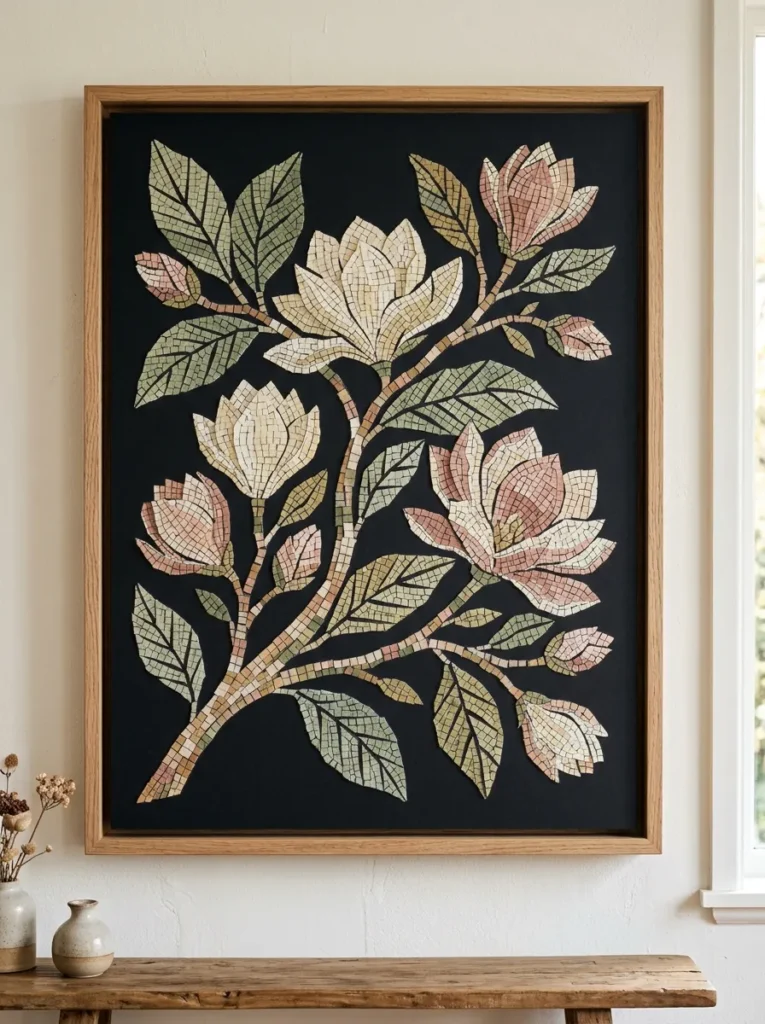
Vibe: Warm and textural — the wall art that makes visible the time invested in its making.
Why it works: Paper mosaic applies the design principle of tessellated surface from varied materials — the visual richness of a mosaic composition comes not from any individual piece but from the accumulated color and tonal relationships between thousands of small pieces arranged in a pattern. Paper is ideal for mosaic work because its variety of available textures (tissue, magazine, cardstock, patterned paper, painted paper) provides the tonal and surface variation that stone and ceramic provide in traditional mosaic, at a fraction of the cost and weight. The black paper background is the essential element that creates the characteristic mosaic “grout line” effect — by leaving small consistent gaps between each mosaic piece, the black background shows between pieces and creates the visual separation that makes each piece distinct within the overall composition.
How to get it: Draw the desired composition lightly in pencil on a piece of black cardstock or mount board — keep the design to bold, simple shapes that will read clearly at the small mosaic scale. Tear or cut paper pieces into approximately 1x1cm irregular squares from varied paper sources sorted by color family. Working section by section within the design, apply pieces using a fine brush loaded with diluted PVA glue, pressing each piece into position and leaving a consistent 2mm gap between each piece. Complete the entire composition before the glue sets, as PVA remains repositionable for approximately 5 minutes after application. Apply a thin coat of diluted Mod Podge over the completed surface to seal all pieces.
| Product |
|---|
| Black cardstock mount board for base |
| Tissue paper pack varied tones |
| Magazine selection for mosaic paper |
| PVA glue diluted for piece adhesion |
| Natural oak float frame 30x40cm |
10. Geometric Paper Wall Art (Intermediate)
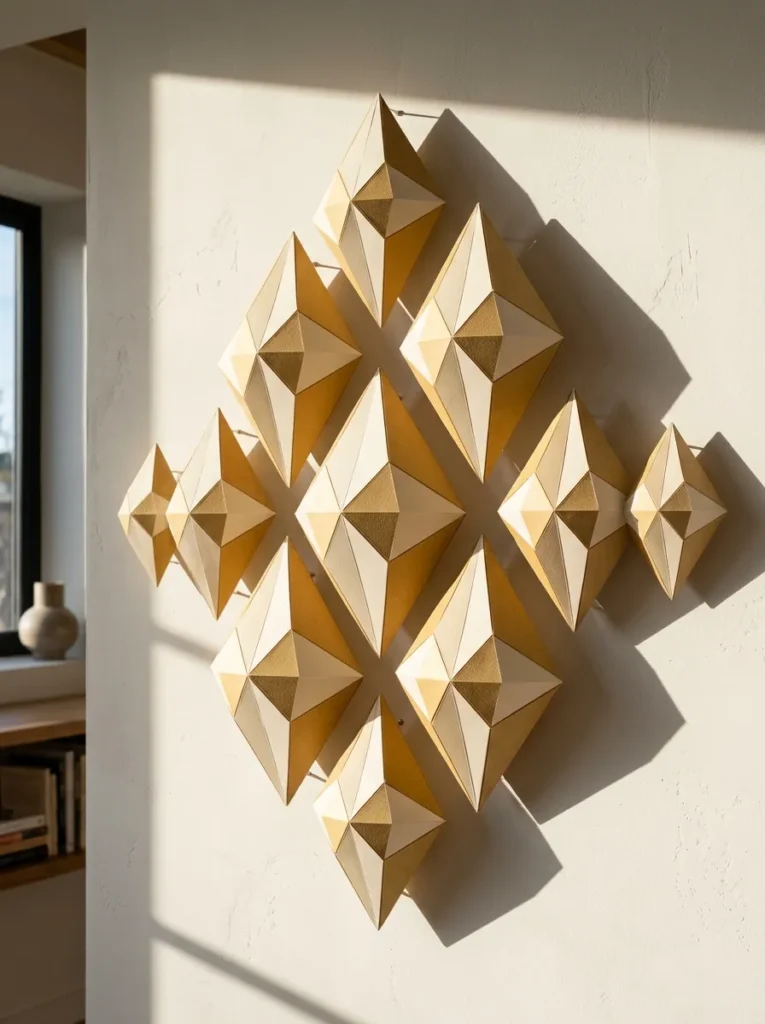
Vibe: Clean and architectural — the wall installation that uses paper to do something most people assume requires heavier materials.
Why it works: Three-dimensional geometric paper diamonds applied to a wall as a cluster installation use the design principle of shadow casting as primary decorative medium — the dimensional diamond forms are themselves clean and minimal, but the geometric shadows they cast on the wall behind them as light direction changes throughout the day create a continuously evolving secondary composition that is as visually significant as the physical objects. This shadow contribution makes a geometric paper wall installation more spatially dynamic than any flat wall art — the installation effectively has different versions of itself visible in morning light, afternoon light, and evening artificial light. The cluster arrangement of graduated sizes creates visual rhythm and compositional balance that a single diamond or evenly-sized repeating pattern cannot achieve.
How to get it: Score and fold a square of heavy cardstock (110lb minimum for structural rigidity) diagonally in both directions and horizontally and vertically to create eight triangular sections — this fold map produces the fold lines needed to form the diamond. Pinch alternate triangular sections upward and downward following the pre-scored fold lines to create the faceted form. Close each diamond by folding along the equatorial score line and securing with double-sided tape at the joining edges. Mount each diamond to the wall using a small adhesive foam mounting square at the diamond’s flat back face, which creates the gap between diamond and wall that allows the shadow to form cleanly.
| Product |
|---|
| Cream cardstock 110lb pack |
| Warm gold metallic cardstock pack |
| Scoring stylus for fold lines |
| Steel ruler and cutting mat set |
| Foam mounting square set adhesive |
11. Papier-Mâché Vessel (Intermediate)
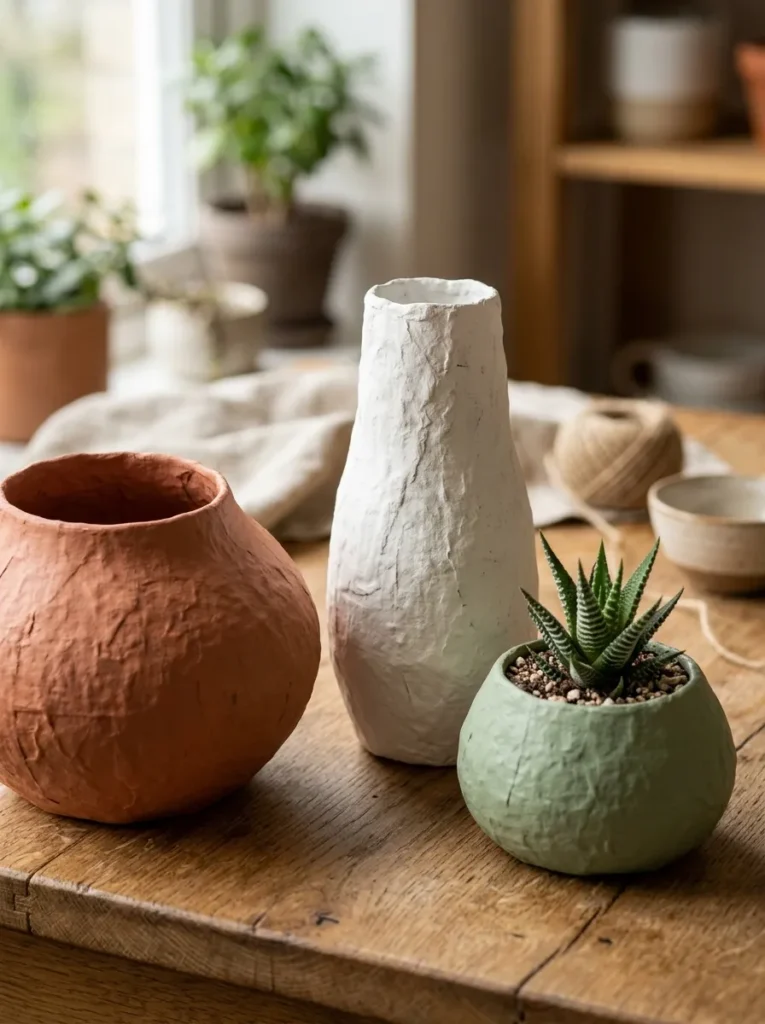
Vibe: Warm and handmade — the vessels that make the wall shelf look like it holds things made rather than things bought.
Why it works: Papier-mâché vessel construction applies the design principle of strip lamination around a temporary mold — strips of newspaper dipped in diluted PVA glue are layered over an inflated balloon (the mold) in multiple directions, each layer perpendicular to the previous, creating a composite material whose structural strength comes from the cross-directional layering of each strip rather than from any single layer’s thickness. When the balloon is deflated after the layers dry, the papier-mâché shell retains the balloon’s organic round form. The characteristic surface texture of papier-mâché — the slight ridges and valleys from individual strip edges — is the visible evidence of the construction method and the specific quality that makes papier-mâché objects read as handmade rather than manufactured. Painted in matte earth tone acrylics and sealed, the finished vessels are lightweight, structurally sound, and visually indistinguishable from ceramic at normal viewing distances.
How to get it: Tear newspaper into strips approximately 3cm wide and 15cm long — torn edges rather than cut edges create softer transitions between strips in the finished surface. Dilute PVA glue with water to a 2:1 ratio. Inflate a balloon to the desired vessel size and knot. Dip each strip in the diluted PVA, remove excess glue between two fingers, and apply to the balloon surface, smoothing flat. Apply 6–8 layers in total, allowing each layer to dry partially before applying the next. After the final layer is completely dry, pop and remove the balloon. Paint with two coats of acrylic in the desired color and seal with matte varnish.
| Product |
|---|
| PVA glue large bottle for diluting |
| Newspaper stack for papier-mâché strips |
| Acrylic paint set earth tones terracotta sage |
| Matte varnish spray sealer |
| Balloon pack assorted sizes for molds |
12. Block-Printed Wrapping Paper (Intermediate)
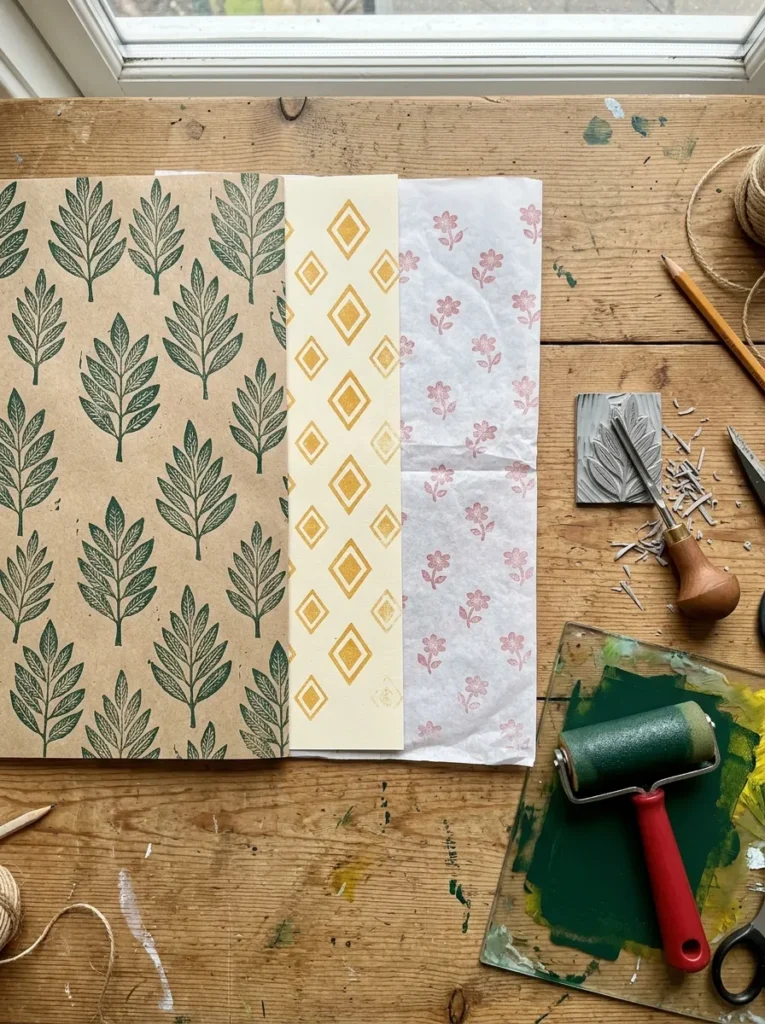
Vibe: Creative and artisanal — the wrapping paper that makes the unwrapping a secondary pleasure to studying the print.
Why it works: Block-printed wrapping paper applies the printmaking principle of relief printing to a domestic craft context — material is removed from the flat surface of a carving block (lino, rubber eraser, or soft carving block) leaving a raised design in relief that, when inked and pressed onto paper, transfers only the raised surface to the paper in the exact design carved. Each impression of the block carries slightly different ink density depending on ink load, pressure variation, and the carving block’s surface characteristics — this variation between impressions is the quality that distinguishes hand-block-printed paper from digitally printed paper and gives each sheet its artisan character. A repeating geometric or botanical pattern printed across a full sheet of kraft or tissue paper produces wrapping material more beautiful and more personal than any commercial alternative.
How to get it: Carve a simple botanical or geometric design into a soft rubber carving block (sold as printmaking eraser blocks) using a V-gouge lino carving tool — simple designs (a single leaf, a small star, a simple flower) are more effective at wrapping paper scale than complex detailed designs. Apply printing ink or acrylic paint to a foam brayer roller and roll evenly onto the carved block surface. Press the inked block onto the paper, applying even pressure across the full block surface without rocking. Lift cleanly and repeat in a regular pattern across the sheet. Allow to dry completely before using as gift wrap.
| Product |
|---|
| Soft rubber carving block set |
| V-gouge lino carving tool set |
| Block printing ink set assorted colors |
| Foam brayer roller small |
| Kraft paper roll natural for printing |
13. Paper Quilling Wall Art (Intermediate to Advanced)
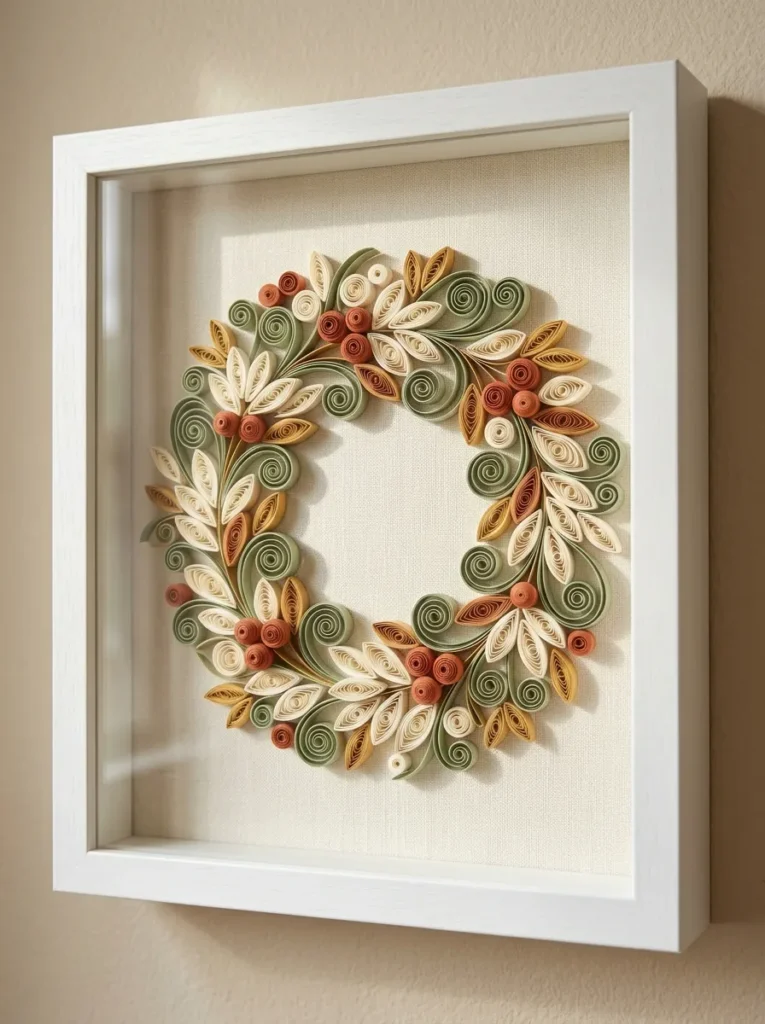
Vibe: Detailed and warm — the wall art that makes viewers lean in closer the longer they look at it.
Why it works: Paper quilling applies the design principle of dimensional form from flat material through rolling tension — a strip of paper rolled tightly around a quilling tool and allowed to spring open partially creates a coiled form whose tightness (and therefore shape when pinched and shaped) is controlled by how long the paper was held before being released. The quilling tool’s narrow tip creates the precise rolling radius that produces consistent coil size across multiple identical shapes, while the variety of pinch and shaping techniques (pinching to a teardrop, marquise, square, or triangle; allowing different amounts of spring before releasing) produces the range of shapes that can be combined into complex botanical and geometric compositions. The shadow box frame is the essential display element that protects the three-dimensional quilled forms from dust and contact damage while displaying their dimensionality against the background.
How to get it: Purchase 3mm quilling paper strips in the desired color palette — quilling paper is sold pre-cut to the correct width and length from specialty paper craft suppliers. Roll each strip tightly around a slotted quilling tool (the slot grips the strip end for consistent rolling), release carefully while still holding the coil, and allow to spring open to the desired looseness before gluing the end to seal the coil. Shape the coil by pinching with fingertips into teardrop, marquise, or other forms. Arrange shaped coils on a linen-covered card background within a shadow box frame, adhering each shape with a small dot of PVA glue at its base contact point.
| Product |
|---|
| Quilling paper strips set assorted colors |
| Slotted quilling tool fine tip |
| Quilling comb for additional shapes |
| White shadow box frame 20x20cm |
| PVA glue fine tip applicator bottle |
14. Paper Cutting Mandala (Advanced)
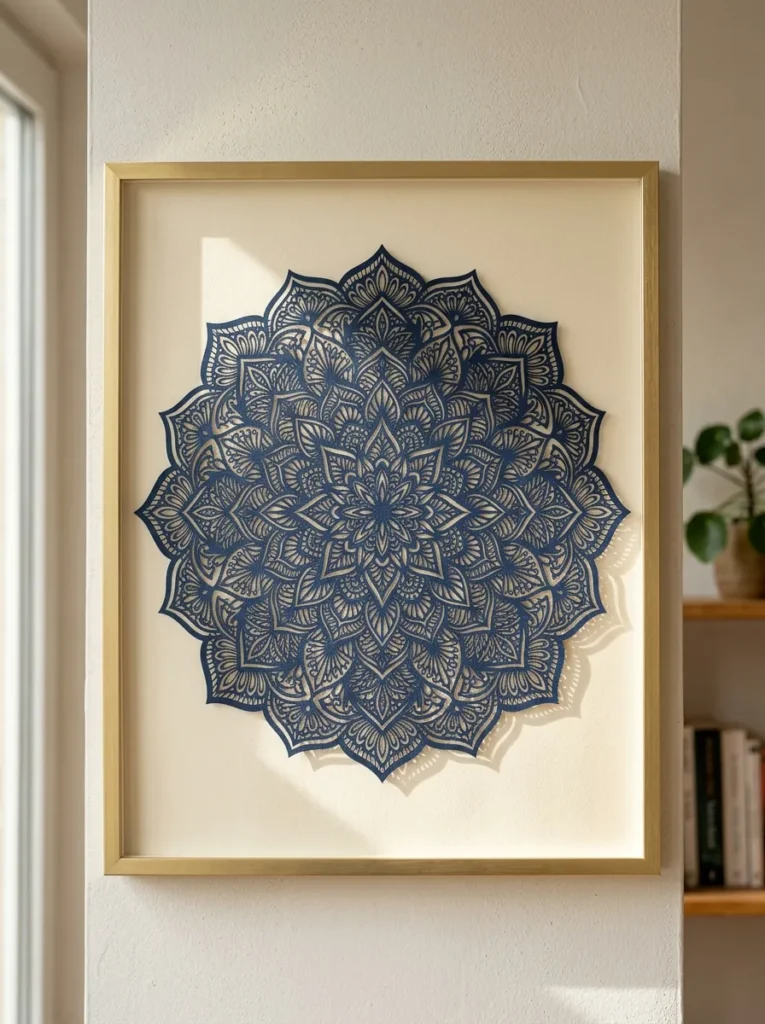
Vibe: Precise and meditative — the paper cut that makes visible the sustained attention required to produce it.
Why it works: A paper cutting mandala applies the design principle of negative space as primary image — the mandala design exists in the paper that is removed rather than the paper that remains, with the cut-away negative spaces forming the pattern visible against the background when the completed piece is mounted. This inversion of conventional mark-making (adding rather than removing material) requires the paper cutter to visualize and work toward a negative space pattern rather than a positive one — a cognitive approach that is genuinely different from drawing or painting and produces the specific meditative quality that paper cutting practitioners consistently describe as the defining experience of the craft. The eight-fold symmetry of a mandala pattern provides the structural logic that makes complex paper cutting achievable by working one-eighth of the design at a time, repeating the same cuts across each section.
How to get it: Print or draw the mandala design lightly on the back of the cardstock — working from the back means pencil lines are not visible on the finished front face. Fold the paper in half, then in half again, then in half a third time, creating an eight-layered triangle — cutting through all layers simultaneously creates the eight-fold symmetry with one set of cuts. Use a sharp craft knife with a new blade (blade sharpness is the most critical variable in paper cutting quality) on a self-healing cutting mat, always cutting toward yourself with the knife angled away from the desired cut line edge. Cut all enclosed interior shapes before cutting the outer silhouette — this prevents the paper from becoming structurally compromised before all interior cuts are completed.
Quick Win: Working with a fresh craft knife blade for every paper cutting session rather than using a dull blade is the single technique change that most dramatically improves paper cutting results — a sharp blade cuts with the knife’s weight alone, while a dull blade requires pressure that compresses and tears the paper edge rather than cutting it cleanly.
| Product |
|---|
| Deep navy cardstock 110lb pack |
| Craft knife handle with fresh blades |
| Self-healing cutting mat A3 size |
| Gold frame set for mandala mounting |
| Cream mat board for mounting background |
How to Start Your DIY Paper Craft Transformation
Start with the marbled paper project. Before investing in specialized tools, specialty paper, or bookbinding supplies, spend one afternoon making marbled paper with shaving cream and acrylic paint using materials available in virtually every household already. This single session teaches the most important lesson available in paper craft: paper’s transformation potential is enormous, the tools required are minimal, and the results of even the simplest technique are genuinely surprising and beautiful. The marbled sheets produced in one session become the raw material for half the other projects on this list — used as covers for the accordion book, as mosaic paper for the wall art project, as gift wrap for the origami boxes. Paper craft is a cumulative practice where each project’s output becomes another project’s input, and the marbled paper session is the ideal entry point into that cumulative cycle.
The most common mistake paper craft beginners make is using paper that is too light for the construction method they are attempting — thin copy paper for a project requiring cardstock, standard cardstock for a project requiring heavy book board, lightweight tissue for a project requiring structural paper. Each paper craft technique has a specific weight range within which it performs correctly: origami works best between 60–90gsm, quilling requires the specific 3mm-wide strips sold for the purpose, papier-mâché works with any newspaper weight, block printing requires paper absorbent enough to accept ink without beading but dense enough not to tear when wet, and book binding requires different weights for text block (90gsm) and covers (book board, 2–3mm thickness). Matching paper weight to construction method is the technical decision that most reliably separates successful paper craft outcomes from frustrating ones.
Three items under $50 that make an immediate impact: A bone folder ($6–$10) that immediately elevates the quality of every fold in every paper project from hand-creased to professionally crisp — the single tool that most distinguishes paper craft that looks handmade from paper craft that looks amateurish; a self-healing A3 cutting mat ($15–$20) that provides a safe, consistent cutting surface for every craft knife project on this list and protects both the table and the craft knife blade from damage; and a pack of mixed weight cardstock in 10–15 colors ($12–$18) that provides the raw material for the majority of structural paper projects without requiring individual color purchases.
Realistic expectations: A single beginner paper craft project — origami boxes, paper bead necklace, or marbled paper — takes 30–60 minutes of active making time and costs $5–$15 in materials. An intermediate project — accordion book, papier-mâché vessel, or block-printed paper — takes 2–4 hours across one or two sessions and costs $15–$25 in materials. An advanced project — coptic stitch notebook, paper quilling mandala, or paper cutting mandala — takes 4–8 hours of focused making time and costs $20–$35 in specialized materials. A complete paper craft collection spanning beginner through advanced projects — building skills progressively from marbled paper through to paper cutting — can be developed across six to eight weekend sessions for a total material investment of $80–$150, producing a range of objects suitable for home display, gifting, and ongoing personal practice.
Frequently Asked Questions About DIY Paper Craft Projects
What is the best paper to use for paper craft projects as a complete beginner?
For a complete beginner, 80gsm copy paper (standard printer paper) and 110lb cardstock are the two paper weights that collectively cover the majority of beginner paper craft projects and are available at any office supply store. Copy paper is the appropriate weight for origami, paper beads, and practice folding where the goal is learning the fold sequence rather than producing a display-quality result. Cardstock at 110lb (approximately 300gsm) is the appropriate weight for structural projects — paper lanterns, geometric wall art, origami boxes for actual use — where the paper needs to hold its shape under load without collapsing. Specialty papers (washi, handmade botanical papers, Japanese kozo) are worth investing in once the specific construction technique has been practiced on standard papers — the specialty paper’s cost is only justified when the maker’s technique is developed enough to produce results worthy of the material.
How do I prevent paper from wrinkling when using glue or wet techniques?
Paper wrinkling during wet techniques (marbling, watercolor resist, papier-mâché) occurs because water causes paper fibers to expand and contract unevenly as they absorb and release moisture. Three techniques minimize wrinkling: stretching paper before wet application (tape the paper to a flat board using gum strip tape along all four edges while dry — the tape holds the paper flat as it expands during wetting and contracts during drying, eliminating buckling); using heavier paper weight (300gsm watercolor paper buckles far less than 90gsm cartridge paper under equivalent moisture because the additional fiber density resists the expansion-contraction movement); and pressing wet paper flat under heavy books immediately after the wet stage is complete and allowing it to dry under the weight (the pressure prevents the buckling that occurs as paper dries freely in the air). For PVA glue application specifically, diluting PVA 2:1 with water rather than using full-strength PVA reduces the total water load applied to the paper, which reduces buckling significantly.
What tools do I absolutely need to start paper crafting and what can I skip initially?
The three tools that deliver the most value across the widest range of paper craft techniques are: a bone folder (used in folding, scoring, burnishing, and bookbinding — the single most versatile paper craft tool available), a self-healing cutting mat with grid lines (protects work surfaces, guides straight cutting, and extends craft knife blade life), and a craft knife with replaceable blades (provides the precision cutting that scissors cannot achieve for intricate designs, paper cutting, and clean geometric cuts). Everything else — specialized quilling tools, bookbinding awls, brayer rollers, embossing tools — should be purchased when a specific project requires them rather than in advance. A craft knife, a bone folder, a cutting mat, and a steel ruler cover approximately 80% of the tool requirements for every project on this list.
How do I display paper craft projects so they last without fading or deteriorating?
The two primary deterioration risks for paper craft projects are UV light exposure (which fades paper and ink colors, particularly in tissue paper projects and watercolor pieces) and humidity variation (which causes paper to expand and contract, distorting flat pieces and weakening adhesive bonds). To maximize longevity: display paper craft projects away from direct sunlight and out of rooms with high humidity variation (kitchens and bathrooms are the least suitable environments for paper craft display). Frame paper pieces behind UV-filtering glass rather than standard glass — UV-filtering glass is available as a standard option from most framing suppliers. Seal completed paper crafts with a matte or satin UV-resistant varnish spray before display — one light coat of UV-resistant spray varnish extends the color life of paper craft objects by several years. Three-dimensional paper objects (origami forms, quilled compositions) should be displayed under glass domes or in shadow box frames to protect from dust accumulation and physical damage.
Can paper craft projects be made with children, and at what age?
Paper craft projects are among the most age-adaptable craft activities available — the skill and complexity range of paper techniques means that appropriate projects exist for every age from three to adult. Children aged 3–5 can successfully participate in marbled paper (applying paint drops and watching colors swirl), simple paper bead rolling (with adult help setting up the rolling tool), and paper mosaic (tearing paper pieces and gluing them onto a background with guidance). Children aged 6–9 can independently complete origami boxes from clear instructional diagrams, paper flower petals (with adult help on stem assembly), and block printing with pre-carved stamps. Children aged 10+ can attempt accordion books, paper lanterns, and basic paper cutting with appropriate craft knife supervision. The adjustment required for working with children in paper craft is safety tool management (craft knives require adult supervision for children under 10), paper weight selection (younger children work more successfully with lighter, more easily manipulated paper), and project scope (a single origami box is an appropriate session for a young child; a full notebook binding is appropriate for an older child or teen).
Ready to Create Your Dream DIY Paper Craft Collection?
These 14 projects cover the complete spectrum of what paper craft can become — from the five-minute satisfaction of rolling a paper bead and the quiet precision of folding an origami box, to the meditative hours of a coptic stitch binding and the advanced spatial reasoning of a paper cutting mandala. Every paper craft journey begins with a single afternoon of marbling — no tools, no special paper, no previous experience, and two hours that produce something genuinely surprising from materials already in the house — and from that first session, the cumulative logic of paper craft reveals itself: each technique you learn enables the next, each material you work with teaches you how paper behaves under different interventions, and each project you complete makes the next one more achievable than the last. Right now, find a can of shaving foam, three colors of acrylic paint, and a sheet of white paper, and discover in twenty minutes what paper can become in your hands. Save the projects that match your current skill level and the ones that represent the skill you want to build toward — and begin from that first marbled sheet.