14 Easy Yarn Craft Ideas for Cozy DIY Days
Easy yarn crafts are hand-worked textile projects using wool, cotton, acrylic, or specialty fiber that produce beautiful, tactile results without requiring advanced knitting or crochet skills — many use only fingers, a blunt needle, or basic tools available at any craft store. Here are 14 ideas for spending a cozy DIY day with yarn and ending it with something genuinely worth keeping.
Yarn is one of the most forgiving creative materials available — it unravels, restarts, forgives mistakes, and rewards patience with warmth in the most literal sense. A cozy DIY day with yarn doesn’t require expertise or expensive equipment. It requires a good skein, a clear surface, and the willingness to make something with your hands. The results tend to be softer, more personal, and more lasting than most people expect. Here are 14 ideas worth saving — and stealing.
Why Easy Yarn Crafts Work So Well
What are easy yarn crafts? Easy yarn crafts are textile projects that prioritize accessibility over complexity — they use a limited number of techniques (looping, knotting, wrapping, weaving, finger-knitting) and produce finished objects in a single session or across a comfortable weekend. As a creative category, they sit within the broader fiber arts tradition that spans millennia of human textile production, but they deliberately set aside the steeper learning curves of structured knitting and crochet in favor of techniques where beautiful results are achievable from the very first attempt. The best easy yarn crafts produce objects with genuine tactile richness — the warmth, texture, and weight that only natural and semi-natural fiber can provide.
Core materials and colors. The yarn palette that produces the most beautiful easy craft results leans toward the natural and the muted: undyed natural wool in cream and oatmeal, chunky merino in dusty sage and warm terracotta, cotton in warm white and natural greige, and specialty fibers like mohair (for halo texture), bouclé (for nubby surface interest), and roving (unspun wool for finger-knitting and weaving). Color approaches split into two equally successful directions: a strictly neutral palette of cream, oatmeal, warm grey, and natural brown that reads as Japandi-calm, or a warm accent palette of rust, mustard, dusty teal, and burnt sienna that reads as maximally cozy. Hardware and tools in natural materials — wooden dowels, brass rings, bamboo hoops, birch frames — consistently produce the most cohesive finished presentations.
Why yarn crafts are trending now. The resurgence of fiber arts — documented in craft publication circulation data, Etsy seller growth in handmade textile categories, and Pinterest search volume for “yarn wall hanging” and “arm knitting blanket” — reflects a cultural correction away from purely digital creative expression. Working with yarn is one of the few creative activities that simultaneously occupies the hands, calms the nervous system, and produces a tangible physical object — a combination that no screen-based activity replicates. The specific rise of easy, no-pattern yarn crafts reflects a wider democratization of making: the idea that textile craft should not require years of skill acquisition before it becomes enjoyable or beautiful.
Can complete beginners achieve display-worthy results? Consistently yes — and yarn is arguably the most forgiving medium for beginners because its most fundamental property, reversibility, removes the anxiety of permanence. Unlike clay, paint, or resin, yarn can always be unwound and restarted. The projects in this list are selected specifically for techniques where the first attempt produces a genuinely beautiful result, not a practice piece.
Style at a Glance
| Element | Detail |
|---|---|
| Philosophy | Tactile beauty made slowly, with fiber and patience |
| Key Materials | Chunky merino, cotton roving, wool bouclé, mohair, natural jute |
| Key Colors | Cream, oatmeal, dusty sage, warm terracotta, rust, natural grey |
14 Easy Yarn Craft Ideas for Cozy DIY Days
1. Chunky Arm-Knit Throw Blanket
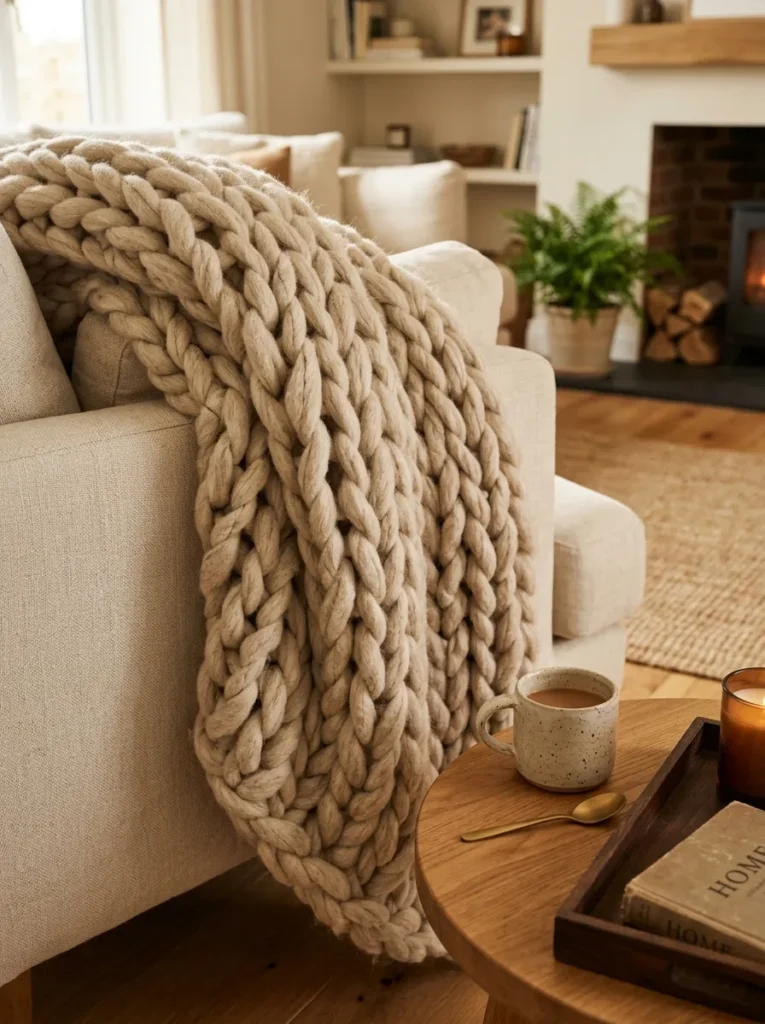
Vibe: A chunky arm-knit throw feels enveloping — absurdly soft, visually warm, and genuinely impressive for something made without a single tool.
Why it works: Arm knitting uses the maker’s own arms as the knitting needles, which produces an enormously open, airy stitch structure that would require US size 50 needles to replicate with conventional tools. This openness is the design principle at work: the large stitch allows the fiber’s own quality — the lanolin sheen of merino, the gentle halo of a wool-mohair blend — to read clearly rather than being compressed into a tight fabric. A throw blanket in natural oatmeal merino is the arm-knitting project with the highest impact-to-effort ratio in the entire yarn craft category, because the finished object looks like a $200 luxury purchase and costs $40–$70 in materials.
How to get it: You need approximately 2–3 kg of super-chunky merino roving yarn for a throw blanket sized 100×150 cm. Cast on 20 stitches onto your right arm using the long-tail cast-on method (tutorial videos available on YouTube for this specific technique). Knit 25–30 rows using your arms as needles. Cast off and weave in the two ends with a blunt tapestry needle. Total active time: 45–75 minutes.
Quick Win: A single 1 kg skein of super-chunky merino roving in natural oatmeal costs $25–$40 and produces a generous lap throw — start with a smaller piece before committing to a full bed blanket.
Shop The Look
| Product |
|---|
| Super chunky merino roving yarn 1kg natural oatmeal |
| Blunt tapestry needle set large eye |
| Cream linen sofa cushion cover replacement set |
| Small ceramic mug warm white handmade |
| Natural wood display tray oval |
Also view: 15 Simple One Hour DIY Gifts Anyone Can Make
2. Yarn Wall Hanging on Driftwood
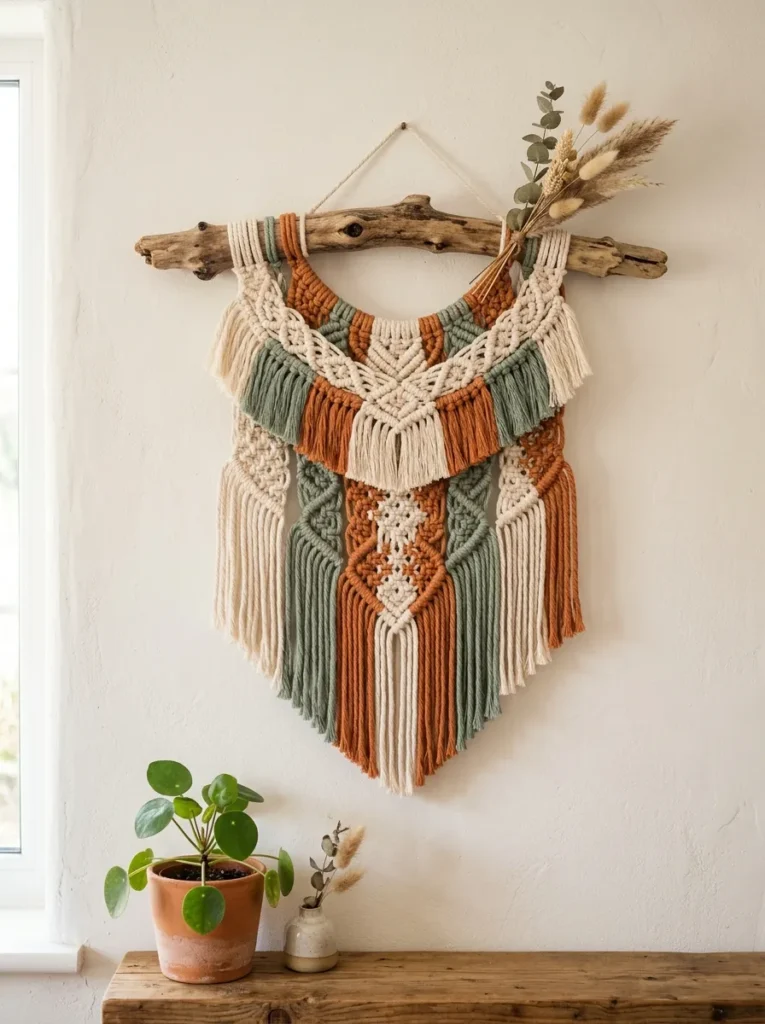
Vibe: A driftwood yarn hanging feels gathered — like something collected from a walk and made beautiful the same afternoon.
Why it works: Driftwood provides an irregular, organic hanging structure that no purchased dowel rod can replicate, and its visual relationship to the yarn beneath it roots the piece in the natural world. The design principle is organic contrast: the smooth, water-worked surface of driftwood against the soft, fibrous quality of cotton yarn creates a material dialogue that makes both elements more interesting. A yarn wall hanging on driftwood also benefits from the compositional principle of varied rhythm — alternating knotted sections with loose fringe sections creates visual movement that a uniformly knotted or uniformly fringed piece cannot achieve.
How to get it: Collect a driftwood branch approximately 50–60 cm long. Cut yarn lengths at 60 cm each (you need approximately 80 lengths for a generous hanging). Attach each length to the driftwood using a lark’s head knot. Work three rows of alternating square knots across the full width, then leave the remaining lengths as fringe. Trim the fringe into a V or U shape using sharp scissors. Attach a hanging cord to the driftwood ends.
Shop The Look
| Product |
|---|
| Cotton macrame yarn 3mm natural cream |
| Terracotta cotton yarn chunky weight |
| Dusty sage cotton yarn for wall hanging |
| Natural driftwood branch set craft use |
| Sharp fabric scissors for yarn fringe trim |
Also view: 15 One-Hour Crafts That Look Surprisingly Beautiful
3. Pom-Pom Garland for Mantel or Shelf
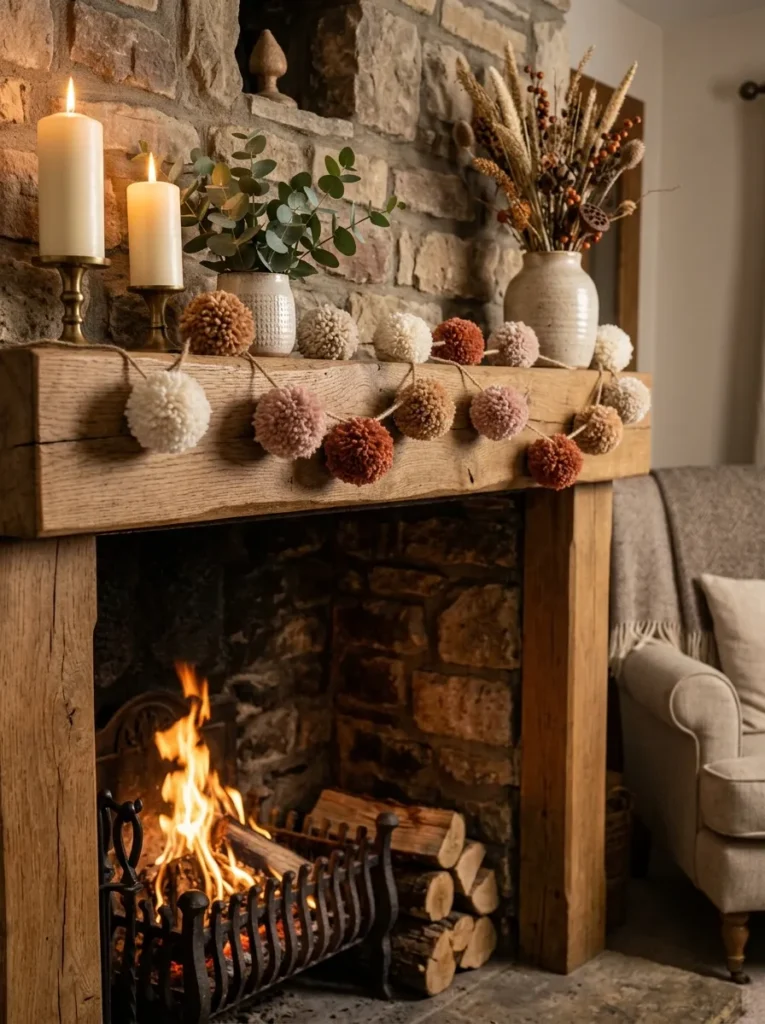
Vibe: A pom-pom garland feels festive without being seasonal — the right palette makes it a year-round mantel moment.
Why it works: Pom-poms are one of the most immediately satisfying yarn craft outputs — the transformation from wound yarn to trimmed sphere happens quickly and produces a tactile object of complete visual charm. Strung as a garland in a deliberate color graduation, individual pom-poms become a composed textile installation rather than a collection of craft objects. The design principle is color sequencing: a garland that moves from cream through blush to terracotta and back creates a tonal arc that reads as designed rather than assembled. Natural jute twine as the stringing material connects the garland to the natural fiber palette and adds texture that thin nylon or cotton thread cannot.
How to get it: Wind yarn approximately 100 times around a cardboard rectangle (8 cm wide for a 6 cm pom-pom). Slide a length of matching yarn through the wound bundle, tie tightly at the center, and remove the cardboard. Cut all loops with sharp scissors and trim to a sphere shape. Thread pom-poms onto jute twine by pulling the tying yarn ends through the twine and knotting. Space pom-poms approximately 4–5 cm apart for a generous garland.
Quick Win: A pom-pom maker tool in the 6 cm size costs $5–$8 and makes consistent, round pom-poms twice as fast as the cardboard method — essential if making more than eight pom-poms in a single session.
Shop The Look
| Product |
|---|
| Chunky wool yarn set cream blush terracotta oatmeal |
| Pom-pom maker set 4 sizes plastic |
| Natural jute twine roll 100ft |
| Sharp yarn scissors small embroidery |
| Tapestry needle blunt large for assembly |
4. Finger-Knit Infinity Scarf
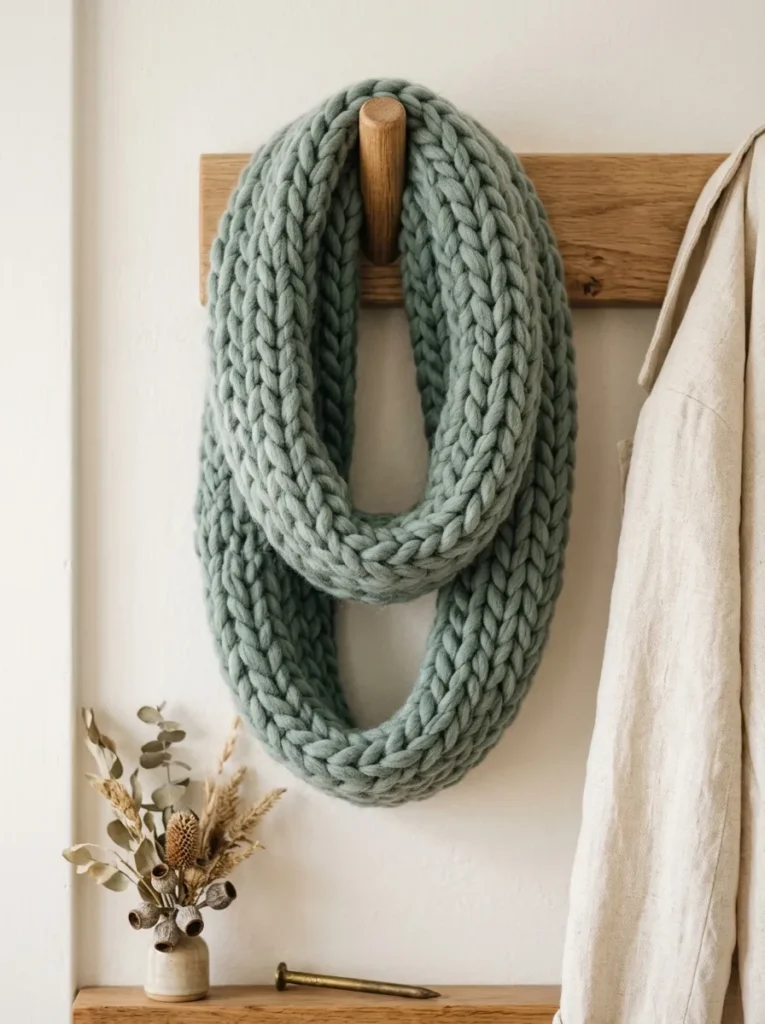
Vibe: A finger-knit scarf feels cozy in the most literal sense — warm fiber worked with nothing but patience and two hands.
Why it works: Finger knitting produces a chain-stitch structure that is looser and more drapey than needle-knitted fabric — which is what makes it perfect for a scarf, where drape and movement are more important than structural density. The design principle is texture through process: the finger-knit chain stitch creates a rhythmic, repetitive pattern that reads as genuinely skilled when executed in a quality fiber, because the stitch definition in chunky merino or wool-blend yarn is clear and beautiful at this scale. An infinity scarf (a looped tube rather than a finished-end piece) avoids the need to cast off and join, which are the two techniques most likely to trip up a beginner.
How to get it: Loop yarn around four fingers of your non-dominant hand (index through pinky). Weave a second layer of yarn across all four fingers in front of the first layer. Lift the first layer of loops over the second on each finger, one by one, to create the first row of stitches. Continue adding yarn and lifting loops for approximately 120 cm of length, then join the two ends with a length of yarn and a blunt needle to form the infinity loop.
Shop The Look
| Product |
|---|
| Chunky merino yarn 100g dusty sage |
| Blunt tapestry needle large eye set |
| Wooden coat hook set of 3 natural |
| Dried botanical bundle for styling |
| Yarn gauge and stitch counter set |
5. Woven Yarn Coasters on a Cardboard Loom
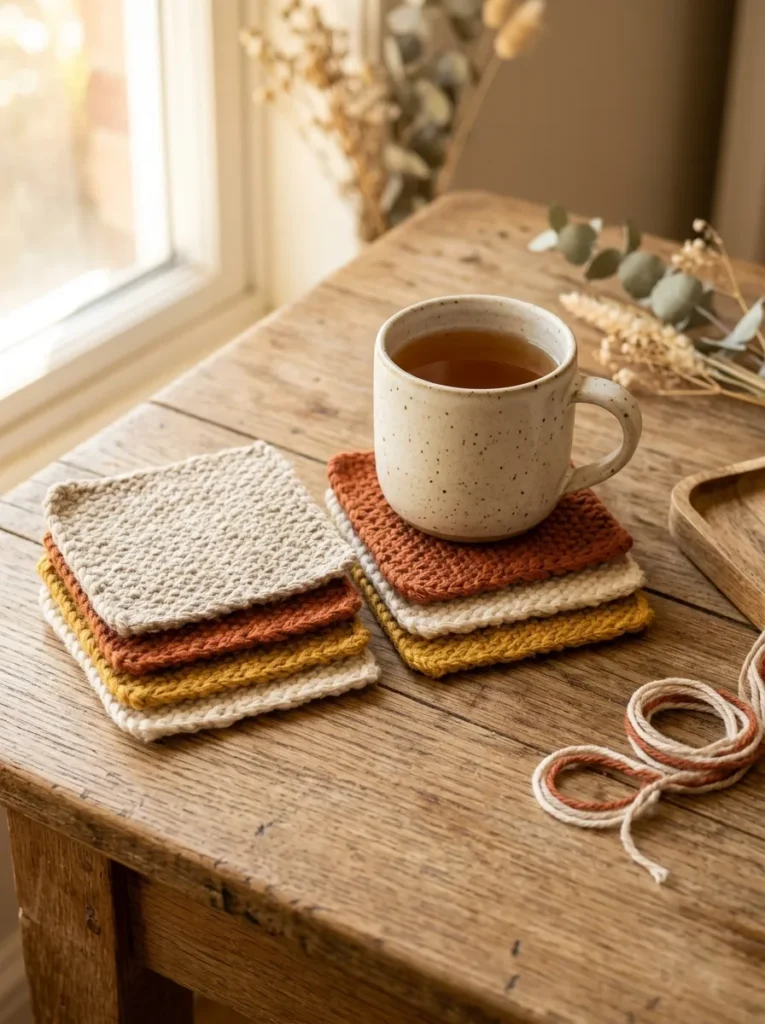
Vibe: Hand-woven coasters feel warm and genuinely useful — a functional object that carries the evidence of someone’s hands.
Why it works: Weaving on a simple cardboard loom introduces the oldest textile-making technique in human history in its most accessible form — no floor loom, no shuttles, no heddles required. The design principle operating in woven coasters is color interaction through interlacement: when warp threads (the vertical base threads) and weft threads (the horizontal working threads) are in different colors, the plain weave structure creates a visual mixing of the two colors that is more nuanced and interesting than either color alone. A set of six coasters in a harmonious warm palette — cream, mustard, rust, oatmeal — reads as a complete textile collection rather than six separate objects.
How to get it: Cut a 12×12 cm cardboard square and make 1 cm notches along the top and bottom edges, 5mm apart. Thread a continuous warp of cream cotton yarn through the notches top to bottom. Weave a tapestry needle threaded with weft yarn over and under the warp threads, alternating the pattern on each row. Press each row down firmly with the needle. When the warp is full, slide the weaving off the cardboard and knot the warp ends in pairs to secure.
Shop The Look
| Product |
|---|
| Cotton yarn set neutral warm tones 4 colors |
| Plastic tapestry needle set blunt large |
| Small wooden loom starter kit 10x10cm |
| Ceramic mug handmade white for styling |
| Natural wood serving tray for display |
6. Yarn-Wrapped Letter or Number Display
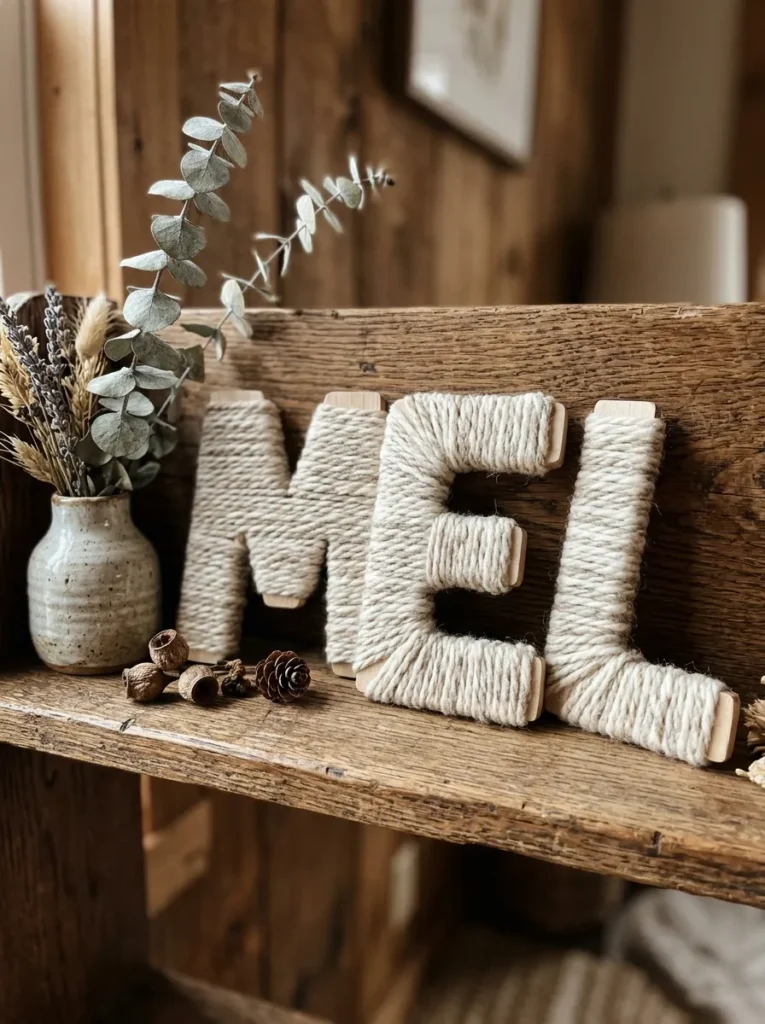
Vibe: Yarn-wrapped letters feel personal — a monogram made slow, by hand, which gives it a warmth that a purchased sign cannot carry.
Why it works: Yarn wrapping is the craft technique that most efficiently covers an irregular three-dimensional surface with a consistent textile texture — the yarn follows contours automatically, filling curves and angles with equal coverage. Applied to wooden letters, the wrapping converts a graphic element (text) into a textile object, which is a material transformation that softens the letter’s visual impact while adding tactile warmth. The design principle is material elevation: the same initial in painted wood reads as a store-bought sign; the same initial in hand-wrapped chunky yarn reads as a considered handmade object. Using two closely related natural tones (oatmeal and cream) rather than a single uniform color adds subtle tonal variation that prevents the wrapped surface from reading as flat.
How to get it: Apply a dot of craft glue to the back of a wooden letter and press the yarn end to secure. Wrap the yarn tightly and evenly around the letter, covering all surfaces, keeping tension consistent to avoid gaps. At corners and curves, work the yarn in close parallel passes rather than trying to turn the yarn at exact angles. When fully covered, glue the end securely. Total time per letter: 15–20 minutes.
Quick Win: Wooden craft letters from a hobby store cost $2–$5 each — wrapping three letters of a family name or a single large initial creates a display piece that reads as significantly more expensive than the combined material cost of $15–$25.
Shop The Look
| Product |
|---|
| Wooden craft letters set 10cm height unfinished |
| Chunky natural oatmeal yarn 100g |
| Clear craft glue precision tip bottle |
| Dried eucalyptus stem bundle for styling |
| Wooden floating shelf 30cm for display |
7. Yarn Tassel Bookmark Set
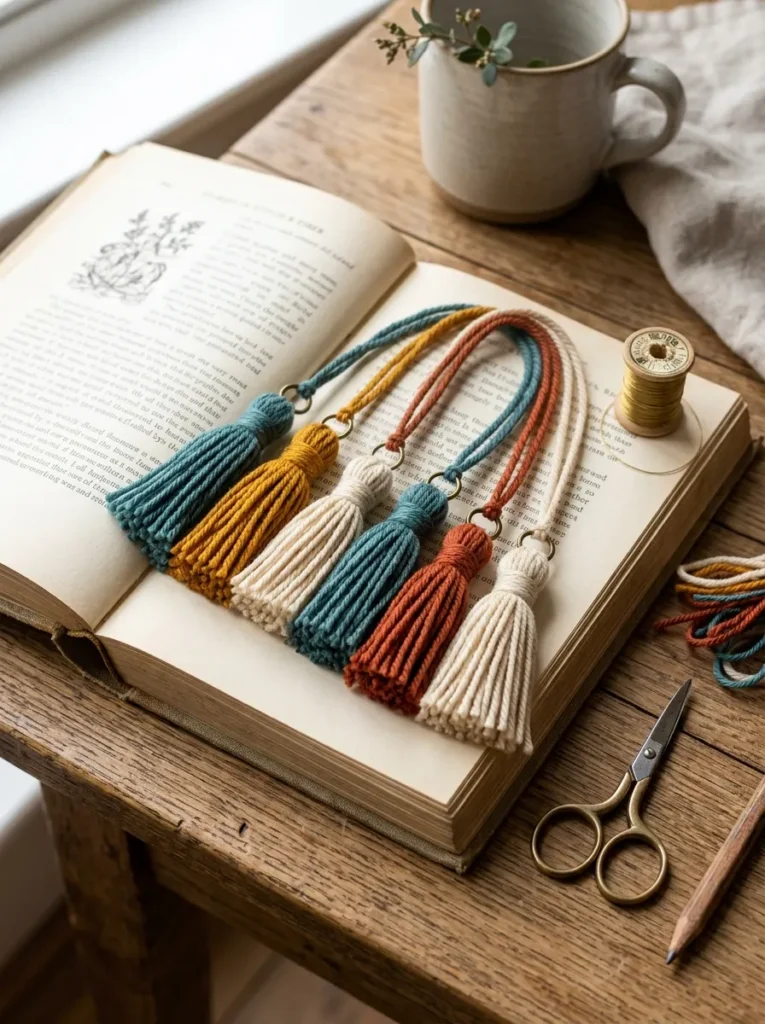
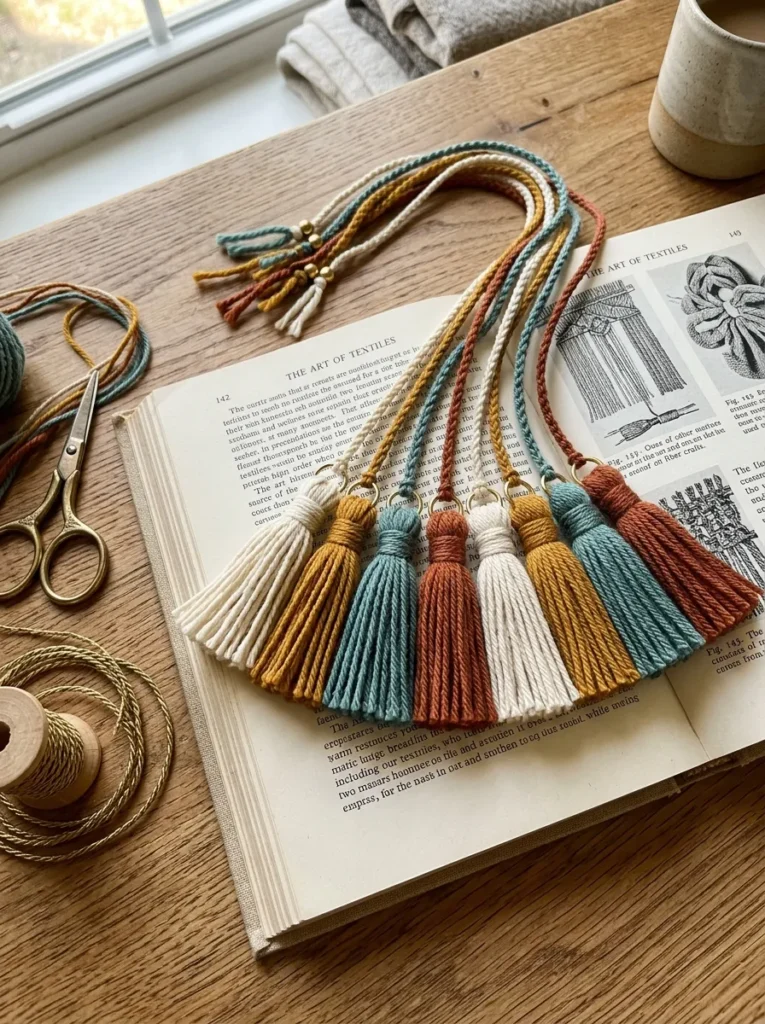
Vibe: Yarn tassels feel artful and effortlessly giftable — small made things that carry more warmth than anything purchased.
Why it works: The tassel is one of textile craft’s most ancient decorative elements — used in the trim of ecclesiastical vestments, Ottoman textiles, and Victorian furnishings — and its revival in contemporary yarn craft reflects a wider appreciation for decorative elements with genuine historical depth. As a bookmark, the tassel’s proportions (long enough to emerge from the book’s top edge) are both functional and visually satisfying. The design principle is concentrated decoration: a tassel gathers the yarn’s texture, color, and movement into a single small point, which creates a higher visual density than the same yarn spread across a larger surface.
How to get it: Wind yarn 40 times around a 10 cm cardboard rectangle. Slide a 20 cm length of yarn through the top loops and tie tightly — this becomes the hanging cord. Slide a second 30 cm length of yarn around the bundle approximately 1.5 cm below the tied top and wrap tightly 8–10 times to form the tassel neck, then knot securely. Cut the bottom loops with sharp scissors and trim evenly. Thread the hanging cord through a brass jump ring and attach to a thin cord or leather strip for the bookmark body.
Shop The Look
| Product |
|---|
| Embroidery floss yarn set jewel tones 36 colors |
| Brass jump ring set 10mm |
| Thin leather cord for bookmark body 1mm |
| Sharp embroidery scissors small |
| Hardcover journal for gifting with bookmark |
8. Chunky Knit Cushion Cover on Large Needles
Vibe: A chunky knit cushion cover feels tactile — the kind of object you reach for before you sit down.
Why it works: A cushion cover is the ideal first knitting project for easy yarn crafts because it is worked flat (two rectangles sewn together), requires only knit and purl stitches, and produces an object with generous visual impact relative to its technical simplicity. The large needle gauge (US 15, approximately 10mm) required for chunky yarn produces a stitch at a scale where individual loops are clearly visible, which means the stitch pattern reads with maximum textural clarity. Moss stitch — alternating knit and purl stitches in a checkerboard pattern — is the most beginner-friendly stitch that produces a genuinely sophisticated surface texture, because it lies flat without curling and creates equal texture on both sides of the fabric.
How to get it: Cast on 30 stitches on US 15 (10mm) needles with chunky merino yarn. For moss stitch: Row 1: knit 1, purl 1 across all stitches. Row 2: purl 1, knit 1 across all stitches. Repeat these two rows until the panel measures 45 cm. Cast off and make a second identical panel. Sew three sides together using a blunt tapestry needle and mattress stitch, insert a 45×45 cm cushion pad, and sew the fourth side closed.
Shop The Look
| Product |
|---|
| Chunky merino yarn 200g cream for cushion |
| Circular knitting needles US15 10mm |
| Cushion insert pad 45x45cm feather or fiber |
| Blunt tapestry needle large set |
| Stitch marker ring set for counting |
9. Yarn-Wrapped Floral Wire Wreath
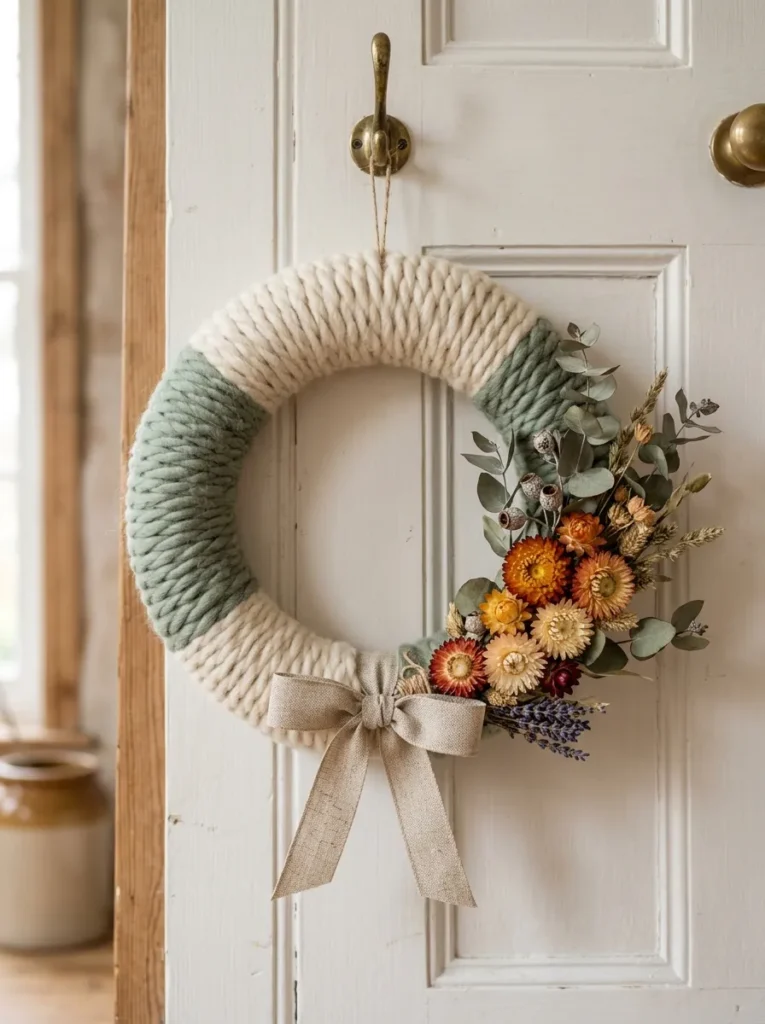
Vibe: A yarn-wrapped wreath feels organic and genuinely handmade — the kind of thing guests notice before the door is fully open.
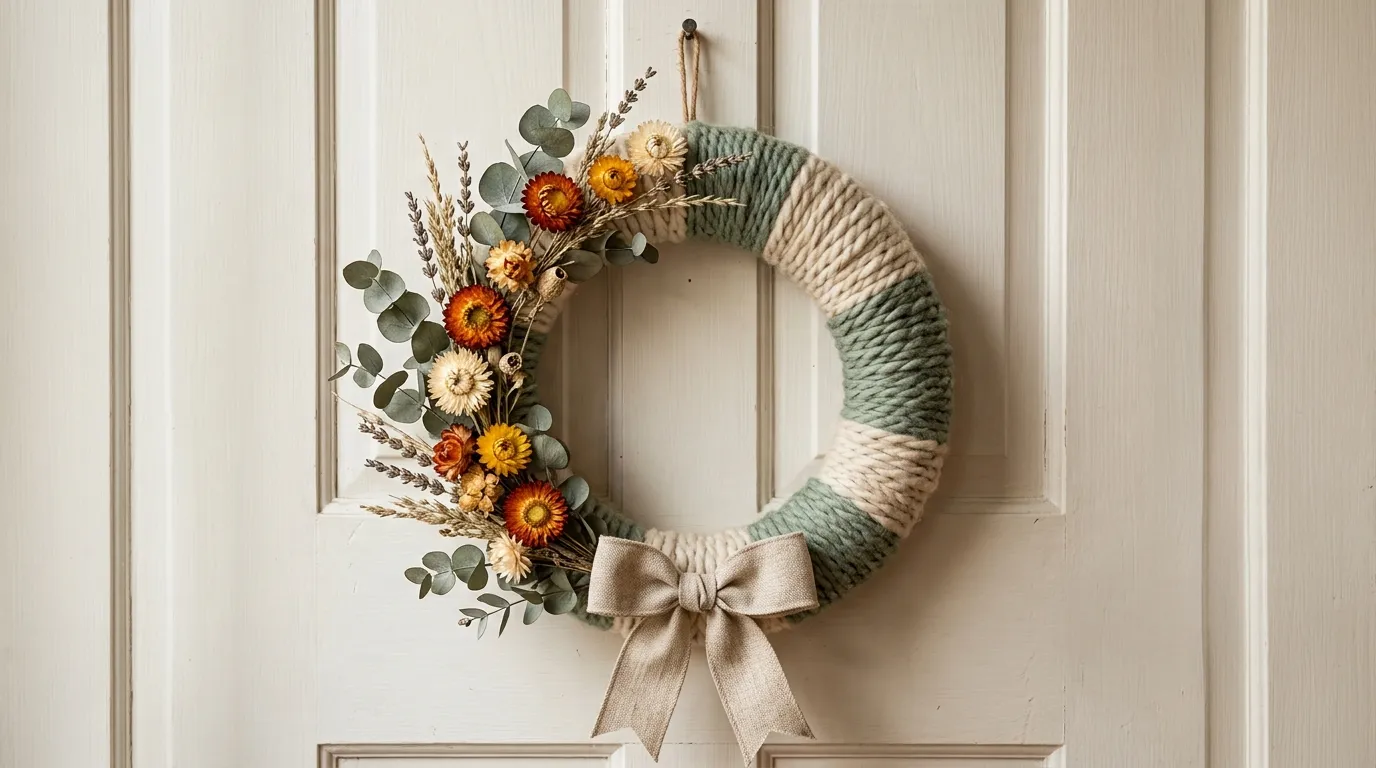
Why it works: Yarn wrapping transforms a wire wreath frame from a craft supply into a textile object — the coverage of the metal structure with fiber changes the piece from industrial to handmade at the most fundamental material level. The design principle is surface unity: once the frame is fully covered with consistent yarn wrapping, it reads as a single coherent textile form rather than a decorated wire circle, which is the foundation that makes any botanical adornments appear intentional rather than added. Using two yarn colors in broad sections (cream for two-thirds, dusty sage for one-third) creates a tonal variation that prevents the wrapping from reading as flat while maintaining the neutral palette that allows dried botanicals to be the color accent.
How to get it: Secure yarn to a 30 cm wire wreath frame with a double knot. Wrap the yarn tightly and continuously around the frame, keeping each pass of yarn flush against the previous one to ensure no wire shows through. When you want to change color, cut the first yarn and secure the end under the wrapping, then knot on the new color and continue. Once fully wrapped, attach dried botanical bundles with fine wire and add a linen or cotton ribbon bow.
Quick Win: A wire wreath frame costs $3–$6, and a single 100g skein of chunky yarn covers a 30 cm frame in full — the entire base material cost is under $12 before botanicals.
Shop The Look
| Product |
|---|
| Wire wreath frame 30cm metal |
| Chunky yarn natural cream 100g |
| Dusty sage chunky yarn accent color 50g |
| Dried eucalyptus wreath addition bundle |
| Natural linen ribbon 3cm width |
10. Simple Yarn God’s Eye Wall Decoration
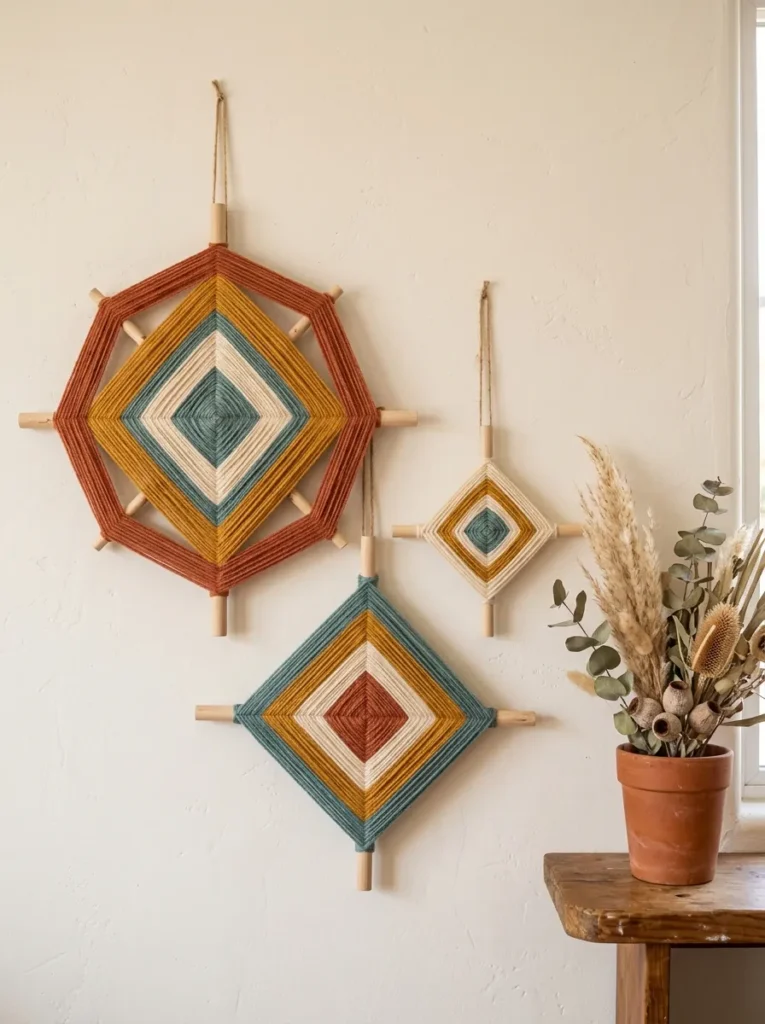
Vibe: A god’s eye wall piece feels graphic and warm — geometric pattern made with nothing but yarn and two sticks.
Why it works: The ojo de dios (god’s eye) is a Huichol and Tepehuan craft tradition from western Mexico, in which yarn is woven diagonally around two crossed sticks to create a diamond pattern that grows outward with each color change. Its visual impact is disproportionate to its technical difficulty — the diagonal wrapping pattern creates a geometric form of genuine visual complexity from the simplest possible technique. The design principle is color band sequencing: each yarn color in the god’s eye wrapping forms a distinct diamond ring, and the order of those rings — from dark to light, or from warm to cool — determines the piece’s entire visual character. A grouping of three in graduated sizes creates a wall installation with more visual presence than any single piece.
How to get it: Cross two 30 cm wooden dowels at the midpoint and secure with yarn in an X-wrap (wrap around each arm in sequence, making a figure-8). Begin wrapping diagonally — take the yarn from arm to arm, looping once around each arm as you go, creating the widening diamond. Change color by knotting on a new yarn length. Continue for 8–10 color changes, leaving the final 3 cm of each dowel arm exposed. Hang from one arm using a loop of matching yarn.
Shop The Look
| Product |
|---|
| Thin wooden dowel set 30cm 6mm diameter |
| Cotton yarn set terracotta mustard teal cream |
| Craft glue small for securing yarn ends |
| Yarn needle set for joining colors |
| Picture hanging hook small set for wall display |
11. Knotted Yarn Trivet or Hot Pad
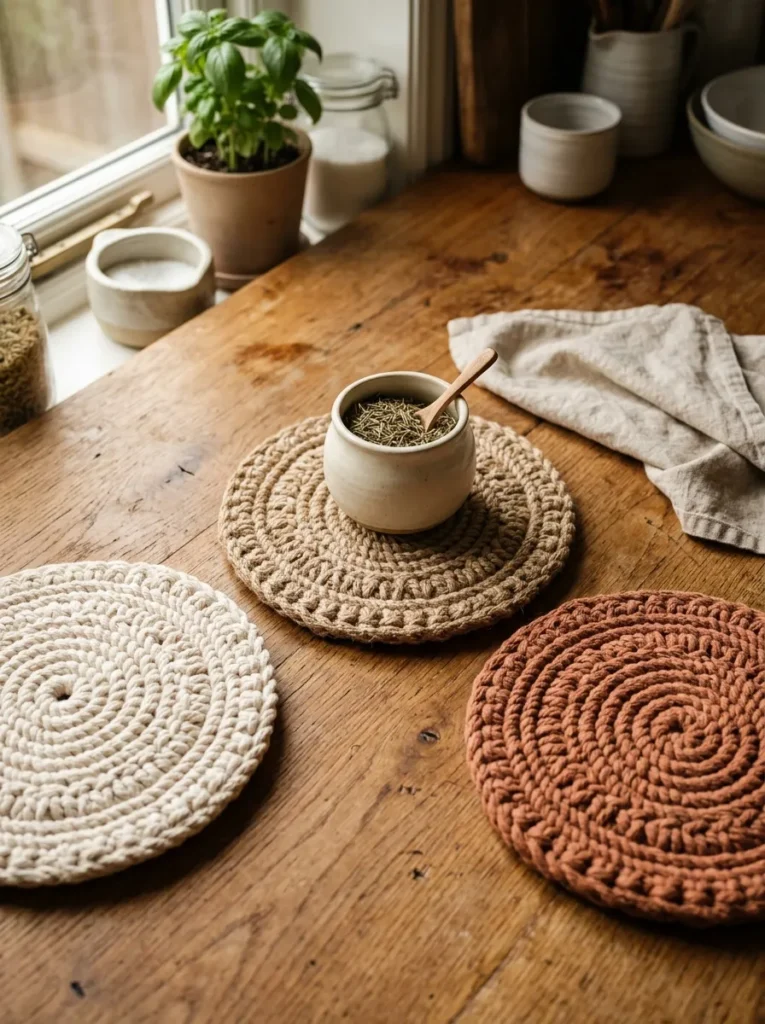
Vibe: A hand-knotted trivet feels functional and considered — a kitchen object that earns its space on the counter before anything is placed on it.
Why it works: The knotted trivet is where yarn craft moves from purely decorative into genuinely functional territory — a dense spiral of knotted cotton rope provides real heat protection (rated for pots up to 200°C when made in 100% cotton), meaning this is a craft that earns a permanent place in a working kitchen rather than sitting on a shelf. The design principle is structural density: close-packed square knots in thick cotton rope create a surface with enough air gaps to provide insulation but enough mass to be stable under the weight of heavy cookware. The circular spiral form requires no template and produces a naturally beautiful object simply by virtue of its rotational symmetry.
How to get it: Cut 16 lengths of 5mm natural cotton rope at 1 meter each. Fold all 16 lengths in half and attach the loops to a small brass ring using lark’s head knots (giving 32 working ends). Tie alternating square knots in rounds, working outward from the center ring. After each round, the diameter increases by approximately 2–3 cm. Continue for 5–6 rounds until the trivet reaches 18–22 cm diameter. Trim the outer ends to 1 cm and apply a small dot of fabric glue to prevent fraying.
Shop The Look
| Product |
|---|
| Natural cotton rope 5mm 50m roll |
| Brass ring 50mm for trivet center |
| Fabric glue washable for cord ends |
| Linen kitchen cloth set natural |
| Ceramic pot small for styling |
12. Yarn Photo Display with Branch and Pegs
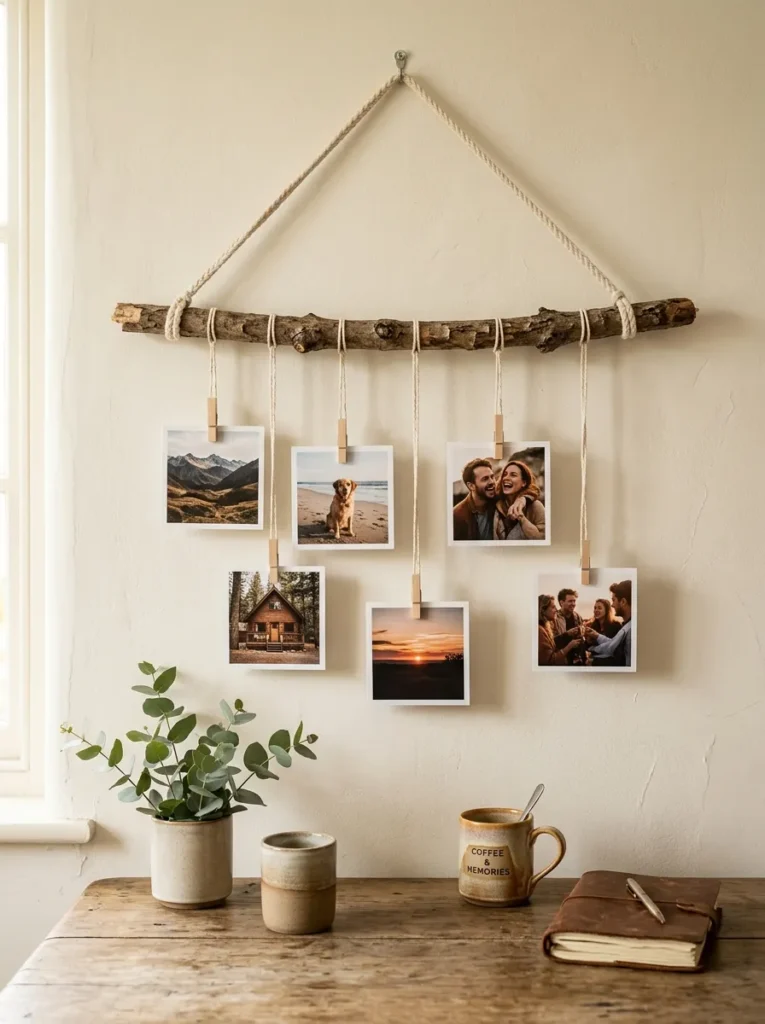
Vibe: A branch photo display feels personal — photographs held lightly by yarn and wood, like memories that haven’t been framed yet.
Why it works: Displaying photographs on a natural branch with yarn and wooden pegs applies the principle of informal curation — photographs presented without frames read as more accessible and intimate than the same images behind glass, because they appear as objects to be handled and changed rather than fixed and preserved. The branch as a hanging structure references the natural world in a way that a purchased metal rod cannot, and its slight irregularity (thicker in one place, with a knot or fork in another) makes the display feel found rather than manufactured. Yarn rather than wire or string as the hanging material adds warmth and softness to what would otherwise be a graphic, linear arrangement.
How to get it: Find a straight-ish branch approximately 60 cm long and 2–3 cm diameter from a fallen tree or garden pruning. Allow to dry for several days if freshly cut. Tie a loop of cream cotton yarn at each end for hanging. Cut six lengths of yarn at varying heights between 20–40 cm. Tie one end to the branch and clip a small wooden peg to the other end. Print six photographs at square 4×4-inch format and clip to the pegs.
Quick Win: A pack of 50 small wooden mini clothespeg clips costs $4–$6 — combined with photographs printed at a standard print kiosk ($0.10–$0.30 each) and a found branch, the entire display costs under $10.
Shop The Look
| Product |
|---|
| Mini wooden peg clips set of 50 |
| Natural cotton twine thin 1mm craft roll |
| Photo print service square 4×4 inch |
| Small potted plant indoor for desk display |
| Adhesive hook for branch hanging damage free |
13. Felted Wool Dryer Balls
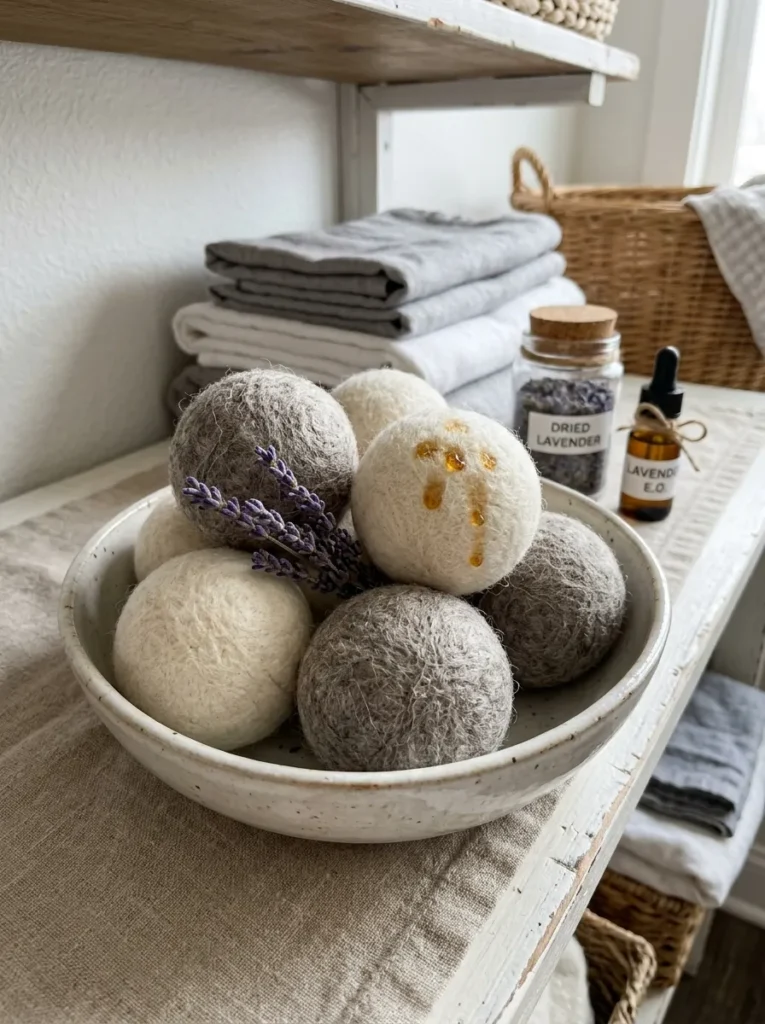
Vibe: Felted dryer balls feel quietly useful — objects that disappear into daily life and make it genuinely better.
Why it works: Wool dryer balls are one of the few yarn crafts that are simultaneously beautiful objects and a genuine household improvement: they reduce dryer time by 25–30% (by separating laundry items and improving hot air circulation), eliminate static without chemical dryer sheets, and last for up to 1,000 dryer loads — making them an object with real functional value beyond their visual appeal. The design principle is material dignity: a hand-felted wool ball in natural fiber tones, displayed in a ceramic bowl, reads as a considered domestic object in the tradition of the handmade home. Adding a few drops of lavender or eucalyptus essential oil before each dryer cycle makes the balls additionally functional as a natural fabric scent treatment.
How to get it: Wind 100% wool yarn (not superwash — the scales must be intact for felting) into a tight ball approximately the size of a tennis ball. Tie the end securely. Place the ball inside a nylon stocking, tie it off, add another ball, tie off again, and repeat for all six balls. Run through the washing machine on the hottest cycle, then the dryer on high heat. Repeat the wash-dry cycle 2–3 times until the surface is fully felted and the fiber is dense and non-separating.
Shop The Look
| Product |
|---|
| 100% wool yarn natural cream for felting 200g |
| Nylon stocking sock for felting process |
| Ceramic bowl medium for display storage |
| Lavender essential oil for dryer ball scent |
| Dried lavender bundle for styling |
14. Small-Space Yarn Craft: Mini Woven Wall Hanging on Embroidery Hoop
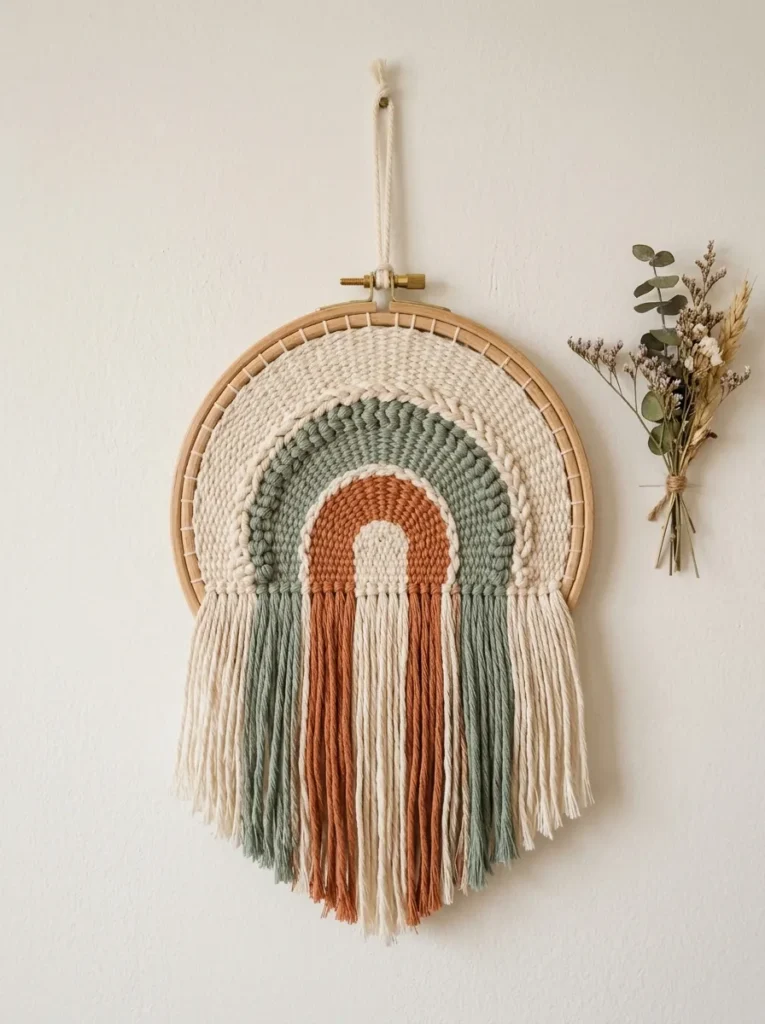
Vibe: A hoop wall hanging feels delicate and complete — a small woven world, perfectly contained in its circular frame.
Why it works: The embroidery hoop provides a ready-made circular frame that requires no additional framing investment and whose natural wood tone integrates with virtually any interior palette. For small-space yarn crafting, the hoop hanging is the ideal format: it requires minimal yarn (a single 100g skein covers multiple hoops), minimal space to make, and produces a wall object with the same visual presence as a framed print at a fraction of the material cost. The sunrise arc weaving pattern — where weft rows are woven only across the lower half of the warp threads, creating arcing color bands — is achievable on the first attempt and produces a result that reads as genuinely designed rather than simply filled-in.
How to get it: String warp threads (cream cotton yarn) vertically across an inner embroidery hoop, tying off at the top and bottom of the hoop frame. Starting from the bottom center, weave a tapestry needle threaded with your first color through the warp in a curved arc, covering only the central warp threads first. Add rows in the same color, extending the arc outward by adding one warp thread on each side per row. Change to the next color when the arc reaches the desired width. Add hanging fringe by looping 15 cm lengths of yarn through the bottom warp threads and trimming to a V shape.
Shop The Look
| Product |
|---|
| Wooden embroidery hoop set 15 20 25cm |
| Cotton yarn set cream sage terracotta for weaving |
| Plastic tapestry needle set fine and medium |
| Cream cotton cord thin for hanging |
| Small dried botanical bundle for wall styling |
How to Start Your Yarn Craft Practice
The single first move is to buy one skein of high-quality chunky merino yarn in a natural oatmeal or cream tone and begin the arm-knit throw blanket — not because it is the easiest project (though it nearly is), but because it is the one that most immediately demonstrates what yarn can do. The speed at which a large, tactile, genuinely beautiful object emerges from nothing but fiber and arms resets what most beginners expect from their first yarn craft experience, and that reset makes every subsequent project feel achievable.
The most common mistake beginner yarn crafters make is choosing acrylic yarn because it is inexpensive, then being disappointed that the finished object doesn’t have the warmth, drape, or tactile quality of the pieces that inspired the project. Acrylic fiber is indistinguishable from quality natural fiber in photographs but entirely distinguishable in the hand — and it is the hand-feel that determines whether a finished yarn object is one you reach for or one that sits in a box. The fix is to buy one ball of real merino, real cotton, or real wool and feel the difference before committing to a larger purchase. The material investment in quality fiber is the single decision that most determines whether a yarn craft project succeeds.
Three materials under $50 that unlock the most projects: a 200g skein of chunky merino in natural oatmeal ($18–$28) that covers the throw blanket starter, the cushion cover, and the wrapped letters; a set of four cotton yarn colors in cream, sage, terracotta, and mustard ($15–$20) that covers the wall hanging, the coasters, the god’s eye, and the pom-pom garland; and a pack of mixed-size embroidery hoops ($8–$12) that provides frames for the hoop hanging and the wreath base. Together these three purchases cover eleven of the fourteen projects in this list.
Realistic expectations: easy yarn crafts are genuinely easy — the first attempt at any project in this list produces a displayable result within a single afternoon. What improves with practice is not the technique but the decision-making: the color combinations, the proportions, the finishing details that distinguish a considered piece from a competent one. Allow the first attempt to be exactly what it is — a beginning — and notice what you would do differently on the second.
Frequently Asked Questions About Easy Yarn Crafts
What type of yarn is best for beginner yarn crafts?
Chunky or super-chunky merino wool is the best all-round choice for beginners — it works up quickly (so results appear fast), its large stitch size makes individual stitches easy to see and correct, and its natural fiber content gives finished objects the tactile warmth and visual depth that acrylic yarn cannot match. For projects involving weaving, knotting, or wrapping, 3–5mm natural cotton rope or cotton macramé cord is the most versatile choice — it holds knots cleanly, doesn’t stretch, and photographs beautifully. Avoid acrylic yarn for a first project if at all possible, as the material quality significantly affects the finished result’s visual appeal.
How much yarn do I need for a chunky arm-knit throw blanket?
A full-size throw blanket measuring approximately 100×150 cm requires 2–3 kg of super-chunky merino roving yarn — the exact amount varies based on how tightly you knit and how open you want the stitch to be. A lap blanket (70×100 cm) requires 1–1.5 kg. Purchase slightly more than you calculate, as running out of yarn mid-project and trying to match the same dye lot is one of the most frustrating yarn craft experiences and almost always produces a visible color difference in the finished piece.
What is the easiest yarn craft for a complete first-timer?
The yarn-wrapped letter or number display is the most reliably successful first yarn craft because it requires no technique at all — only wrapping, which is a motor skill every adult already possesses. The linen-wrapped vase from the craft projects category also applies here for the same reason. Among projects that use yarn’s structural properties, the pom-pom is the most beginner-reliable: the tool does the work, the technique is learnable in two minutes, and the result is immediately satisfying and useful across multiple projects (garlands, keychains, cushion embellishments).
Can I sell yarn crafts I make at home?
Many yarn crafts are commercially saleable — particularly arm-knit throw blankets, macramé wall hangings, felted dryer ball sets, woven coasters, and pom-pom garlands, all of which have established markets on Etsy and at local craft markets. Pricing handmade yarn objects correctly is the most common challenge: material cost plus time at a fair hourly rate produces prices that feel high relative to mass-produced alternatives, but the handmade, natural-fiber quality commands genuine premium in the market. Tracking material costs from the first project is worthwhile if selling is a long-term goal.
How do I store yarn so it stays organized and tangle-free?
The most effective yarn storage system for an active crafter is a combination of open display and functional containment: skeins in use stored in a large open-top basket (where they can be pulled freely without tangling), unused yarn sorted by weight and color into clear-front zippered pouches or stackable clear bins. Avoid storing yarn in plastic bags without ventilation — natural fibers need airflow to prevent moisture damage. A large wicker or rattan basket in a living room corner serves as both yarn storage and a decorative element that signals an active creative life.
Ready to Start Your Coziest DIY Day Yet?
These 14 yarn craft ideas cover the full spectrum of what fiber and a few hours can produce — from arm-knit throws and woven coasters to felted dryer balls, god’s eye wall pieces, and delicate hoop hangings — so whether you have a full cozy Sunday or a single focused hour, there is a project here that fits both your time and your skill level exactly. The best way to begin is to pick the project that made you reach for the yarn you already have, set up your space with a warm drink nearby, and let the making be as enjoyable as the finished object. Today, order one skein of chunky merino in a color you love and commit to one project before the skein arrives — the anticipation is half the pleasure. Pin the ideas that made your hands want to start immediately, and let those be the ones you make first.