15 Easy Paper Craft Ideas for Creative Adults
Paper crafts for adults are handmade decorative objects, functional accessories, and art pieces created from paper — through folding, cutting, layering, rolling, or sculpting — designed with the sophistication, material intention, and aesthetic refinement that distinguishes adult making from children’s classroom projects. This article gives you 15 paper craft ideas across wall art, functional objects, sculptural forms, gift-making, botanical pieces, and decorative display so you can create work that looks considered, expensive, and genuinely made by someone who knows what they’re doing.
There is a particular satisfaction in making something beautiful from a single sheet of paper — a material so ordinary that its transformation into something worth displaying feels almost like a trick. Adult paper crafting is not about the craft store kits of childhood. It is about understanding paper as a design material with specific properties — weight, grain, translucency, fold memory, surface texture — and using those properties deliberately to make objects that could sit in a design shop without embarrassment. Here are 15 ideas worth saving — and stealing.
Why Paper Crafts Work So Well for Adults
Adult paper crafting draws from a rich convergence of traditions — Japanese origami and kirigami, which elevated paper folding to a precise mathematical and aesthetic discipline; European marbled and decorated paper arts, which produced the endpapers and binding papers of fine books for four centuries; the German Bauhaus paper-folding exercises of the 1920s, which used paper as the primary material for understanding three-dimensional form; and contemporary paper sculpture, where artists including Jen Stark and Matthew Shlian have demonstrated that paper’s structural and visual possibilities are essentially unlimited. What all these traditions share is the recognition that paper is not a substitute material — it is a primary one with its own distinctive beauty.
The material palette of sophisticated adult paper crafts is specific and important. Heavyweight watercolor paper (300gsm cold press) has a surface texture that catches light beautifully in three-dimensional sculptural work. Japanese washi paper carries natural fiber inclusions and translucency that no Western paper replicates. Kraft paper ages to a warm amber tone that complements natural home interiors. Hot-pressed illustration board provides the rigidity for precise cutting work. Marbled paper, paste paper, and hand-dyed tissue are the decorated papers that add color and pattern without requiring painting skill. The supporting materials — linen thread, beeswax, brass brads, natural twine, and archival adhesive — should match the quality of the paper itself.
The cultural moment is exactly right for adult paper crafting. The global return to analog making — driven by digital fatigue, the slow living movement, and the documented mental health benefits of focused manual activity — has made paper crafting one of the fastest-growing adult hobby categories. Unlike woodworking or ceramics, paper crafting requires minimal space, minimal investment, and minimal cleanup, making it accessible to apartment dwellers and busy adults in a way that more equipment-intensive crafts are not.
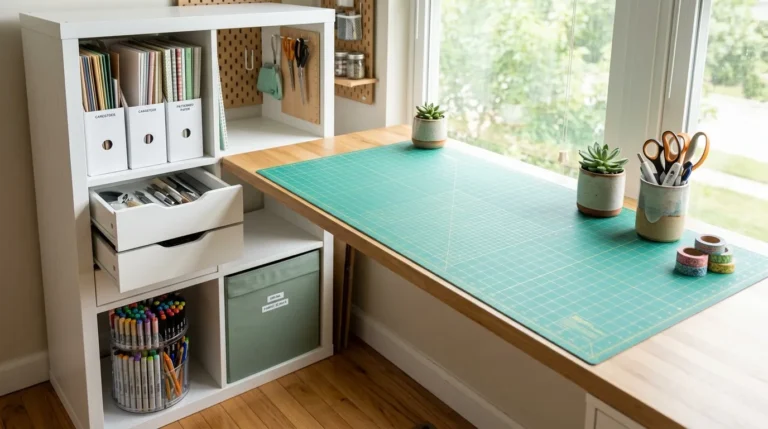
Small spaces are no barrier to paper crafting — the entire practice can be conducted on a kitchen table with a self-healing cutting mat, a craft knife, and a bone folder. Finished pieces are lightweight, flat-storable, and easily displayed, making them the ideal creative output for space-constrained living.
Style at a Glance
| Element | Detail |
|---|---|
| Philosophy | Paper as a primary design material — precise, intentional, and genuinely beautiful |
| Key Materials | 300gsm watercolor paper, Japanese washi, kraft paper, illustration board, marbled paper |
| Key Colors | Natural white, warm kraft amber, indigo, botanical green, aged cream |
1. Sculptural Paper Quilling Wall Art in Geometric Forms
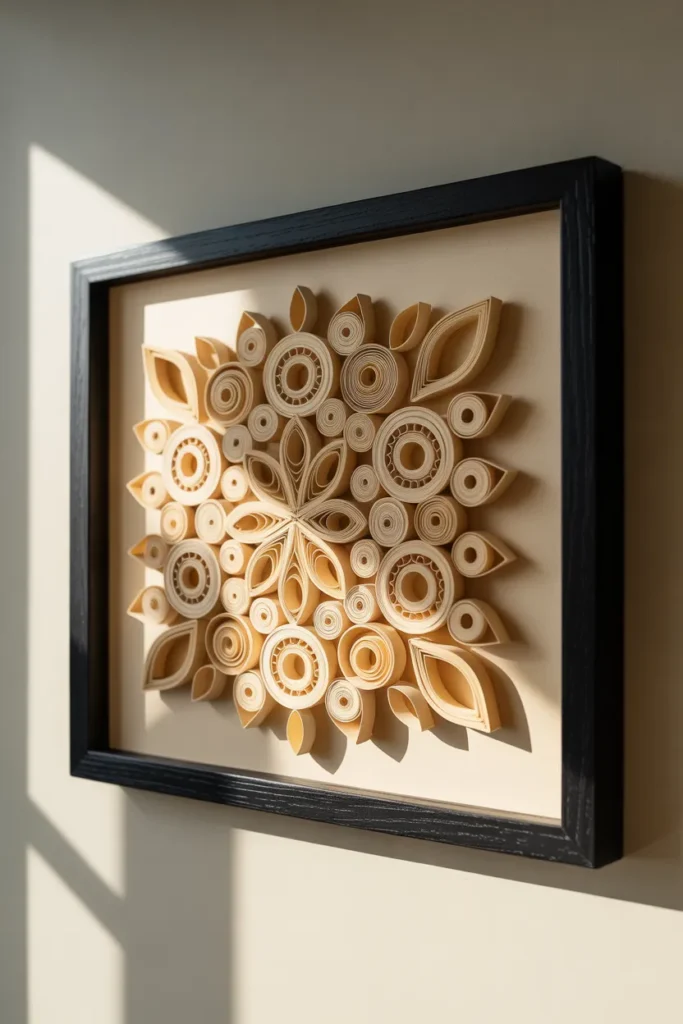
Vibe: The piece is gallery-quiet — tightly quilled geometric forms in a shadow box frame cast micro-shadows that change with the light direction, giving the artwork a dimensional life that flat prints entirely lack.
Why it works: Paper quilling exploits the most fundamental optical property of three-dimensional relief — the shadow cast by each raised coil creates contrast that makes the overall composition readable from across a room while rewarding close inspection with intricate detail. Tight coils (made by rolling a 1/8-inch paper strip around a quilling tool and releasing to a controlled diameter) have a structural integrity that maintains their form for decades when made from acid-free paper. The shadow box frame is essential rather than optional — it provides the depth required to display three-dimensional quilled forms without crushing them, and the depth of the shadow between the work surface and the frame glass creates a visual separation that elevates the piece to the quality of a relief sculpture.
How to get it: Begin with pre-cut quilling strips in 1/8-inch width from acid-free 120gsm paper — the specific paper weight matters, as too-thin paper collapses under rolling tension and too-thick paper resists the tight coil form. A quilling tool with a slotted tip ($4–$8) controls coil tightness more precisely than a toothpick substitute. Arrange and glue coils to a backing paper inside the shadow box using archival PVA glue applied with a fine-tip applicator bottle.
Quick Win: A single 4-inch quilled medallion (approximately 20 coils in a radial arrangement) framed in a 5×5 inch shadow box takes 45 minutes and costs under $10 in materials — it reads as a purchased design object at any price point.
Shop The Look
- Quilling paper strips set acid free 1/8 inch
- Quilling tool slotted tip precision
- Shadow box frame deep 8×10 matte black
- Archival PVA glue fine tip applicator
- Pre-cut quilling board circle template
Also view: 14 Crochet Wall Hangings for Cozy Home Decor
2. Japanese Stab-Bound Notebook with Decorative Cover
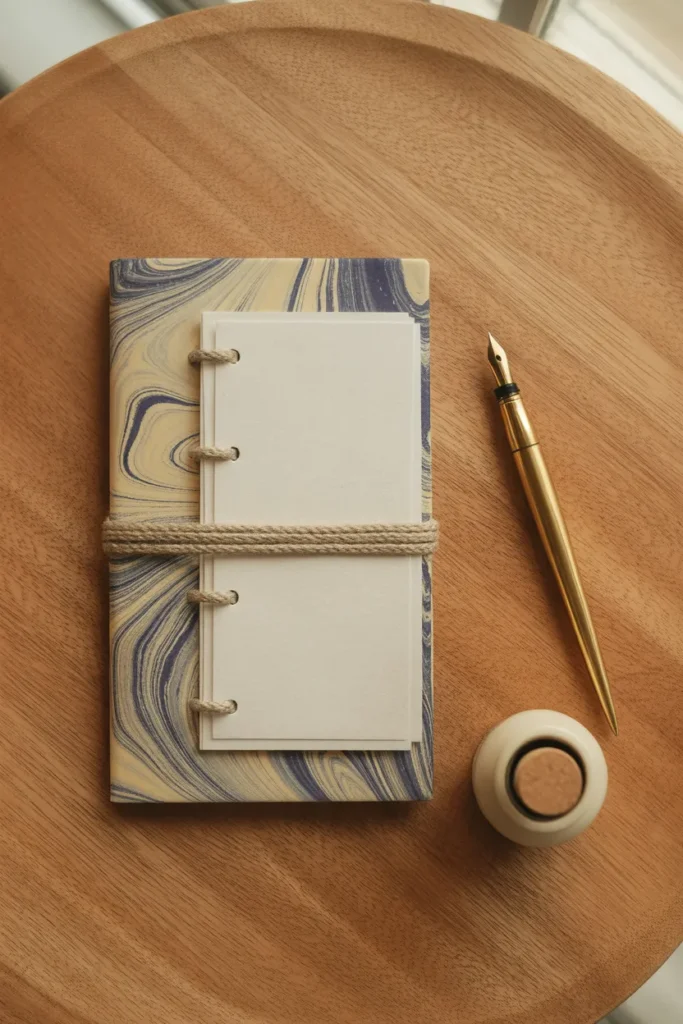
Vibe: The notebook is artisan — a hand-bound stab notebook with a marbled cover and visible linen thread stitching is the kind of object that makes writing feel like a considered act rather than a convenience.
Why it works: Japanese stab binding (yotsume toji, or four-hole binding) is the most accessible bookbinding technique for beginners because it requires no spine preparation, no sewing frame, and no adhesive on the binding itself — the entire structure is achieved through a single length of thread passed through four holes punched along the spine edge in a specific sequence. The exposed binding thread on the spine becomes the decorative element rather than something to hide, which means execution quality is visible and the craft rewards precision. A marbled paper cover introduces sophisticated color and pattern without requiring any painting skill — marbled sheets are available as purchased paper that transforms a simple notebook into a visually complex object.
How to get it: Cut pages to your chosen notebook size (A5 works well as a starter). Stack pages with front and back cover papers. Mark four holes along the spine edge at 1/2 inch from the spine and evenly distributed. Pierce all holes simultaneously with a bookbinding awl through the stacked pages. Follow a four-hole stab binding sequence (widely available as a free printable diagram) using waxed linen thread. Finish with a square knot on the outer spine surface.
Shop The Look
- Waxed linen bookbinding thread natural
- Bookbinding awl pointed craft tool
- Marbled paper sheet decorative Italian style
- 300gsm watercolor paper pad cold press
- Bone folder scoring tool paper crafts
3. Paper Cut Botanical Shadow Box Art
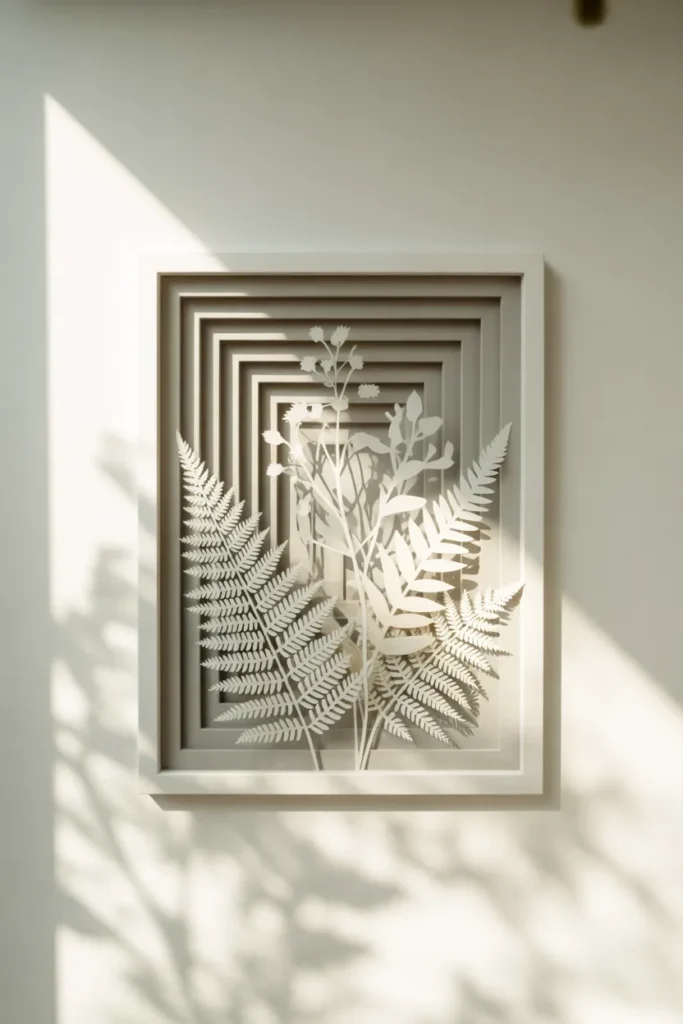
Vibe: The piece is precise — layered white paper cut botanicals in a shadow box create a study in light and shadow that reads as architectural model-making applied to natural form.
Why it works: Layered paper cut art in a shadow box exploits the physics of depth and shadow — each paper layer placed further from the back wall of the shadow box casts a progressively softer, wider shadow, creating a natural depth gradient that the eye reads as three-dimensional space. White paper against white background makes this shadow gradient the only color in the composition, which is the aesthetic decision that elevates paper cut art from illustration to sculpture. The botanical subject (ferns, grasses, wildflowers) is specifically well-suited to paper cutting because the natural forms — long stems, divided leaf structures, radial flower heads — translate directly into cut silhouettes that are recognizable at any level of detail.
How to get it: Design or trace botanical silhouettes onto hot-pressed illustration board (smoother than watercolor paper, producing cleaner cut edges). Cut with a precision craft knife on a self-healing mat, changing the blade every 15–20 minutes of cutting — a dull blade tears rather than cuts, producing ragged edges that are immediately visible in white-on-white compositions. Layer cut pieces in the shadow box using foam mounting squares of increasing thickness to create progressive depth.
Shop The Look
- Hot press illustration board white sheet
- Craft knife precision set replacement blades
- Self healing cutting mat A3 size
- Foam mounting squares thick adhesive set
- Deep shadow box frame white 11×14
4. Marbled Paper Using Shaving Cream Technique
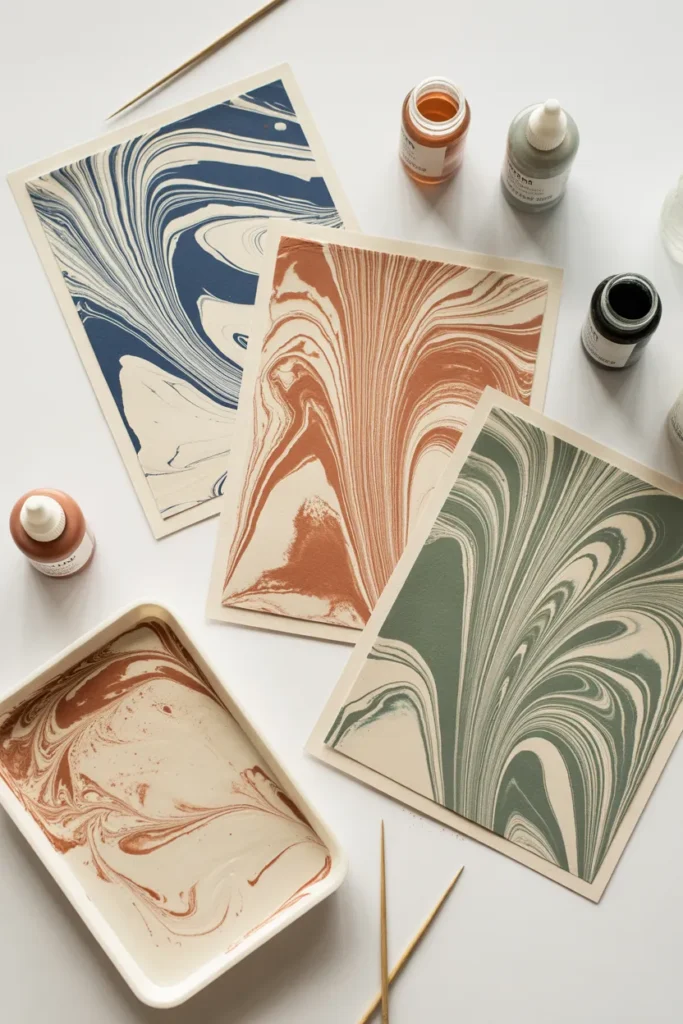
Vibe: The process is colorful — shaving cream marbling produces unpredictable, organic swirl patterns that cannot be replicated, making every sheet genuinely unique and the process itself as satisfying as the result.
Why it works: The shaving cream marbling technique works through fluid dynamics — drops of diluted acrylic ink placed on a shaving cream surface float on the cream’s surface tension without mixing immediately, allowing the maker to drag a skewer through the ink dots to create swirl patterns before laying paper on top to transfer the design. The shaving cream acts as a printing medium that releases the ink pattern onto the paper surface cleanly when the cream is wiped away. The resulting pattern has a quality of organic complexity — the slight bleed where ink colors meet, the directional momentum of the skewer pulls — that printed paper patterns cannot achieve because they emerge from the fluid behavior of the materials rather than a digital design process.
How to get it: Fill a shallow tray (at least 2 inches larger than the paper size on each side) with a 1/2-inch layer of inexpensive white shaving cream. Drop diluted acrylic inks (3 parts water to 1 part ink) onto the cream surface at random or in planned dot patterns. Drag a wooden skewer, comb, or folded card through the ink in one continuous pull — the complexity of the final pattern is directly related to the number and direction of pulls. Lay paper face-down on the cream surface, press gently, and lift. Wipe cream from paper surface with a straight card edge.
Quick Win: Ten sheets of marbled paper take approximately 45 minutes using the shaving cream technique, producing unique decorated sheets for gift wrapping, notebook covers, bookmarks, and framing — at a total material cost under $8 for the full batch.
Shop The Look
- Acrylic ink dropper bottle set primary colors
- Shallow rectangular craft tray marbling
- 120gsm smooth paper sheet pack white
- Wooden skewer set craft marbling tool
- Straight edge plastic squeegee card
5. Kirigami Pop-Up Card Architecture
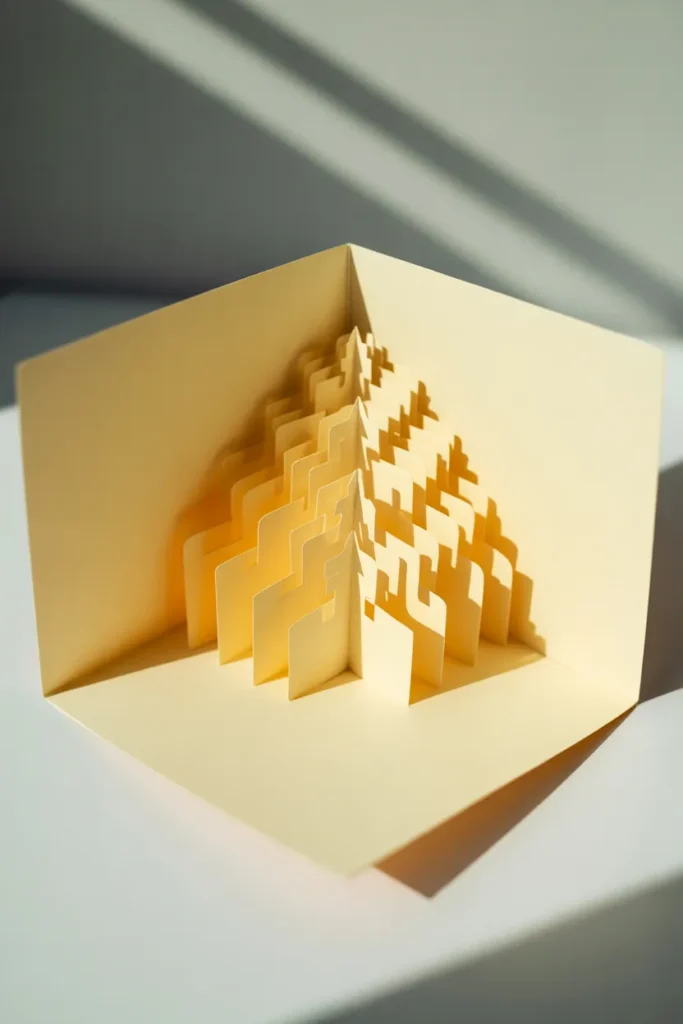
Vibe: The card is delightful — a kirigami pop-up that rises from a flat card as it opens produces a response of genuine surprise and admiration that no printed card can generate, because the structure reveals itself through the act of opening.
Why it works: Kirigami pop-up architecture works through the mechanical principle of parallel fold — cuts made parallel to the card’s central fold create tabs that, when the card is opened, are pushed forward by the geometric relationship between the cut tab and the card’s main fold angle. This means no gluing, no additional pieces, and no armature — the entire three-dimensional structure emerges from a single piece of card through the physics of the fold alone. The precision requirement (cuts must be exactly parallel and fold lines must be exactly perpendicular to be structurally sound) is what makes the technique genuinely satisfying for adults — it rewards careful measurement with a result that appears impossible.
How to get it: Begin with a 300gsm card folded in half to the final card size. Mark cut lines parallel to the central fold at varying distances from the fold edge to create tabs of different projection depths. Cut along the marked lines with a craft knife. Pre-crease each tab’s base fold lines with a bone folder before opening — this ensures clean, crisp pop-up action rather than torn or collapsed tabs. Open the card slowly the first time to check all folds release correctly.
Shop The Look
- 300gsm white card stock sheet pack
- Craft knife precision set fine blades
- Bone folder scoring tool crease card
- Metal ruler 12 inch non-slip craft
- Self healing cutting mat A4 size
6. Paste Paper Making for Decorative Sheets
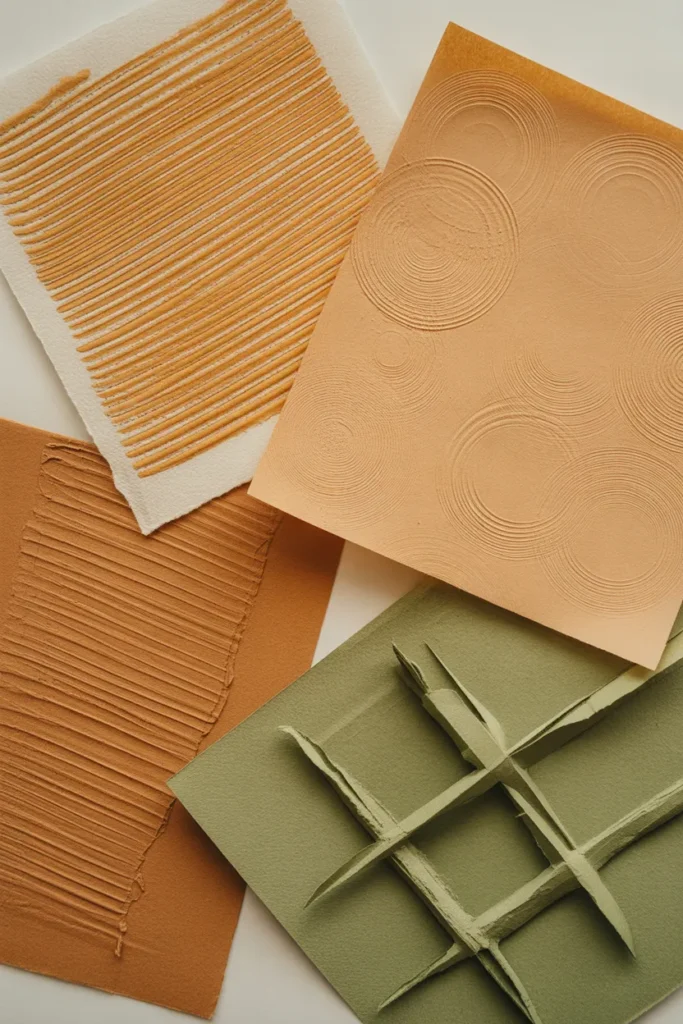
Vibe: The sheets are process-rich — paste paper made by dragging texturing tools through pigmented paste on paper produces surfaces with a depth and tactile interest that printed paper cannot achieve because the texture is physically raised, not visually implied.
Why it works: Paste paper is made by coating dampened paper with a pigmented wheat starch paste and then working the paste surface with texturing tools before it dries — combs, fingertips, crumpled plastic, folded card — each producing a different pattern. The paste sinks slightly into the paper fibers as it dries, creating a surface that is simultaneously painted (pigment in the paste) and textured (paste relief remaining on the surface). This dual quality — color plus physical texture — is what distinguishes paste paper from painted or printed paper and gives finished sheets the visual richness of handmade material. Paste paper is used professionally for bookbinding endpapers, journal covers, and gift wrapping precisely because its quality is immediately legible as handmade.
How to get it: Cook wheat starch paste (2 tablespoons wheat starch to 1 cup water, stirred over heat until clear and thickened). Allow to cool. Mix in acrylic paint to desired color, aiming for a consistency slightly thinner than yogurt. Dampen heavy printing or drawing paper (at least 100gsm). Apply paste generously with a wide brush. Work texture immediately while paste is wet. Dry flat on a non-absorbent surface.
Shop The Look
- Wheat starch bookbinding paste natural
- Acrylic paint set earthy tones
- Wide soft brush paste application 2 inch
- 100gsm drawing paper pack white
- Hair comb wide tooth paste paper texture
7. Paper Bead Jewelry with Varnished Finish
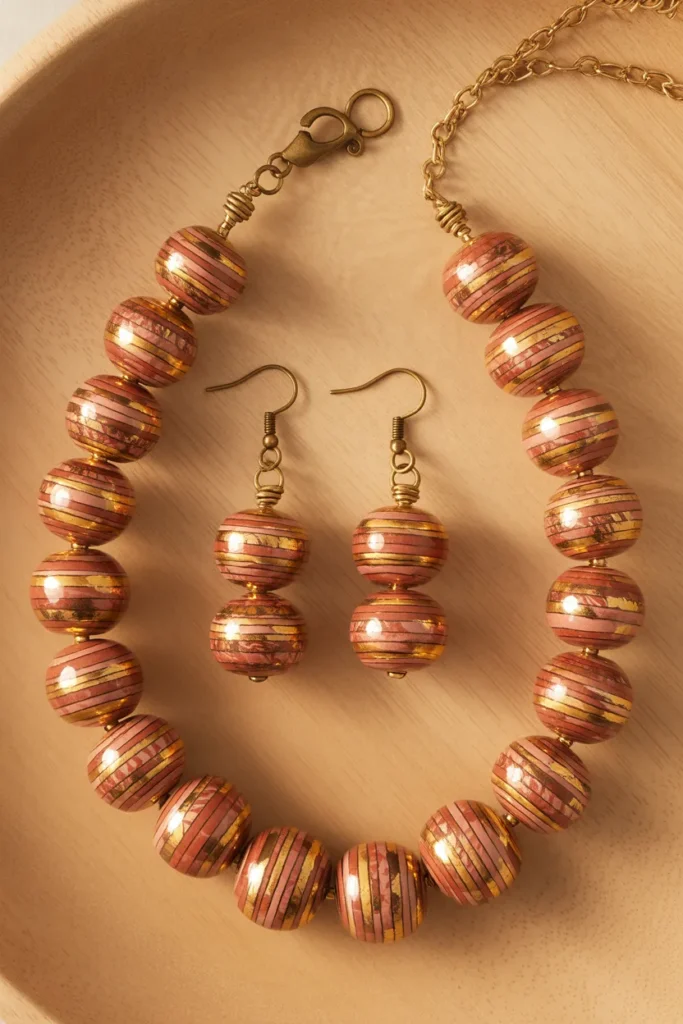
Vibe: The jewelry is artisan — paper beads sealed to a high-gloss lacquer finish are indistinguishable from resin or ceramic at normal viewing distance, and the pattern visible through the gloss surface gives each bead a depth that solid-color beads lack.
Why it works: The visual quality of a paper bead is determined by two factors: the tightness of the roll and the number of varnish coats. A bead rolled with consistent tension has a smooth, even cylindrical form with no visible seams or gaps — this requires rolling slowly and maintaining pressure throughout. Varnish coats (minimum four, maximum eight, with full drying between each) build up a surface hardness and gloss that reads as resin or lacquer rather than paper, while the pattern of the decorated paper beneath the varnish remains visible as depth rather than surface decoration. Decorative paper with small-scale pattern (marbled sheets, wrapping paper with fine repeat patterns, paste paper) produces the most sophisticated bead appearance because the pattern wraps continuously around the bead form.
How to get it: Cut decorative paper into long triangles (base 1/2 inch, length 10 inches). Starting at the wide base, roll firmly around a 2mm bamboo skewer, applying a thin line of PVA glue along the paper as you roll. Slide off the skewer when dry. Apply four coats of glossy Mod Podge or craft varnish, allowing full drying between coats. String on gold-filled wire with small brass spacer beads between paper beads, finished with a lobster clasp.
Quick Win: Eight paper beads from a single sheet of marbled paper, sealed with four varnish coats and strung on a simple cord, takes 90 minutes total and produces a necklace that reads as artisan jewelry worth $25–$40.
Shop The Look
- Gold filled jewelry wire 24 gauge roll
- Brass lobster clasp findings set small
- Glossy varnish craft finish paper seal
- Marbled decorative paper sheet pack
- Bamboo skewer set round 2mm
8. Botanical Pressed Flower Paper Collage in a Gallery Frame
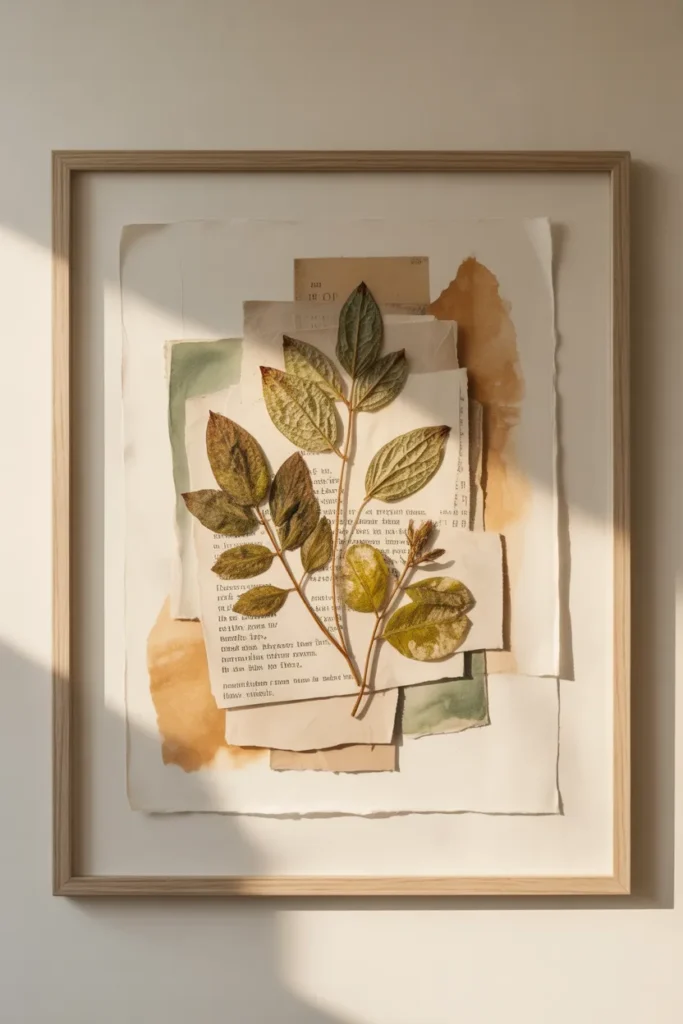
Vibe: The collage is warm — a botanical pressed flower collage with torn paper fragments and light watercolor wash has the quality of a naturalist’s field journal page elevated to gallery art.
Why it works: Botanical collage works through the principle of layered material richness — pressed flowers provide organic color and form, torn handmade paper fragments introduce texture variation and irregular edges, and light watercolor washes add painted color that unifies all elements without obscuring them. The torn edge (rather than cut edge) is a critical compositional choice — torn paper produces a soft, fibrous edge that integrates naturally with the pressed botanical material, while cut edges create a geometric precision that visually clashes with the organic forms of dried plants. Archival mounting is essential for longevity: pressed botanicals mounted with acid-free adhesive on acid-free background paper will remain stable for decades.
How to get it: Press fresh botanicals between absorbent paper in a heavy book for 2–3 weeks. Arrange on a cream archival background paper, experimenting with composition before committing. Tear handmade or washi paper fragments and position between botanical elements. Apply light watercolor washes in sage, ochre, or dusty rose around botanical groupings using a wet brush — let washes dry before adhering botanicals. Mount all elements with archival PVA or wheat starch paste using tweezers for small botanical pieces.
Shop The Look
- Archival PVA glue acid free bookbinding
- Watercolor paint set small botanical palette
- Handmade paper sheet pack natural fiber
- Pressed flower specimen pack dried
- Wide mat board pre-cut cream archival
9. Paper Lantern Mobile with Washi Paper Shades
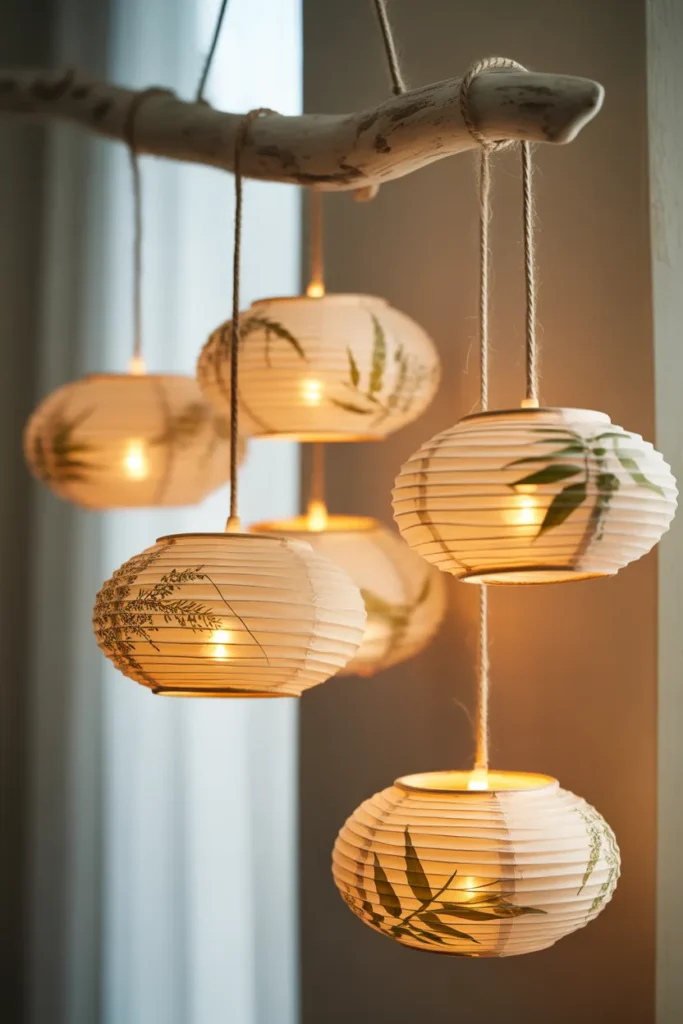
Vibe: The mobile is delicate — washi paper lanterns glowing from within cast warm light through paper with visible botanical fiber inclusions, producing the most beautiful low-tech ambient lighting available from a sheet of paper.
Why it works: Japanese washi paper’s defining material property is its long-fiber structure — kozo (mulberry), gampi, and mitsumata fiber papers all contain visible fiber inclusions that create a natural pattern visible in transmitted light. A lantern form (which places a light source inside the paper) converts these fiber inclusions from surface texture into a backlit pattern, giving the lantern the visual quality of stained glass at paper weight. The mobile suspension format distributes multiple light sources at different heights and positions, creating an ambient light cluster that reads as a designed installation rather than a single object.
How to get it: Cut washi paper into rectangles (dimensions vary by desired lantern size). Score and fold a cylindrical or rectangular lantern form, securing the vertical seam with a thin line of archival glue. Create a top and bottom collar from heavier card to maintain the lantern’s structural form. Thread a natural fiber cord through the top collar and suspend from a driftwood branch with knots at varying cord lengths. Place battery-powered LED tea lights inside each lantern.
Shop The Look
- Japanese washi paper sheet pack natural fiber
- Battery powered LED tea light set warm
- Driftwood branch natural display mobile
- Natural linen thread fine bookbinding
- Archival glue stick acid free craft
10. Paper Mosaic Tray Decoupage with Gold Leaf Accents
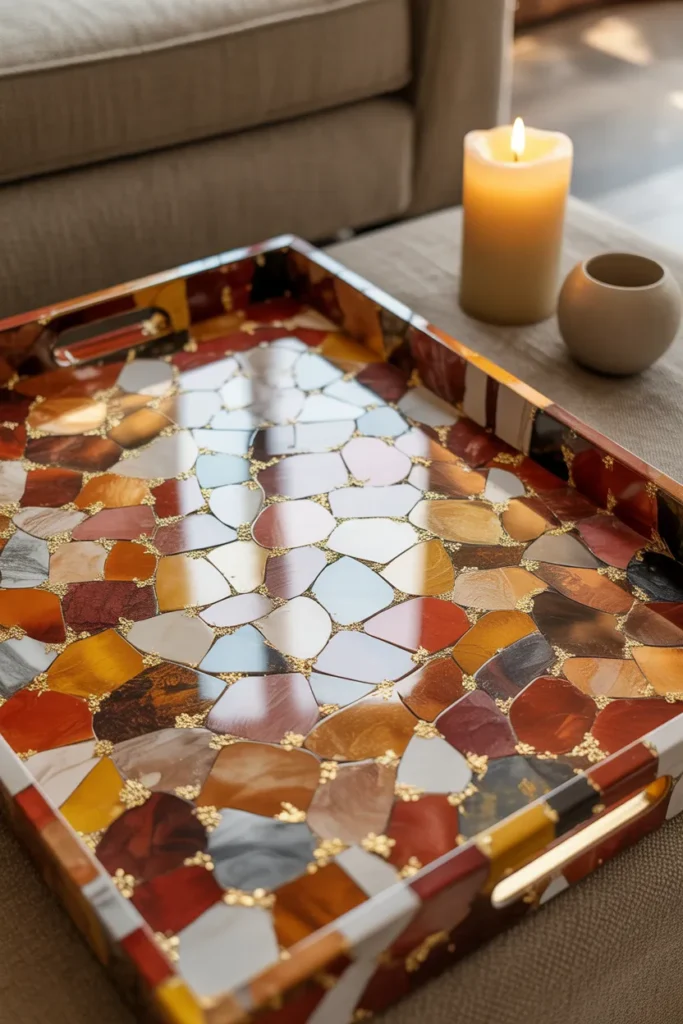
Vibe: The tray is luxurious — a paper mosaic with gold leaf accents sealed under high-gloss varnish reads as lacquerware at ten percent of the cost, and the variety of paper patterns in the mosaic creates visual complexity that rewards close looking.
Why it works: The paper mosaic technique works by treating small irregular paper pieces as mosaic tesserae — the gaps between pieces (filled with gold leaf or left as visible grout lines) create the compositional grid that unifies diverse paper patterns into a single coherent surface. Gold leaf applied in the gaps (using a fine brush and size adhesive) adds genuine luminosity that paint cannot replicate — gold leaf reflects light specularly rather than diffusely, creating a shimmer visible from across the room. The high-gloss varnish finish (four or more coats) seals all paper and gold leaf under a single unified surface, producing the depth of lacquerware rather than the flatness of decoupage.
How to get it: Tear or cut varied decorative papers (marbled, patterned washi, paste paper, printed tissue) into irregular pieces 1/2–1 inch across. Arrange on the tray surface without adhesive first to plan the composition. Adhere with Mod Podge, leaving deliberate 1/8-inch gaps between pieces. When dry, apply gold leaf size to the gaps with a fine brush, allow to tack (5–10 minutes), then press gold leaf sheets over the sized gaps and remove the excess with a soft brush. Seal the entire surface with four coats of high-gloss polyurethane varnish.
Shop The Look
- Composition gold leaf sheets craft pack
- Gold leaf size adhesive craft
- Mod Podge high gloss formula decoupage
- Varied decorative paper pack marbled washi
- Unfinished wood serving tray craft blank
11. Accordion Book with Painted Paper Panels
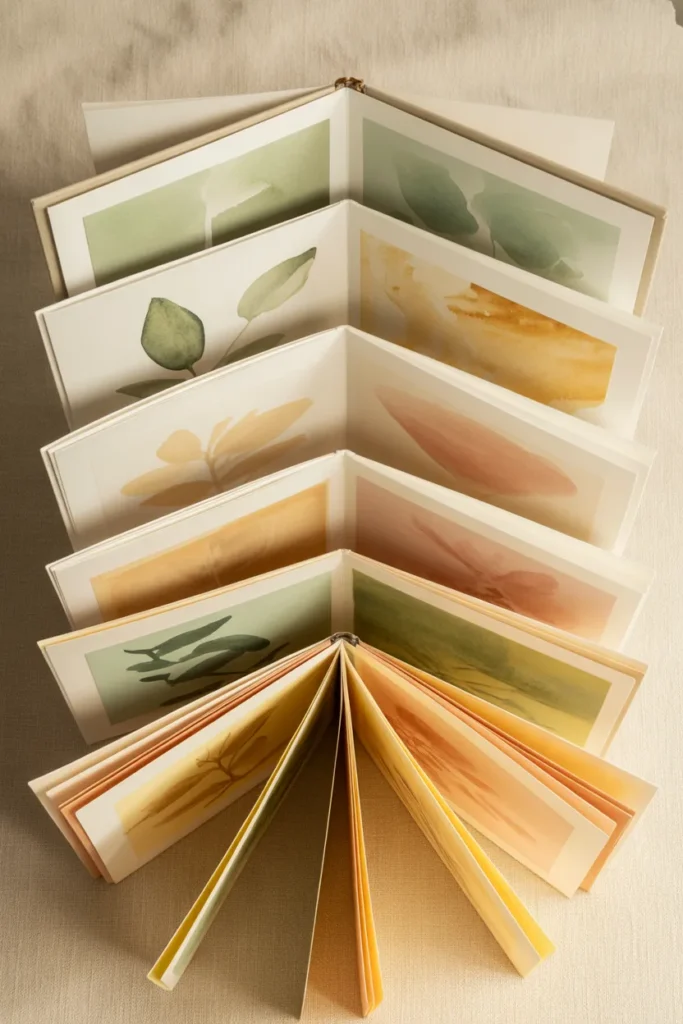
Vibe: The accordion book is creative — a fully opened accordion structure that displays painted panels in a continuous zigzag reveals itself as something between a book and a painting, and the transition from reading object to display object is part of its pleasure.
Why it works: The accordion book structure (a single paper or card strip folded in alternating valley and mountain folds at regular intervals) is the most spatially flexible book form available — it can be read sequentially as a book, stood upright on a shelf as a sculptural display, or opened fully flat as a panoramic painting. This structural flexibility makes it the ideal format for combining image-making (watercolor, collage, or illustration on each panel) with bookbinding craft in a single object. The fold discipline required — all folds must be exactly at the same interval for the structure to nest cleanly — makes it genuinely satisfying to execute precisely.
How to get it: Cut a 300gsm watercolor paper strip to the desired book width and a total length equal to the panel count multiplied by the panel size. Score all fold lines with a bone folder against a metal ruler before folding. Paint or decorate each panel in sequence, allowing each to dry fully before folding to prevent paint cracking at fold lines. Attach hard cover boards (bookbinding board covered in decorative paper) to each end panel with archival adhesive.
Quick Win: An eight-panel accordion book painted with a single simple motif repeated with color variation across all panels — a leaf, a circle, a brushstroke — takes 90 minutes and produces a display object that reads as a designed art piece on any shelf.
Shop The Look
- 300gsm watercolor paper pad cold press
- Watercolor paint set professional small
- Bookbinding board grey chipboard
- Bone folder scoring tool craft
- Soft watercolor brush set round tip
12. Geometric Origami Modular Star Mobile
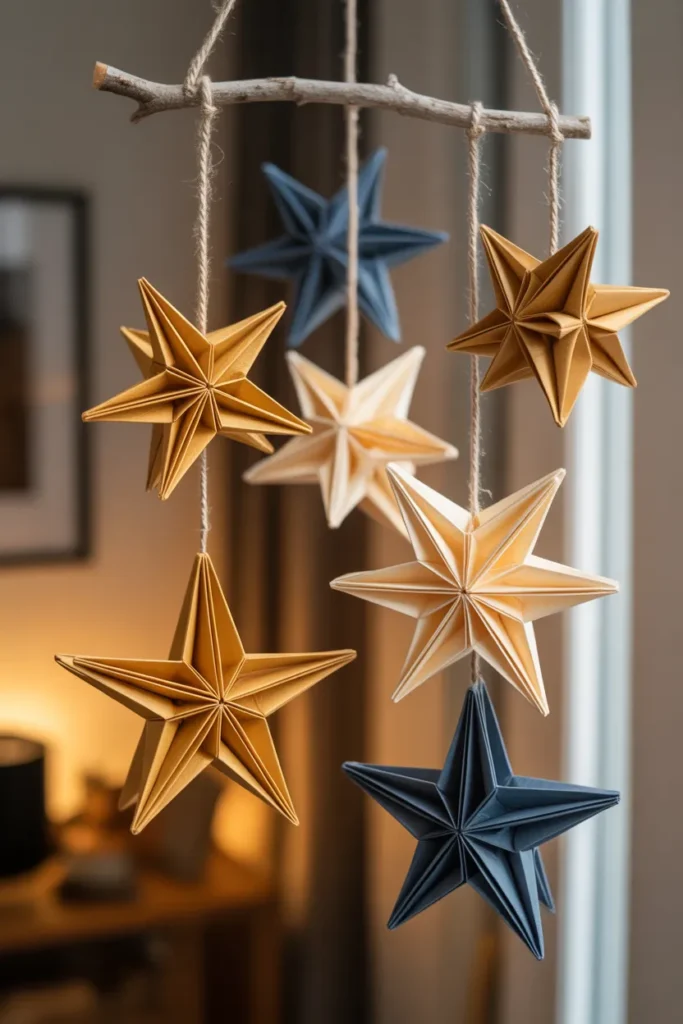
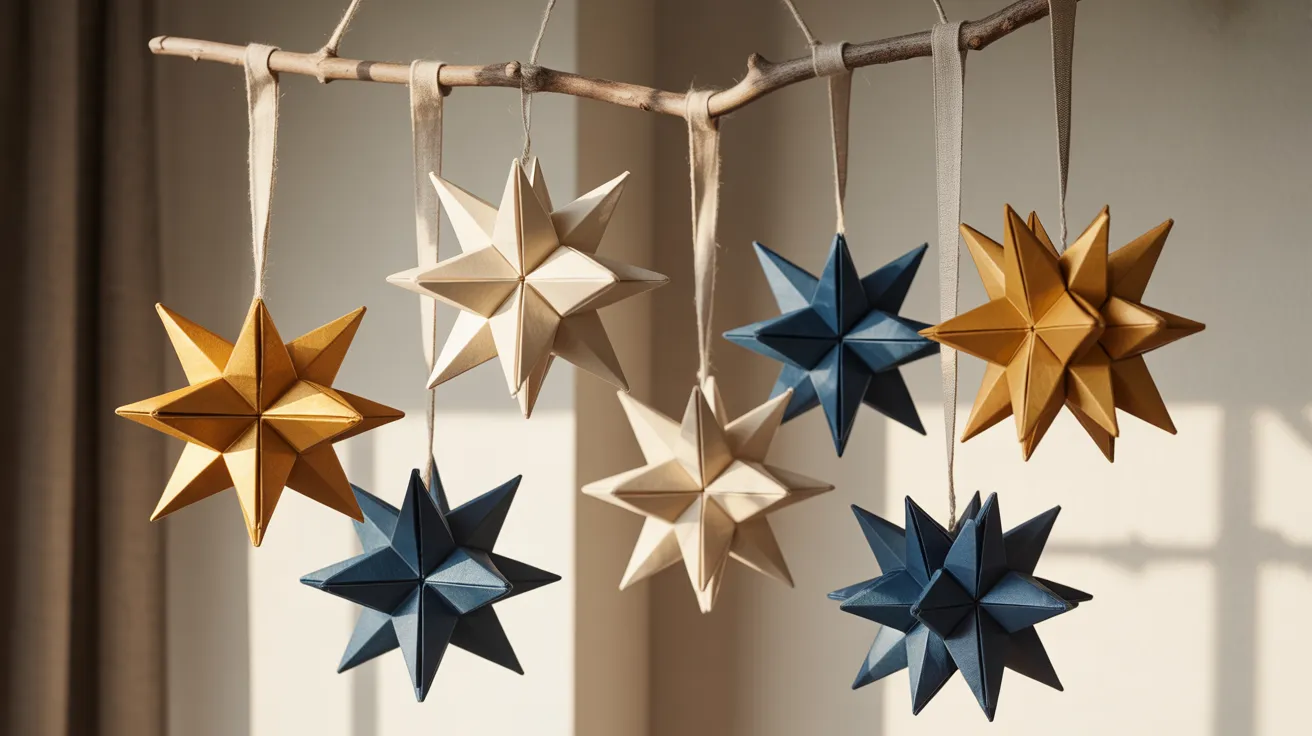
Vibe: The mobile is geometric — modular origami stars in warm gold and deep indigo suspended at varying heights are simultaneously a study in three-dimensional geometry and a genuinely beautiful decorative object.
Why it works: Modular origami stars are built from multiple identical folded units (typically 6, 12, or 30 units for different star complexities) that interlock without adhesive through the geometry of their folded pockets and points. This means the structure is held together entirely by the precision of the folding — a well-folded module set produces a star with crisp points and tight geometry; imprecise folding creates a loose, collapsing form that reads as failed craft. The modular construction also means that varying paper tones across the units of a single star creates color variation that flat-folded origami cannot achieve.
How to get it: Begin with the six-unit modular cube or star (simpler than the 30-unit dodecahedron but uses the same interlocking principle). Cut or purchase square sheets in the desired paper weight (80gsm is ideal — heavy enough for crisp folds, light enough for the multiple fold layers of modular units). Fold all units to identical precision before assembly — inconsistency in individual units makes assembly impossible. Use a thin line of archival glue at each pocket-and-point join for a permanent structure.
Shop The Look
- Origami paper pack gold metallic sheets
- Origami paper pack indigo and navy
- Copper rod mobile hanging craft 12 inch
- Fine nylon thread transparent craft
- Archival glue stick acid free
13. Layered Paper Cut Cityscape in a Window Frame
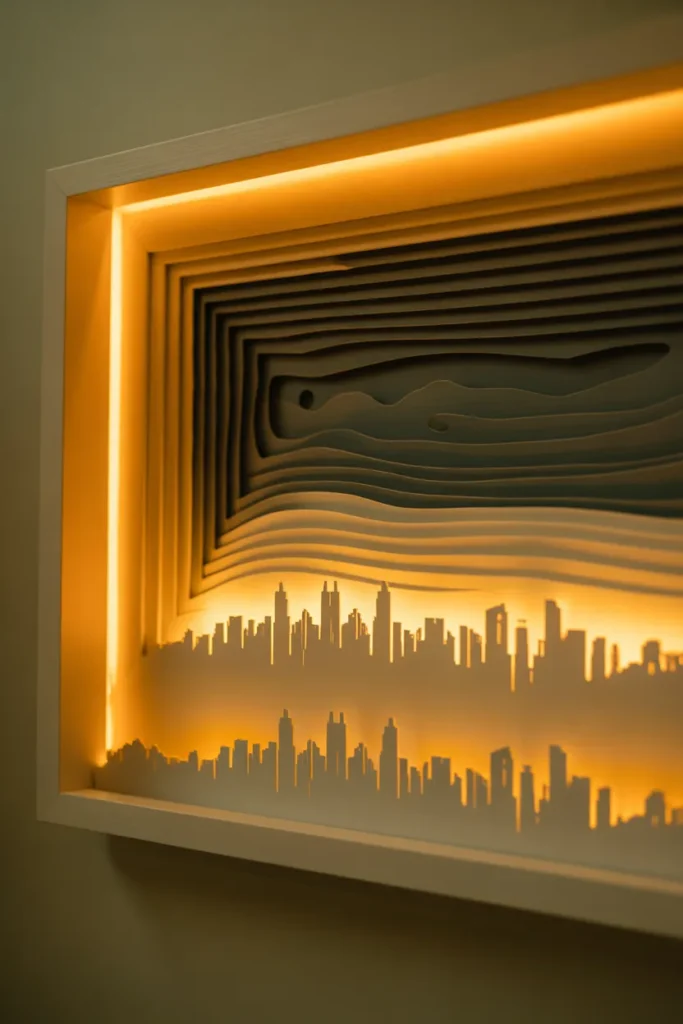
Vibe: The cityscape is graphic — multiple layers of paper cut building silhouettes backlit in a frame create a scene with cinematic depth that changes quality between day (soft shadow layers) and evening (warm backlit glow), making it a different object at different times.
Why it works: Layered paper cut work backlit in a frame uses light transmission rather than reflected light as its primary visual medium — the paper silhouettes block light rather than reflecting it, and the depth between layers creates the visual recession that reads as spatial distance. Multiple layers (minimum four for convincing depth) are essential — a single silhouette reads as flat illustration, while multiple layers at different depths create genuine atmospheric perspective as each successive layer blocks slightly more light. The cityscape subject works particularly well because architectural forms (building silhouettes, window grids, bridge profiles) have the geometric regularity that makes precise cutting satisfying and the variation in building heights that creates interesting vertical rhythm.
How to get it: Design four skyline layers of progressively more distant (and therefore lower and simpler) building profiles. Cut each from 160gsm black or dark paper using a craft knife. Mount in a deep picture frame with each layer separated by foam mounting squares (approximately 1/4 inch between layers). Install a warm LED light strip behind the rear layer or display in a south-facing window for natural backlighting.
Shop The Look
- 160gsm black cardstock sheet pack
- LED light strip warm white adhesive
- Deep shadow box frame white 12×16
- Foam mounting squares thick set
- Craft knife precision replacement blade set
14. Paper Weaving Wall Art with Painted Strips
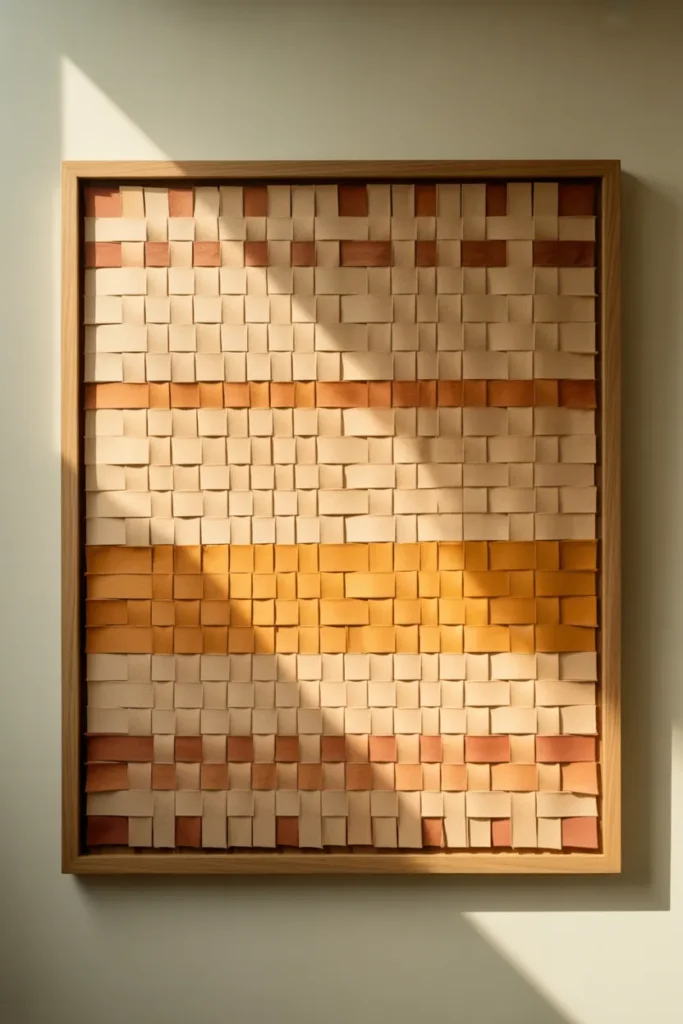
Vibe: The piece is textile-like — paper weaving creates a surface that reads as woven fabric from a distance but reveals its paper material on close inspection, occupying an interesting space between textile art and paper craft.
Why it works: Paper weaving combines the structural logic of textile weaving (warp and weft interlacing creating a stable, self-supporting structure) with the color and texture properties of painted paper. Because each strip passes alternately over and under crossing strips, the visual effect shifts at different viewing angles — the raised portions of each strip catch light differently from the recessed portions, creating the same optical interest that woven textiles have. Painting the paper strips before weaving in a gradient sequence (lightest at one edge to deepest at the other) creates a color field effect across the woven surface that would require sophisticated dyeing to achieve in a textile equivalent.
How to get it: Paint watercolor paper sheets in graduated warm tones (pale ochre through deep terracotta, for example) using flat wash technique. Allow to dry completely. Cut all sheets into 1/2-inch strips along the grain direction. Lay horizontal warp strips on a cutting mat with masking tape holding one end. Weave vertical weft strips one at a time through the warp in alternating over-under sequence. Apply archival glue along the outer edges to secure the weave structure, then mount on backing paper and frame.
Shop The Look
- Watercolor paper sheet pack 300gsm
- Watercolor paint set flat wash technique
- Masking tape low tack craft supply
- Archival glue stick acid free
- Simple wood picture frame 10×10
15. Paper Sculpture Vessels Using Paper Clay Technique
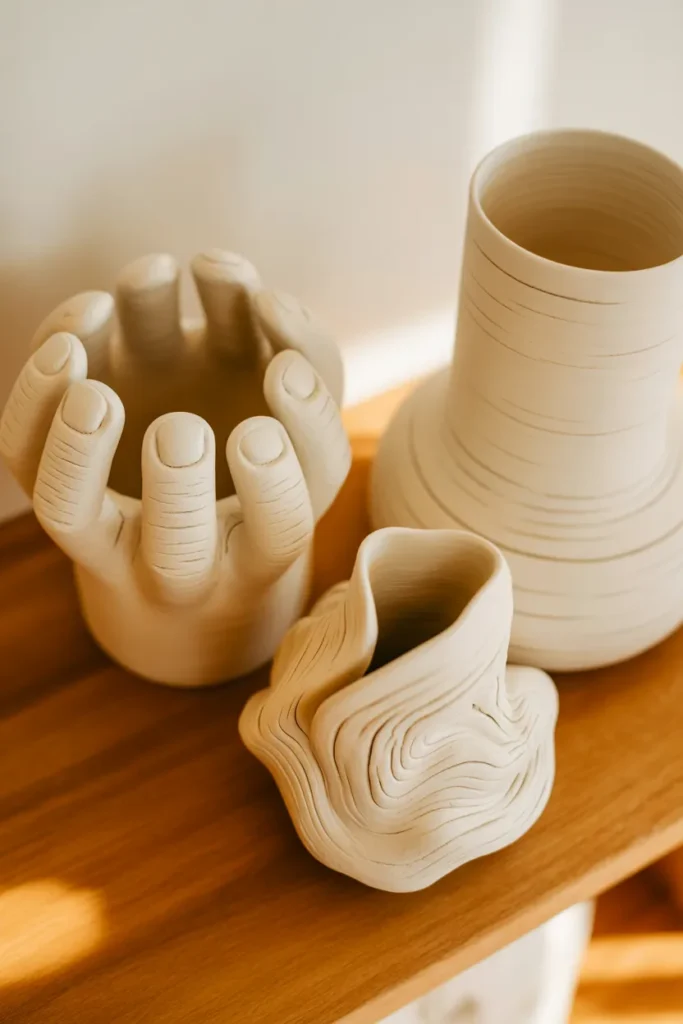
Vibe: The vessels are artisan — hand-formed paper clay objects have the weight and organic form of ceramic pieces at paper weight, and the slightly irregular surfaces produced by hand-building techniques confirm their handmade origin.
Why it works: Paper clay (a composite of paper pulp and air-dry clay, or commercially available as Creative Paperclay) has the workability of traditional clay — it can be pinched, coiled, slabbed, and carved — but dries to a lightweight, paintable solid at room temperature without kiln firing. The paper fiber reinforcement in paper clay prevents the cracking that makes standard air-dry clay frustrating for vessel forms, allowing thin walls and complex shapes that would crack in unfired clay. Finished paper clay vessels are paintable with chalk paint, gesso, or watercolor, and sandable to a smooth surface — giving the maker control over the final appearance from rough natural texture to refined smooth finish.
How to get it: Work paper clay on a smooth non-stick surface (silicone mat or parchment). For a pinched bowl, form a ball and insert both thumbs to create a cavity, then pinch the walls outward to the desired form, rotating continuously. For a coiled vase, roll long coils of consistent diameter and stack in a circular form, blending each join on the interior. Allow to dry slowly (24–48 hours) away from direct heat to prevent cracking. Sand lightly with 220-grit when fully dry and finish with chalk paint or leave natural.
Quick Win: A single paper clay pinched bowl takes 20 minutes to form and 24 hours to dry — painted with two coats of chalk white paint and placed on a shelf with two similar vessels, it reads as a set of artisan ceramics at zero ceramic skill required.
Shop The Look
- Creative Paperclay air dry paper clay white
- Chalk paint matte white small pot
- Silicone craft mat non stick work surface
- Sandpaper sheet 220 grit fine craft
- Natural wood shelf display small floating
How to Start Your Adult Paper Craft Practice
The single most important first investment in an adult paper craft practice is quality paper rather than quality tools. A craft knife from a hardware store cuts precisely the same as an expensive specialty knife — but cheap, thin paper tears, warps, creases unevenly, and absorbs adhesive in ways that undermine every technique on this list regardless of skill level. Spend the first $20 on paper: one pad of 300gsm cold-press watercolor paper, one pack of Japanese washi sheets, and one sheet of hot-press illustration board will give you the correct material for the majority of techniques here and the experience of working with paper that responds predictably and beautifully to every tool.
The most common beginner mistake in adult paper crafting is cutting with a dull blade. A craft knife blade should be replaced every 15–20 minutes of active cutting — at approximately $0.10 per blade for replacement packs, this is the cheapest quality upgrade available. A sharp blade cuts through paper fibers in a single clean pass; a dull blade compresses and tears the fibers, producing a ragged edge that is permanently visible in finished work and cannot be repaired. Every tear, rough edge, and incomplete cut in paper craft is caused by a dull blade more often than by any other factor.
Three supplies under $50 that unlock the full quality range of adult paper crafting: a self-healing cutting mat in A3 size ($12–$18) that protects both the work surface and the blade while providing measurement guides; a bone folder ($5–$8) that produces crisp, clean fold lines that fingers alone cannot achieve; and a bottle of archival PVA glue with a fine-tip applicator ($6–$10) that applies precise amounts of pH-neutral adhesive without warping paper the way water-based glues do.
A single paper craft session — one completed piece — is a realistic 60–90 minute investment for most techniques on this list. A developed paper craft practice producing gallery-quality work builds over 3–6 months of regular making, with a total material investment of $80–$150 covering the paper, tools, and adhesives for the full range of techniques here. The most effective approach is to begin with one technique that matches an existing aesthetic interest (botanical collage for those drawn to natural forms; quilling for those drawn to geometric precision; bookbinding for those drawn to functional craft) and develop fluency in that one technique before exploring others.
Frequently Asked Questions About Paper Crafts for Adults
What paper weight should I use for different paper craft techniques?
Paper weight determines the structural behavior of paper in every technique, and using the wrong weight is the most common reason a technique fails to produce the expected result. For folding and origami, 60–90gsm is ideal — heavy enough for crisp folds, light enough for multiple fold layers. For paper cutting and kirigami, 160–200gsm produces clean cut edges without blade dragging. For sculptural quilling and coiling, 120gsm quilling-specific paper has the correct balance of flexibility and structural memory. For paper mache and paste paper, 80–100gsm absorbent paper accepts wet media without disintegrating. For bookbinding covers and structural elements, 300gsm or above provides the rigidity required. When in doubt, test a small piece of any paper with the specific technique before committing a full sheet.
What is the difference between washi paper and regular paper for crafts?
Japanese washi paper differs from Western machine-made paper in its fiber structure and manufacturing process. Washi is made from long plant fibers (kozo, gampi, or mitsumata) beaten into a pulp and formed on a bamboo screen in a process that aligns the fibers randomly rather than in one direction — this gives washi its characteristic strength, flexibility, and distinctive appearance, including visible fiber inclusions and a natural translucency. These properties make washi uniquely suited to applications that exploit translucency (lanterns, lampshade work), flexible strength (bookbinding repairs, collage layering), and surface beauty (decorative covering, paper jewelry). Western machine-made paper is stronger in one direction (with the grain) and tears cleanly against the grain — washi tears in any direction with similar force and does not have a dominant grain direction.
How do I prevent paper from warping when using wet adhesives or watercolor?
Paper warps when wet because the paper fibers absorb moisture and expand unevenly — the side with wet adhesive or paint expands while the dry side does not, creating a concave warp toward the wet surface. Three strategies prevent this. First, use the minimum amount of adhesive or water possible — diluted PVA applied with a fine brush rather than a wide wet brush reduces warp dramatically. Second, wet both sides of the paper simultaneously (for watercolor work, pre-wet the back of the paper with a damp sponge before applying paint to the front) so both surfaces expand equally. Third, mount wet paper flat on a smooth surface using painter’s tape around all edges, or dry the finished piece between two heavy boards with weight on top — the boards constrain the warp while the paper dries to its natural flat form.
Can paper crafts be preserved long-term without deterioration?
Yes, with archival materials and correct display conditions. The primary causes of paper deterioration are acid content (causes yellowing and brittleness over time), light exposure (UV radiation bleaches and weakens paper fibers), humidity fluctuation (causes repeated expansion and contraction that weakens paper structure), and adhesive failure (non-archival adhesives yellow, become brittle, and release over time). Archival-quality paper crafts — made with acid-free paper, archival PVA or wheat starch adhesive, and UV-protective glass in frames — can remain stable for 50–100 years. Practical display guidelines: avoid direct sunlight and keep relative humidity between 40–55%. For pieces with pressed botanicals, color may shift over years regardless of archival materials — this is an inherent property of plant pigments rather than a failure of the craft.
What is the best way to display paper crafts in a home without them looking like crafts?
The single most important display decision is framing — the right frame elevates a paper craft to gallery art, and the wrong frame (or no frame) leaves it reading as a project. Specifically: shadow box frames with depth for three-dimensional work (quilling, paper cut layers, sculptural pieces), wide cream or white mats for flat work (botanical collage, paper weaving, pressed botanicals), and simple matte black or natural wood frames rather than ornate or colored frames that compete with the paper work itself. Beyond framing, display paper crafts with high-quality supporting objects — a quilled piece beside a ceramic lamp, a handmade notebook beside a fountain pen, paper clay vessels in a group of three — so the paper work is contextually elevated by its neighbors. Lighting is the final variable: soft directional natural light or warm gallery-style picture lighting reveals the dimensional quality of three-dimensional paper work in a way that flat overhead lighting completely flattens.
Ready to Start Your Paper Craft Practice?
These 15 ideas span the full range of what paper can become in adult hands — from the dimensional precision of quilled geometric relief and layered paper cut botanicals to the fluid unpredictability of shaving cream marbling and paste paper making, from functional objects like hand-bound notebooks and paper bead jewelry to display pieces like accordion books and modular origami mobiles. You do not need to attempt all 15 to build a meaningful craft practice — the most satisfying approach is to choose the single technique that most closely matches the aesthetic you want to create and the material property of paper you find most compelling: its foldability, its translucency, its cuttability, or its capacity to hold paint and texture. Start this week by purchasing one pad of 300gsm watercolor paper, one pack of washi sheets, and a sharp craft knife — that $25 investment opens every technique on this list. Paper is the most democratic of all design materials: it costs almost nothing, requires almost no space, and in the right hands produces objects of genuine beauty. Pin the techniques that made you want to stop reading and start making — those are the ones your hands are already ready for.