15 IKEA MALM Dresser Hacks to Create a Luxury Bedroom Look
A plain dresser can look custom with a few smart changes. These IKEA MALM dresser hacks turn a simple, budget-friendly chest into the high-end centerpiece your bedroom has been missing.
This article shares 15 beginner-friendly upgrades, from brass handles and fluted fronts to marble-look tops, tapered legs, and styled lamps. Each idea solves a real problem: a flat, boxy look, a tight budget, or a room that feels more basic than luxurious. I’ve noticed that most bedrooms don’t need new furniture. They need better details. In my experience, one or two upgrades can change the entire mood in a single weekend. Scroll through, save your favorites, and start with the idea that suits your space.
Brass Pull Handles
Content About the Image:
- Adds a metal accent that catches the light
- Swaps in minutes with just a screwdriver
- Costs far less than a new dresser
- Makes plain drawers feel custom
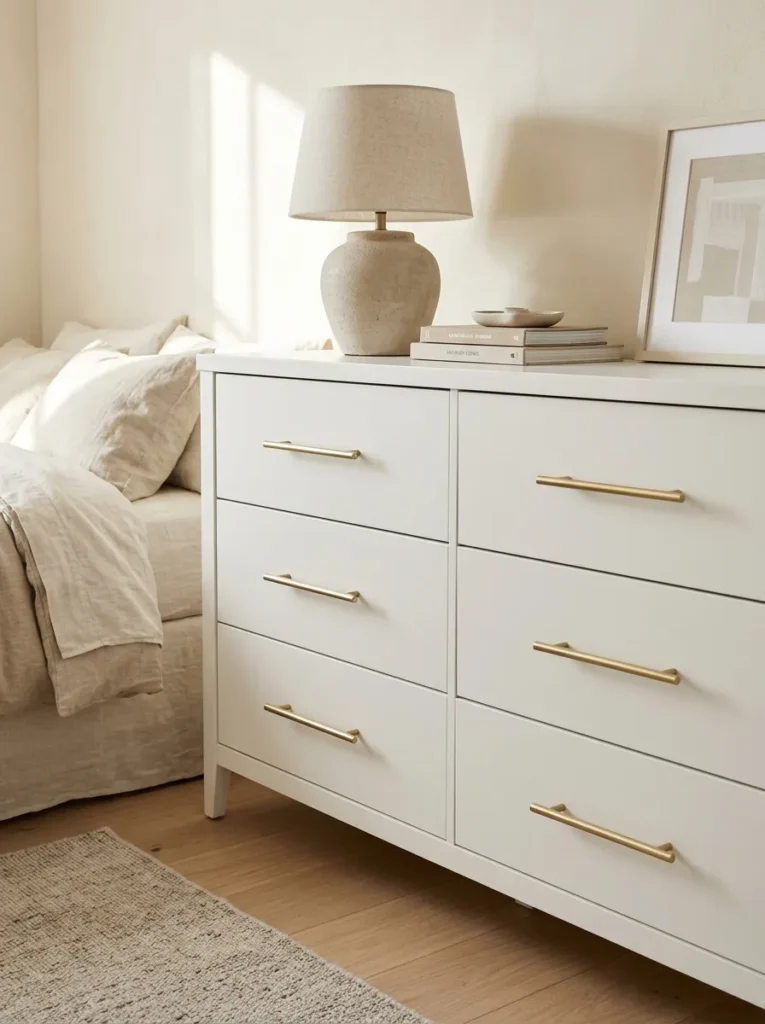
Hardware is the fastest way to make a basic dresser look expensive. Swap the standard handles for slim brushed brass bar pulls, and the whole front changes character. The warm metal catches light and adds a boutique feel against white drawers. I’ve seen this single change fool guests into thinking the piece was custom. Measure the center-to-center distance on your drawers before buying, since sizes vary. Most pulls come with screws, and the job takes about twenty minutes with a screwdriver. It costs little, needs no paint, and gives you an instant upgrade that feels polished, warm, and luxurious.
Choose the finish with care. Brushed or satin brass looks softer and more modern than shiny gold, which can feel dated. Match the metal to other pieces in the room, such as lamp bases, mirror frames, or curtain rods, so everything feels connected. Use a piece of tape and a ruler to mark the new holes if the sizes differ, and fill the old ones with wood filler before painting. Keep the style consistent across every drawer. The finished dresser looks tailored, warm, and intentional, and the small metal details quietly lift everything placed on top of it.
Fluted Drawer Fronts
- Adds deep vertical texture to flat drawer fronts
- Creates a custom, built-in look at low cost
- Pairs with paint, stain, or natural wood
- Works with most flat-front dressers
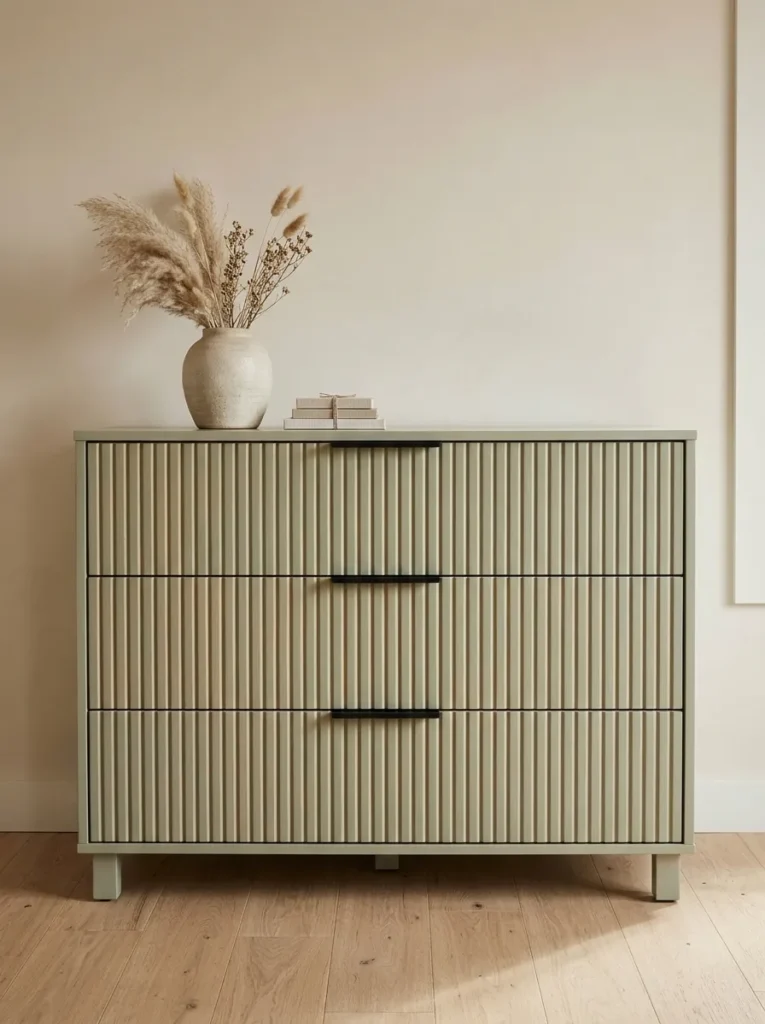
Flat drawers can look plain, but ridges change everything. Glue fluted wood panels or half-round dowels onto each drawer front, and the dresser suddenly looks like designer furniture. The vertical lines catch light differently through the day, which adds depth without adding color. In my experience, this is one of the most impressive upgrades for the effort. Pre-made fluted panels come in sheets you can cut to size. Paint them sage, white, or deep walnut for the finish you want. The result feels sculptural, rich, and expensive, and guests will keep running their hands along it.
Prep decides how clean the finish looks. Sand the drawer fronts lightly, wipe away dust, and measure each panel so the ridges line up across the whole dresser. Use strong wood glue and press the panels flat with books or clamps for a few hours. Paint with a small foam roller for a smooth coat, then seal with a matte topcoat. Keep the ridges running in the same direction on every drawer. Because the dresser is light, avoid heavy panels that could strain the runners. The finished piece looks custom, textured, and calm, and it anchors the room beautifully.
Marble Contact Top
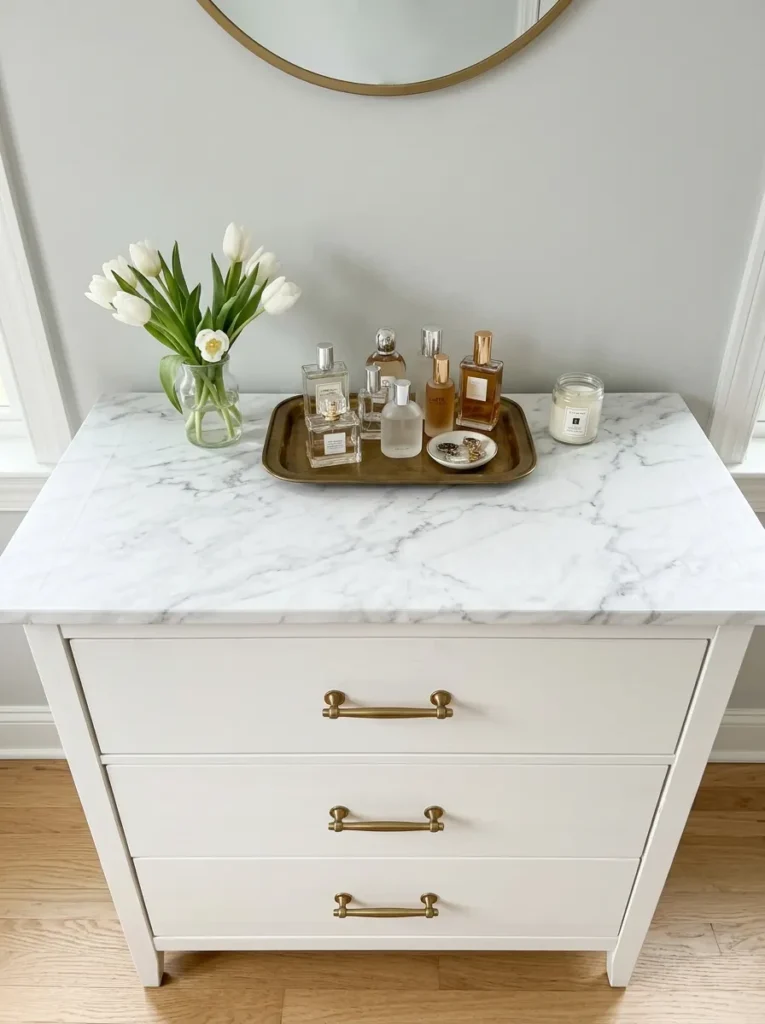
- Gives a plain top the look of real stone
- Peels off cleanly if you change your mind
- Resists small spills better than raw laminate
- Costs a fraction of a marble slab
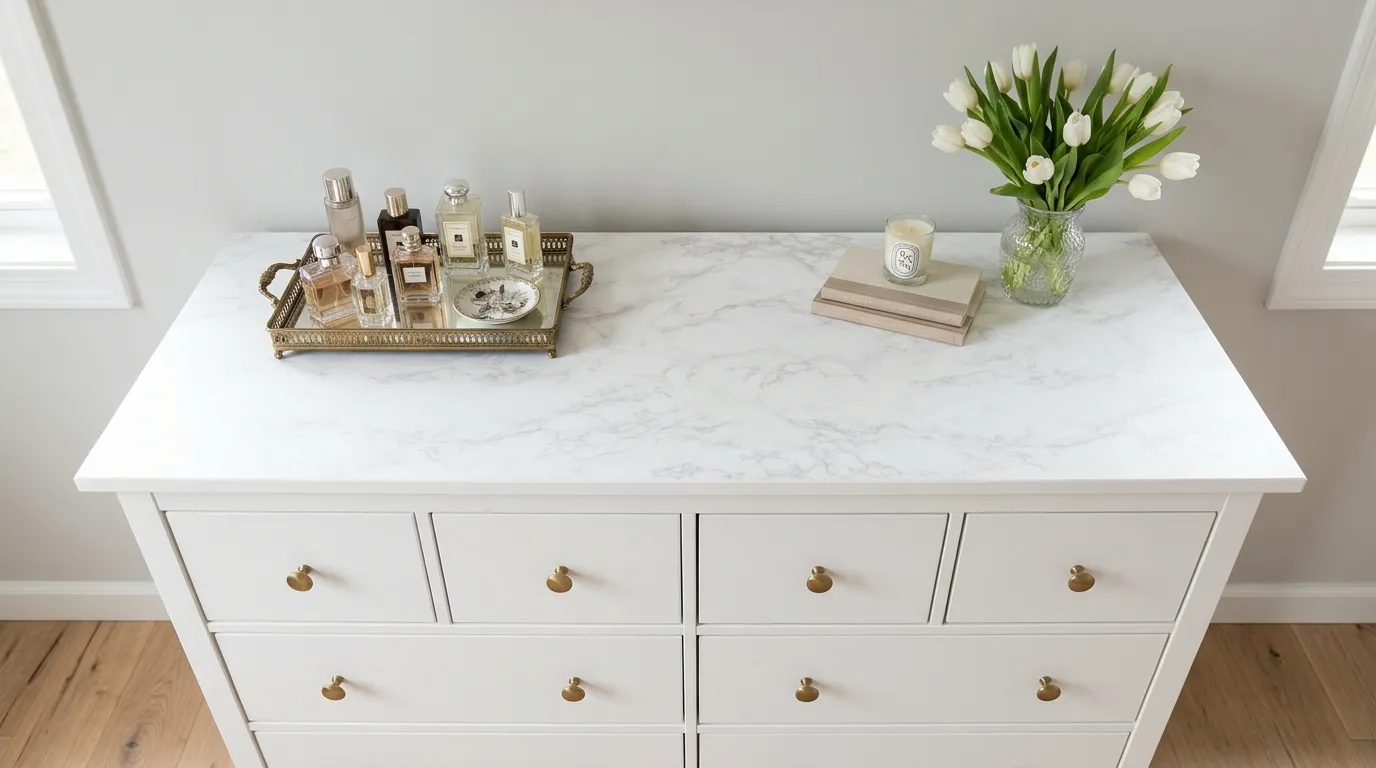
Real marble is gorgeous, but heavy and costly. Faux marble contact paper gives the same soft veining for the price of a coffee. Cut the film slightly larger than the dresser top, peel back a corner, and smooth it down with a card as you go. I’ve tried this on a nightstand, and the finished surface looked surprisingly real from a few steps away. White with grey veining keeps things bright, while black marble adds drama. It transforms a flat laminate top into a luxe surface, and it takes about thirty minutes from start to finish.
Smooth application keeps the illusion alive. Clean the surface with a damp cloth, then let it dry fully so the adhesive grips well. Work slowly from one edge, pressing out air bubbles with a soft squeegee. A hairdryer on low heat helps the film bend around corners. Trim the edges with a sharp craft knife, and seal the seams with a touch of clear tape if needed. Choose a low-gloss pattern with fine veining, since big bold swirls look fake. Add a tray for perfume and a small vase on top, and the dresser feels instantly elegant and refined.
Tapered Wood Legs
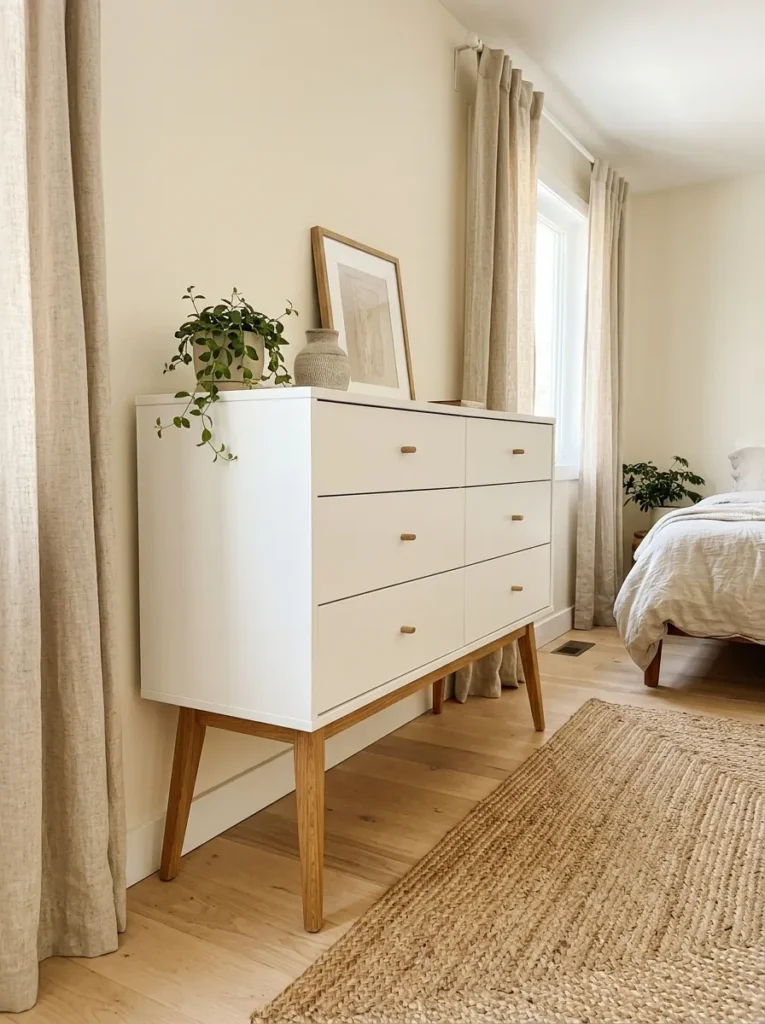
- Lifts the dresser off the floor for a lighter look
- Adds a mid-century silhouette in minutes
- Makes vacuuming underneath easy
- Works with oak, walnut, or black legs
Height changes the whole mood. A dresser sitting flat on the floor feels heavy, while one on tapered legs looks light and airy. Attach solid wood legs with mounting plates, and the piece takes on a mid-century shape. I’ve noticed that visible floor under furniture makes small bedrooms feel larger. Choose oak for warmth, walnut for richness, or black for contrast. Measure the base before buying, and pick legs about fifteen to twenty centimeters tall for balance. The upgrade takes less than an hour and turns a basic box into a designer-style piece that feels light and modern.
Installation is simple, but the details matter. Turn the dresser on its back, remove any feet, and mark the leg positions about five centimeters from each corner. Use angled mounting plates for the classic splayed look, and add a center support if the dresser is wide. Tighten every screw, then stand the piece up and check that it doesn’t wobble. A drop of thread-locking glue keeps screws from loosening over time. Sand and oil the legs before attaching them. The finished dresser looks elevated, graceful, and intentional, and it fits beautifully beside a bed or under a window.
Cane Webbing Panels
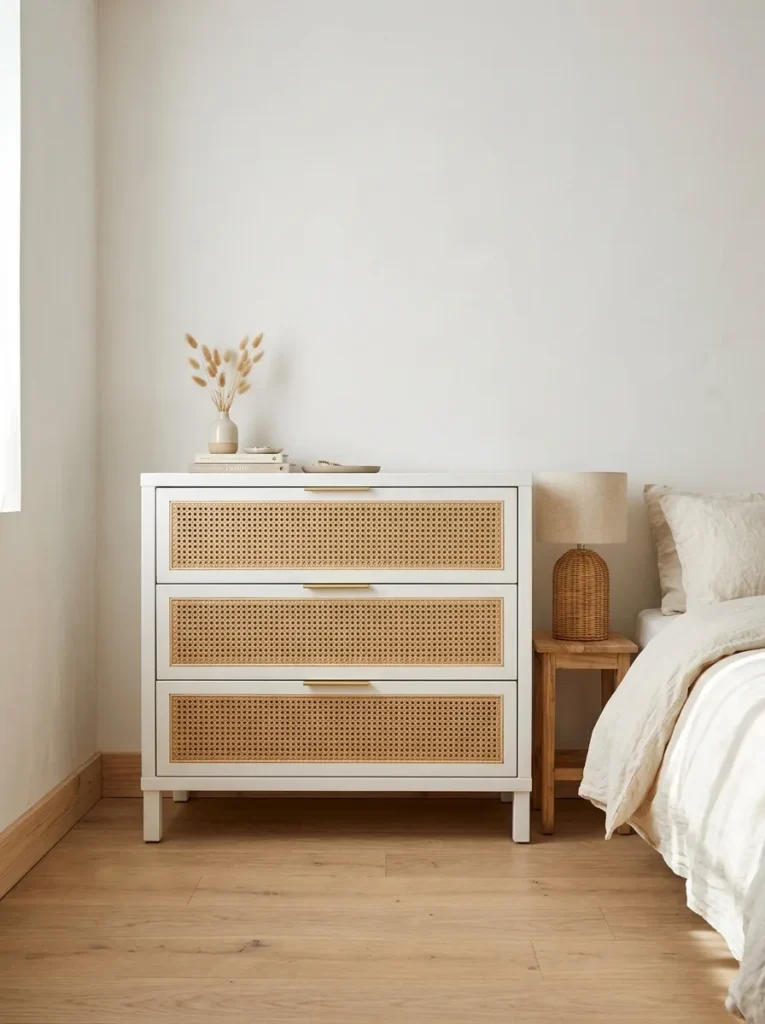
- Adds a woven, boutique-hotel texture
- Lightens the look of a heavy dresser
- Natural fiber warms a cool, white room
- Pre-woven cane sheets are easy to cut
Woven texture feels instantly high-end. Cane webbing, the same airy weave used in designer cabinets, can replace flat drawer centers with a soft, natural pattern. Cut out a panel from each drawer front, then glue pre-woven cane behind the opening. I’ve seen this work well in plain, modern rooms that need warmth. The open weave adds lightness, and the natural color pairs with white, black, or sage paint. It looks like something from a design magazine, yet the materials cost little. A weekend of careful work gives you a statement dresser that feels textured, warm, and carefully crafted.
Soak the cane in warm water for about twenty minutes so it bends easily without cracking. Cut it slightly larger than the opening, then press it in place and secure it with a staple gun or wood glue. Trim the excess once it dries and cover the edges with thin wood trim. If cutting your drawers feels risky, glue a pre-made cane panel on top of a frame instead. Wear gloves and a mask when sanding. Finish the wood with a matte sealer. The result looks airy, crafted, and inviting, and it gives your bedroom a gentle glow.
Deep Green Paint
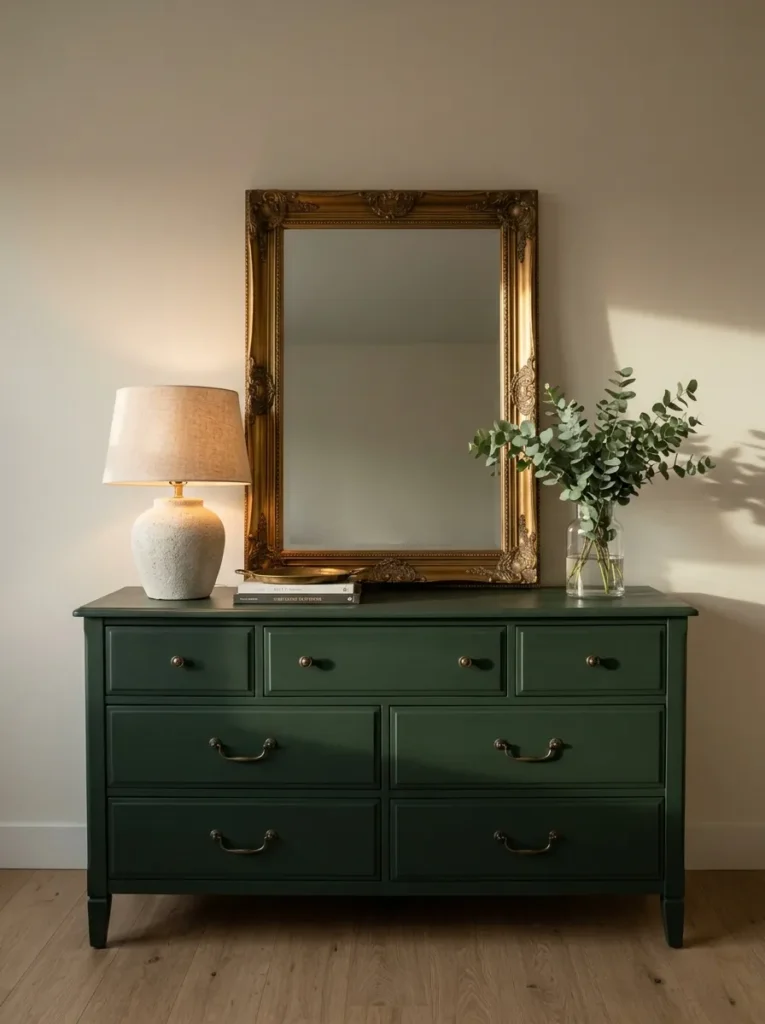
- Adds rich color that feels bold and refined
- Makes a basic dresser a true focal point
- Pairs beautifully with brass and cream
- Fresh paint hides wear and scratches
Color is the quickest route to luxury. A deep forest or emerald green turns a plain white dresser into a moody, jewel-toned statement. Against cream walls, the dark shade feels rich and calm instead of heavy. I’ve noticed that dark furniture makes a bedroom feel more grown-up and cozy. Pair it with brass hardware and a gold-framed mirror for a classic look. Navy, charcoal, and deep burgundy work in the same way. The paint costs less than a new dresser, and the change is dramatic, giving the room a confident, layered, and high-end feel from the first brushstroke.
A smooth finish starts with prep. Clean the dresser, sand lightly, and apply a bonding primer, since laminate resists regular paint. Use a small foam roller and thin coats, letting each dry fully before the next. Two or three coats give deep, even color. Finish with a satin or matte sealer for durability, and wait a few days before loading the drawers. Always paint in a ventilated space. Test the color on a small board and look at it in daylight and lamplight first. The finished dresser looks velvety, bold, and expensive, and it anchors the whole bedroom.
Wallpapered Drawer Fronts
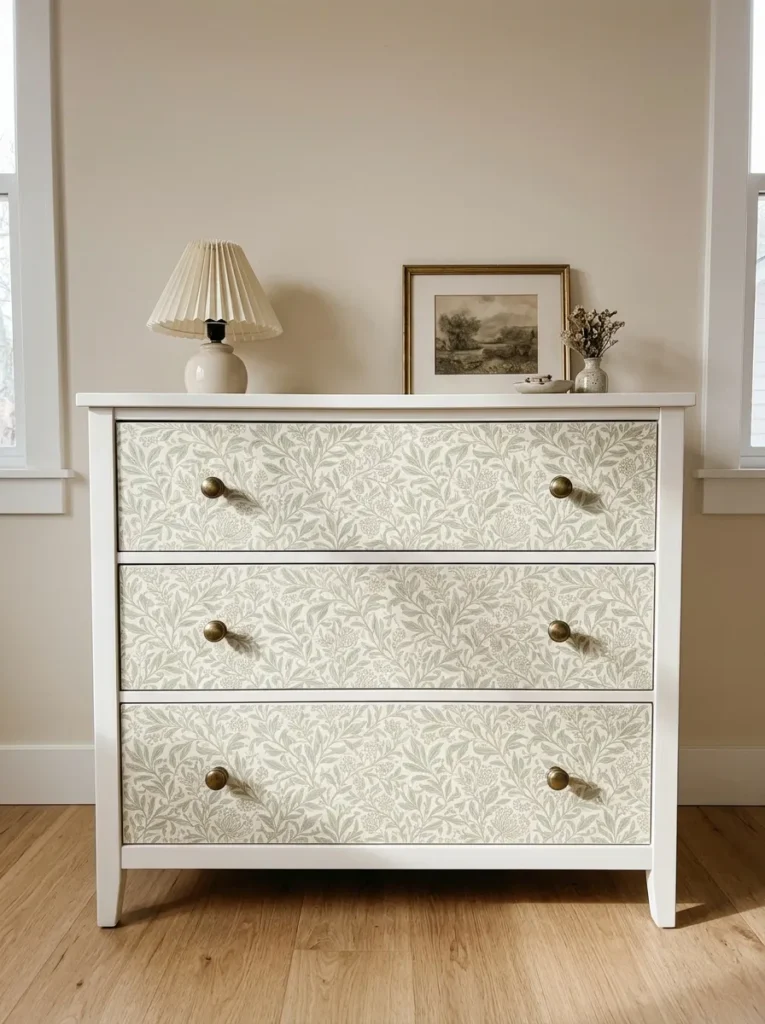
- Adds pattern without any paint mess
- Removable, so it suits renters
- Gives each drawer a custom, tailored look
- One roll covers a whole dresser
Pattern can make a dresser feel like a treasure. Peel-and-stick wallpaper in a soft botanical, geometric, or grasscloth design covers drawer fronts in minutes. No paint, no mess, and no fuss. I’ve tried this on a small chest, and the transformation was bigger than I expected. Pick a pattern with a calm color palette, such as sage, cream, or soft blue, so it stays elegant. A thin white or gold border around each drawer makes it look framed. It is affordable, easy to remove, and a great way to add personality that feels charming, tailored, and distinctly yours.
Precision keeps the pattern looking polished. Wipe each drawer front, then measure and cut the wallpaper about two centimeters larger than the surface. Peel the backing slowly, smoothing from the center outward with a plastic card. Trim the edges with a craft knife and a metal ruler for crisp lines. Match the pattern direction across all drawers so the design flows from top to bottom. Remove hardware before you start, then reattach it afterward by piercing the paper. Choose a thicker paper that hides the surface beneath. The finished dresser looks designed, soft, and unique.
Leather Strap Pulls
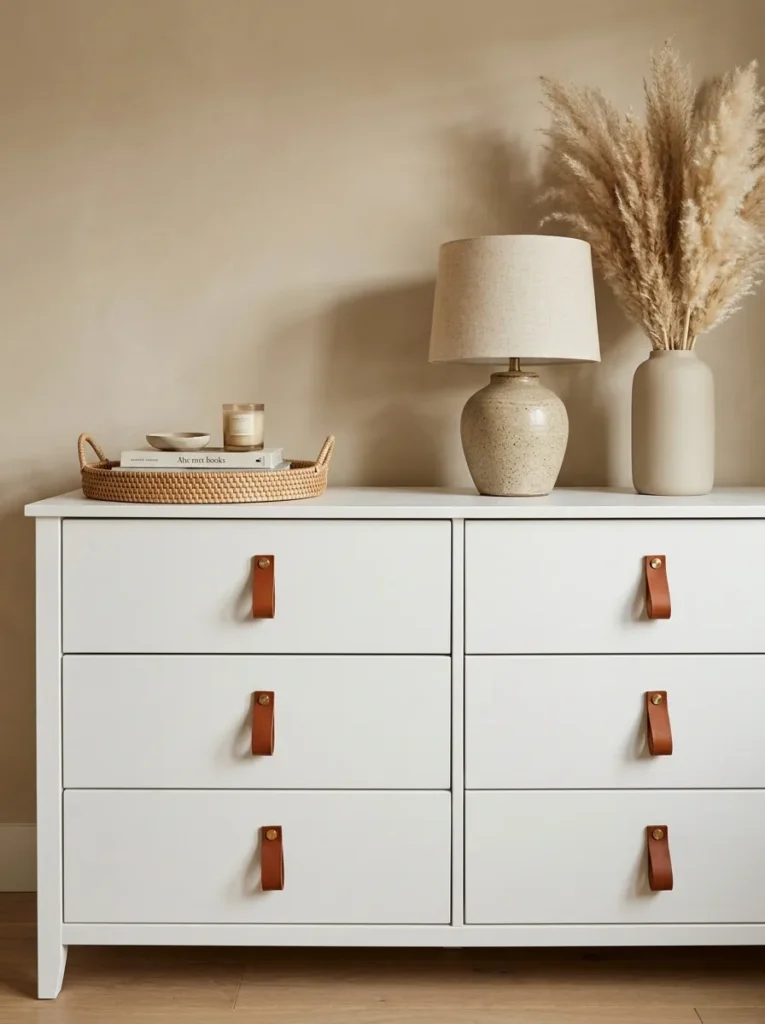
- Adds soft, tactile warmth to hard drawers
- Looks like boutique hotel furniture
- Costs only a few dollars per pull
- Easy to swap for different styles
Leather says luxury in one touch. Replace metal handles with leather strap pulls, and the dresser gains a soft, tailored look that suits modern and rustic rooms alike. Cognac, tan, and black leather all look rich against white drawers. I’ve noticed that people reach for these pulls because they feel good in the hand. You can buy ready-made straps or cut your own from a leather belt. Fix each one with brass screws and small washers. The detail is quiet but effective, and it gives the dresser an expensive, warm, and handcrafted personality that guests notice without knowing why.
Cutting leather is easier than it sounds. Use a ruler and a sharp craft knife to cut strips about two centimeters wide and twelve centimeters long. Punch holes at each end with a leather punch or a sharp nail, then loop the strap and fasten it with a screw. Round the ends for a softer look. Condition the leather with a little balm so it stays supple, and avoid damp areas that could stain it. Choose a color that echoes other leather in the room, like a chair or a bag. The finished pulls look warm, classic, and luxurious.
Wood Veneer Wrap
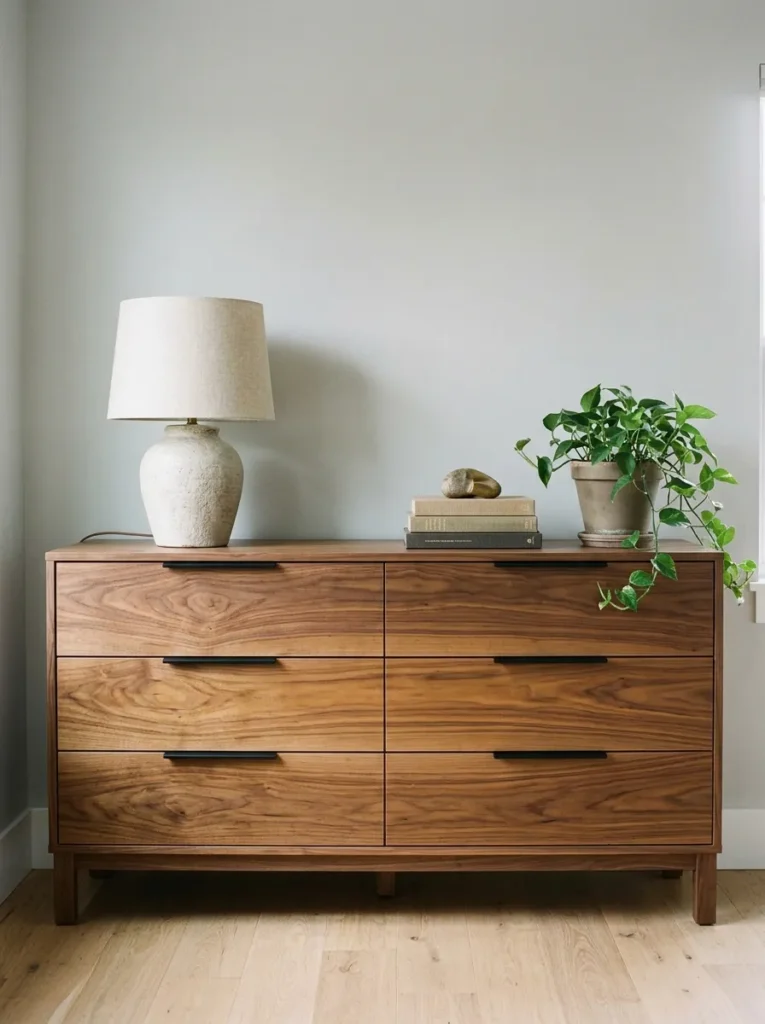
- Gives the look of solid walnut or oak
- Iron-on and peel-and-stick options are easy
- Adds natural grain that paint can’t copy
- Warms up a cold white bedroom
Real wood grain feels special. Wood veneer, sold in thin sheets with an adhesive back, lets you wrap a plain dresser in walnut, oak, or ash. The natural grain gives warmth and depth that paint can’t copy. I’ve seen this idea work especially well in white or grey bedrooms that feel a little cold. Cut each sheet slightly larger than the drawer front, press it down, and trim the edges. Seal with a clear oil or varnish. The dresser suddenly looks like solid furniture, and the rich wood tone gives the whole room a calm, modern, and expensive feel.
Take your time with the edges. Clean and lightly sand the drawer fronts so the adhesive holds, then mark the veneer with a pencil before cutting. Use a roller to press out bubbles, working from the center outward. Wrap the edge pieces last for clean corners, and keep grain direction running the same way on every drawer. Sand the cut edges gently, then add a thin coat of oil to bring out the color. Choose a thicker veneer if you plan to use the dresser daily. The finished piece looks natural, luxe, and calm.
Scalloped Edge Trim
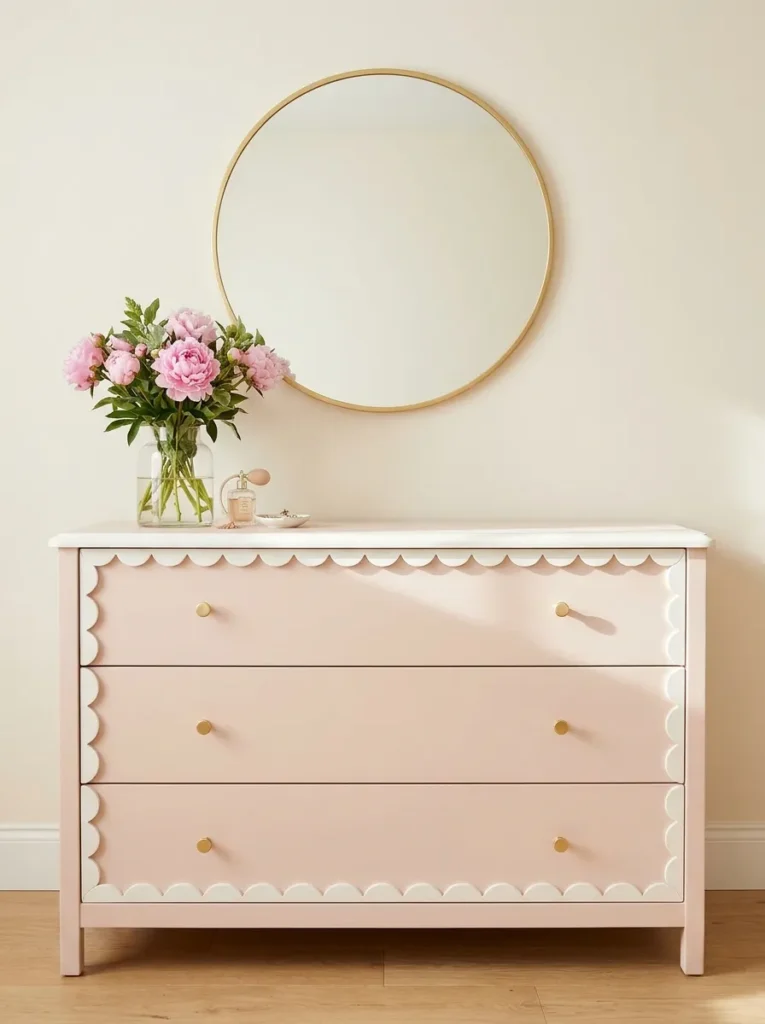
- Adds a soft, curved edge to a boxy shape
- Gives a feminine, French-inspired look
- Uses thin trim sold by the meter
- Easy to paint to match the dresser
Curves soften a boxy dresser beautifully. Scalloped wood trim, glued along the top edge or the bottom of each drawer, adds a delicate, French-inspired detail. It looks like hand-carved furniture, yet it comes in ready-made strips you simply cut to length. I’ve seen this idea transform a plain chest into a romantic centerpiece. Paint the trim in the same shade as the dresser, or use a contrasting white for a crisp outline. Pair it with small gold knobs and a pale blush finish for a soft, dreamy look. The effect is feminine, polished, and unmistakably high-end.
Measure twice and cut once. Use a miter saw or a small hand saw with a miter box to trim each strip to the exact width of the dresser. Sand the cut ends, then paint the trim before gluing it so the paint lines stay neat. Apply wood glue along the back and press it in place with painter’s tape until it dries. Fill gaps with paintable caulk. Keep the scallops evenly spaced, since a shift looks obvious. The finished dresser looks delicate, charming, and carefully made, and it suits nurseries, guest rooms, and cozy bedrooms.
Mirror Top Tray
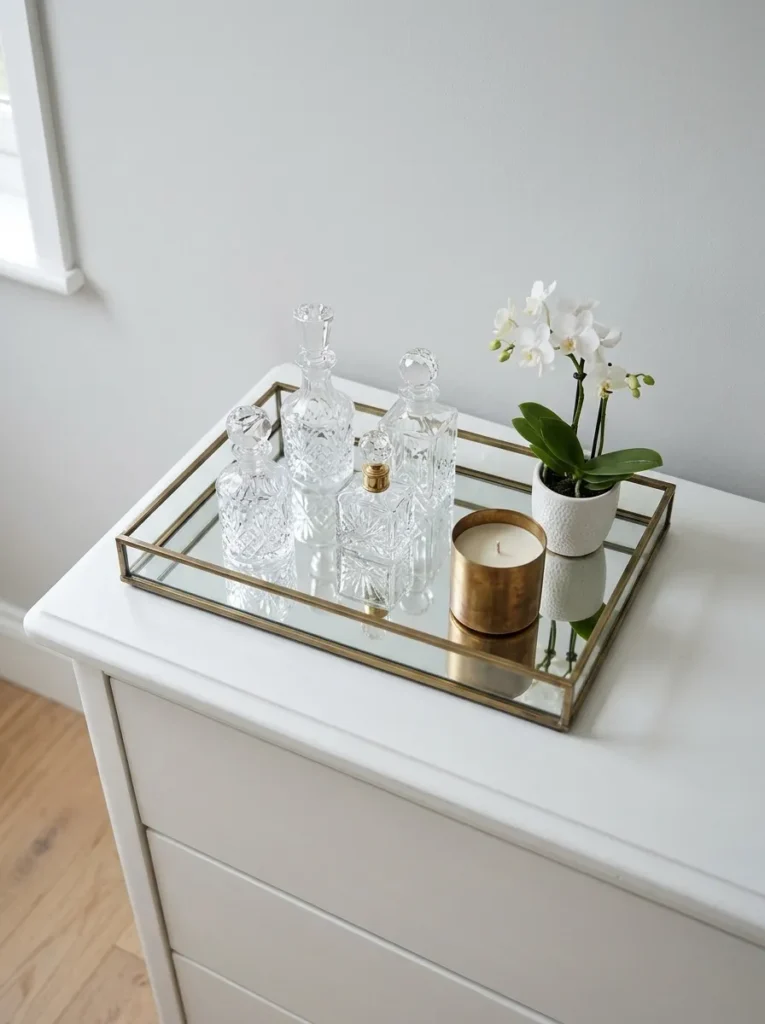
- Reflects light for an instant glow
- Groups small items into one clean zone
- Adds a classic hotel-vanity feel
- Costs little and needs no tools
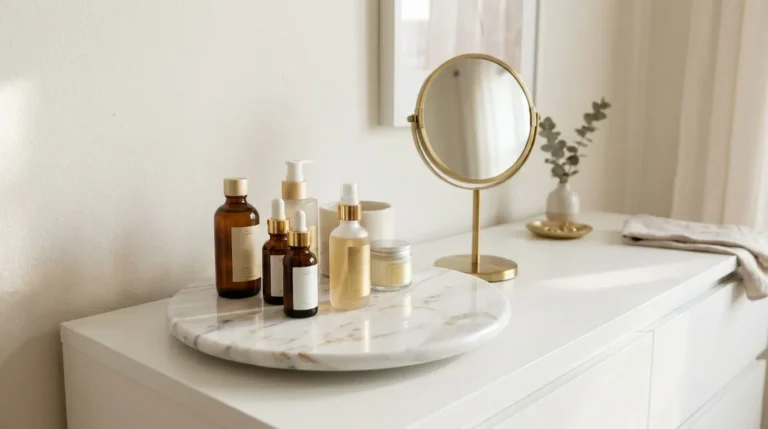
Light turns a dresser top into a showpiece. A mirrored tray bounces lamp and window light across the surface, so even small items look special. Group perfume bottles, a candle, and one fresh flower on top, and the dresser feels like a hotel vanity. I’ve noticed that clutter looks calmer when it sits on a reflective base. Choose a tray with a thin brass or silver edge for a refined finish. Wipe it often, since fingerprints show easily. It needs no tools and almost no budget, yet it gives your dresser a glamorous, polished, and carefully styled look.
Styling rules keep the tray from looking crowded. Place the tallest item at the back, a medium piece in the middle, and the smallest in front. Stick to three or four items, and leave a little mirror showing for sparkle. Use glass or ceramic containers in matching tones, such as clear, white, and gold. Place felt pads under the tray to protect the dresser top. Rotate the items each season so the arrangement feels fresh. Never leave a lit candle unattended near mirrored surfaces. The finished look feels elegant, balanced, and bright, and it makes mornings feel more special.
Velvet Drawer Liners
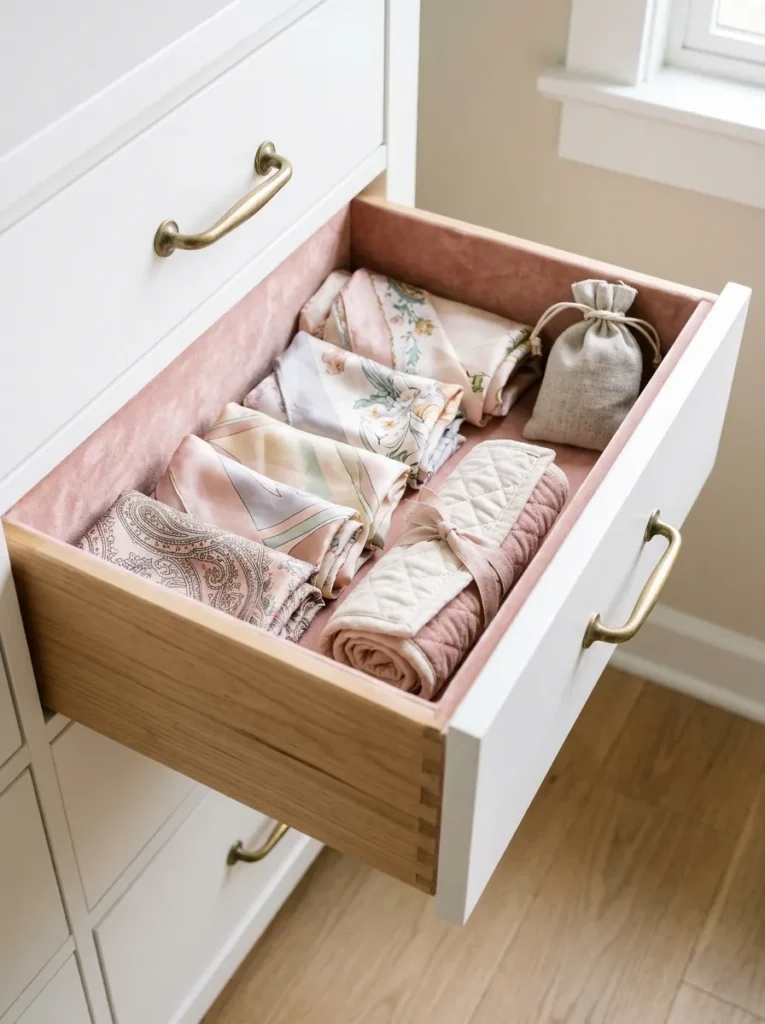
- Adds a hidden luxury touch inside the drawers
- Protects clothes and jewelry from rough surfaces
- Makes dressing feel like a boutique ritual
- Easy to cut and glue, with no sewing
Luxury lives in the details nobody sees. Line the inside of each drawer with velvet or soft felt, and opening it feels like a small treat. The fabric protects delicate clothes, scarves, and jewelry from rough surfaces. I’ve tried this with blush velvet, and every morning it felt a bit special. Choose deep green, navy, or soft pink to contrast with the white interior. Add a lavender sachet or cedar block for a light scent. It costs a few dollars per drawer, needs no sewing, and adds a hidden touch of elegance that makes the whole dresser feel premium.
Measure each drawer’s base and sides, then cut the fabric about one centimeter smaller on each edge. Cut thin cardboard to the same size, wrap the fabric around it, and tape the back. Glue or tuck the panel into place, so it can be lifted out and washed. Spray-on fabric adhesive works well for velvet, since it dries clear. Add small corner stitches or double-sided tape for stability. Wipe the drawer clean first, and let the glue dry overnight. The finished drawers look tidy, soft, and boutique-worthy, and every pull reveals a small, pleasant surprise.
Floating Wall Mount
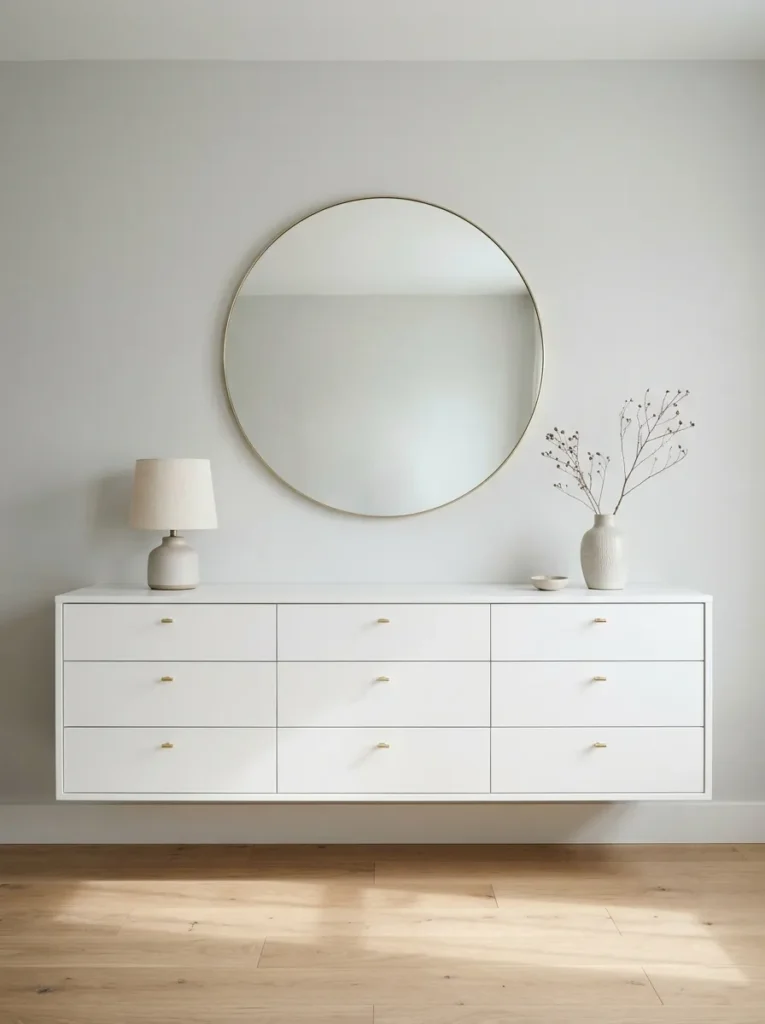
- Frees up floor for a lighter, airier look
- Gives a custom, built-in luxury feel
- Makes cleaning under the dresser easy
- Works best with smaller, lighter units
Floating furniture feels light, modern, and expensive. Mount a small two-drawer chest to the wall, and the floor stays visible beneath it, which makes the room feel bigger. It looks custom and built-in, like something from a boutique hotel. I’ve seen this work well in narrow bedrooms where a standing dresser blocks the path. Hang a round mirror above, and the wall becomes a styled vignette. Use this idea with a smaller, lighter unit, and make sure it is securely fixed. The result is airy, tidy, and sophisticated, and it gives the room a sleek, high-end finish.
Safety comes first with wall mounting. Locate the wall studs with a stud finder, and use heavy-duty brackets rated well above the dresser’s loaded weight. Mount the chest at a comfortable height, usually about thirty to forty centimeters above the floor, and check it with a level. Keep heavy items in the lowest drawer and avoid overloading the top. Follow the manufacturer’s instructions, and ask a professional if you’re unsure about your wall type. The finished piece looks sleek, intentional, and clean, and it frees up valuable floor space without losing any storage.
Arched Mirror Pairing
- Adds height and a soft curved shape
- Bounces light across the room
- Turns the dresser into a vanity corner
- Works with any frame color
A mirror gives a dresser its crown. Place a tall arched mirror above or behind it, and the pair reads like a boutique vanity. The curve softens the straight lines of the dresser, while the glass bounces daylight into the room. I’ve noticed that a mirror makes a small bedroom feel larger instantly. Choose a thin black, brass, or wood frame to match your hardware. Lean it against the wall for an easy, relaxed look, or hang it securely with heavy-duty hooks. The pairing feels elegant, bright, and balanced, and it turns a basic dresser into a statement corner.
Size and placement shape the look. Choose a mirror about two-thirds the width of the dresser, and let it sit slightly off center for a relaxed feel. Keep the bottom edge a few centimeters above the dresser top so lamps and vases don’t crowd it. Use a wall bracket or safety strap when leaning a tall mirror, because it can slide. Position it opposite a window so it reflects daylight. Wipe the glass with a soft cloth to avoid streaks. The finished corner looks airy, graceful, and designed, and it gives you a bright spot to start the day.
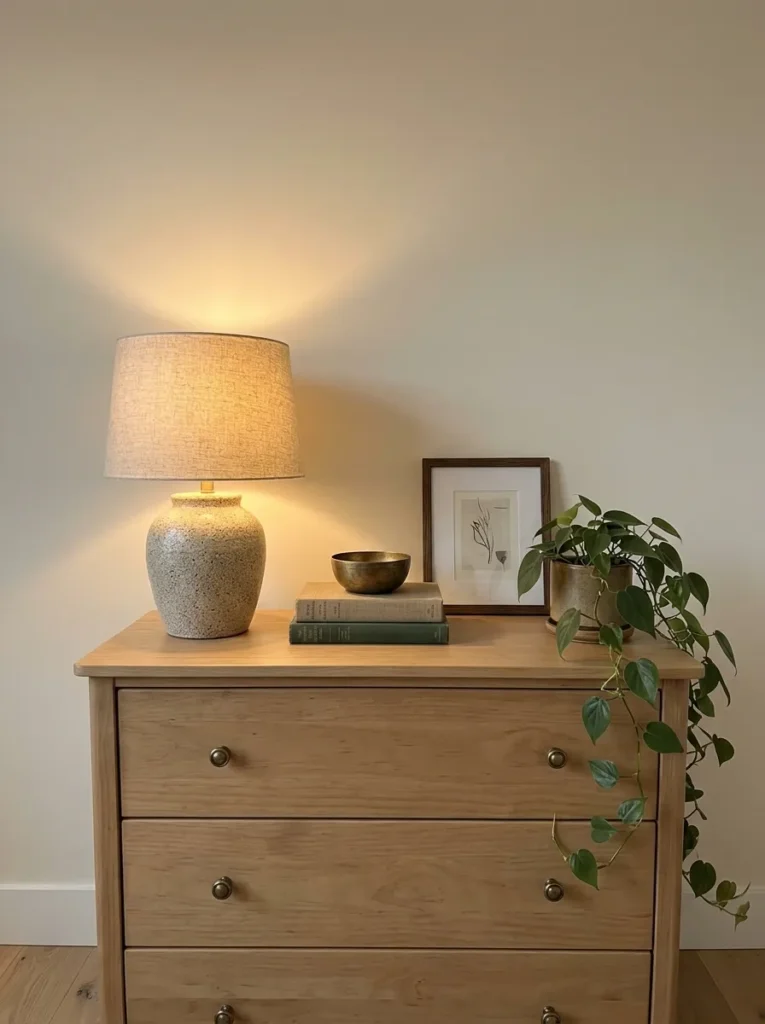
Layered Lamp Styling
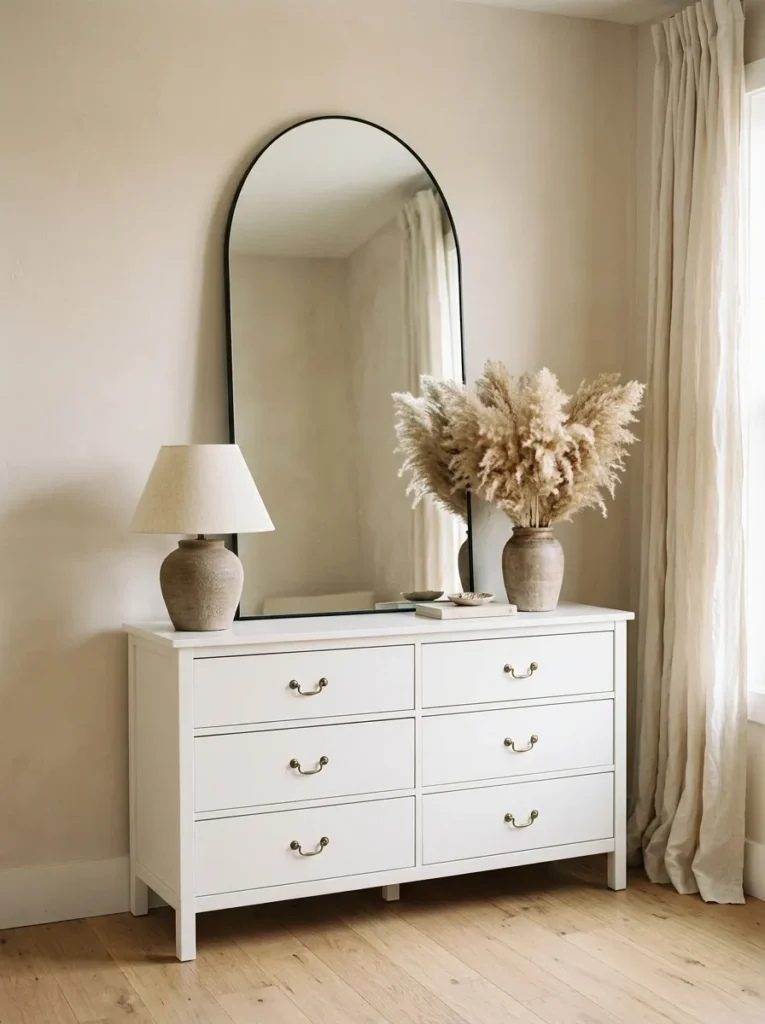
- Adds height, texture, and a warm glow
- Turns the dresser top into a styled vignette
- Uses items you may already own
- Costs nothing if you shop your own home
Styling is the finishing touch that makes everything click. Even the best upgrade looks flat without a layered top. Start with a lamp for height, add a stack of books, then include a small plant or vase for softness. I’ve seen this simple formula work in nearly every bedroom. Warm light makes the dresser glow at night, while the mixed heights keep the eye moving. Keep the palette limited to two or three tones so the display feels calm. The look feels collected, cozy, and luxe, and you probably own most of the pieces already.
Follow the rule of three. Group items in odd numbers, and place the tallest piece slightly off center. Choose a lamp with a linen or paper shade, and use a warm bulb around 2700 Kelvin for a soft glow. Leave about a third of the surface empty, since breathing room signals luxury. Add a small tray to corral keys, jewelry, or perfume. Reset the arrangement weekly and wipe away dust. Avoid placing heavy items near the edge, especially on a lightweight dresser. The finished dresser looks curated, welcoming, and calm, and it makes the entire bedroom feel styled.
Conclusion
A luxury bedroom doesn’t start with a big budget. It starts with smart details that make everything look chosen. Whether you add brass pulls, wrap the top in faux marble, or lift the dresser on tapered legs, these IKEA MALM dresser hacks show how a basic chest can become the star of the room. I’ve seen how small changes like these can completely shift the way a space feels. Save this post on Pinterest, try one upgrade this weekend, and share it with a friend who loves a good furniture makeover. Your dream dresser is already waiting.