Creative Book Page Crafts Ideas for Selling at Craft Fairs
Old paperbacks cost almost nothing, and that is the whole appeal. A cut, folded, or rolled page can turn into a bookmark, a card, or a wreath that sells for a few dollars or more. If you want book page crafts ideas for selling at craft fairs, the trick is picking items that look good from three feet away and cost very little to repeat. Most beginners skip that part.
I think most craft fair tables look the same by noon. Candles, jewelry, more candles. In my opinion, a table of paper goods made from real book pages stands out, because people stop to read a line before they even look at the price. I feel that tiny moment of curiosity is half the sale.
Here is what you get. Ten ideas, ordered from the easiest to the most involved. Most of the small items cost roughly 20 cents to a few dollars each in materials, and the quick ones take 10 to 20 minutes, while the bigger pieces take an evening. You also get a comparison table, a starter checklist, a mistakes chart, and honest notes on pricing.
So grab a few thrifted paperbacks and clear a table. Start with the first idea, make five, and see how it feels. You do not need a studio. A craft knife, some glue, and a bit of patience will carry you through most of this list.
Book Page Bookmarks, a Simple Craft Fair Starter
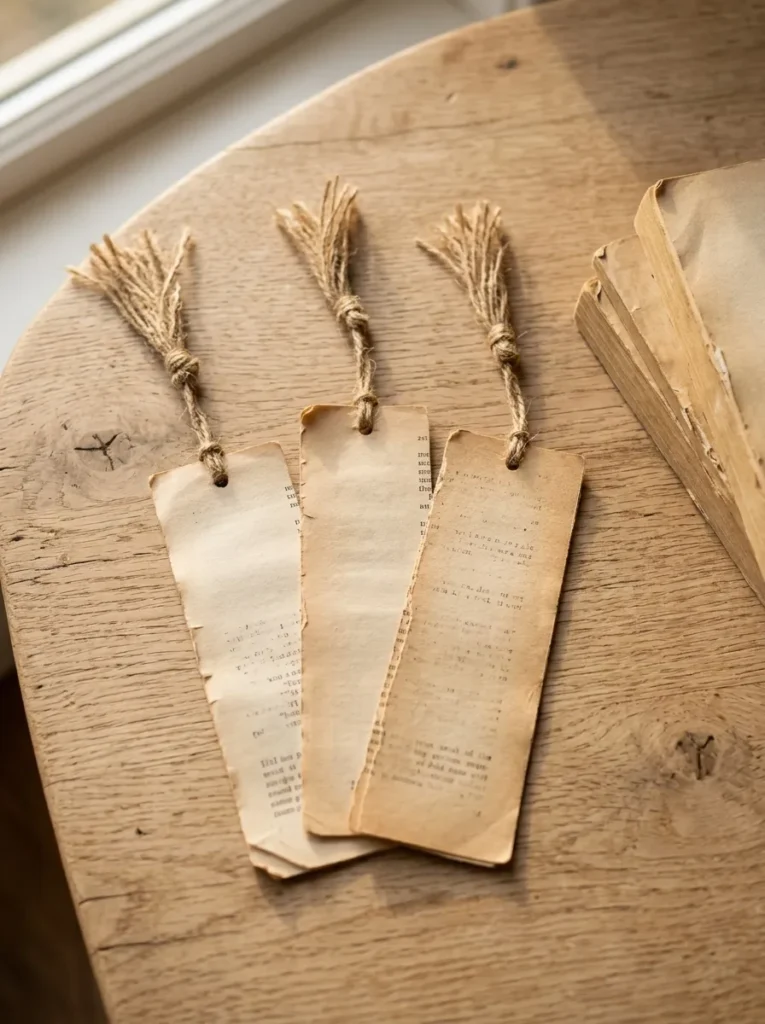
Bookmarks are the cheapest book page craft to make and the easiest to sell, because buyers need no explanation. Cut each page to 2 by 6 inches, glue it onto matching cardstock for strength, and trim the edges. Materials run roughly 30 to 80 cents per bookmark, and they usually sell for about 2 to 4 dollars (prices vary by region and fair).
Cutting Method: Use a paper trimmer and cut several pages at once, using the printed margin as a guide so each bookmark keeps a clean block of text. Glue with a thin layer of glue stick, then press under a heavy book for 20 minutes. Warning: wet liquid glue wrinkles thin pages, so skip it here.
Finishing Swap: Punch a hole at the top and loop 6 inches of cotton cord or embroidery thread into a tassel, or skip the tassel and cover the bookmark with self-adhesive laminate for a sturdier version. Tassels suit readers and gift buyers. Laminated ones suit children’s tables and lower price points.
Bookmark Quick Specs
- Size: 2 by 6 inches on medium-weight cardstock.
- Batch: about 20 bookmarks in 90 minutes once you have a rhythm.
- Display: bundles of 3 in a small paper sleeve.
- Page choice: pick pages with chapter titles or dialogue so each bookmark looks different.
Shop This Look
Book Page Gift Tags for Craft Fair Bundles

Gift tags work well as an add-on sale. A shopper already holding a card or bookmark will often add a pack of six for a few dollars. Cut tags at 2 by 3.5 inches, back them with kraft paper, and punch a 1/4 inch hole. Materials cost roughly 20 to 50 cents per tag, depending on the string.
Hole and String Setup: Use a 1/4 inch punch, then thread 8 inches of jute through each hole and tie a loop. Reinforce the hole with a paper sticker ring if the page is thin. Warning: unreinforced holes tear quickly, and a ripped tag in a pack makes the whole pack look careless.
Set Variation: Build packs by theme. Use cookbook pages for kitchen gifts, poetry pages for weddings, and old atlas pages for travel gifts. Mix two page sources in each pack so the set looks varied. This suits shoppers who want handmade gift wrap on a small budget.
Gift Tag Pack Details
- Pack size: 6 or 8 tags tied together with a loop of string.
- Cut size: 2 by 3.5 inches.
- Backing: one color of kraft paper keeps the bundles consistent.
- Pricing check: roughly 3 to 5 dollars per pack suits many tables, but compare with nearby booths.
Shop This Look
Book Page Greeting Cards That Sell at Craft Fairs
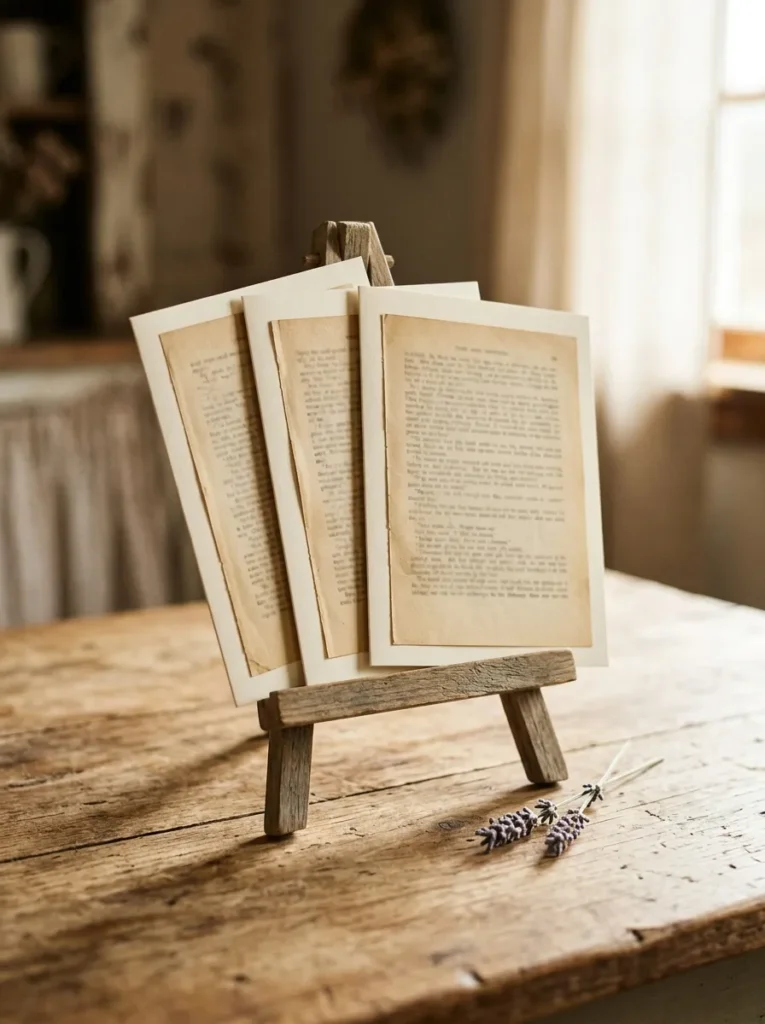
Cards bring in more per sale than bookmarks and use about the same materials. Fold A2 cardstock to 4.25 by 5.5 inches, then glue a cut book page onto the front, leaving a quarter inch border. Materials come to roughly 60 cents to 1.50 dollars per card with an envelope, and cards tend to sell for around 4 to 6 dollars.
Folding and Gluing Steps: Score the cardstock at the middle with a bone folder before folding, so the spine stays straight. Attach the page with double-sided tape, because glue sticks can leave a rough edge. Warning: cut the page slightly smaller than the card front, or the edge lifts and peels inside a bag within a day.
Back Label Option: Add a small tag on the back flap that names the kind of book the page came from, such as a mystery novel or a cookbook. Include a kraft envelope. Cards suit shoppers buying for birthdays, teachers, and book clubs, and a tabletop rack with 3 or 4 designs saves space.
Card Table Essentials
- Size: A2, 4.25 by 5.5 inches, with envelope.
- Protection: clear card sleeves keep fingerprints off the pages.
- Rack: a small tabletop card rack holds roughly 12 to 20 cards upright.
- Bundle: offer 3 cards for a set price to raise the average sale.
Shop This Look
Decoupage Book Page Coasters
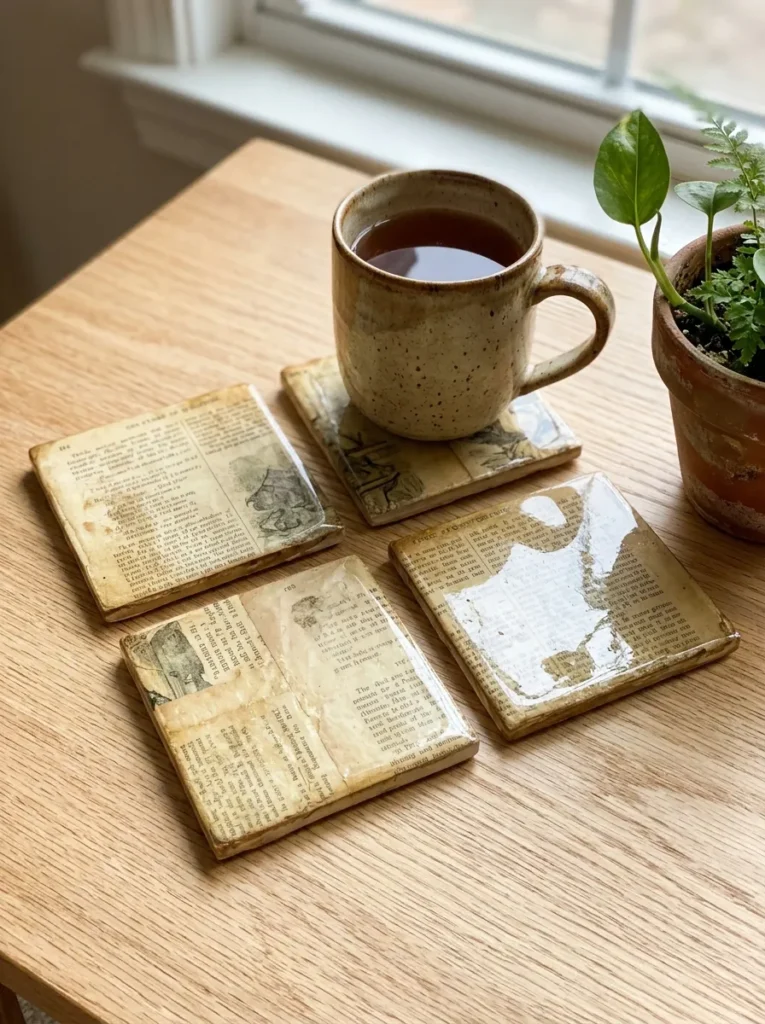
Coasters let you sell something useful, not just something to look at, and sets of four work well as gifts. Use 4 by 4 inch ceramic tiles, glue a book page on top, and seal it. Materials run roughly 1 to 2.50 dollars per coaster with a cork backing. Sets of four often go for about 15 to 22 dollars, though local prices differ.
Decoupage Steps: Brush a thin coat of decoupage medium on the tile, lay the page down, and smooth out bubbles from the center to the edges. Add 3 coats of sealer, letting each coat dry about 20 minutes. Warning: follow the sealer label for ventilation and cure time, and do not sell a coaster until it has fully cured.
Size and Backing Swap: Use 4 inch cork squares instead of ceramic for a lighter and cheaper version, or 3.5 inch wood slices for a rustic look. Ceramic suits kitchen and tea gifts. Cork suits buyers who travel and need something that will not break. Test one with a damp glass before you sell it.
Coaster Set Checklist
- Tile size: 4 by 4 inches.
- Cure time: let sealed coasters rest 24 hours or longer, as the label says.
- Backing: felt or cork pads on the bottom so they do not scratch tables.
- Care card: a note saying wipe clean, do not soak.
Shop This Look
Rolled Book Page Paper Flowers

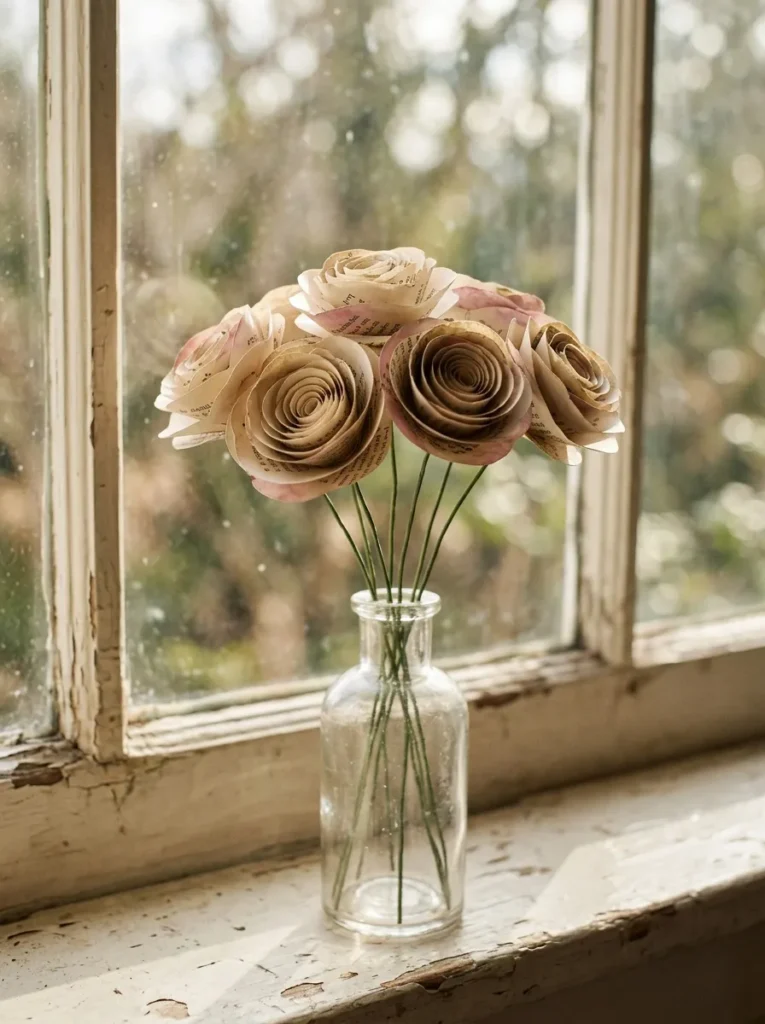
Paper flowers made from book pages keep their shape for years, which is why decorators and gift buyers like them. Cut a 4 inch circle into a spiral, roll it from the outer end, and let it open into a rose. Materials cost roughly 40 to 90 cents per flower, and a single stem can sell for around 2 to 4 dollars.
Spiral Cutting Steps: Trace a 4 inch circle, cut a spiral about 1/2 inch wide, and roll tightly from the outer end. Release it onto a drop of glue at the base. Warning: hot glue burns skin, so use a low-temperature gun and keep a bowl of cool water close.
Stem and Color Swap: Wrap 12 inch floral wire in green paper tape for stems, or skip stems and glue the flowers onto a wreath base. Tint the edges with light tea stain or watercolor for variety. Stemmed flowers suit bouquet buyers. Stemless ones suit people who make their own displays.
Flower Bunch Notes
- Circle size: 4 inches for small roses, 6 inches for large blooms.
- Bunch size: 5 stems in a jar looks full on a table.
- Wire: 18 to 22 gauge is a common range for stems.
- Time: plan on about 10 minutes per flower while you learn.
Shop This Look
Book Page Garland Craft Ideas for Craft Fair Booths
Garlands are light, flat, and easy to pack, and buyers often take two or three for parties. Cut triangles 4 inches wide and 5 inches tall, then string 20 of them on baker’s twine for roughly a 6 foot garland. Materials cost about 1.50 to 3 dollars per garland, and they can sell for around 8 to 14 dollars (prices vary).
Stringing Steps: Fold the top edge of each triangle over the twine, glue it, and hold for 10 seconds. Space the triangles about 1/2 inch apart for a full look. Warning: cut batches with a rotary cutter and mat, and keep your fingers behind the ruler, since blades slip on thin paper.
Length Choice: Offer two sizes, a 6 foot garland for shelves and a 10 foot one for weddings and parties. Add every fifth triangle in a colored paper for accents. Short garlands suit small bookshelves, and long ones suit event buyers who need to cover a wall.
Garland Specs
- Triangle: 4 inches wide, 5 inches tall.
- Twine: 6 to 10 feet, depending on the length you offer.
- Spacing: about 1/2 inch between triangles.
- Packing: roll loosely around a cardboard tube to avoid creases.
Shop This Look
Folded Book Page Ornaments for Holiday Craft Fairs
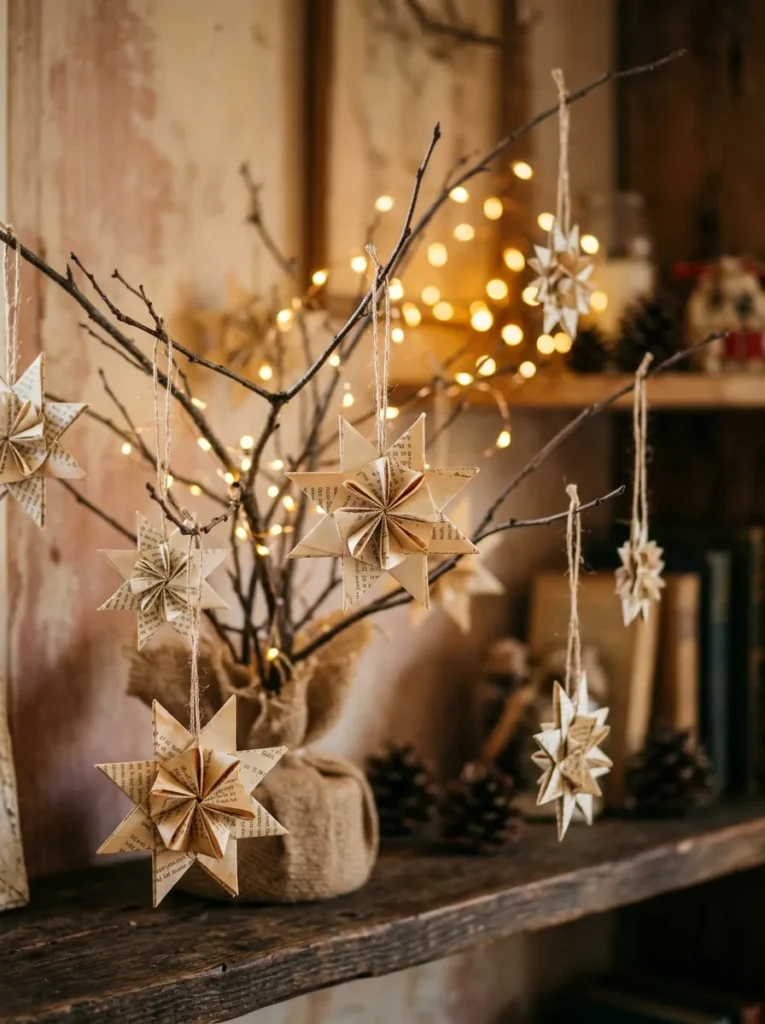
Ornaments sell well from late fall, and folded stars use only narrow paper strips. Cut strips about 1 inch wide from a page and fold each one into a five point star. Each star costs under 50 cents, and they can sell for around 3 to 5 dollars each, or a bundle of three at a set price.
Strip Folding Steps: Tie a loose overhand knot in the strip, flatten it gently, then fold the tail over each edge and tuck it in. Trim the extra length and puff each point with a pin. Warning: thin or brittle pages crack at the folds, so test one before you cut a whole stack.
Hanging Option: Add a 6 inch loop of thread through one point, or glue a small magnet to the back for refrigerator buyers. Loops suit tree shoppers, and magnets suit people who want something small for a desk or a kitchen. Package three in a clear bag for a gift price.
Ornament Batch Notes
- Strip width: about 1 inch.
- Display: hang them on a small bare branch standing in a jar of sand.
- Timing: if your fair is in November, start now so the tray is full.
- Packaging: clear bags with a card, so the stars do not get crushed.
Shop This Look
Book Page Luminaries, a Craft Idea for Selling at Craft Fairs
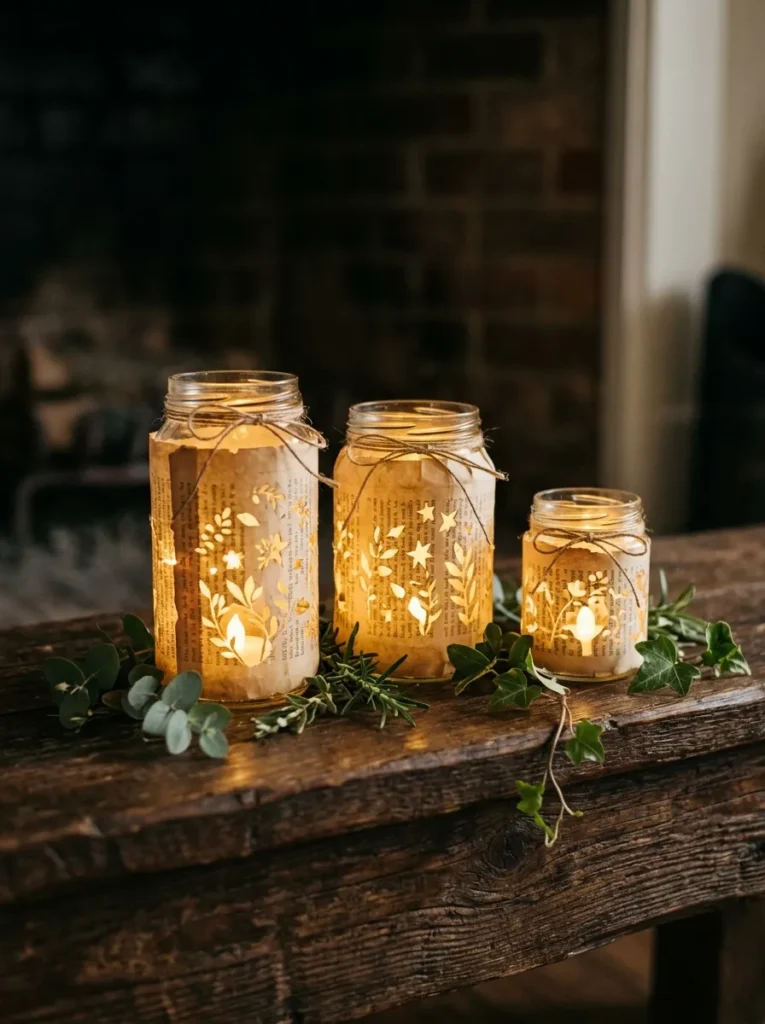
Luminaries look best when the light shines through the print, and they catch attention from across an aisle. Wrap a 16 ounce glass jar with book pages, glue them on, and drop in a battery LED tea light. Materials cost roughly 1.50 to 3 dollars each with the light, and they tend to sell for around 8 to 12 dollars.
Jar Wrapping Steps: Cut two pages to fit the jar height, overlap them by 1/2 inch, glue with decoupage medium, and brush a thin coat over the top. Let the jar dry flat. Warning: use LED lights only, never an open flame, because paper burns and many fairs and indoor venues restrict real flames, so check the rules.
Light Source Swap: Use a string of small battery fairy lights coiled inside for a brighter glow, or a flameless candle with a timer. Tea lights suit mantels. Fairy lights suit shelves and windowsills. Sell the jar and the light together, and tape a spare battery to the base card.
Luminary Safety and Size Notes
- Jar: 16 ounce glass, about 3 inches wide.
- Light: battery LED only, never a real flame.
- Moisture: keep away from damp, since paper warps.
- Spare batteries: include one in the package.
Shop This Look
- Warm white flameless LED tea lights
- Pint regular mouth mason jars
- Battery fairy lights warm white copper wire
Book Page Wreaths for Doors and Walls
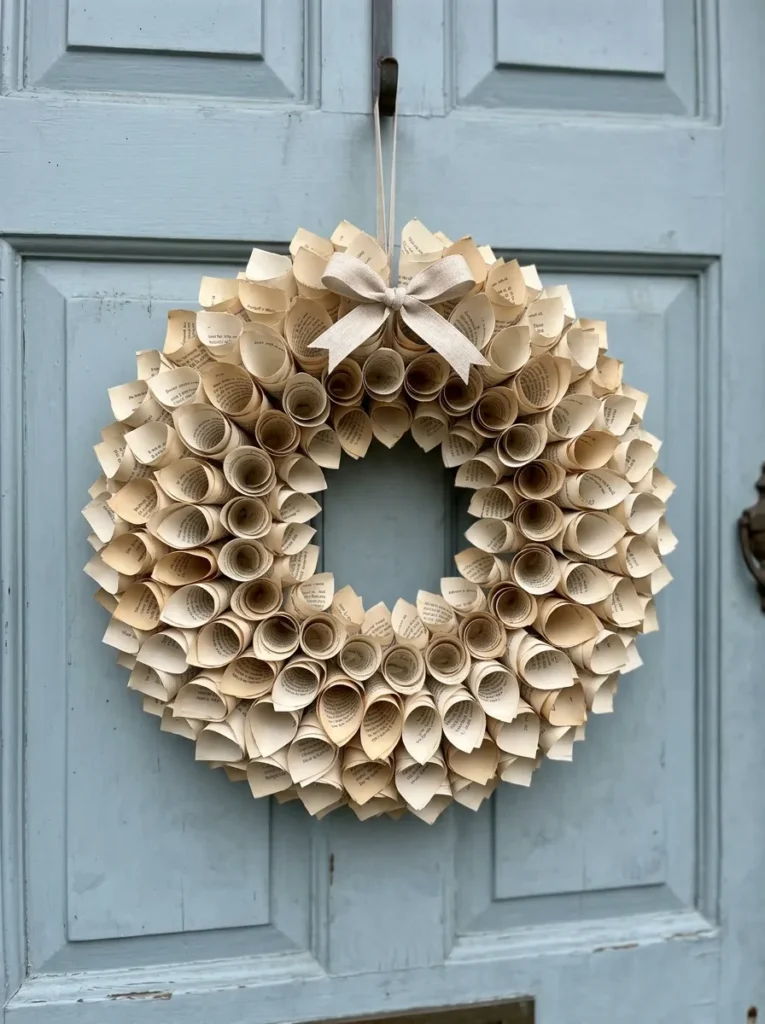
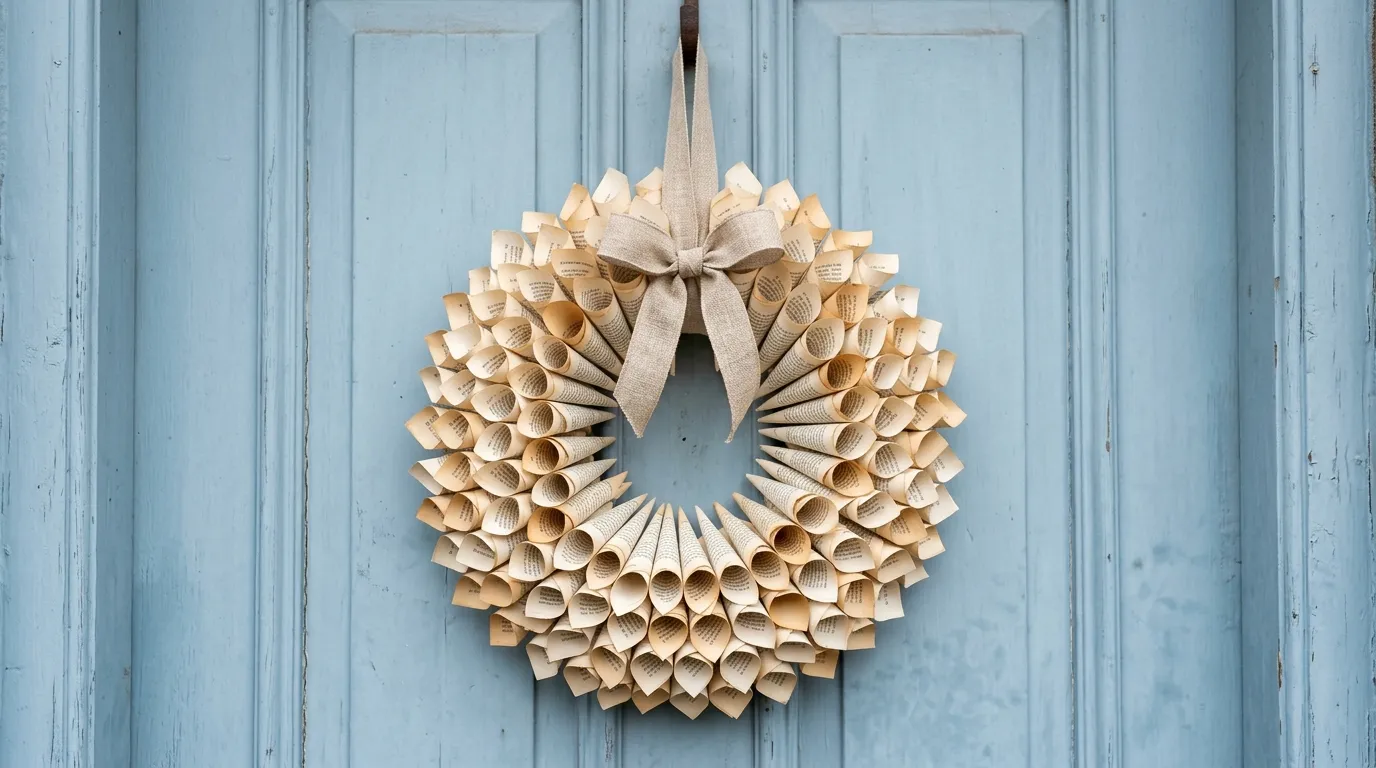
Wreaths are a showpiece, and they carry a higher price. Roll pages into cones about 3 inches long and glue them onto a 12 inch foam ring. A full wreath uses roughly 60 to 100 pages and costs about 6 to 12 dollars in materials, so pricing around 35 to 60 dollars is common, depending on size and your local market.
Cone Rolling Steps: Roll each page from corner to corner, glue the point, trim the open end flat, then glue the cones in rings starting from the outside edge of the foam. Warning: hot glue strings cool fast but burn on contact. Work in sections of 10 cones and fill any gaps with half pages.
Door or Wall Option: Sell these for indoor doors and walls, since paper warps in rain, and mention that on the tag. Add a ribbon loop for hanging. Mini 6 inch wreaths suit shelves and cost less to make, and large ones suit entryways and living rooms.
Wreath Materials List
- Foam ring: 12 inches for a standard size.
- Pages: roughly 60 to 100, depending on cone size.
- Glue: a low-temperature gun and a few glue sticks.
- Hanging: a ribbon loop glued to the back.
Shop This Look
Folded Book Art, a Higher-Priced Book Page Craft Idea

Image Prompt: A hardcover book folded into a heart shape standing open on a white shelf beside a small trailing plant and a stack of old books, soft cream pages in a graduated fold pattern, warm side lighting, calm cozy mood, realistic photography, vertical 2:3, no people, no text, no logos.
Folded book art turns a whole book into a sculpture, and it carries the highest price on your table. A hardcover with 300 to 400 pages works well. A thrifted book costs roughly 1 to 3 dollars, with other supplies bringing the total to about 3 to 8 dollars, and finished pieces often sell for 20 to 45 dollars, though prices vary.
Marking and Folding Steps: Pick a pattern, then measure and mark the top edge of each page in pencil along a ruler, and fold every page to its marks. A heart takes about 1 to 2 hours. Warning: a bad measurement repeats on every page, so check the first 10 pages against the pattern before continuing.
Pattern Swap: Start with a simple heart or a short word, then move to a Christmas tree for the holiday season. Add a ribbon around the book or a small tag. Hearts suit gift buyers, and word patterns suit book club members and teachers. Folded books are heavy, so bring only a few to the fair.
Folded Book Details
- Pages: 300 to 400 for a clear shape.
- Tools: a ruler, a pencil, and a bone folder.
- Time: 1 to 3 hours per book while you learn.
- Stock: a few pieces, since each one takes the longest to make.
Shop This Look
How to Start
Image Prompt: A tidy craft table with a paper trimmer, a small stack of cut paperback pages, a roll of twine, cardstock, and a few finished bookmarks, soft morning light from a window, warm neutral colors, realistic photography, vertical 2:3, no people, no text, no logos.
Pick two items from the list, not ten. Start with bookmarks and gift tags, since they cost the least and let you test how shoppers react. Make 20 of each before you book a table, and put them in front of a friend to see which gets picked up first.
Do things in this order: source your books, cut and make a sample batch, set your prices, then plan the table. Make the cheap items first, then add one mid-priced item such as coasters or cards, and one display item such as a garland or a wreath that draws people in from the aisle.
With a budget of under 40 dollars, buy three starter items: a paper trimmer, cardstock, and cotton twine. Roughly, a trimmer costs 12 to 20 dollars, cardstock 8 to 12, and twine under 5. Prices vary, so check current listings. Thrifted paperbacks are an extra cost, usually 1 to 3 dollars each.
Plan on 15 to 20 hours to build starter stock of about 60 to 100 small items for a one-day fair. Set aside roughly 80 to 150 dollars for materials, booth fee, and display. Booth fees vary widely, so check your fair’s current price and its rules on handmade goods, permits, and sales tax.
Quick Comparison of All Ideas
| Idea | Rough Cost to Make | Time Needed | Difficulty |
|---|---|---|---|
| Bookmarks | Roughly 30 to 80 cents each | 10 to 15 minutes | Easy |
| Gift tags | Roughly 20 to 50 cents each | 5 to 10 minutes | Easy |
| Greeting cards | Roughly 60 cents to 1.50 dollars | 15 to 20 minutes | Easy |
| Decoupage coasters | Roughly 1 to 2.50 dollars each | 30 minutes plus drying | Medium |
| Paper flowers | Roughly 40 to 90 cents each | About 10 minutes | Medium |
| Garlands | Roughly 1.50 to 3 dollars each | 30 to 40 minutes | Easy |
| Folded ornaments | Under roughly 50 cents each | 10 to 15 minutes | Medium |
| Luminaries | Roughly 1.50 to 3 dollars each | 20 minutes plus drying | Medium |
| Wreaths | Roughly 6 to 12 dollars each | 2 to 3 hours | Hard |
| Folded book art | Roughly 3 to 8 dollars each | 1 to 3 hours | Hard |
Costs and times are approximate. Prices vary by store and region, so check current product pages before you buy.
Starter Checklist
- Buy 10 to 15 thrifted paperbacks first, and skip any with a musty smell or mold spots.
- Measure your table space before you make large items like wreaths.
- Hold off on wreaths and folded books until your first batch of small items has sold.
- Pack bags, price tags, and a small sign saying the items are made from recycled book pages.
Shop This Look
Common Mistakes
Image Prompt: A craft workspace with a wrinkled glued book page set beside a cleanly finished one, a bottle of glue, a ruler, and a pencil on a pale wooden table, soft natural light, calm mood, realistic photography, vertical 2:3, no people, no text, no logos.
Using Brittle or Musty Books: Old paperbacks can carry mold or crumbling pages, which spoil the product and make buyers back away. Smell and flex a page before you buy, and skip any book that sheds or smells damp.
Using Too Much Glue: Wet glue ripples thin pages and leaves lumps. Apply thin layers or use double-sided tape, and press the piece under a heavy book.
Cutting Collectible Books: A first edition or rare title may be worth more intact than as a craft supply. Check the title page and a quick online listing before cutting anything unusual.
Pricing Only on Material Cost: Materials are cheap, so it is easy to set the price too low, but your time is the real cost. Add a fair hourly rate and test two price points over the day.
Skipping Sealer on Handled Items: Coasters and luminaries get touched, wiped, and sometimes splashed. Follow the sealer label, apply the full number of coats, and let each piece cure before packing.
Packing Without Protection: Paper creases when it is tossed into a bag. Use sleeves, tissue, or small boxes, and stack flat items between pieces of cardboard.
Making One Product Only: A table of just bookmarks looks thin. Bring 3 to 5 product types at different price points so more shoppers find something they want.
Mistake and Quick Fix Chart
| Mistake | Quick Fix |
|---|---|
| Brittle or musty books | Smell and flex pages before buying |
| Too much glue | Use thin layers or tape |
| Cutting collectible books | Check the title page first |
| Pricing on materials only | Add your time to the price |
| Skipping sealer | Apply full coats and cure |
| No packing protection | Use sleeves and cardboard |
| One product only | Bring 3 to 5 types |
Frequently Asked Questions
Image Prompt: A small notebook open beside a cup of tea, a few cut book page bookmarks, and a pencil on a sunlit kitchen table, soft warm light, cozy mood, realistic photography, vertical 2:3, no people, no text, no logos.
What book page crafts sell best at craft fairs?
Low-cost, useful items such as bookmarks, cards, and gift tags tend to move fastest. Buyers can decide in a few seconds and carry them home easily. A display piece like a garland or a wreath draws people in, even if most of your sales come from the small items.
Where can I get cheap books for book page crafts?
Thrift stores, library sale racks, and yard sale bins are the usual sources, with paperbacks roughly 1 to 3 dollars each. Look at the condition before you buy.
- Smell the book for dampness.
- Flip through for mold spots or loose pages.
- Skip anything that looks collectible.
How much should I charge for book page crafts at a craft fair?
Start with your material cost, then add a fair rate for your time, and compare with nearby booths. A simple formula keeps this easy.
- Add up materials per item.
- Add your time multiplied by an hourly rate you choose.
- Round to a clean price and test it for the first hour.
How do I keep book pages from yellowing or tearing?
Back thin pages with cardstock and seal them with a clear matte sealer. Old paper yellows partly because of the paper itself and partly from light, so keep finished pieces out of direct sun. Always follow the sealer label for coats, drying, and ventilation.
How many book page crafts should I bring to a craft fair?
A common starting range for a one-day fair is about 60 to 100 small items and 5 to 10 larger ones. Adjust it to the expected foot traffic and your table size.
- Bring more of the cheapest items.
- Keep 2 or 3 showpieces.
- Pack extras in a box under the table.
The Finishing Touch
Image Prompt: A finished craft fair table with neatly arranged book page bookmarks, cards, a garland, and a small wreath on a linen tablecloth, warm afternoon light, inviting mood, realistic photography, vertical 2:3, no people, no text, no logos.
Step back from your table or your workbench, about 6 feet away, and look at your book page crafts ideas for selling at craft fairs the way a shopper would. Check four things before you call it done.
Four Quick Checks
- Color: do the pages look matched, or random in a messy way?
- Edges: are there any frayed corners or glue marks?
- Prices: can you read every tag from arm’s length?
- Height: do items sit at different levels, so nothing hides behind something else?
Now change one thing and look again. Swap a ribbon color, raise one box by 3 inches, or move the garland to the front. Step back again. One change at a time shows you what actually works.
Today, make five bookmarks from a single paperback and decide on a price. Then save your favorite book page crafts ideas for selling at craft fairs to a Pinterest board, so you can come back to the ones you want to build next.
Notes
- Facts to verify: page and tile sizes, rough costs and selling prices (they vary by region and fair), sealer and glue drying times (follow product labels), your craft fair’s rules on handmade items, open flames, permits, and sales tax.
- Sources used: none. No webpages were provided, and no web search was run, so everything is from general craft knowledge. Check current product pages and fair rules before publishing.
- Primary keyword used: “book page crafts ideas for selling at craft fairs”.
- Ideas count: 10 (bookmarks, gift tags, greeting cards, coasters, flowers, garlands, ornaments, luminaries, wreaths, folded book art).
- How links were built: every link is an Amazon search URL with real search words and the tag fashion02877-20, placed only in Shop This Look boxes. No product names or brands were invented.